Nessus is a remote security scanning tool, which scans a computer and raises an alert if it discovers any vulnerabilities, it uses the Common Vulnerabilities and Exposures architecture for easy cross-linking between compliant security tools.
It is a paid tool and requires licenses for extension on the features. However, there is a free trial that you can activate to test its functionality.
https://docs.tenable.com/nessus/Content/GettingStarted.htm
Installing Nessus
1. Download the software from https://www.tenable.com/products/nessus, in this case Nessus Essentials
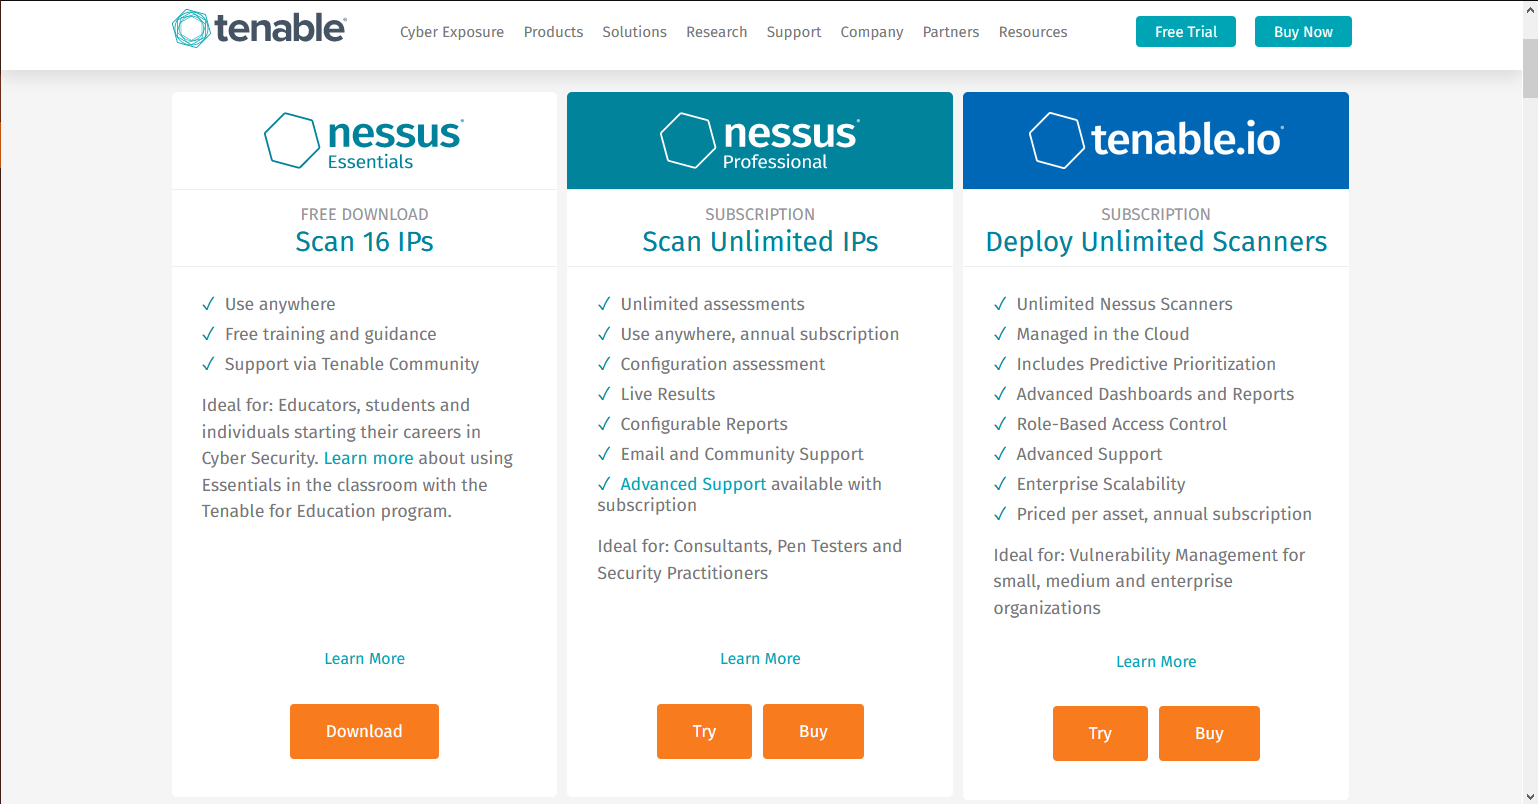
2. You will be redirected to create an account, https://www.tenable.com/products/nessus/nessus-essentials
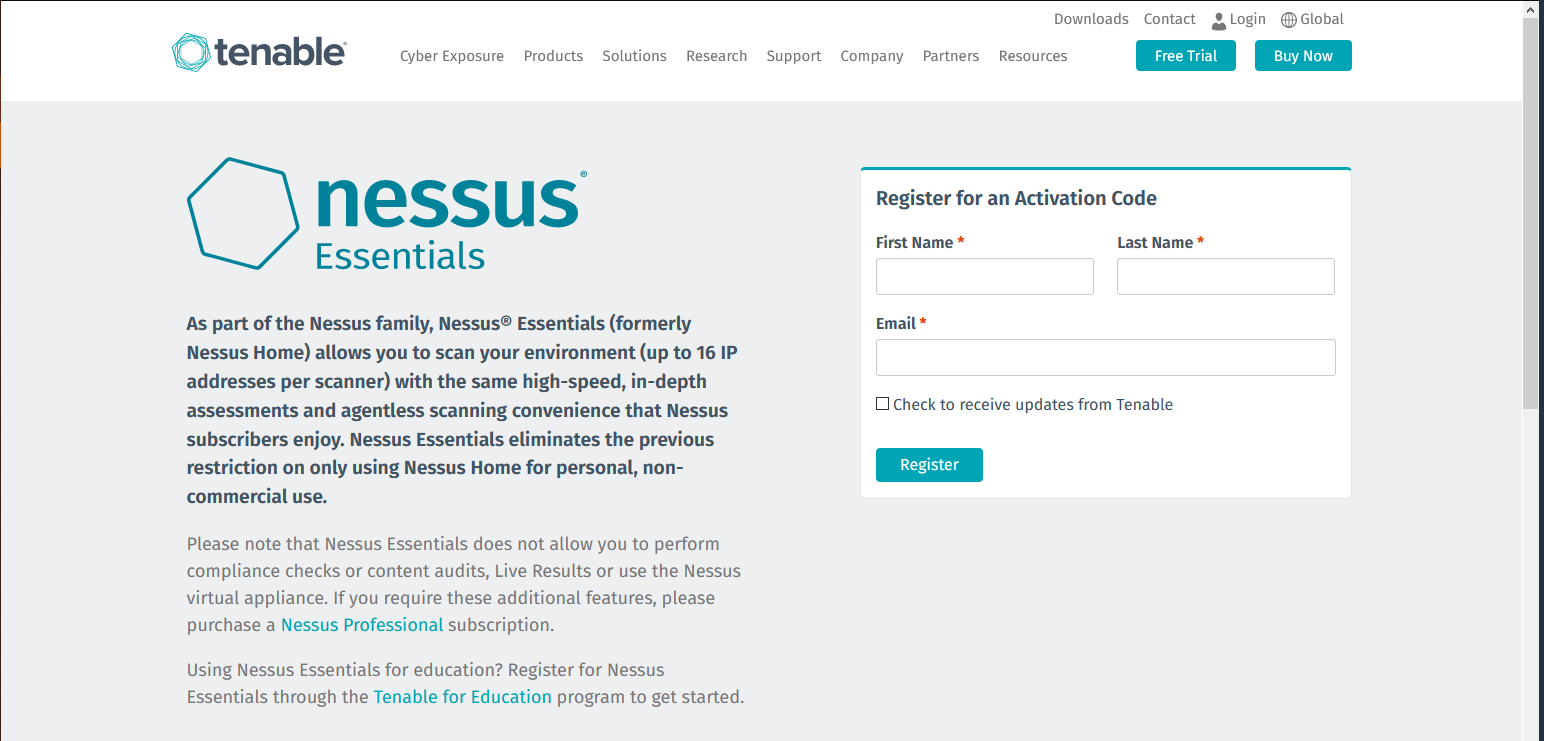
3. After you create an account, you will receive to the registered email the activation key. And you will see the button to download

Activation email example

- It is a one-time code, unless your license or subscription changes, at which point a new activation code will be issued to you.
- Must be used with the Nessus installation within 24 hours
- Cannot be shared between scanners
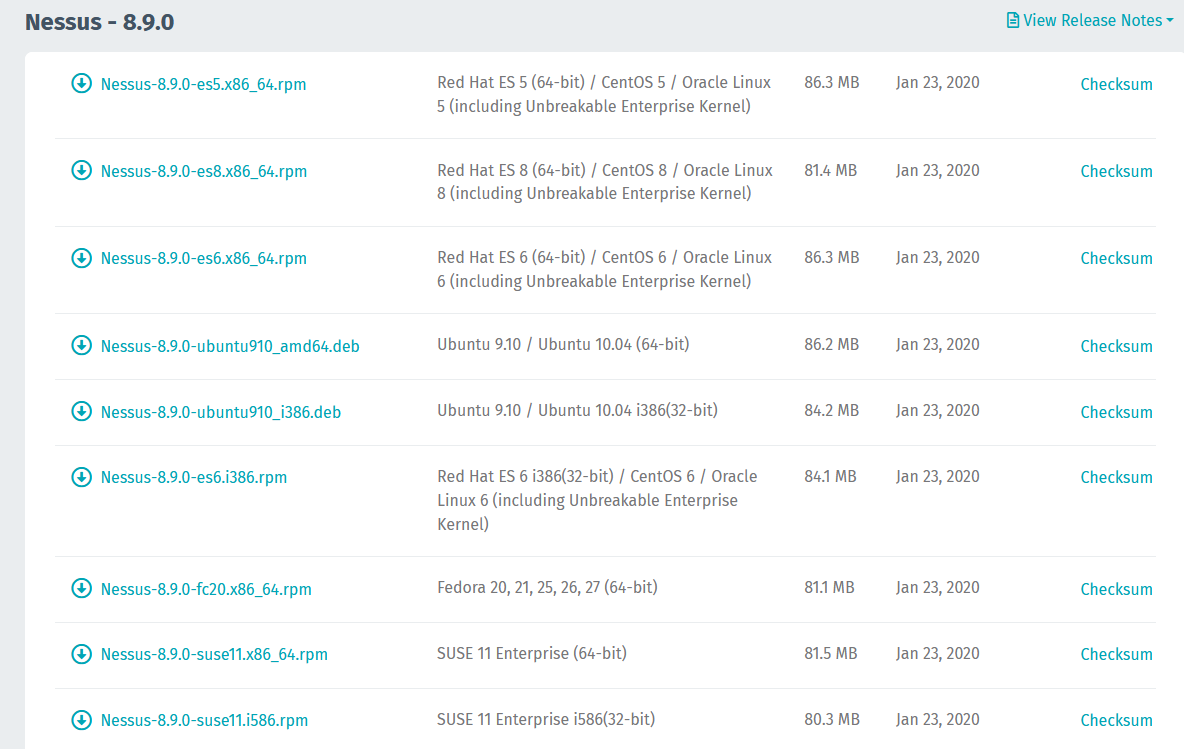
4. Download the software to your PC, in my case my machine is Debian so I download the one that ends .deb, it supports OSX, Linux, Windows
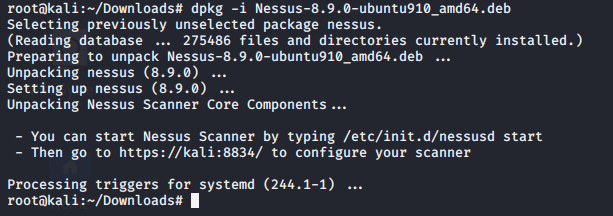
5. To install the software simply run dpkg installation manager.
- dpkg -i Nessus-8.9.0-ubuntu910_amd64.deb
Starting Nessus
1. To start the daemon run
- service nessusd start
- service nessusd status

2. Visit on your browser http://127.0.0.1:8834,
Considerations
- Nessus uses port 8834
- Works on HTTPS, uses a self-signed certificate, you can custom and use your own
- Make sure that there is no Firewall blocking that port, if you’re accessing from remote.
- It can work with firewallD (RHEL, CentOS, etc.)
firewall-cmd –permanent –add-service=nessus
firewall-cmd –reload

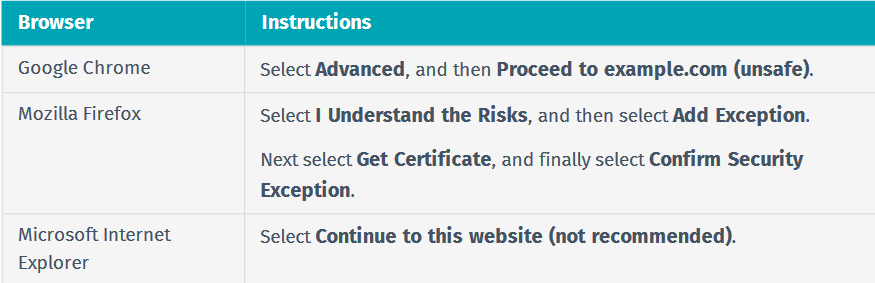
Click on advanced -> Accept the Risk and Continue (Firefox)
3. Now the installer opens and you need to select the type of software in this case, Nessus Essentials, Click continue

4. It will ask for account creation, as I already have the activation code I will skip it.

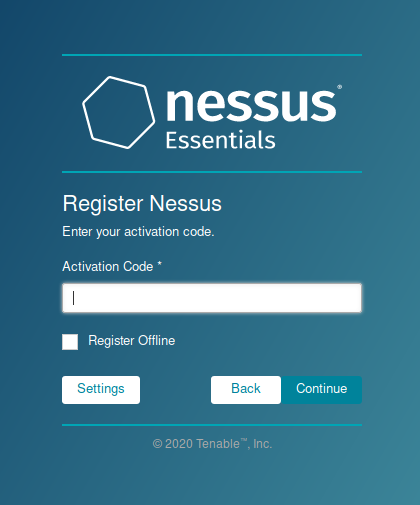
5. Now it asks for the activation code
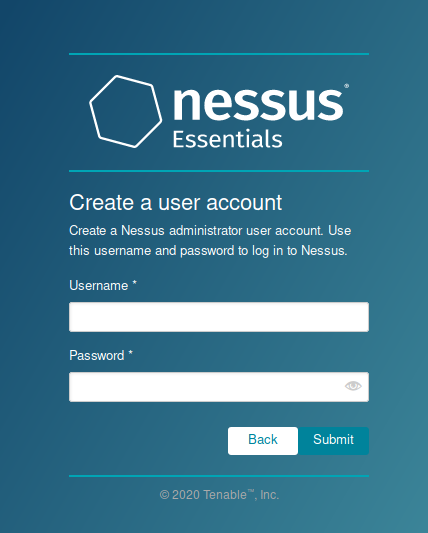
6. Create a local Username & Password
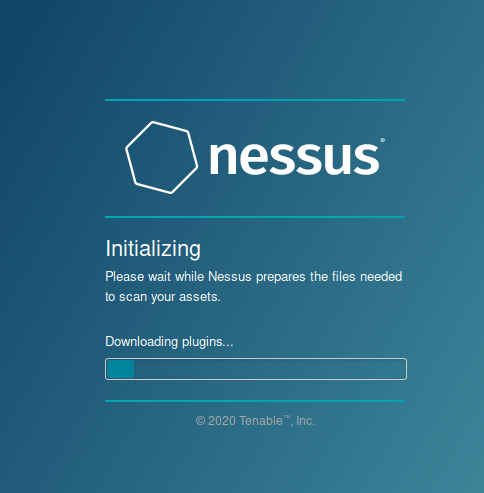
7. Now Nessus starts installation, it may take some minutes.
Once, the process completes you reach the initial home page
Using Nessus
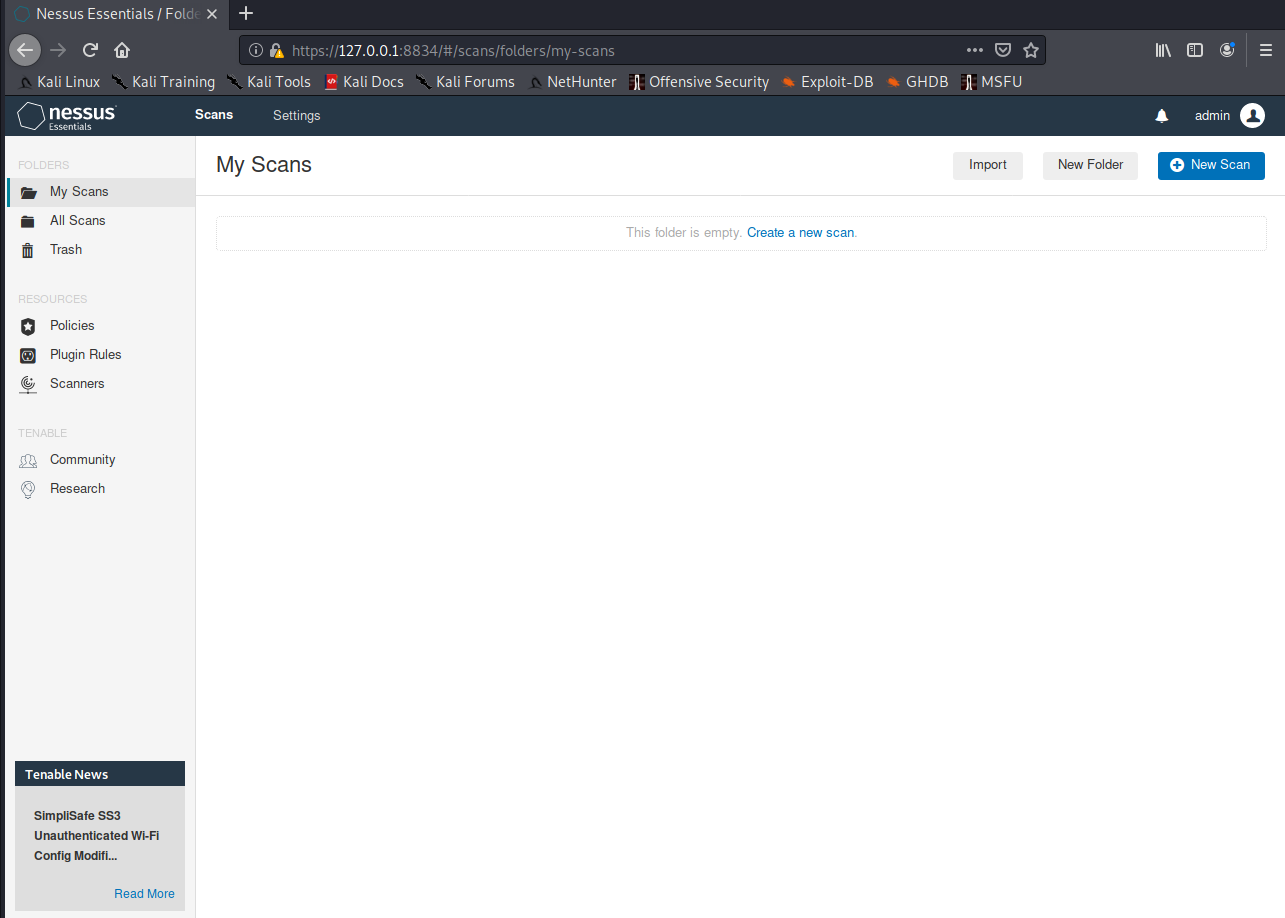
1. On the Scan page you can view, create and manage scans. At the top of the page shows the scan home page
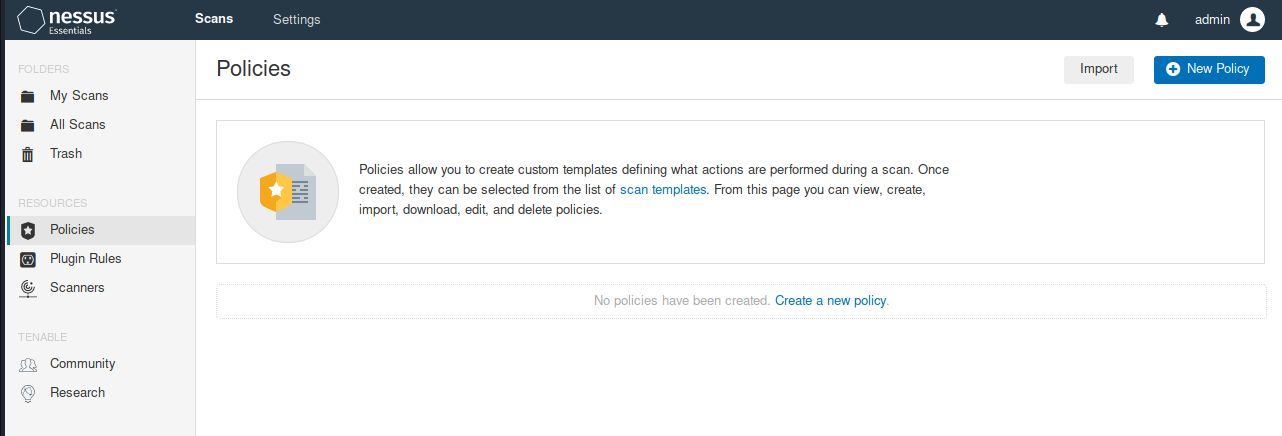
2. First thing is to create a scan policy, you can use your own policy or a custom scan template
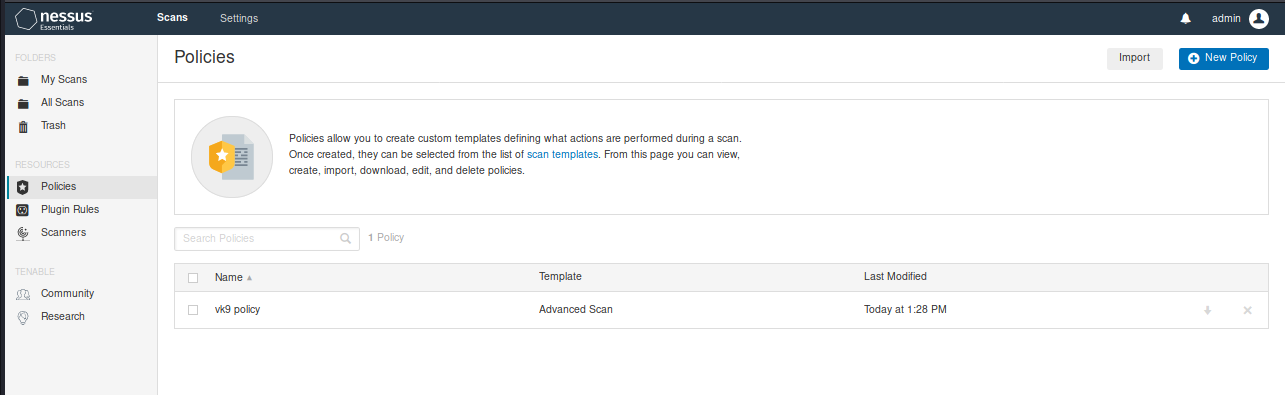
- Go to Resources -> Policies
Scan templates samples (some require premium account)
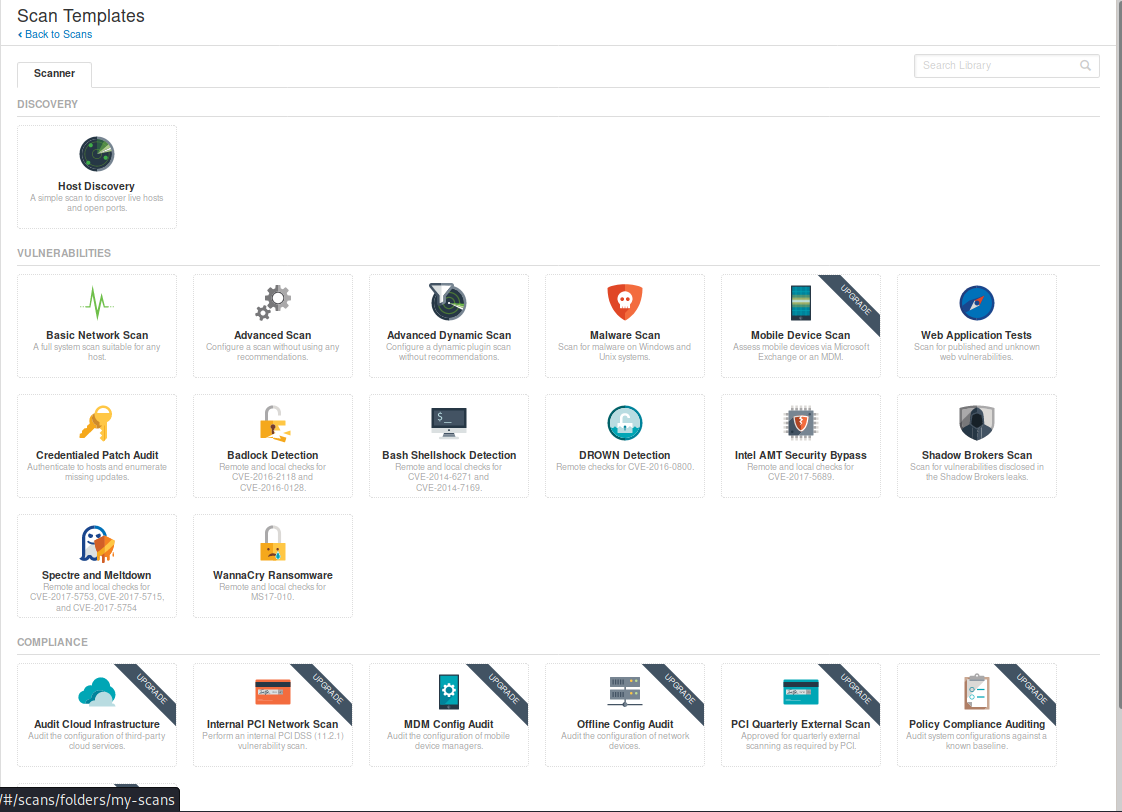
Scan template
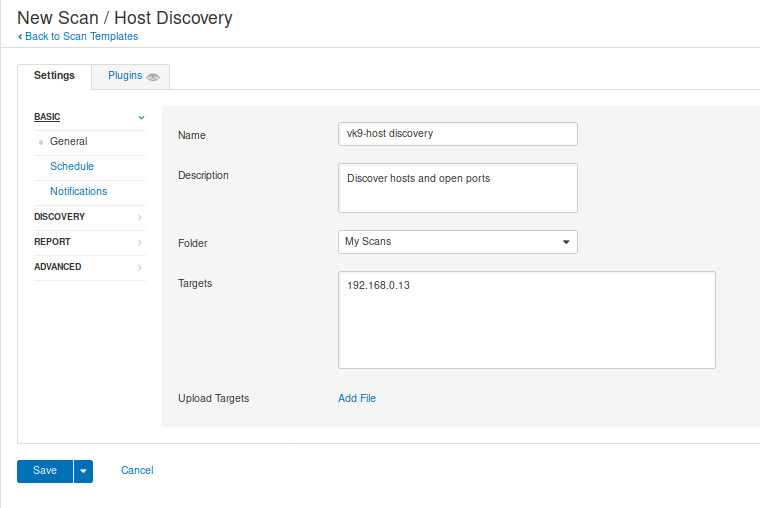
1. Host discovery: Performs a simple scan to discover live hosts and open ports
General
- Name: Name of the scan
- Description: Notes about the scan
- Folder: Where the scan is going to be stored
- Target: Hosts or network range or upload a file with target list.
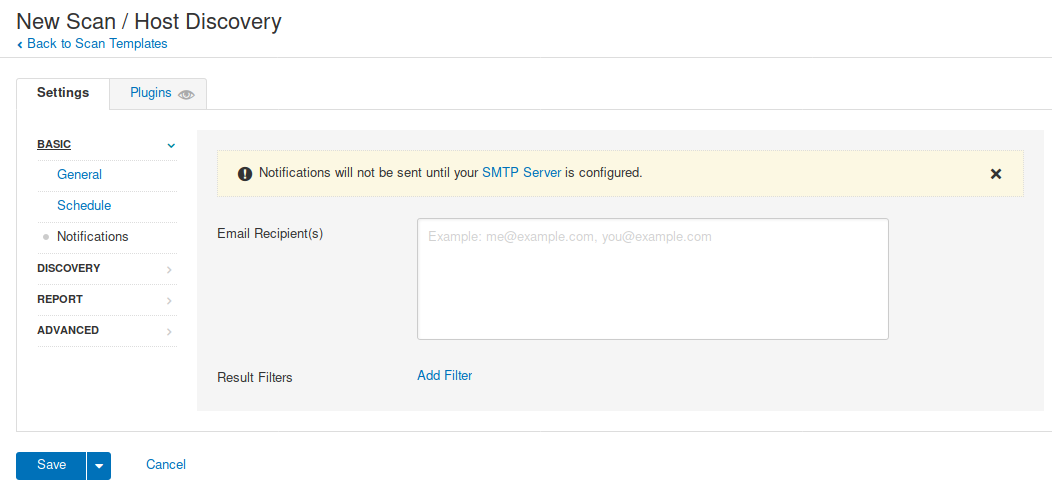
2. Scheduled scan, used to program the scan at a specific time (not required)

3. Notifications, used to send emails about the scan to an Admin, for example. SMTP needs to be configured
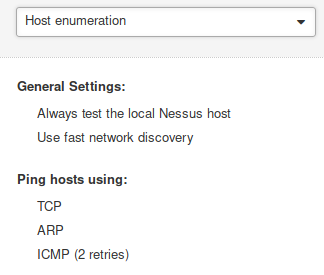
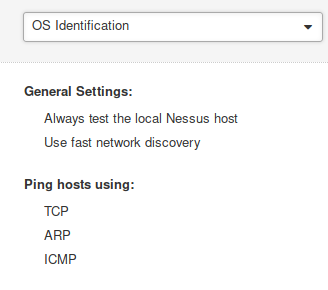
4. Here you can check the scan type
- Host enumeration
- OS Identification
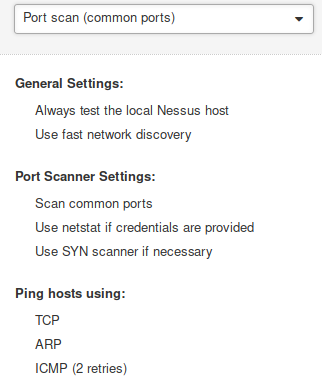
- Port scan (common ports)
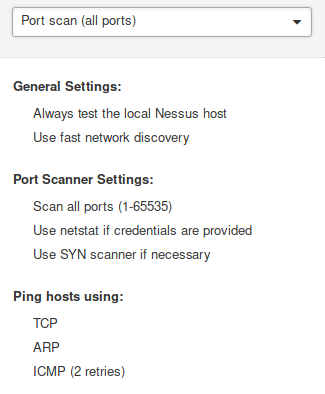
- Port scan (all ports), takes longer
- Custom: Enables to configure Host Discovery & Port Scanning

In this case we will use Custom
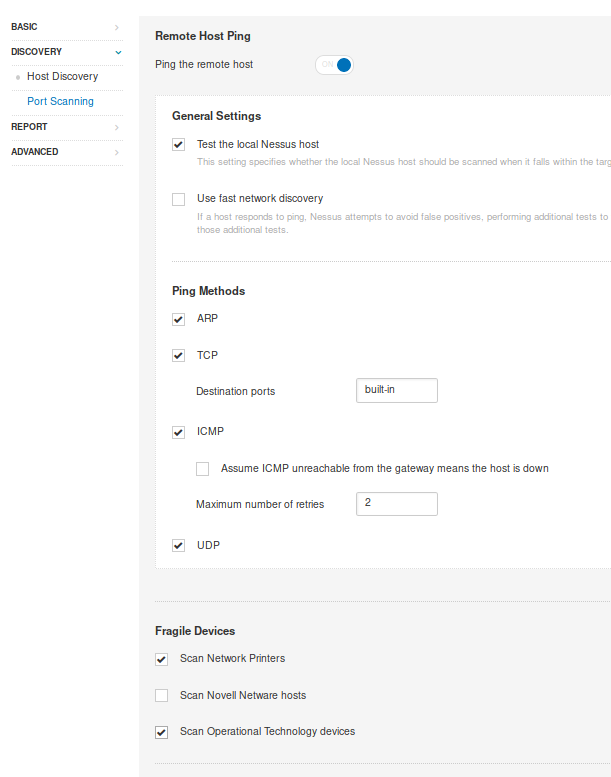
5. Host Discovery, I will use TCP UDP, ARP, ICMP for the scan, and will discover printers and Operational technology devices
6. Port Scanning: Will use SYN and UDP scan

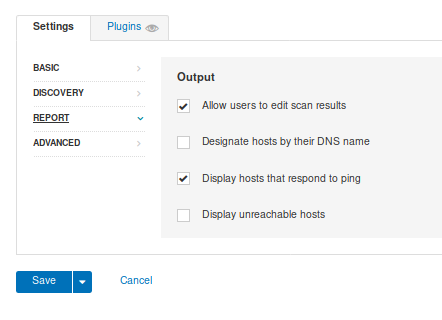
7. Reporting, data gather to build a report, I leave it as default
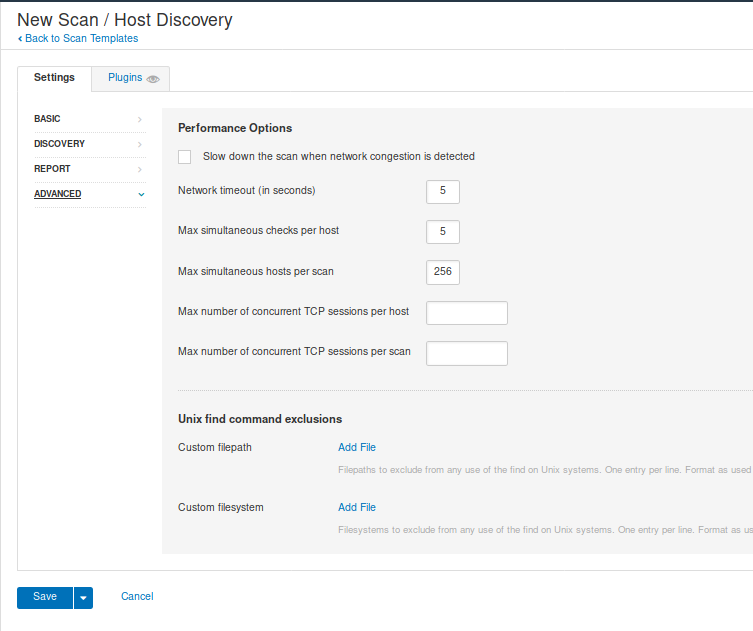
8. Advanced, used to configure settings for the scan, like timers, max hosts to scan, etc. I leave it default
When you are done, either configuring custom Discovery scan or using one of the templates click on “Save”
Under “My scans”, we will see our scan, and we can run it if we click on the “play” button at the right

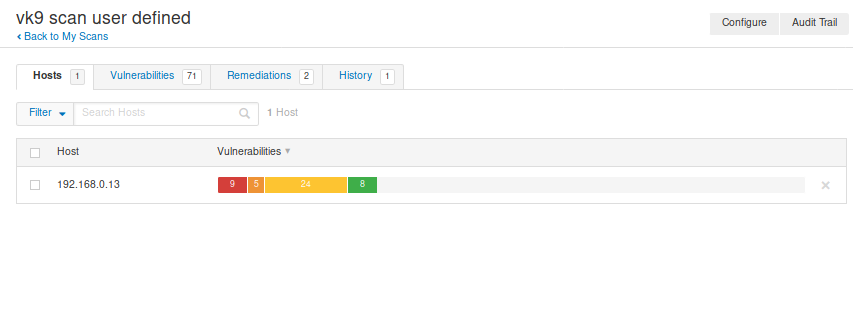
9. You can click on the scan name, to see the status of the scan and its results.

10. Once the scan is completed, we can see its status and results

Hosts: Scanned hosts & discovered ports

Vulnerabilities: Details about the discovered ports
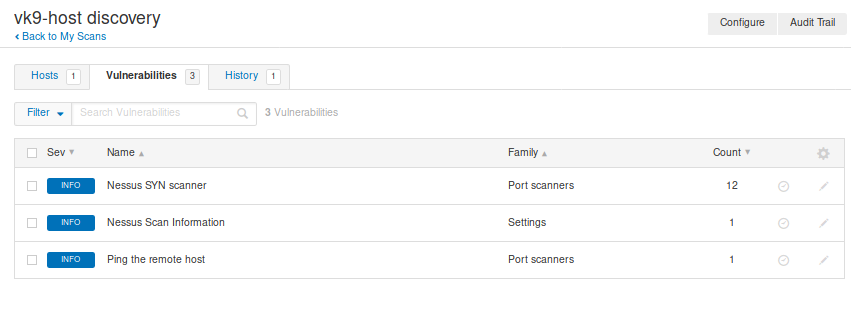
Clicking on any of those will give you more insight
History: Shows info about the scan, example when it has been run

Create a scan policy
1. Go to Policies -> New Policy -> Select the template you want your policy to use. (In this case Advanced scan)

2. Fill out the form
Basic
- Name: Name of the scan
- Description: Text about the scan

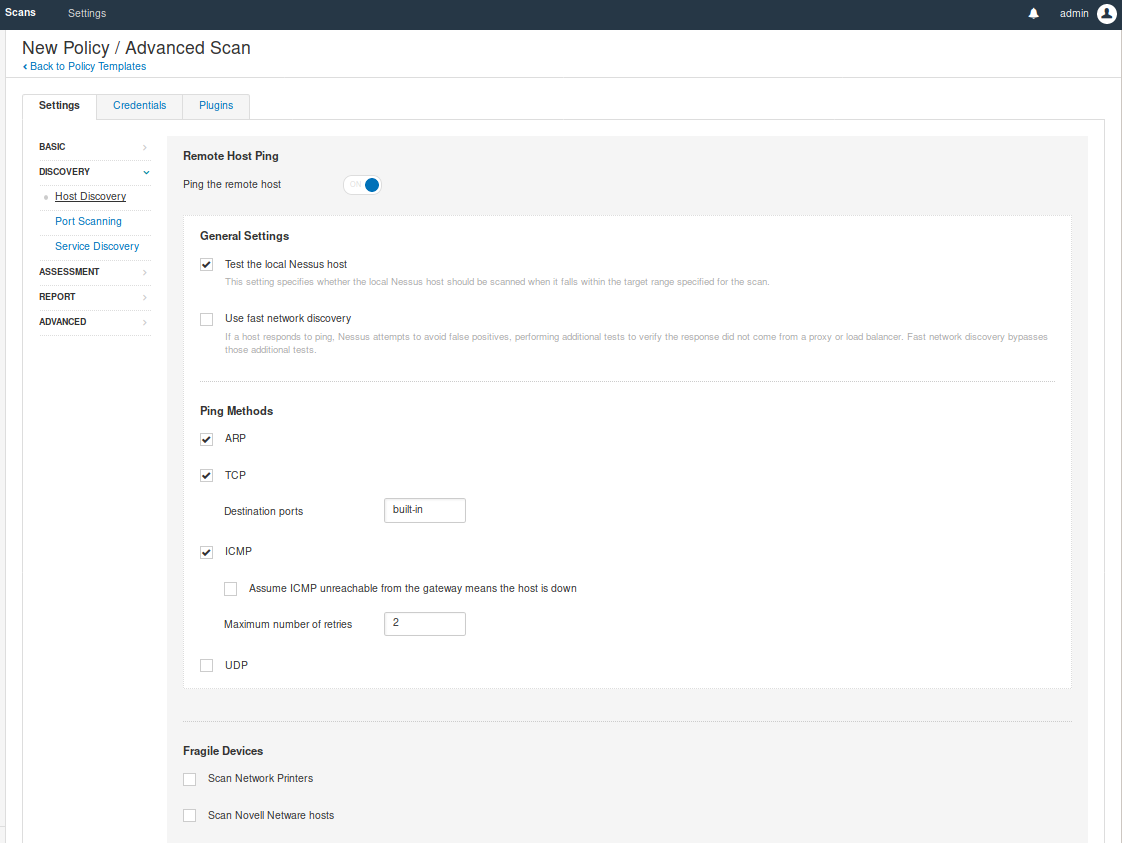
Discovery
- Host Discovery: Scan for UP hosts
- Port scanning: Discover open ports
- Services: Find services running on the open port
I will leave that as default
Assessment
- General: Setting like SMTP
- BruteForce: You can try User & password file to brute force services

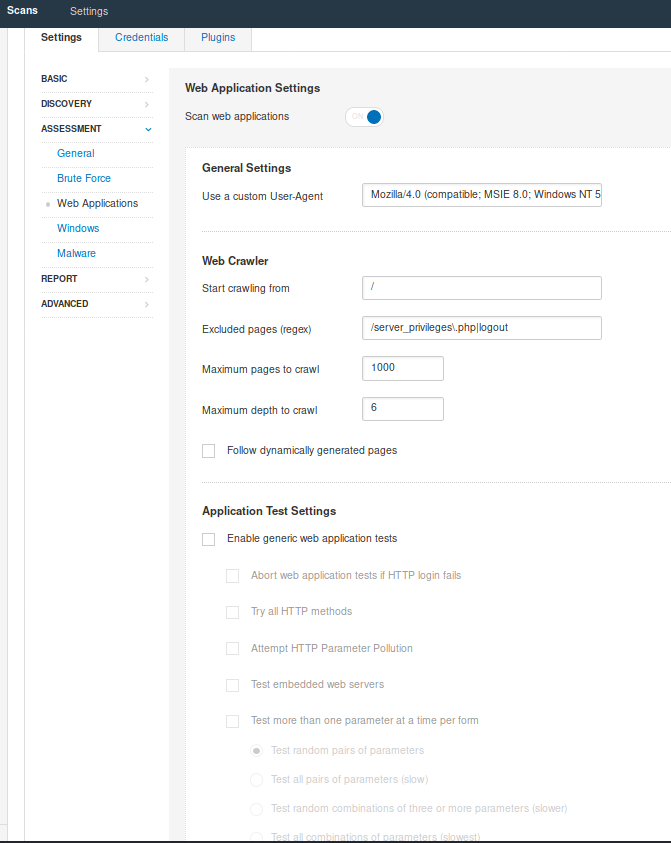
- Web applications (Optional): If you are scanning a web application you can enable this option, and enter settings like User-Agent, discover web content, test using different HTTP methods, etc
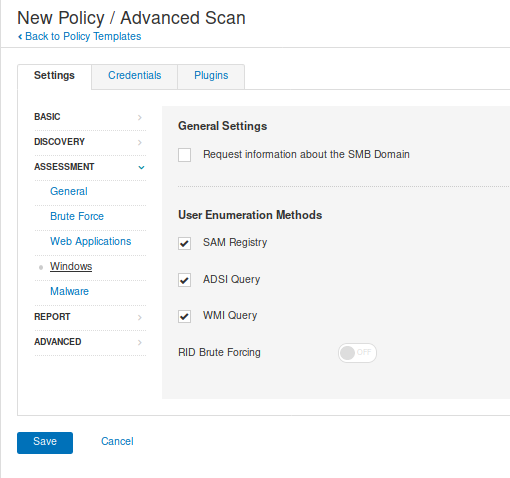
- Windows: if you know the box is Windows you can scan for SAM registry, as an example
- Malware (Optional): You can scan for Malware using a listof known hashes or Yara rules, as an example

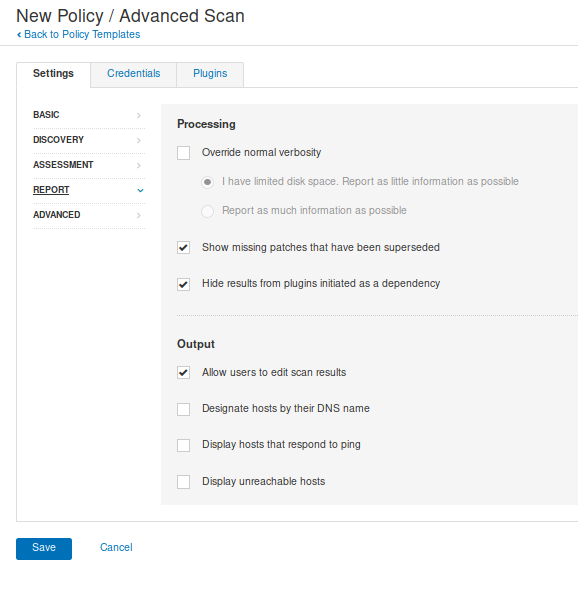
- Reports: data gather to build a report, I leave it as default
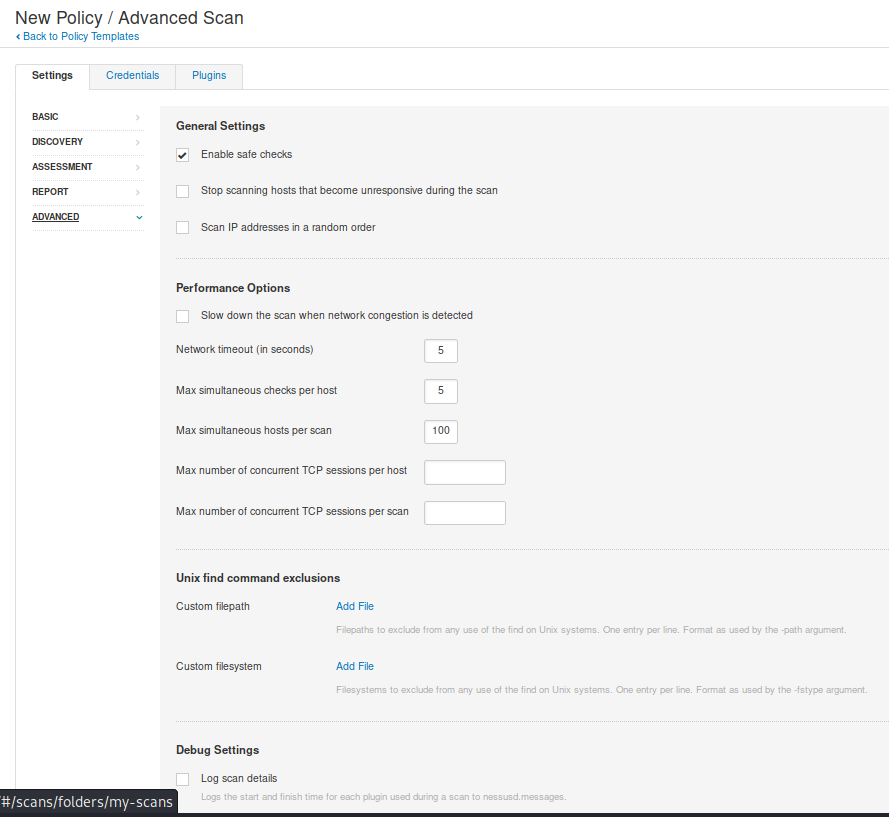
- Advanced: Performance setting
Once done, click “Save” at the bottom. And now the policy has been created. It can be exported, also.
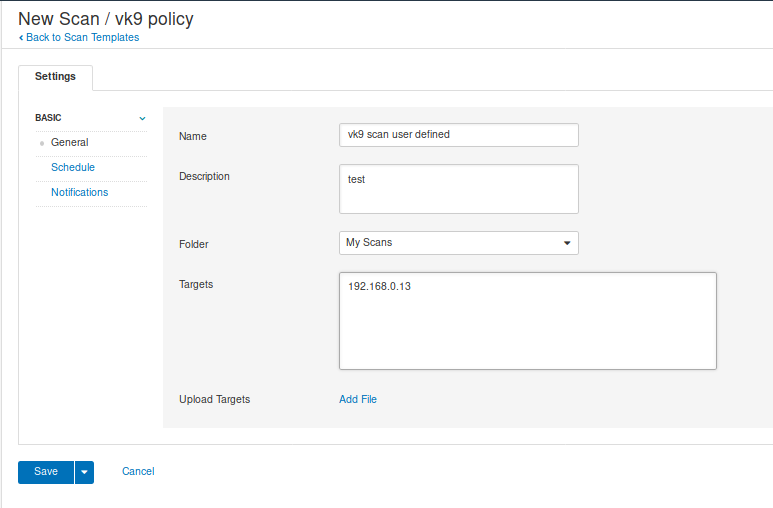
3. To use this custom policy go to “My Scans” -> “New Scan”, you will be prompted to use one of the templates or User defined policy

I will select the user defined policy we just created. After that, fill out the scan form.
General
- Name: Name of the scan
- Description: Notes about the scan
- Folder: Where the scan is going to be stored
- Target: Hosts or network range or upload a file with target list.
Use schedule if you want to program the scan for a specific date/time (optional)
Use Notifications if you want to notify via email, SMTP needs to be configured (optional
Click on “Save” to submit

4. Click on the play button at the right of the scan to start, then click on the policy name to monitor its progress

Once completed, the results show up

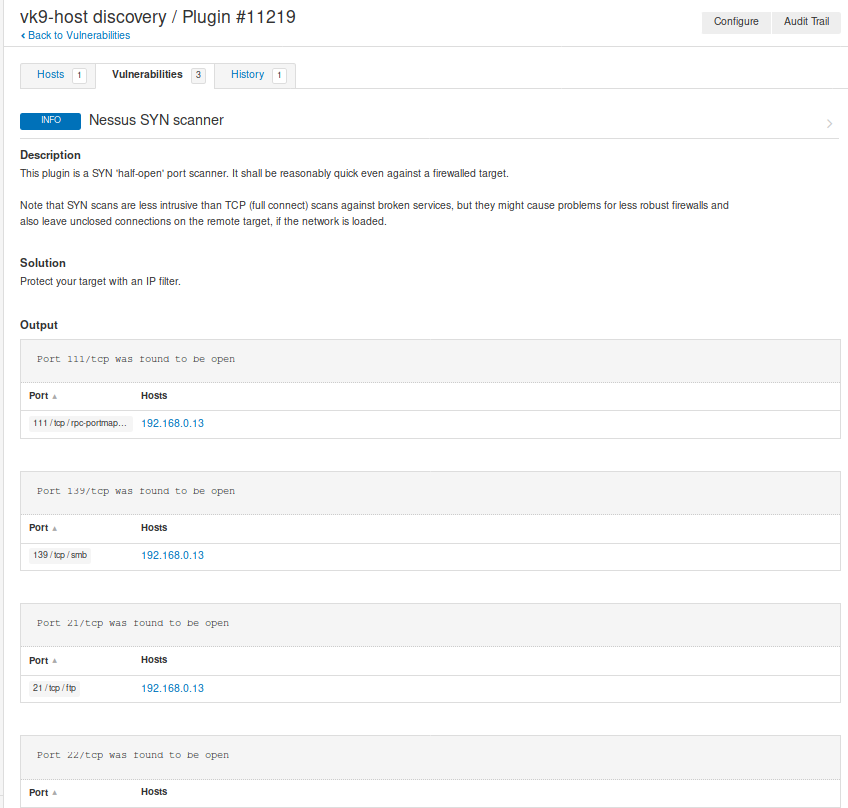
Clicking on “Vulnerabilities” we can see the list of discovered vulnerabilities

Clicking on the vulnerability, displays
- Description
- Solution
- Links that show more info
- Output received from the server

Remediation shows some recommendations, too
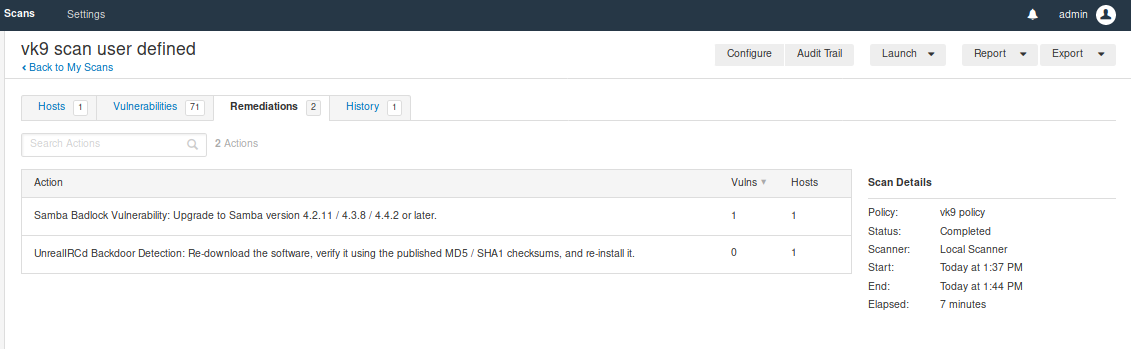
Scanners
Local monitoring of the health of the Nessus application
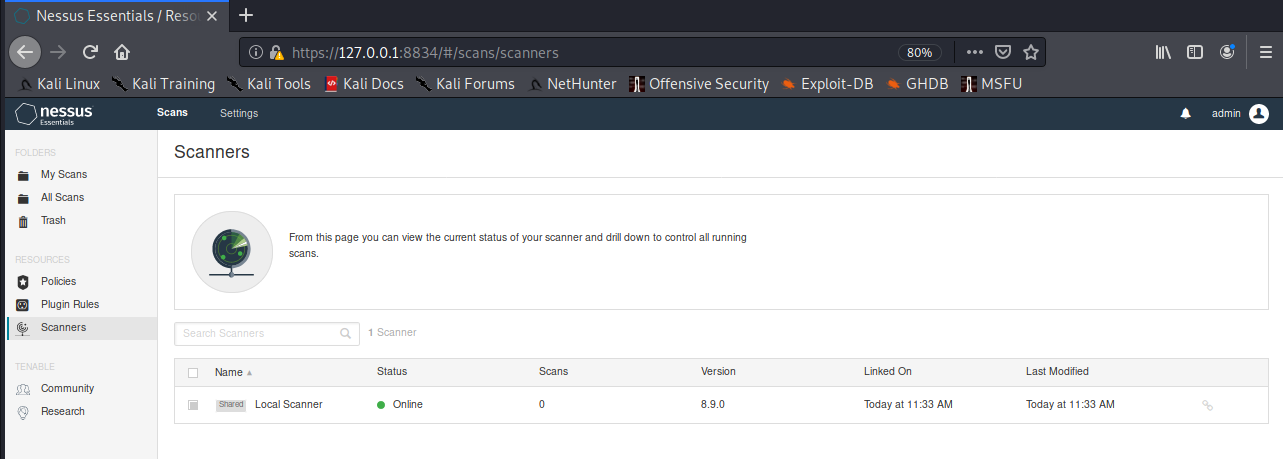
Clicking on the scanner displays the results of the task

Creating a report
1. My scans -> Click on the scan you want to check -> Report (at the upper right)
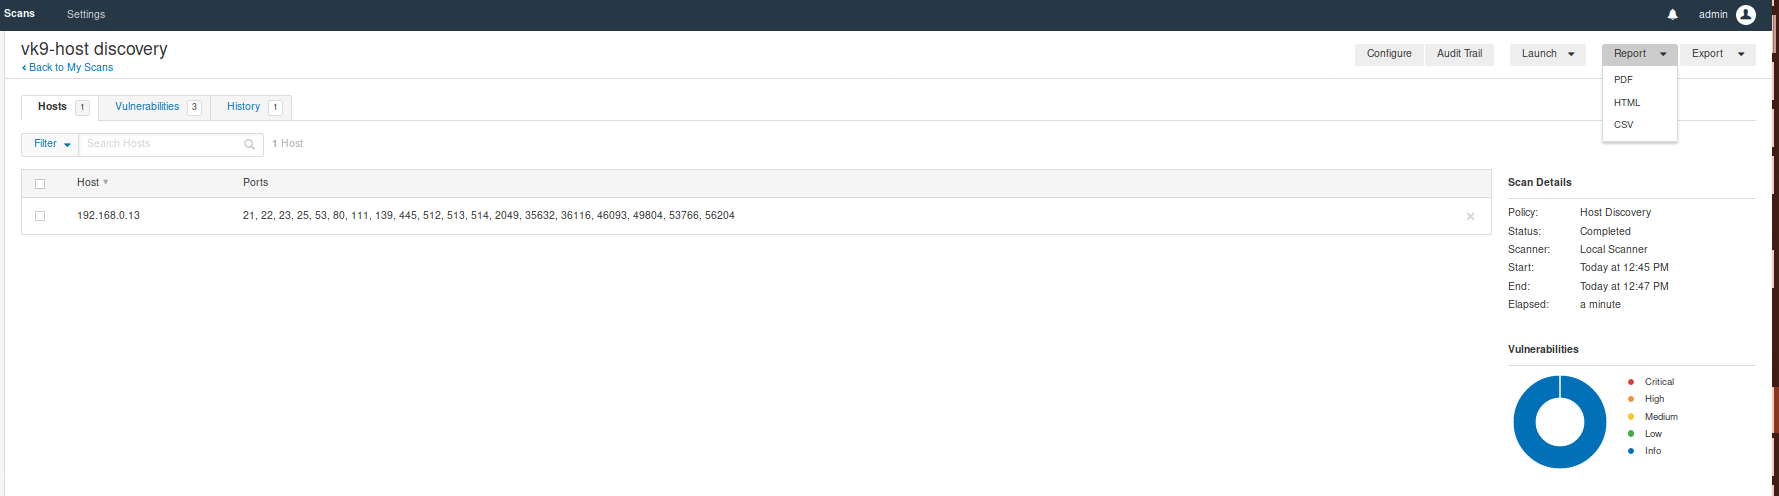
We have 3 Formats
- HTML
- CSV
Click on the file type
2. Then, you’ll be asked which type of report
- Executive summary
- Custom
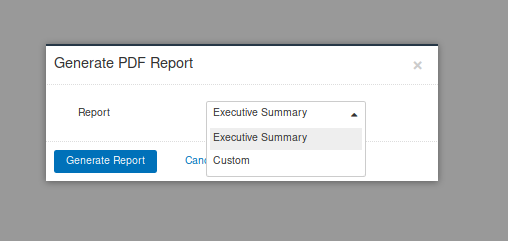
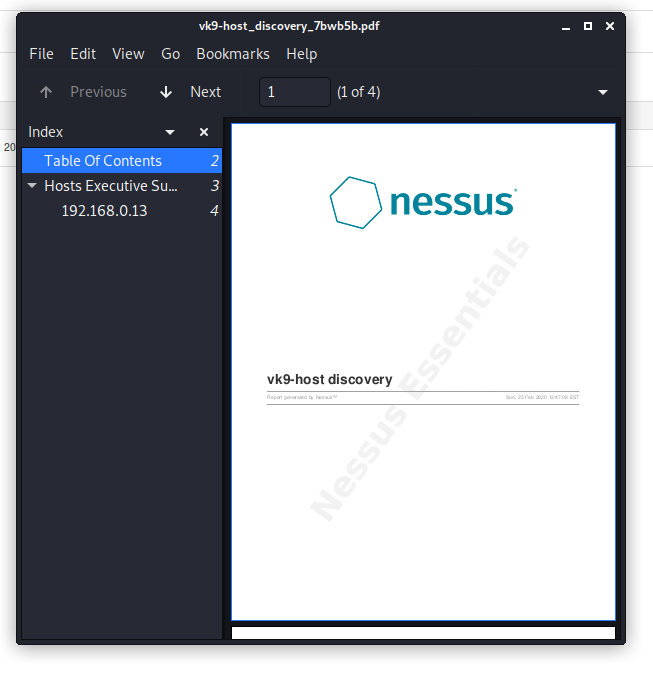
3. Click on generate report, save it and open it
Import a scan
I exported the previous one and deleted the scans from Nessus

There are 2 types Nessus & Nessus db (requires password protection)
1. Go to “My scans” -> import

Select the file type. I choose .nessus

The scan now show up. You open it up and see the results.