by Vry4n_ | Feb 11, 2020 | Tools
Gobuster is a tool used to brute-force on URLs (directories and files) in websites and DNS subdomains. Gobuster can be downloaded through the apt- repository and thus execute the following command for installing it.
https://github.com/OJ/gobuster
Gobuster is a tool used to brute-force:
- URIs (directories and files) in web sites.
- DNS subdomains (with wildcard support).
- Virtual Host names on target web servers.
Installation
apt-get install gobuster
See the available options
gobuster –help

Common Parameters
-fw – force processing of a domain with wildcard results.
-np – hide the progress output.
-m <mode> – which mode to use, either dir or dns (default: dir).
-q – disables banner/underline output.
-t <threads> – number of threads to run (default: 10).
-u <url/domain> – full URL (including scheme), or base domain name.
-v – verbose output (show all results).
-w <wordlist> – path to the wordlist used for brute forcing (use – for stdin).
Dir mode Parameter
-a <user agent string> – specify a user agent string to send in the request header.
-c – use this to specify any cookies that you might need (simulating auth).
-e – specify the extended mode that renders the full URL.
-f – append / for directory brute forces.
-k – Skip verification of SSL certificates.
-l – show the length of the response.
-n – “no status” mode, disables the output of the result’s status code.
-o <file> – specify a file name to write the output to.
-p <proxy url> – specify a proxy to use for all requests (scheme much match the URL scheme).
-r – follow redirects.
-s <status codes> – comma-separated set of the list of status codes to be deemed a “positive” (default: 200,204,301,302,307).
-x <extensions> – list of extensions to check for, if any.
-P – HTTP Authorization password (Basic Auth only, prompted if missing).
-U – HTTP Authorization username (Basic Auth only).
-to – HTTP timeout. Examples: 10s, 100ms, 1m (default: 10s).
DNS mode Parameters
-cn – show CNAME records (cannot be used with ‘-i’ option).
-i – show all IP addresses for the result.
How to use
1. Basic dir scan
- gobuster dir -u http://10.10.10.40 -w /usr/share/wordlists/dirb/small.txt
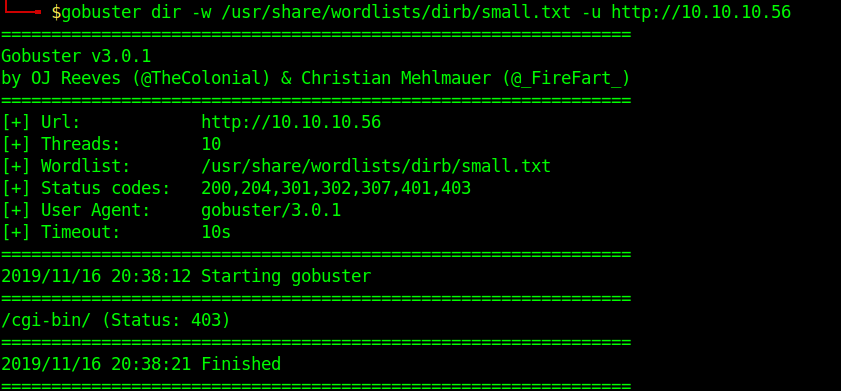
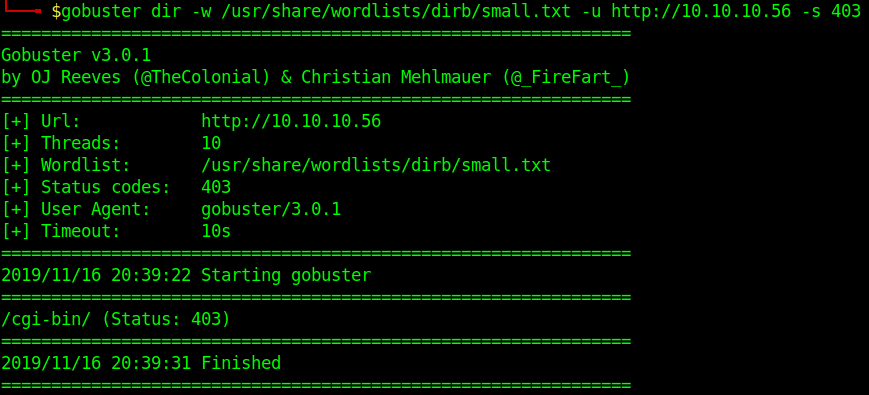
2. To select only specific types of responses use “-s”
- gobuster dir -u http://10.10.10.40 -w /usr/share/wordlists/dirb/small.txt -s 403
3. Search for files with extention sh,pl within /cgi-bin/
- gobuster dir -u http://10.10.10.40/cgi-bin/ -w /usr/share/wordlists/dirb/small.txt -x sh,pl

4. Print verbose of what is going on
- gobuster dir -u http://10.10.10.40/cgi-bin/ -w /usr/share/wordlists/dirb/small.txt -v

5. Identify content length
- gobuster dir -u http://10.10.10.40/cgi-bin/ -w /usr/share/wordlists/dirb/small.txt -l

6. Writing results to a file
-
- gobuster dir -u http://10.10.10.40 -w /usr/share/wordlists/dirb/small.txt -o results.txt
- ls -l results.txt

by Vry4n_ | Feb 11, 2020 | Tools
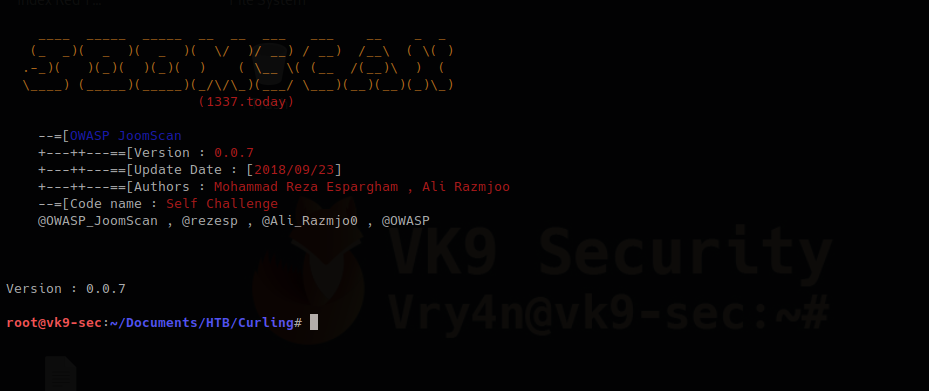
OWASP Joomla! Vulnerability Scanner (JoomScan) is an open source project, developed with the aim of automating the task of vulnerability detection and reliability assurance in Joomla CMS deployments. It not only detects known offensive vulnerabilities, but also is able to detect many misconfigurations and admin-level shortcomings that can be exploited by adversaries to compromise the system.
https://github.com/rezasp/joomscan
https://www.owasp.org/index.php/Category:OWASP_Joomla_Vulnerability_Scanner_Project
Features
Automated …
*Version enumerator
*Vulnerability enumerator (based on version)
*Components enumerator (1209 most popular by default)
*Components vulnerability enumerator (based on version)(+1030 exploit)
*Firewall detector
*Reporting to Text & HTML output
*Finding common log files
*Finding common backup files
How to install
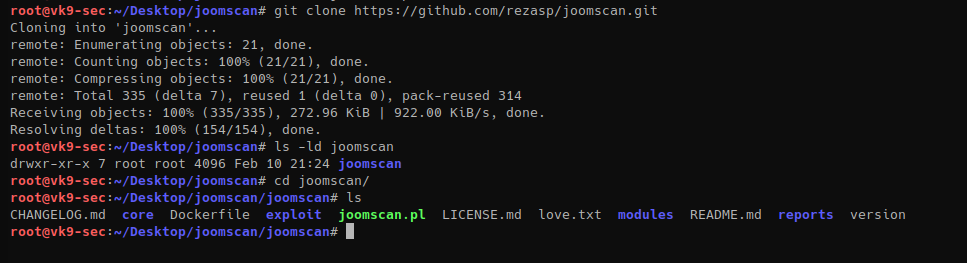
Run the script
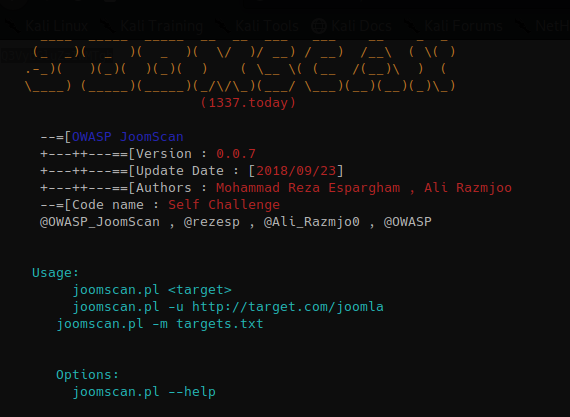
How to use
1. Display the menu
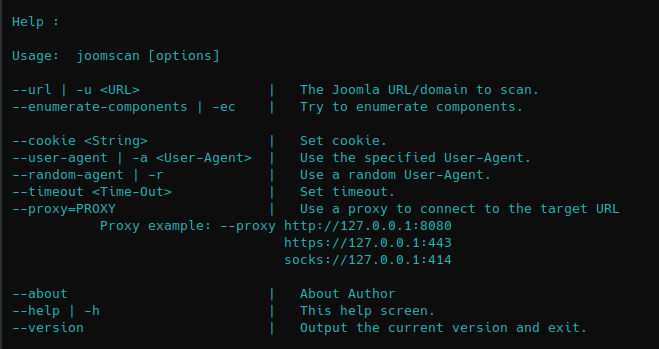
2. Basic scan
- joomscan –url http://10.10.10.150

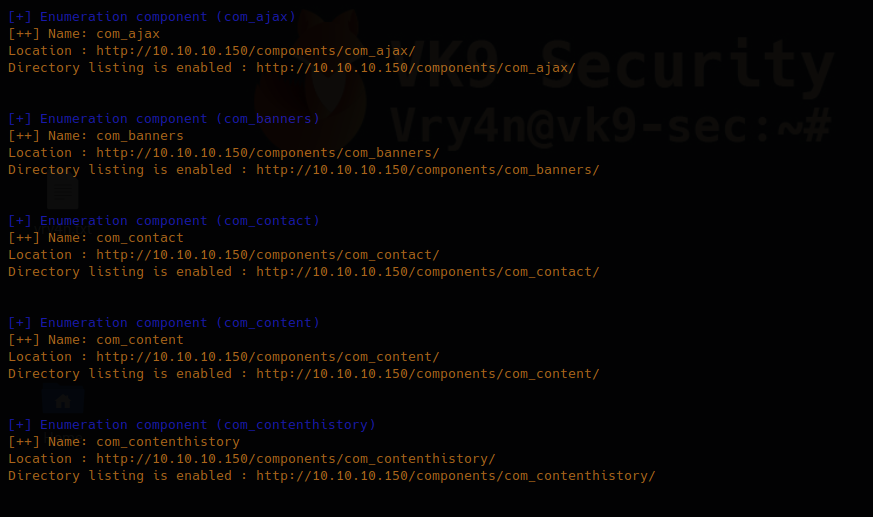
3. You can enumerate components using “-ec” option
- joomscan –url http://10.10.10.150 -ec
4. Using an existing cookie
- joomscan –url http://10.10.10.150 –cookie=74n2dshlg2gp2nmv0emvqltfv1
5. Spoof user agent
- joomscan –url http://10.10.10.150 –user-agent Mozilla/5.0
6. Use a random value for spoofed user agent
- joomscan –url http://10.10.10.150 –random-agent
7. Set a time out value, in this case (1)
- joomscan –url http://10.10.10.150 –timeout 1
Script information
1. Know about the author
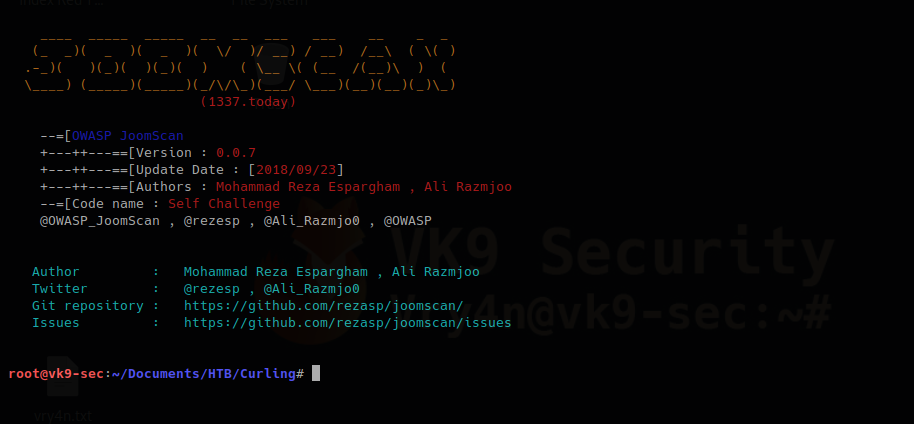
2. know the version
by Vry4n_ | Feb 9, 2020 | Anonymity
This can be used to bypass switchport security mechanisms as an example. Also, it gives us another layer of anonymity. During a pentest you can do this if you get blocked by any security policy based on MAC address just change the MAC address and you’ll get in.
Manual way to do this on Linux
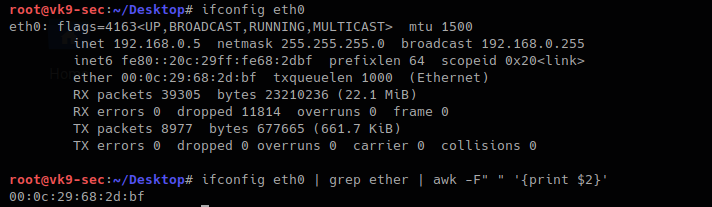
1. Check the current MAC address value
- ifconfig eth0
- ifconfig eth0 | grep ether | awk -F” “ ‘{print $2}’
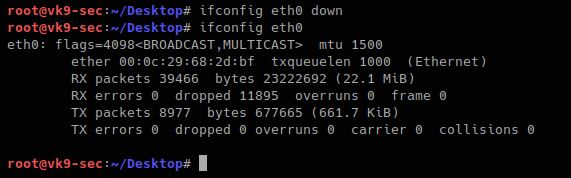
2. turn off the “eth0” interface before the change
- ifconfig eth0 down
- ifconfig eth0
3. With the command below you will set the MAC address to any value you want. I decided something dummy, AA:BB:CC:DD:EE:FF, then bring the interface up and verify
- ifconfig eth0 hw ether AA:BB:CC:DD:EE:FF
- ifconfig eth0 up
- ifconfig eth0
- ifconfig eth0 | grep ether | awk -F” “ ‘{print $2}’

When the machine reboots the value goes as normal.
Using automated tools to change the MAC address
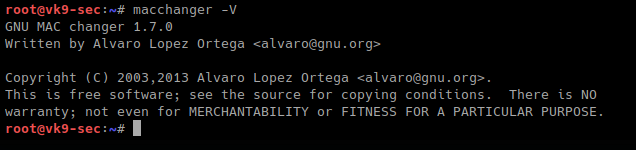
macchanger is a tool that helps automate this task. It has some cool features. It comes built into Kali by default.
How to use
1. Display the menu

2. This is how to use each of the options
-V, –version
-s, –show # list interface MAC address

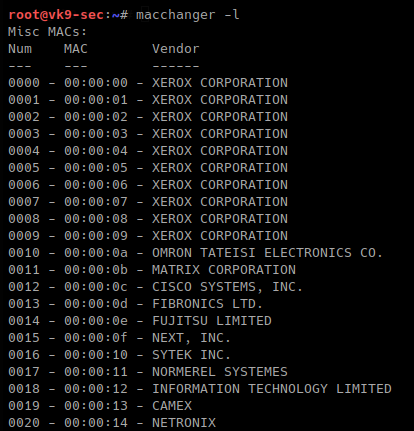
-l, –list # lists vendor MAC id
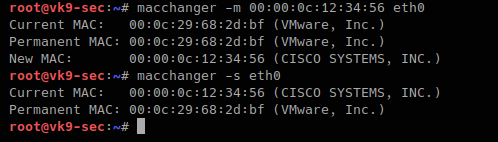
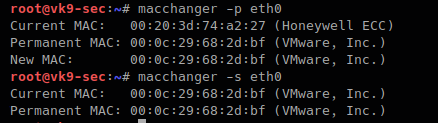
-m, –mac=XX:XX:XX:XX:XX:XX # set a MAC manually, we will use Cisco
- macchanger -m 00:00:0c:12:34:56 eth0
- macchanger -s eth0
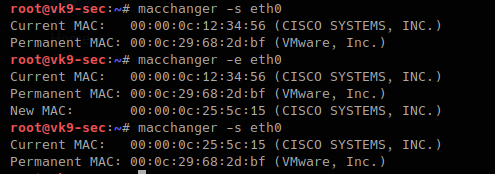
-e, –ending # keps the vendor bytes and randomizes the rest
- macchanger -s eth0
- macchanger -e eth0
- macchanger -s eth0
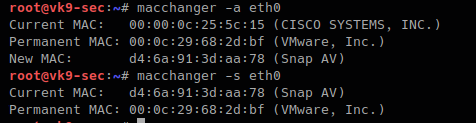
-a, –another # changes vendor of the same kind
- macchanger -a eth0
- macchanger -s eth0
-A # changes vendor of different kind
- macchanger -A eth0
- macchanger -s eth0

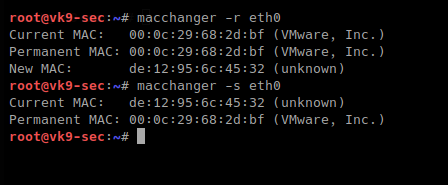
-p, –permanent # go back to the burned-in address
- macchanger -r eth0
- macchanger -s eth0
-r, –random # complete randomize the MAC, unknown type
-b, –bia # pretend to be burned-in-address
- macchanger -b –random eth0

A script can also be created to automate the change of the MAC address of a time interval. This tool can be downloaded from the internet in case that you don’t find it in your PC
https://github.com/alobbs/macchanger
by Vry4n_ | Feb 9, 2020 | Windows Misc
Activating Windows 10 license key, this tutorial is intended for lab machines. It is recommended to always buy licenses from vendor.
Steps
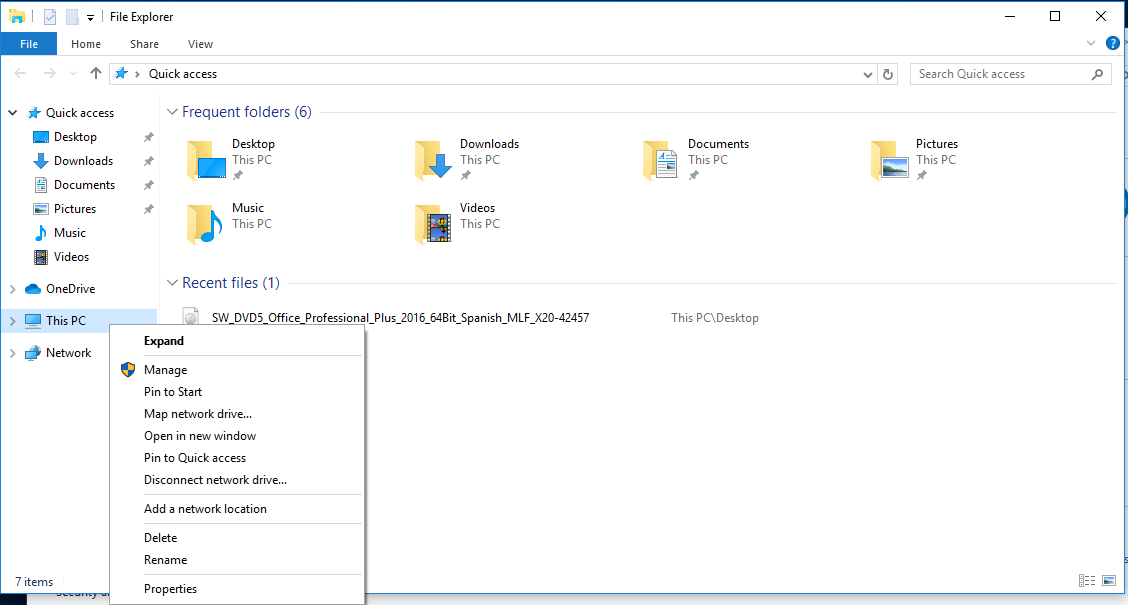
1. Go to file explorer -> Right Click “This PC”-> Properties
2. At the bottom, we can verify whether Windows has been activated or not “Windows is not activated”

3. Open cmd as administrator, Win key -> cmd -> Right Click “Run as administrator”
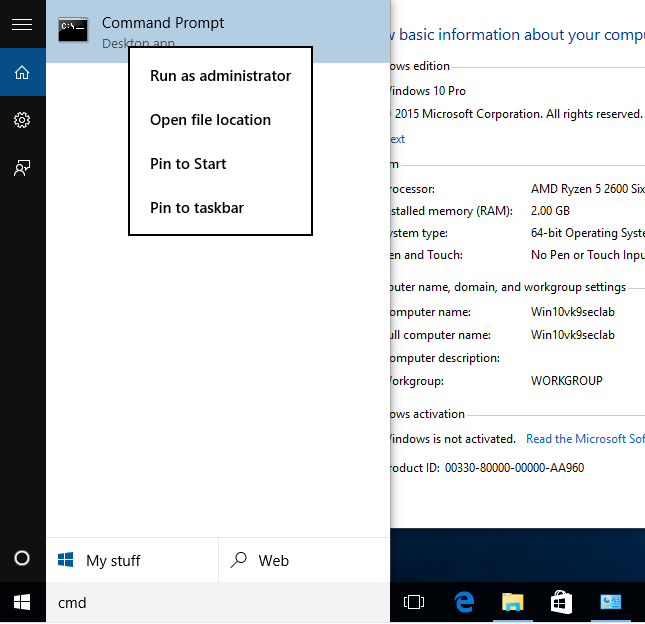
Click yes to permit the operation


4. In this case I will be using “VK7JG-NPHTM-C97JM-9MPGT-3V66T” which is for Windows 10 Pro, you can search on the internet for some key codes.
https://ykmmedia.com/windows-10-product-key-free-serial-keys-or-activation-keys-2019-2020/
Enter the following command to submit the key
- slmgr /ipk VK7JG-NPHTM-C97JM-9MPGT-3V66T
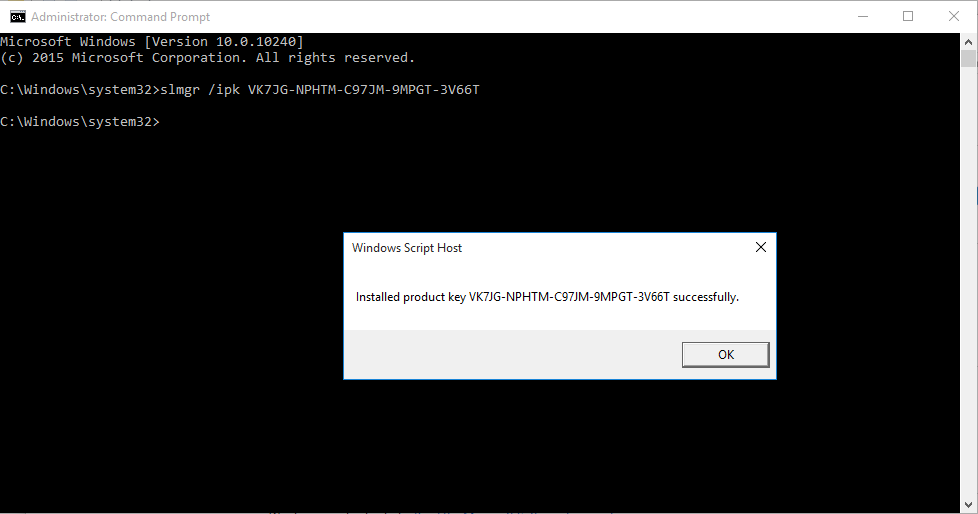
Wait a few minutes until this pops up.
5. Now you need to connect to KMS server
- slmgr /skms kms8.msguides.com
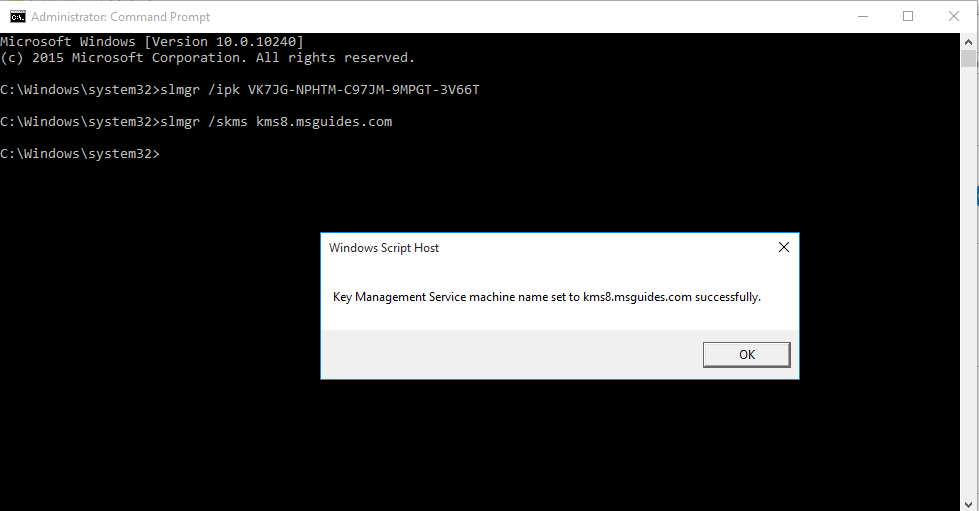
This message indicates the connection is successful
6. Now submit the request
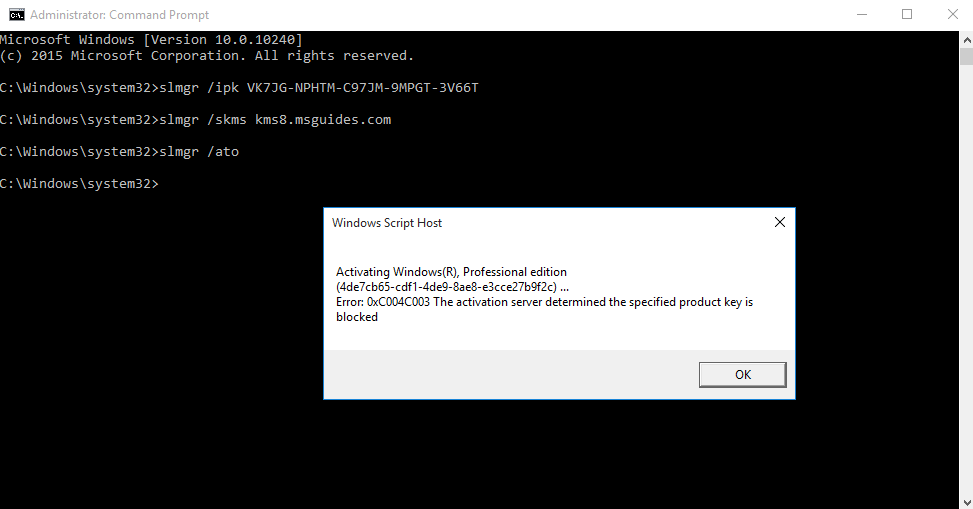
This activation fails due to the key has been reported, we need to find a clean key from the internet.
Now repeating the process with a valid key will activate the product.
- slmgr /ipk W269N-WFGWX-YVC9B-4J6C9-T83GX
- slmgr /skms kms8.msguides.com
- slmgr /ato
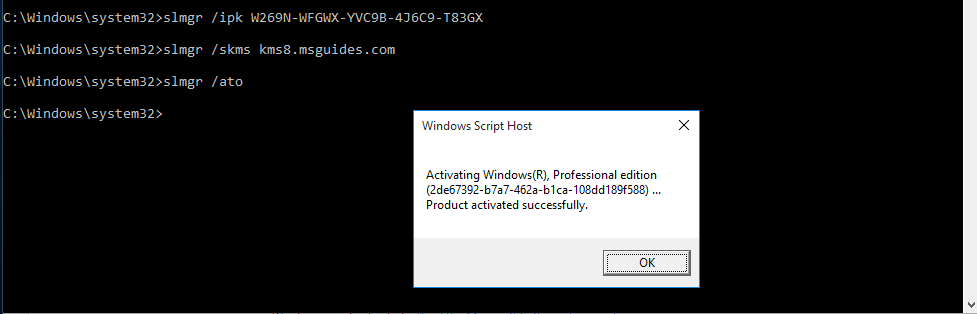
Now click Ok and reboot.

Repeat Step 1 & 2 to check the activation of Windows. Now it shows “Windows is activated”

by Vry4n_ | Feb 9, 2020 | Linux Commands
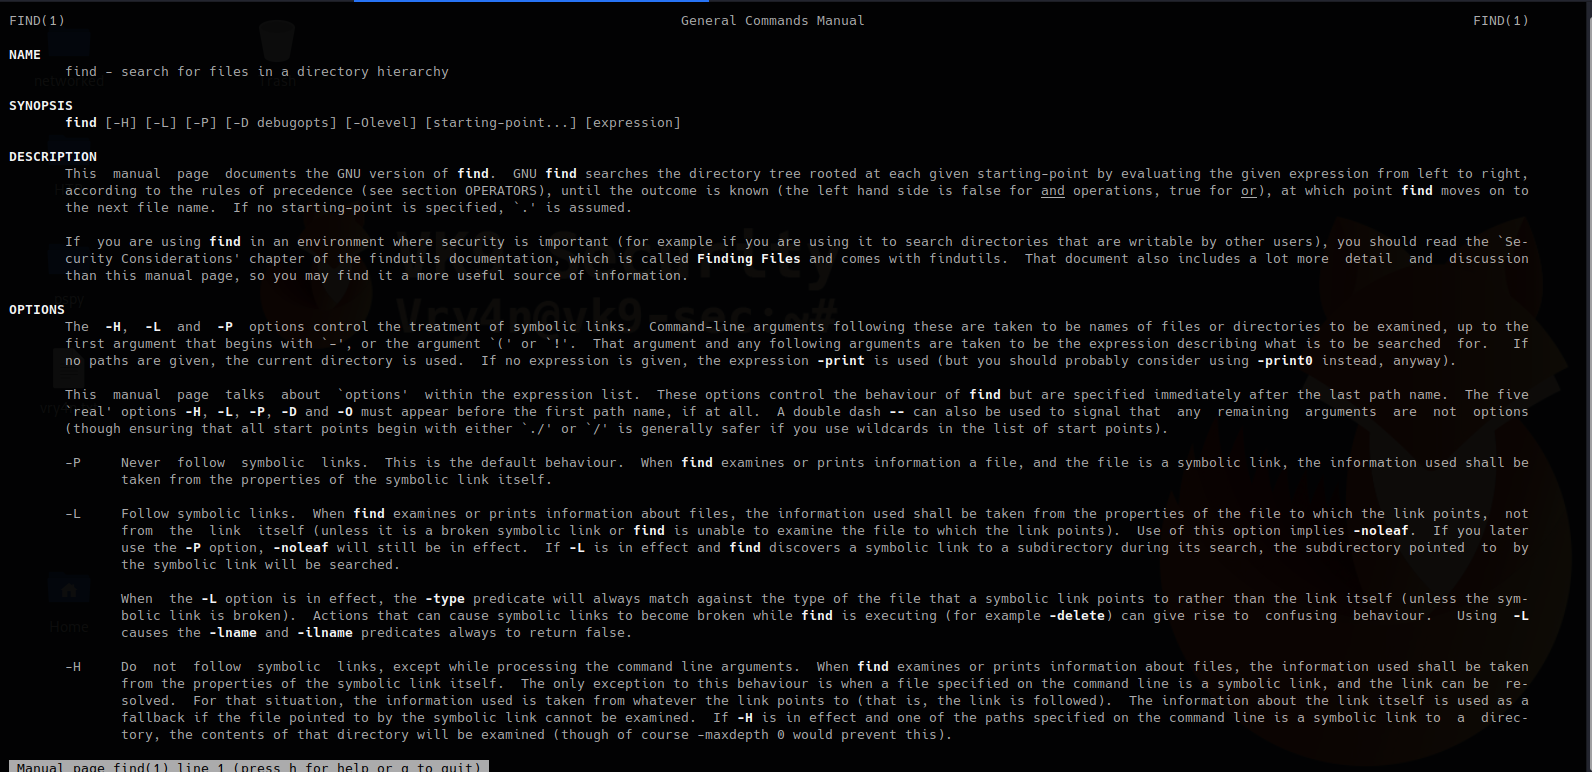
find searches the directory tree rooted at each given starting-point by evaluating the given expression from left to right. In this article we will explore the most useful commands.
Useful commands
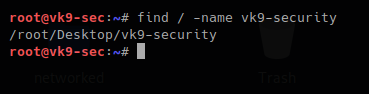
1. Basic search of a file named vk9-security.txt, starting at / position
- find / -name vk9-security.txt
2. The same search but case not sensitive
- find / -iname vk9-security.txt

3. Executing commands during the search, using wildcards to complete names, * means -> 0 or more characters
- find / -name vk9-sec* -exec ls -l {} \;

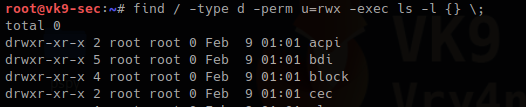
4. Search only directories, using
-type d = only directory type
-perm u=wrx = searches for permissions 700
-exec ls -l {} \; = runs a listing command
- find / -type d -perm u=rwx -exec ls -l {} \;
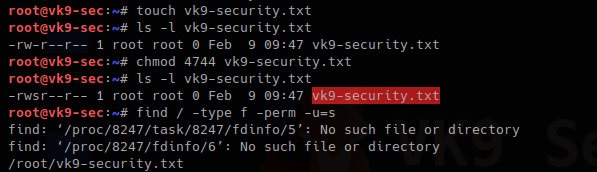
5. Searching files, with SUID permissions
-type f = only file type
-perm = file that have permissions sticky bit
chmod = used to change file permissions
- touch vk9-security.txt
- ls -l vk9-security.txt
- chmod 4744 vk9-security.txt
- ls -l vk9-security.txt
- find / -type f -perm u=s
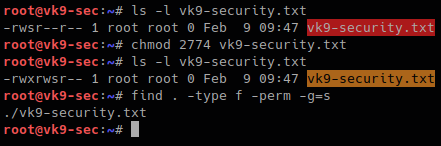
Also files with GUID can also be found
- ls -l vk9-security.txt
- chmod 2744 vk9-security.txt
- ls -l vk9-security.txt
- find . -type f -perm -g=s
6. Getting rid of errors
2> /dev/null = used to redirect STDERR to trash lets run the same command again
- find / -type f -perm u=s 2> /dev/null

7. Using find to find within multiple places
- find . /tmp -type f -perm -u=s 2> /dev/null

8. Finding hidden files that start with F
Files starting with “.” are hidden in Linux.
- find . -name “.F*” -type f

9. Finding file owned by a particular user
- find /tmp -user vry4n
- find /tmp -user vry4n -exec ls -l {} \;

10. Searching for files & directories that belong to a specific group
- find /var/www -group www-data -exec ls -l {} \;

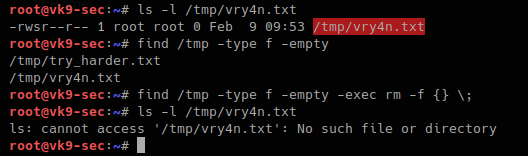
11. Searching & deleting empty files
-empty
rm -f {} \; = removes a file
- ls -l /tmp/vry4n.txt
- find . -type f -empty
- find . -type f -empty -exec rm -f {} \;
- ls -l /tmp/vry4n.txt
12. Find a file and filter it using grep
- find . -name “vry*” -exec grep -i “hello” {} \;

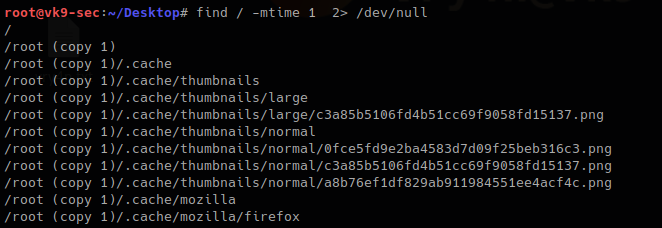
Searching for files base on time
1. Searching for file with modification time within 1 day
- find / -mtime 1 2> /dev/null
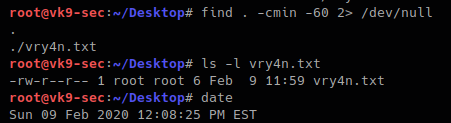
2. Searching for file that where changed in the last 60 min
- find / -cmin -60 2> /dev/null
3. Searching for file that were modified within the last 60 min
- find / -mmin -60
- ls -l
- date
There are too many more options use with find. Visit man page to get the output of full documentation
https://linux.die.net/man/1/find