by Vry4n_ | Mar 6, 2020 | Windows Misc
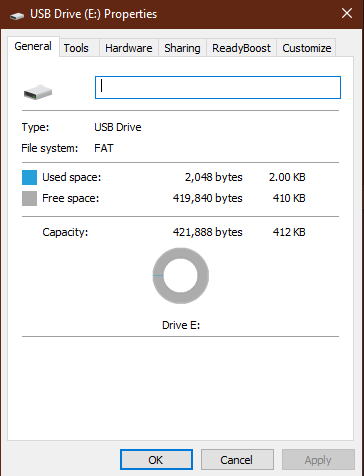
I used to play a lot with USB (making bootable images, encrypting, formating, etc). I got to a point where when I format it the space of the USB is lost. This is a tutorial on how to recover that space.
This has happened to me when I use the USB drive as bootable of .iso files
1. Open CMD as administrator

2. Enter to disks view

3. List the available disks

4. Select the disk

5. Clean the disk

6. Create a partition

7. Format the drive

8. It should now show the real storage space

by Vry4n_ | Mar 6, 2020 | Linux Security
Apache is an open-source and free web server software
How to use the services (System V)
Start
- /etc/init.d/apache2 start
- Or
- sudo service apache2 start

View Status

Restart the service

Stop the service
- service apache2 stop
- service apache2 status

Steps for RHEL 4.x/5.x/6.x or older
Start
Stop
Restart
How to use the services (Systemd)
RHEL 7.x or newer
Start
- systemctl start httpd.service
Stop
- systemctl stop httpd.service
Restart command
- systemctl restart httpd.service
Basic Info
- Document root Directory: /var/www/html or /var/www
- Main Configuration file: /etc/httpd/conf/httpd.conf (RHEL/CentOS/Fedora) and /etc/apache2/apache2.conf (Debian/Ubuntu).
- Default HTTP Port: 80 TCP
- Default HTTPS Port: 443 TCP
- Test your Configuration file settings and syntax: httpd -t
- Access Log files of Web Server: /var/log/apache2/access_log
- Error Log files of Web Server: /var/log/apache2/error_log
Best Practices
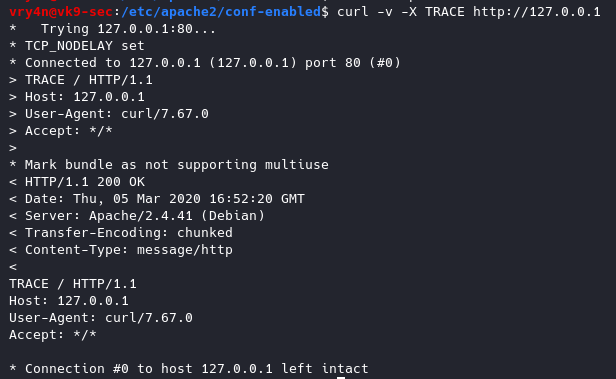
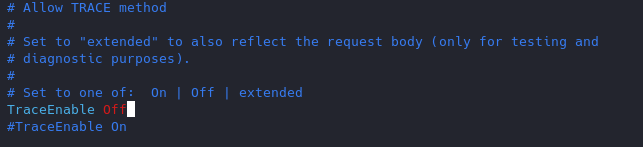
1. Disable TRACE HTTP Request
Having this feature on can lead to Cross Site Tracing attack (XST). (See, https://owasp.org/www-community/attacks/Cross_Site_Tracing )
TraceEnable on allows for Cross Site Tracing Issue and potentially giving the option to a hacker to steal your cookie information.
- curl -v -X TRACE http://127.0.0.1
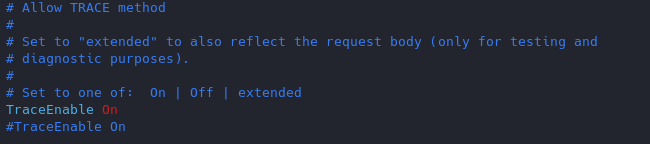
Solution
Set the TraceEnable directive to “off” in the main configuration file and then restart Apache. (the directory may vary depending on apache installation, see user guide for more information)
- sudo vi /etc/apache2/conf-enabled/security.conf
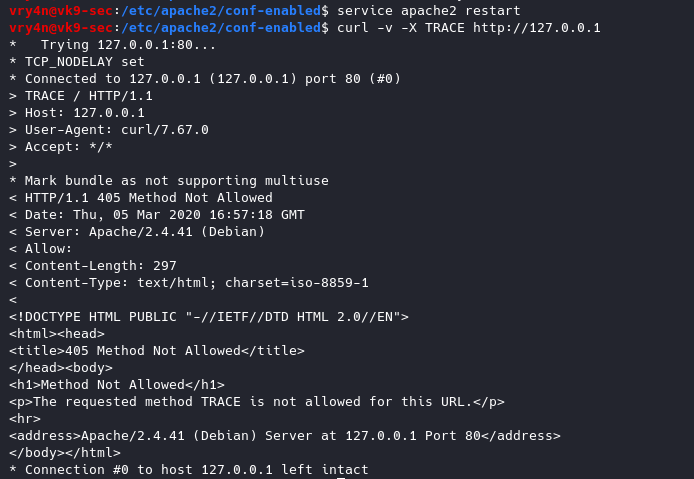
Restart apache service and try to run again curl command
- service apache2 restart
- curl -v -X TRACE http://127.0.0.1
2. Set User & Group
Never run as root, You can set a default user with minimal rights and accesses to exclusively run apache it can be set as follows

www-data is used by default by most administrators we can leave it as it is or modify the values at will.
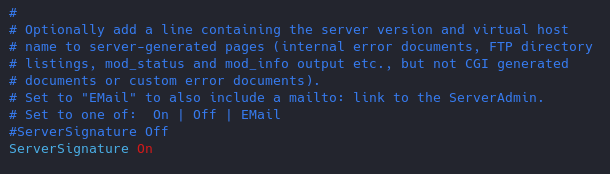
3. Disable Signatures
By default apache displays the version of the web service install as an error, can also show the information about Apache modules installed in your server.
Solution
Turn Off “ServerSignature”
- vi /etc/apache2/conf-enabled/security.conf
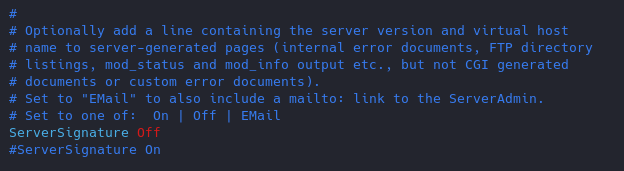
Results
(Optional)
Change the “serverTokens” value to hide OS-Type and modules disclosure. This also disables Banner
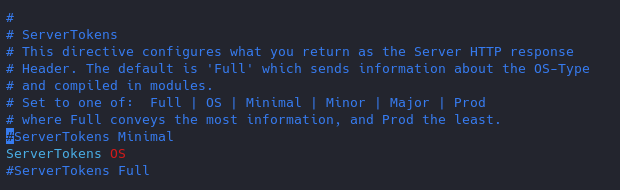
Having this feature on it displays in the response that the OS is Debian
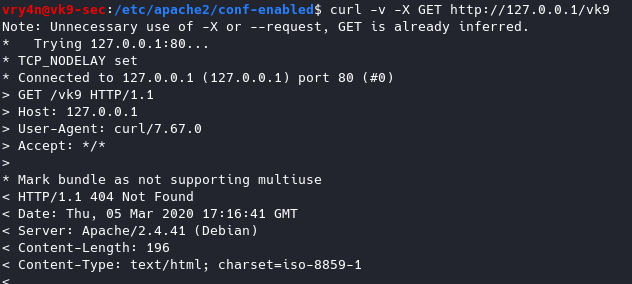
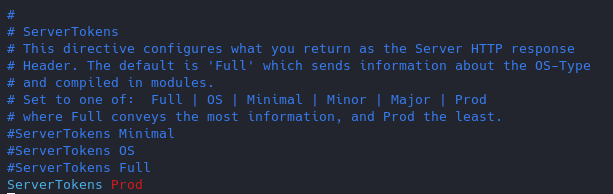
Now the OS info is not disclosed
4. Restrict access to some network/file type
if the files are sensitive for example. Config file /etc/apache2/apache2.conf
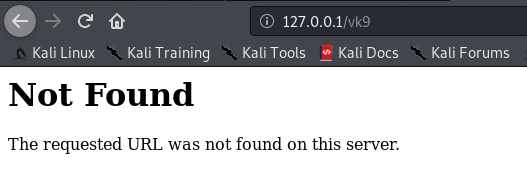
File access control
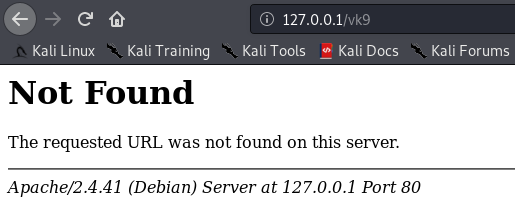
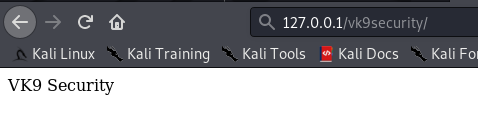
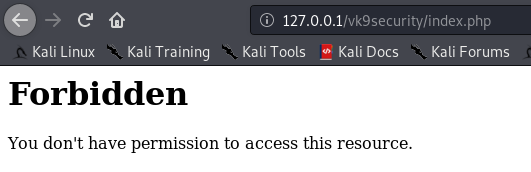
As of now, we can access 127.0.0.1/vk9security/
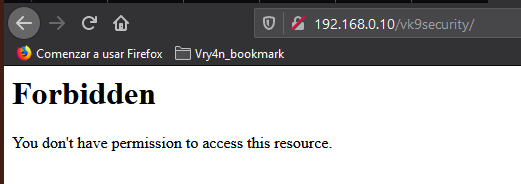
- Restrict index.php from anyone
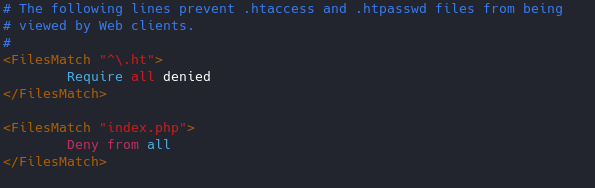
Result
Note: I can still access other resources that are not index.php, like, index.html

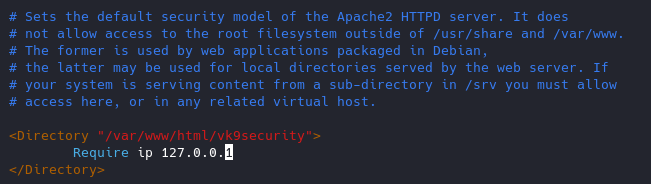
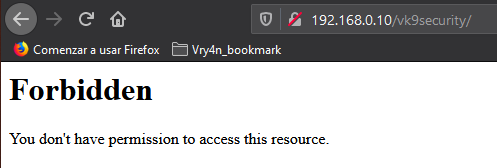
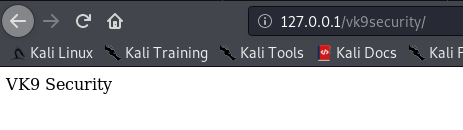
Network access control
You can control which networks access which resources, in this case we are only allowing loopback 127.0.0.1.
5. Use strong encryption HTTPS
Use TLS 1.2, disable SSL v2 & v3
1. Copy the module ssl.conf from mods-available to mods-enabled
- sudo cp mods-available/ssl.conf mods-enabled/ (or create a link to the original file)
- cd mods-enabled
- ls -l ssl.conf

Highlight
Better to use a2enmod to activate the module
2. Modify the ssl.conf file and negate some protocols

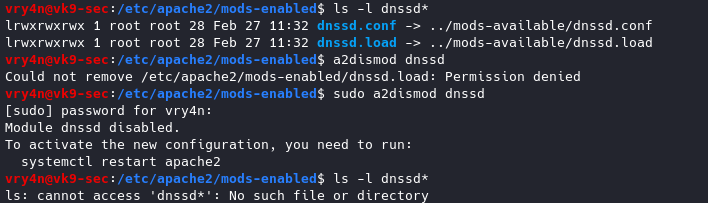
6. You can remove unused or unnecessary modules

https://haydenjames.io/strip-apache-improve-performance-memory-efficiency/
Disable modules
To enable a module
sudo a2enmod <module_name>
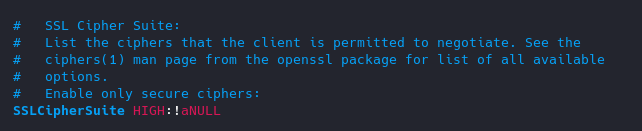
7. Control Ciphers
You can choose what ciphers are allowed
List of Ciphers
https://curl.haxx.se/docs/ssl-ciphers.html
8. Keep it updated!
Always use the latest software version.
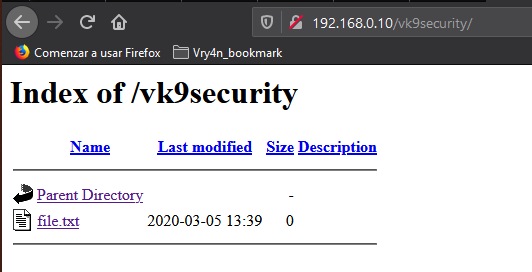
9. Void directory listing
This works almost like “ls” linux & dir “windows”
- vi /etc/apache2/apache2.conf
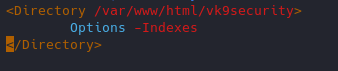
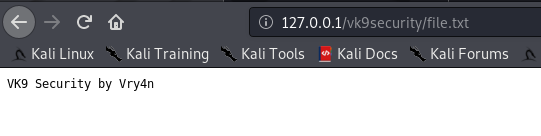
Result
We still have access to the file
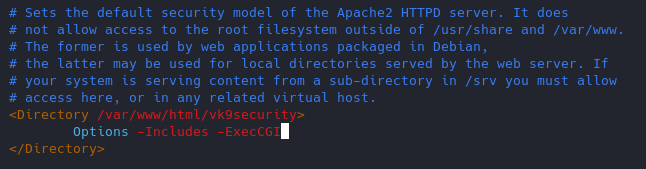
10. Turn off Server side Includes and CGI execution
If not in use turn off SSI and CGI
Server Side Includes: SSI are inserted into HTML code that allows us insert dynamic content in our web sites.
CGI: The Common Gateway Interface (CGI) is a set of rules for running scripts and programs on a Web server. Most Web servers include a cgi-bin directory in the root folder of each website on the server. Any scripts placed in this directory must follow the rules of the Common Gateway Interface.
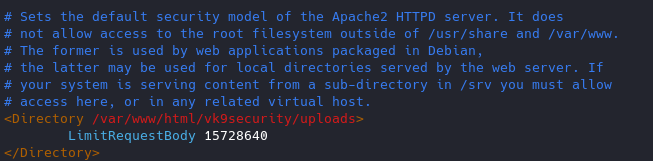
11. Limit the Request size
By default, Apache has no limit on the total size of the HTTP request (it’s possible that you could be a victim of Denial of service attacks)
You can set the value in bytes from 0 (unlimited) to 2147483647 (2GB) that are allowed in a request body.
If you upload files, and, you want to limit the upload size for a particular directory. (in Bytes)
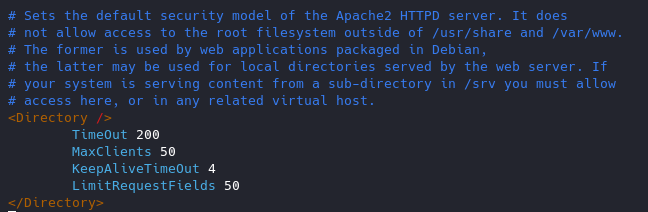
12. Protect against DDoS
it’s true that you cannot completely protect your web site from DDos attacks. Here are some directives which can help you to have a control on it.
- TimeOut : This directive allows you to set the amount of time the server will wait for certain events to complete before it fails. Its default value is 300 secs. It’s good to keep this value low on those sites which are subject to DDOS attacks.
- MaxClients : This directive allows you to set the limit on connections that will be served simultaneously. Every new connection will be queued up after this limit. The default value of it is 256.
- KeepAliveTimeout : Its the amount of time the server will wait for a subsequent request before closing the connection. Default value is 5 secs.
- LimitRequestFields : It helps us to set a limit on the number of HTTP request’s header fields that will be accepted from the clients. Its default value is 100. It is recommended to lower this value if DDos attacks are occurring as a result of so many http request headers.
- LimitRequestFieldSize : It helps us to set a size limit on the HTTP Request header.
13. Enable apache Logging
Apache allows you to logging independently of your OS logging. It is wise to enable Apache logging, because it provides more information, such as the commands entered by users that have interacted with your Web server.
To do so you need to include the mod_log_config module. There are three main logging-related directives available with Apache.
- TransferLog: Creating a log file.
- LogFormat : Specifying a custom format.
- CustomLog : Creating and formatting a log file.
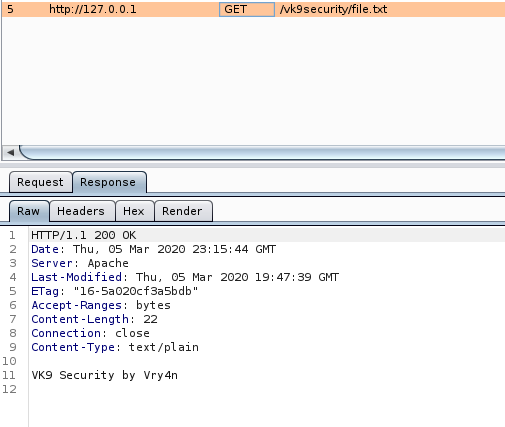
14. Disable Etag
It allows remote attackers to obtain sensitive information like inode number, multipart MIME boundary, and child process through Etag header.
ETag (entity tag) response header provides a mechanism to cache unchanged resources. Its value is an identifier which represents a specific version of the resource. Here’s an example ETag header:
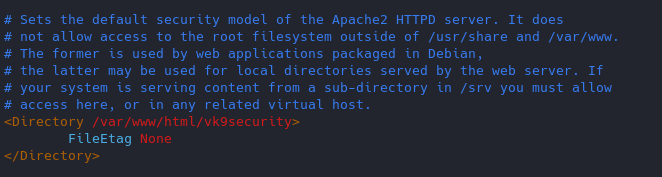
Disabling ETag
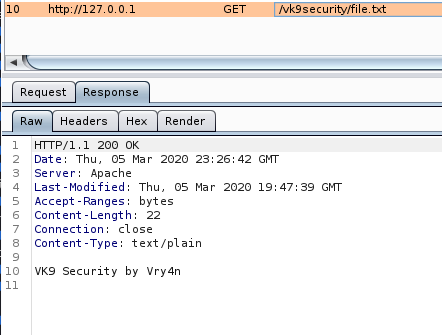
Response
15. change config files permission
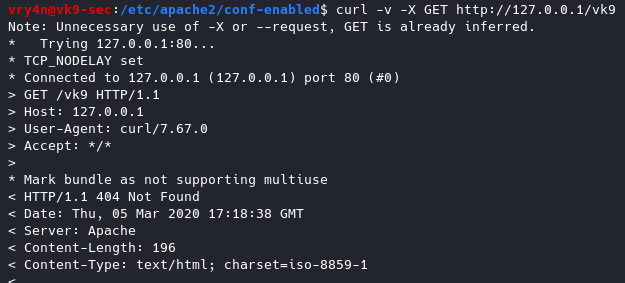
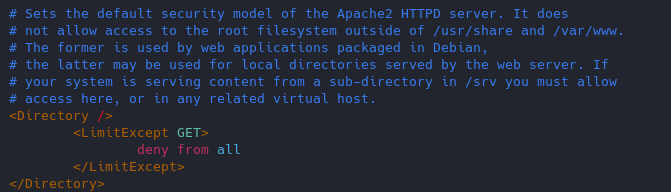
16. Restict HTTP methods in use
Using nmap we can query for the methods allowed
- nmap –script http-methods 127.0.0.1
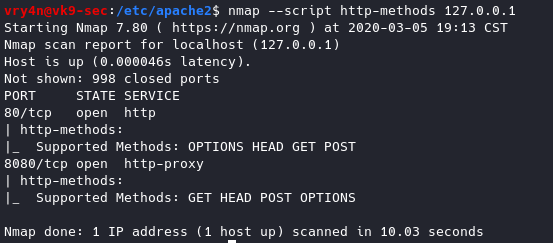
Enabling methods
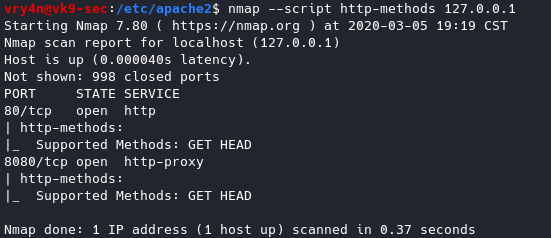
Results of nmap
- nmap –script http-methods 127.0.0.1
17. Set cookies (HttpOnly & Secure flag)
You can mitigate most of the common Cross Site Scripting attack using HttpOnly and Secure flag in a cookie. Without having HttpOnly and Secure, it is possible to steal or manipulate web application session and cookies, and it’s dangerous.
- Header edit Set-Cookie ^(.*)$ $1;HttpOnly;Secure
You can set up cookies using PHP or the config files of apache2.
18. Prevent Clickjacking
Clickjacking is a well-known web application vulnerabilities.
- Header always append X-Frame-Options SAMEORIGIN
19. Protection against Cross Site Scripting
Cross Site Scripting (XSS) protection can be bypassed in many browsers. You could apply this protection for a web application if it was disabled by the user. This is used by a majority of giant web companies like Facebook, Twitter, Google, etc.
- Header set X-XSS-Protection “1; mode=block”
by Vry4n_ | Mar 1, 2020 | Tools
Nikto is a web server assessment tool. It is designed to find various default and insecure files, configurations and programs on any type of web server. This tool is written in Perl language.
Open-source web server scanner that examines a website and reports back vulnerabilities. you can use with any web servers (Apache, Nginx, IHS, OHS, Litespeed, etc.)
https://github.com/sullo/nikto/tree/master/program
OSVDB prefix are vulnerabilities reported in the Open Source Vulnerability Database (a site that shut down in 2016). It’s similar to other vulnerability databases such as SecurityFocus, Microsoft’s Technet, and Common Vulnerabilities and Exposures, National Vulnerability Database.
You can recursively scan each page and virtual host as you discover them

How to use
1. Display basic menu
-H, -Help = help menu

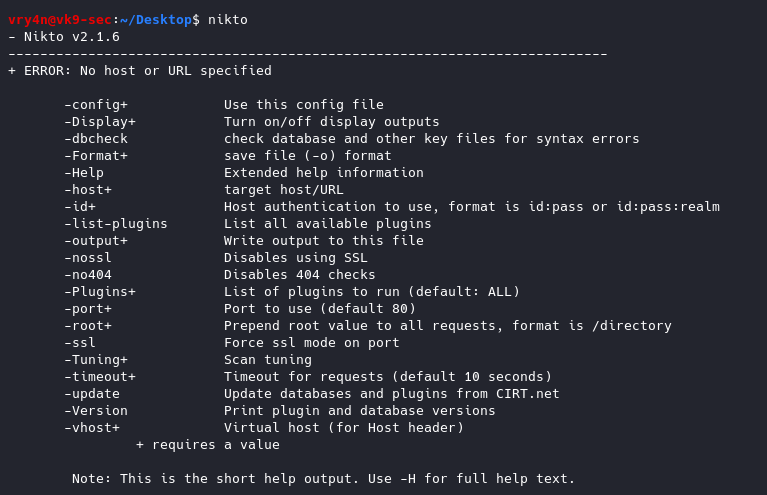
-Version Print plugin and database versions
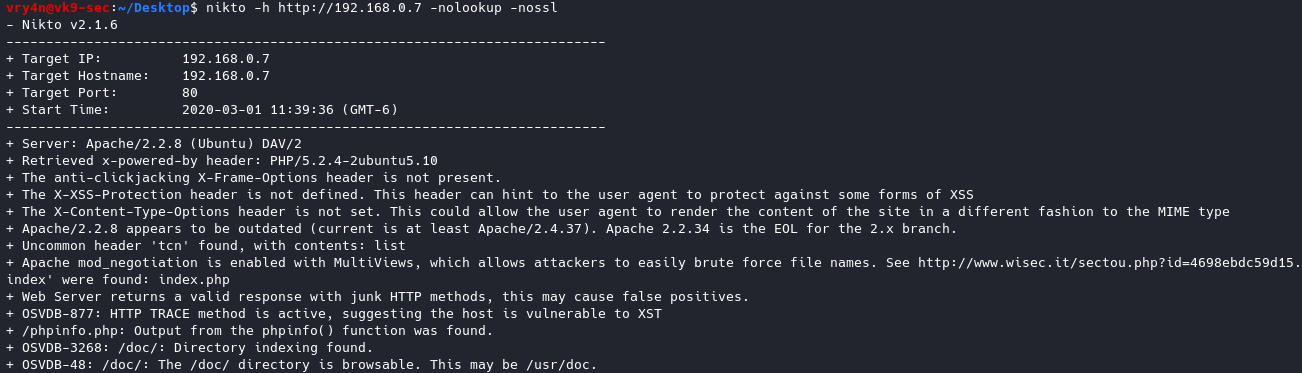
2. Basic Scan
-h = host
- nikto -h http://192.168.0.7

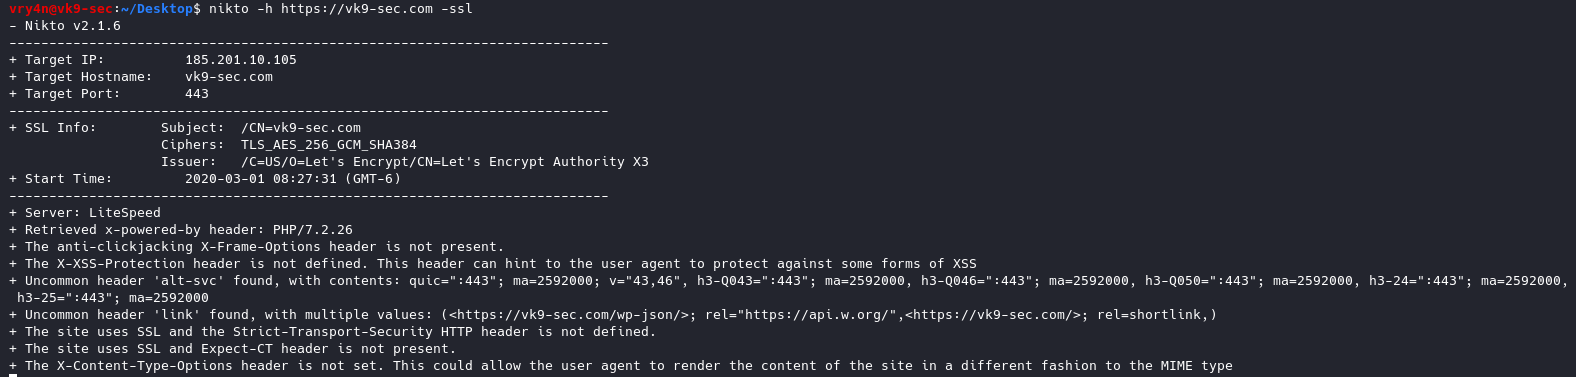
3. Scanning sites protected with SSL
-ssl
- nikto -h https://vk9-sec.com -ssl
4. Scan a list of IP addresses
- cat targets.txt
- nikto -h targets.txt

5. Output to integrate with Metasploit Framework.
-Format nbe = Format output for Nessus format
-o nessus.txt, – output = saves the output to a file named nessus.txt
csv Comma-separated-value
json JSON Format
htm HTML Format
nbe Nessus NBE format
sql Generic SQL (see docs for schema)
txt Plain text
xml XML Format
- nikto -h http://192.168.0.7 -Format nbe -o nessus.txt


6. Scan for any cgi directories
-Cgidirs all = Scan these CGI dirs: “none”, “all”, or values like “/cgi/ /cgi-a/”
- nikto -h http://192.168.0.7 -Cgidirs all
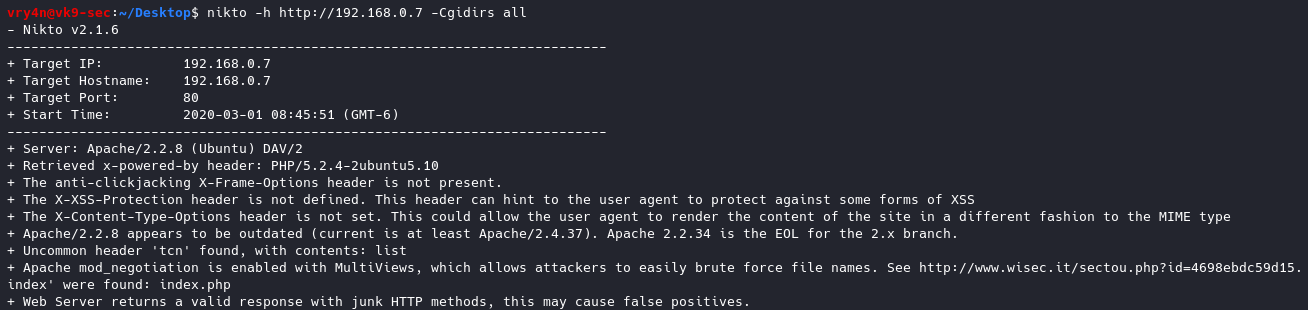
This time we got no results.
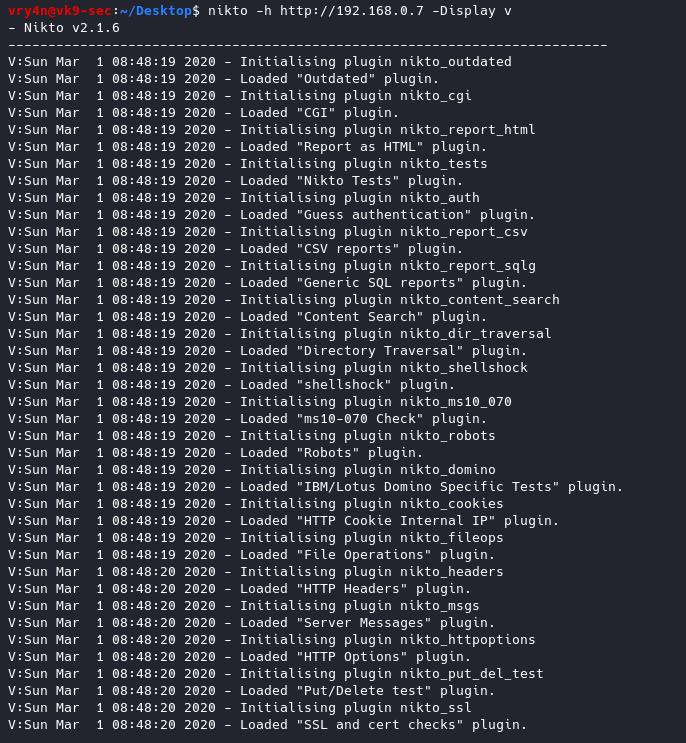
7. Display verbose, and, some results like 200 or 404 messages
-Display v = Turn on/off display outputs:
1 Show redirects
2 Show cookies received
3 Show all 200/OK responses
4 Show URLs which require authentication
D Debug output
E Display all HTTP errors
P Print progress to STDOUT
S Scrub output of IPs and hostnames
V Verbose output
- nikto -h http://192.168.0.7 -Display v
8. Check for database status and entries
-dbcheck = Check database and other key files for syntax errors

9. Ignore 404 code
-404code = Ignore these HTTP codes as negative responses (always). Format is “302,301”
- nikto -h http://192.168.0.7 -404code 404

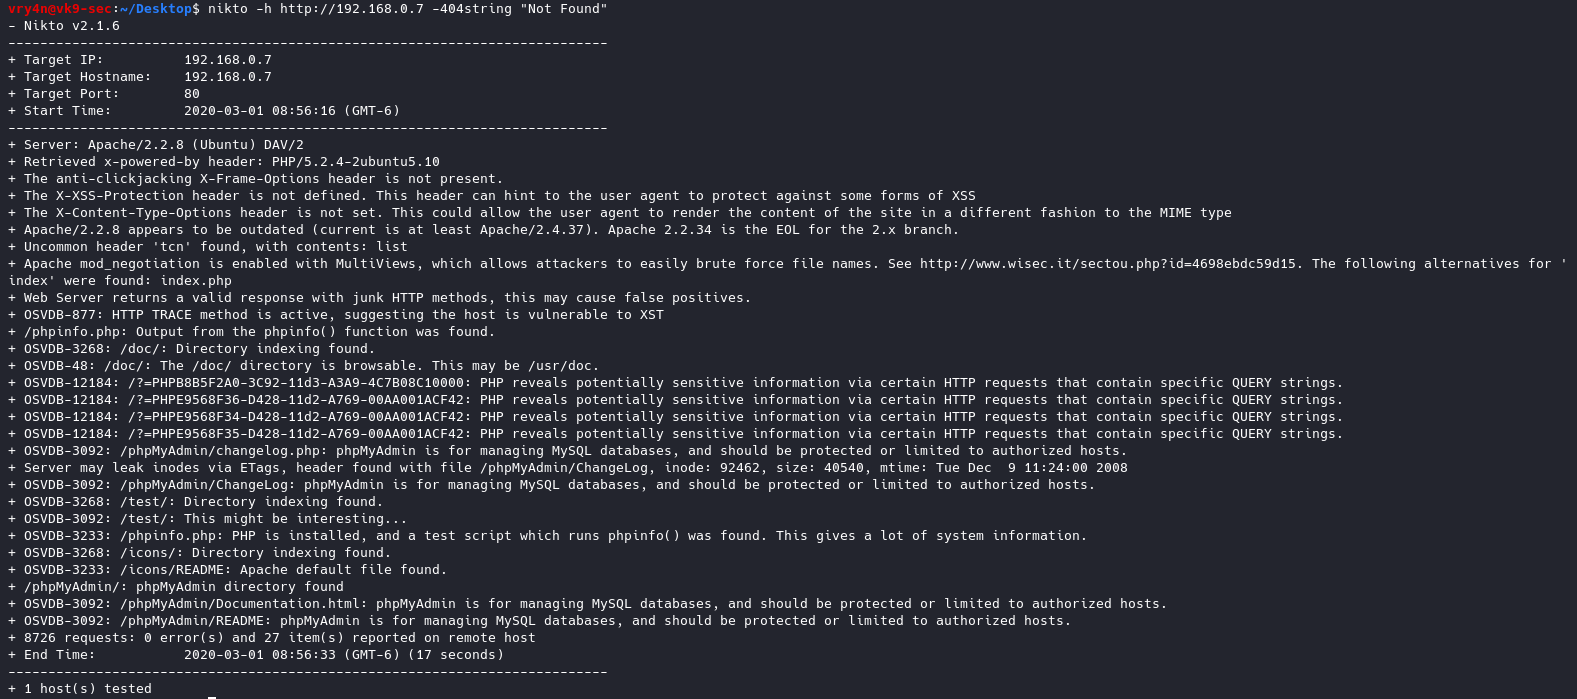
10. Ignore string in the response body
-404string = Ignore this string in response body content as negative response (always). Can be a regular expression.
- nikto -h http://192.168.0.7 -404string “Not Found”
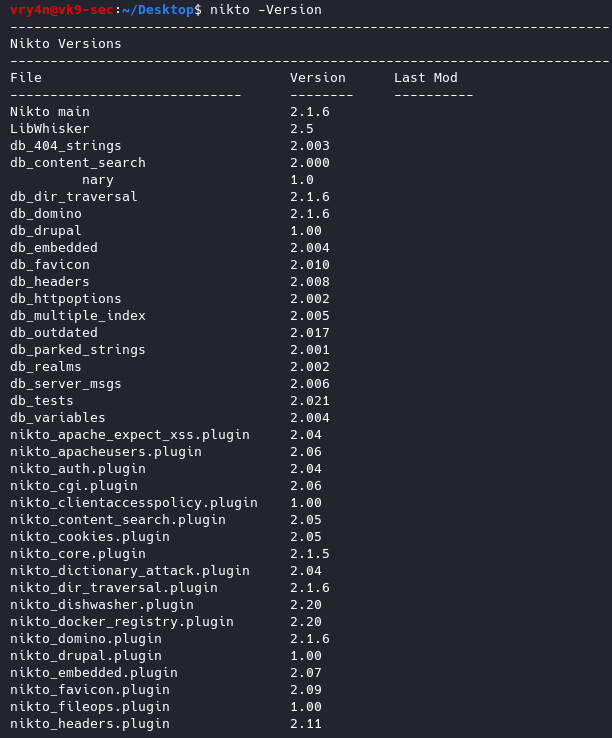
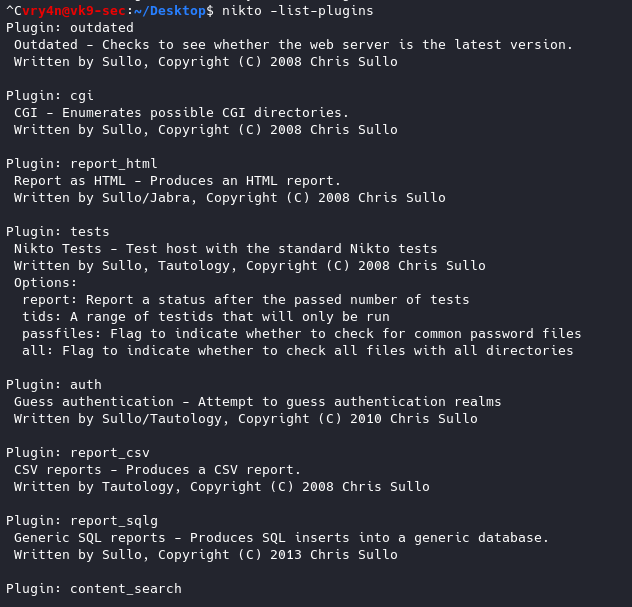
11. List of plug-ins and their status
-list-plugins = List all available plugins, perform no testing
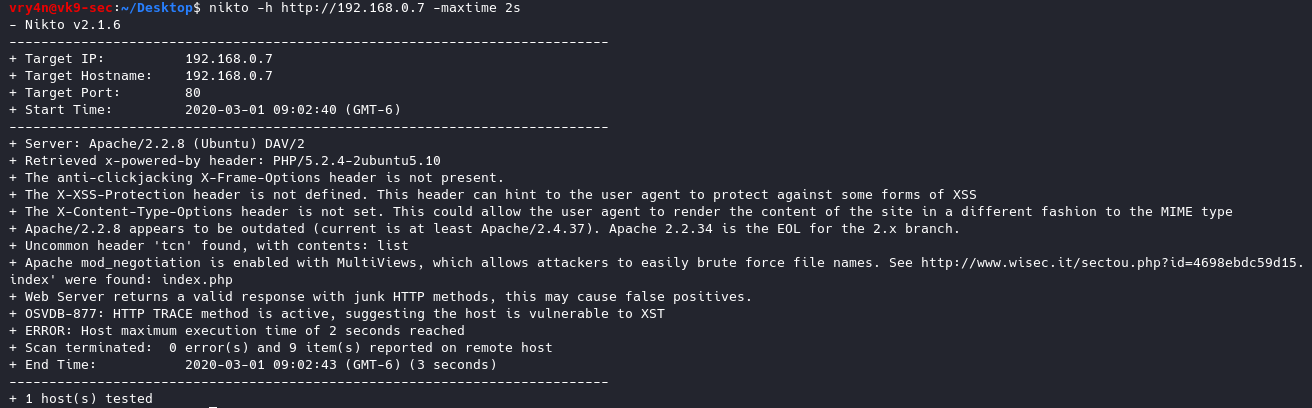
12. Specify how much time the scan should give per host
-maxtime+ = Maximum testing time per host (e.g., 1h, 60m, 3600s)
- nikto -h http://192.168.0.7 -maxtime 2s
13. Set a pause between tests
-Pause+ = Pause between tests (seconds, integer or float)
- nikto -h http://192.168.0.7 -Pause 2

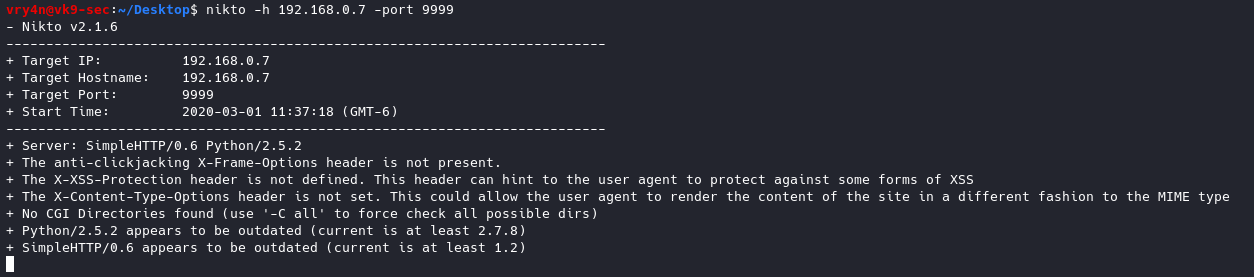
14. use a different port other than 80
-port+ = Port to use (default 80)
- nikto -h 192.168.0.7 -port 9999
15. Disable SSL & DNS
-nolookup = Disables DNS lookups
-nossl = Disables the use of SSL
- nikto -h http://192.168.0.7 -nolookup -nossl
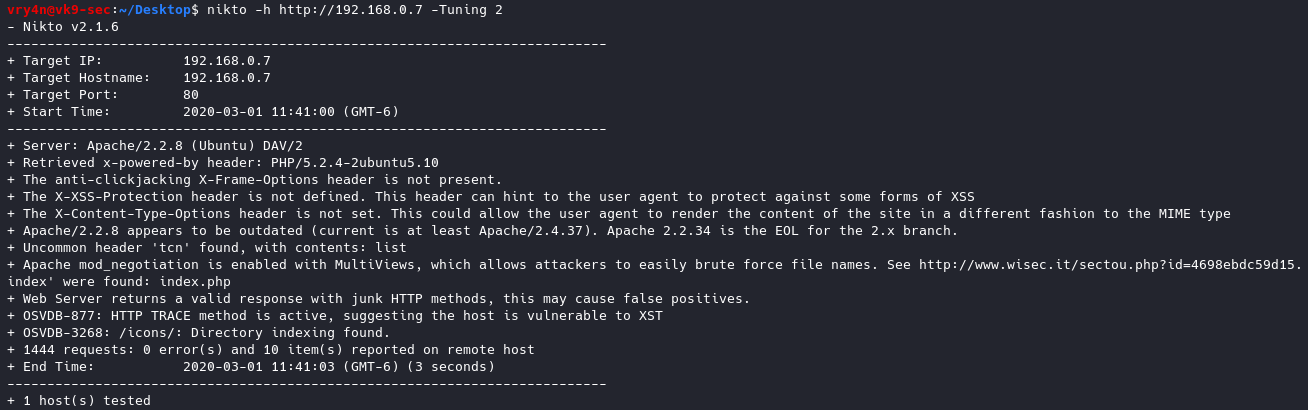
16. Test different types of attacks with Tuning option
-Tuning+
1 Interesting File / Seen in logs
2 Misconfiguration / Default File
3 Information Disclosure
4 Injection (XSS/Script/HTML)
5 Remote File Retrieval – Inside Web Root
6 Denial of Service
7 Remote File Retrieval – Server Wide
8 Command Execution / Remote Shell
9 SQL Injection
0 File Upload
a Authentication Bypass
b Software Identification
c Remote Source Inclusion
d WebService
e Administrative Console
x Reverse Tuning Options (i.e., include all except specified)
- nikto -h http://192.168.0.7 -Tuning 2
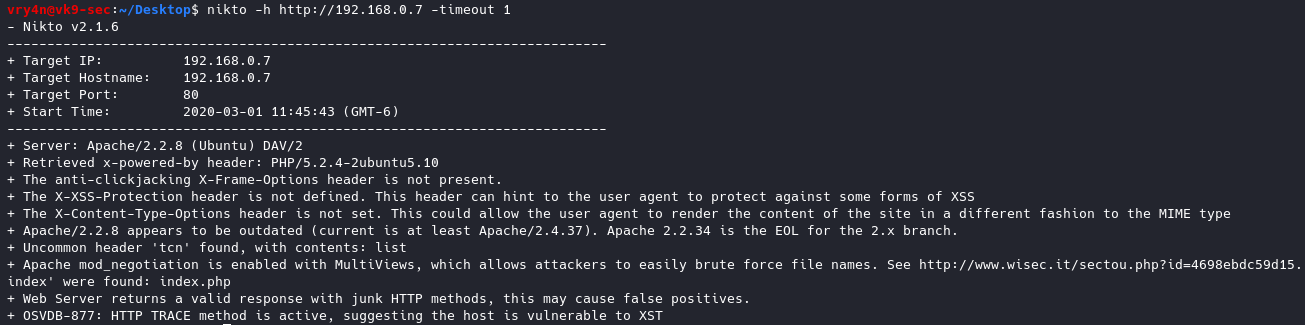
17. Set a timeout in case the request fails
-timeout+ Timeout for requests (default 10 seconds)
- nikto -h http://192.168.0.7 -timeout 1
18.Update the databases and plugins. (out of date already)
-update = Update databases and plugins from CIRT.net

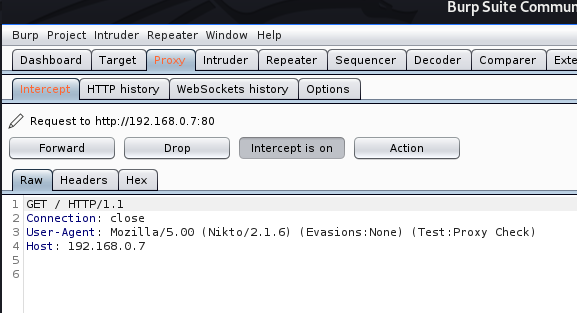
19. Send traffic through a Proxy
-useproxy = Use the proxy defined in nikto.conf, or argument http://server:port
- nikto -h http://192.168.0.7 -useproxy http://127.0.0.1:8080

In the proxy we can see
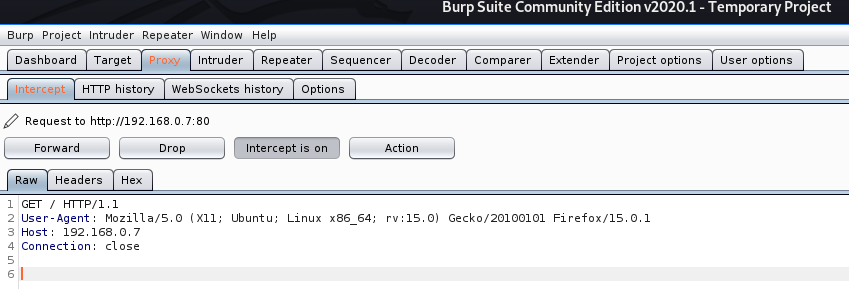
20. Spoof the User-Agent
-useragent = Over-rides the default useragent
- nikto -h http://192.168.0.7 -useragent “Mozilla/5.0 (X11; Ubuntu; Linux x86_64; rv:15.0) Gecko/20100101 Firefox/15.0.1” -useproxy http://127.0.0.1:8080

In the proxy we see
by Vry4n_ | Mar 1, 2020 | Tools
Crunch is a utility that is used to create wordlists using letters, numbers, and symbols for every possible combination or according to specific rules.
Syntax to create the wordlist (lowercase letters, then uppercase letters, then numbers and finally symbols)
- crunch <min-len> <max-len> [<charset string>] [options]
https://sourceforge.net/projects/crunch-wordlist/
How to use
1. Run crunch to see help menu

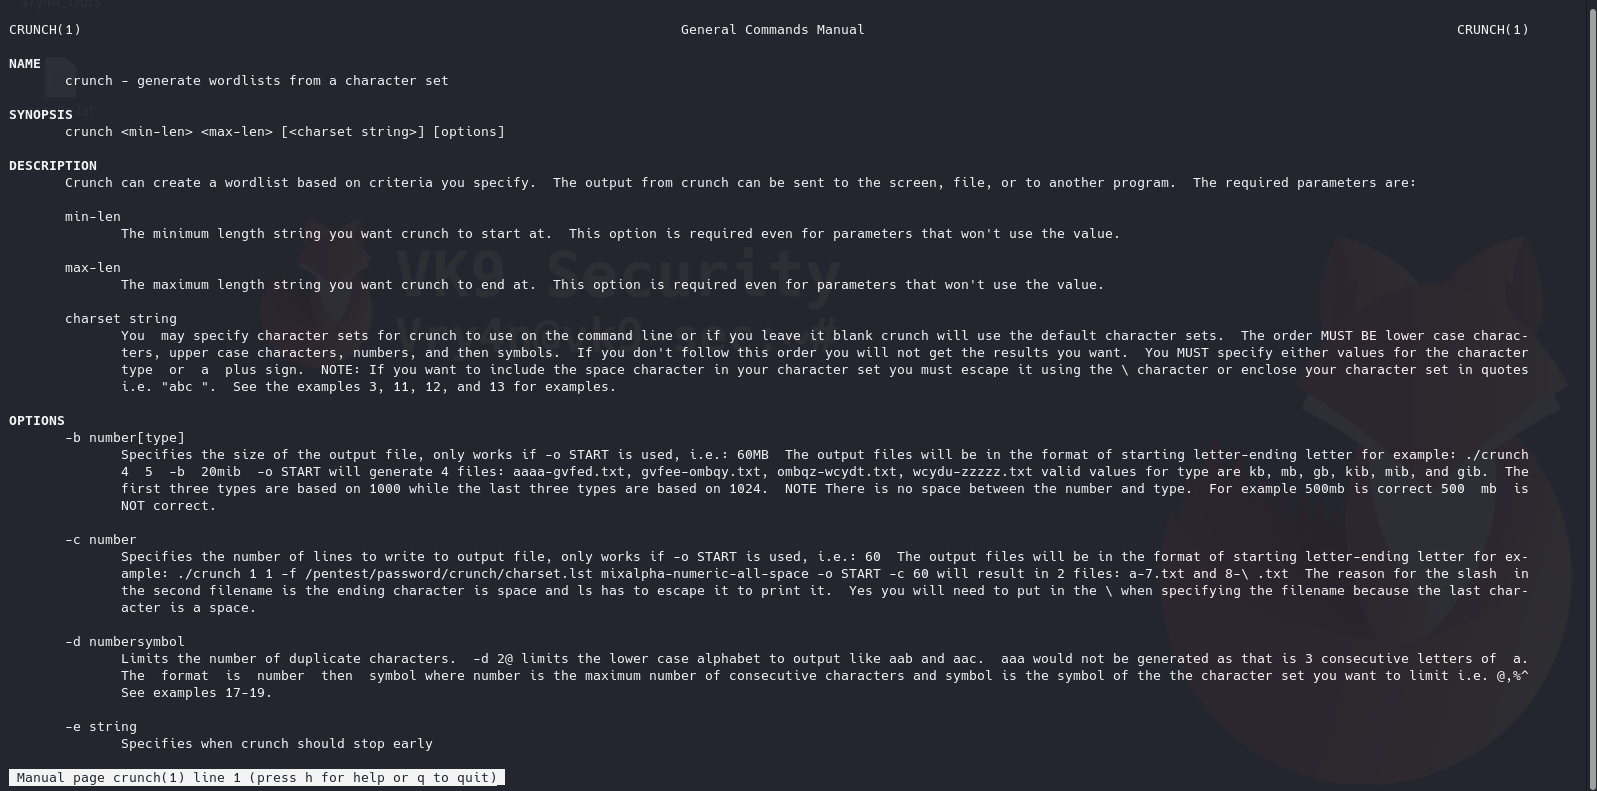
2. See man page for help
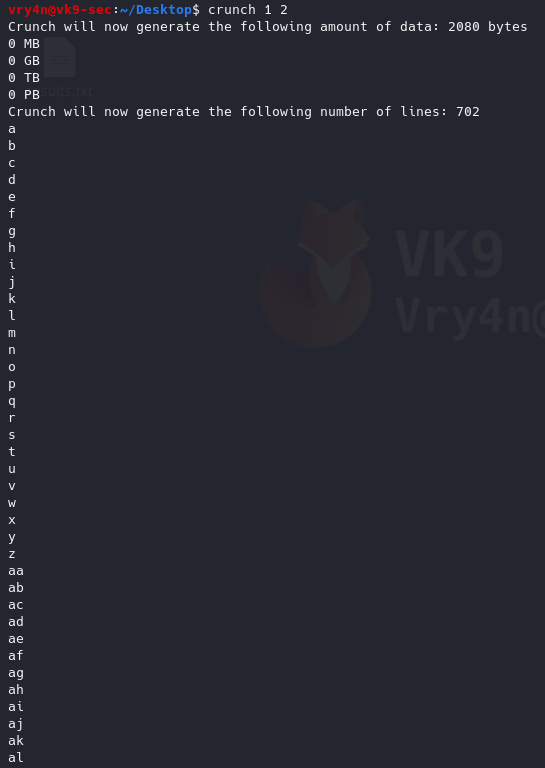
3. Generate a word list with 1 to 2 length
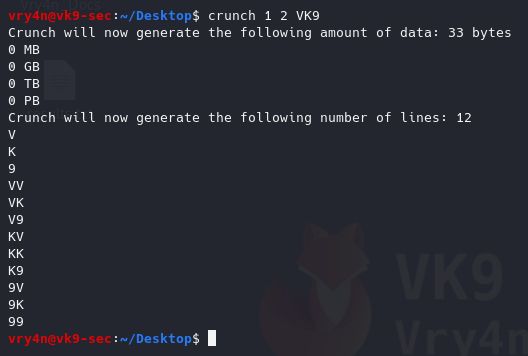
4. Generate a word list with all possible combination (VK9)
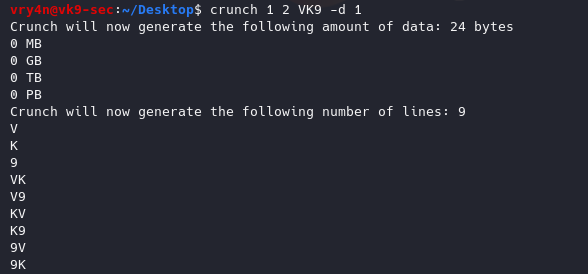
5. Generate the same test, but, repeat every character one time
-d 1 = Limits the number of duplicate characters. [n][@,%^]
1@ = one lowercase
1, = Uppercase
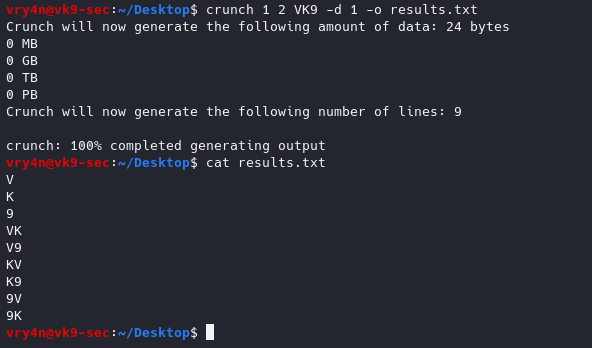
6. Write the results to a file
-o wordlist.txt = Specifies the file to write the output to
- crunch 1 2 VK9 -d 1 -o results.txt
- cat results.txt
7. Specify a string to begin the wordlist
-s VV = Specifies a starting string

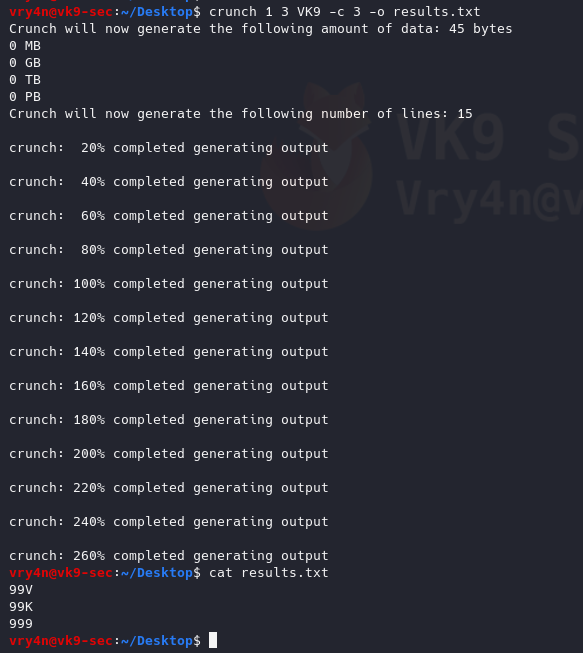
8. Specify the number of lines to write
-c 3 = Specifies the number of lines to write to output file, only works if -o START is used
- crunch 1 3 VK9 -c 3 -o results.txt
- crunch 1 3 VK9 -c 3 -o START
- cat results.txt
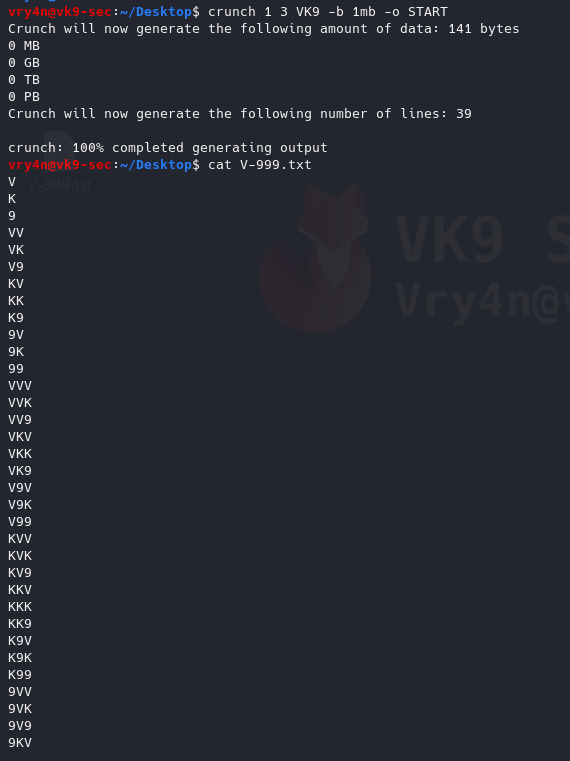
9. Specify the file size
-b 1mb = Specifies the size of the output file, only works if -o START is used
- crunch 1 3 VK9 -b 1mb -o START
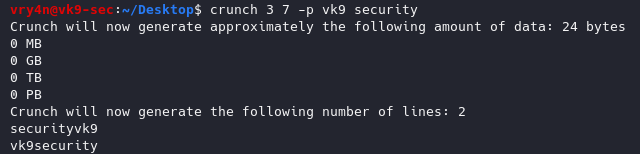
10. Generate wordlists using whole words
-p word1 word2 = Tells crunch to generate words that don’t have repeating characters.
- crunch 3 7 -p vk9 security
11. Generating wordlists using wild cards, the size min & max should be the same
@ = lowercase letters
, = Uppercase letters
% = Numbers
^ = Symbols
-t : set a specific pattern of @,%^
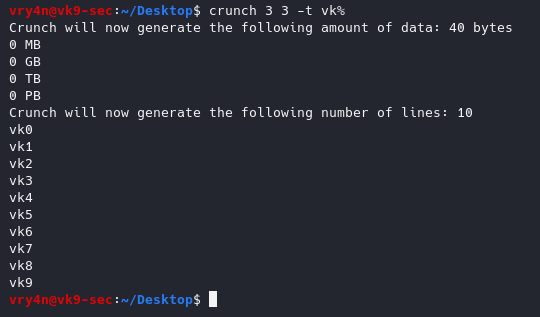
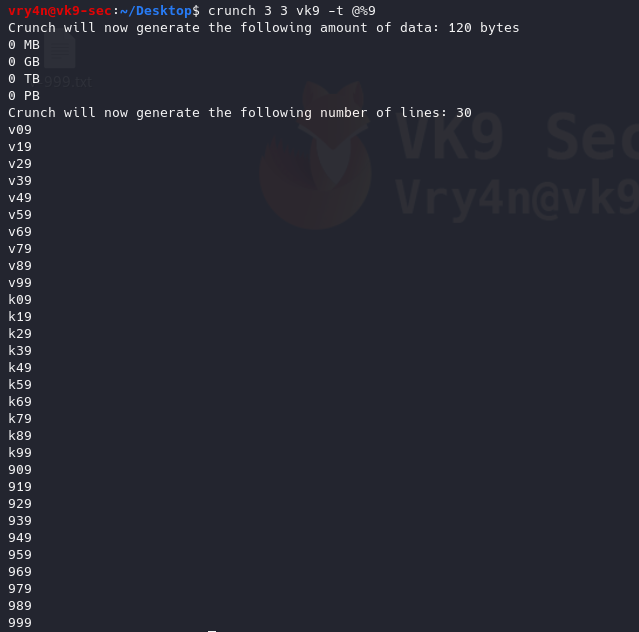
12. Generate a wordlist using a pattern and wild card
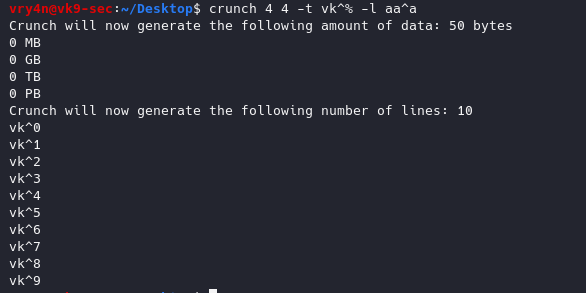
13. Use literal characters instead of being a wildcard
-l = When you use the -t option this option tells crunch which symbols should be treated as literals
- crunch 4 4 -t vk^% -l aa^a
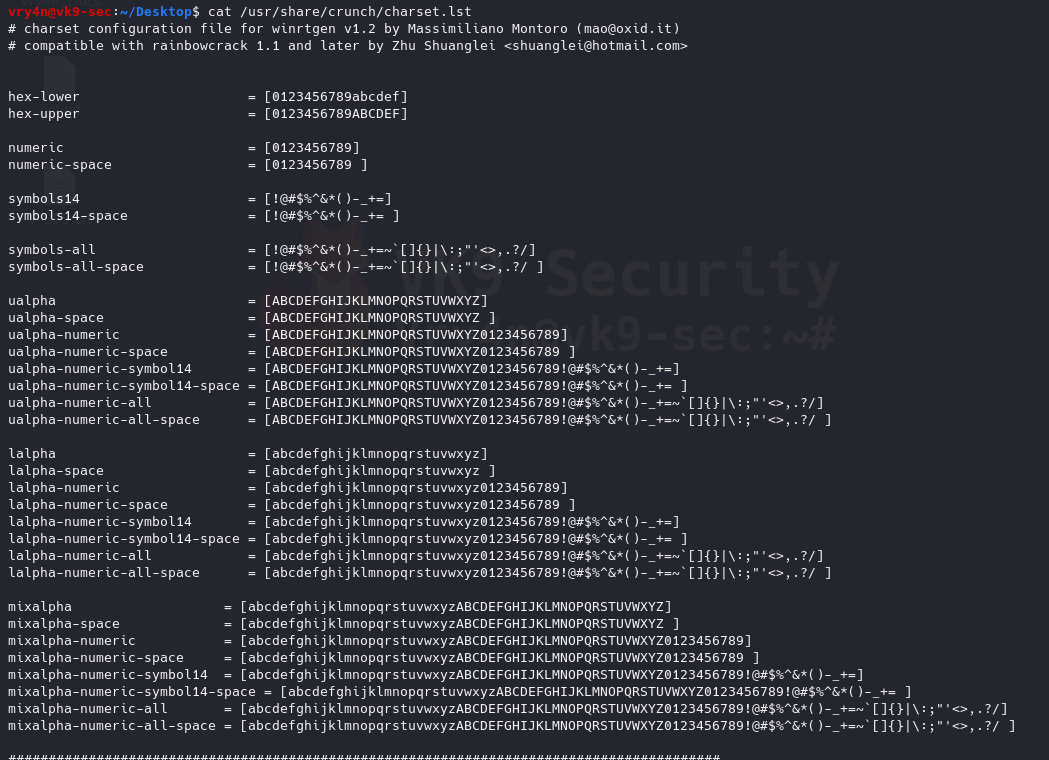
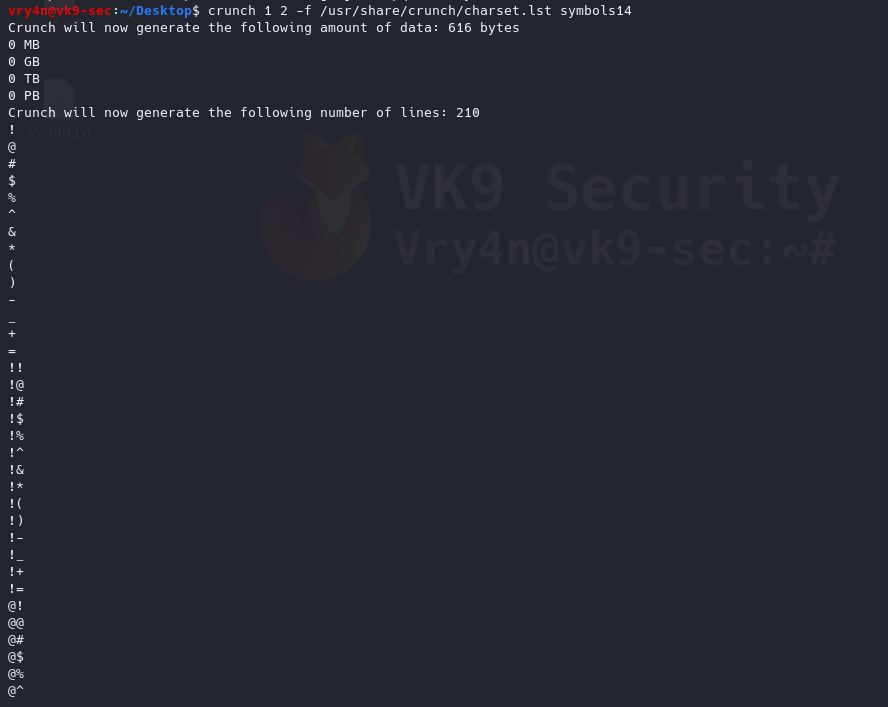
14. Choose character sets to create the wordlists
/usr/share/crunch/charset.lst = Path to character set
- cat /usr/share/crunch/charset.lst
- crunch 1 2 -f /usr/share/crunch/charset.lst symbols14
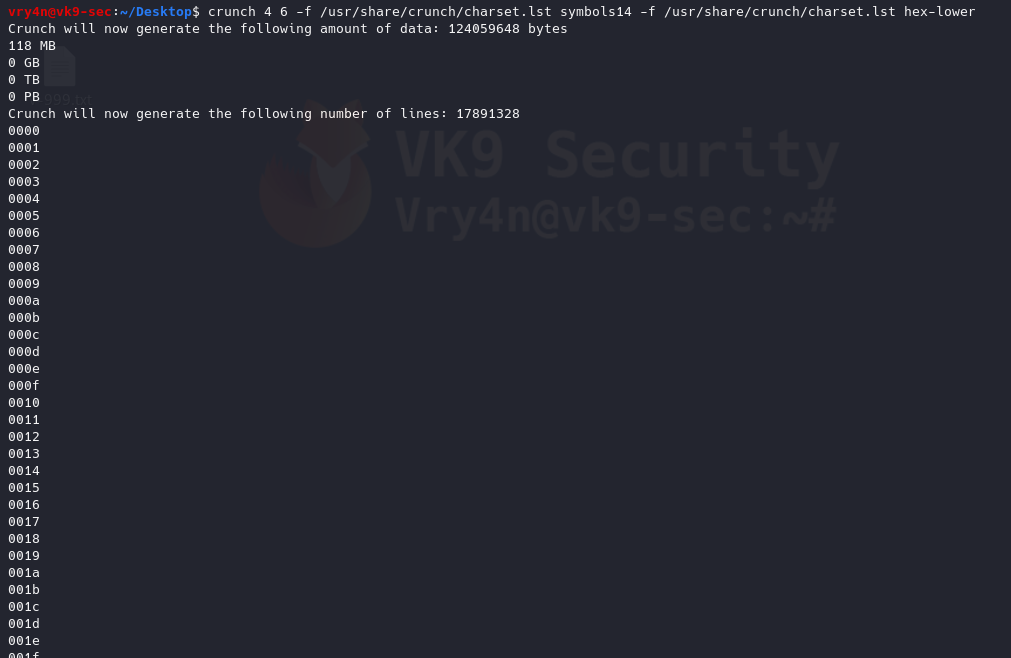
15. Combining multiple charsets
- crunch 4 6 -f /usr/share/crunch/charset.lst symbols14 -f /usr/share/crunch/charset.lst hex-lower
by Vry4n_ | Mar 1, 2020 | Tools
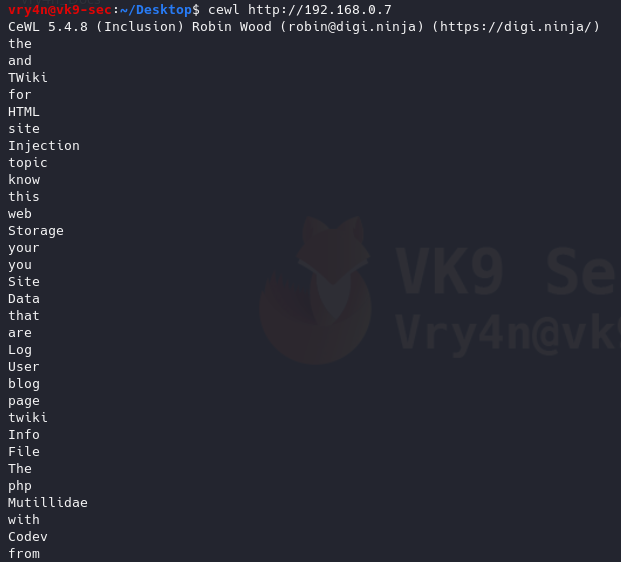
Cewl is a wordlist generator written in Ruby language, it spiders a given URL to a specified depth. It returns a list of words which can then be used for password crackers such as John the Ripper.
https://github.com/digininja/CeWL
It comes installed in most security OS
How to use
1. Display help
-h, –help = Displays help menu

2. Default method
Uses default depth for wordlist creation
3. Save the results to a file
-w = write to a file
- cewl http://192.168.0.7 -w results.txt
- ls -l results.txt
- wc -l results.txt
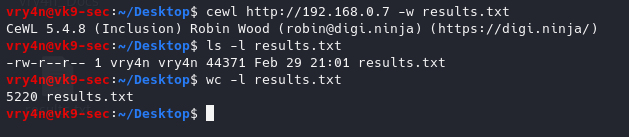
We got 5220 words
4. Generate wordlists of specific length of words
-m 9 = minimum 9 characters
- cewl http://192.168.0.7 -m 10

5. Gather only email addresses
-n = no words
-e = find email
- cewl http://192.168.0.7 -n -e

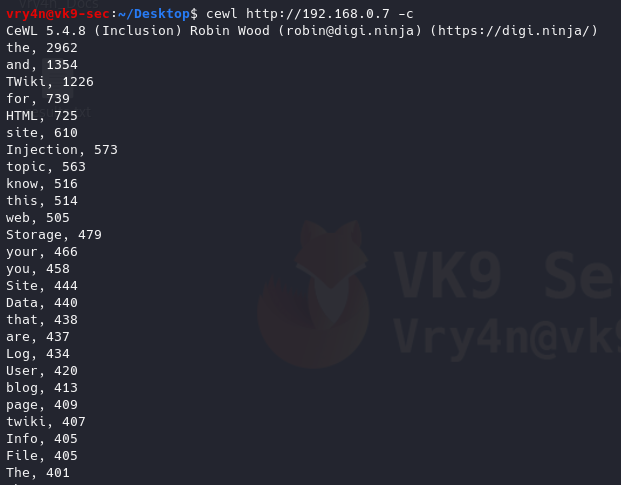
6. Count the number of words repeated in the website, it also orders it by number of occurrences
-c = word count
- cewl http://192.168.0.7 -c
7. Scanning using a higher depth, takes longer for a result
-d 3 = Depth to spider to, default 2
- cewl http://192.168.0.7 -d 4 -w results.txt
- ls -l results.txt
- wc -l results.txt

This time we got more words by increasing the depth level
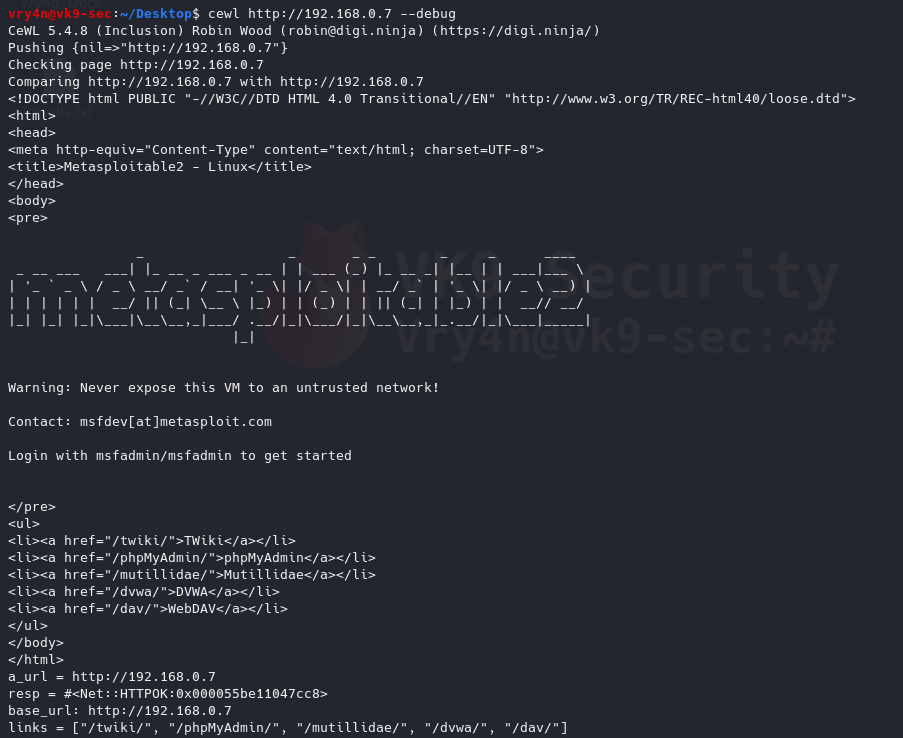
8. Debugging the results, also, shows the content of the results (errors, raw details)
–debug = Enable debugging
- cewl http://192.168.0.7 –debug
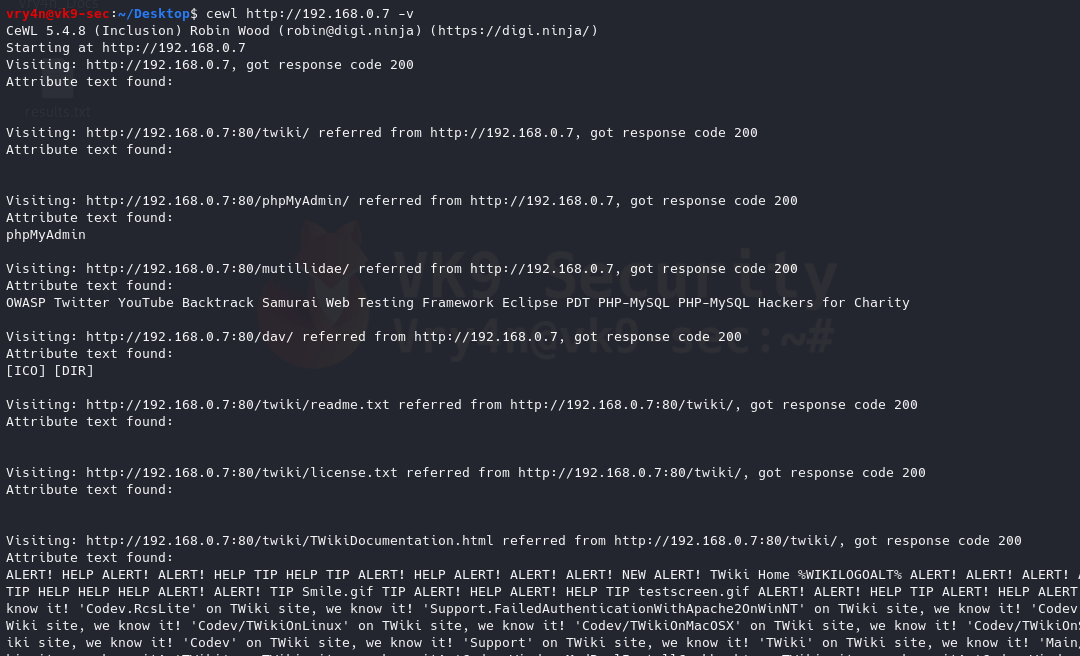
9. Enabling verbosity, retrieving completed detail and results of a website
-v = enable verbosity
- cewl http://192.168.0.7 -v
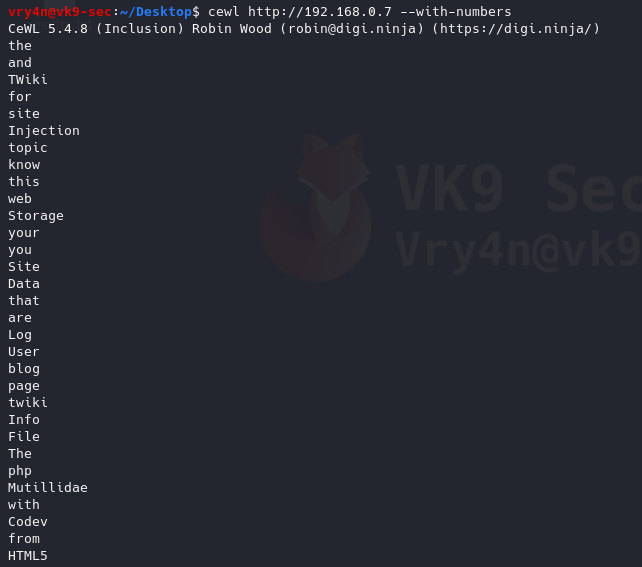
10. Generate alpha-numeric results, by default without this option the script only prints letters
–with-numbers = Accept words with numbers in as well as just letters
- cewl http://192.168.0.7 –with-numbers
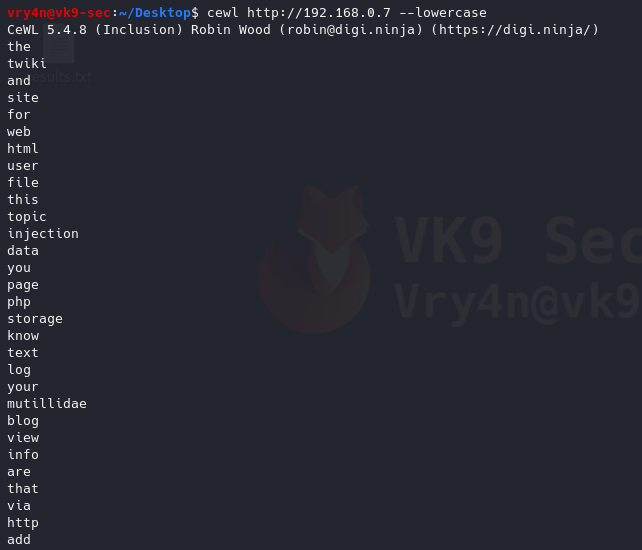
11. Print all as lowercase
–lowercase: Lowercase all parsed words
- cewl http://192.168.0.7 –lowercase
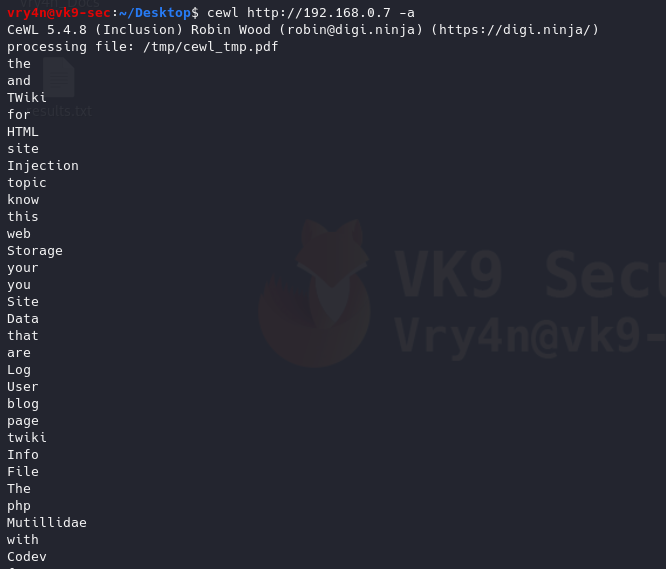
12. Print metadata
-a, –meta: include meta data.
- cewl http://192.168.0.7 -a
Authentication
1. If there is any authentication we need to log in to proceed to the site to generate the wordlist
–auth_type: Digest or basic.
–auth_user: Authentication username.
–auth_pass: Authentication password.
- cewl http://192.168.0.7/dvwa/login.php –auth_type basic –auth_user admin –auth_pass password -v

Proxy Support
1. Send the requests through a proxy
–proxy_host: Proxy host.
–proxy_port: Proxy port, default 8080.
- cewl http://192.168.0.7 –proxy_host 127.0.0.1 –proxy_port 8080

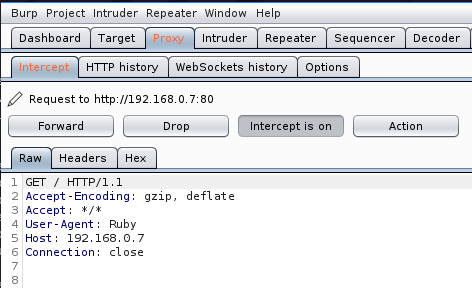
In Burp suite, we can see the requests
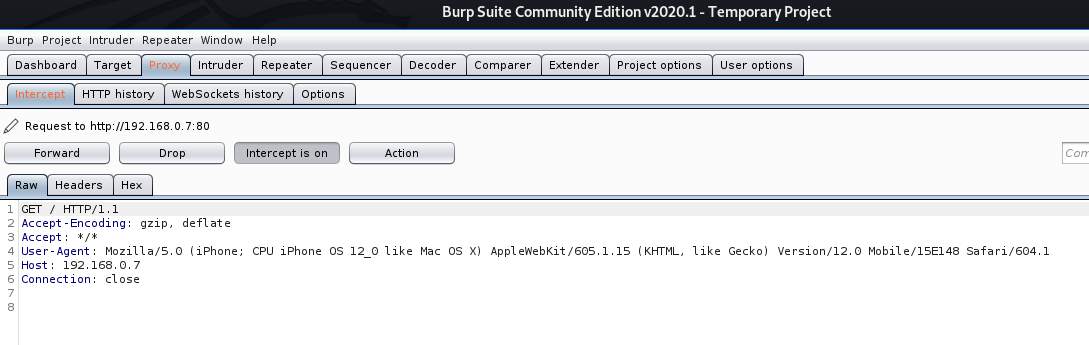
2. Spoof User-Agent
-u, –ua <agent>: User agent to send.
- cewl http://192.168.0.7 –proxy_host 127.0.0.1 –proxy_port 8080 -u “Mozilla/5.0 (iPhone; CPU iPhone OS 12_0 like Mac OS X) AppleWebKit/605.1.15 (KHTML, like Gecko) Version/12.0 Mobile/15E148 Safari/604.1”

In BurpSuite we can see the User-Agent spoofed
https://deviceatlas.com/blog/list-of-user-agent-strings
Extra
Create a wordlist with CEWL, develop a more sophisticated list with JTR, and attack a web login page with hydra
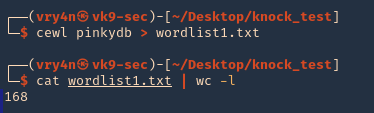
1. Use cewl to create the worklist
- crewl pinkydb > wordlist1.txt
- cat wordlist1.txt | wc -l
2. Use sed to make all words, lowercase, uppercase
- cat wordlist1.txt > wordlist2.txt; sed -e ‘s/.*/\L&/’ wordlist1.txt >> wordlist2.txt ; sed -e ‘s/.*/\U&/’ wordlist2.txt >> wordlist2.txt
- cat wordlist2.txt | wc -l

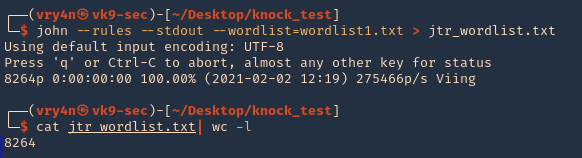
3. (OPTIONAL) having cewl results you could generate a wordlist using JTR (John)
- john –rules –stdout –wordlist=wordlist1.txt > jtr_wordlist.txt
- cat jtr_wordlist.txt | wc -l
4. Now, use Hydra to test each of the passwords, already having a username. In This case I have ‘pinky’ & ‘pink1337’. In this case, I have a login page at http://pinkydb:7654/login.php
- hydra -L users -P wordlist2.txt pinkydb -s 7654 http-post-form “/login.php:user=^USER^&pass=^PASS^:Invalid Username or Password”

Note, we found a match username: pinky & password: Passione, the other result seems to be a false positive.
5. Try to log in using the credentials
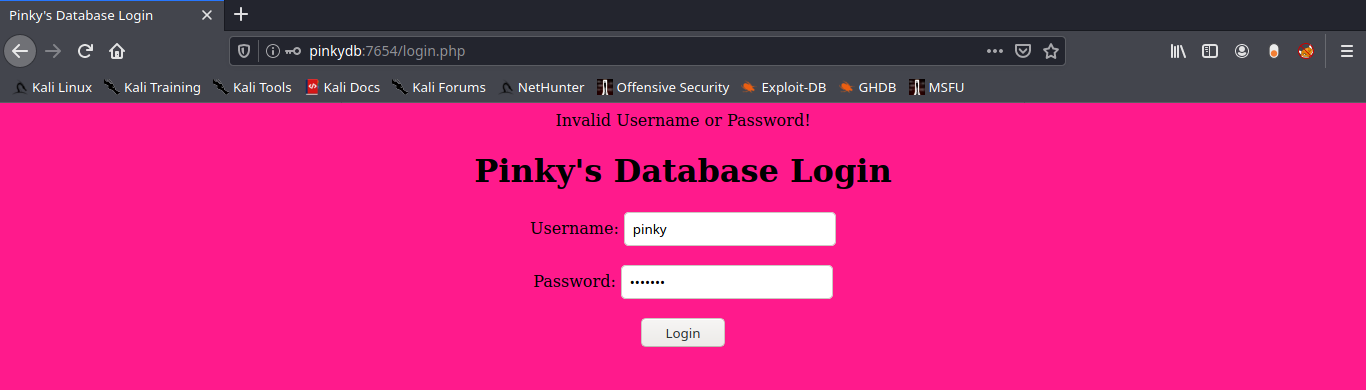
6. Successful log in